



There’s just something about a good thrift store makeover that gets my creative wheels turning. Give me an old dresser, a forgotten piece of decor, or something slightly questionable sitting in the corner with a cheap price tag, and I immediately start thinking, What could I do with that?
Over the years, I’ve dragged home more than my fair share of secondhand treasures—and a few pieces that probably had Mr. Honey Do wondering if I’d finally lost it. 😂 But that’s half the fun! With a little paint, some elbow grease, and a willingness to think outside the box, those castoffs can become some of the most unique pieces in your home.
So, before you walk past that ugly dresser, dated picture frame, or funky thrift store find, take another look. I’ve rounded up some of my favorite thrift store makeovers for your home to show you just how much potential can be hiding underneath all that ugly.
You might even find yourself planning your next junking trip before you make it to the end.
* As an Amazon Associate, I earn from qualifying purchases and through other companies as well. You will not be charged extra when you purchase through these affiliate links, but any income I make helps me create more amazing DIY projects to share with you! To see my full disclaimer, click here!
What I Look for When Thrift Shopping for Makeover Projects
When I’m thrift shopping, I try not to look at what something is—I look at what it could be. Ugly paint colors, dated finishes, and questionable decorating choices don’t scare me. Actually, those are usually the pieces that get my attention first. 😂
I look for good bones, interesting shapes, solid construction, and pieces that can be cleaned, repaired, painted, or repurposed. A few scratches or missing hardware? No biggie. Those things can usually be fixed. And sometimes the uglier the before, the better the after!
And don’t limit your treasure hunting to thrift stores. Garage sales, estate sales, Facebook Marketplace, curbside finds, and even your own garage can be gold mines for DIY projects. I’ve found treasures in all of them.
If you’re wondering where I find all this good junk, check out my How and Where to Find Furniture to Upcycle guide. I share my favorite places to hunt for secondhand furniture and a few tips I’ve learned after years of dragging home things other people didn’t want.
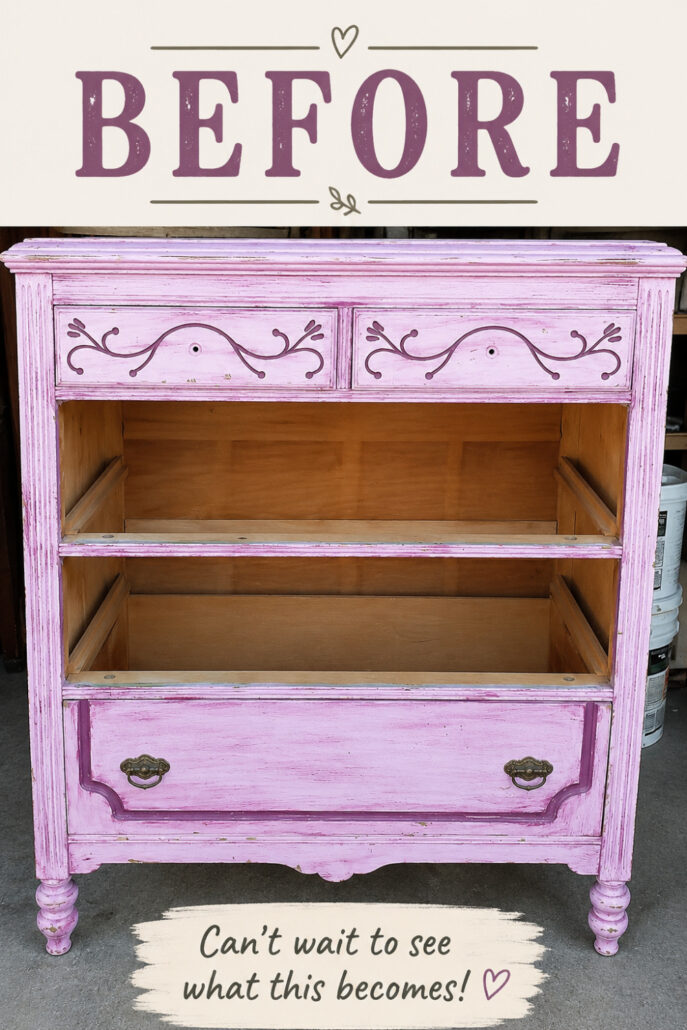
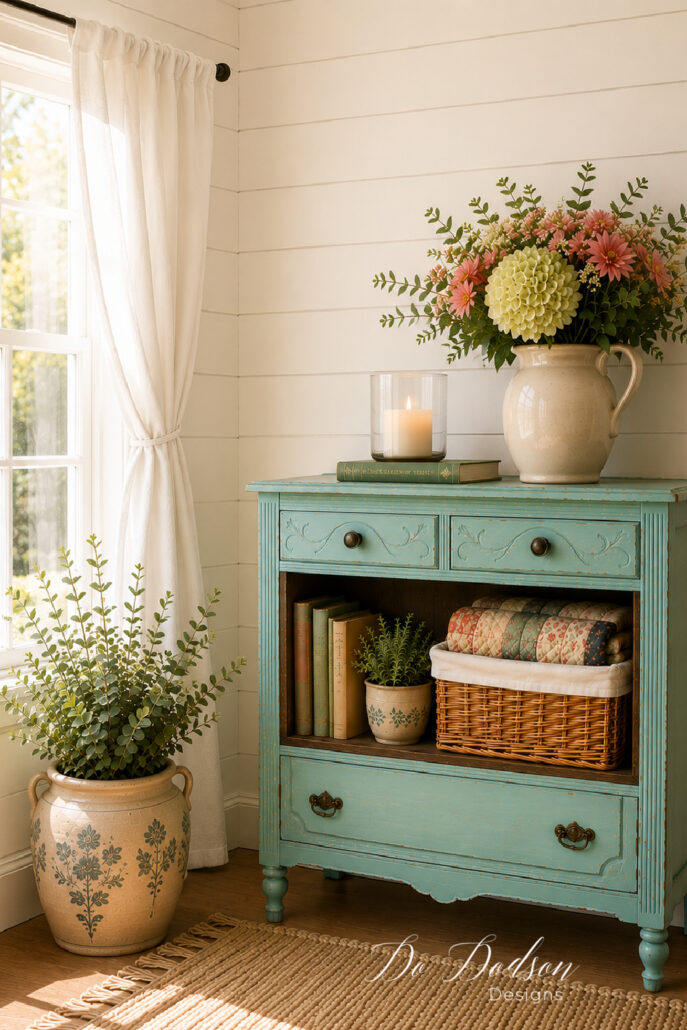
1. Turn a Sad Old Dresser Into a One-of-a-Kind Statement Piece
This little dresser was one of those finds I just couldn’t leave behind. It was missing drawers, covered in layers of old paint, and had definitely seen better days. But after circling back for another look (or three 😂), I knew it was coming home with me.
Once I started sanding, unexpected colors began peeking through. I added teal paint, distressed the finish to reveal those colorful layers, and replaced the missing drawers with open wood shelving.
See the full recycled furniture dresser makeover and step-by-step transformation here.
2. Give Dated Thrift Store Decor a Fresh New Look
When I spotted a hen and rooster at the thrift store, they immediately reminded me of the set my Grandma gave me when I was young. That sent me digging through boxes at home until I found mine. Some things you just can’t let go of.
The colors were dated, but the memories certainly weren’t. So I gave Grandma’s chickens a simple paint makeover that worked better with my farmhouse style.
And yes, I painted Grandma’s chickens. 😂 I’m pretty sure she would approve—she’s the one who taught me to paint!


3. Rescue a Piece Everyone Else Would Throw Away
Some of my best furniture makeovers have started with someone saying, “That thing is trash.” Those are dangerous words to say around me. 😂
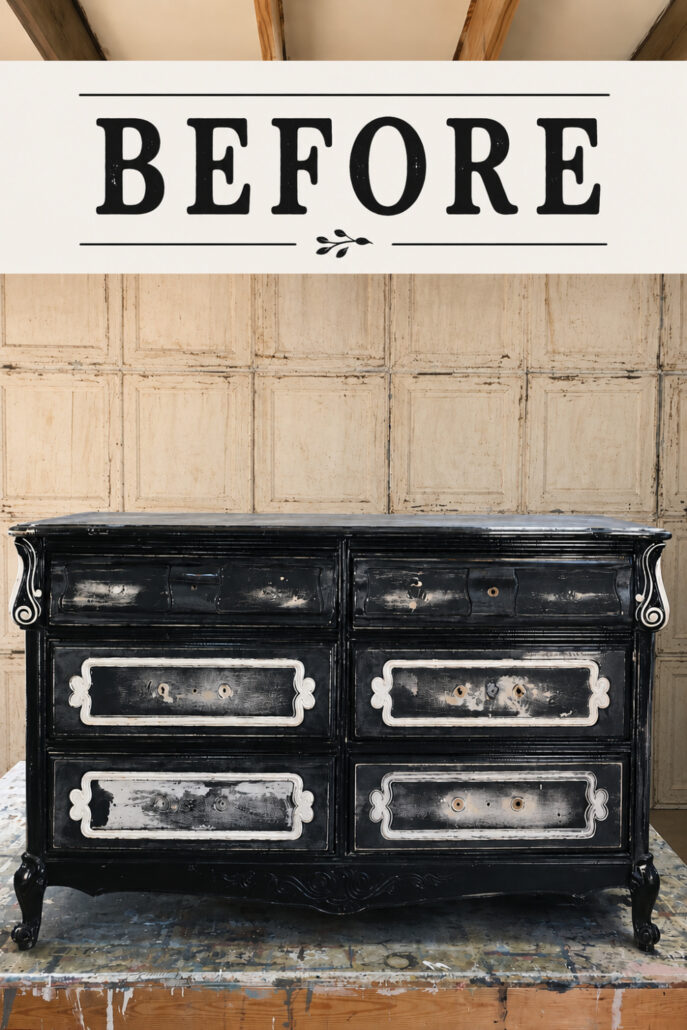
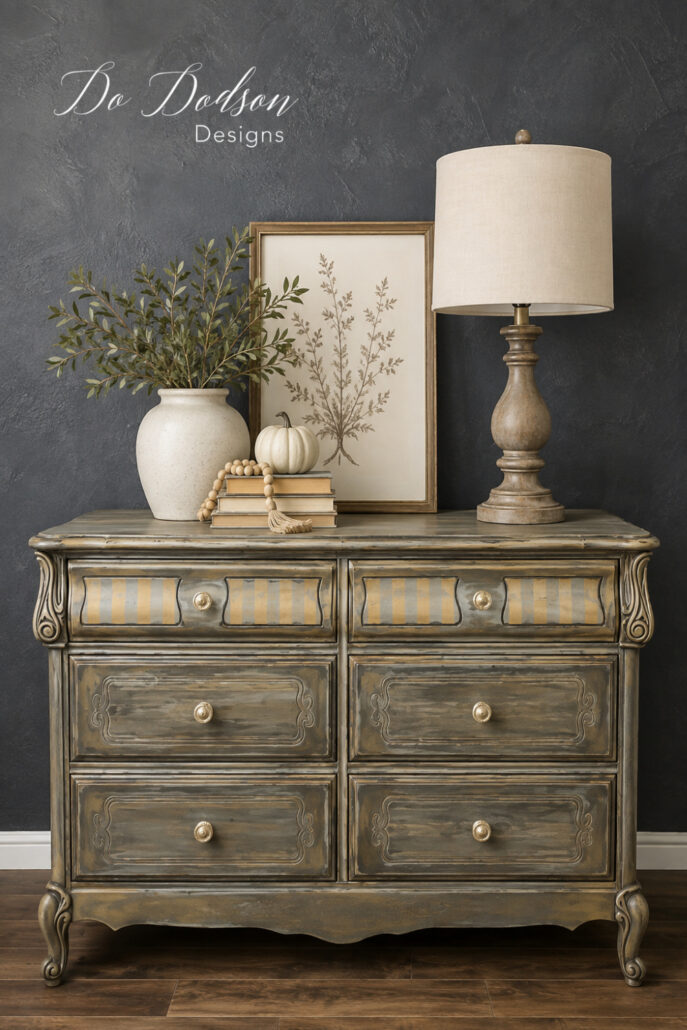
I found this old French Provincial dresser sitting on the curb in front of my sister’s house. She was ready to toss it because of broken and missing drawer slides, damaged wood, and a not-so-lovely paint job. She didn’t think anyone could save this one.
Challenge accepted!
After making the repairs, cleaning it up, and giving it a fresh painted finish, this roadside reject looked nothing like the piece headed for the trash.
See how I rescued this French Provincial dresser and gave it a whole new look with paint.
4. Bring an Old Wood Dresser Back to Life
Not every thrift store furniture makeover needs a coat of paint. Sometimes the prettiest finish is already there—you just have to uncover it.
This old dresser was one of my mom’s garage sale finds, which makes it extra special to me. I grew up going to garage sales with her, and I’m pretty sure that’s where my love of dragging home other people’s unwanted stuff began. Thanks, Mom! 😂
Instead of painting it, I stripped away the old dark finish and used wood bleach to lighten the natural wood. What was hiding underneath was completely worth the work.
See how I stripped and bleached this old dresser to create a beautiful natural wood finish.


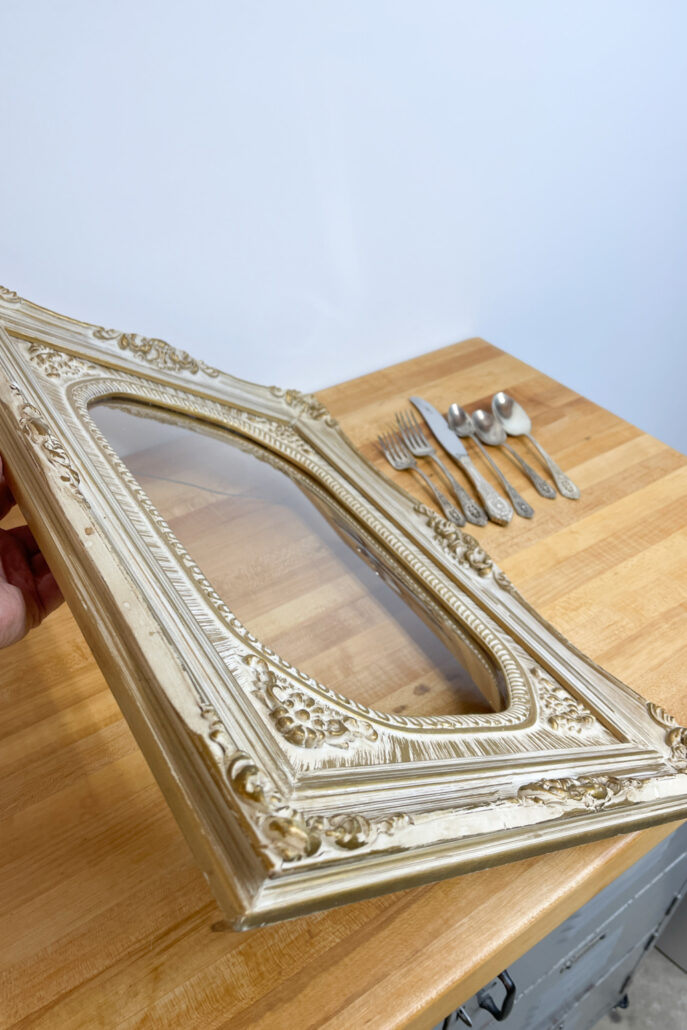
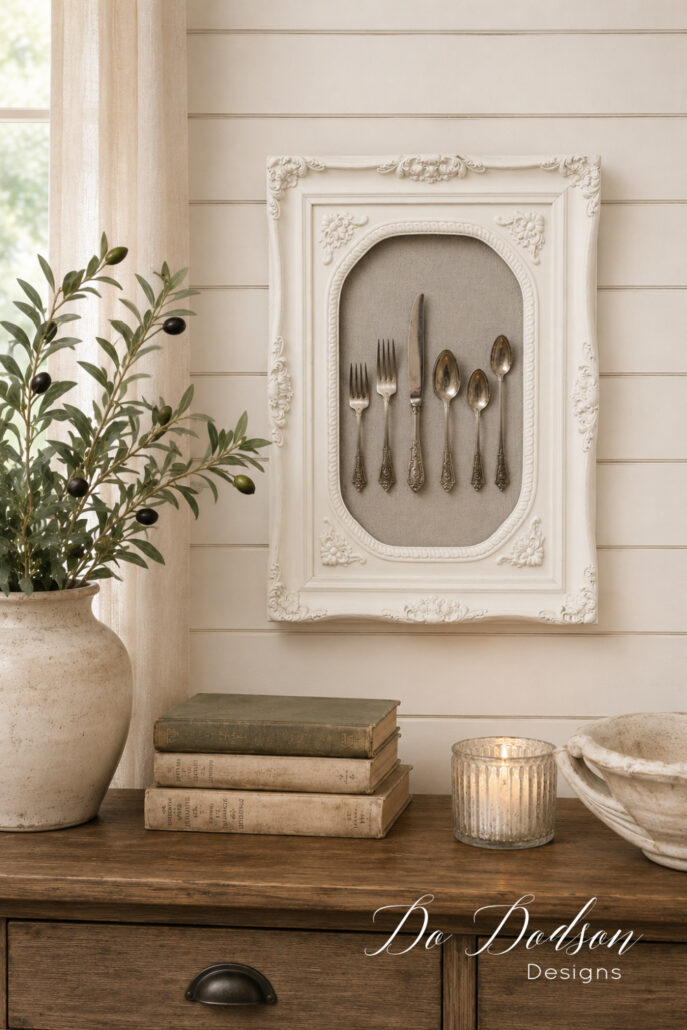
5. Turn an Old Picture Frame Into Something Unexpected
Picture frames are one of those things I almost always stop and look at when I’m thrift shopping. They’re inexpensive, and even the ugly ones can have great details hiding underneath.
For this project, I turned an old frame into a decorative display for vintage silverware. Because why put another picture in it when you can hang forks and spoons on the wall? 😂
With a little paint and creative repurposing, an ordinary frame became one-of-a-kind farmhouse wall decor. So next time you’re digging through old frames, take a good look at the frame itself. That might be the real treasure.
6. Make Cheap Thrift Store Vases Look High-End
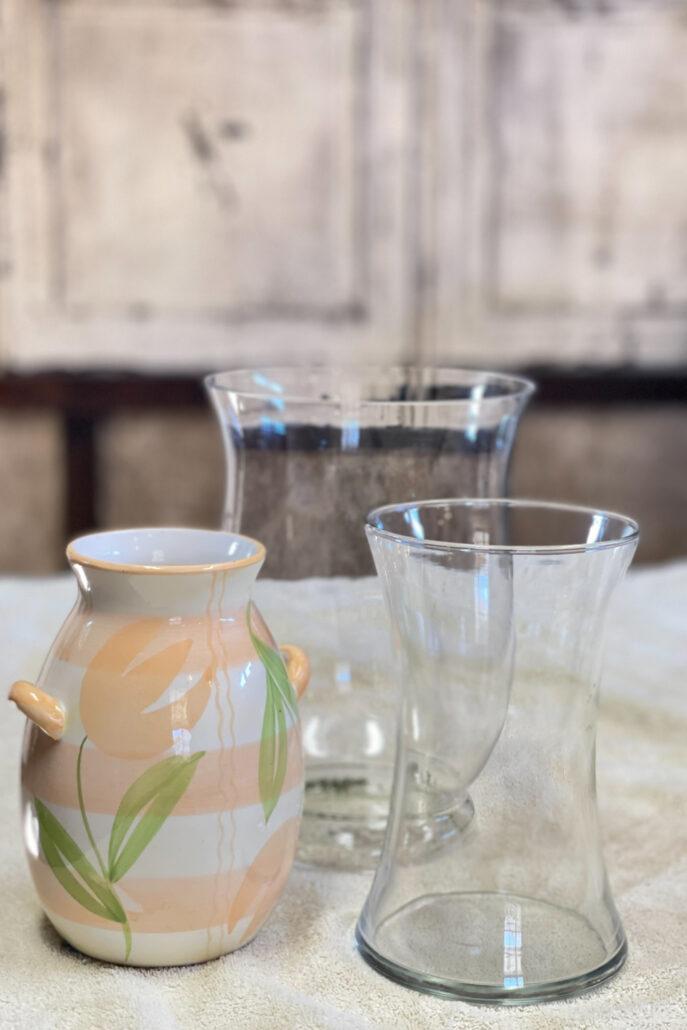
You know that aisle at the thrift store filled with random vases in every color imaginable? I always take a peek because sometimes there’s a good shape hiding underneath all that ugly. 😂
I found these vases for just $1 each, and while they weren’t anything special to look at, I loved their shapes. That’s usually all I need to get those creative wheels turning.
With a little texture and layered paint, I transformed them into Pottery Barn-inspired decor with that beautiful aged pottery look I love—and for a whole lot less than buying the real thing!
See how I turned $1 thrift store vases into Pottery Barn-inspired decor.
Prefer to watch? See the video tutorial here for this makeover. 👇🏼

7. Don’t Be Afraid of the Really Janky Furniture
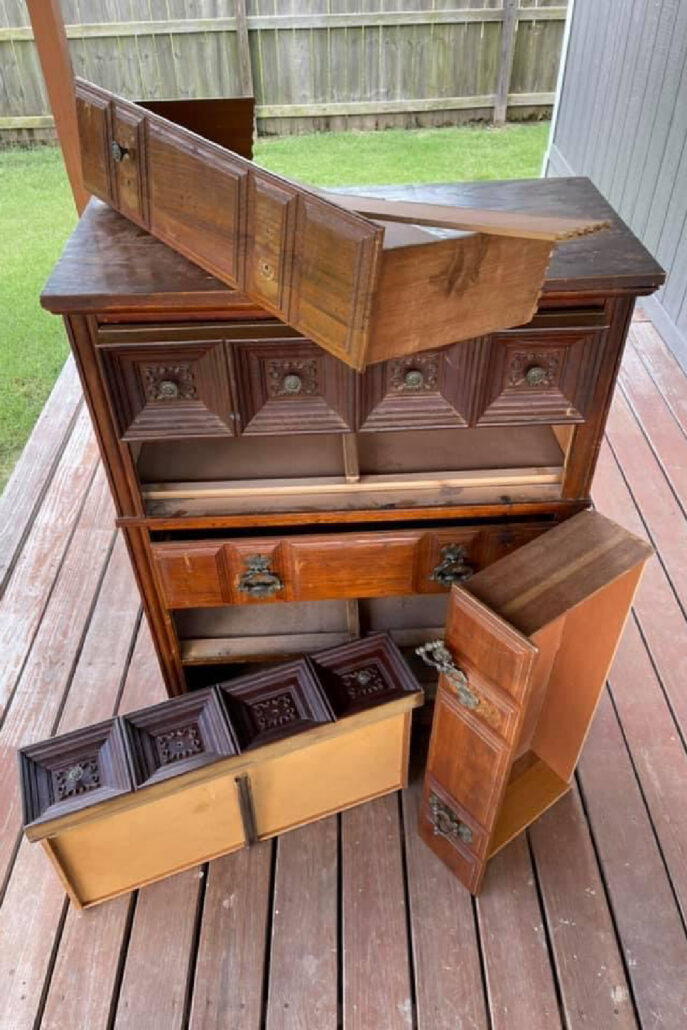
Every once in a while, I find a piece of furniture that makes me question my own judgment. This dresser was one of those pieces. 😂
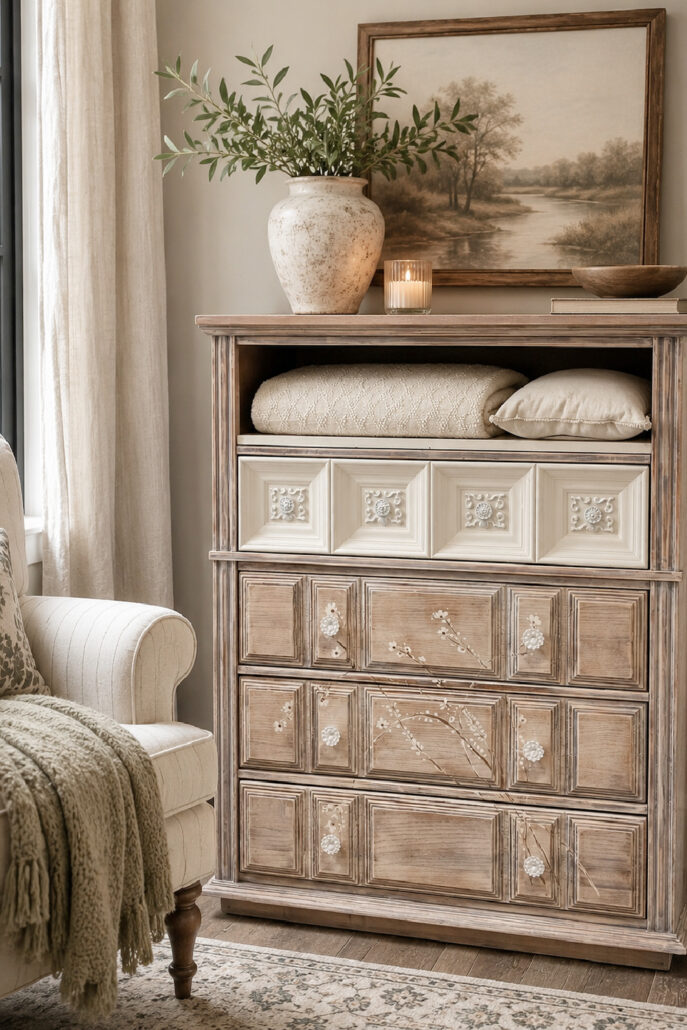
I found it on Facebook Marketplace, and “janky” might actually be putting it nicely. It needed repairs, had definitely seen better days, and then I let it sit outside for months before I finally decided what in the world I was going to do with it.
After making the repairs, I gave it a lighter color-washed finish and added hand-painted floral details. What started as a sad secondhand dresser became a fun, one-of-a-kind statement piece.
See the complete before-and-after of this Facebook Marketplace dresser makeover.
8. Look Past the Caution Tape 😂
Some people see yellow caution tape and think, stay away.
Apparently, I see it as an invitation. 😂
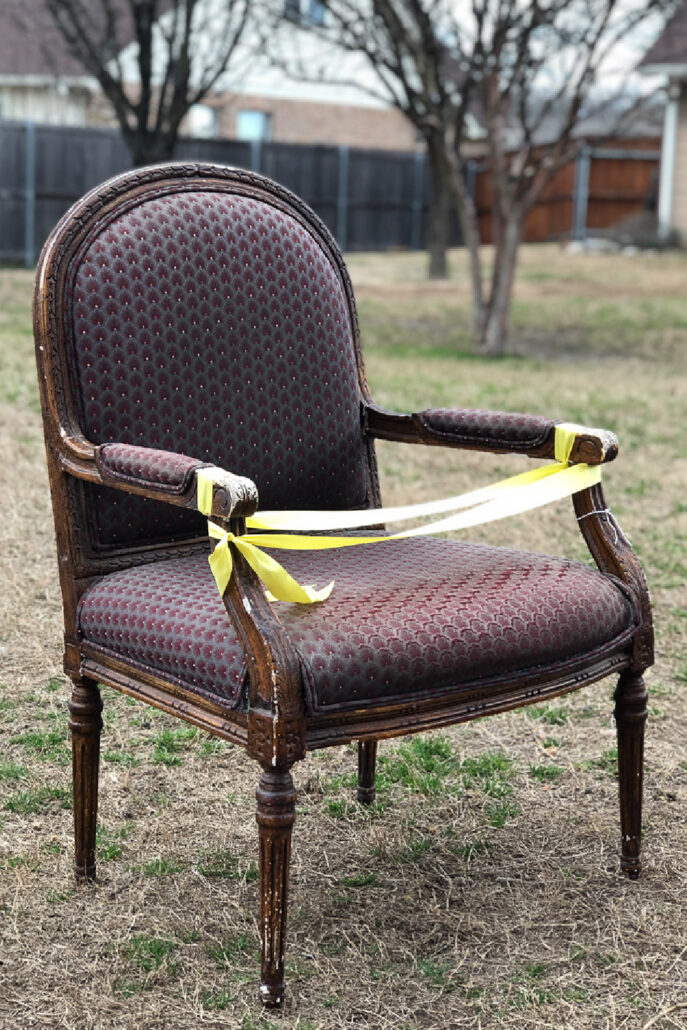
I found this vintage French armchair tucked away in a local treasure store when I was just killing a little time—which, as we all know, is how these things usually start.
Then I spotted the yellow caution tape. That probably should have been my clue to keep walking, but instead, I had to get a closer look.
Yep. I bought it.
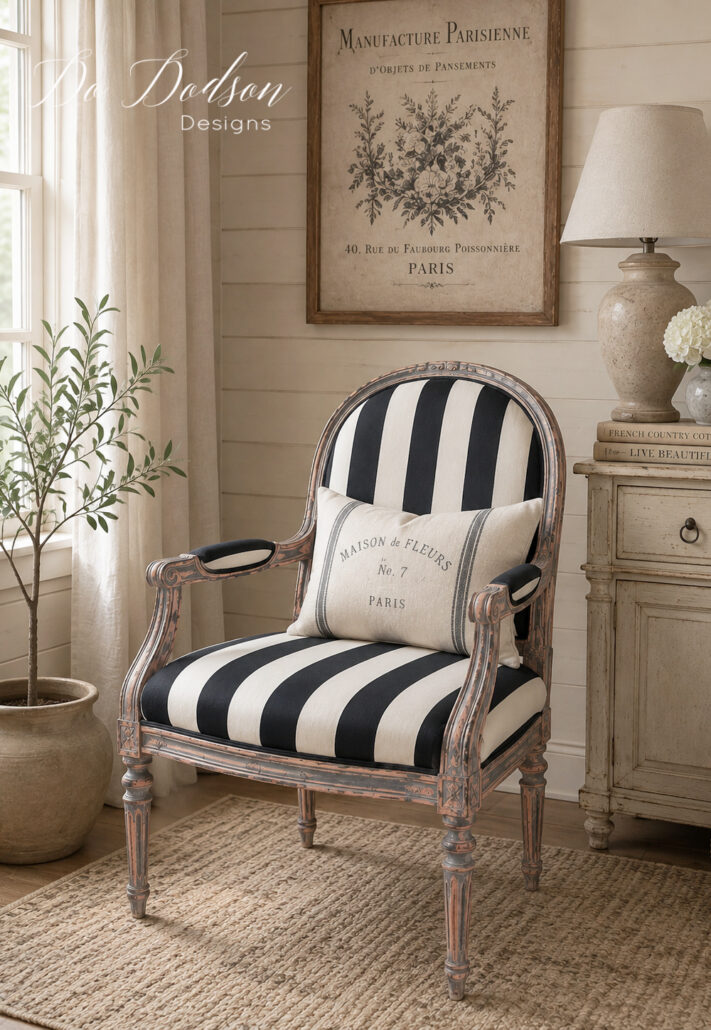
The chair had beautiful curves and details, and with a freshly painted finish, my questionable thrift-shopping decision became a beautiful one-of-a-kind chair.
See how I transformed this vintage French armchair with paint.
9. Grab the Weird Thrift Store Finds Before Someone Else Does
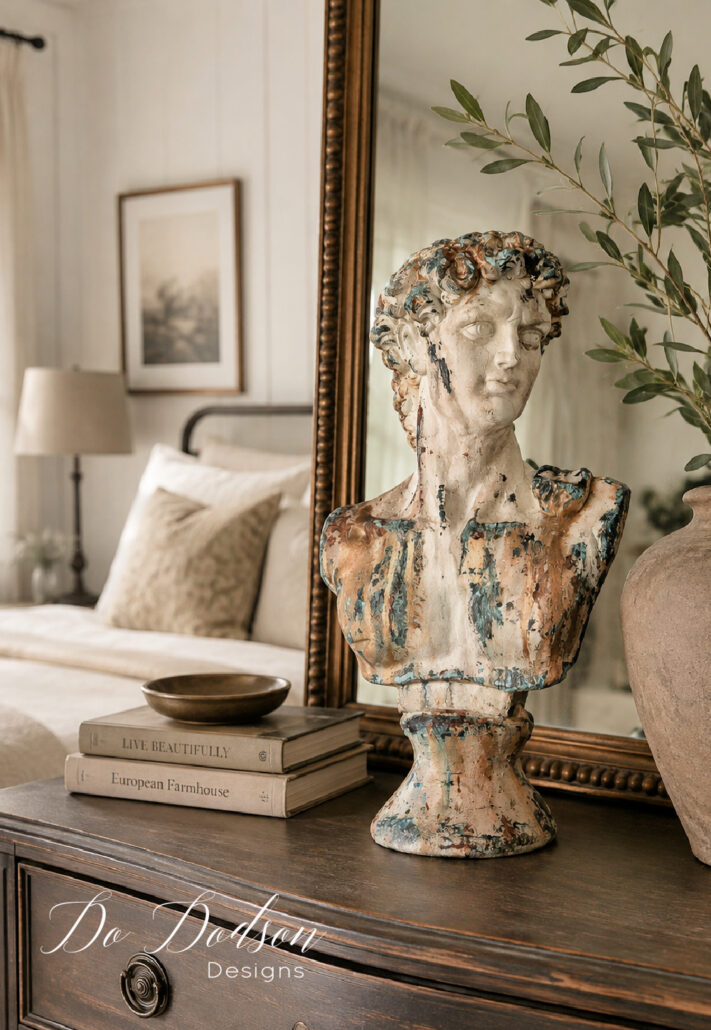
Some thrift store finds practically scream your name from across the aisle. David was one of those finds.
The minute I spotted this bust of Michelangelo’s David, I swooped down on him like an eagle on its prey. 😂 Then I clutched him to my body while giving everyone the side-eye—as if there were a line of people waiting to snatch him away.
There wasn’t.
Before his makeover, I tucked David into our bed to scare Mr. Honey Do. 😂 Apparently, bringing home strange men from the thrift store wasn’t enough.
Then I gave him layers of paint, reactive patina, and a touch of metallic gold to create an old, weathered finish. He went from a plain thrift-store find to a seriously handsome piece of home decor.
See how I gave my thrift store Bust of David an aged patina finish.
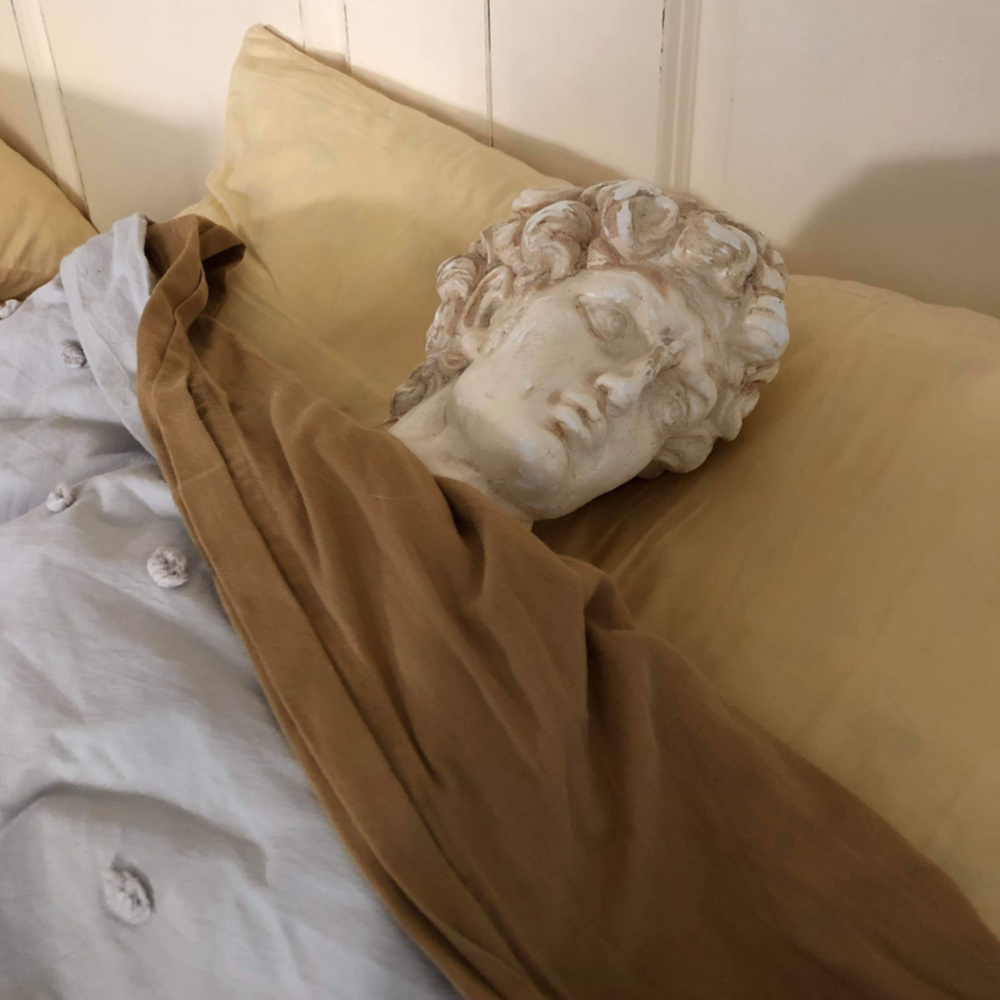
After scaring Mr. Honey Do half to death, I gave David a permanent spot in the bedroom. David, that is. Mr. Honey Do already had one. 😂
10. Turn a Cheap Thrift Store Find Into Artwork
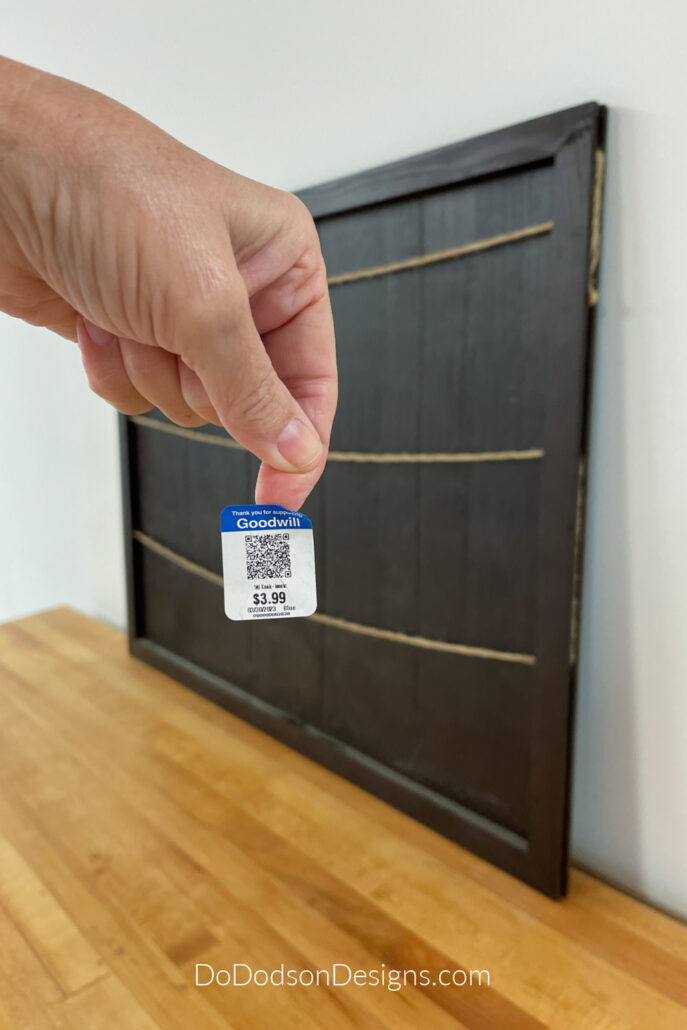
Sometimes the best thrift store finds aren’t even what you’re looking for. You spot something, see that little price tag, and think, SCORE!
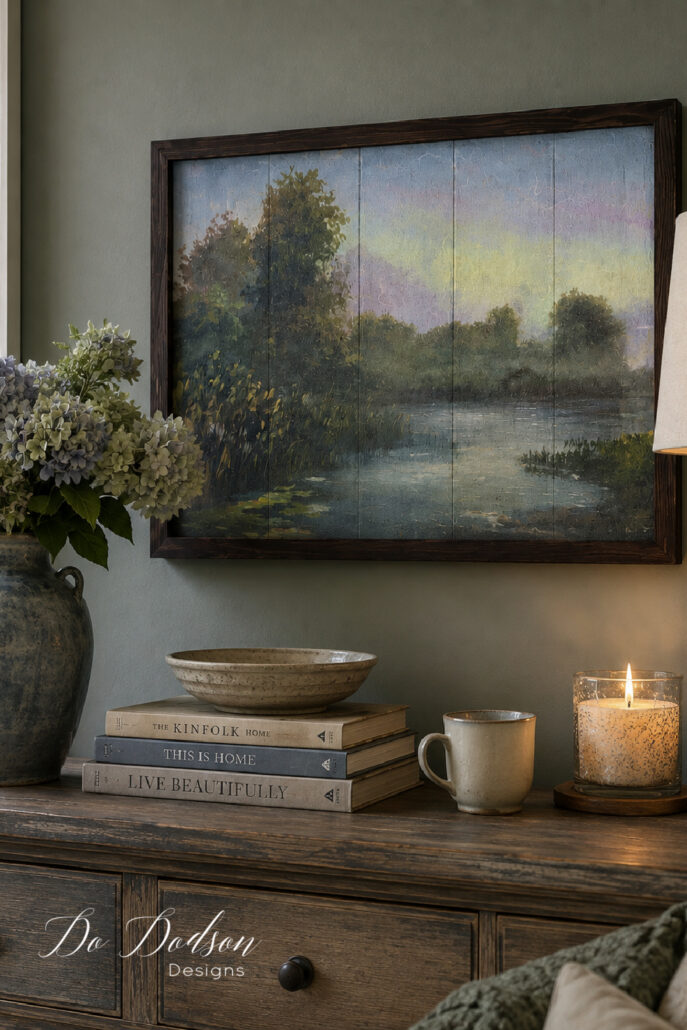
I found this wooden hanging wall piece for just $3.99, and I wasn’t exactly sure what its original purpose was. But I loved the wood, the grooves, and, most importantly, the price. 😂 I knew I could do something with it.
Using decoupage rice paper and a few simple tricks, I turned it into artwork that looks more like a painting than paper glued to wood.
Sometimes you don’t need to know what a thrift store find was—you just need an idea for what it could be.
11. Give an Old Washstand Another Chance
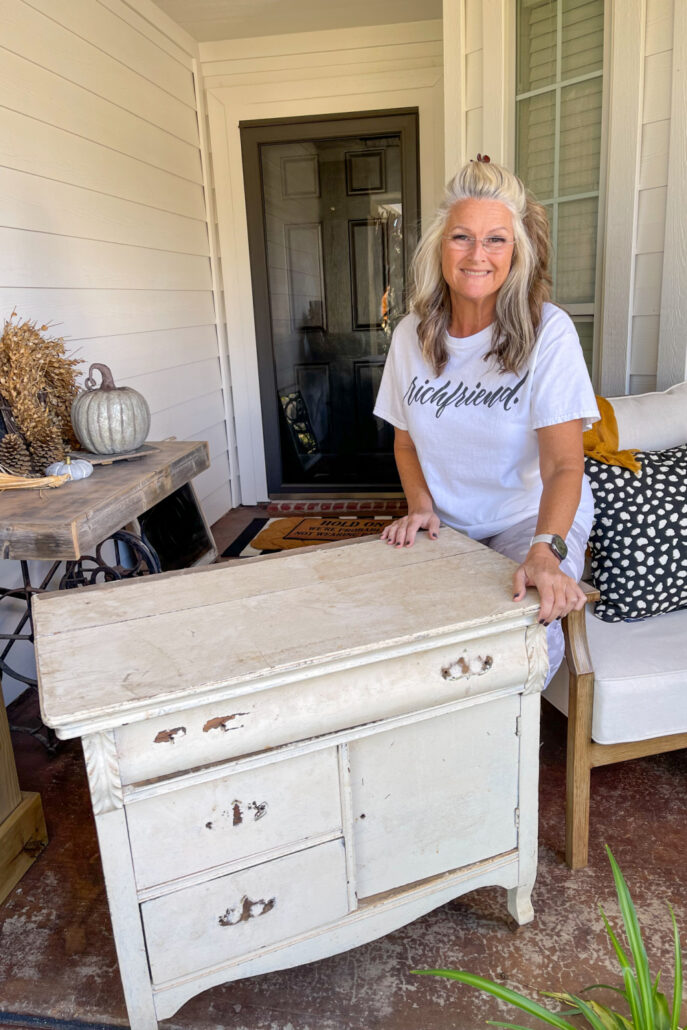
Some pieces have too much character to end up on the curb, and this antique washstand was definitely one of them.
Yep, another curbside rescue. Apparently, I have a hard time minding my own business when perfectly good furniture is sitting beside the road. 😂
The finish was rough and it needed repairs, but those beautiful old details caught my eye. After stripping away the old finish, making the repairs, and adding paint, this forgotten piece was ready for another chapter.
Besides, if it’s sitting on the curb with a FREE price tag, I’m at least slowing down for a look. 😂
See how I rescued this antique washstand and gave it a beautiful new painted finish.

12. Don’t Let a $5 Price Tag Fool You
Five dollars for a piece of furniture? You know I’m at least taking a look. 😂
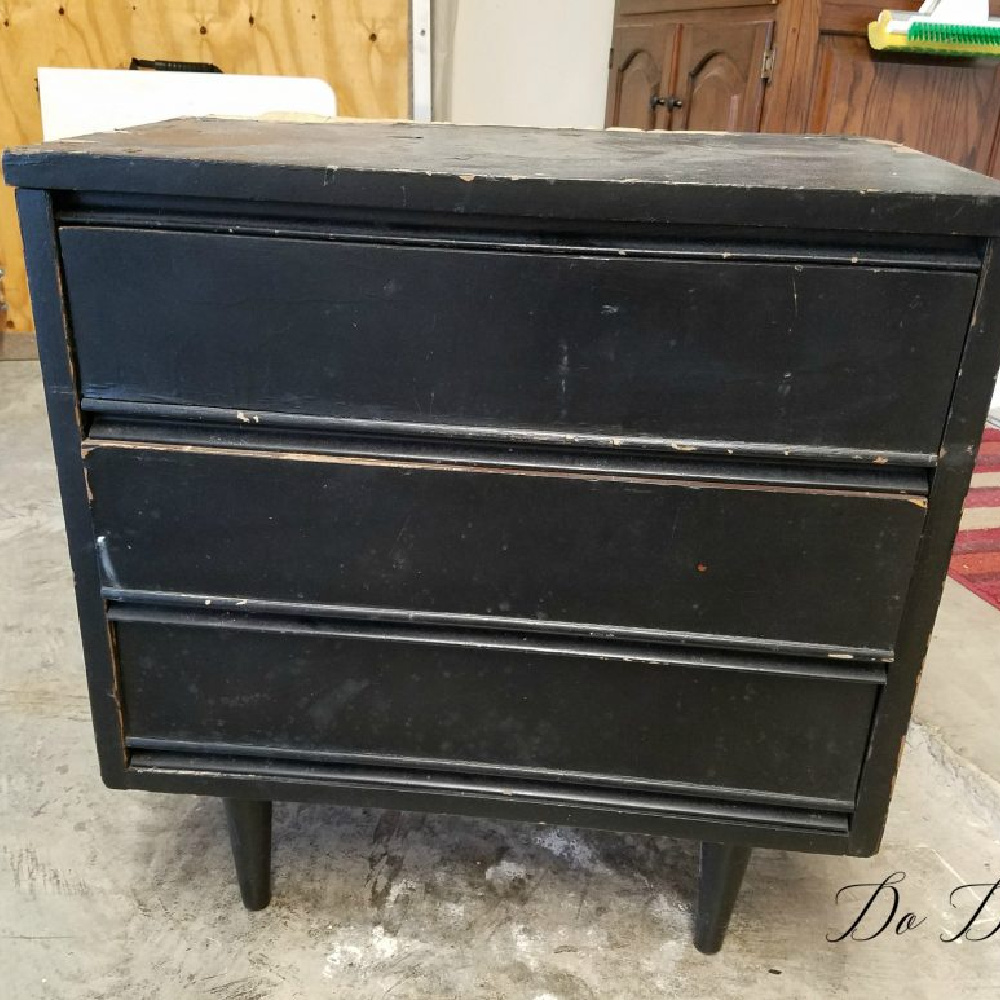
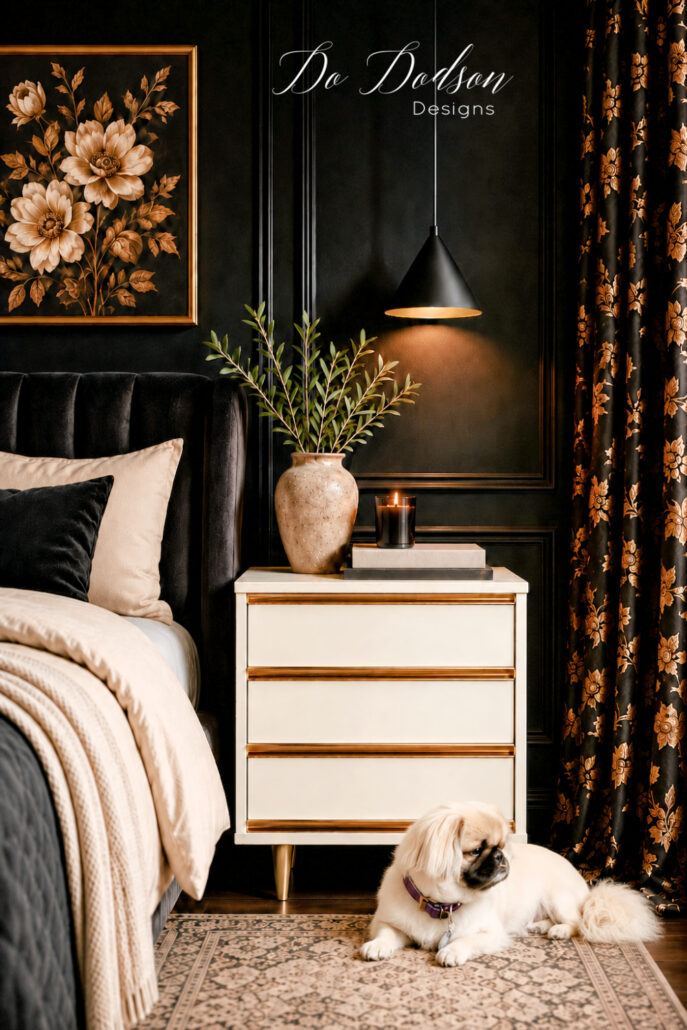
This little Dixie nightstand was only $5, which sounds like a SCORE until you get close enough to see why. The veneer was severely damaged, but I loved the shape and Mid-Century Modern lines.
After making the repairs, I added a fresh painted finish, gold details, and a rustic faux-plank wood top. Suddenly, my sad little $5 find didn’t look so cheap anymore.
Of course, a $5 piece of furniture can turn into several hours of work, but we don’t need to discuss that part while I’m celebrating my bargain. 😂
See how I turned this damaged $5 thrift find into a beautiful painted nightstand.
13. Sometimes You Have to Look Past the Nasty
I’ve brought home some questionable furniture over the years, but this one was a real beauty—and I use that term loosely. 😂
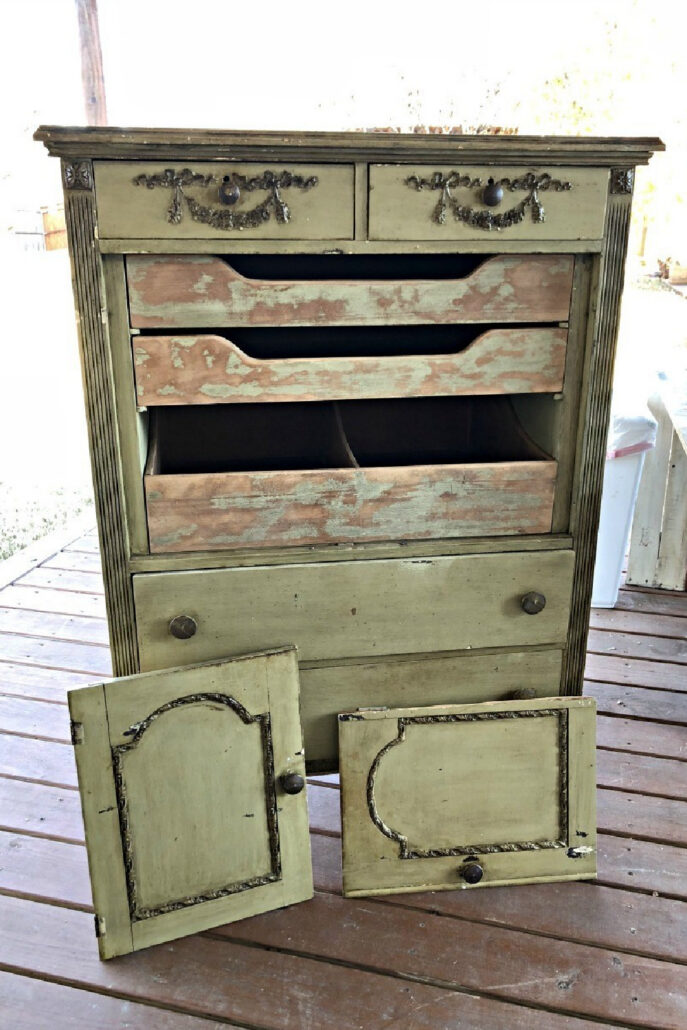
This secondhand cabinet was dirty, grungy, damaged, smelled like cigarette smoke, and just when you think it couldn’t get any better, there were spider eggs involved too.
I know. SCORE! 😂
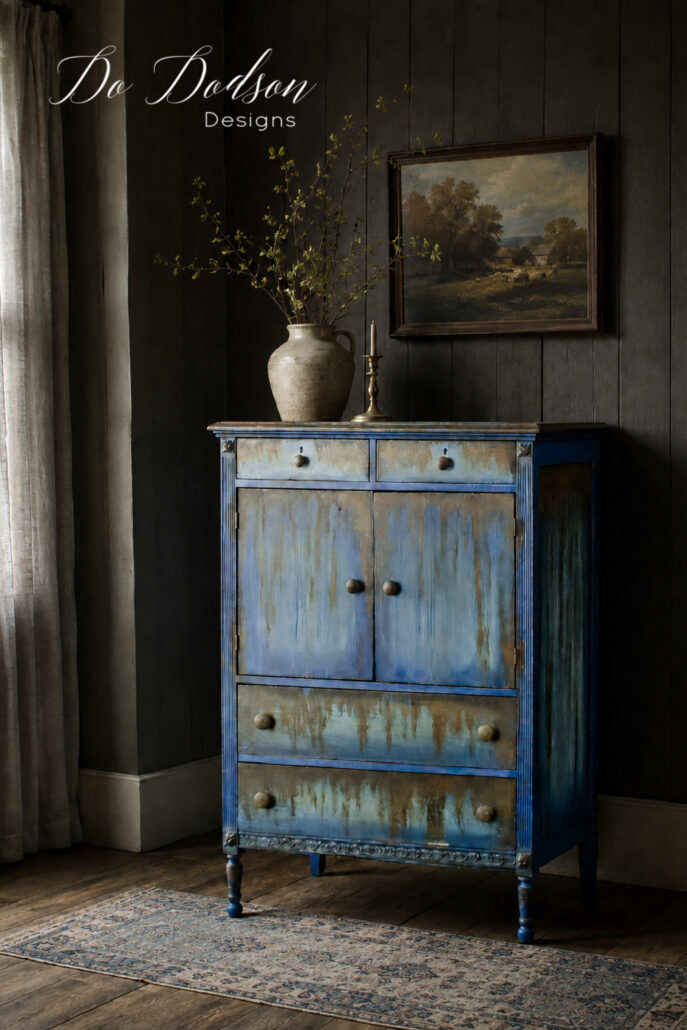
After a serious cleaning and repairs, I gave it layers of blue paint and a gorgeous rusty, aged patina. Somewhere along the way, this ugly duckling earned the name “Green Goddess” in her former life, and I think she deserved it.
Of course, if you see spider eggs, you might want to handle those before loading it into your vehicle. Ask me how I know. 😂
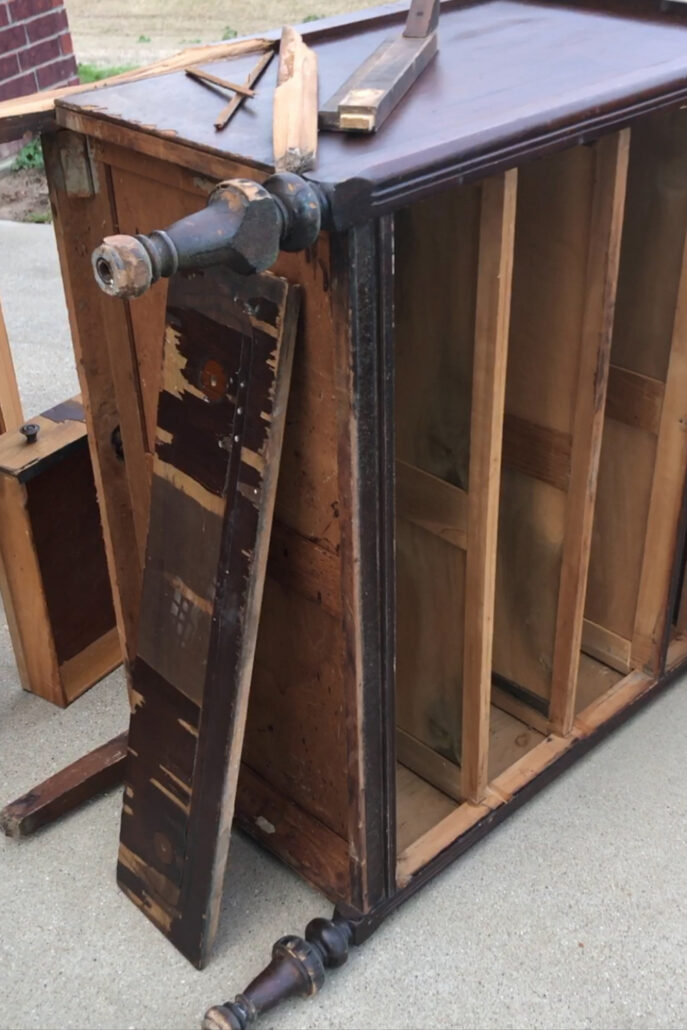
14. A Broken Dresser Can Still Be Worth Saving
Missing drawers are usually a pretty good sign that most people will walk right past a piece of furniture.
Me? I start wondering what I can put in those empty spaces. 😂
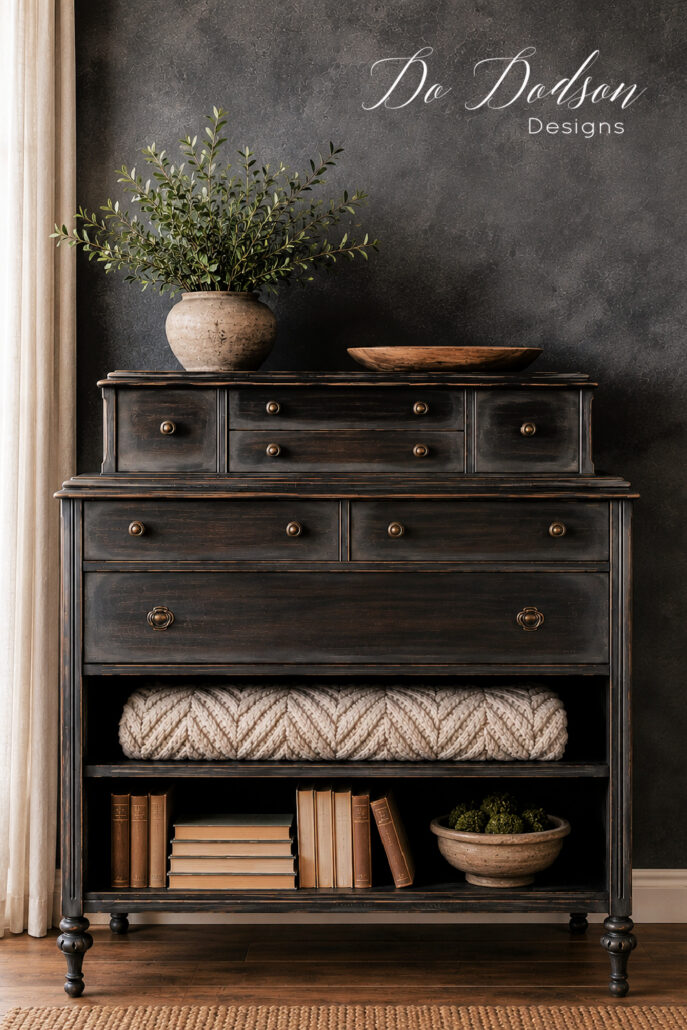
This old dresser had two broken drawers, a broken leg, and damaged wood. Instead of rebuilding the missing drawers, I turned those spaces into open shelving, made the repairs, and gave the dresser a layered, Restoration Hardware-inspired finish.
A missing drawer isn’t always a problem.
Sometimes it’s a shelf waiting to happen. 😂
See how I repaired this damaged dresser and gave it a Restoration Hardware-inspired makeover.
15. Turn an Outdated Facebook Marketplace Cabinet Into Useful Kitchen Storage
Sometimes I bring home questionable furniture, but we have already established that.
And sometimes Mr. Honey Do brings it home for me. 😂
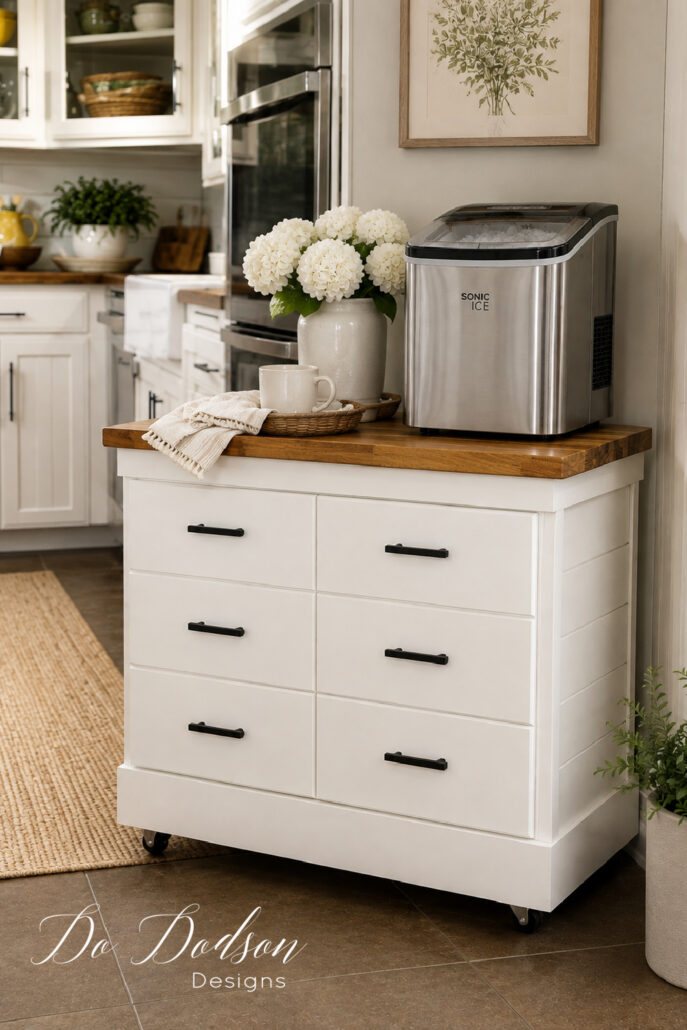
After buying me one of those fancy “Sonic Ice” machines for my birthday, we discovered it wouldn’t fit under our kitchen cabinets. His solution? A $40 Facebook Marketplace microwave cabinet straight out of the 1990s.
Then came the question:
“Can you make this match our kitchen cabinets?”
Challenge accepted.
I added shiplap, paint, a butcher block top, and wheels to turn that outdated cabinet into useful kitchen storage—and Mr. Honey Do’s beloved ice machine finally had a proper home.
Apparently, I can now add custom furniture accommodations for birthday appliances to my résumé. 😂
See how I turned a $40 Facebook Marketplace cabinet into a shiplap rolling kitchen cabinet.

Before You Pass Up That Next Thrift Store Find…
After all these years of thrifting, junking, and dragging home things that probably should have scared me away, I’ve learned one thing: you just never know where your next favorite project will come from.
It might be a $1 vase, a dresser sitting on the curb, or something so questionable it comes with caution tape—or spider eggs. 😂
So the next time you’re thrift shopping, take a second look before you walk away. You might just be looking at your next great makeover.
Thrift Store Makeover FAQs
What should I look for when buying furniture to makeover?
Look for solid construction, interesting shapes, and details you love. Scratches, ugly paint, and missing hardware usually don’t bother me because those things can be changed. I pay more attention to whether the piece is sturdy and whether the damage is something I can realistically repair.
Do I need to sand thrift store furniture before painting?
Not always, but I always clean secondhand furniture thoroughly before doing anything else. Depending on the existing finish and the paint I’m using, I may scuff sand, strip, or prime the piece before painting. When in doubt, proper prep is worth the extra time.
What are the easiest thrift store items to makeover?
Vases, picture frames, small wood decor, lamps, baskets, and ceramic pieces are great places to start. They’re inexpensive, don’t require a huge time commitment, and a little paint can completely change the way they look.
Where can I find inexpensive pieces for thrift store makeovers?
Don’t limit yourself to thrift stores! I also hunt garage sales, estate sales, Facebook Marketplace, flea markets, curbside piles, and sometimes my own garage. You’d be surprised what you can find when you start looking at other people’s castoffs with a DIY eye.
Need more ideas? Check out my How and Where to Find Furniture to Upcycle guide for my favorite places to hunt for secondhand furniture.
Before You Pass Up That Next Thrift Store Find…
After all these years of thrifting, junking, and dragging home things that probably should have scared me away, I’ve learned one thing: you never know where your next favorite project will come from.
It might be a $1 vase, a dresser sitting on the curb, or something so questionable it comes with caution tape—or spider eggs. 😂
So the next time you’re thrift shopping, take a second look before you walk away. A little paint, creativity, and elbow grease might be all that forgotten piece needs to become something beautiful for your home.
And if you bring home something really janky, just remember—you’re in good company. 😂
Which of these thrift store makeovers was your favorite? Let me know in the comments. And don’t forget to save this post for your next junking trip!
Until the next project… xo, Do