Estimated reading time: 6 minutes
Hello creative friends! I may be a little late to the party, but I just discovered Pottery Barn. I know, but I live in the country, so I don’t go to the big city very often. This is why I L-O-V-E is able to recreate some of the trendy décor styles. Today I’m going to show you how to recreate a DIY Pottery Barn vase from thrift store finds. I think you’re going to love this technique.
Thanks to Dixie Belle Paint Co for sponsoring this post. While I was compensated to write this post, all opinions are my own.
This post contains a few affiliate links to help you find the products I use. You are not charged extra to use any of the links, but any income I make will be used for more amazing DIY projects to share with you! To see my full disclaimer, click here!
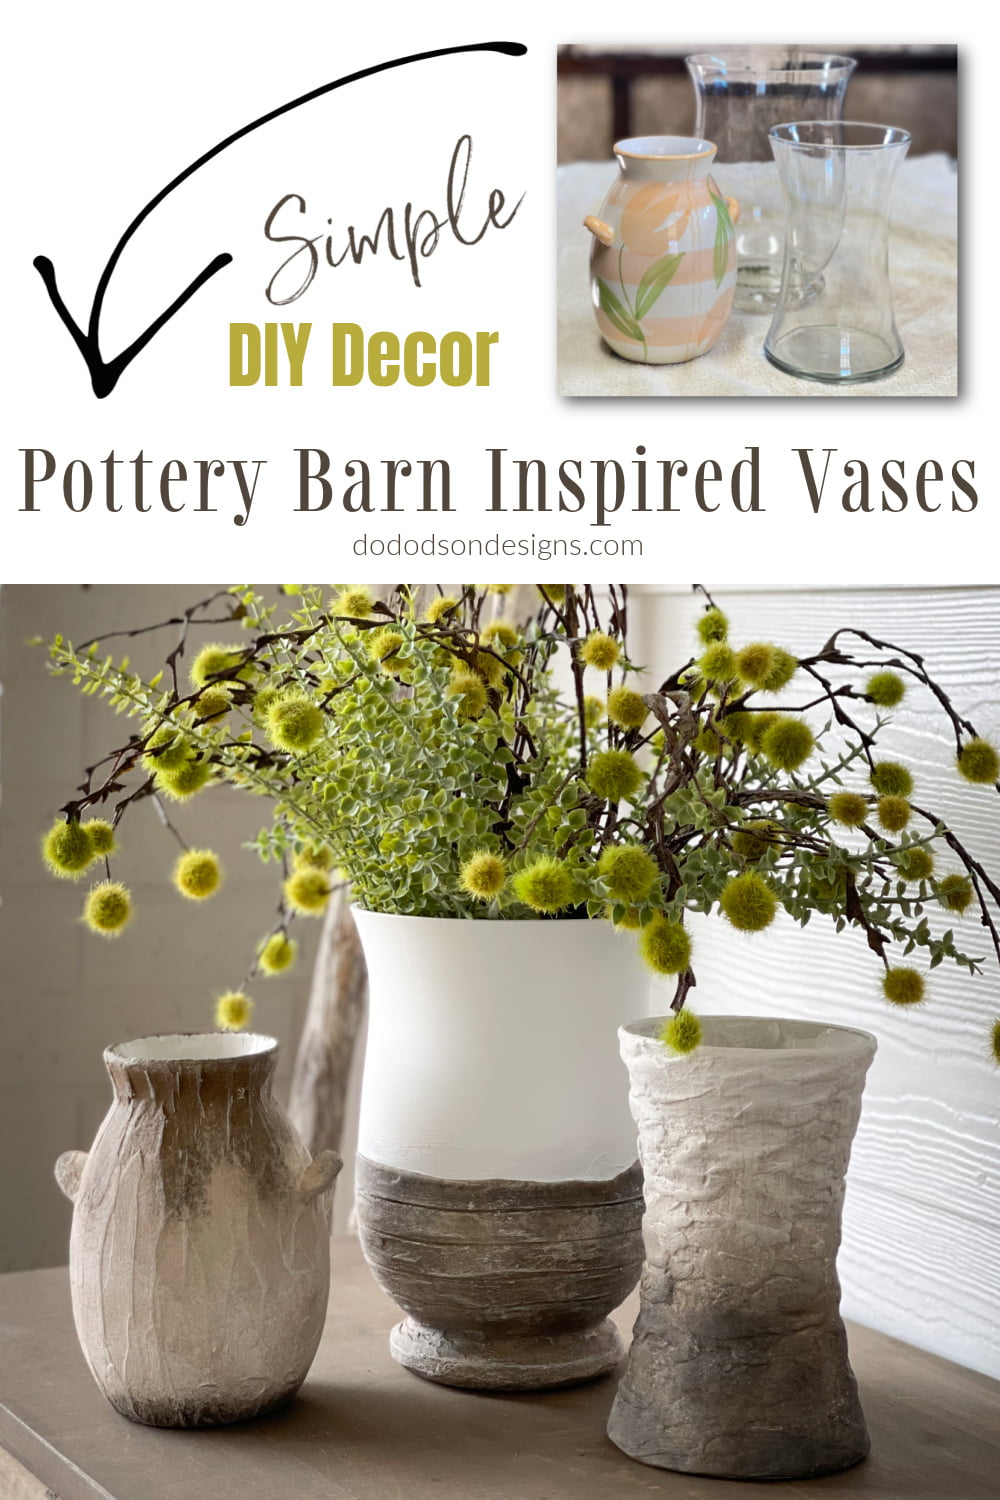
DIY Pottery Barn Inspired Vases

Gather Your Supplies
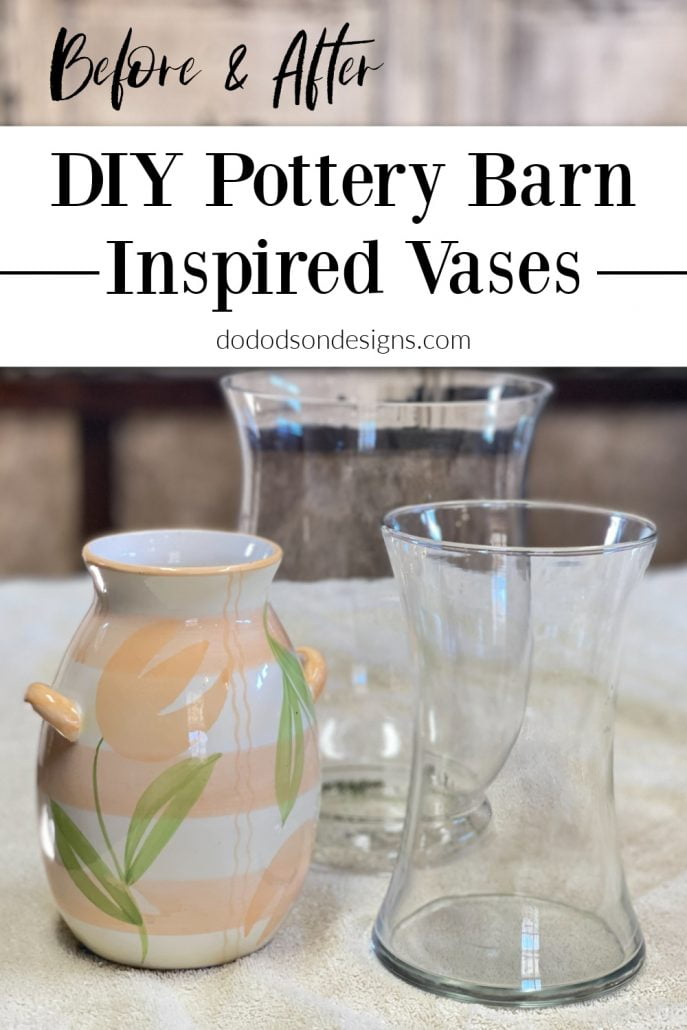
- Thrift Store Vases
- SLICK STICK (bonding agent for slick surfaces)
- Synthetic Paint Brush
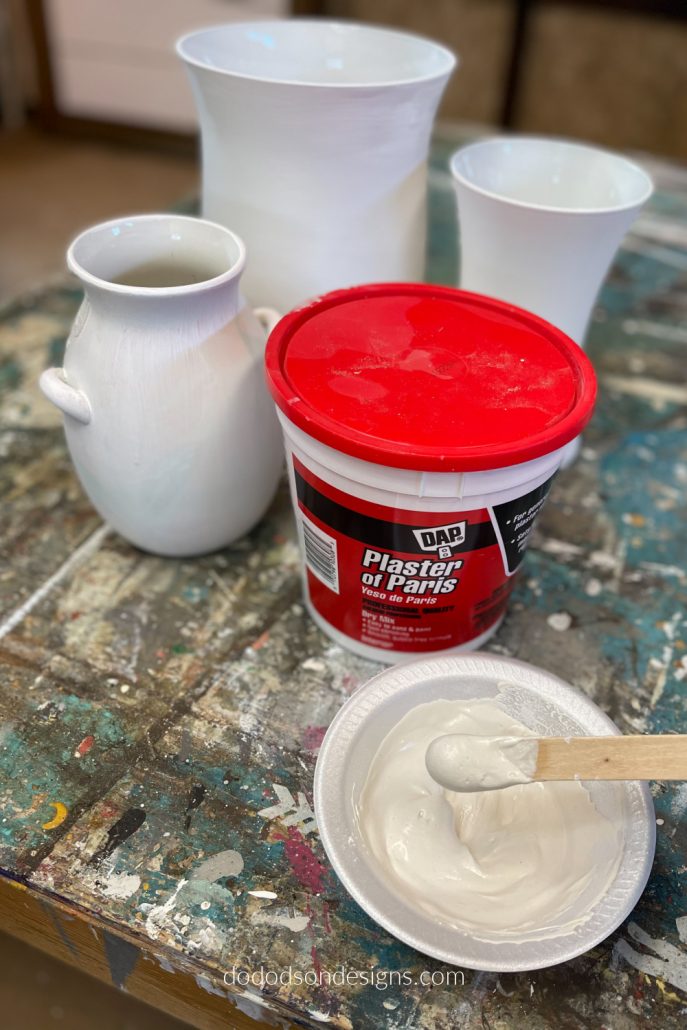
- Plaster of Paris (drywall compound)
- Craft Sticks
- Water
- Cotton
- Pine Cone
- Coffee Bean
*Before starting this project, you’ll need to clean the vases with warm soapy water, rinse well with water, and allow the vases to dry. This will remove any dirt and oils from the vases and get them ready for the slick stick.
STEP 1: Applying A Bonding Primer To The Glass Vases
To get the texture and paint to adhere to glass or slick surfaces, you’ll need a bonding primer to get the desired results. I use a product called SLICK STICK, which hasn’t failed me yet. Apply the first coat and allow it to dry for 2-3 hours at room temperature. Apply the second coat and dry allow it to dry overnight.

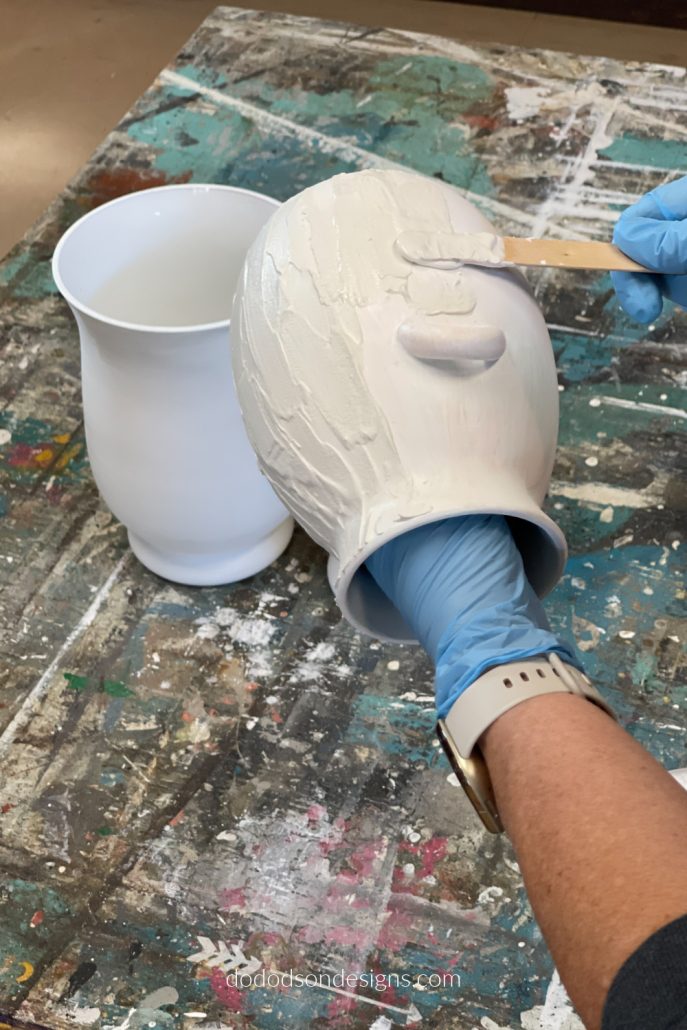
STEP 2: Applying Texture To The DIY Pottery Barn Vase
Mix the Plaster of Paris and water in a disposable bowl using a 2:1 ratio. Two parts plaster and 1 part water, or until you get it to the consistency you want. Stir the mixture well until smooth. Next, you’ll have to work fast because the plaster mixture dries fairly quickly, and it becomes harder to work with as you go, especially when you start applying it to the vase. I applied the texture with the craft stick, but you can also use a putty knife for a smoother finish. I suggest you research the patterns before starting your project to get the look you want. Get creative with your patterns.
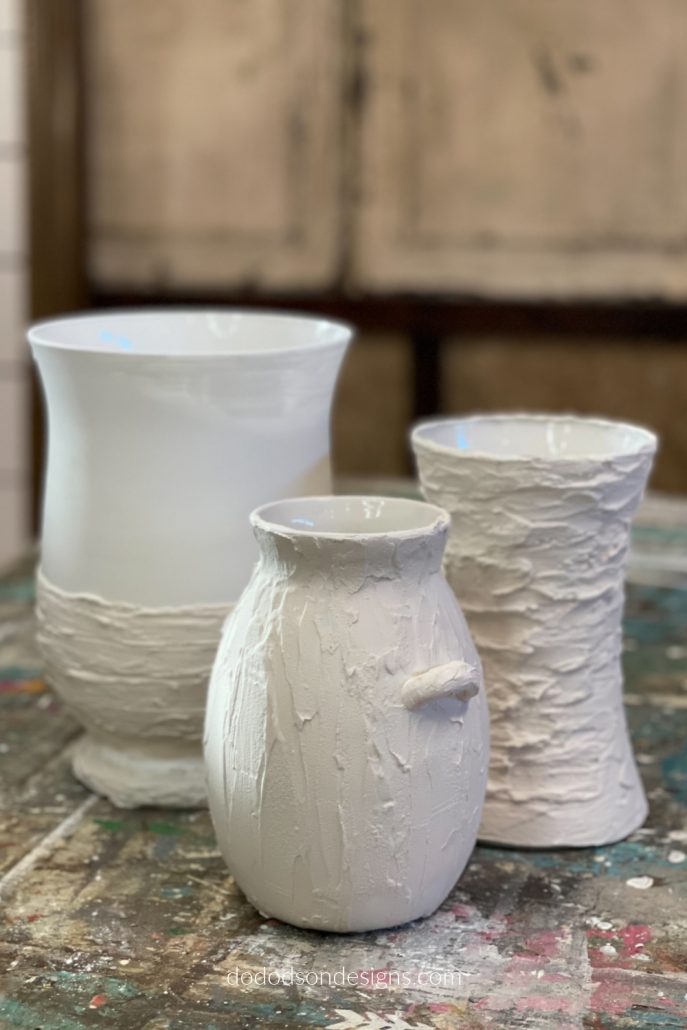
STEP 3: Your DIY Pottery Barn Vase Is Now Taking Shape
Once the texture is applied to the design you like, allow the Plaster of Paris to dry thoroughly. This can take anywhere from overnight to 24 hours. It depends on the environment you’re working in and how much of the mixture you applied. A controlled room temperature is best. This is important!
Now that you’re DIY Pottery Barn vases are taking shape, it’s time to start thinking about paint colors.
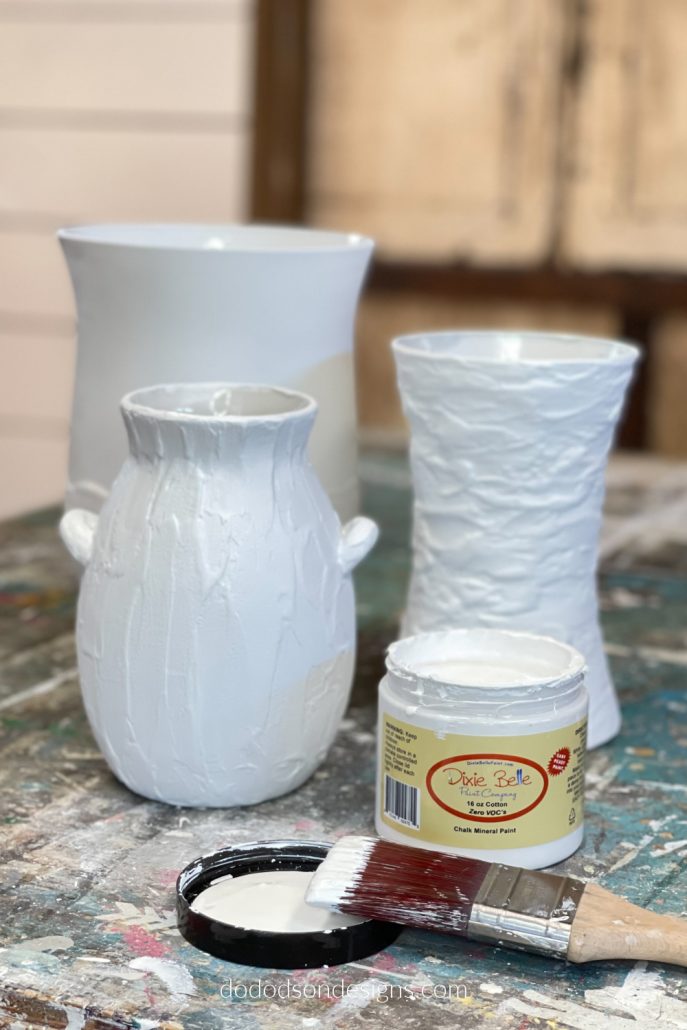
STEP 4: Adding Color To Your DIY Pottery Barn Vases
I used Cotton (white chalk mineral paint) for the paint, and then I added colors on top by layering and dry brushing to create the Pottery Barn look.
Watch The Full Video Tutorial HERE
The Final Results
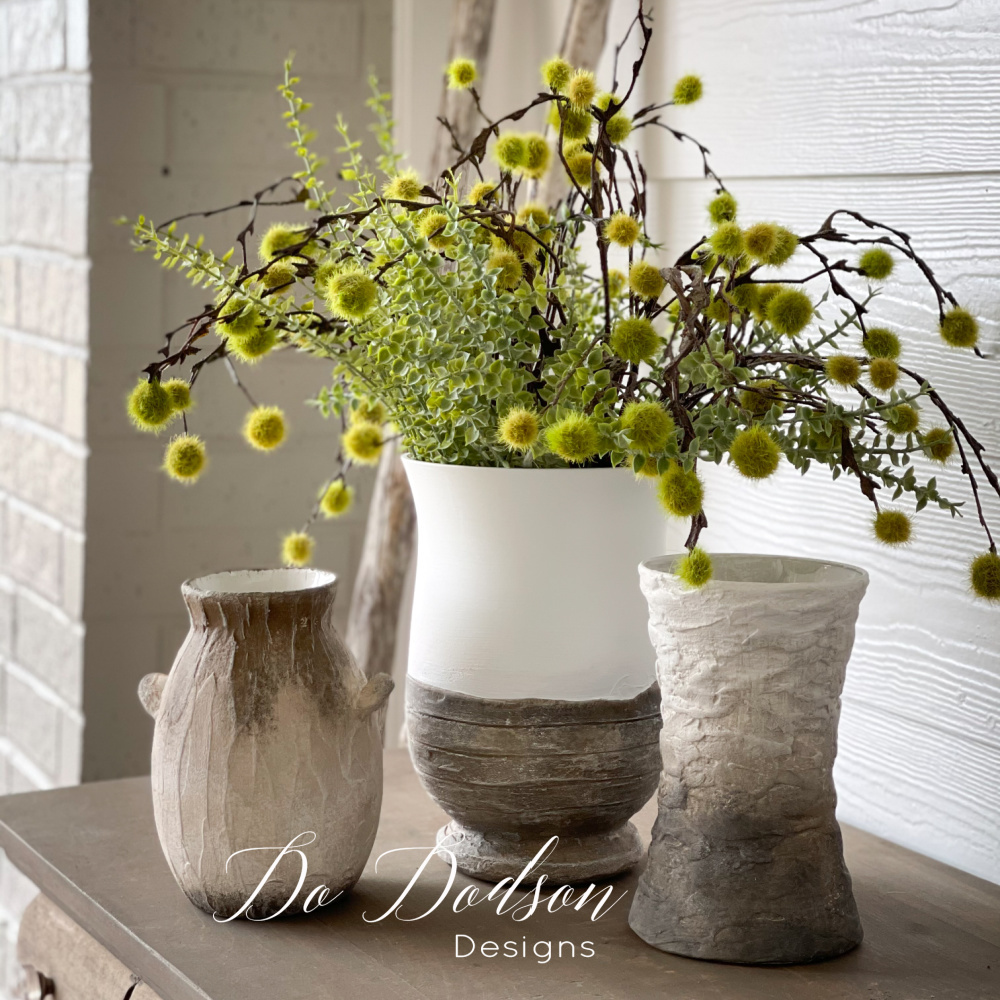
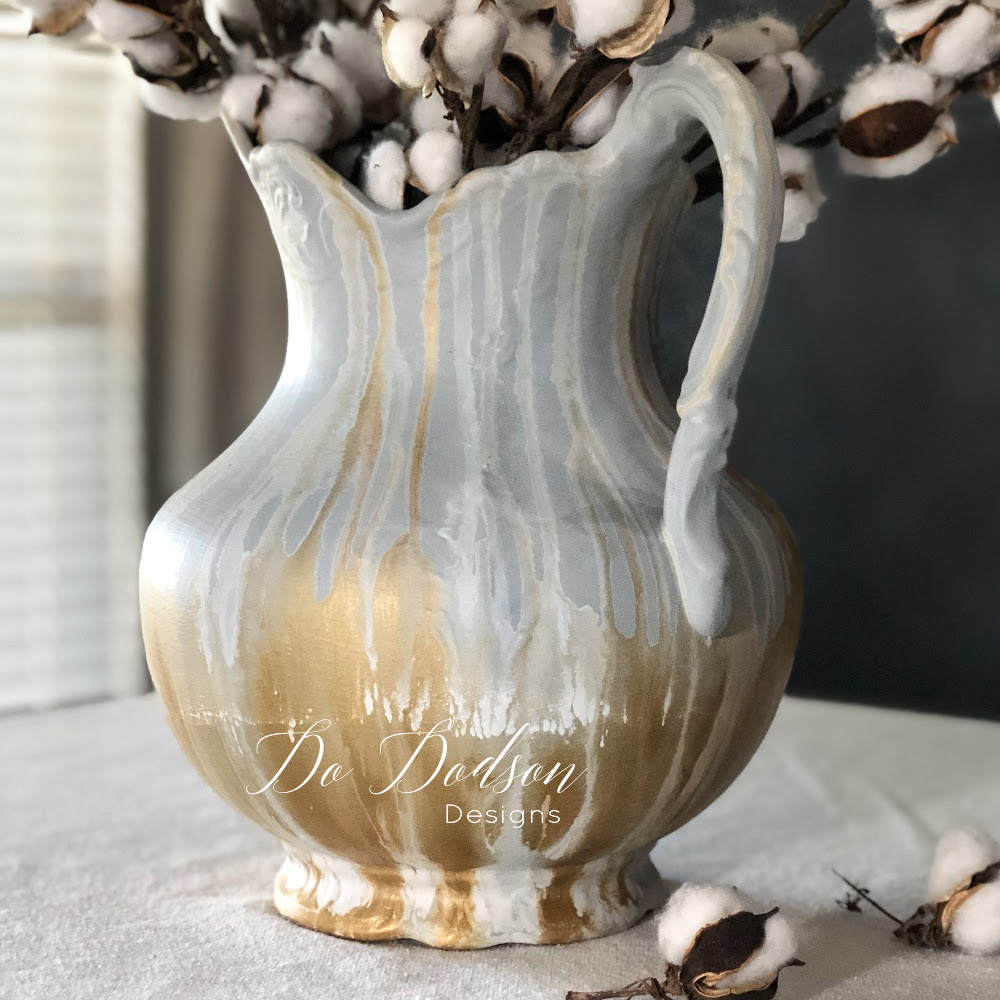
DIY Artisan Hand Painted Earthenware Vases that cost a fraction compared to Pottery Barn Vases. Depending on the style, the “real deal” will cost you anywhere from $79 -$139 per vase. I paid $1 each + supplies for my trio. This happens when you add texture and paint to thrift store vases. L-O-V-E
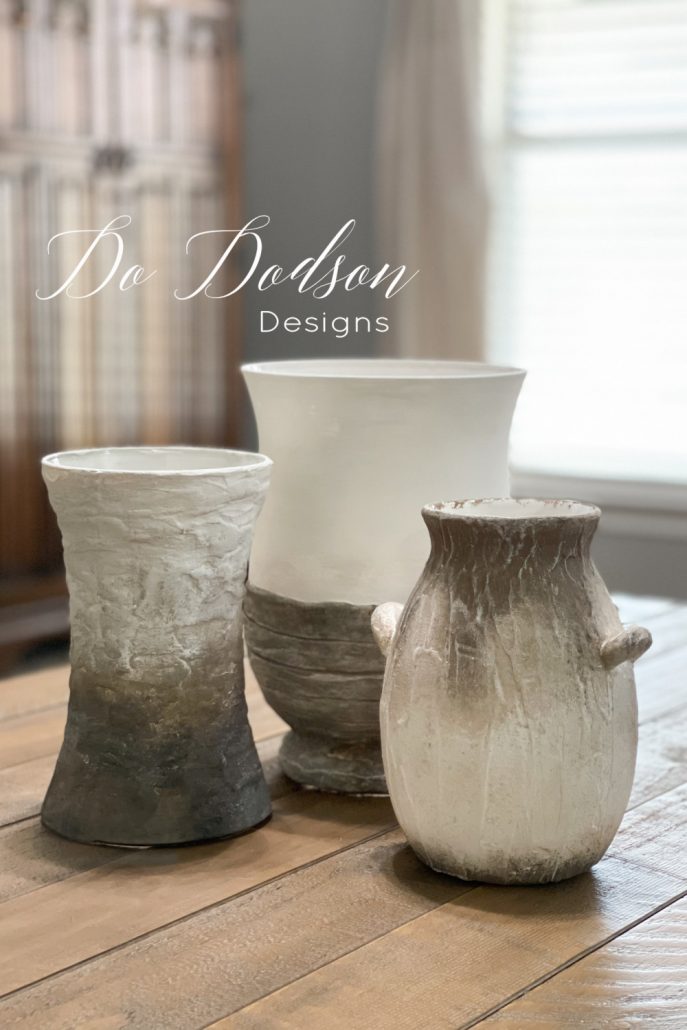
But this DIY Pottery Barn Vase is my favorite of the three. ❤ I love how the texture wraps around the vase.
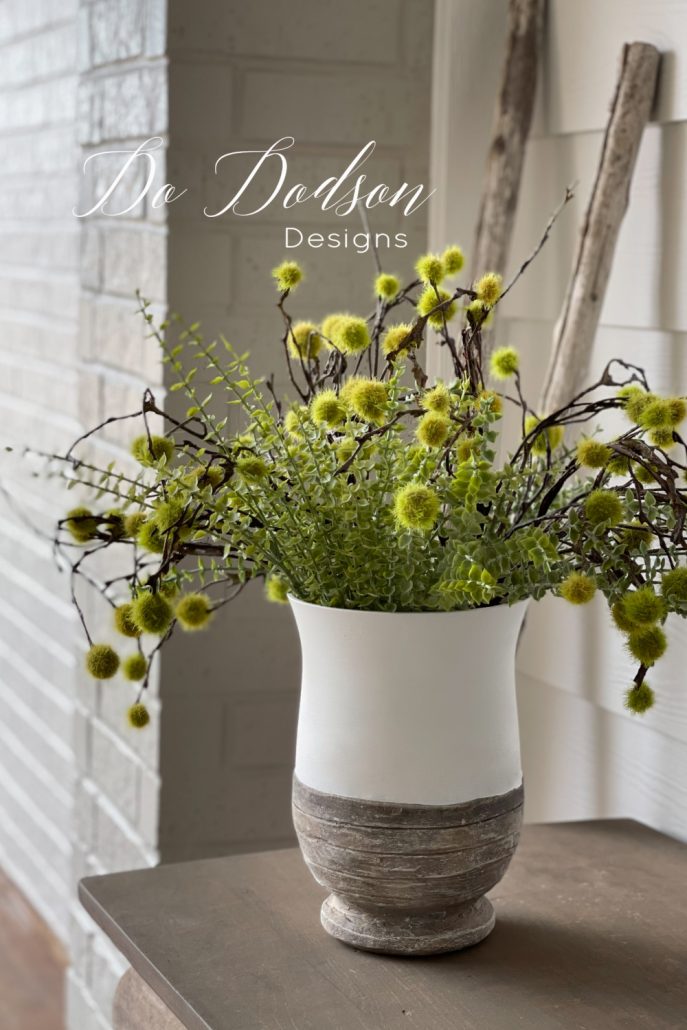
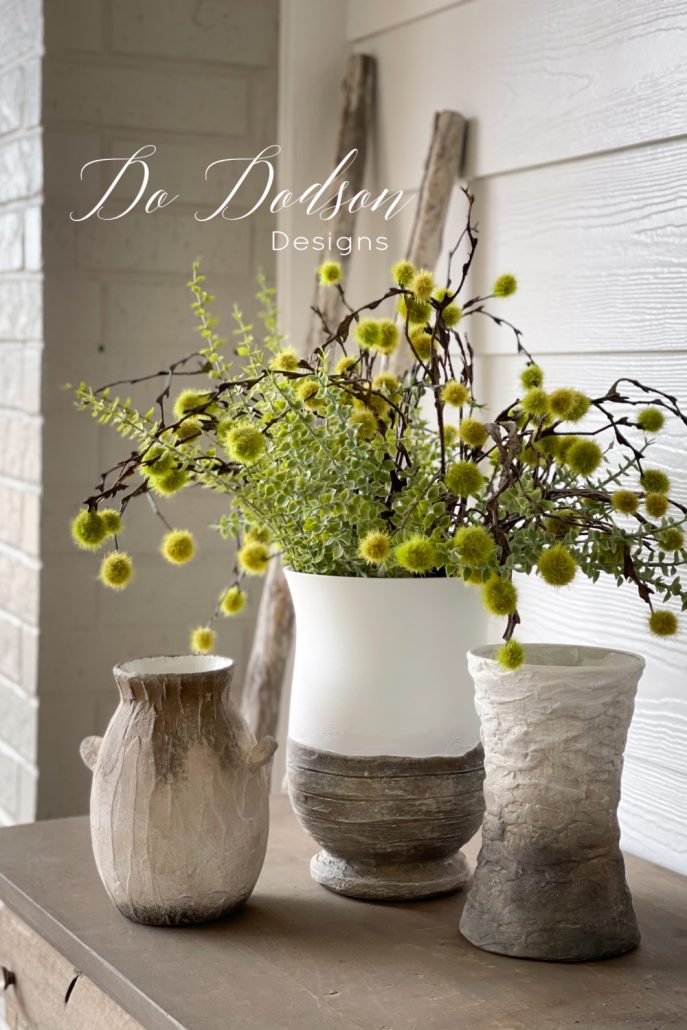
On second thought, maybe I love all three together. And can I have a moment of silence for the greenery I picked up at Hobby Lobby??? It’s been so cold here lately, and I’ve been longing for Spring green… for now, this will have to suffice.
Which vase is your favorite? I’d love to hear your feedback on this DIY home décor project in the comment section below. Or say, “HEY!” I always love hearing from my readers.
Until the next project… xo, Do
I love it Do! I am 100% trying this I have tons of vases from the thrift store!
Ha, ha! Judith, you’re going to love this one! 🙂
Hey!! Love this idea and something I can probably manage! They turned looking very high end!! Thanks for sharing, Do!
I’m so glad you liked it, Karolyn. It’s not hard at all, and I think you will be surprised by the results. Keep me posted. 🙂
Beautiful!!! I did this on a vase last year and added some shells made from molds and it turned out really good Think I’ll make some like yours next time.
What a great idea! Thanks for sharing. 🙂 xo
Spectacular! I love the look! I’ll definitely give this a try with my stash of vases.
Great, Leslie! Let me know how it turns out. Have fun. 🙂
Love this look, I cant believe P.B.’s prices. I just packed a box of vases for the thrift store. Not going there now, well maybe some will. I see lots of earthy colors happening, Arizonia sunsets, green foilage shades, ocean blues, so many choices. Great project for chasing away the winter blues , oh some in creams and whites with light shades of blue highlights. Can’t wait to get started. One question, do you extend the textured finish down into the inside of the vase? Thank you for this great easy project. Keep them coming.
Isn’t that the truth?! That’s exactly why I tried this technique out. I didn’t extend the texture beyond the lip of the vase. The only reason I would have done that is if the vase were a different color. Clear vases work the best.
Have fun! 🙂 xo
Really really like the transformed vases. Gotta try that. I see great gifts. Thanks for the tutorial
Yes! They would make fantastic gifts. I’m glad you liked it. 🙂 xo
Oh those were ugly vases before you turned them into something beautiful ! Love the transformation
Thanks, Harjith! It gives me great pleasure to repurpose. 🙂
Hi, Do! Very fun idea! I have been looking for a pretty vase. I just happen to have several vases in my workroom. Yesterday, I was cleaning and dusting, and really thought about throwing them away, but instead, I just dusted them, thinking I might need them “one day.” I’m so glad I did. Now I know how to make my own vase! You have inspired me! Thank you so much!
Marilyn
Thank you, Marilyn! It sounds like you have the same disease I have. “I might need them one day” 🙂 I’m a hoarder of good junk that I can use later. Let me know how your vases turn out. xo
Wow what a terrific idea! I did two vases, so easy and fun. I’m going to make a few more and experiment with texture and colors. Thanks so much for the inspiration. I am seriously addicted to your site.
Oh, yay! I’m so glad you found pleasure in creating them. It’s a feel-good project for sure. xo 🙂
Love these PB vessels especially the colors. What is the dark color you used? It goes great with my style.
I’m so glad you liked this tutorial. I’m pretty much a neutral gal myself… with a pop of color. 🙂 The colors are listed in the products list in the post. You may have just missed it.
What a great idea. I love Pottery Barn but hate their prices so if I can find a way to recreate a look for a third of the price it makes me happy. I can’t wait to try this on some of my vases that are piling up. Thanks so much for sharing!
I’m so glad you enjoyed this project, Kimberly. It really is simple, and I think you’ll love the results. Happy painting! 🙂 xo
I think this is the easiest tutorial for transforming the 80’s vases to modern looking beauties!!!!
I need to give it a try;)
I’m glad you enjoyed it, Maria! I’m into easy everything. I think you’ll have fun with this one and make some beautiful vases too. Enjoy! 🙂 xo
I tweaked your idea and used DAP compound. It’s easy to mold to fingers and then I let dry, and glued shells on it and then spray painted in a teal. Thank you for the inspiration.
DAP is a great option! Thanks for sharing. 🙂
Robin, I would love to see that.
can’t wait to try this.thanks for all the in infro.
You’re welcome, Paulette. Have fun with your project. 🙂 xo
I’m with you, Do, the large one is my favorite, although I love them all! I, no lie, have about 50 glass vases sitting on a shelf in my storage closet! Time to get to work! Thank you for this wonderful idea and tutorial! Have a great day!
Hi Donna! I’m so glad you enjoyed this. Sounds like you have a great collection just waiting to be amazing. Have a great day! 🙂 xo
As always, you are so awesome at everything you do Do 😉 I have a few clear glass vases sitting on the table in my workroom right now. I love all three of these vases but my fav is the smaller one with the handles on both sides. I love different-looking pottery vases & as different in shape too. I have everything here to do this DIY fun idea. Do you think Modge Podge would work for the stick-on base coat?
Thank you so much for sharing all your wonderful ideas and showing us how to do them.
Keep doing what you do best and have lots of fun while doing it! 😉
Loving hugs to you from myself and my 3 wee fur babies.
xoxoxoxoxo
Hi Brenda, I’m not sure about the Mod Podge. The only way to know it is to try it. It sounds like it could work. Please let me know if you try it and the results. Love and hugs to you and the three wee ones. 🙂 xo
Hey Donna!! I have been recreating these cases for a little while but I just can’t seem to get a pattern like yours. I use Salt Wash because that’s what I have. Any advice on how to get the pattern you did on the bottom? I appreciate all your makeovers..love them.
Hi Cheryl! I used a craft stick to make the lines. Simple process but it looks hard. Use the edge of the stick and drag it through your texture around the bottom of the vase so that it meets up on the other side. I hope this helps. 🙂
Great project Do! I’ve been wanting to try this to some of my glass vases! Your’s look amazing! Pinning 😊
Thanks, friend! I think you’ll have fun with this technique. I felt like I was back in 6th-grade art class. Fun stuff! xo 🙂
I love how these turned out, Do! So nice. I just played around with some texture on old glass vases. So much fun.
Thanks, Wendy! It’s one of my faves. 🙂 xo
This is a great project Do! I haven’t tried it yet but one day I will! Pinned 😊
How fun would this be for a girl’s night out? Thanks for sharing, my friend. 🙂 xo
Hi Donna!! I create these faux Pottery Barn vases alot to sell in my booth. I’m always.looking for new designs and these are gorgeous. Thank you for the inspiration!
Fantastic, Cheryl! Isn’t it amazing how something so simple can be transformed into a masterpiece? Have a blessed day. 🙂 xo
Hi there Do, Haven’t been following for long, but I have to give you a big Thank you for all of your wonderful ideas! I am so impressed that you actually answer back to each and every person who mails you! It’s such a nice feeling. I’m going to be giving a shot at those Pottery Barn dupes; yours’ are so lovely. Have a lovely weekend.
Hi Eloise,
Thank you so much for sharing this. I feel like you, and I remember someone answering me a long time ago in an email. I was blown away by their kindness and always said I wanted others to feel what I felt that day. We are all human beings and deserve respect and courtesy of a reply. I do my best to keep up with my readers.
I think you’ll have fun with the pottery barn dupes. It’s almost as fun as playing in the mud… as a small child, of course. 🙂 Take care, and have a wonderful weekend. xo
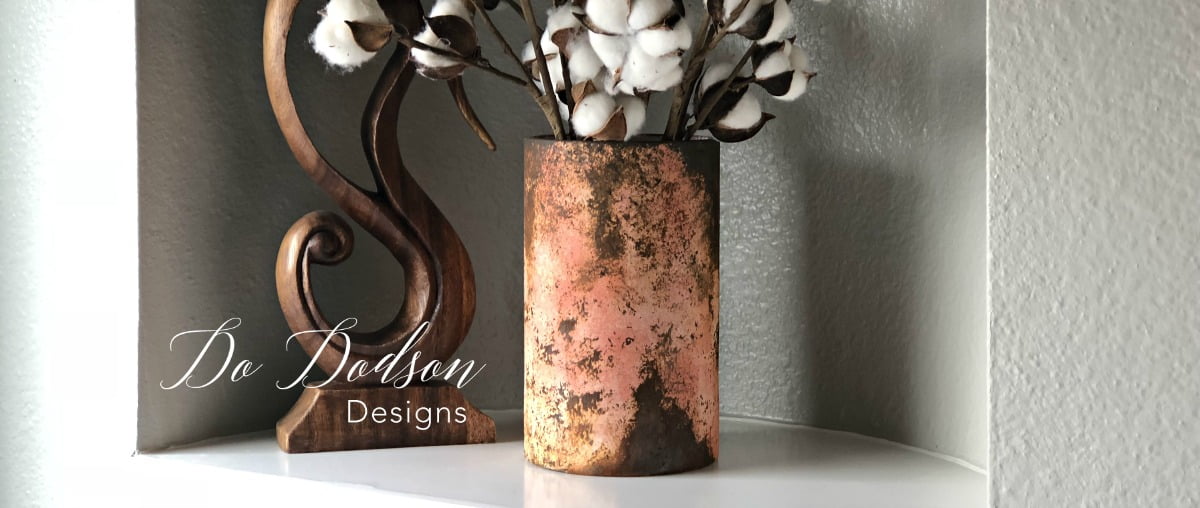
The vases are absolutely amazing. I love the rust-painted vase you did as well. Will be trying them soon.
Thanks, Jo! I think you’ll have a lot of fun creating the look you want. So glad you enjoyed this post. 🙂 xo
These vases (and your styling!) are so gorgeous Do! Thanks for sharing. I love PotteryBarn dupes because just as you mentioned, it can be costly shopping for home decor there! Have a great week my friend. XOXO
Hey friend! Thanks for stopping by. I think it’s time to start searching for some new vases and some new designs. I ended up giving them away as gifts and I’d love to give it another go. Enjoy your week. 🙂