Hey, triple-D friends! Are you tired of generic store-bought wall art? Me too! Want to add a touch of your personal style to your living space? This unique art form involves decoupaging beautiful rice paper onto a surface to create a style and design you will love. Don’t worry if you’re a beginner, I have you covered. In this article, I’ll give you some tips and tricks for creating beautiful vintage rice paper wall art that looks just as good as a real oil painting but costs a fraction of the real thing. Now that’s something to brag about! So let’s dive in and unleash your inner artist.
Thanks to Dixie Belle Paint Co for sponsoring this post. While I was compensated to write this post, all opinions are my own.
* As an Amazon Associate, I earn from qualifying purchases and through other companies as well. You will not be charged extra when you purchase through these affiliate links, but any income I make helps me create more amazing DIY projects to share with you! To see my full disclaimer, click here!
Aurora Borealis Wall Art
To say I’m a bit obsessed with the electrical phenomenon of the Northern Lights is putting it mildly. The effect is caused by the interaction of charged particles from the sun with atoms in the upper atmosphere.
Stay with me, I promise this will lead to something amazing. 🙂
Experiencing this in person would be pure magic. While it’s on my bucket list, if it doesn’t happen in my lifetime, I’ll have this amazing wall art I created with decoupage rice paper with its lights dancing in the sky that I can get lost in any time I want.
What Is The Difference Between Rice Paper And Decoupage Paper?
When it comes to creating decoupage rice paper wall art, choosing the right paper is crucial. While both rice paper and decoupage paper can be used for this project, there are some differences between the two that can affect the final result. Rice paper is typically thinner and more delicate than decoupage paper, which is thicker and sturdier. This makes rice paper perfect for creating intricate designs and patterns, while decoupage paper is better suited for larger, bolder designs.
Another difference is the level of transparency. Rice paper is more translucent than decoupage paper, which can create a beautiful effect when layered. However, if you want a more opaque look, decoupage paper may be the better choice. Additionally, rice paper often has a more natural, organic texture and appearance compared to the smoother, more uniform surface of decoupage paper.
Ultimately, the choice between rice paper and decoupage paper will depend on your personal preference and the specific project you have in mind. As you experiment with different papers, you’ll learn which one works best for each design and technique. Remember to have fun and let your creativity flow as you explore the world of decoupaging rice paper wall art.
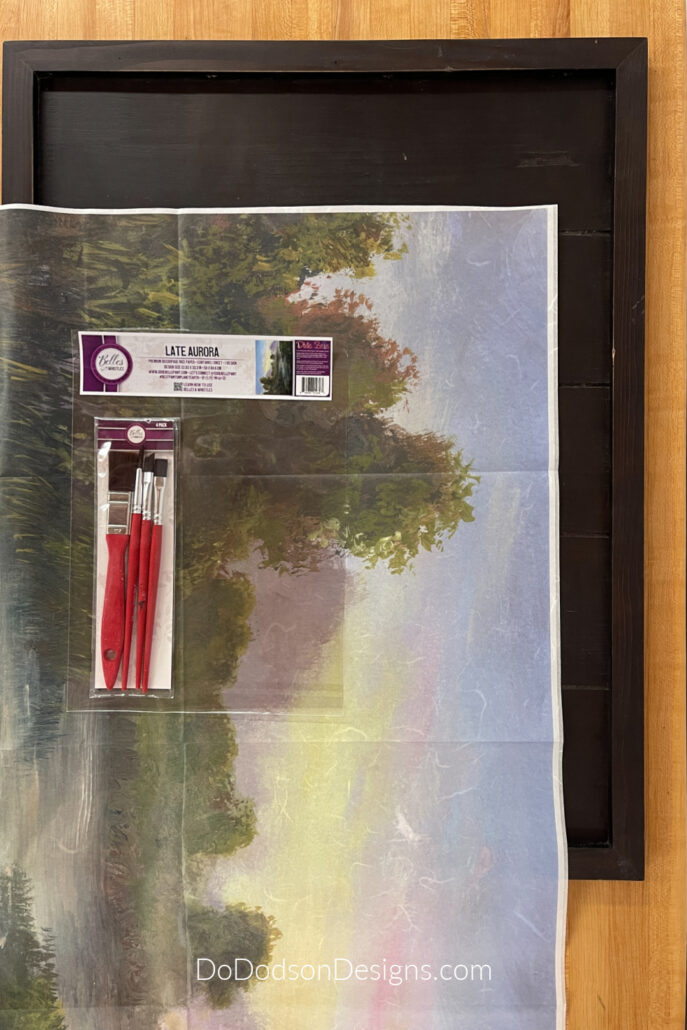
My Thrift Store Find… Before
I’m using a wooden thrift store find that wasn’t intended for this purpose, but I think I can make it work. You can most certainly apply decoupage tissue paper over printed artwork too. So, don’t pass up an ugly print with an amazing frame. Grab it and make it beautiful!
I found this wood board for $3.99! SCORE! It has grooves in the wood, but I like it. It’s character, right?


SUPPLY LIST:
Here’s what you’ll need to create your own amazing decoupage rice paper wall art.
- Thrift Store Picture with a frame (garage sales or the Goodwill) or wood
- 220-grit sanding blocks or sandpaper
- Premium Late Aurora Rice Decoupage Paper by Dixie Belle Paint Co.
- Artist Brushes
- Craft Knife exacto knife
Preparing The Surface For Decoupaging
Before you start decoupaging with rice paper, it’s important to ensure your surface is properly prepared.
First, make sure it’s clean and dry, as any dirt or moisture can cause the paper to bubble and rip.
Another important aspect is to consider the texture of your surface. Smooth and flat surfaces are ideal for rice paper, but if you’re working with a textured or bumpy surface, it’s important to smooth it out as much as possible to prevent air bubbles and wrinkles from forming. You can use a soft brush or sponge to apply a thin layer of glue onto the surface before placing the paper, making sure to smooth out any bumps or creases. Do the best you can. I know I’m not perfect, but neither is art. It’s an interpretation.
How To Decoupage Rice Paper On Wood
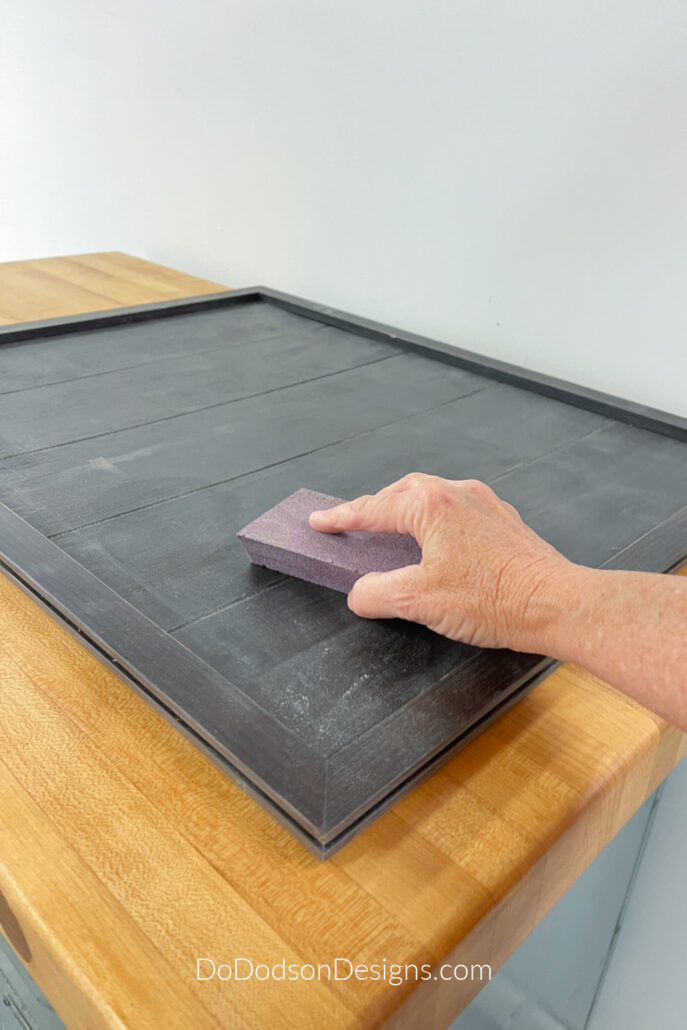
If you’re looking to create a vintage or rustic decoupage piece, wood is an excellent surface to work with. However, decoupaging on wood requires a slightly different approach than other surfaces.
The first step is to sand the wood with 220-grit paper to create a smooth surface for the rice paper to adhere to. Wipe away any wood dust with a damp cloth.
Apply the mod podge onto the wood with a paintbrush. Use a good amount. No worries, it dries clear if you have a little that seeps out from under the paper.

Next, carefully place your rice paper on top of the glue. Use a soft brush or your hand (I prefer my hands) to gently smooth out any bubbles or creases.
If you need to trim your paper, you can do this by using a sanding block and gently rubbing over the wet edges, or in my case, I had to pull out my exacto knife.
* TIP… Rice paper doesn’t cut well when it’s wet. It will tear and rip. It’s best to wait until the glue has dried and then use a sharp blade to make the cuts when applying to inside areas. If, after cutting the rice paper, you notice the paper doesn’t adhere well in the corners, add a bit of mod podge to the underside of the paper and press firmly.
Once you have your decoupage paper secured on your surface, allow it to dry overnight.
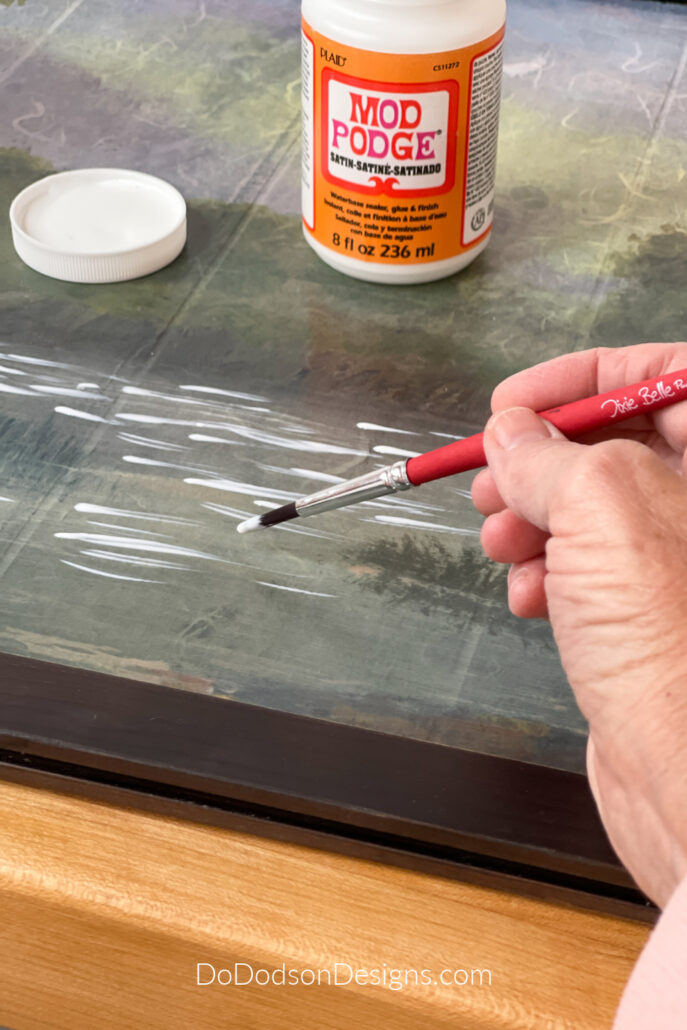
Next, apply a heavy coat of mod podge over the decoupage rice paper with a paintbrush using a cross hatch pattern to create texture over the decoupage rice paper.
Applying a layer of Mod Podge on top of your rice paper will not only protect it but will also give it a polished look.
It’s Mod Podge, Not Modge Podge
Ha, ha! I know I’m not the only one that messes up the name of this glue. It was several years before I could actually pronounce the name correctly. Who cares? Right?
Mod Podge is a great tool to use for making the rice paper adhere to your projects, but did you know it can also create texture?
In the next section, I’ll cover some finishing touches to help perfect your decoupage wall art. I promise you’ll feel artsy-fartsy when it’s all done.
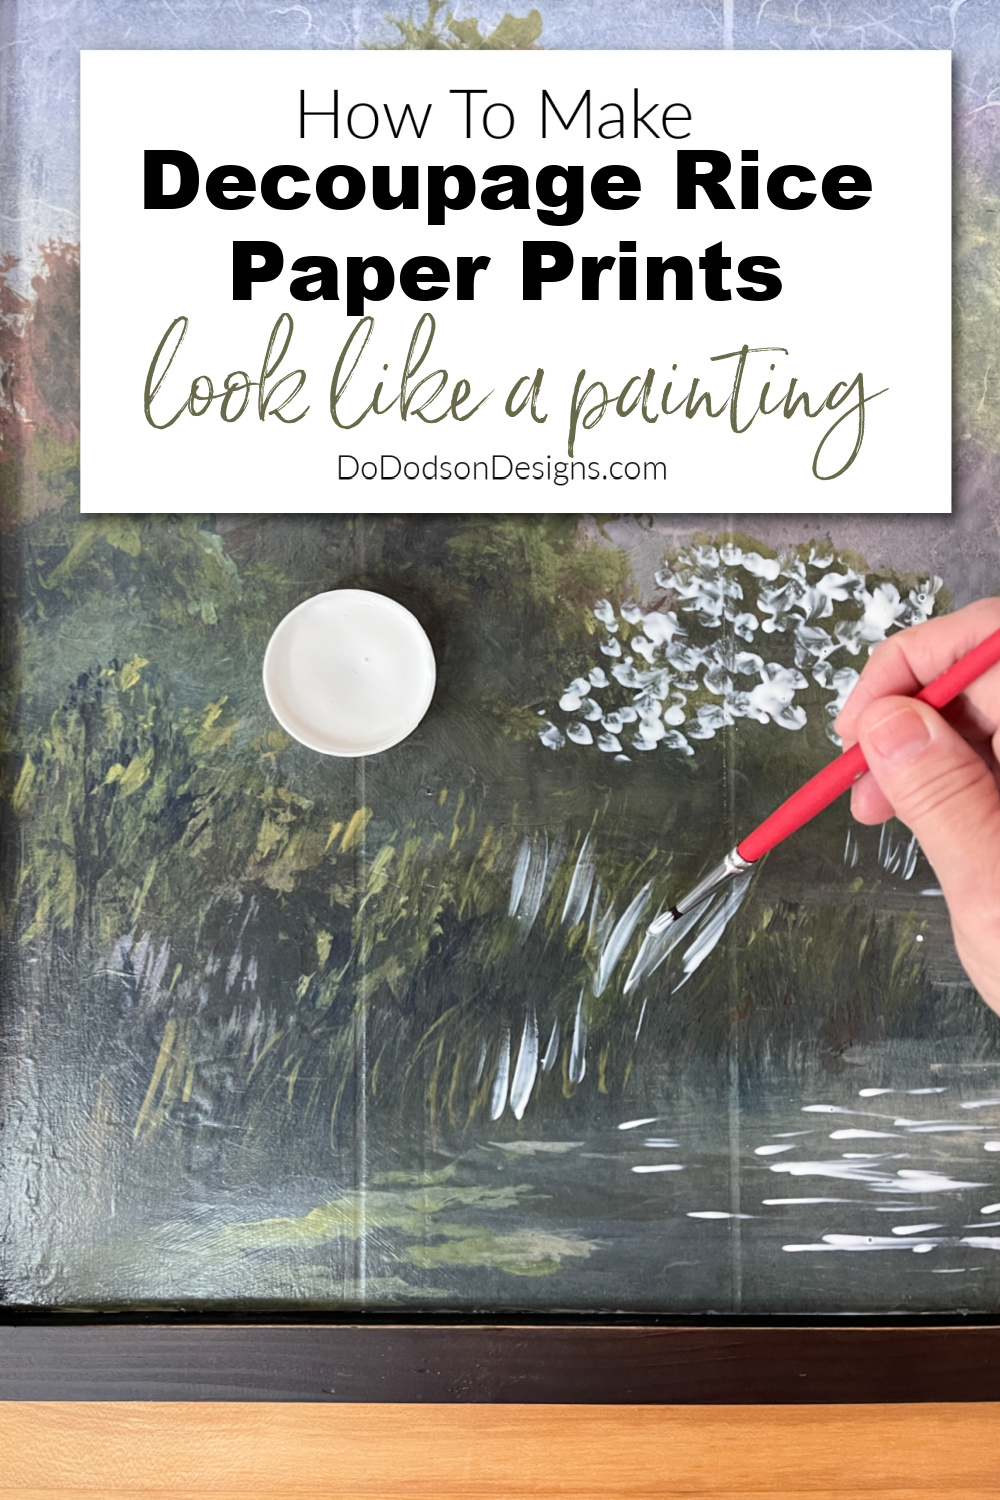
How To Make Decoupage Rice Paper Look Like A Painting
I read somewhere that using mod podge with an artist brush and copying the artist’s brush strokes can level up a print to look like an original work of art. So, I had to give it a try! Here’s how I did it.
With an artist brush, apply a small amount to the tip of the brush like you were actually painting a landscape or portrait. Look at the print to determine the strokes the artist used and add the mod podge over the rice paper. This isn’t hard to do. It’s actually fun!
Doing this will add unique details to your decoupage rice paper artwork piece that will truly make it stand out.
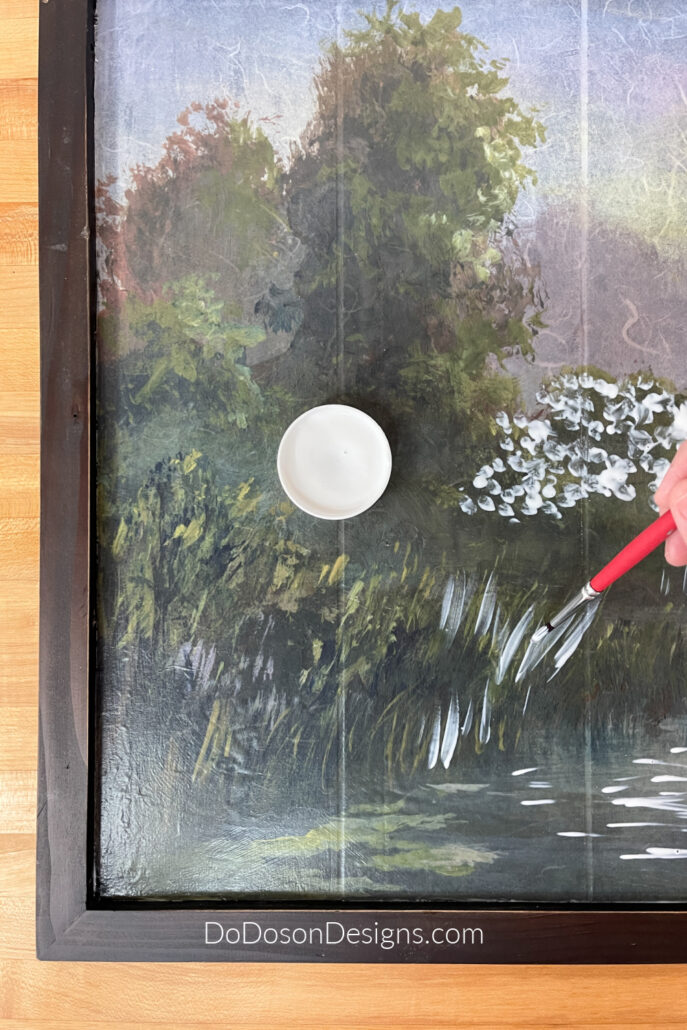
Don’t skimp on the mod podge. You want lots of texture and raised areas.
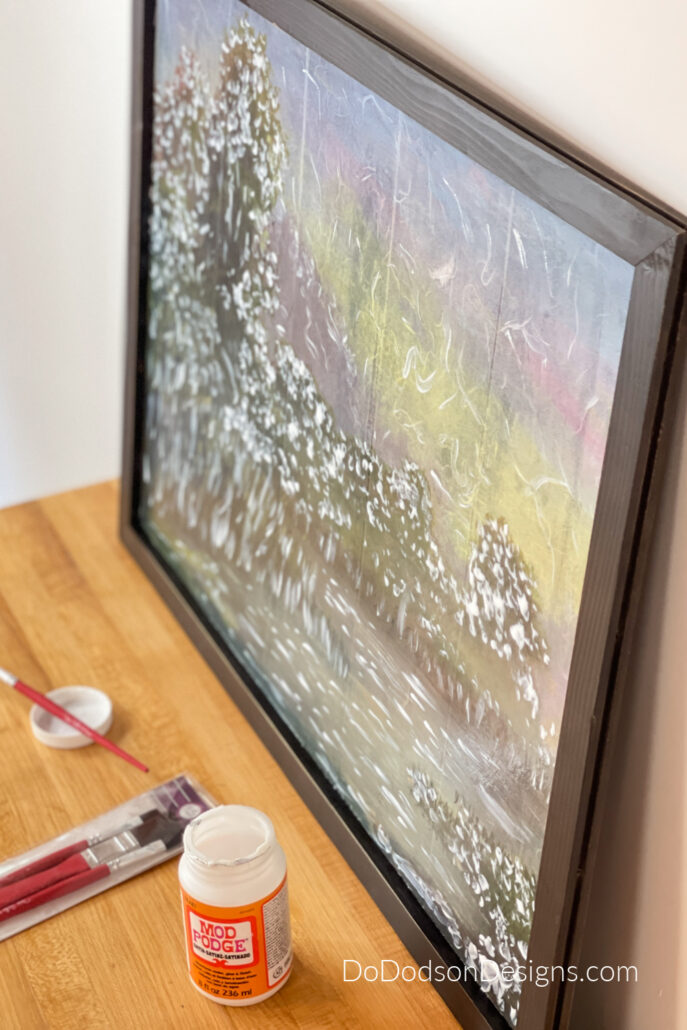
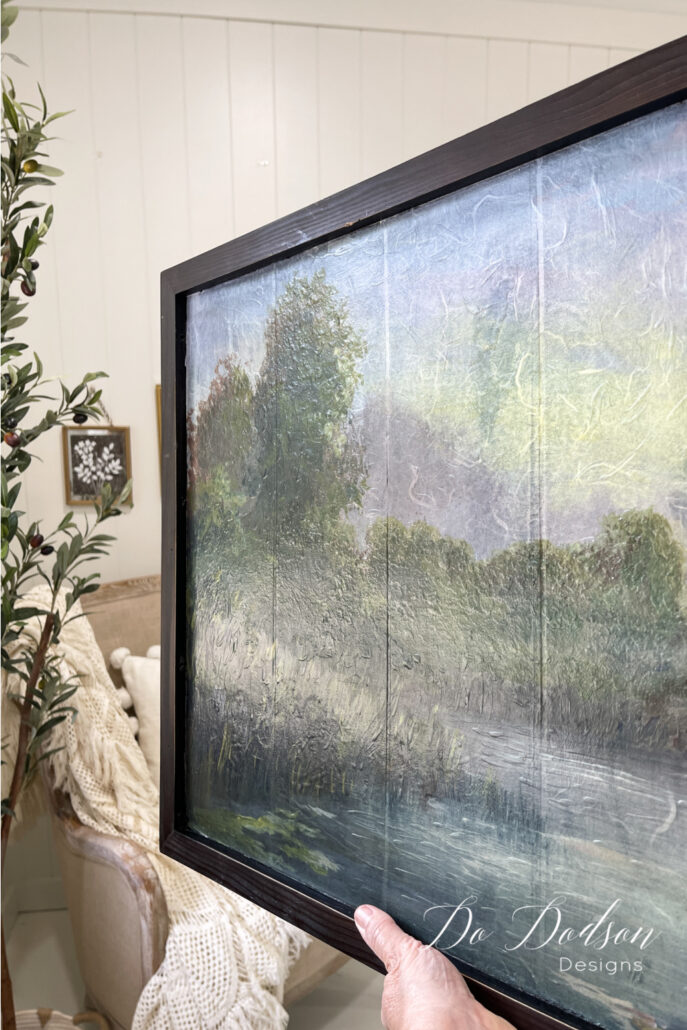
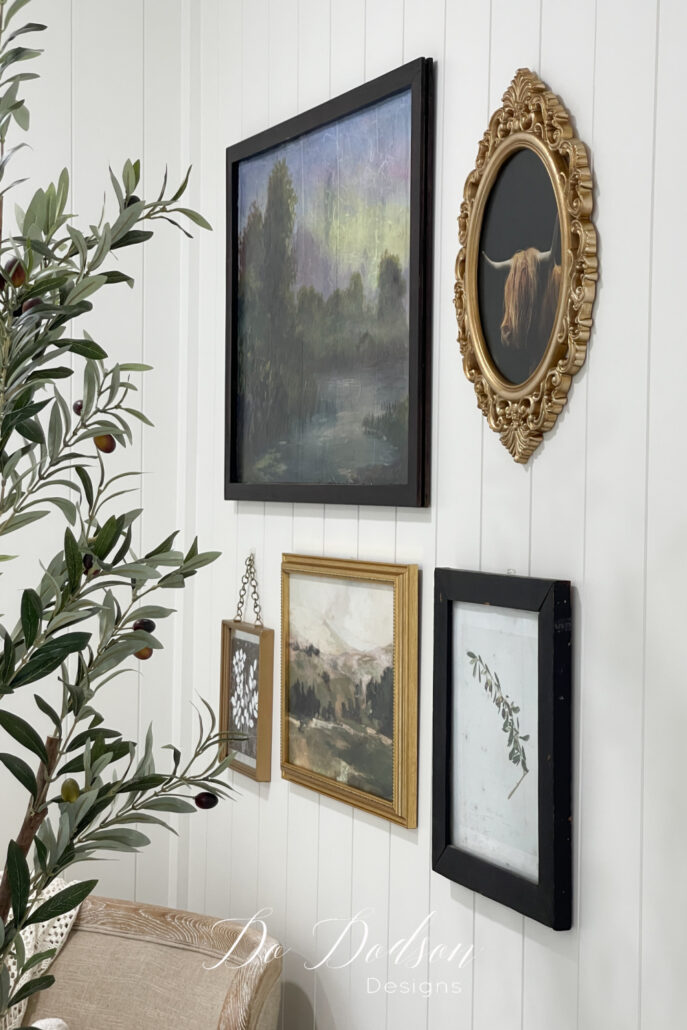
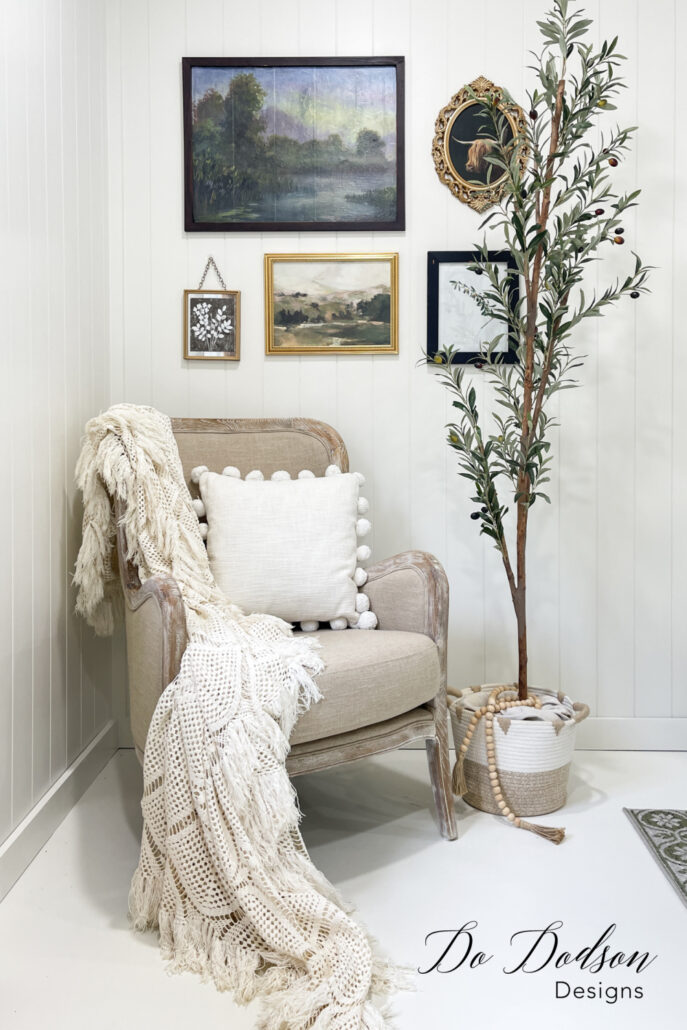
After it dries, you’ll have an amazing piece of art you can add proudly to your wall. This one is going on a vintage gallery wall in my office.
Channeling Your Inner Van Artist
With a little creativity, you can turn your decoupage rice paper into a stunning masterpiece that looks like a painting. No one has to know that you didn’t paint it. I won’t tell a soul!
From preparing your surface to adding unique details with Mod Podge, with the right materials and techniques, anyone can create beautiful wall art. Create a gallery wall or add to what you already have.
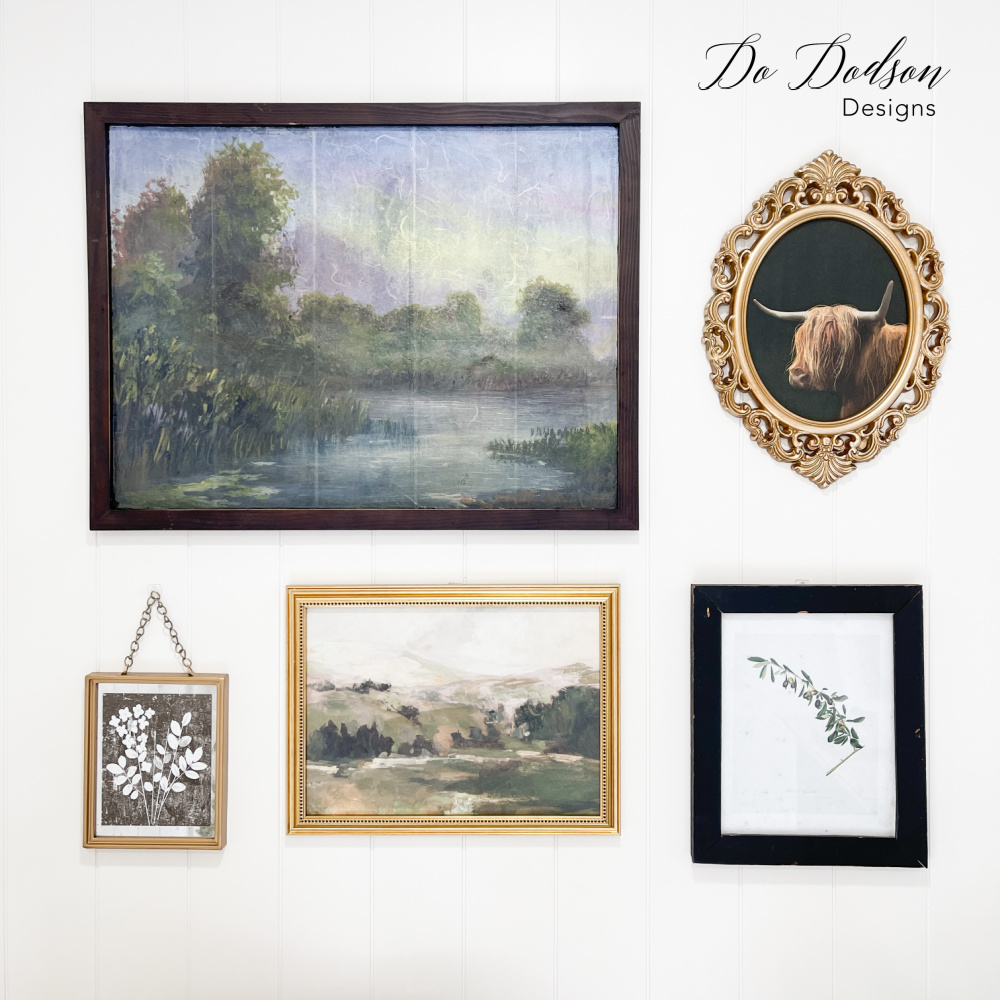
I’m having fun decorating my new office.

So, what do you think about this decoupage rice paper wall art technique?
It’s a wonderful way to add a personal touch to your living space, and I’m super happy with the results.
As always, I’d love to hear from you. Leave me your thoughts in the comment section, or just say hi so I’ll know you stopped by.
As Pablo Picasso once said, “Art washes away from the soul the dust of everyday life.”
Until the next project… xo, Do

This is a great way to get art on the wall inexpensively Do! Thanks for your amazing ideas 🙂 Pinned!
Hi Cindy,
I can’t take all the credit for this one. Someone else did this on a print, so I thought it might work on decoupage paper. It did! Fun stuff! Thanks for sharing. 🙂 xo
What a fun and BRILLIANT idea Do! I love your gallery wall! XOXO
Hey Denise! It was super fun! Thanks! I love the gallery wall too. Have a wonderful week, my friend. 🙂 xo
I love this-so creative, and people are always looking for wall art. How do you think that this would work over a Goodwill canvas piece? Would a coat of Slick Stick, or a primer work for a base? Thanks much for posting.
Hi Mary,
I think it will.
The prints have a paper backing. I would say wipe them clean with a damp cloth and go for it. Mod Podge is glue and sticks to everything. Let me know if you try it. I for sure am looking for old prints now.
Have a fantastic week. 🙂 xo
Hi Donna! I did not know about this. I will , definitely try it. God willing. I love the whole sitting area. That tree is so pretty.
Hey, thanks, Cheryl.
Surprisingly, it is easy and makes ordinary paper prints look like real paintings. Hello Goodwill! Think of the old prints in amazing frames that can be updated.
I love my new office. As soon as I get my door repaired and painted, I’ll give you a tour. Have a great week. 🙂 xo
Great idea! Beautiful! And I have lots in my stash to chose from
Hi Cletia,
I couldn’t believe the difference it made. It looks so real. 🙂 xo
Such a cool idea. I need to try this on some old paintings I’ve picked up. “Modge Lodge” all the way 🙂
Hi Wendy! You should try it. I was surprised at how well this works. Thanks for reading. 🙂 xo