
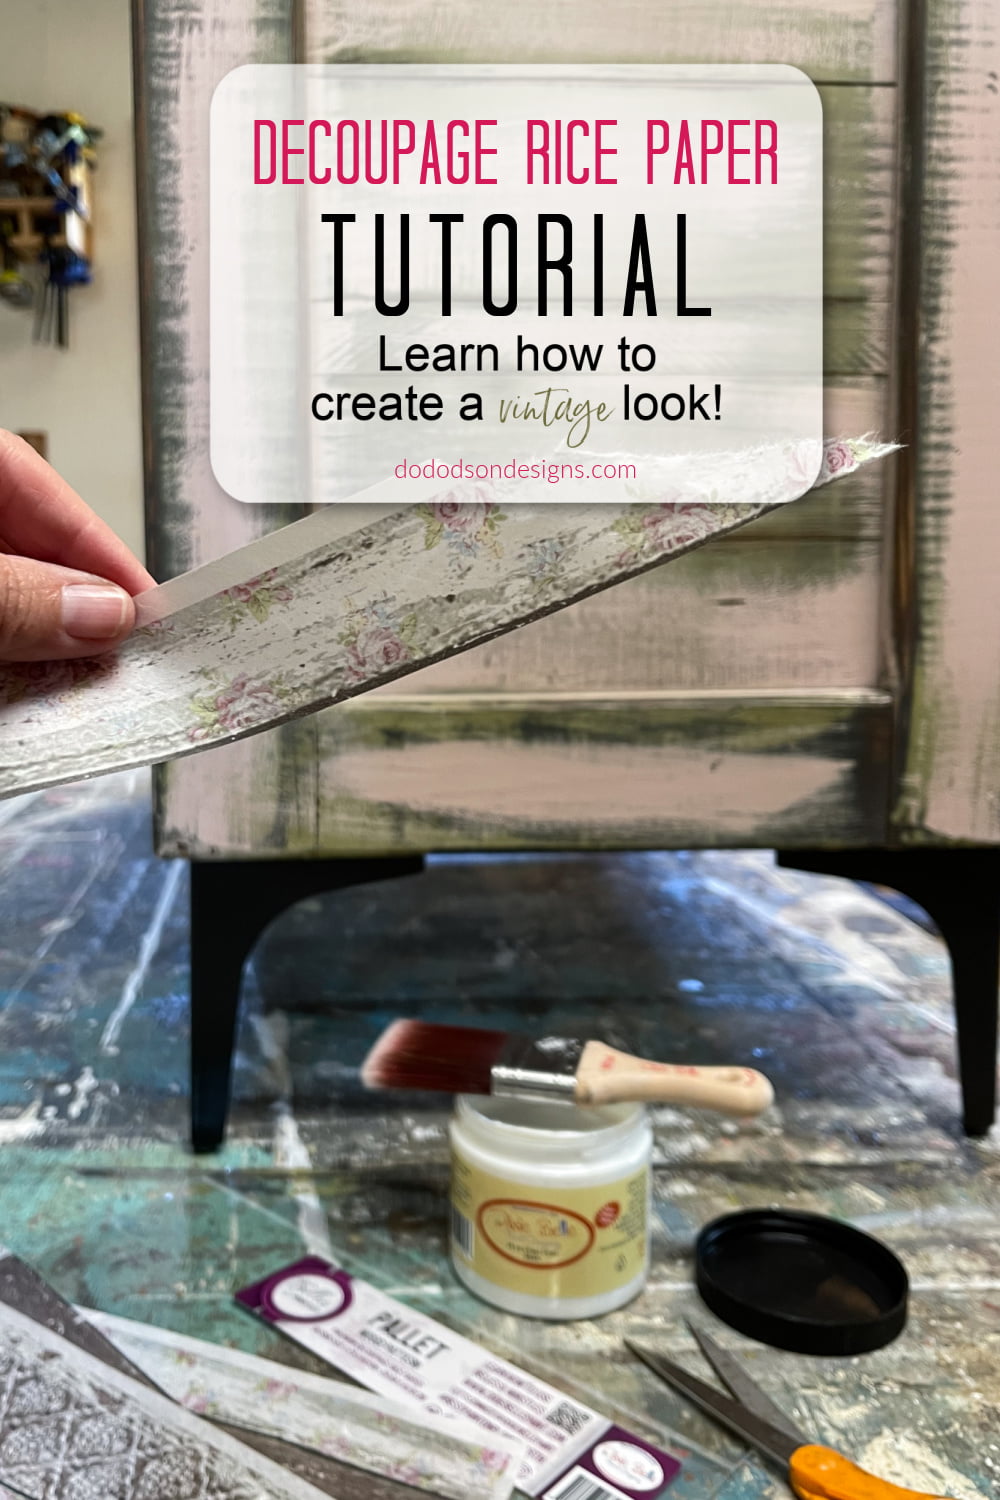
Hey creative friends! Let’s DO a little rice paper decoupage today on wood furniture. Get ready to be amazed!
* As an Amazon Associate, I earn from qualifying purchases and through other companies as well. You are not charged extra to use any of the links, but any income I make helps me create more amazing DIY projects to share with you! To see my full disclaimer, click here!
How To Add Rice Paper Decoupage On Wood Furniture
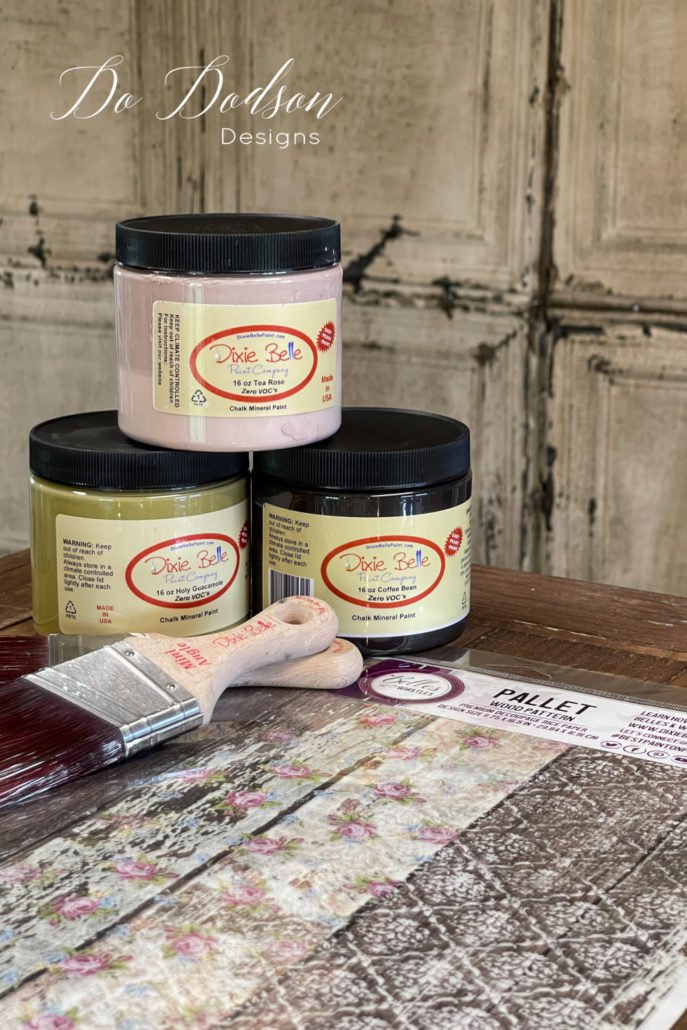
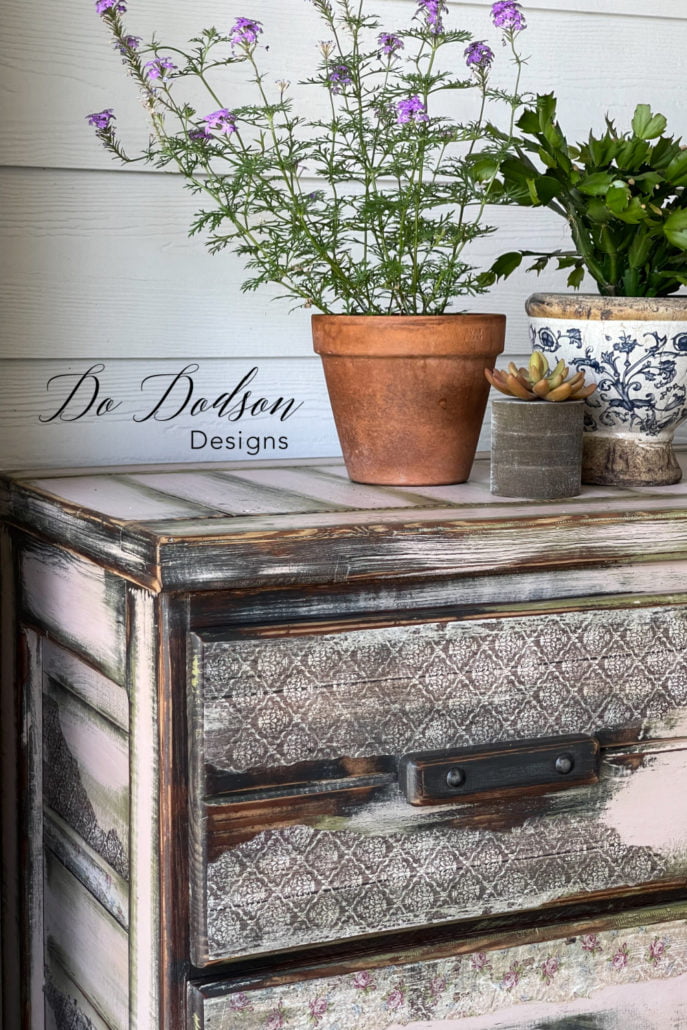
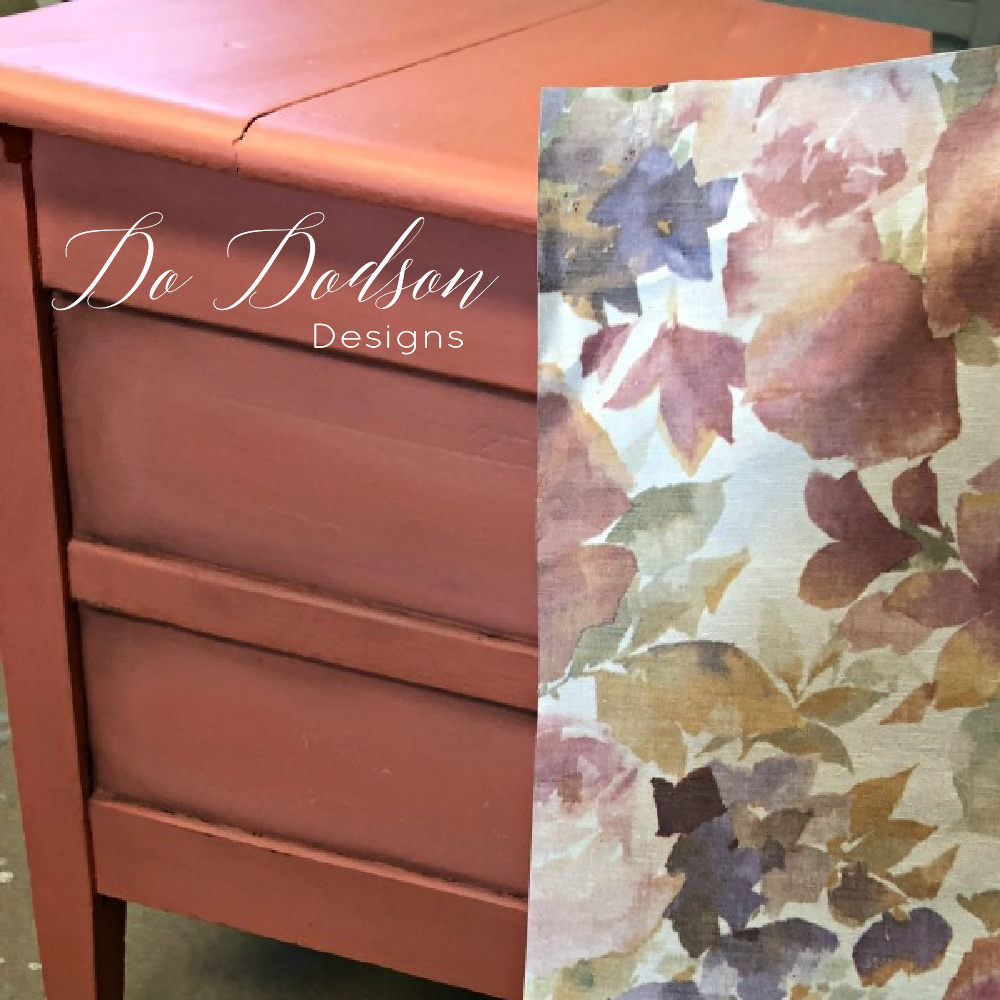
I’ve used many different types of paper… wallpaper, vintage tissue paper, photos, etc., when decoupaging items, but I have never used rice paper, and I’m excited to share my experience with you today. I chose a beautiful vintage pattern called Pallet Wood from the Belle’s And Whistles Line by Dixie Belle paint Co.
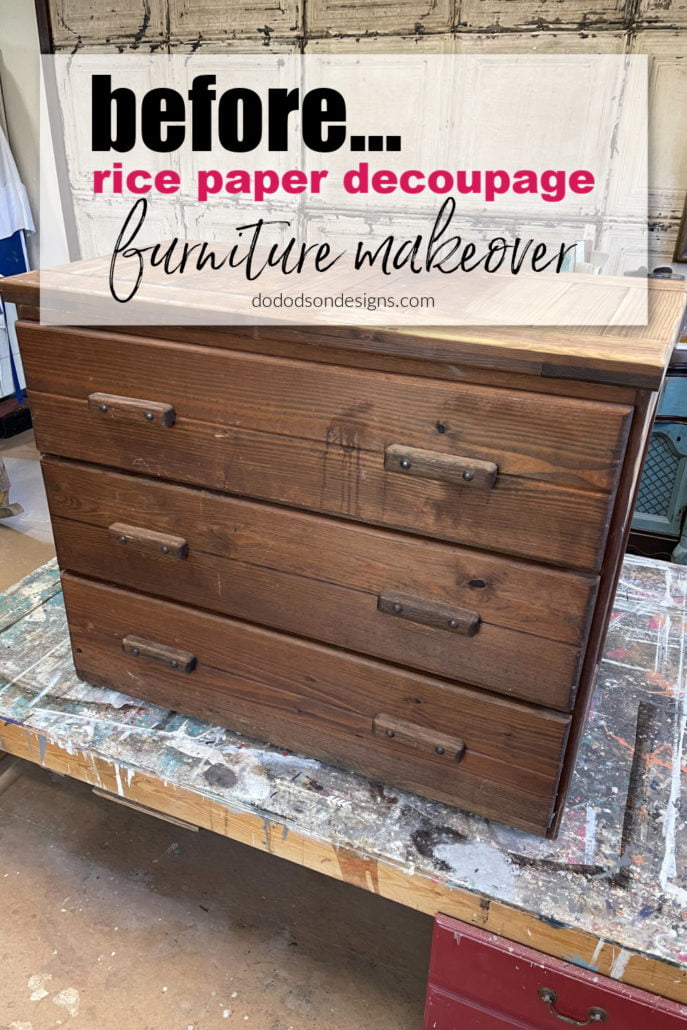
Please take a good look at this brown box and remember how it looked before because the AFTER is AH-MAZING!

SUPPLY LIST:
- wood furniture
- Rice Paper (Pallet Wood Pattern)
- scissors
- Chalk Mineral Paint (Tea Rose, Holy Guacamole, Coffee Bean
- Mini Angle Paint Brush
- Satin Clear Coat (used to apply rice paper)
- Surfprep Sanding System (Use my discount CODE DOIT10 to receive an additional 10% savings)
- Modern Iron Furniture Feet
Using Complimentary Paint Color With Rice Paper
To get the vintage look I wanted on this wood dresser, I chose three complementary colors of chalk mineral paint that I thought would go nicely with this pallet wood pattern… and I was right. Creating the background for the rice paper was fun.
I randomly painted the wood dresser with all three colors overlapping the edges in spots and then sanded it back with my Surfprep Sanding System to distress and pulled some of the paint back to reveal the bare wood.
If you would like to watch the FULL VIDEO TUTORIAL, it’s available in The Art Of Painting Furniture. CLICK HERE for more info.
Customizing Your Rice Paper Decoupage Project
Because I have to have it my way… (remember the Burger King commercial) that’s me! I didn’t want to apply the paper as is. Don’t get me wrong, the paper is gorgeous, but my vision was more of a vintage shabby chic look, like old wallpaper peeling away from a wall. You know the look… like it’s been there for 100 years.
To get that look, I had to get creative and think outside of the box. So if you’re a purest and love clean lines, this is not your project. It’s going to get really messy up in here!

How To Apply Rice Paper To Wood
The surface you apply the rice paper decoupage needs to clean and free of dust. So if you’re applying it to bare wood, you’ll want to clean it well first.
If you’re applying it over a painted surface, be sure that the paint had dried thoroughly. Always allow the paint to dry for a minimum of 48 hours in a controlled environment before applying paper. Maybe longer if you have painted multiple coats. I DO NOT recommend applying any paper products the same day to a painted surface, PERIOD! Paint dries from the surface and may feel dry to the touch, but water is still trapped below. It takes ample time to dry to a hard finish. Trust me on this one.
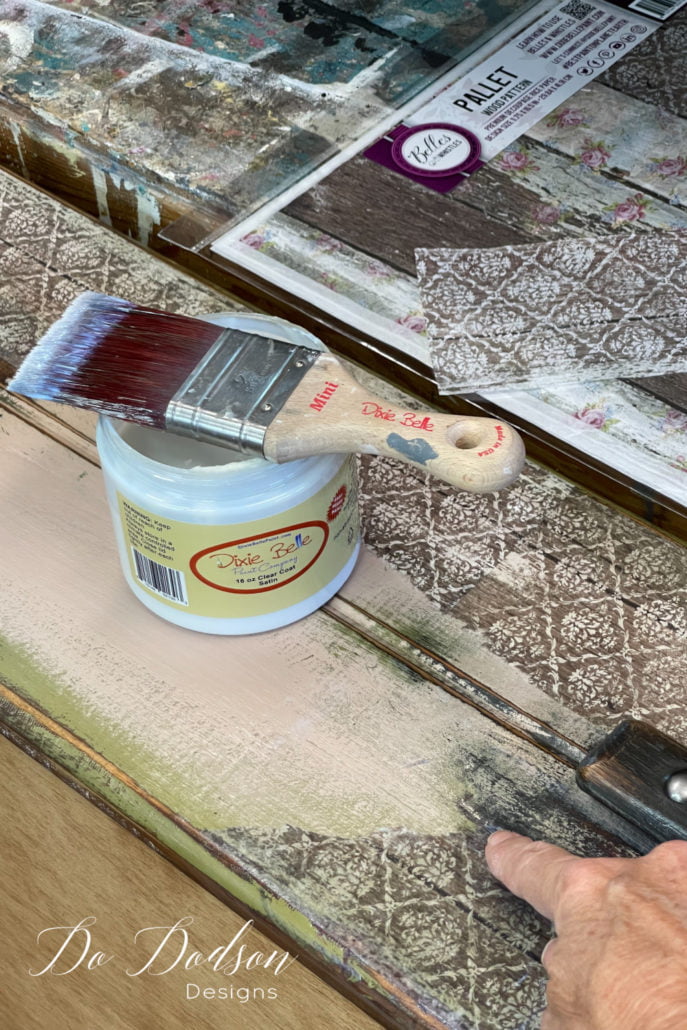
4 Reasons You Should Use Dixie Belle Top Coat To Apply Rice Paper
Let’s talk glue! If you’re a fan of Mod Podge or have never tried anything else to apply your paper to a surface, this will change your mind… for several reasons.
#1 It’s a clear topcoat and can be used not only for your furniture projects but for decoupaging. (multi-use) Two products in one!
#2 It has a longer dry time than Mod Podge, making it easier to work with.
#3 It has a creamy texture (feels like lotion) and can be used with your finger tips to smooth out wrinkles in the paper.
#4 It’s water-based and easy to use.
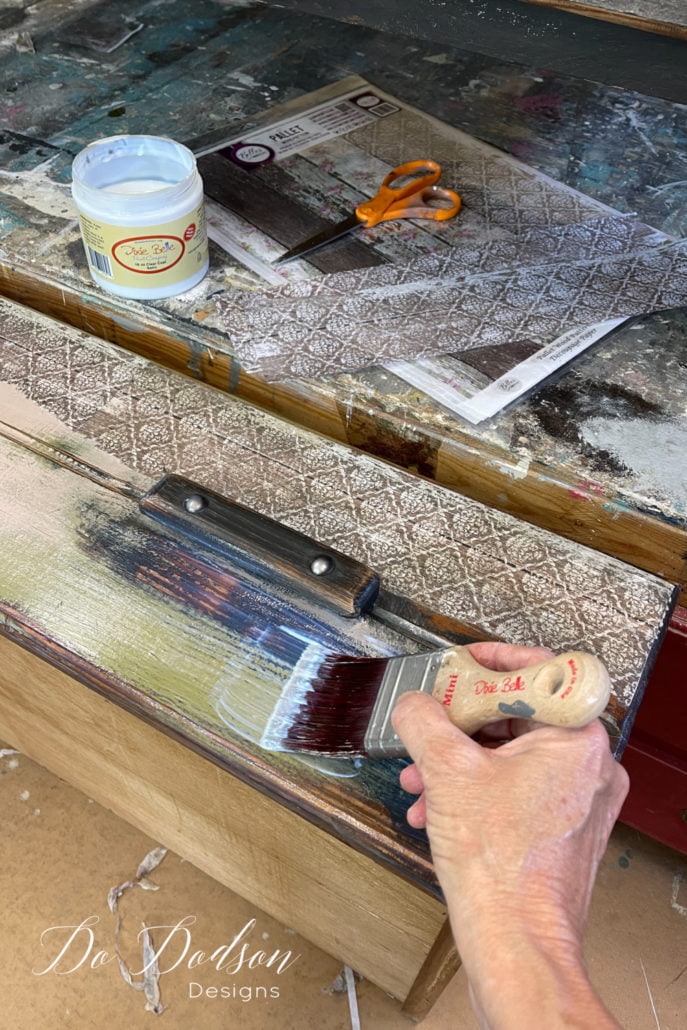
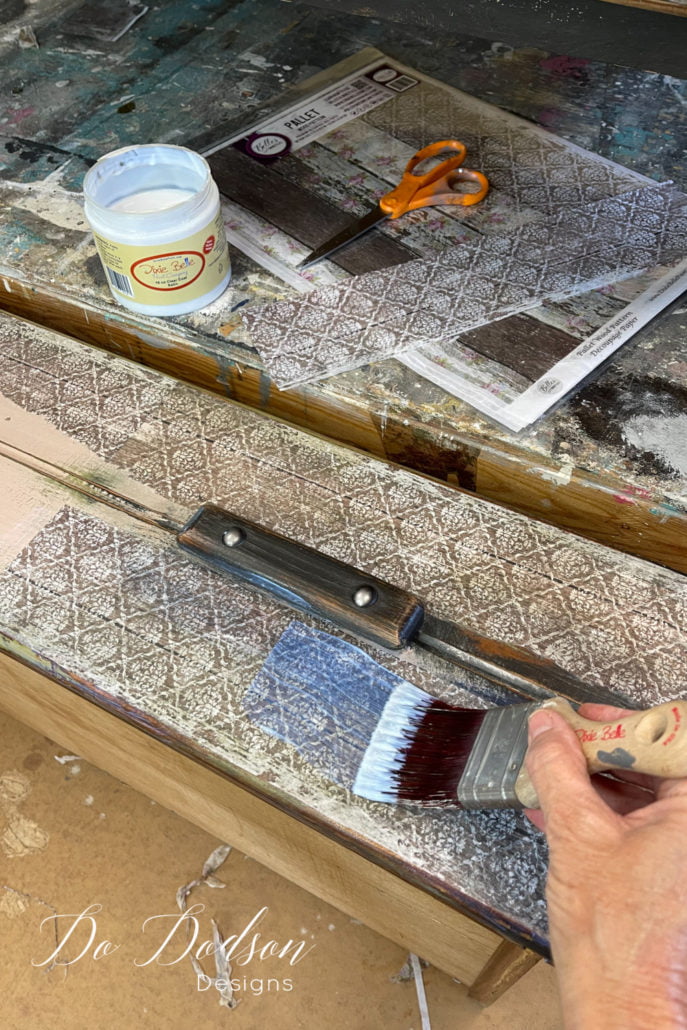
Applying The Rice Paper Decoupage
STEP 1 Apply a liberal amount of the satin clear coat over the wood with a good quality paintbrush.
STEP 2 Apply the rice paper over the clear coat immediately after application. If you don’t get the correct placement you want, you can reposition the paper with a little finesse. You can gently slide it into position or lift the paper and reapply.
STEP 3 Now that the paper is in place, apply the clear coat over the rice paper. This is the time to work out those tiny wrinkles, bubbles, and imperfections, and you will have them. Rice paper is super thin, so this is to be expected but easy to work with. This is where you’ll be glad to have that creamy clear coat and your fingertip to make it perfect… or not. I like the tiny wrinkle.
STEP 4 After the clear coat has dried on the rice paper, apply a second coat for durability and just in case you missed a spot. That does happen.

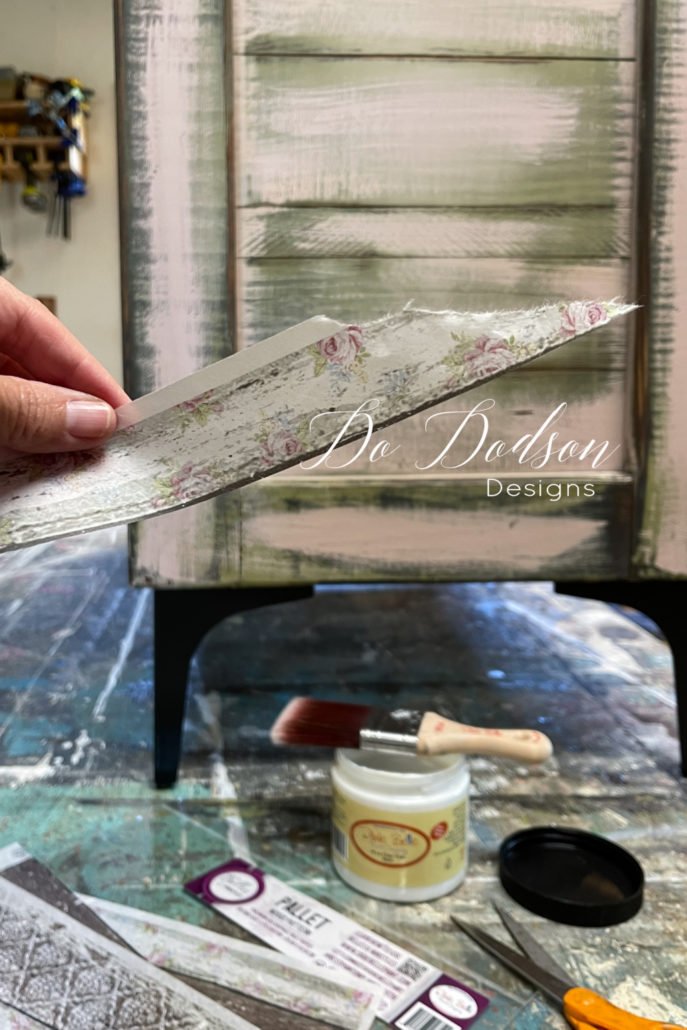
Cut Or Tear The Paper
If you’re like me, you’ll want to play around with your artistic abilities. The rice paper comes in sheets and will need to be trimmed with scissors before application. You can cut it to fit your project or tear it for a vintage shabby chic look. That’s what I did!
You can tear the rice paper two ways. The first way is to tear it in the shape you want before applying it with a clear coat. The second way is to tear it once it’s been applied. Let me explain…
After the rice paper decoupage is wet with the clear coat, it becomes super easy to tear and creates a more authentic look, in my honest opinion, but it’s just my preference.
The rice paper can be overlapped to create a layered look as well. It’s just plain ole fun! It took me back to art class when I first learned about paper mache.
My Results Of Using Rice Paper
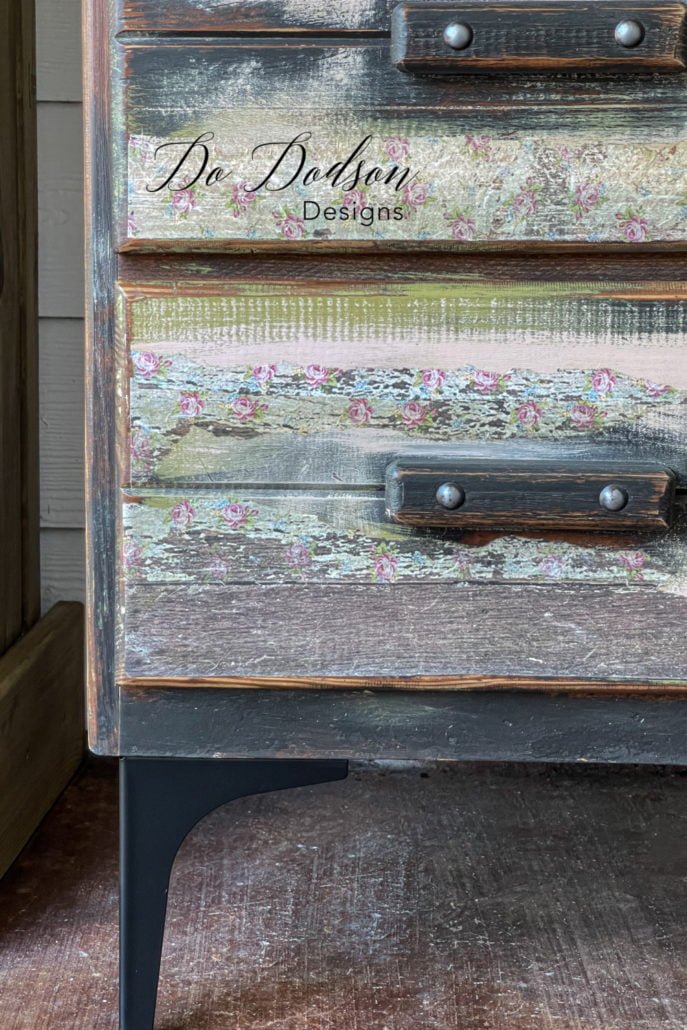
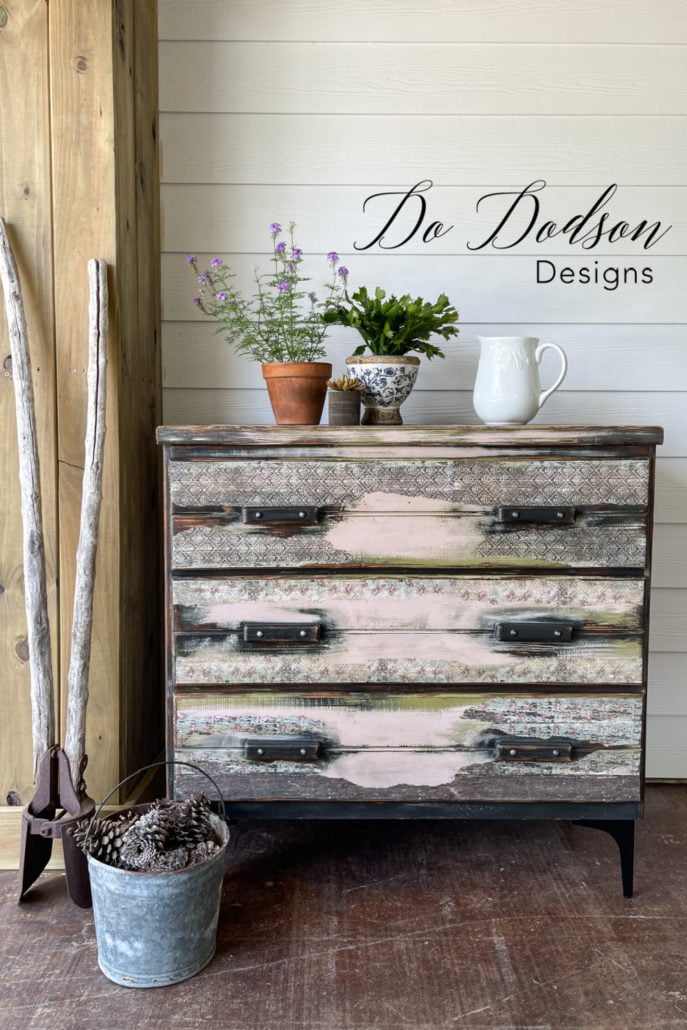
What a fun project, and I really like how you can customize this rice paper with just a little bit of imagination or creativity.
Thanks for joining me today, and I hope you enjoyed my rice paper decoupage project. I’d love to hear about your experiences with this paper or if you have ideas of how you would use it. Share your thoughts in the comment section below. It’s always so good to hear from you.
Until the next project… xo, Do
Yummy! Love me a good wooden box project!
Love a blank canvas! Thanks for joining me. 🙂 Have a beautiful week. xo
I really like that and I wouldn’t mind trying it myself. I have some rice paper but I have yet to use any of it. Haven’t found the right project yet. But I am working on a project right now that I would like to decoupage some hot air balloons on it. I printed some out on regular paper that I would like to use but I don’t know if that will work or not. What do you think?
Hi Barbara,
I think that would depend on the printer ink. My fear would be the ink would run, but you don’t know until you try. Let me know how it works out. 🙂 Have a beautiful day.
Do this is so creative! I am not that artsy, so I’m thankful for your posts that give me ideas!
Thanks, Jackie!
Creativity is in us all. The biggest problem I hear from others is that it’s scary, and fear stops them from even trying. It’s a form of self-expression and letting go of the fear can be so freeing. Keep creating, my friend. 🙂
Thanks Do, I think I will try it on a test board first and go from there. Those air balloons sure are pretty.
Wish me luck!
You know what, Barbara? My hubby gifted me with a hot air balloon ride. It was magical! Good luck with your project. 🙂
definitely have to have a try . great project .
Thanks, Steve! I think you’ll have fun creating with the paper. 🙂
Wow!! Fabulous piece…love, also, what you did with the pulls!
Thank you, Michele! The pulls were a bit weird but I decided to go with what I had. 🙂
This piece is gorgeous… I love how you tied everything together and made it look so orignal! XOXO
Thank you, Denise. That rice paper is super cool. I’m looking for my next victim. 😀 xo
Oh Do I’m so excited! I tried the hot air balloons on a test board and used DB clear coat and it worked perfectly.. So I went ahead with my project and it’s just what I wanted. I even tried blending for the first time and I love it. I feel like a school girl I’m so delighted. Wish I knew how to send you a picture.
Thanks for your help.
This makes me so happy to hear, Barbara. I can feel your excitement. You are always welcome to ask questions. That’s why I DO what I Do… to help others. xo 🙂 I’d love to see pics.
Update: Although the hot air balloons worked out the airplanes didn’t. They had a lot more red on them. But I fanalgaled it around and cleaned it up so it looks pretty good. This piece is for a 20 month old so he won’t be critiqueing it.
I’m so glad to hear it worked out. Way to go, Barbara! 🙂
Hi Donna! This is great!!! I loved the way you made it your own. Me? Of course I left them as a full page. I love love how you placed the rice paper. Definitely going to pin.
Thank you, Cheryl! You are always so kind. It is fun to work with the papers. Have a fantastic week, my friend. 🙂 xo
I’m in the middle of redoing a very old folding tray table, that was my grandmother’s. I’m almost ready to put the rice paper on the top. What brand of “clear coat” did you use on the dresser I watched you do? Is it Dixie Belle & where can I buy it? I’ve used Mod Podge before & wasn’t exactly thrilled with the end result. I’m constantly redoing old furniture. I’ve got a barn full of finished projects that I’m going to put out for sale this summer. The tray table, however, I’m keeping. So I want it to have a good solid glossy finish on the top when I’m done. Col J.
Hi Colly! I use a top coat to apply decoupage paper. Here is an affiliate link if you should want to purchase. https://dixiebellepaint.com/waxes-glazes-and-finishes/clear-coats/satin/?aff=80
Wishing you all the best with your project. 🙂 xo