

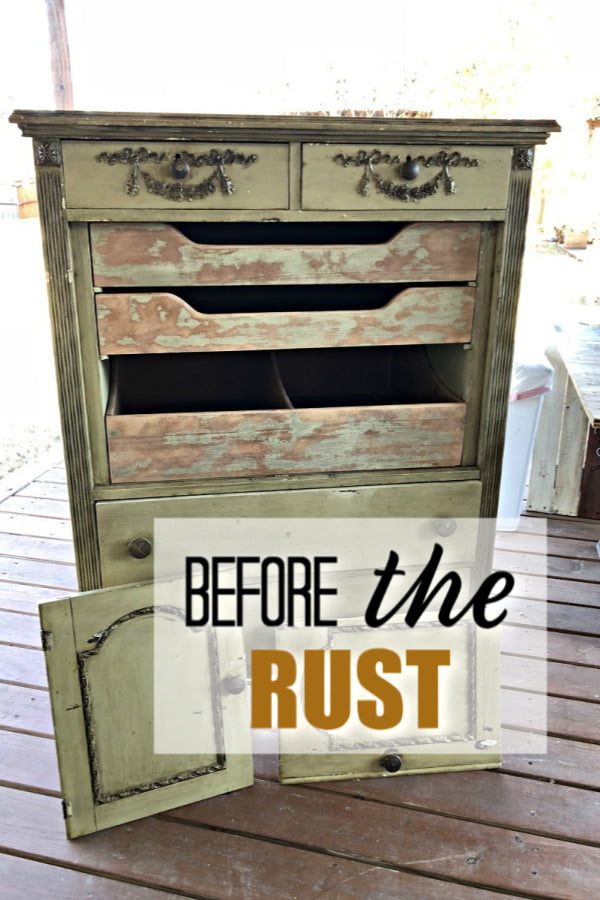
Some secondhand furniture needs more than a fresh coat of paint—and this old chest was proof! Between the broken cabinet door, years of grime, a stubborn smoke smell, and more spider eggs than I care to remember, she was definitely headed for the discard pile. But underneath all that mess was a solid piece of furniture with plenty of makeover potential.
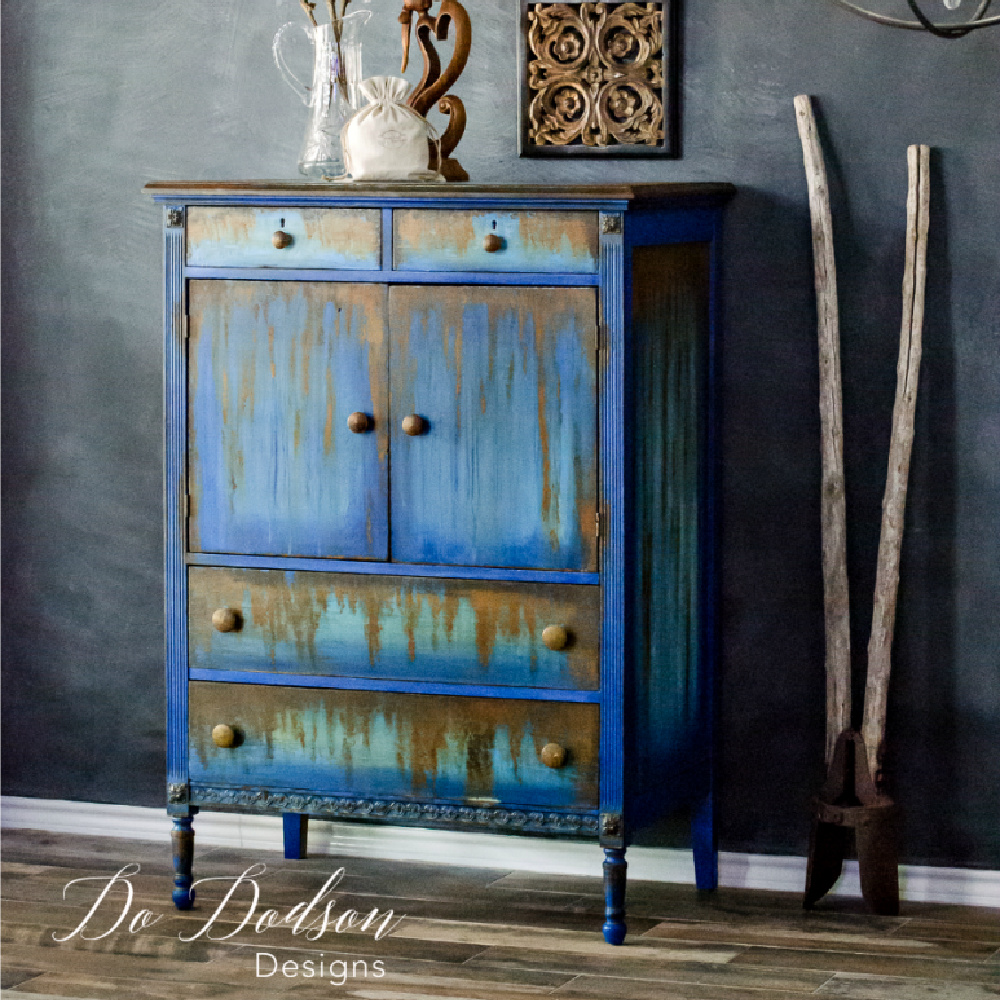
After making new doors, simplifying the drawer fronts, and layering the surface with blended paint and a real rust patina finish, the forgotten Green Goddess became the beautifully aged Rusty Goddess. If you love furniture makeovers with character, texture, and an authentically timeworn finish, wait until you see this transformation! And a BONUS Video Tutorial of the process! 🎥* Post update August 2026
This post contains a few affiliate links to help you find the products I use. You are not charged extra to use any of the links, and any income I earn will go toward more fun projects! To see my full disclaimer, click here.
Assessing and Preparing the Secondhand Furniture
Before I could even think about paint, this secondhand chest needed some serious attention. It was covered in years of dirt and grime, smelled strongly of smoke, and came with more old spider egg sacs than any piece of furniture should legally be allowed to have. Let’s just say flipping it over came with a few sound effects!
Because the smoke odor was so strong, I left the chest on my covered porch to air out for about two months. When working with old furniture, always inspect the entire piece—including the underside, drawers, and interior—for odors, pests, loose joints, water damage, and broken parts. A beautiful paint finish won’t matter if the piece isn’t clean, sturdy, and properly prepared first.
How to Replace a Broken Cabinet Door
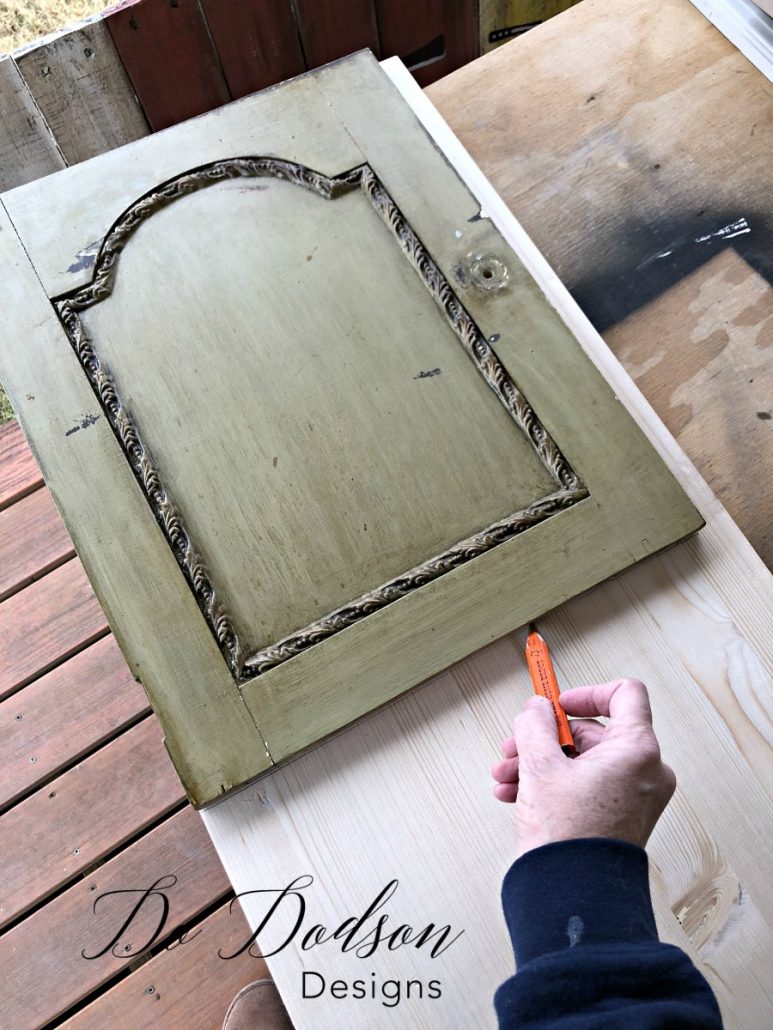
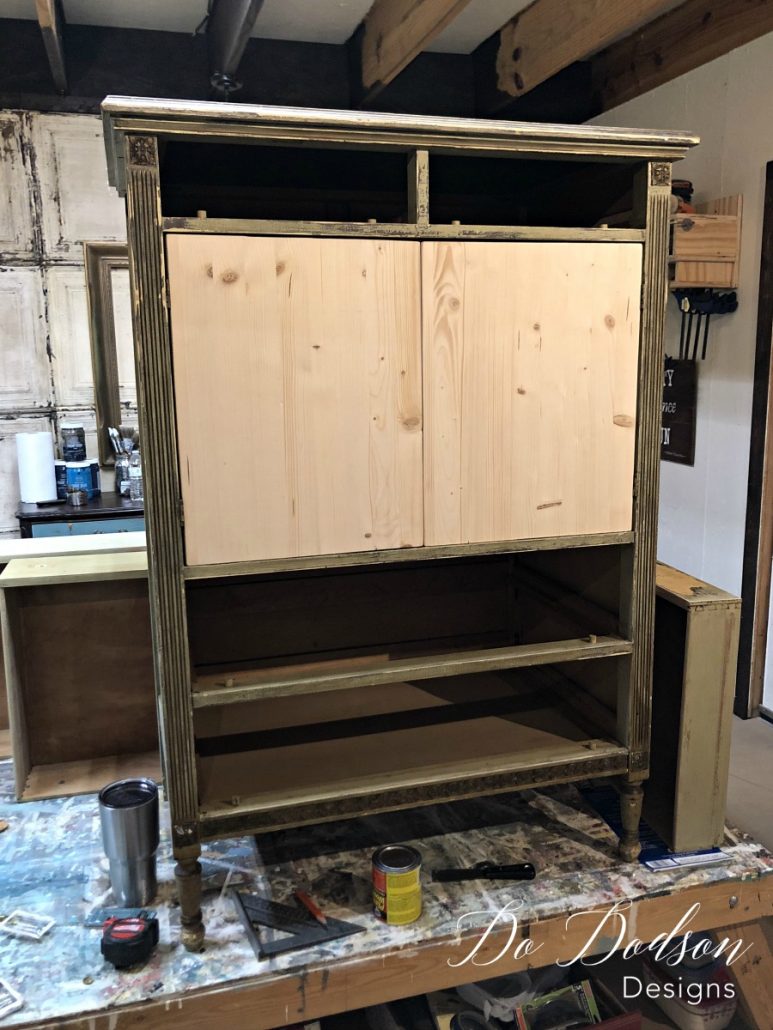
Since one of the original doors was beyond repair, I decided to make two new doors to match. I used the remaining original door as a pattern and traced its shape onto a piece of wood with a carpenter’s pencil.
To make the job easier, I lined up two sides of the original door with the board’s straight edges. That meant I only needed to cut the remaining two sides with my circular saw. After cutting both replacement doors, I sanded the edges smooth and prepared the wood for paint.
W
Reattaching the New Cabinet Doors
Once the replacement doors were cut, sanded, and checked for a proper fit, I reattached them using the original hinges. Whenever possible, I like to reuse vintage furniture hardware because older hinges and screws are often made specifically for that piece.
New hardware doesn’t always align with the existing holes or fit the proportions of antique and secondhand furniture. Reusing the originals can save time, preserve the character of the piece, and prevent unnecessary repairs.
If the old hinges are still sturdy, clean them well and make sure they open and close smoothly before reinstalling them. You can always refresh their appearance with paint or an aged finish to complement the completed furniture makeover.
If it’s in good shape.
Simplifying the Drawer Fronts
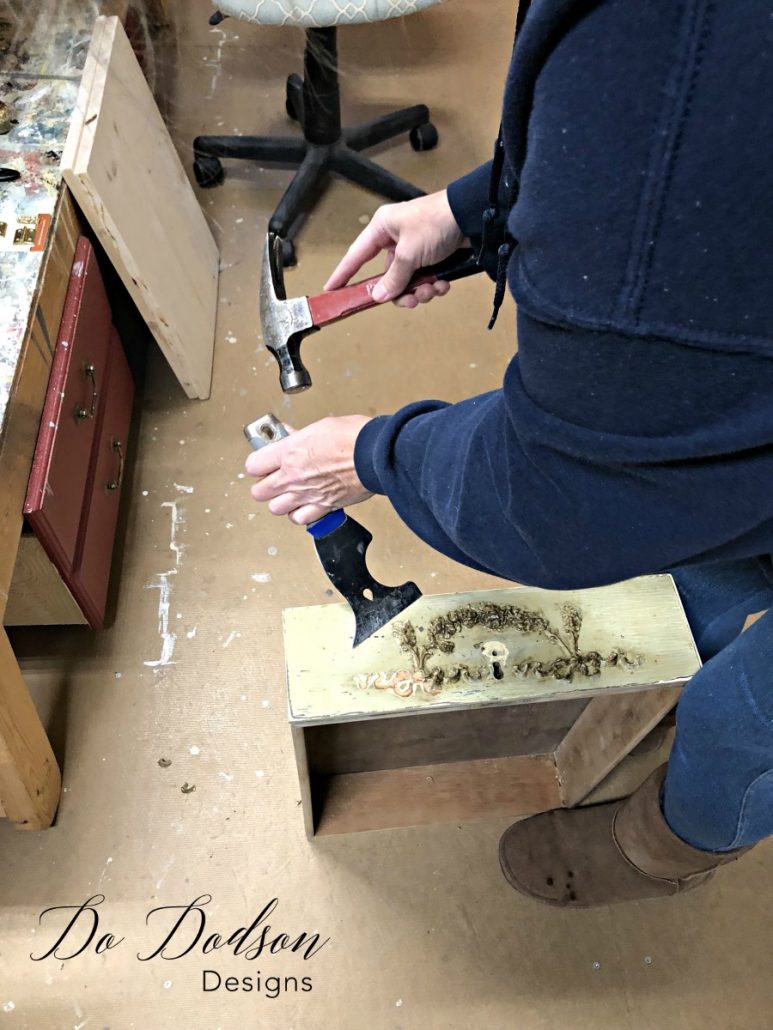
The original cabinet doors had ornate molding, but the new replacement doors were simple and flat. To give the chest a more cohesive look, I decided to remove the decorative molding from the drawer fronts as well.
I carefully loosened the molding with a paint scraper and hammer. A wood chisel would have been the better tool, but apparently, I was feeling adventurous and grabbed the first sharp-looking thing within reach! Once the trim was removed, the drawer fronts were rough and uneven, so I used my sander to smooth the surface and remove the remaining residue.
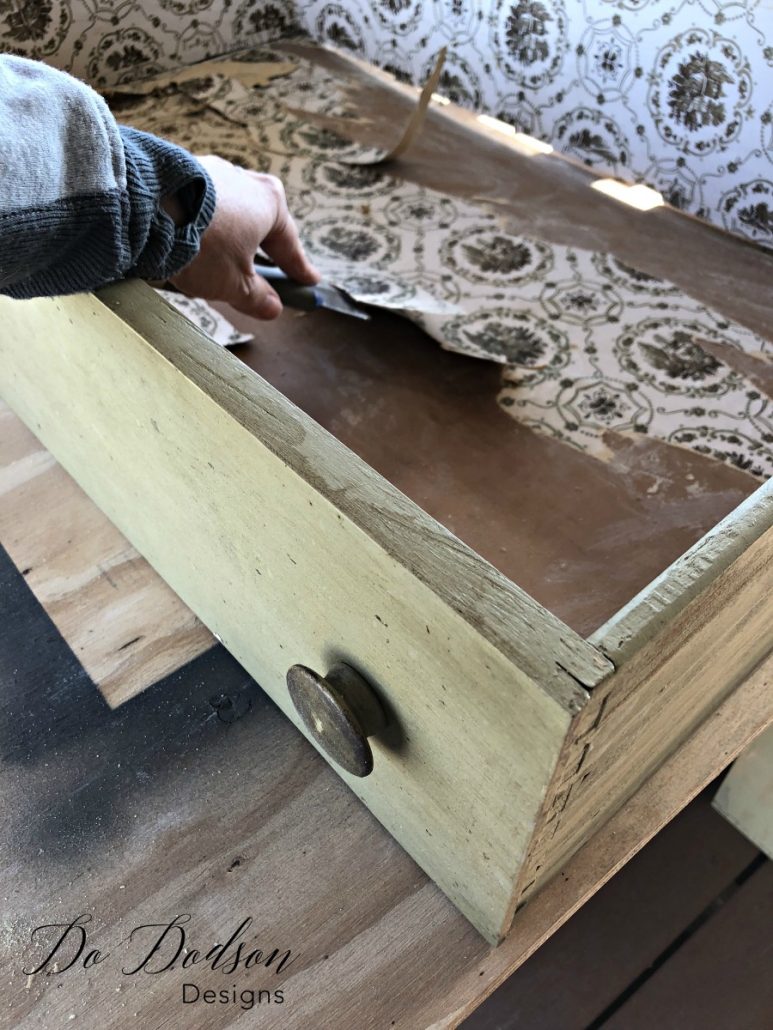
The drawers were also lined with beautiful vintage paper. I carefully removed and saved several of the larger pieces for a future project. When working on old furniture, it’s always worth preserving unique details like vintage paper, hardware, and trim—even if you don’t reuse them on the original piece.
Choosing the Paint Colors and Patina Finish
Choosing the paint design is usually the hardest part for me. I had purchased Modern Masters Metal Effects products a few months earlier and was waiting for the right furniture makeover to use them on. My original plan was to paint this chest black and add a rusty finish—but about five minutes before picking up my paintbrush, I completely changed my mind. Does anyone else redesign furniture at the last possible second?
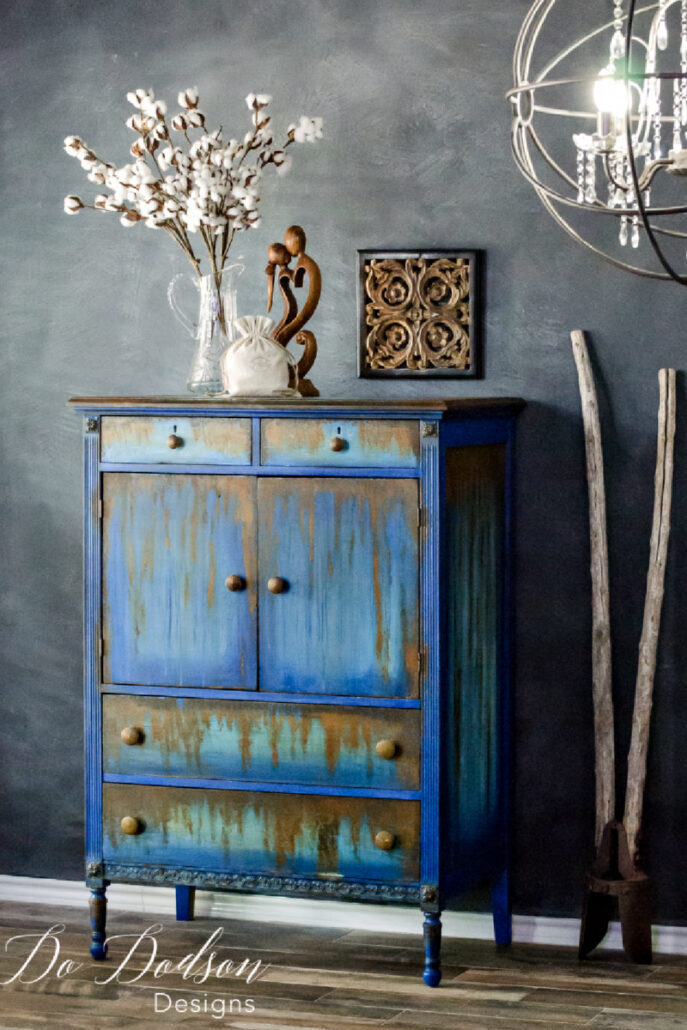
Instead, I chose a layered combination of deep sapphire blue, robin’s egg blue, and weathered gray. The blend of cool colors created a beautiful aged background for the warm, rusty patina. That contrast gave the finish more depth and helped the repaired secondhand chest look as though it had naturally weathered over many years.
Supplies for Creating a Rust Patina Finish
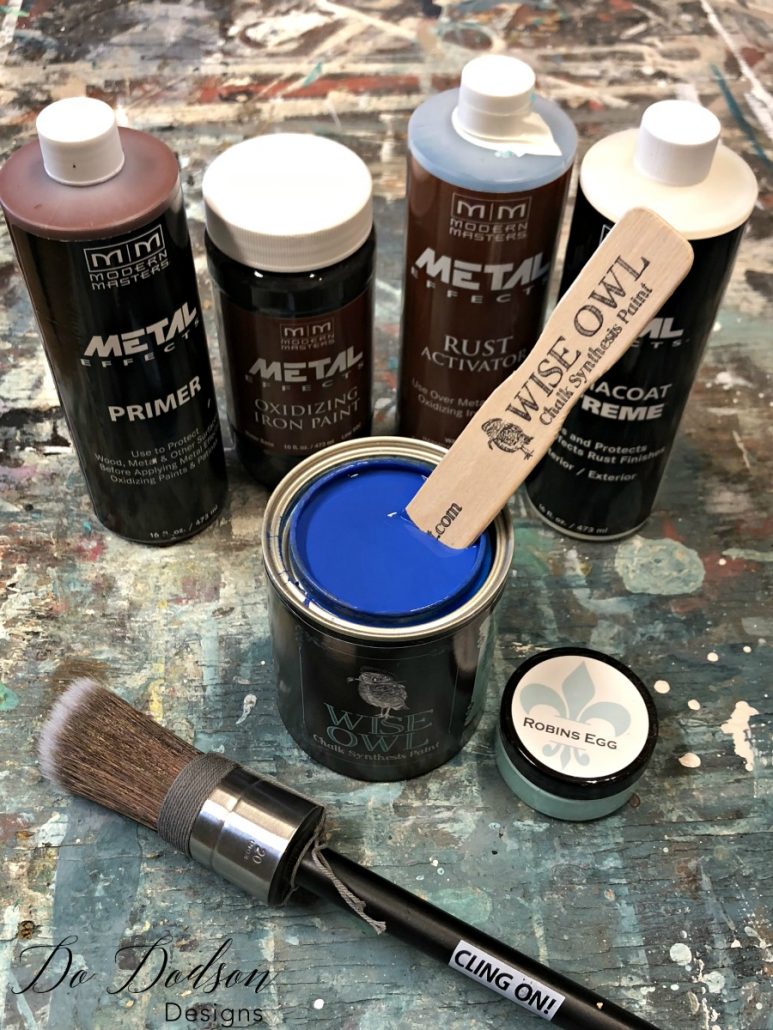
Here are the products and tools I used to create the layered, rusty finish on this secondhand furniture makeover:
- Furniture paint in deep blue, robin’s egg blue, and weathered gray
- Modern Masters Metal Effects Primer
- Modern Masters Oxidizing Iron Paint
- Modern Masters Rust Activator
- Paintbrush
- Spray bottle filled with water
- Putty knife
- Natural sea sponge
- Clean lint-free cloths
- Protective gloves
- Drop cloth
- Clear sealer made for oxidized finishes, if needed
Modern Masters still recommends using its specially formulated Metal Effects Primer with the Oxidizing Iron Paint and Rust Activator. The primer helps prevent the activator from penetrating the underlying wood and interfering with the patina finish. Always follow the current manufacturer’s directions and drying times for the best results. Modern Masters Metal Effects products
Creating a Layered Paint Finish
I began by blending deep sapphire blue, robin’s egg blue, and weathered gray across the chest. Instead of trying to create a perfectly smooth, even finish, I worked in small sections and let the colors overlap naturally.
A spray bottle filled with water helped keep the paint workable while I blended the colors with my paintbrush. I also used a putty knife and natural sea sponge to add irregular texture and movement. The goal was to create a finish that looked worn, weathered, and beautifully imperfect.
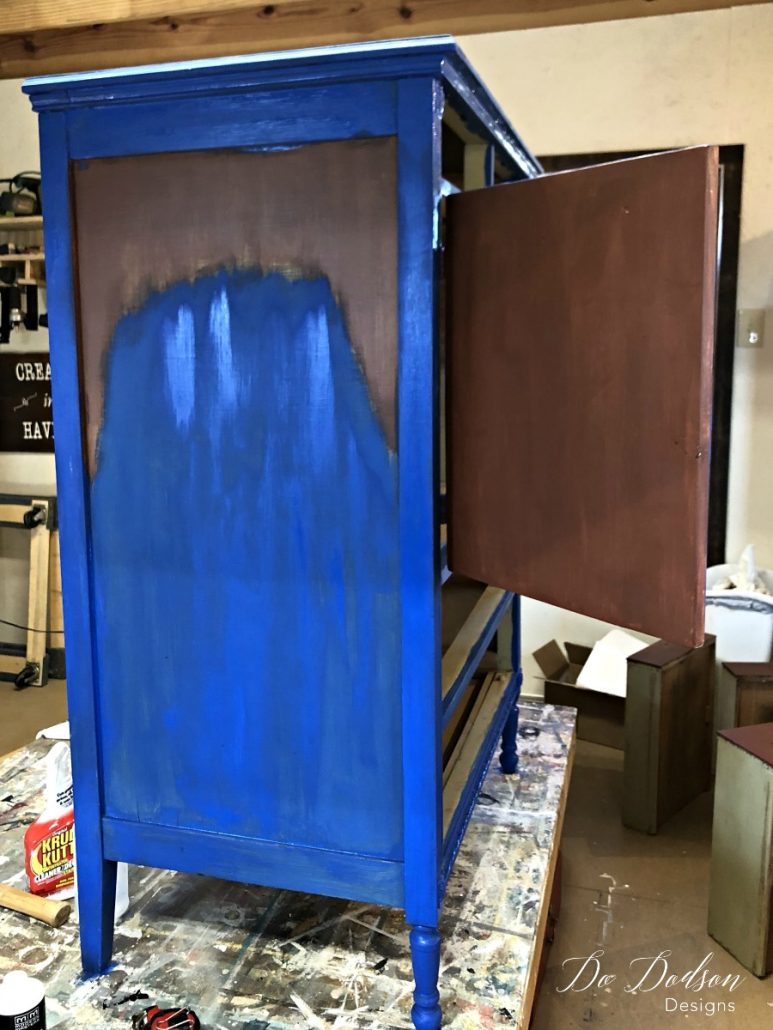
Don’t overthink this part. Vary the placement of the colors and step back occasionally to look at the entire piece. Uneven layers, visible texture, and unexpected color variations will give the final rust patina more depth and character. This is one furniture finish where perfection is definitely not invited!
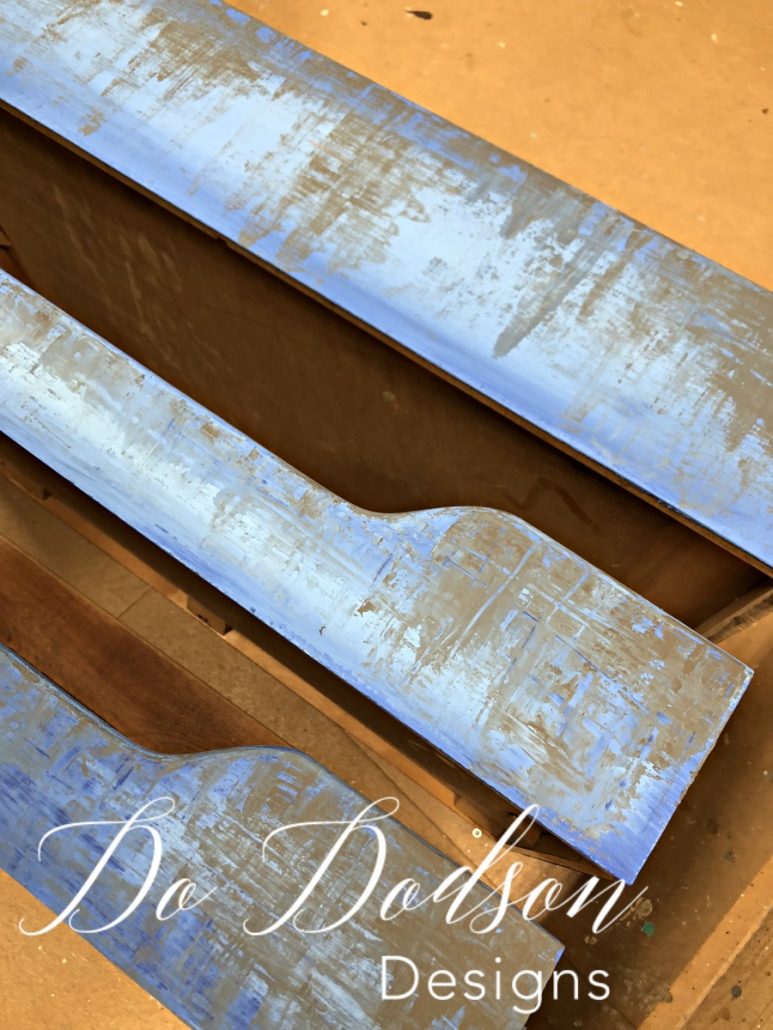
How to Apply the Rust Patina
Once the layered base coat was completely dry, I applied the Metal Effects Primer to the areas where I wanted the authentic rust finish. After the primer dried according to the manufacturer’s directions, I stirred the Oxidizing Iron Paint thoroughly and applied it over the primed surface.
The iron paint contains real metal particles, so stirring it well is important. I applied a second coat for fuller coverage and added the Rust Activator while the final coat was still workable, following the product directions.
The reaction didn’t happen all at once, but soon those beautiful rusty tones began appearing across the surface. Watching the finish oxidize felt like a little paint magic! Avoid oversaturating the furniture with activator, as too much can puddle and create an uneven reaction. A light application can always be repeated if you want more rust.
Should You Seal a Rust Patina Finish?
A rust patina can leave a powdery residue that may rub off when touched, so sealing is a good idea on furniture that will be handled or used regularly. It also helps prevent the oxidized finish from transferring onto clothing, flooring, or nearby surfaces.
Allow the patina to develop and dry completely before applying a topcoat. Modern Masters recommends waiting at least 24 hours and using a sealer formulated for its Metal Effects system, such as Permacoat Xtreme. Apply light coats to avoid pooling or dramatically changing the appearance of the rust.
Keep in mind that any clear coat may slightly deepen or darken the patina. If you’re unsure, test the sealer on a hidden area first. For a mostly decorative piece, you may choose to seal only the doors, drawers, top, and other areas likely to be touched.
Frequently Asked Questions About Rust Patina Furniture
Can you apply rust-patina paint to wooden furniture?
Yes. Oxidizing iron paint can be applied to wood and previously painted furniture when the surface is properly prepared. Use the primer recommended by the manufacturer to protect the wood and help the patina develop correctly.
Does rust patina paint contain real metal?
Modern Masters Oxidizing Iron Paint contains real metal particles. The Rust Activator reacts with those particles to create an authentic oxidized finish rather than a painted imitation of rust.
Do you have to seal a rust patina finish?
Sealing is recommended for furniture that will be touched or used regularly, as rust may leave a powdery residue. A protective topcoat also prevents the finish from rubbing off or transferring to nearby surfaces.
How long does it take for the rust patina to develop?
You may begin seeing the rusty finish appear as the activator dries. Temperature, humidity, product application, and the number of coats can affect the reaction time. Allow the finish to develop completely before applying more activator or sealer.
Can you control where the rust appears?
You can guide the finish by applying the iron paint and activator only where you want oxidation. However, the reaction will develop somewhat unpredictably—and that natural variation is part of what makes every patina finish unique.
The Finished Secondhand Furniture Makeover
The Green Goddess officially became the Rusty Goddess—and what a transformation! The layered blues and weathered gray peeking through the authentic rust patina gave this once-forgotten chest incredible depth, texture, and character.
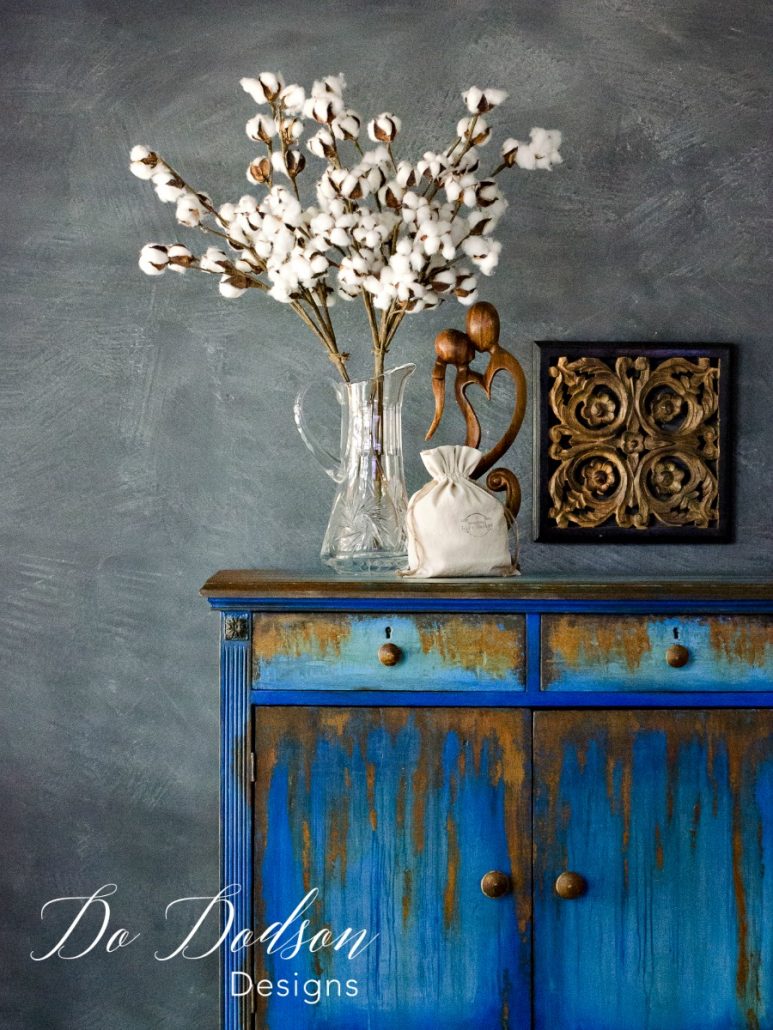
The new cabinet doors and simplified drawer fronts gave the piece a more cohesive look without erasing its vintage charm. What began as a dirty, smoke-scented chest with a broken door and a questionable spider population became a one-of-a-kind statement piece.
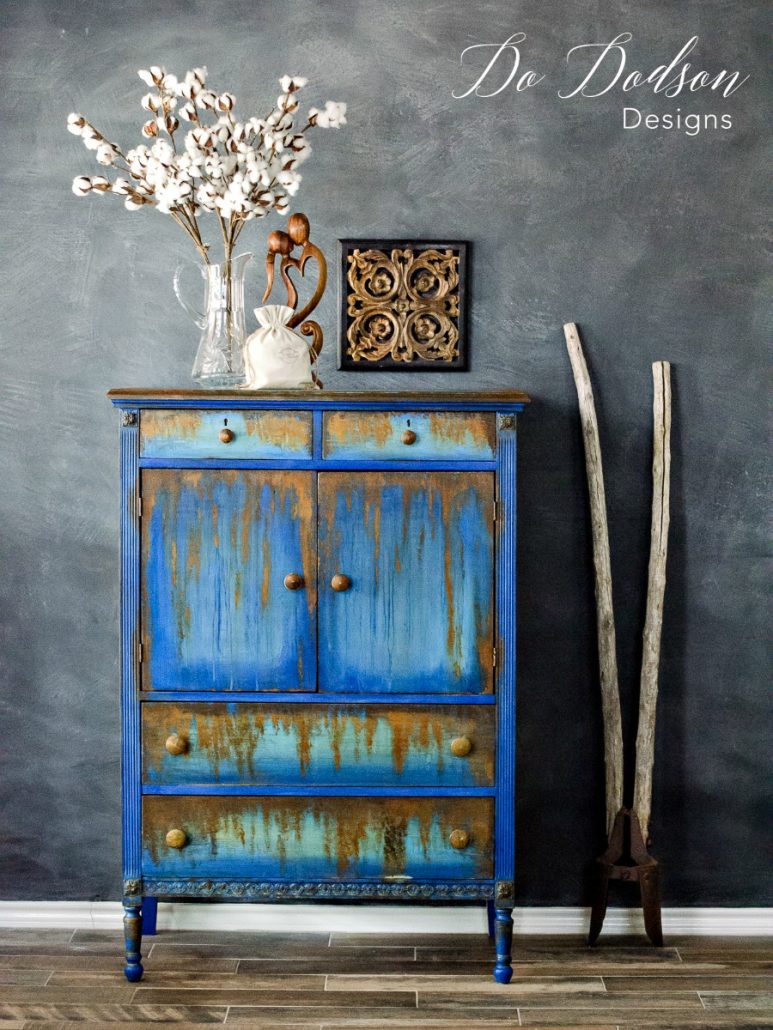
This makeover is proof that secondhand furniture doesn’t need to be perfect to be worth saving. Sometimes the pieces with the most problems make the most dramatic before-and-after transformations. A few repairs, some creative paint layering, and a little rusty goodness were all this old chest needed to become beautiful again.
Watch the Step-by-Step Rust Patina Furniture Tutorial 🎥
Want to see exactly how this rust patina finish came together? Watch the step-by-step video tutorial below to follow the entire process—from blending the paint colors and adding texture to applying the oxidizing iron paint and watching the rusty finish develop. Seeing the technique in action makes it much easier to recreate this beautifully aged look on your own secondhand furniture. Watch it here! 🎥
From the Green Goddess to the Rusty Goddess
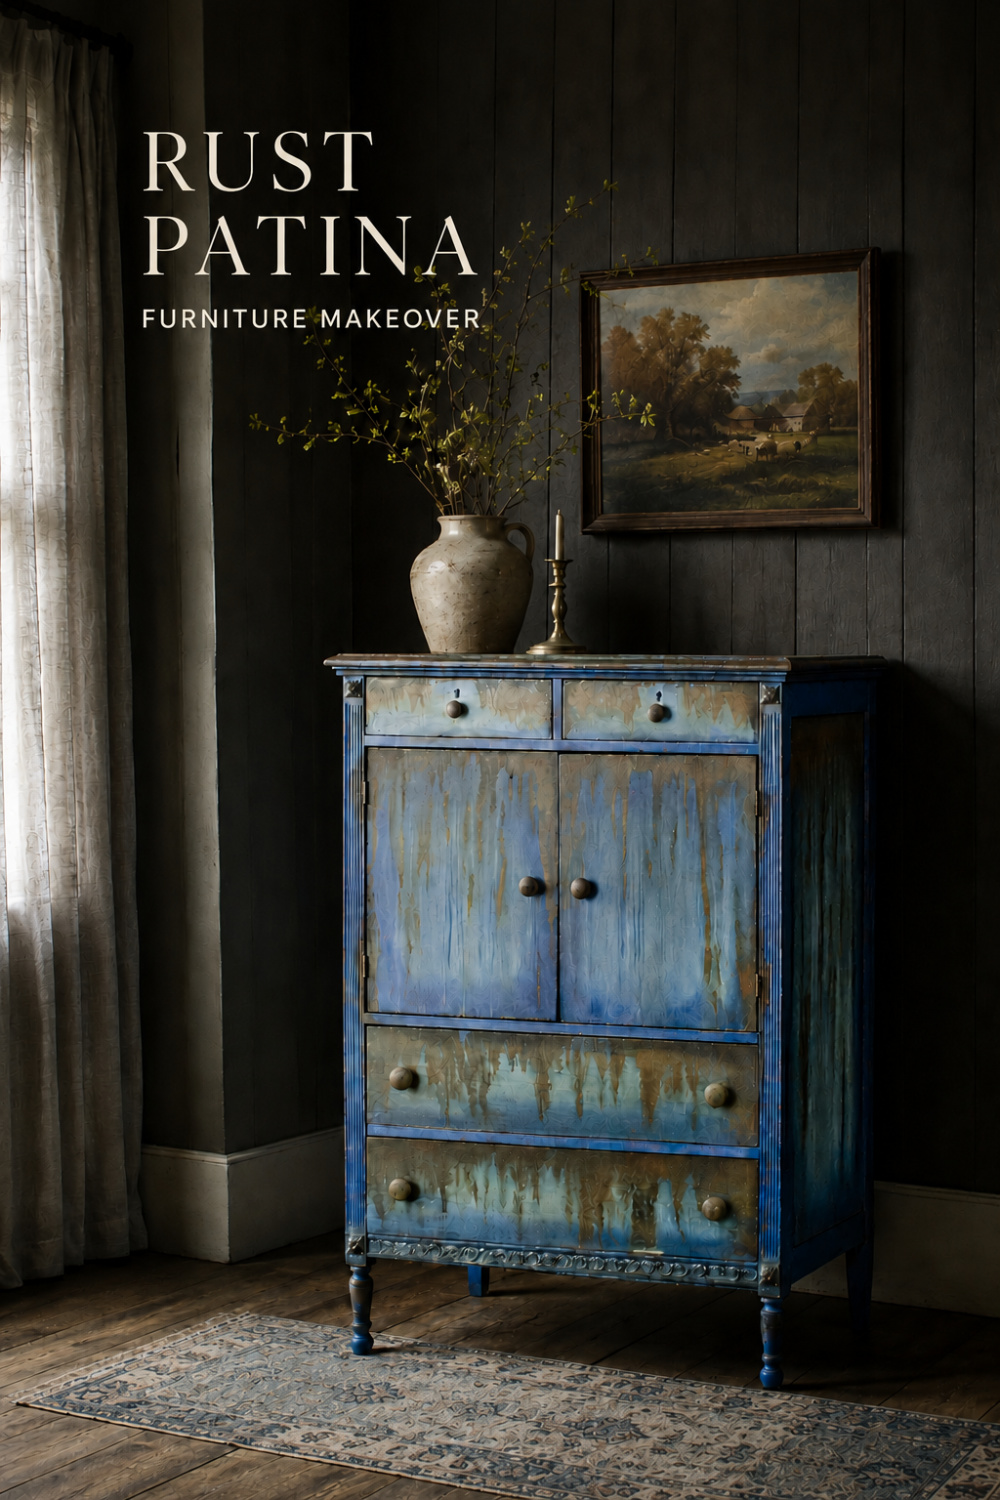
I used AI to update the room and give it a moody farmhouse setting as decorating inspiration for the finished chest. The charcoal-paneled walls, faded blue rug, and minimal vintage decor show how its blue-and-rust patina could work beautifully in a warm, collected space. What do you think? Does it work?
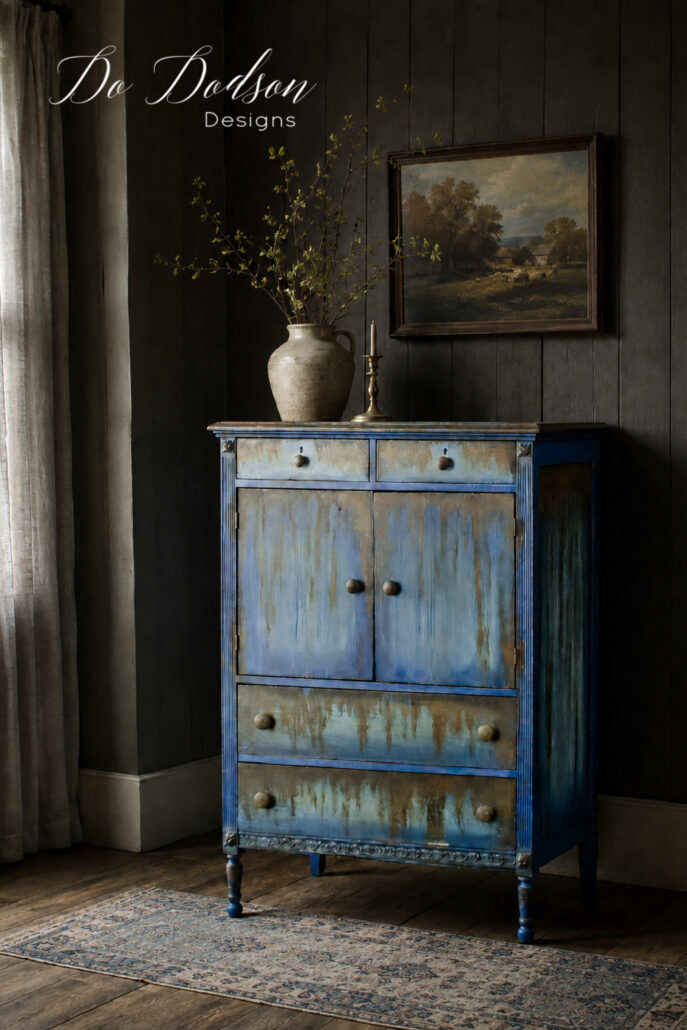
Who would have guessed that the dirtiest, grungiest secondhand chest could turn into such a beauty? She needed new doors, smoother drawer fronts, plenty of cleaning, and a whole lot of patience—but the layered paint and authentic rust patina gave her a second chance with more character than ever.
I hope this makeover encourages you to look beyond the dirt, damage, and questionable spider evidence the next time you find an old piece of furniture. Sometimes the roughest pieces are hiding the best transformations!
What do you think of the Rusty Goddess? Leave me a comment below—I’d love to hear whether you would try a rust patina finish on your furniture.
If you enjoyed this makeover, take a look at my copper patina furniture makeover for another beautifully aged painted finish. Don’t forget to save this secondhand furniture makeover to your favorite painted furniture board on Pinterest!
Until the next project… xo, Do