

For this furniture makeover, I experimented with a layered paint technique using several colors, added texture, dark wax, and just a touch of metallic gilding wax. And because apparently I like to make things difficult for myself, I challenged myself to use a color I normally wouldn’t reach for.
PINK! 😳
Don’t get me wrong, it’s a pretty color, but I’m just not a pink kind of girl. The results shocked me, and I might be a convert. The finished piece has that wonderfully imperfect, timeworn appearance I love about Old World furniture, with subtle hints of color peeking through the layers.
Let me show you how I created the look. BONUS! There’s a link to the complete tutorial at the end of this post.
This post contains a few affiliate links to help you find the products I use. You are not charged extra to use any of the links, but any income I make will be used for more fun projects! To see my full disclaimer, click here.
How To Create an Old World Finish With Layered Paint
The secret to creating an authentic Old World paint finish is layering—and not trying to make it perfect. Unlike a smooth, freshly painted piece of furniture, this look is all about building depth with different paint colors, texture, and subtle variations that mimic years of natural aging.
For this makeover, I started with a dark gray base and gradually added contrasting colors using dry brushing and stippling techniques. A little added texture gave the finish even more character, while dark wax settled into all those beautiful imperfections, creating an aged patina.
And here’s the fun part: there really isn’t a perfect formula. The more random and imperfect the layers are, the more authentic the finish looks. So don’t overthink it. Grab your paintbrush and have some fun with it!
Supplies You’ll Need for This Layered Paint Technique
You don’t need a huge collection of products to create this Old World layered paint finish. The magic comes from combining several colors and textures and allowing each layer to peek through the next.
Here’s what you’ll need:
- Furniture cleaner or degreaser
- Gray furniture paint for the base coat
- Dark brown or deep charcoal furniture paint
- Cream furniture paint
- Muted blush or dusty pink furniture paint
- Paint texture additive
- Quality paintbrush
- Inexpensive chip brush for stippling
- 220-grit sandpaper
- Dark furniture wax
- Gold gilding wax
- Optional pink, copper, or warm-toned gilding wax
- Clean lint-free cloths
The original colors I used: Hurricane Gray, Coffee Bean, Buttercream, and Tea Rose. I also used Sea Spray to create the raised texture, then applied black wax, with touches of Warm Gold and Anastasia gilding wax.
A Quick Note About Furniture Prep
Before you start layering paint, give your furniture a thorough cleaning to remove dirt, grease, furniture polish, and anything else that could prevent the paint from adhering properly.
Depending on the piece, you may also need to scuff sand or apply a stain-blocking primer. The existing finish on this dresser was in good condition, so after cleaning it well, I was able to go straight to paint.
If you’re working with bare wood, unknown stains, or a piece that’s prone to tannin bleed-through, I recommend using a stain-blocking primer first. It’s much easier to prevent those pesky stains than to deal with them after you’ve created all those beautiful layers!
*Always clean your furniture properly before painting.
STEP 1: Layered Paint
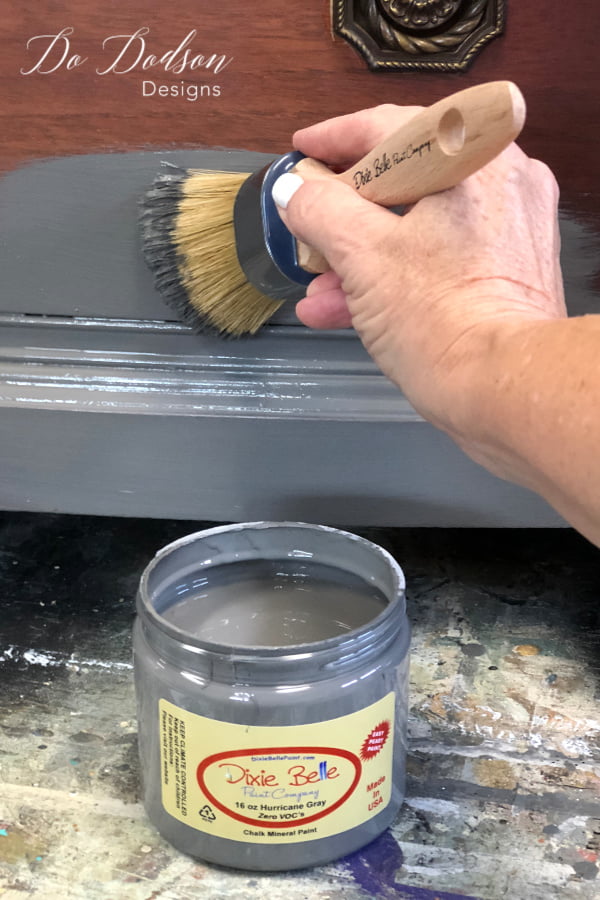
I started this Old World furniture makeover with a coat of dark gray furniture paint. This became the foundation for all the colors and texture I would add later.
The gray gave me a beautiful moody base without being quite as harsh as black. It also created the perfect backdrop for the lighter and warmer colors I planned to layer over it.
My original dresser only needed one coat of Hurricane Gray for good coverage. Depending on the paint you’re using and the original finish on your furniture, you may need a second coat.
Allow the base coat to dry completely before moving on to the fun part—building those beautiful layers!
STEP 2: Dry Brush Technique
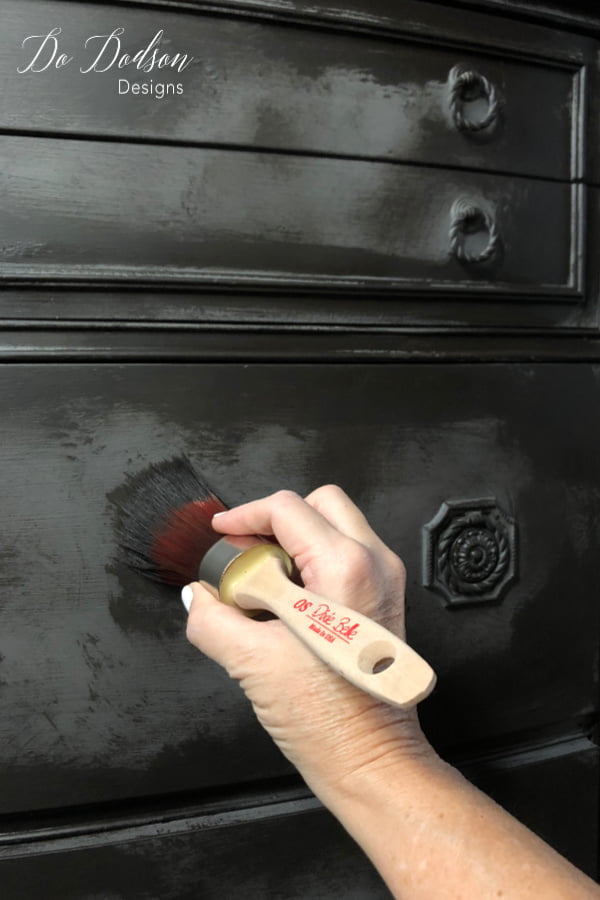
Next, I added a deep brown/black paint to begin creating depth and that aged, Old World look.
For this layer, I used a dry brush technique. Dip just the tips of your brush into the paint, then offload most of it onto a paper towel or scrap piece of cardboard. Your brush should have very little paint left on it.
Lightly drag the brush across the furniture, concentrating on random areas around the drawers, edges, corners, and details. Don’t try to completely cover the gray underneath. You want that base color to show through.
I used Coffee Bean for this layer, but any deep chocolate brown, charcoal, or almost-black shade can create a similar effect.
Don’t aim for perfect coverage. This is one of those furniture painting techniques where uneven is actually a good thing! Some areas can be darker, some lighter, and some can have very little of the second color at all.
Those variations are what begin to give the finish the appearance of paint that has naturally aged over time.
STEP 3: Add Texture for an Aged Old World Look
Now for the part that really brings this Old World paint finish to life—texture!
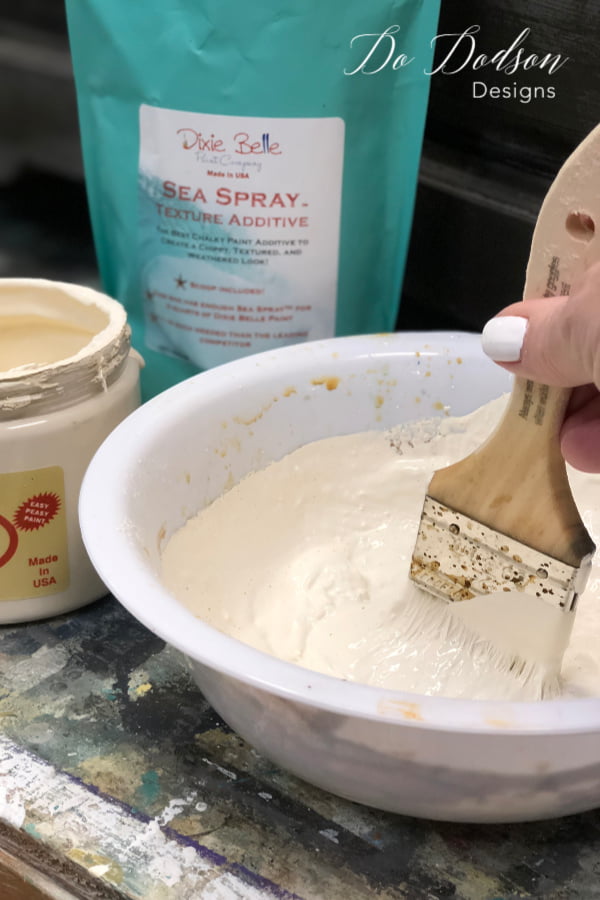
I mixed a paint texture additive into my cream-colored furniture paint until it was about the consistency of peanut butter. I didn’t measure it exactly, and you really don’t need to. You’re simply looking for a thick mixture that will hold its shape when applied.
Using an inexpensive chip brush, I stippled the textured paint onto random areas of the dresser. Instead of brushing the paint on in long strokes, use the ends of the bristles to dab or pounce the mixture onto the surface.
Don’t cover the entire piece. Allow some of the dark gray and brown layers underneath to remain visible. Those irregular areas are exactly what create the depth and character we’re after.
And here’s a little tip from experience: don’t use your favorite paintbrush for this step! 😂 The thick texture mixture isn’t exactly kind to brushes. A cheap chip brush works perfectly, and you won’t feel bad if it ends up in the trash when you’re finished.
Allow the textured paint to dry completely before adding your next color.
STEP 4: Bring in That Unexpected Pink
Once the textured layer was completely dry, it was time to add the color I wasn’t so sure about at first—pink!
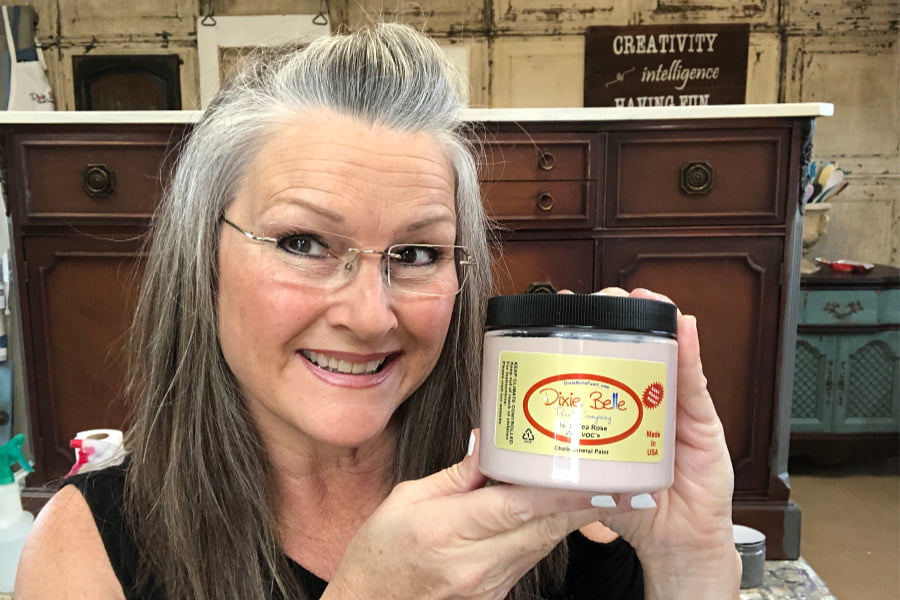
I used a muted dusty pink furniture paint and applied it using the same stippling technique. Rather than brushing the paint smoothly across the surface, I dabbed it on with the ends of the brush bristles.
The pink wasn’t meant to completely cover everything underneath. I wanted glimpses of the gray, brown, and cream layers to remain visible so that no single color dominated the finish.
This is also where you can make this technique your own. You certainly don’t have to use pink. A muted terracotta, warm taupe, olive green, dusty blue, or another earthy shade could be beautiful in an Old World furniture makeover.
Once the paint was dry, I used 220-grit sandpaper to gently smooth the highest points of the textured finish.
The goal isn’t to sand the surface smooth. We worked hard to create all that glorious texture! Just lightly knock down any sharp or overly rough peaks while allowing the uneven surface and layers of color to remain.
Remember, imperfect is perfect with this finish. The variation in color and texture is what gives the furniture that collected-over-time appearance.
STEP 5: Adding Dark Wax to Create an Aged Patina
Once all those beautiful layers of paint were dry, it was time to bring out the details with dark furniture wax.
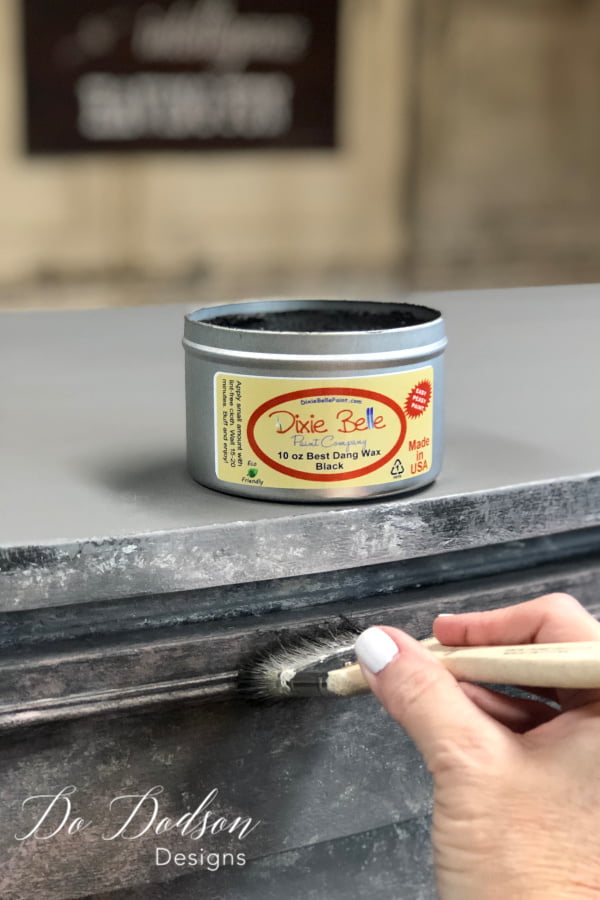
This is the step where the finish really started to come together for me. The dark wax settled into the textured areas, corners, and details, instantly giving the dresser more depth and that wonderfully aged Old World patina I was after.
I applied the wax with a small chip brush rather than a large wax brush. The smaller brush gave me more control and allowed me to work the wax into the drawers’ rough texture and around the trim.
Start with a small amount of wax and build the color gradually. I concentrated more dark wax in the corners, crevices, and around decorative details—areas where you might naturally expect an old finish to darken with age.
If an area gets too dark, don’t panic. Use a clean, lint-free cloth to blend and soften the wax before it sets.
And just look at that texture! This is when all those seemingly random layers of gray, brown, cream, and pink finally begin to make sense.
Because apparently all those layers weren’t quite enough for me, I decided this Old World furniture layered paint makeover needed a little something extra. 😉
For the final layer, I added small touches of metallic gilding wax to the hardware, drawer edges, corners, and a few of the raised details.
I used a warm gold along with a pinkish-red gilding wax that complemented the dusty pink paint underneath. The metallic finish wasn’t meant to cover large areas. I simply wanted little hints of color and shimmer to catch the light and emphasize the details.
On the hardware, I found that the easiest application tool was something I already had—my finger! I rubbed a tiny amount of gilding wax over the raised areas and blended it until I was happy with the look.
For the dresser’s flat surfaces and edges, I used a small soft-bristled brush to lightly blend the wax into the finish.
A little gilding wax goes a long way! You don’t want your furniture to suddenly look shiny and new. Keep the application subtle so it looks like a worn metallic finish that’s been there for years.
And with that final touch, my layered Old World paint finish was complete!
The Finished Old World Furniture Makeover
After stepping back and seeing all those layers together, I have to admit—even the pink won me over!
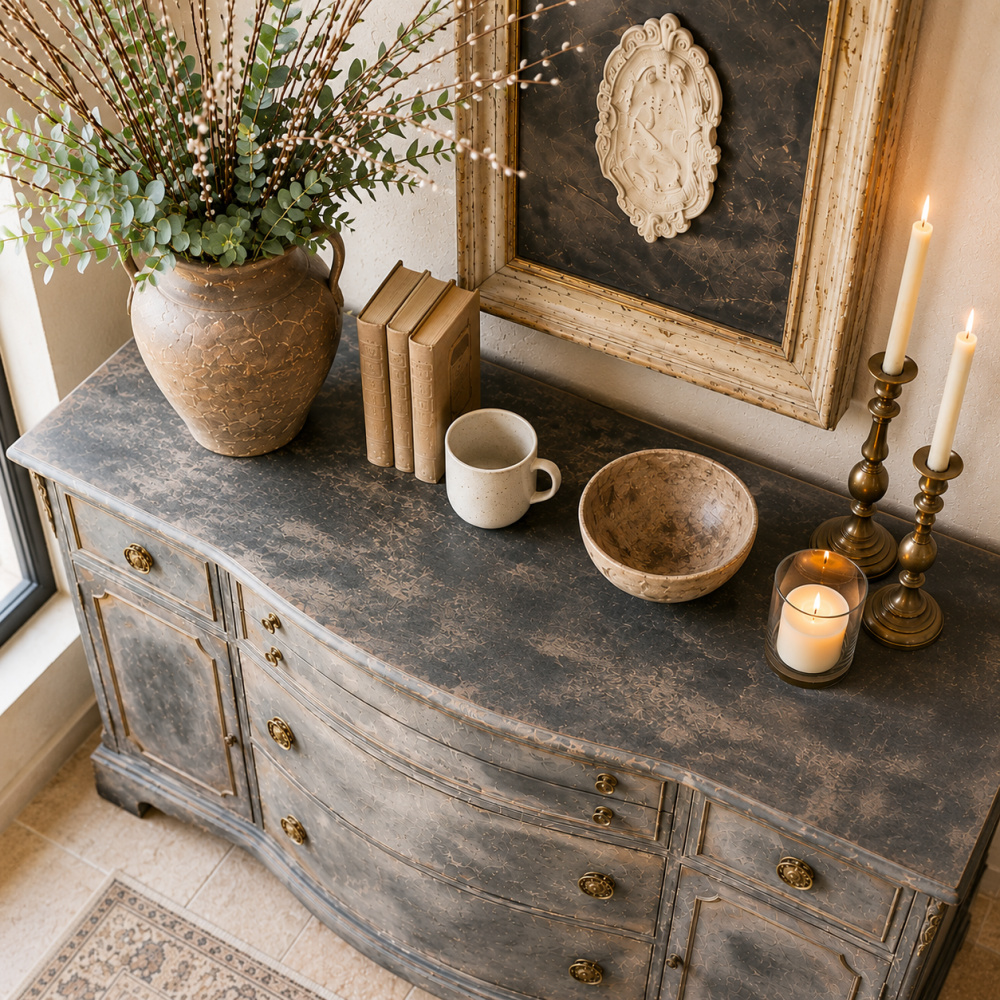
What I love most about this Old World furniture makeover is how no single paint color really stands out. Instead, the gray, brown, cream, and dusty pink blend together beneath the dark wax to create an aged, timeworn finish with so much depth and character.

And that texture! 😍
The uneven surface catches the dark wax in all the right places, while the subtle touches of gilding wax highlight the details and give the dresser just enough warmth. It looks collected and aged rather than freshly painted—and that’s exactly what I wanted.

Looking at this piece again years later, I’m reminded of how timeless an Old World layered paint finish can be. Styled with warm woods, aged pottery, vintage-inspired decor, and natural textures, this dresser feels right at home in the warmer, European-inspired interiors we’re seeing today.
That’s one of my favorite things about giving old furniture a new life. Good pieces don’t have to follow decorating trends. Sometimes, all they need is a beautiful finish and a fresh way of styling them.
And yes… apparently, I can be a pink girl—as long as it’s buried underneath several layers of moody paint and dark wax. 😂
Helpful Tips for Getting an Authentic Old World Paint Finish
The beauty of an Old World furniture layered paint finish is that it isn’t supposed to look perfect. You want the piece to have depth, texture, and those little imperfections that make it look as though the finish developed naturally over time.
Here are a few things I’ve learned when creating this look:
- Start with a dark base. A deep gray, brown, charcoal, or even black gives the lighter layers something to play against and creates instant depth.
- Let every color peek through. Don’t completely cover one layer before adding the next. Those glimpses of color underneath are what make a layered paint finish interesting.
- Be random with your application. Avoid repeating the same pattern throughout the piece. Concentrate color and texture in some areas and barely touch others.
- Don’t overwork your paint. Sometimes the best thing you can do is put down the brush and walk away. The more you fuss with this finish, the easier it is to lose those beautiful variations.
- Use texture sparingly. A little goes a long way. Focus on areas where natural wear and age would add character rather than covering every inch of the furniture.
- Build dark wax slowly. It’s much easier to add more than it is to remove too much. Work it into corners, crevices, trim, and textured areas where an aged finish would naturally appear darker.
- Keep metallic accents subtle. Gilding wax should highlight the details, not steal the show. A tiny bit of hardware and raised edges are usually all you need.
Most importantly, don’t try to make both sides match perfectly. Step back from your furniture every so often and look at the piece as a whole. If something feels too balanced or planned, add a little paint here, sand a little there, and keep going until it feels naturally aged.
With this technique, the imperfections aren’t mistakes—they’re what give the finish its character.
Well, I guess this makeover proved that you should never say never when it comes to paint colors. Who knew a little pink could play so nicely with all those moody layers? Certainly not me! 😂
What I love most about this Old World furniture makeover is that there are no rules. You can change the colors, add more or less texture, go heavier with the dark wax, or keep the whole finish a little softer. That’s the beauty of layered paint—you get to make it your own.
And if your first few layers look a little scary, keep going! I’ve learned that some of the best furniture makeovers go through an “Oh no, what have I done?” stage before everything finally comes together. 😉
VIDEO TUTORIAL Step-by-Step
I hope this tutorial inspires you to experiment with a layered paint finish on one of your own furniture pieces. If you do, I’d love to hear what colors you would use. Would you be brave enough to add the pink? And would you learn better if you could watch the whole process, step by step, in a video format? I GOT YOU! CLICK HERE for this video tutorial and many more!
Thanks so much for stopping by and spending a little time on DIY with me. Be sure to save this Old World furniture makeover to Pinterest so you can find the technique when you’re ready to grab your paintbrush.
The pink is still dancing around in my head. I like the look of the old-world finish. What do you think about this finish?
Thanks again for joining me, and as always, I welcome comments and your feedback. I’d love to hear from you.
Until the next project… xo, Do

Going to paint my baby grand, I want to do it in black or i could use navy blue. I think I need some help with the steps of color and supplies. Thank you
Hi Nelda! I’m so glad you’re here. I would love to help you get started! You can learn all my tips and tricks here in my video library. I teach you everything from prep to finish with the supply lists. Click here to learn more. https://bit.ly/2PC82xK
Hope to see you soon. Do
I love this technique Do. Thank you so much for sharing. Love it ??
Thank you, Lynn! It’s fun to create texture. xo
I have a huge fireplace and going to try and recreate your magic! Love this look!
That sounds amazing, Brandy! Please share pics. 🙂
This turned out beautiful! I’m wondering though, did you prime or do anything to your piece before you painted other than clean it?
Thanks, Renea! No, I just cleaned it well first. However… I do believe that most pieces need a primer/stain blocker to prevent bleed-through of possible stains and wood tannins. It really depends on the piece. The varnish was in good shape so I opted to skip that step. 🙂 Hope this helps answer your question. Do
I have an Old World antique door that is outside. It has lots of layered paint and is now chipping/fading away. Could you possibly recommend which technique to use?
Hi Brenda,
That would be a personal preference, but the no-fail chippy finish is probably the easiest to do. https://dododsondesigns.com/chippy-paint-technique/
Good luck with your project. 🙂
I am sooo in love with this look! My husband would probably have a fit over it but oh well! I was wondering…how do you think it would look if I did the buffet to look like the wall and the wall to look like the buffet? I love the incorporated pink! I’m not 100% sold on the design on the buffet. I’m thinking I’d have to go with more of a swirled look or ?? I don’t know exactly. But the mixture of the colors…oh yes I love it! I actually love the whole design with the frame and bowl, the wall, the books, etc. the whole look! Back to the pink…I think I’d go for a deeper pink. Something with just a bit more pink to it. I’m not a pink girl either but I think that would look nice. Great job as usual Do! I’ll follow you to the moon…lol!
I say go for it, Shirley. It sounds gorgeous to me. If worst comes to worst, it’s not permanent. I’m so glad you enjoyed this tutorial. The deeper pink sounds like a lovely idea. 🙂 xo