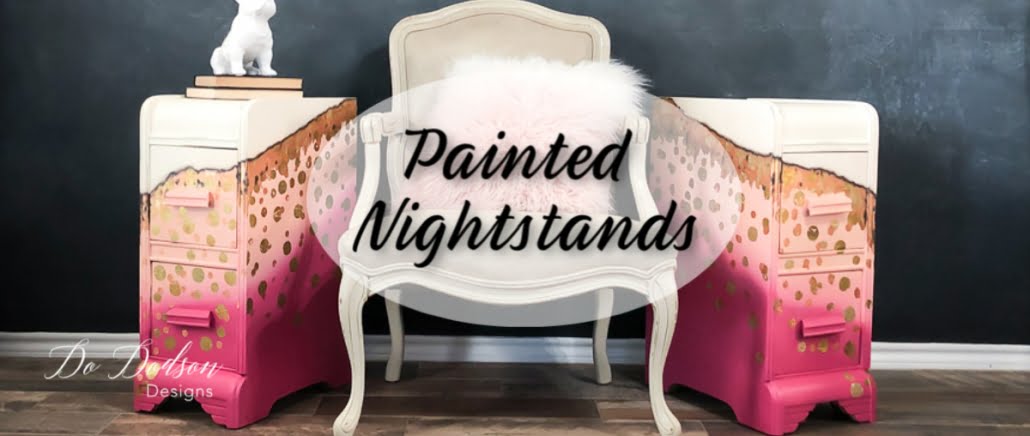

Pink painted nightstands will make any little girl happy. Even a big girl like me! My inspiration for these nightstands comes from way back when I was a little girl. A pink bedroom, an iron bed, and two ballerina paintings hung over my bed. I was more than certain that someday I would tiptoe around in a tutu. Well, that didn’t happen, but these nightstands turned out just about as good as the dream I had.
This post contains a few affiliate links to help you find the products I use. You are not charged extra to use any of the links, but any income I make will be used for more fun projects! To see my full disclaimer, click here.
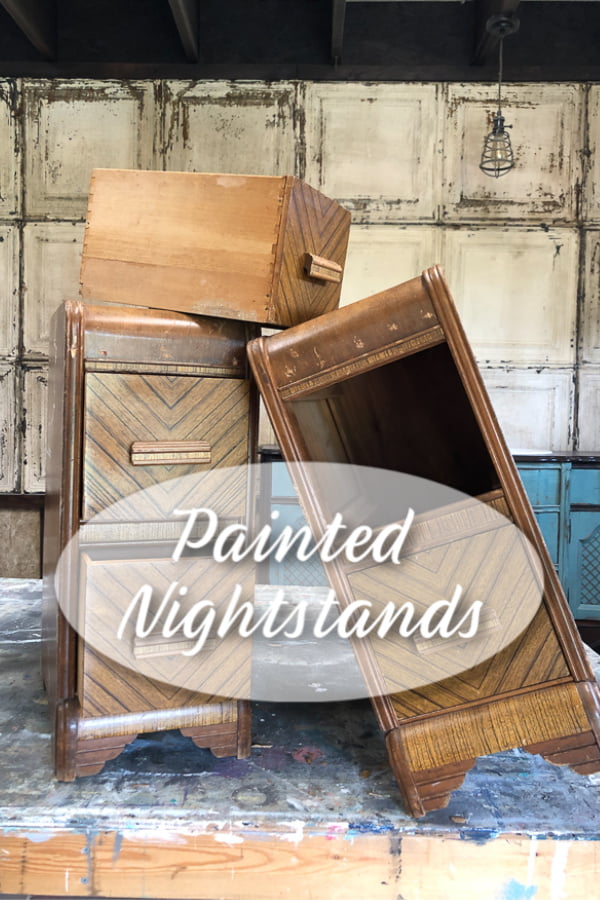
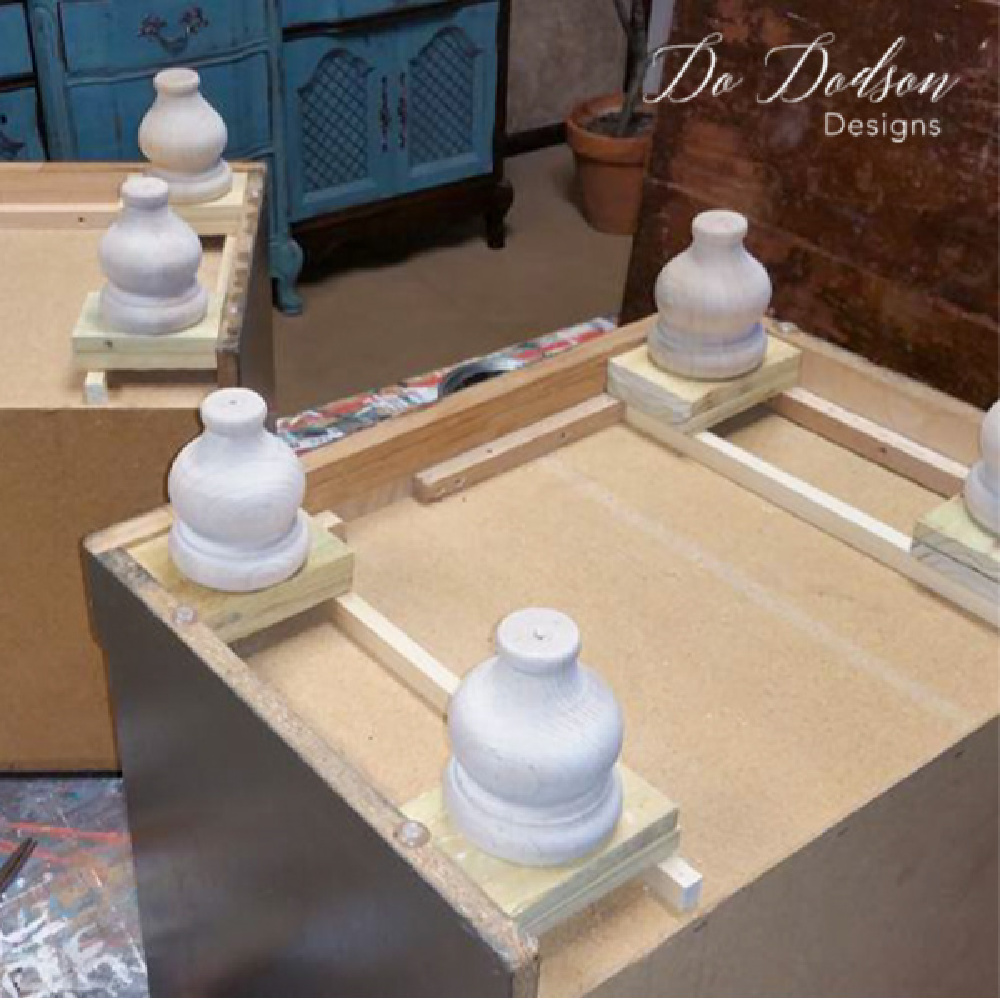
Painted Nightstands – BEFORE

PRODUCT LIST:
- Nightstands
- Mud (wood filler)
- Orbital Sander or 220 grit sandpaper
- White Lightning (wood cleaner)
- Paper Towels
- BOSS (clear) stain blocker/primer
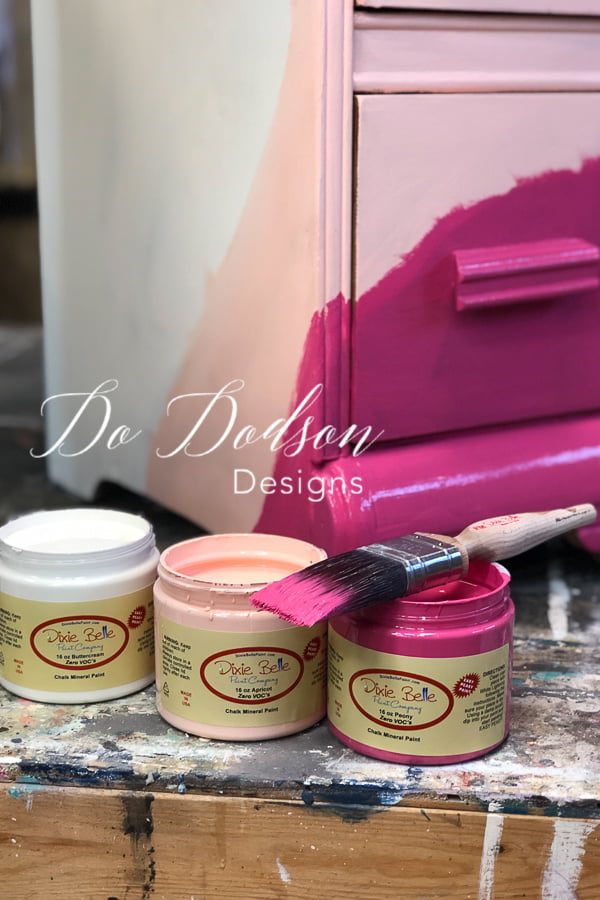
- Buttercream (chalk mineral paint)
- Apricot (chalk mineral paint)
- Peony (chalk mineral paint)
- Spray Mist Water Bottle
- Paintbrushes
- Gold Leaf
- Copper Leaf
- Metal Leaf Adhesive
- Pouncers
- Black Gilding Wax (Dixie Belle)
- Artist Paintbrush Set
- Master Clear (topcoat for metal leaf finish)
Let’s talk MUD. Before painting, you will need to repair and fill holes and gouges with wood filler if they are visible. I created a short video for you on how to repair damaged wood with wood filler. You can CLICK HERE to see how easy it is. It’s my go-to for wood fillers. Next, you will want to clean the wood before painting. Once it’s clean and dried, it’s time to paint!
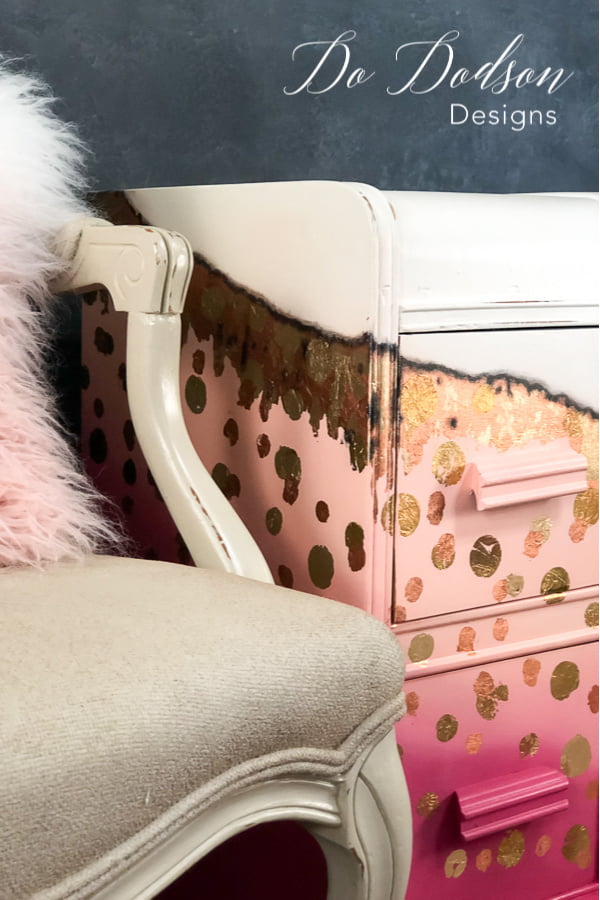
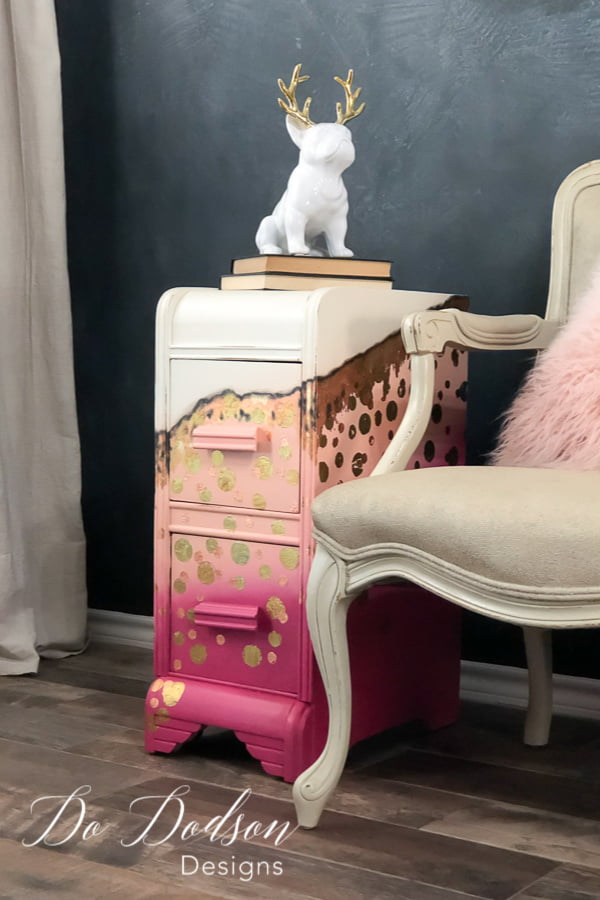
Pink Painted Nightstands
Let the fun begin! I chose three amazing colors that complemented each other when blended.
WATCH THE VIDEO TO LEARN HOW TO BLEND PAINT
Here’s a quick demonstration of how to blend paint on your furniture. Click the video below to play and watch the magic occur right before your eyes on these painted nightstands.
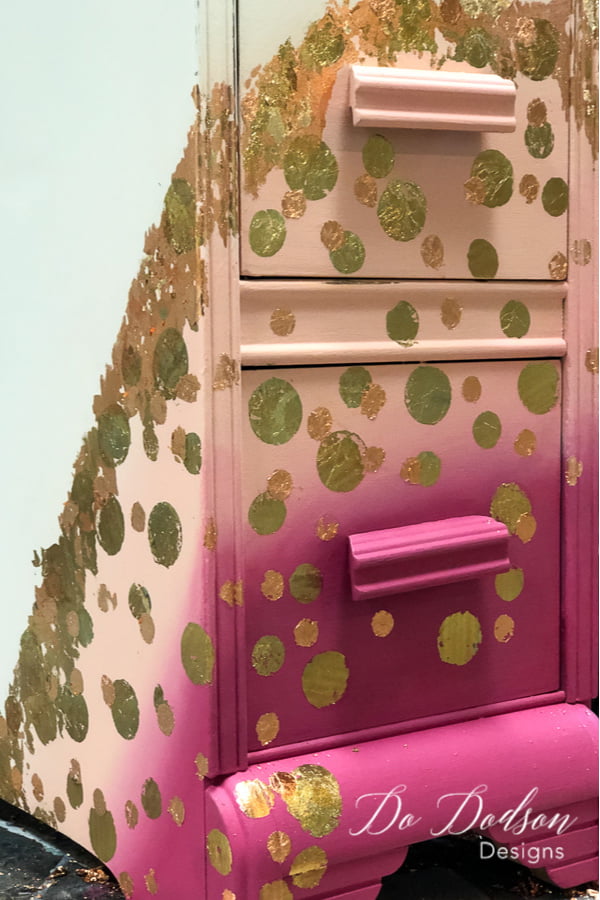
Applying Metal Leaf On The Painted Nightstands
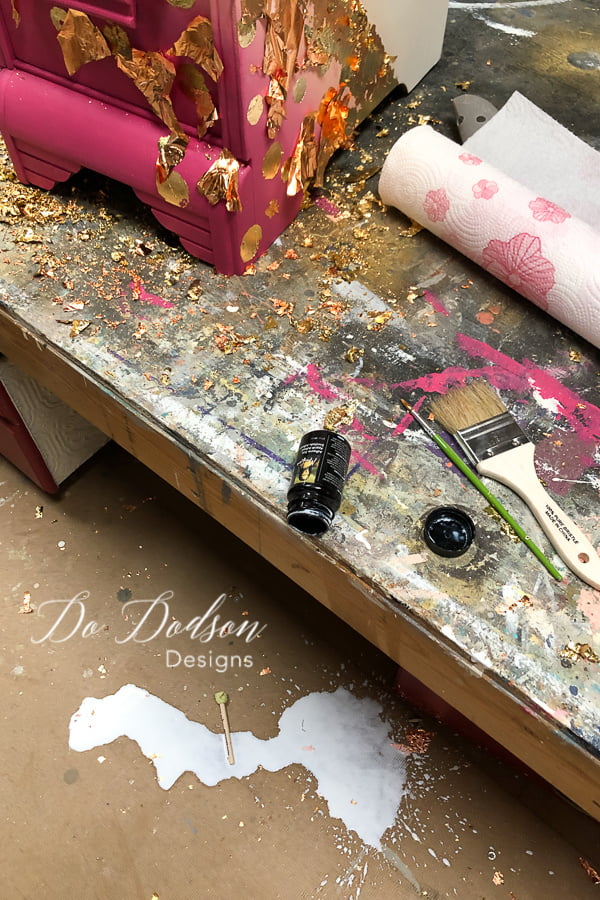
Applying the metal leaf is fun on painted furniture. I used an artist brush and a pouncer in multiple sizes to create this fun, happy polka-dotted look. But before I was done, my coffee mug had more than coffee in it. Check out what happened below.
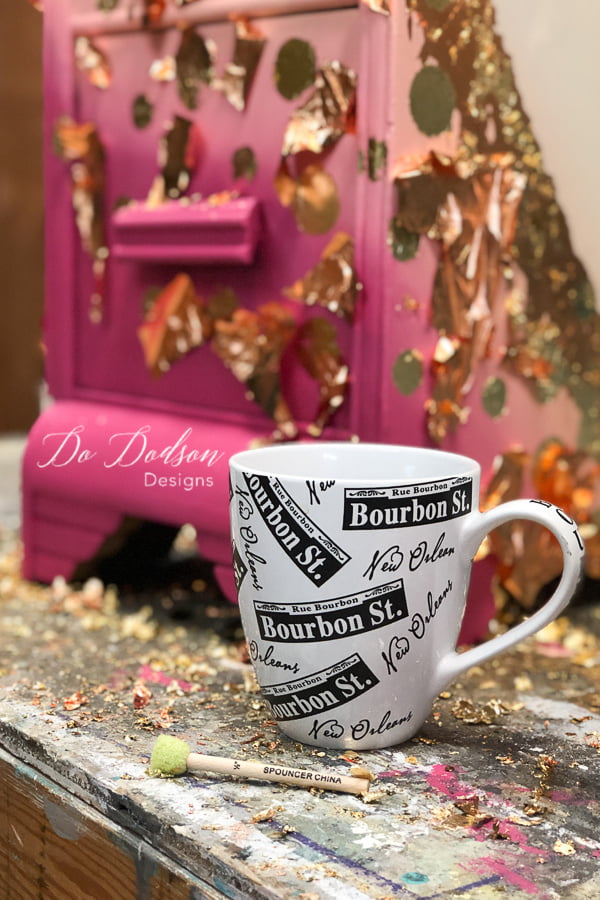
I do cry over spilled glue! The adhesive I use is especially for metal leaf, and it’s super sticky. Want to learn more about how to apply metal leaf to your furniture? Subscribe to my weekly email and get my FREE ebook below. [convertkit form=724904]
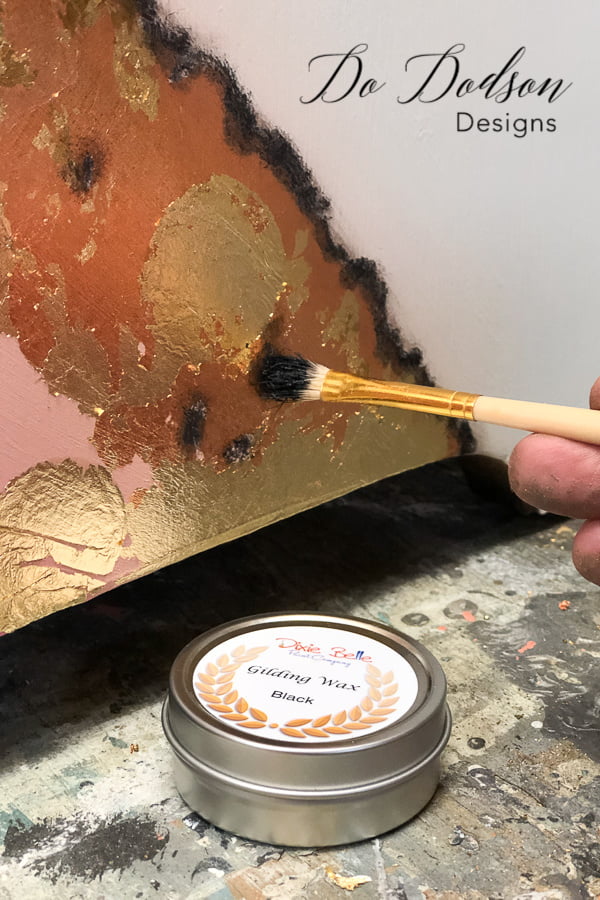
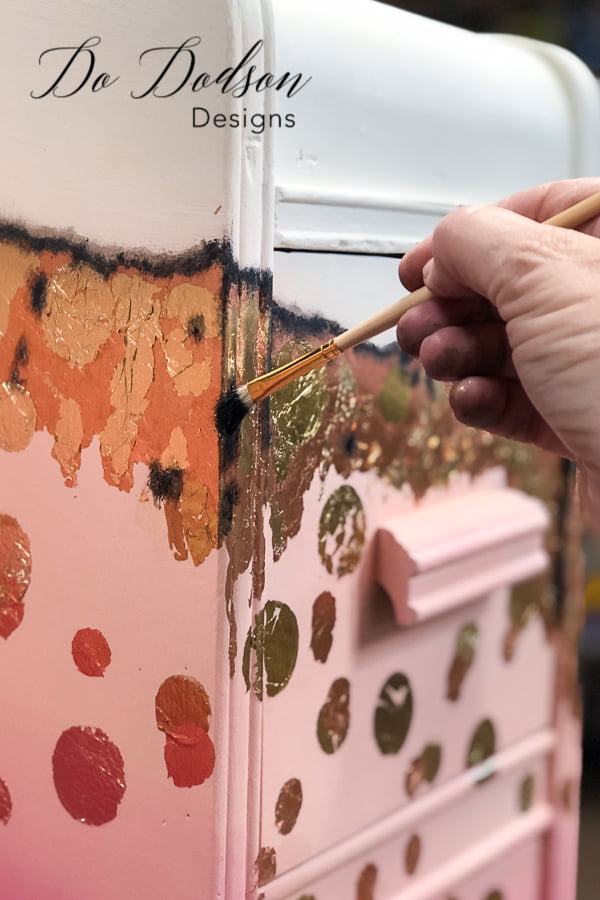
Gilding Wax /Painted Nightstands
I finished the painted nightstands by creating a defined line where the metal leaf design began with black gilding wax and an artist brush.
The End Results
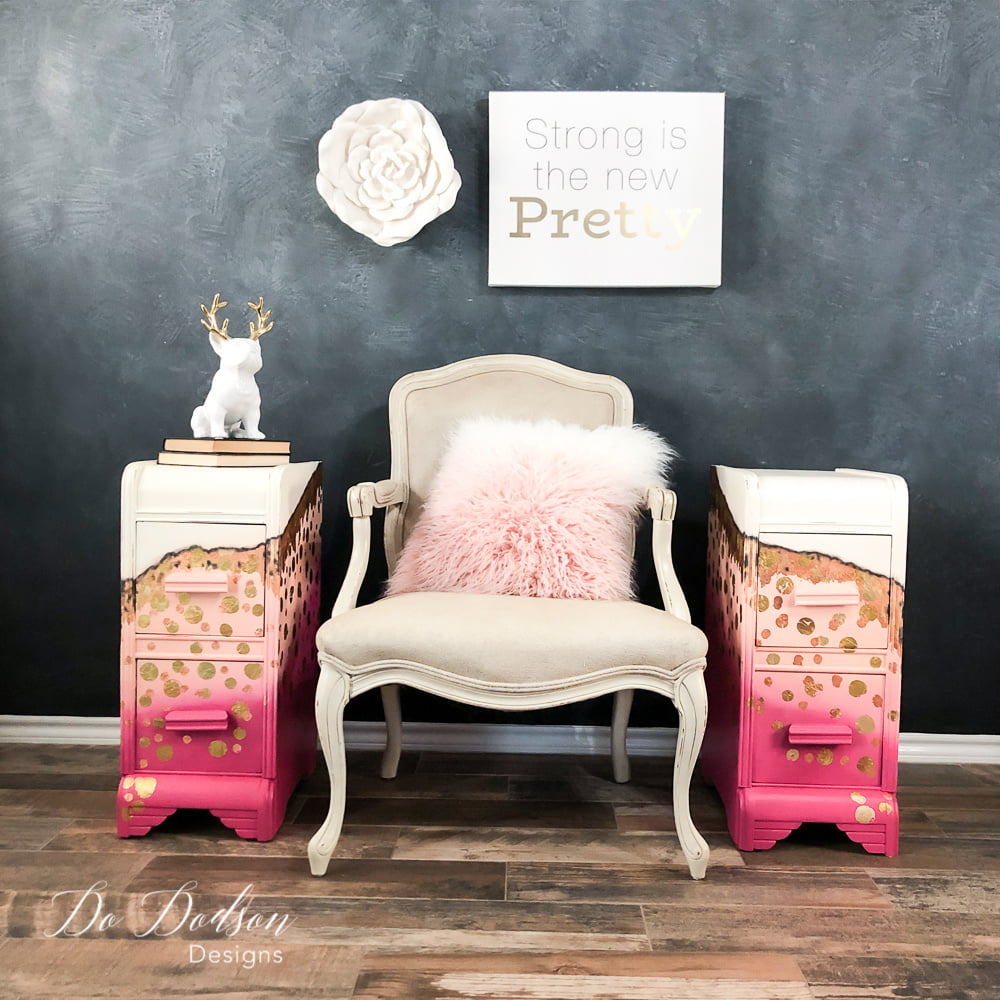
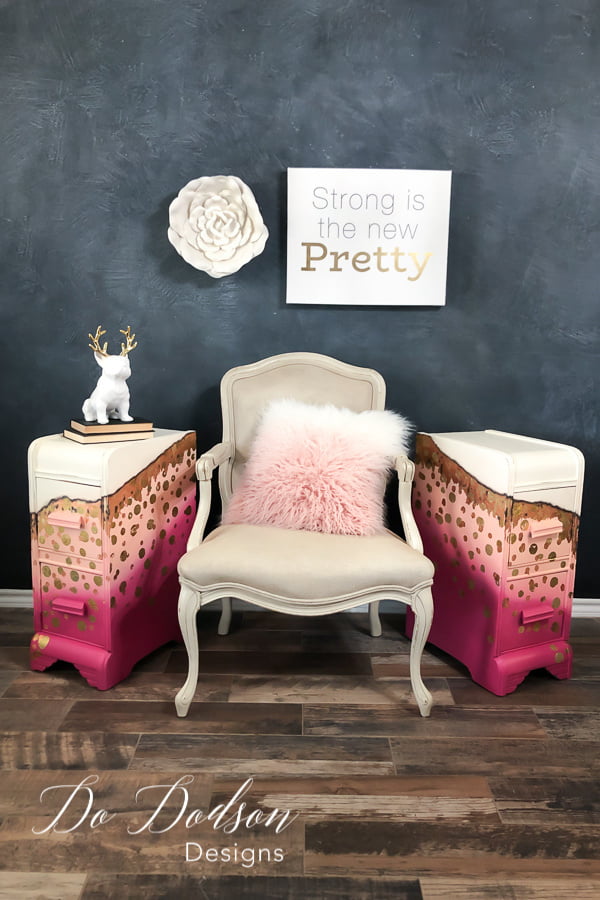
What a fun project! My only regret was that these painted nightstands weren’t in my bedroom as a little girl. It’s always fun to play around with colors and patterns. I’d love to know what you have painted pink or a bit of whimsey.
Until the next project… xo, Do
Hi Donna, I don´t know what to say! the nightstands are awesome, you are an artist. I love the ombre effect, I watched the video twice, with fully attention, and I am sure that I´ll try to do something very similar to this next time i get an old piece of furniture. Thank you for sharing such bold ideas!
Thanks, Val! Oh, please if you would be so kind as to share your work. I get inspiration from seeing others succeed. You can do it! xo
I really like what you are doing with furniture. I recently got my hands in an 80 years old tall-boy dresser that I refinished with wood dye. Any chance you have experience with dyes? It’s water based and now i am at the stage of sealing. I was wondering if there was anyone here who can help me with what sealer to use?
Many thanks
Hey there DJ! If it’s a water based product, most water-based top coats should work. My personal preference is Dixie Belle Top coats or Gator HIde. You can find the products here. CLICK HERE ? https://bit.ly/2K19PJT
Let me know how it works out. Happy painting! xo
Thank you for your reply. I read on some woodworking forums that water based top coats will reactivate the water that was used with the dye and so it can get blotchy. Some say to use shellack after the dye was absorbed, others swear the alter the colors. THe more I read about this, the more confusing it gets. sigh..nothing left but trial and error. Learning curve, here I come. 🙂
DJ,
Trial and error is sometimes the only way to know for sure. All products are different. Sorry, wish I could have helped more with this one. Please share if you find the answer. Good luck 🙂 xo
After some experimenting I concluded that, in fact, water based dyes do not take water based finishes well as they happen to reactivate the water and so the coloring changes. In order to avoid that, I ended up using clear shellack. I had to work fast as it dried very quickly. Then I applied a coat of semi-glossy water based polyurethane. The colors are all you would find in a peacock, beautiful versatile, yet natural. The grains of the many different types of wood are not hiding anymore. So this 80 year old tallboy is now an updated gentleman’s dresser with an option to become a cable-box holder and TV stand in top.
I wish I could share a photo.
THANK YOU SO MUCH FOR BEING AN INSPIRATION, DONNA!
Good to know. I use Dixie Belle products and they have waterbased stains and top coats that work well together. I guess that would depend on the brand of products that are used. I would love for you to share a photo. Email me at [email protected]
I can’t wait to see it. xo Do