
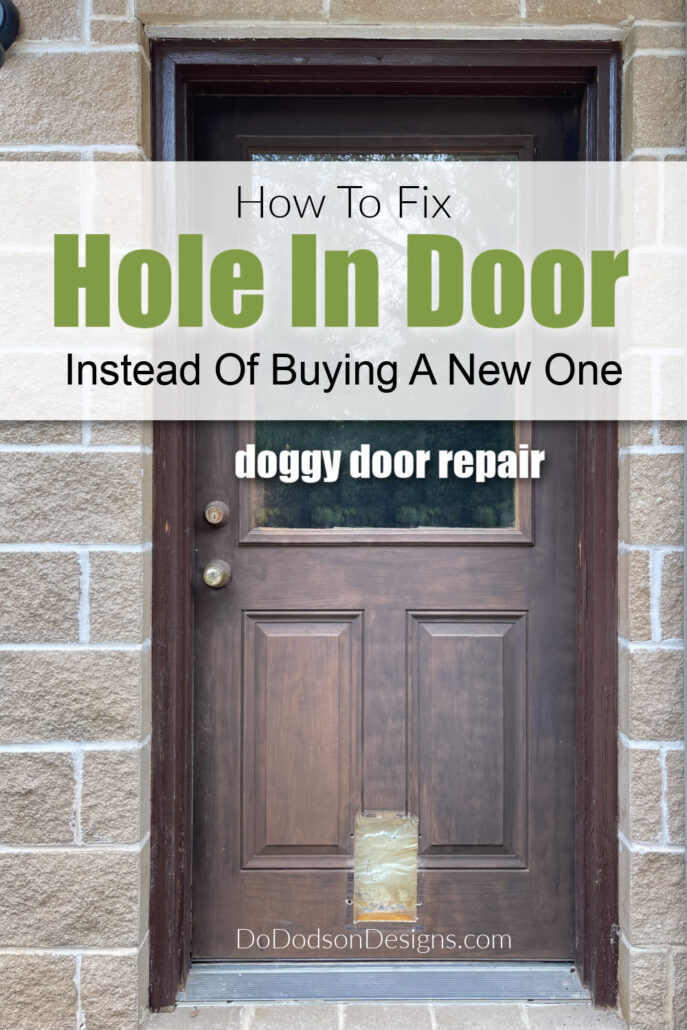
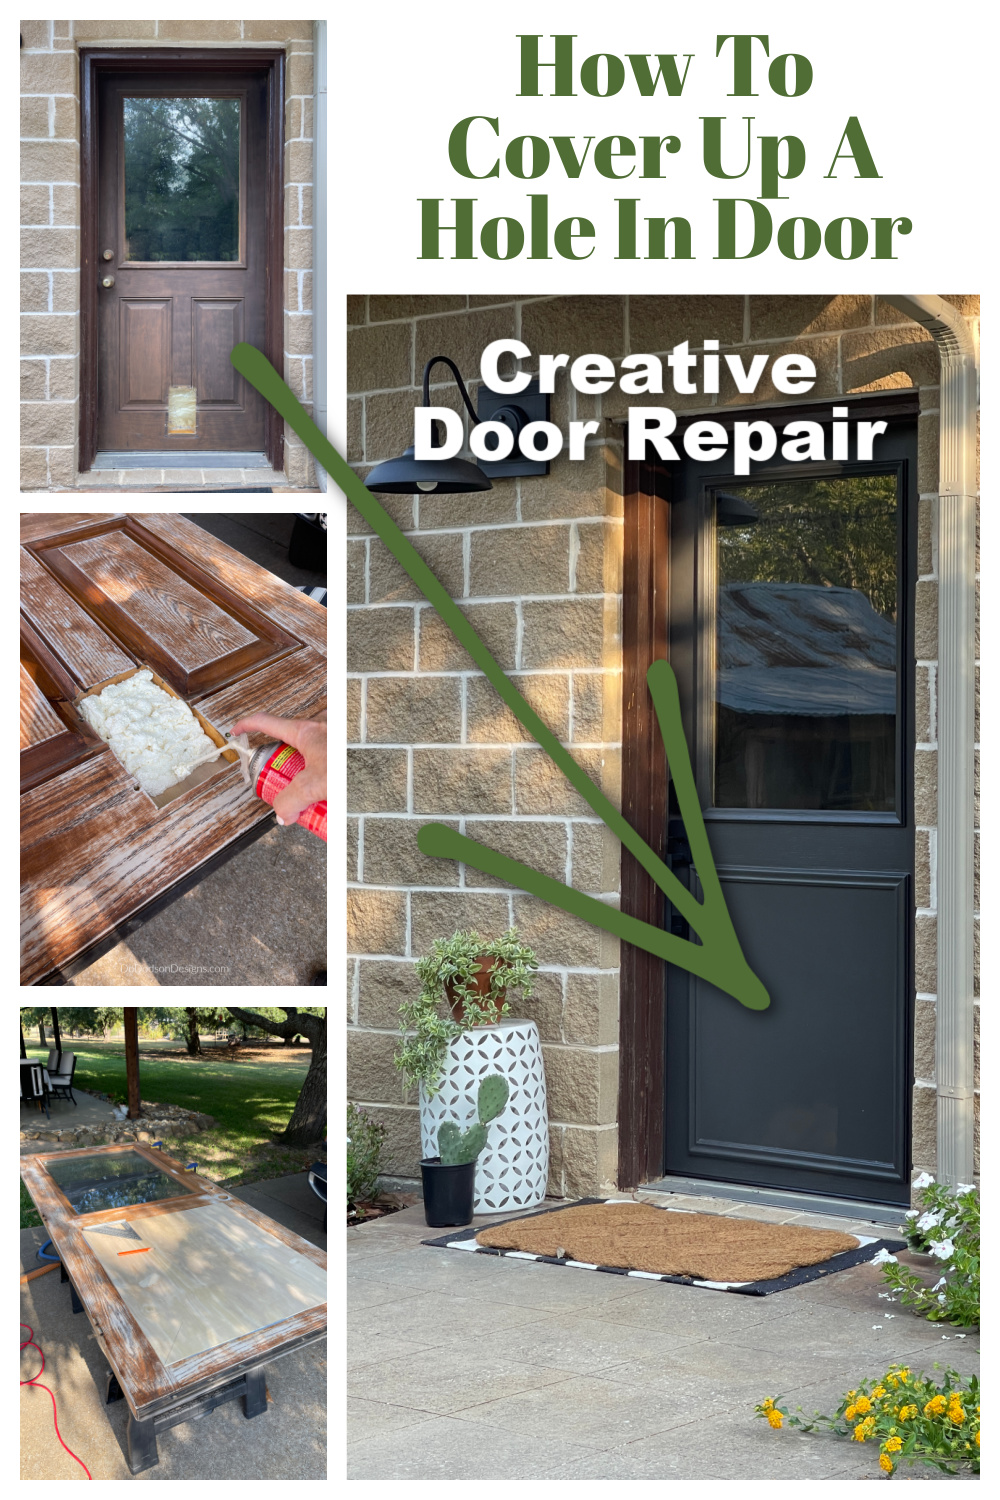
Hey, triple-D friends! Today, I’m sharing how I repaired our exterior office door that had a hole in it after removing the pet door that was no longer in use. Yes, I could have just bought a new door, but it wasn’t in the budget, so I came up with this creative idea. It’s an easy way to fill, fix, and cover up a hole in a door while updating the look instead of buying a new one.
* As an Amazon Associate, I earn from qualifying purchases and through other companies as well. You will not be charged extra when you purchase through these affiliate links, but any income I make helps me create more amazing DIY projects to share with you! To see my full disclaimer, click here!
How To Fix Hole In An Exterior Door
If you have a cat or dog door that’s no longer in use and you don’t have or want to shell out the money for a new one, I think I can help you get the results without breaking the bank. Fixing the hole in my door was easier than I thought it would be.
You may also like How to Remove a Dog Door From a Wood Door and Repair the Damage.
Table Of Contents:
SUPPLY LIST:
- hollow core door (exterior) or solid wood door
- sawhorses (flat work surface)
- insulation foam in a can (expandable foam)
- painter’s tape or cardboard
- electric sander SurfPrep Sanding System
- utility knife
- 1/4 inch plywood (paintable)
- wood trim
- construction adhesive
- hammer and nails (nail punch set)
- wood filler
- paintable caulking (weatherproof)
- foam roller
- paintbrush
- primer
- exterior paint Sherwin Williams Iron Ore
- black matte door hardware set with lock
Getting Creative | The Cover Up
First things first. I had to devise a plan to fill this gaping hole without sacrificing the style I wanted. I wasn’t particularly fond of the door but loved the glass inlay. It added so much light to my office, and I love seeing when someone comes to the door. At times, my big dogs peep in at me, too. 🙂
So, here’s my hack for repairing a pet hole in an exterior door.
STEP 1: Preparing The Surface Of The door
Remove the door hinges and pins; Lay your door on a late work surface. If you have sawhorses, they will make your DIY life so much easier. I use mine all the time.
Cleaning the door well with a damp rag. I used mild soap and water to remove dirt and grime from exposure to the outdoor elements.
Next, I first sanded the hole door (both sides) with 120-grit sandpaper and finished with 220-grit sandpaper using my SurfPrep Electric Sander.
You can always opt to use a sanding block or hand sand if you don’t have an electric sander, but you’ll feel it the next day. Ask me how I know.
After sanding, blow off or wipe away any remaining dust from sanding.
My plans were to paint the door a solid color to match my new wood shutters, so I went ahead and did the prep work to prepare the surface for paint before fixing the hole in the door.

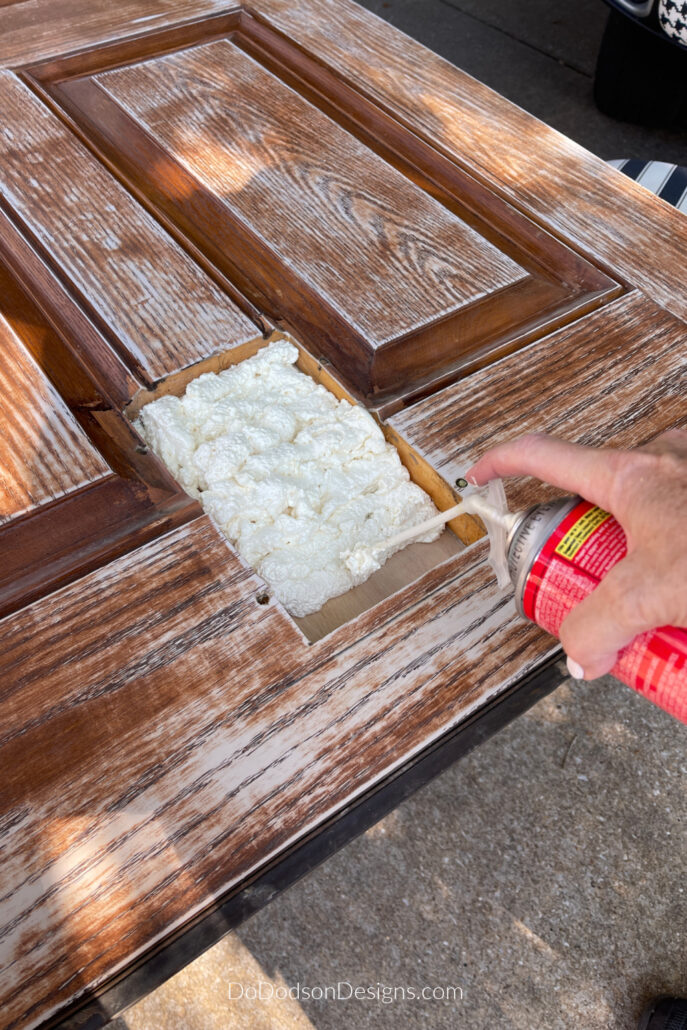
STEP 2: Filling The Hole
Before we get into the repairs, let me say that this repair method works best with exterior hollow-core doors and solid wood doors. And because my door has a window in it, it made it even easier to conceal and patch the hole.
First, add something over the back of the hole on one side of the door. I used painter’s tape, but you can use whatever you have as long as you make a temporary backing. A piece of cardboard will work, too. Just secure it over the hole with tape. This will make it so much easier to hold the spray foam insulation in place without it falling out of the backside of the hole and all over the place.
Hold the foam can at a slight angle and begin to fill the hole with the foam. The foam will expand above the hole, and that’s okay. Allow it to dry. If you add a little too much foam, no worries. You can shave back.
You can find the expandable foam at your local hardware store.
* I read another post about using auto-body filler to fill in the hole made from a pet door but decided this would be the easiest for my particular door style, and I wasn’t sad about covering up the dated style.
STEP 3: How To Remove The Excess Foam
Next, use a sharp utility knife with a sharp blade to trim away any excess foam overfilling the hole. This doesn’t have to be perfect. Just as long as the patched area is level with the face of the door.
If you find that you missed a spot or you find a void in the foam, add a bit more and repeat the process. Again, it doesn’t have to be perfect. It just needs to fill the hole.
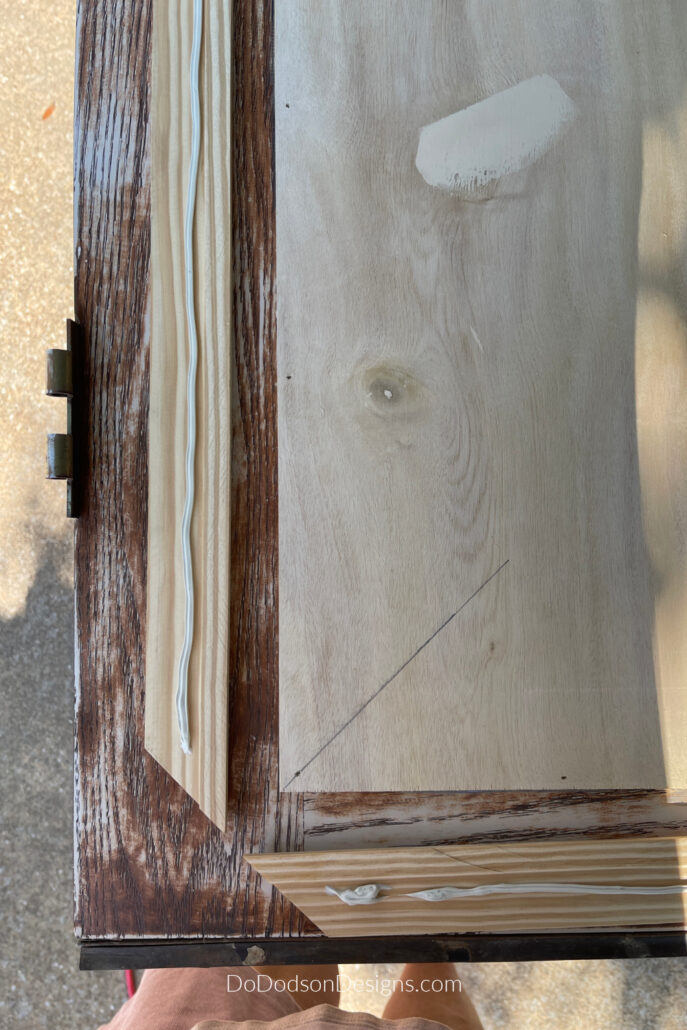
STEP 4: How To Create A Frame Out Of Wood
Next, I measured and cut two pieces of 1/4-inch plywood to cover all the recessed panels and the dog door hole on the door.
Since one side of the door will be exposed to the weather, I secured it using construction adhesive (outdoor use) and used a pneumatic nail gun and brad nails to hold it in place while it dried.
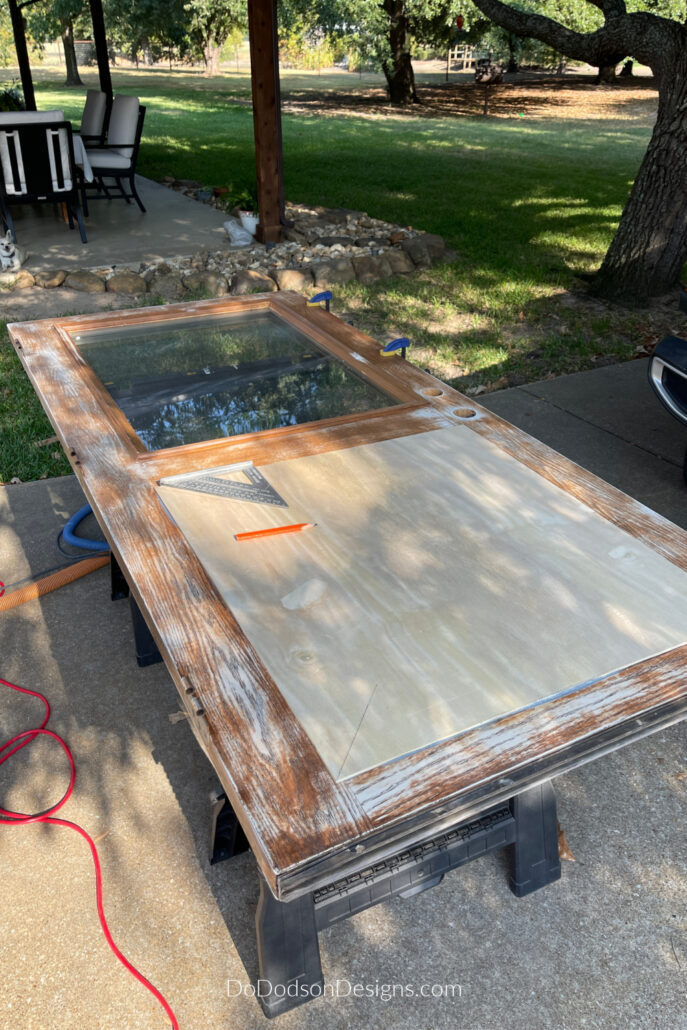
An old-fashioned hammer and nails will work, too. Before painting, you’ll need to recess the nails in the wood with a nail punch and fill the holes with wood filler for a smooth finish.
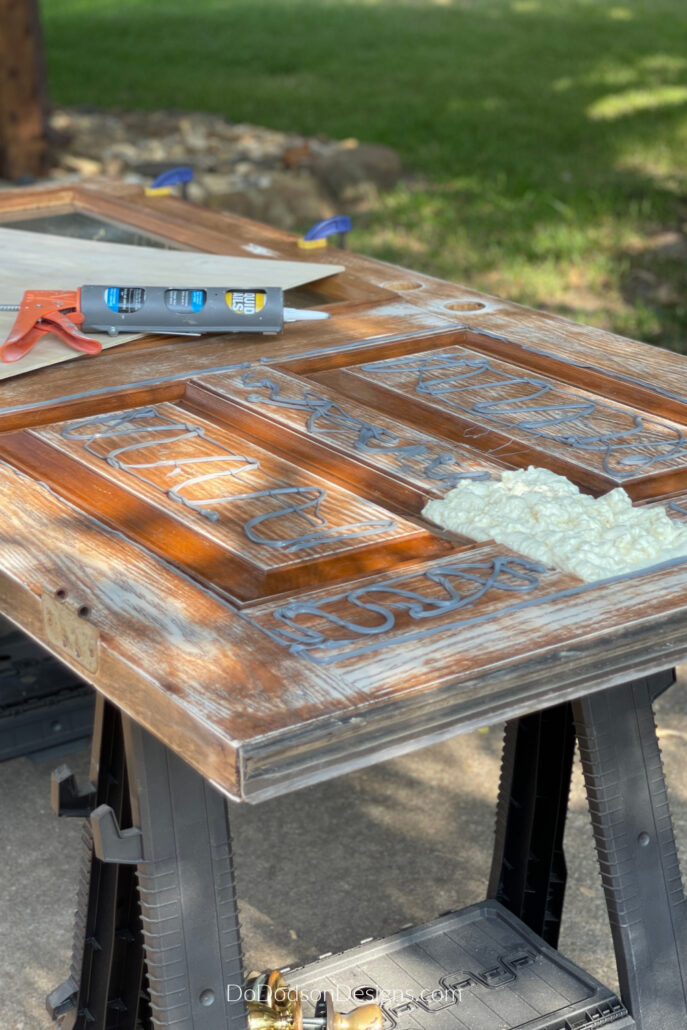
STEP 5: Adding Trim To Make The Frame
By adding wood trim (similar to what was around the window) around the plywood, I was able to transition the plywood to the door to create a similar look that matched the door’s window almost perfectly.
Well, perfect from a distance. But you can’t get much better than that with an old door, and I was super happy with the new look. It gave it a modern vibe, which was a definite improvement and the look I was going for.
After framing around the plywood, I smoothed any rough edges with an electric sander and 220-grit sandpaper.
Wood filler and a putty knife were used to fill in the unsightly holes made from nailing.
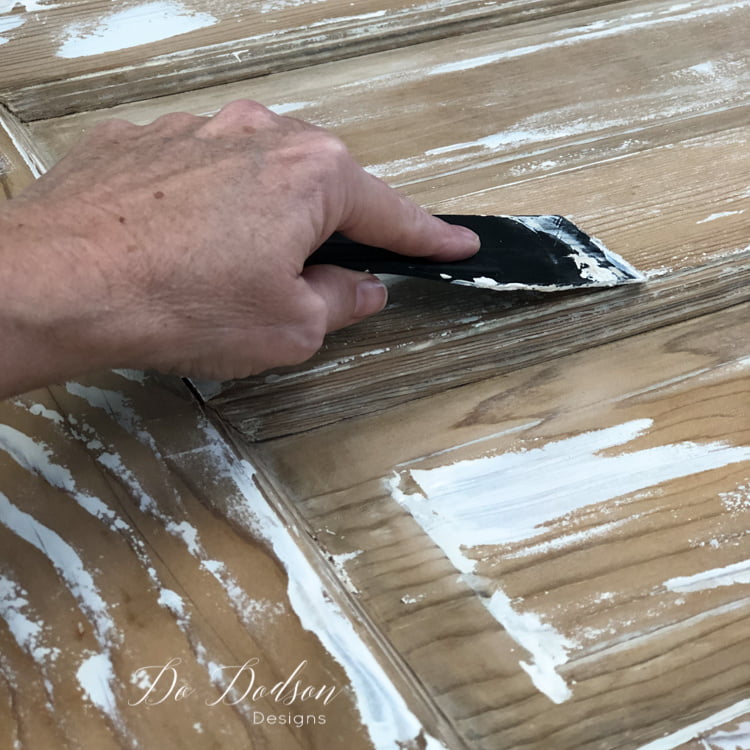
Paintable caulking was used around the newly added trim to fill in the seams.
STEP 6: Painting The Door
Once I fixed the hole in the door, I allowed the door to dry for 48 hours to ensure the wood panels were secure and wouldn’t move or break away from the adhesive.
Grab a drop cloth to protect the area where you’re painting. Plastic sheeting works well too.
Priming the wood door before painting was the first step. This step is necessary to prevent stains or wood tannins from bleeding through the paint, and because I wasn’t sure what was used on the door previously, I was taking no chances. Two coats of primer were applied with a smooth foam 1/4 inch roller, allowing ample time to dry between coats per the manufacturer’s instructions.
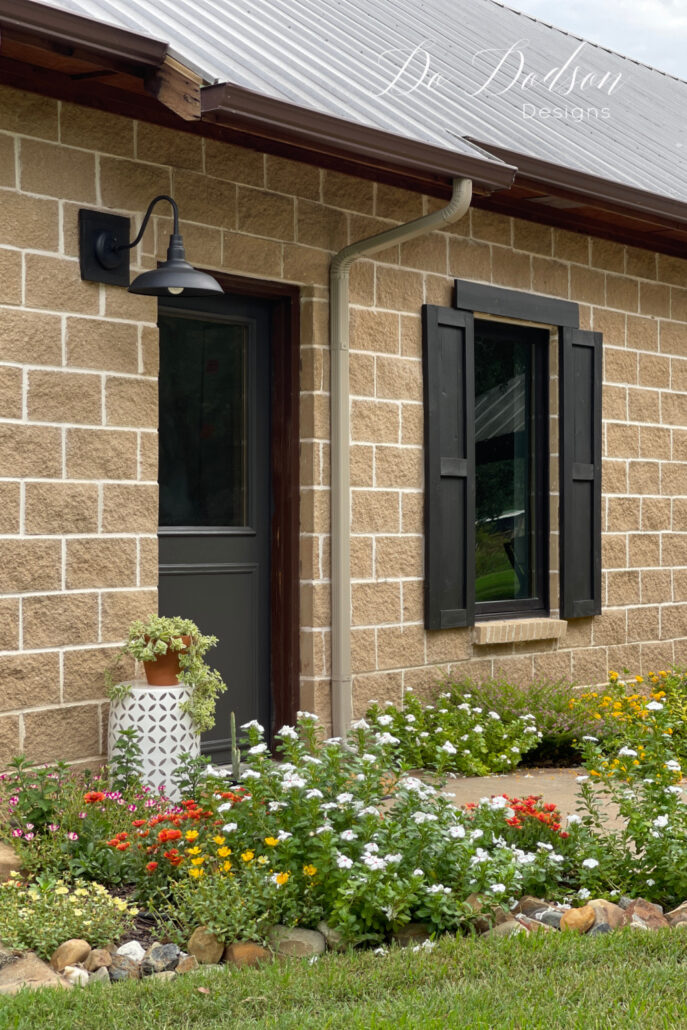
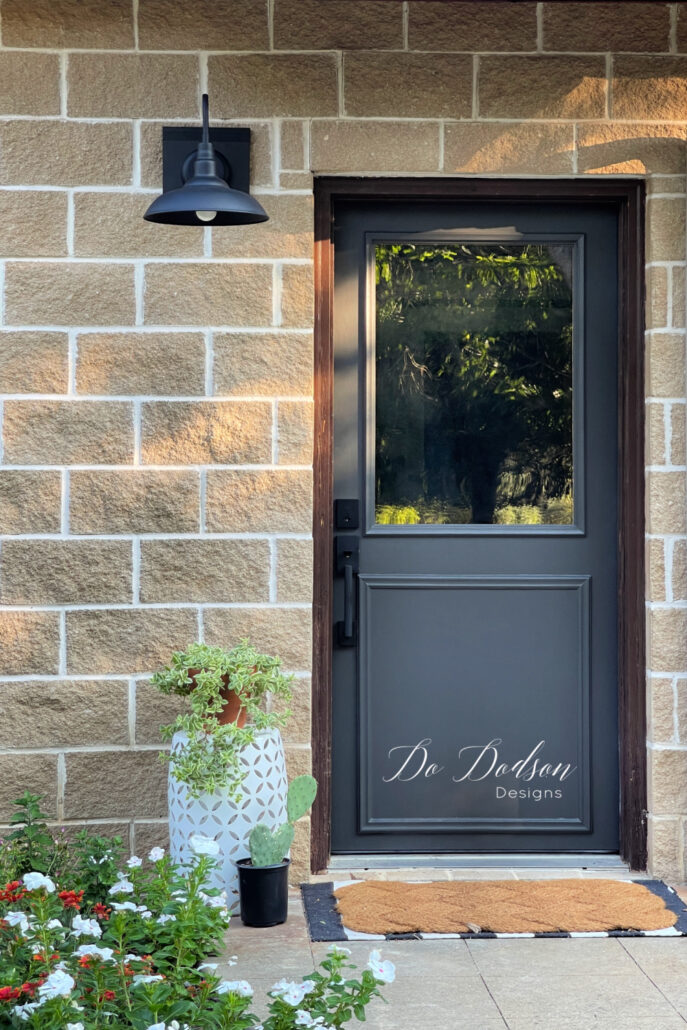
Two coats of paint were applied with a smooth foam roller, and a good quality paint brush was used to trim in the areas I couldn’t reach with the roller. The color I used was Sherwin Williams exterior paint, Iron Ore. It’s a dark gray but appears almost black in certain lighting.
It gives a beautiful, smooth finish and compliments the black hardware I chose.
My Repaired Office Door
Hello, hubby! I’m ready for you to hang my new door. 🙂
Fixing that hole in the door was the best idea I’ve had in a long time. It saved me so much money. The total cost to fix the hole was about $80! To buy a new door… $500! That’s a HUGE win in my book.
Hmmm, I wonder what I could buy with the money I saved? 🙂
Hey, thanks for joining me today. I hope you enjoyed my DIY home improvement project. You never know when you might have to repair a hole in a door.
Don’t forget to PIN this idea on your favorite home improvement Pinterest board, and let me know what you think in the comments below. Would you have tackled this one?
Until the next project… xo, Do

It is great when folks acknowledge their accomplishments, it creates an opening for others to explore new things.
It WAS very well done and pooh on budget:) You were resourceful and upcycled a very usuable door.
Thank you for the tutorial.
Thanks Janet! I appreciate your kind words. Thanks for reading and have a great weekend. 🙂
WOW!! I had my doubts because I thought you were going to do something with the foam and leave it.. lolo But it looks fantastic!!
Love it!!
Hi Cathy,
I had my doubts while I was doing it too. I’m so happy it looks a well as it does. At some point, maybe in a few years I’ll purchase a new door. Thanks for reading and have a great week. 🙂 xo
Hi Do: You did a superb job! Kudos on that AND on saving so much money. You are a rock star!
Thank you, Caye! Just wanted to share incase someone else comes across this issue. It’s all about salvaging what you have and saving money. Have a great week. 🙂
Your door looks great! Love the way it looks.
Thank you, Mae! I’m pleased with the results for now. Someday I’ll get that new door. Have a great week. 🙂 xo
This looks amazing! Great tutorial my friend! 🤗🤗💙💙💙
Thanks, my friend! Desperate times calls for desperate DIYing. LOL, have a great week. 🙂 xo
Well done, YOU. The door looks great.
Thanks, Joanne! Never underestimate the power of DIY. 🙂
What did you do about the opening while the door was off the hinges for a couple of days?
Great question, Brandy! First, I checked my weather app before I started this project. After removing the door, I used a tarp and taped it off the opening from the outside. Then I draped an old blanket inside to add another layer of protection from the cool air. I hope this helps.