This door! I spent more time stripping the layers of paint away than I did applying a chippy paint technique. That was the easy part! I used 4 products that rendered a beautiful finish on this antique door for years to come, and I know that my client will be thrilled that I preserved her Grandmother’s door and now has a beautiful piece of her memory. And I have a little bonus rusty finish for you, too, with this DIY project. Let’s get started.
This post contains a few affiliate links to help you find the products I use. You are not charged extra to use any links, but I will use any income for more fun projects! To see my full disclaimer, click here.
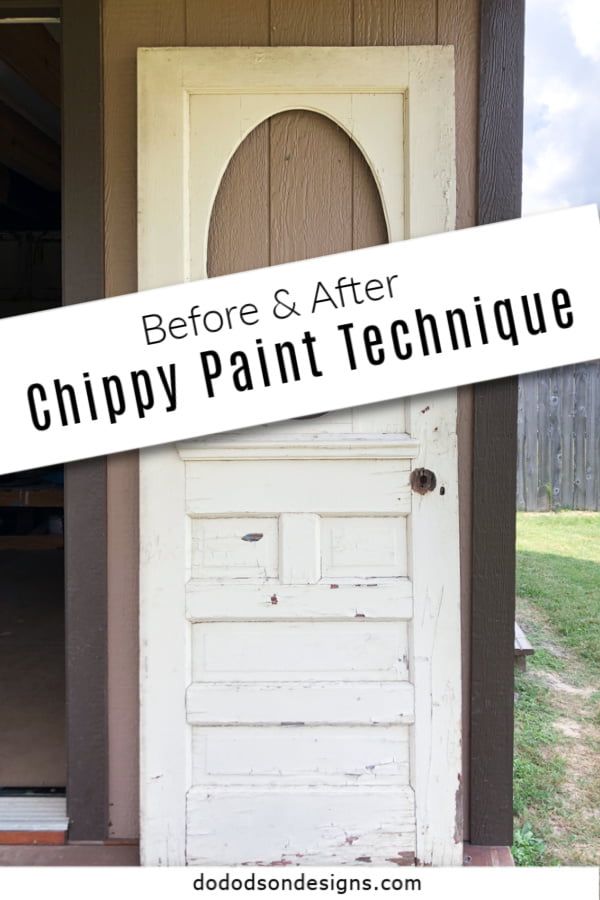
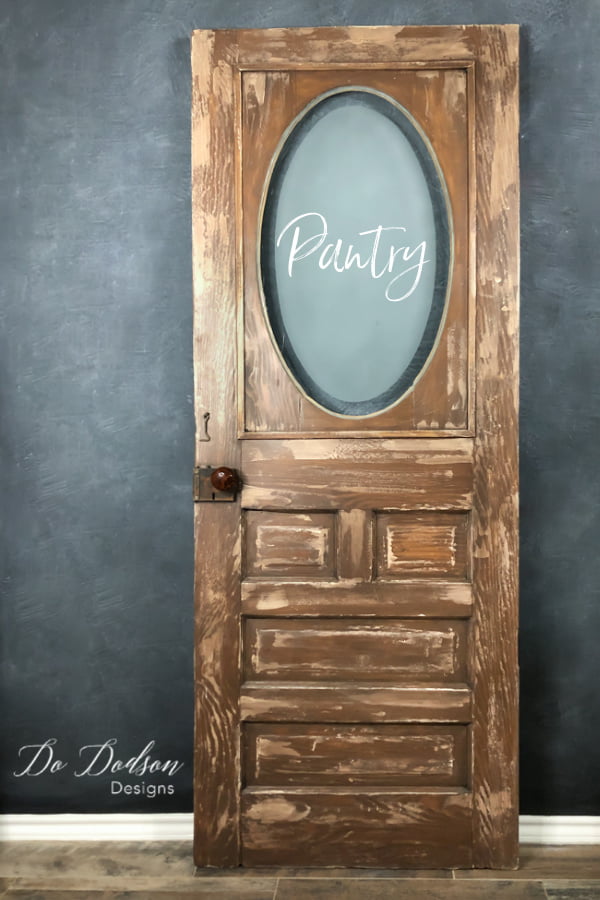
Easy Chippy Paint Technique – Before & After

SUPPLY LIST:
- Vintage door / raw wood surface
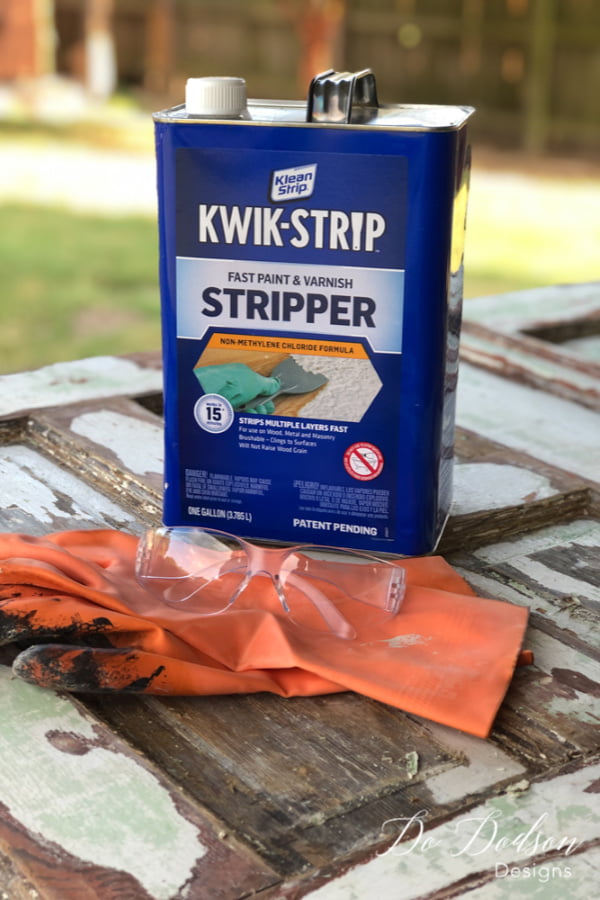
- paint stripper
- Heavy-duty gloves
- Protective eyewear
- SurPrep Sander
- Butter Cream (chalk mineral paint)
- Paint Scrapper
- VooDoo Gel Stain (Tobacco Road)
- applicator pad (for stain)
- Angle Paint Brush
- French Tip Brush (for wax application)
- Gator Hide
For the hardware makeover…
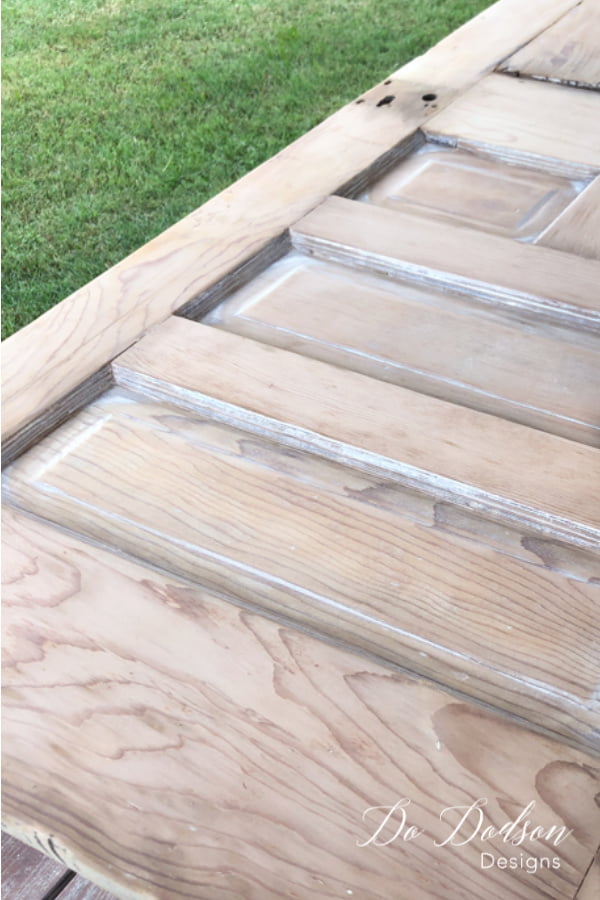
Preparing The Door For A Chippy Paint Finish
This old door had layers of paint, and for these big jobs, I use a chemical stripper. Trust me when I say… protect yourself. Always work in a well-ventilated area with protective equipment because you only get one set of lungs.
You want to make sure your wood surface is clean for the best results because the wood grain makes a difference in this chippy paint technique.
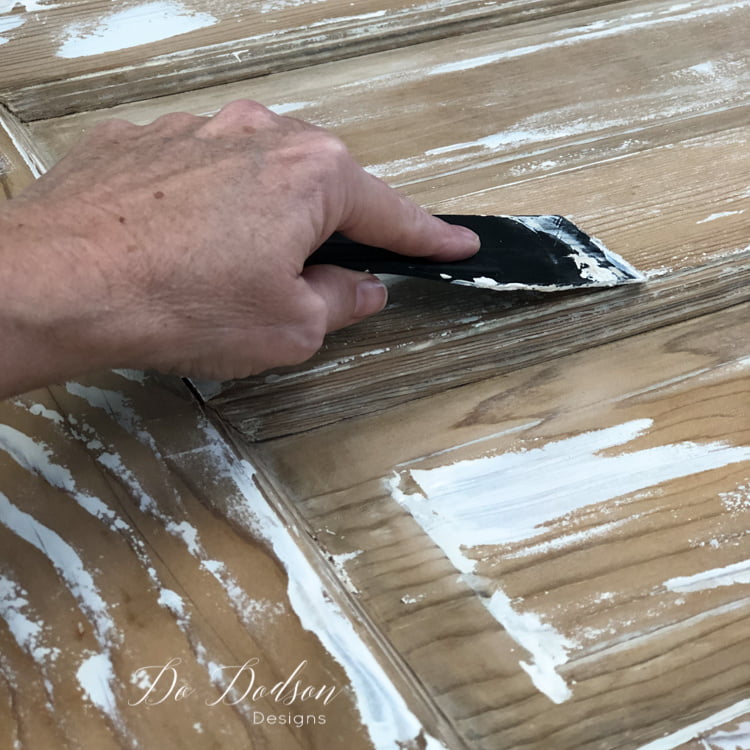
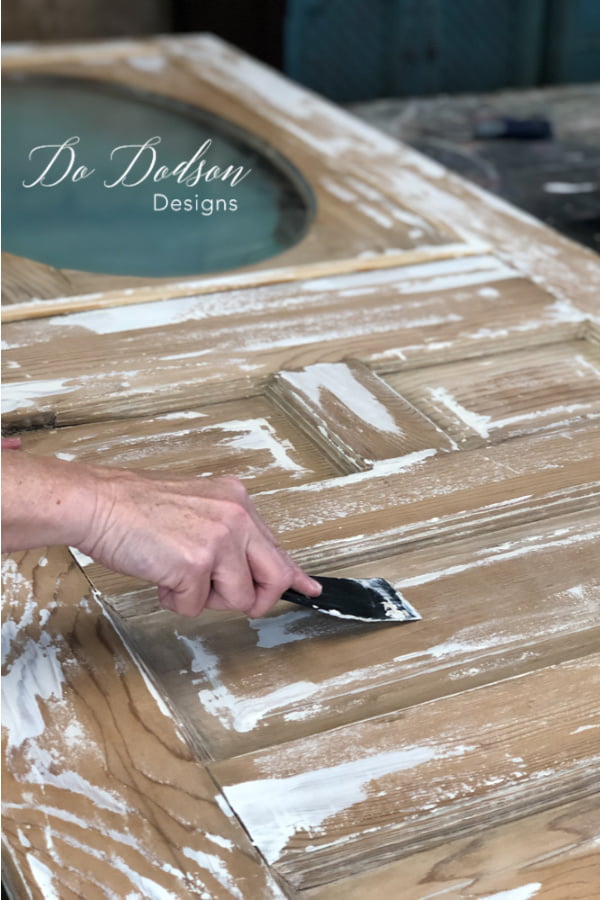
Step #1 The Chippy Paint Technique
Dip a plastic flat-edged scraper into whatever color chalk mineral paint you chose and drag it across the wood in the direction of the wood grain. If the wood has heavy grain, it will highlight the grains in the wood for an authentic aged look. If not, it’s still a cool look. Don’t be afraid to play around with it because old chippy paint isn’t perfect. That’s what I love about this chippy paint technique!
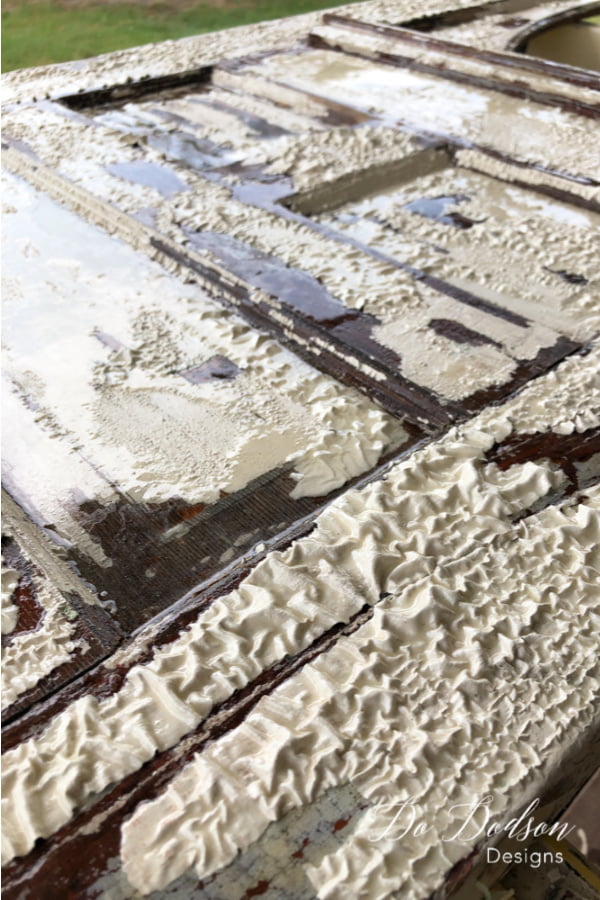
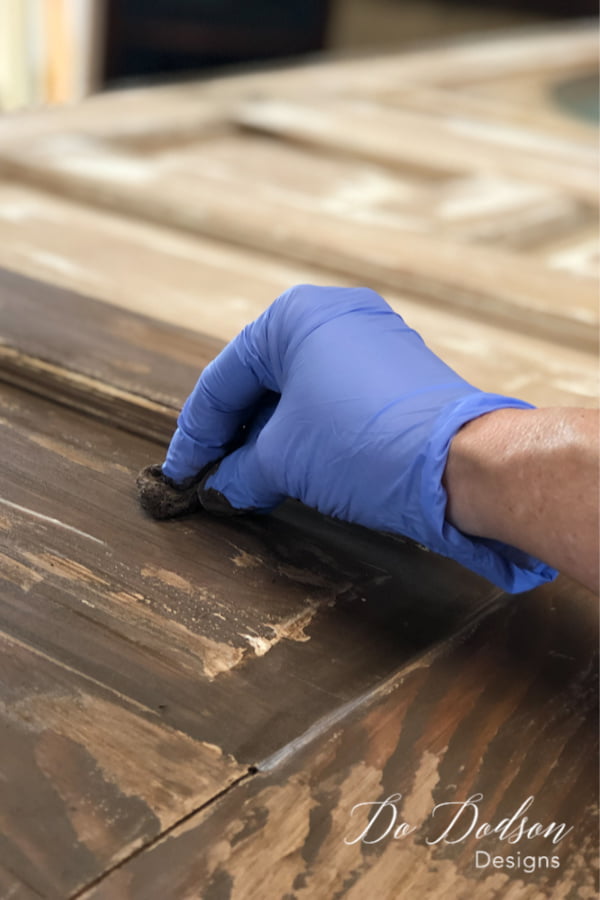
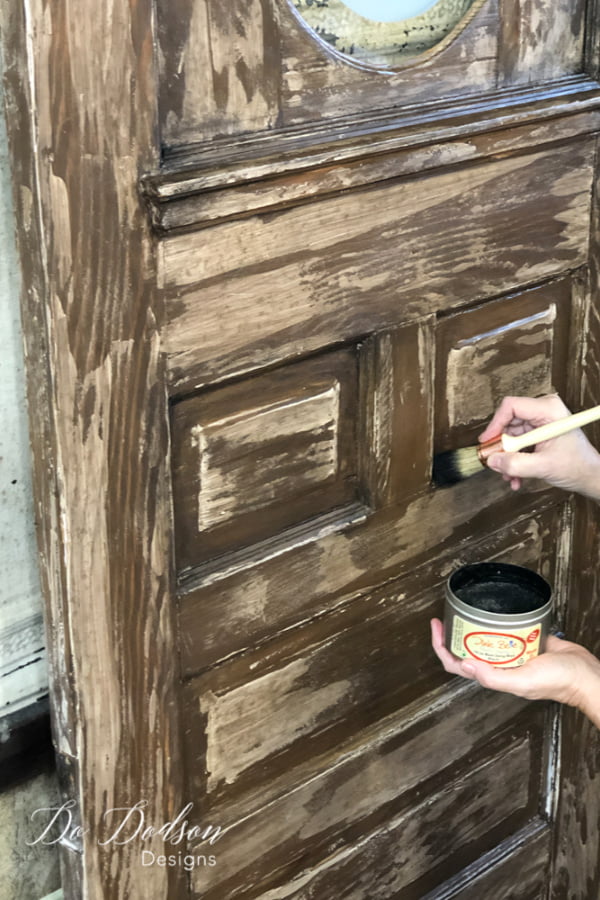
Step #2 Applying The Stain Over The Paint
After the paint has dried, apply a water-based stain over the entire painted surface. For this project, I used the Tobacco Road Gel Stain and applied it with a soft cloth. Allow the gel stain to dry before this next step completely. The chippy paint technique is looking great!
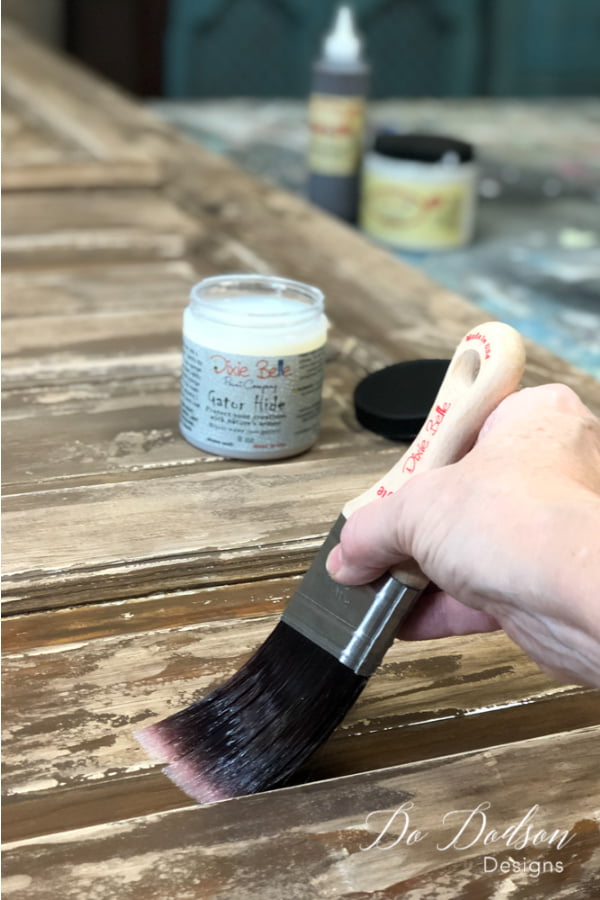
Step #3 Sealing Your Chippy Paint Finish
Next, you will want to seal your chippy paint finish with a durable topcoat. Because this door will be used as a pantry door in a kitchen, I used a waterproof topcoat called Gator hide. Apply 2 coats of the topcoat for the best protection of your chippy paint finish for years of protection.
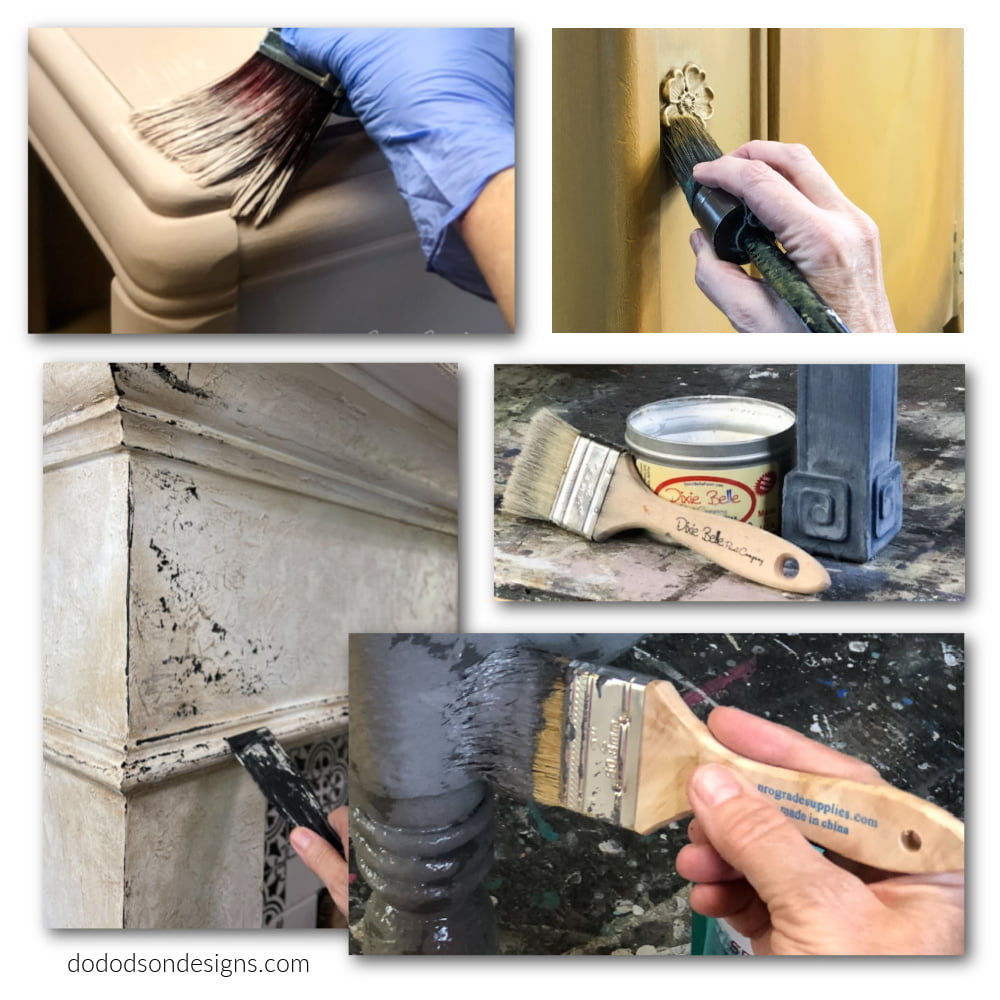
Step #4 Optional
You can always go back and apply dark wax in your project’s corners and inset areas to add depth and even more aged goodness. I used Black wax and applied it with a french tip brush to get into the corners and blended it well over the chippy paint technique. The wax will dry hard in a few days. I recommend adding a coat of Gator Hide to your finish, but it isn’t necessary. It’s mainly to create a consistent finish.
Additional Touches – Chippy Painted Door
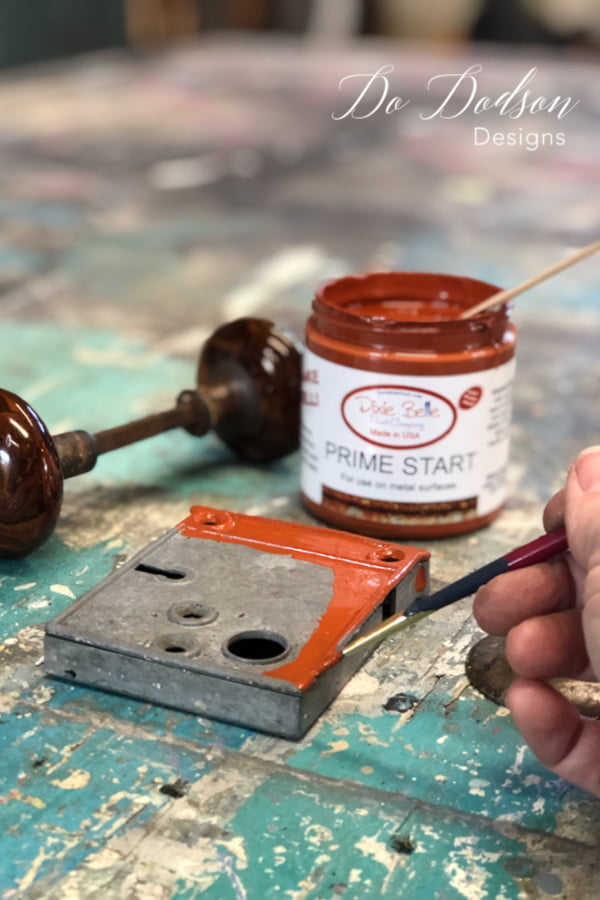
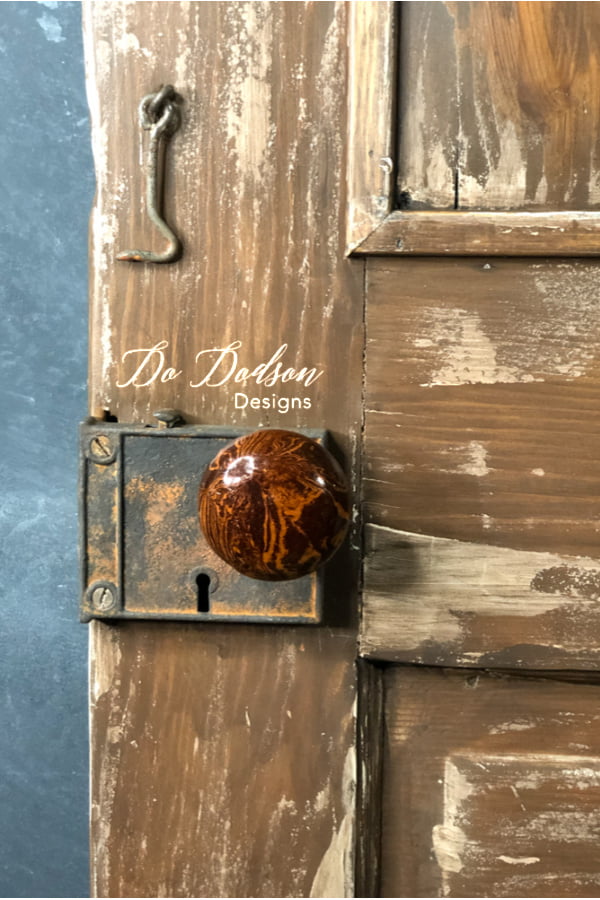
Apply one coat of Prime Start over any clean metal hardware and allow it to dry. I couldn’t leave out the vintage hardware! It needed an aged look too. Be sure that you don’t skip this step. Before painting the metal hardware, remove old paint with a vinegar solution. CLICK HERE to learn how to remove paint easily from vintage hardware.
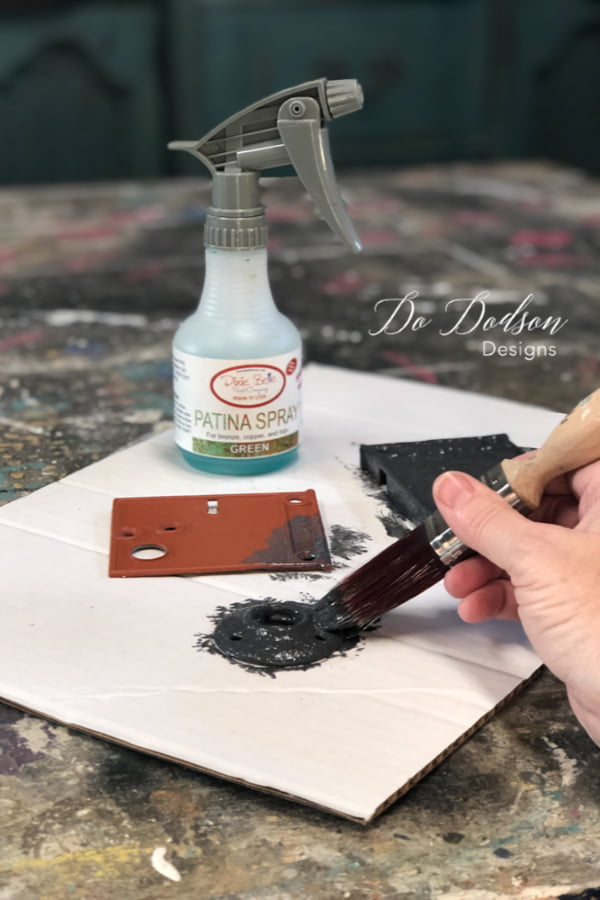
Next, paint over the metal hardware with two coats of Iron Patina paint. While the paint is still wet, spray over the Iron Paint with Green Patina Spray. This will give you a cool rusty finish that will complement the chippy paint technique on your project. This finish works well on furniture too. Lastly, add a coat of Gator Hide over your hardware to seal and protect your rusty crusty finish.
The Chippy Paint Technique
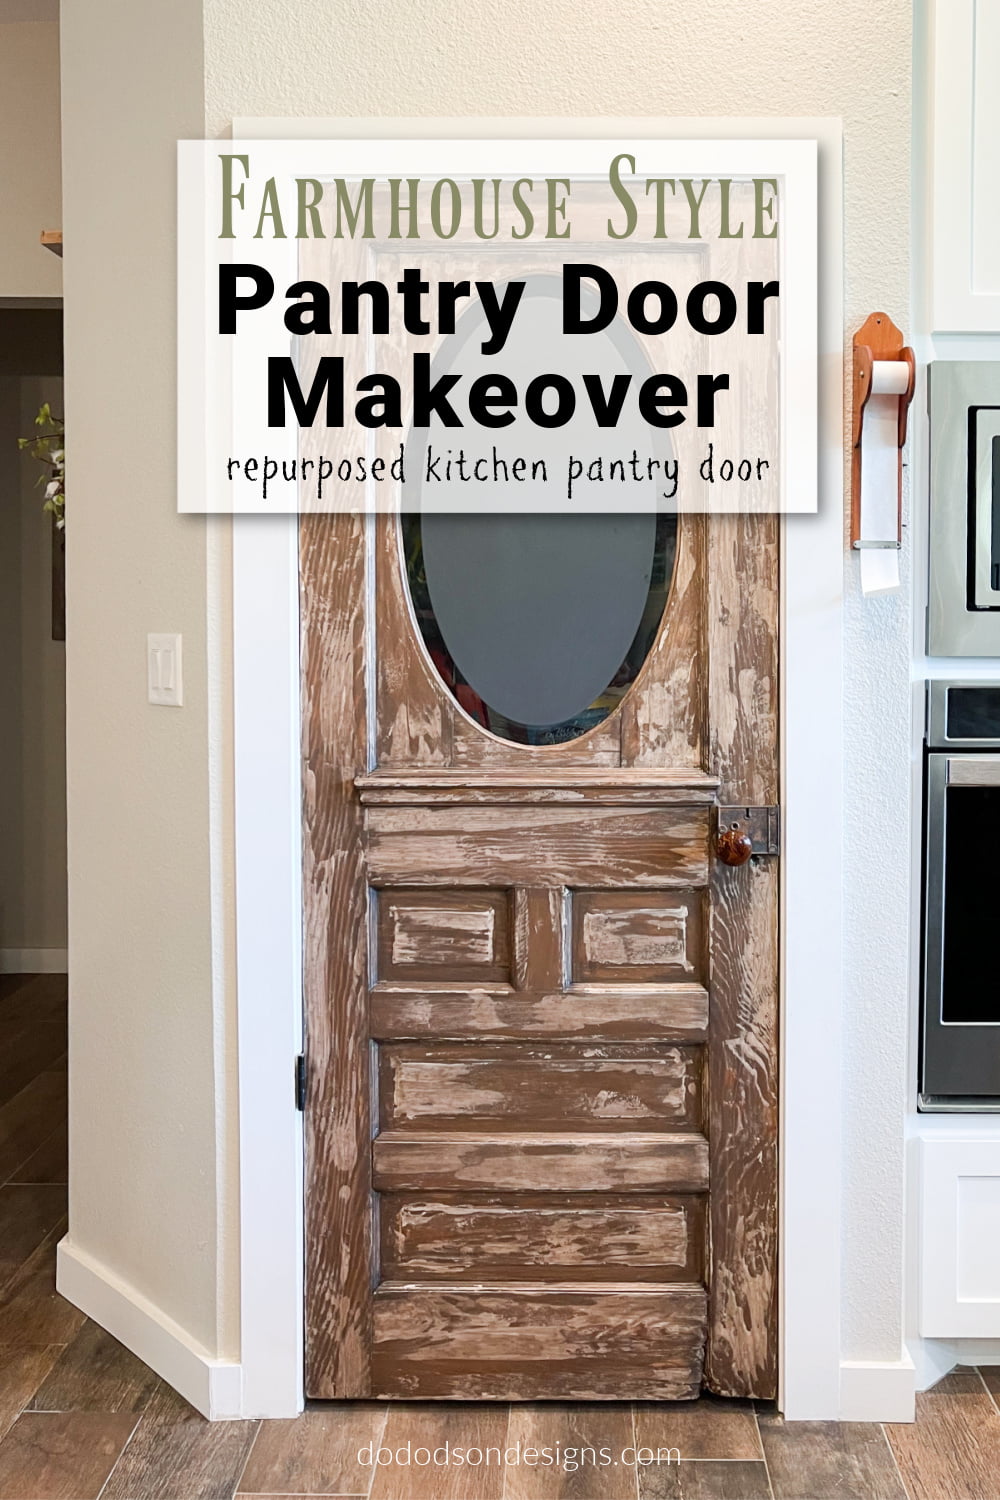
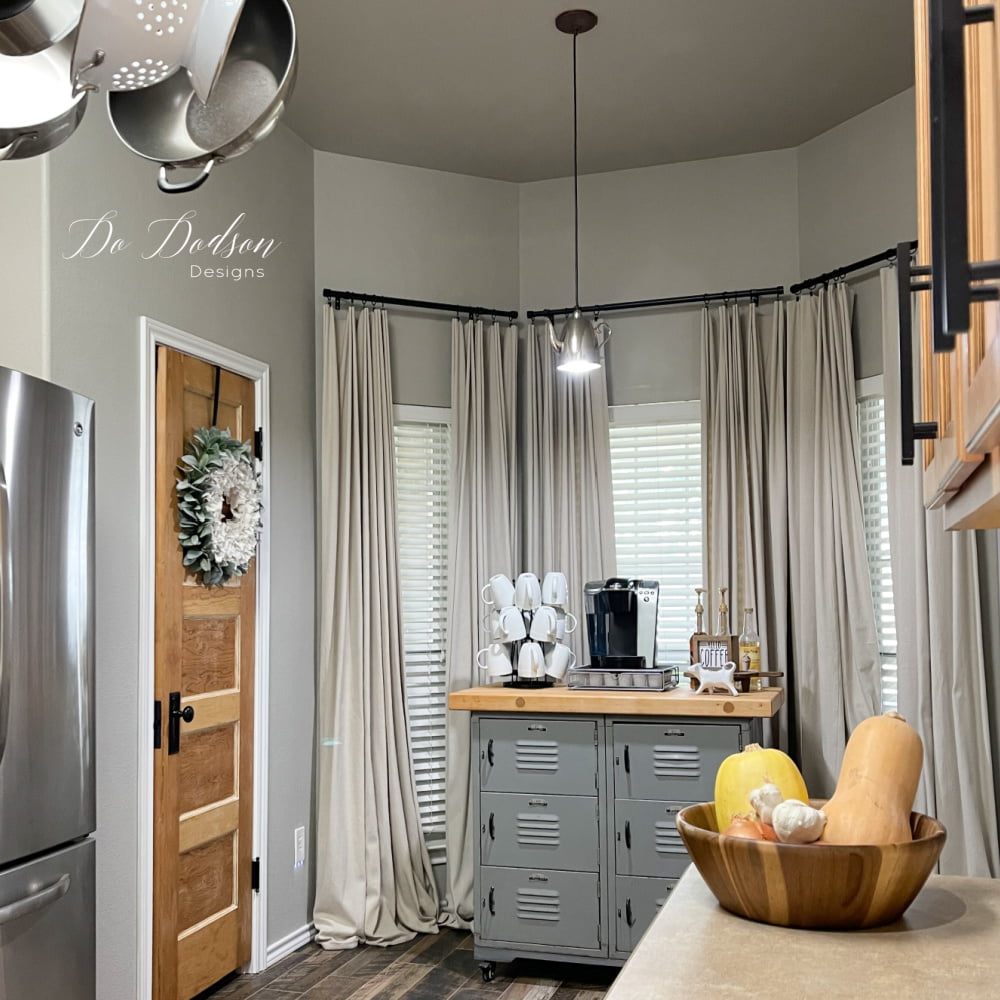
By now, you know my obsession with these antique doors, and this farmhouse-style pantry door makeover is near and dear to my heart. Another memory preserved… and can you imagine how amazing this will look in my client’s new kitchen? Yes! A new life as a pantry door. Lucky door!
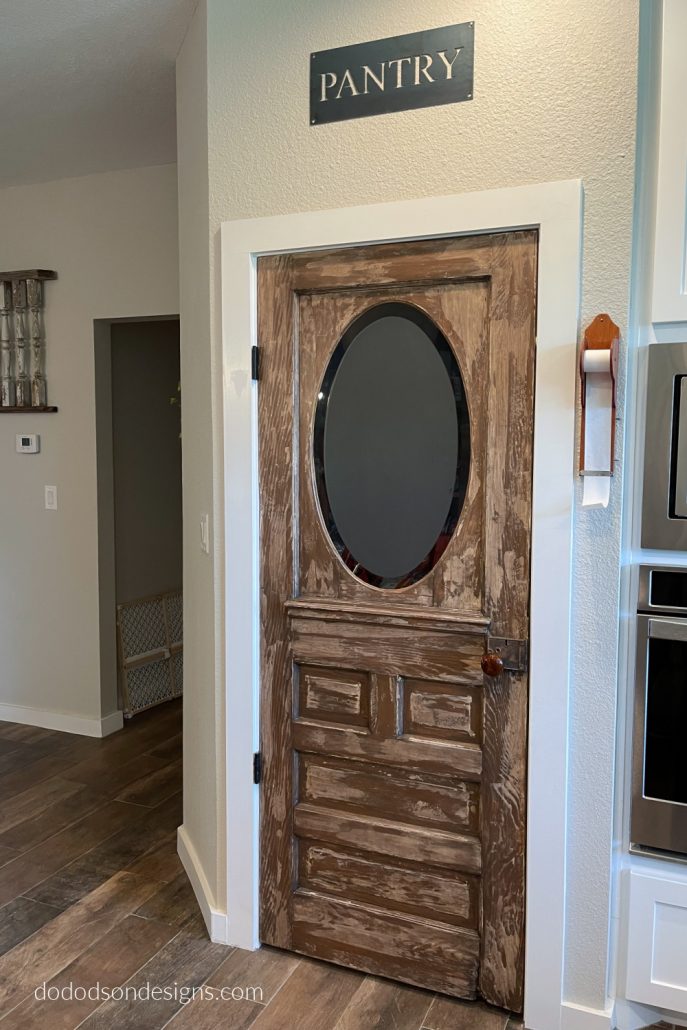
Score! Another pantry door makeover is done. I sure do enjoy repurposing these antique doors, and I would love to hear about yours. Do you share the love of these old doors too? Tell me all about it in the comments below. I get warm fuzzies when I hear from you. 🙂
Until the next project… xo, Do
I love this! Can this technique be done on a new door? Building a home and thought this would be a great look for either pantry or laundry room door.
What a fabulous idea! I don’t see why not, Carol. This old door was stripped down clean as new before I applied the chippy paint technique. I would practice on a new board first. PLEASE, I would love to hear your experience with this technique. I’m excited to see what you do. Happy painting! 🙂 xo, Do
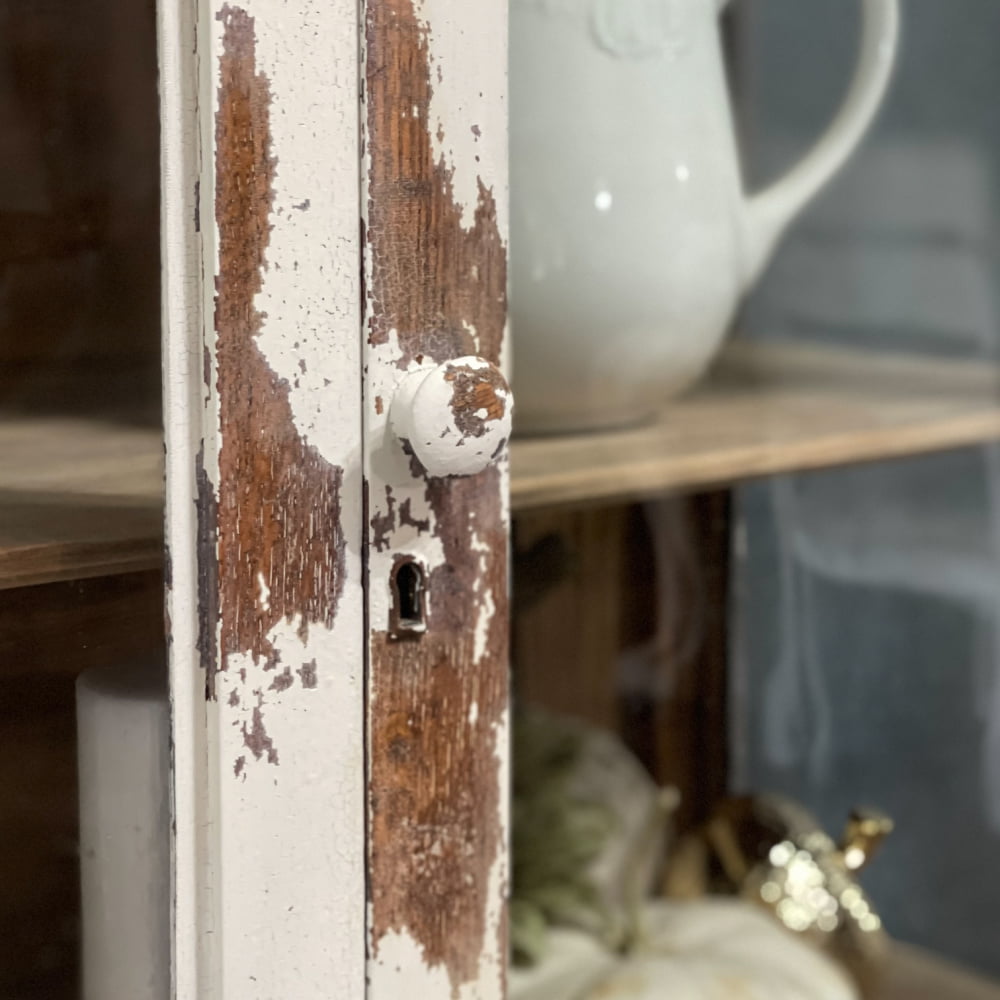
I really like the door knob. Is it vintage as well?
Yes, Ma’am! These are made from porcelain and have a swirl pattern. I was so happy that I could reuse them on the original door. 🙂
Love your technique! You have a little more control using the stain! Fabulous finish.
Thanks, Leigh! It’s a fun way to create a faux chippy look. Thanks for stopping by. 🙂 xo
I’m going to give this technique a shot just curious since I will have to order the paint, stain and everything how much do I need per door. I have a total of 4 doors, also from my grandparents house.
Hi Loreta, I would suggest purchasing one container of each and trying it first. You can always order more.