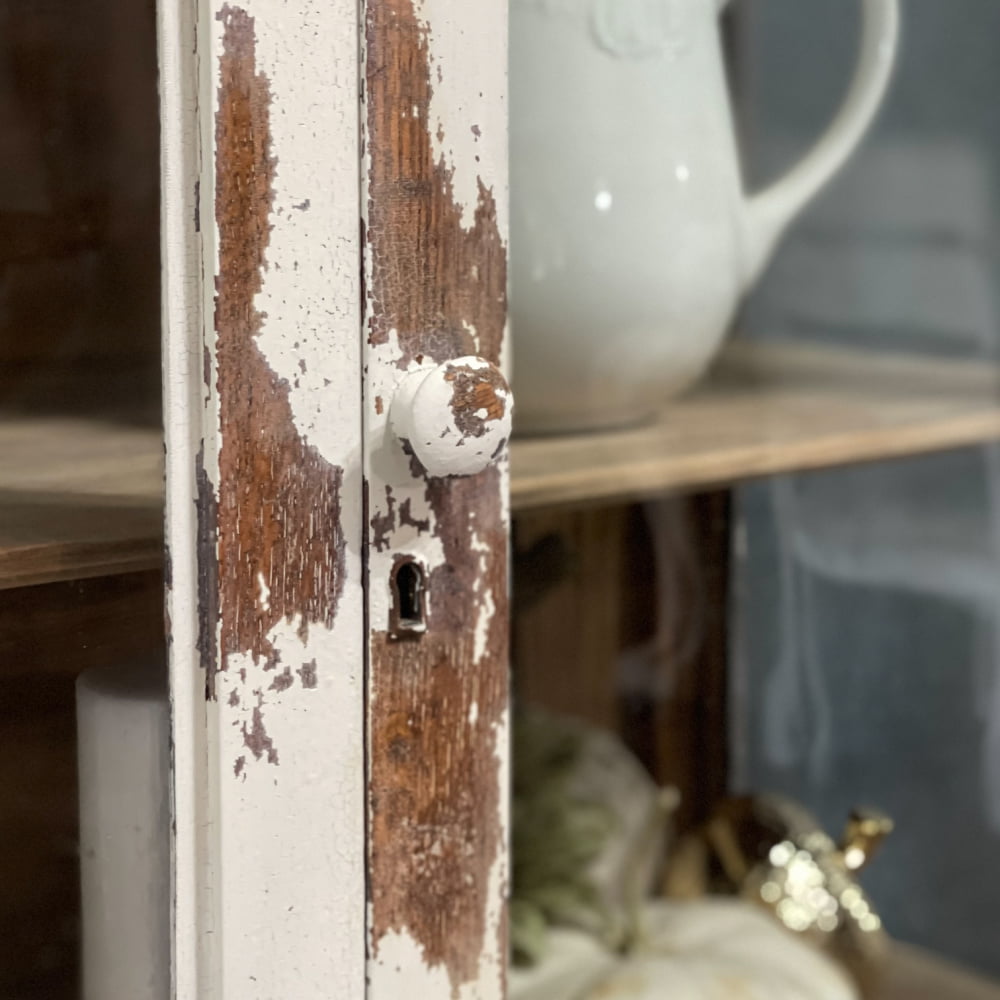
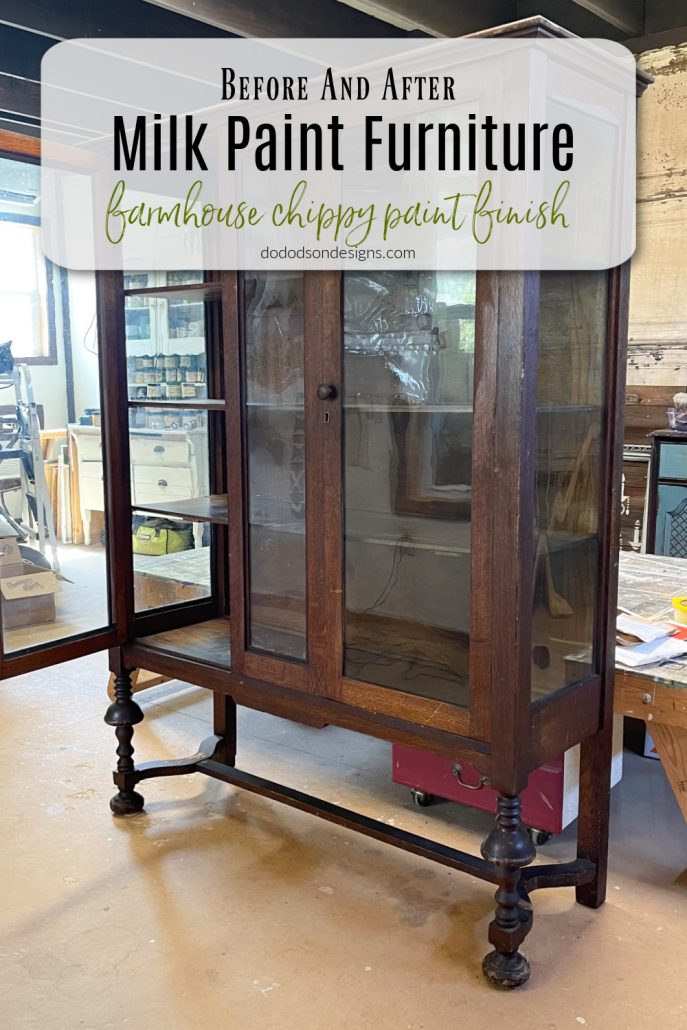
I have always loved a chippy milk paint finish but only on the right piece of furniture. It can’t be new because that doesn’t make sense in my mind. So, I had been searching for the perfect piece, and I think I found it.
* As an Amazon Associate, I earn from qualifying purchases and through other companies as well. You are not charged extra to use any of the links, but any income I make helps me create more amazing DIY projects to share with you! To see my full disclaimer, click here!
What Is Milk Paint? – The History
Before starting today’s milk paint makeover, I wanted to enlighten you about milk paint. I didn’t know until I researched it to find out that it has a long history.
Milk paint is nothing new and has been used by mankind before recorded history. If you want to learn about this paint and how long it’s been around, CLICK HERE. It’s pretty interesting to read!
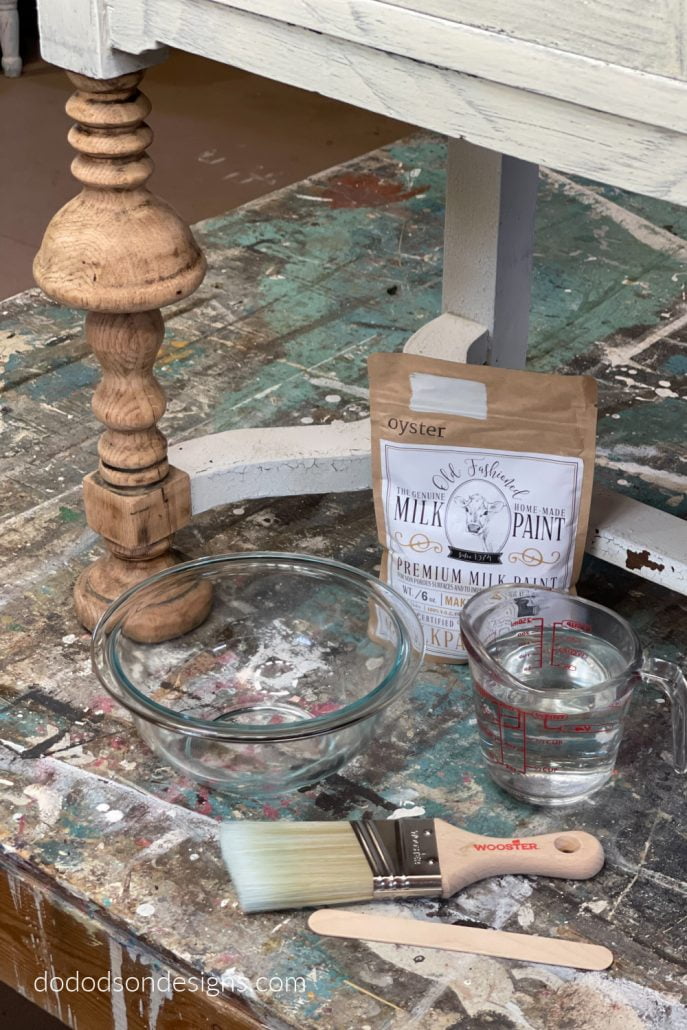
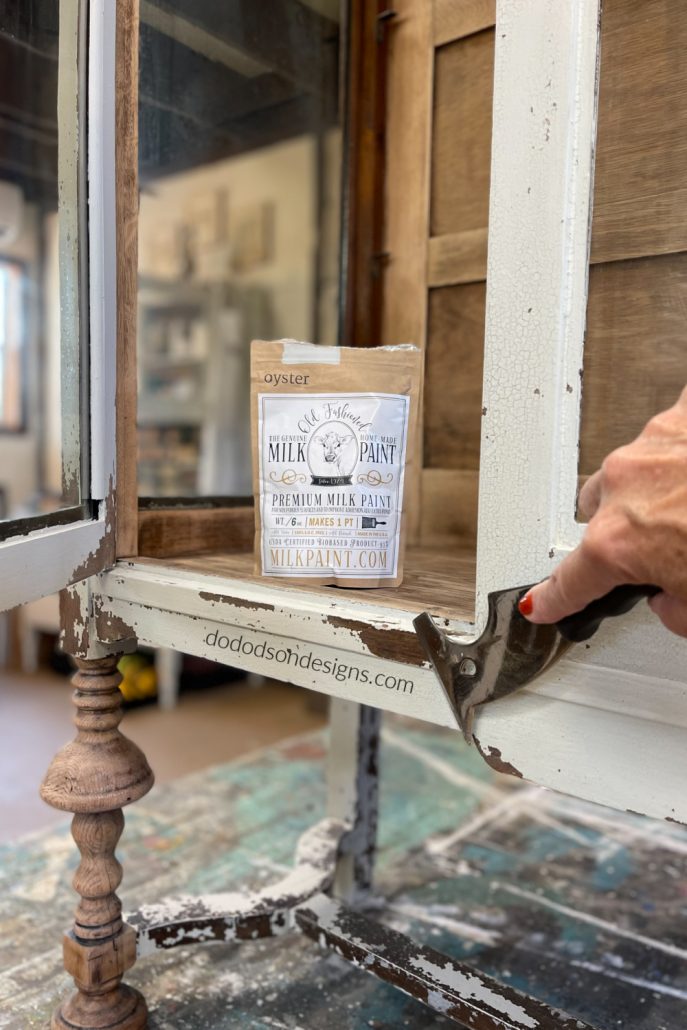
SUPPLY LIST:
- old fashioned milk paint (Oyster White)
- paintbrush
- mini wire whisk (to mix the milk paint)
- paint scraper tool for wood
- wax brush
Different Milk Paint Brands
Don’t be fooled by the name because not every paint labeled milk paint is an accurate representation. True casein-based (milk protein) milk paint comes in a powder form and will produce a matte finish. Topcoats can be used to enhance the finish.
Milk paints are versatile and work well with various faux finish techniques, but today, we will focus on obtaining a chippy farmhouse finish on wood furniture.
STEP 1: Clean Your Wood Furniture First
To prepare the wood surface for milk paint, clean well. I like to use a mild soapy water solution. Rinse with water and towel dry.
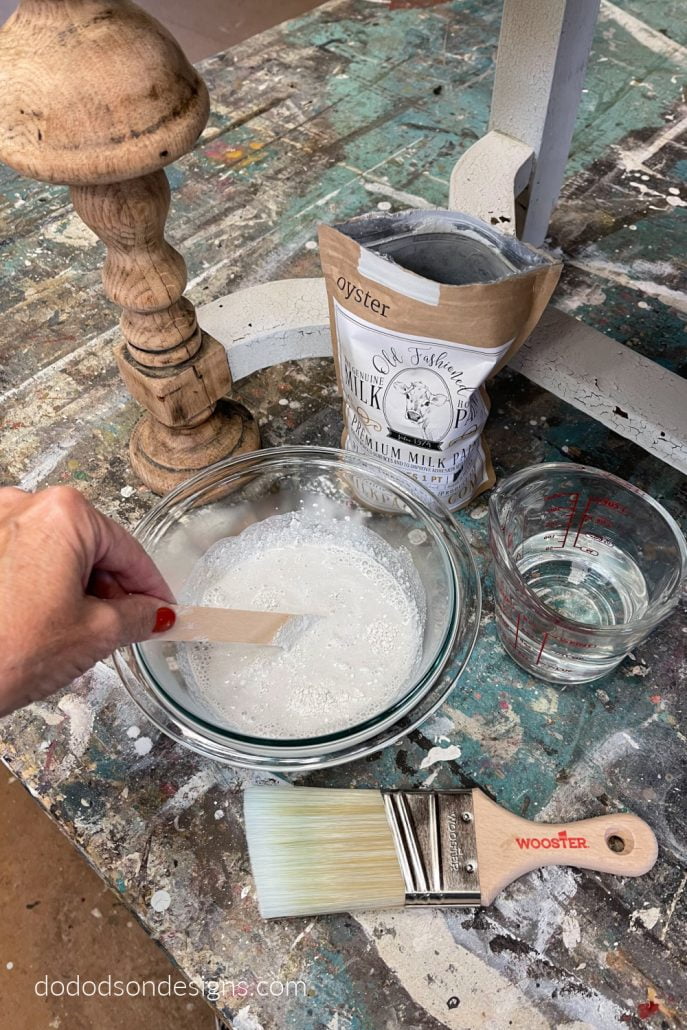
STEP 2: Mixture Of Milk Paint And Water
In a separate container, add warm water to a bowl. The paint to water ratio is about 50/50.
Stir the powdery mixture into the water and continue to stir for about 3-5 minutes or until your arm gets tired. That’s what I did.
I did some research afterward to find that it is difficult to mix and to get a smooth consistency, it’s best blended with a blender, wire whisk, or by shaking it in a jar with a lid. I’ll try that next time.
After mixing, it should have the consistency of cream. Not like milk, but a bit heavier. You can always add more paint or water to adjust.
* The bonding agent that is commonly used with this milk paint was not added because I wanted the milk paint to chip organically.
STEP 3: The Process
The process of getting a chippy paint finish is a bit of luck and guesswork. Here is what I know that has worked for me in the past.
Milk paint adheres well to raw wood (it soaks into the wood), but it doesn’t adhere well to factory or shiny finishes.
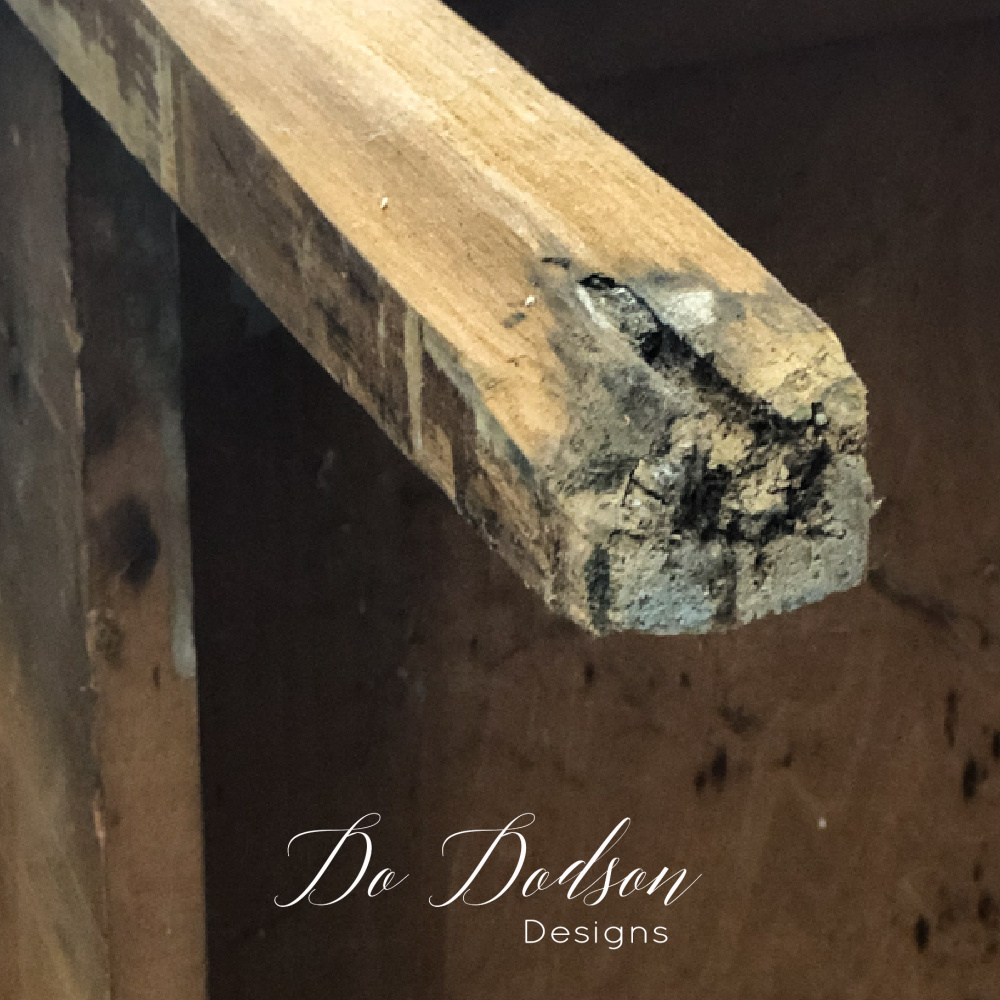
To get a chippy paint finish, you must do the proper prep to achieve this look. The piece I’m working on here is old, and the varnish is not in excellent condition. Some of it has worn off in some places, and it is still intact in other areas.
Before painting, I used 180 grit sandpaper to remove most of the old varnish and to smooth out the wood surfaces. On the areas I wanted the paint to chip, I skipped those areas. Then I wiped it down again with a damp cloth to remove all the dust from sanding.
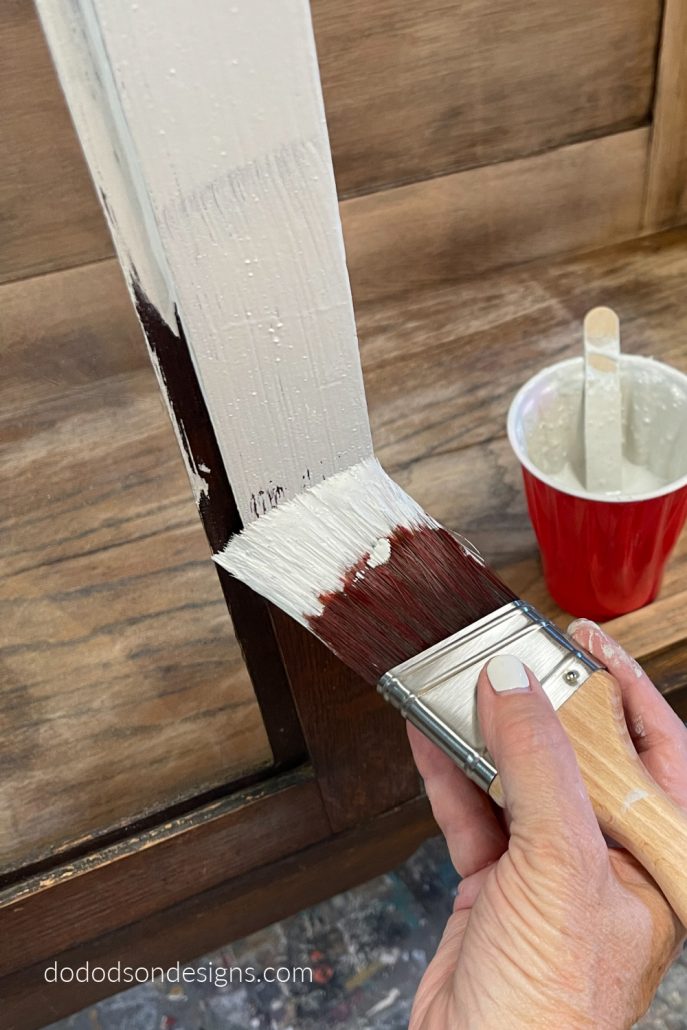
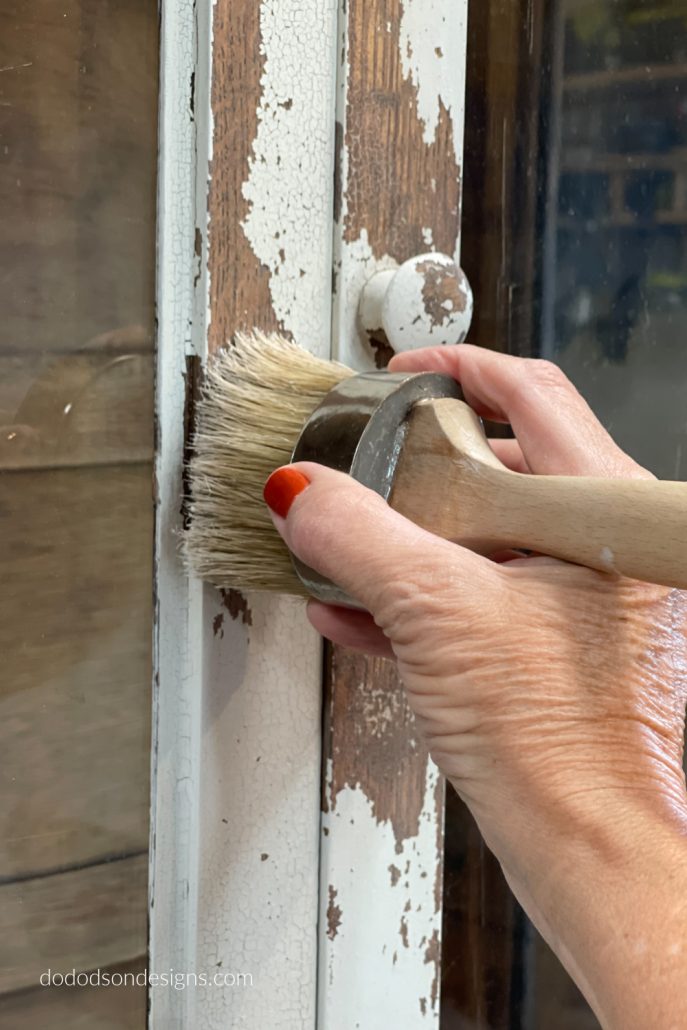
STEP 4:
Always use a good quality paintbrush to apply the milk paint. Depending on the color of paint that you chose and the darkness of the wood, it will take 2-3 coats of this paint to fully cover.
I like to leave the stir stick in the paint while I’m painting. You’ll need to stir the milk paint frequently to keep the paint color consistent. Color pigments in the paint will fall to the bottom of the container and can result in an inconsistent color.
The first coat… well, let’s just say it will be U G L Y like most first coats of paint. But because this paint tends to have tiny lumps even after mixing, it can be a bit worrisome if it’s your first time using it. Don’t let that worry you. The tiny lumps will be sanded away later on in the process.
After applying the first coat, allow it to completely dry (about an hour or so) before applying the second and third coats.
After the first coat has dried is a great time to inspect the painted surface for the beginning stages of chipping. It doesn’t always happen after the first coat but can be a good indicator of what will happen as you proceed.
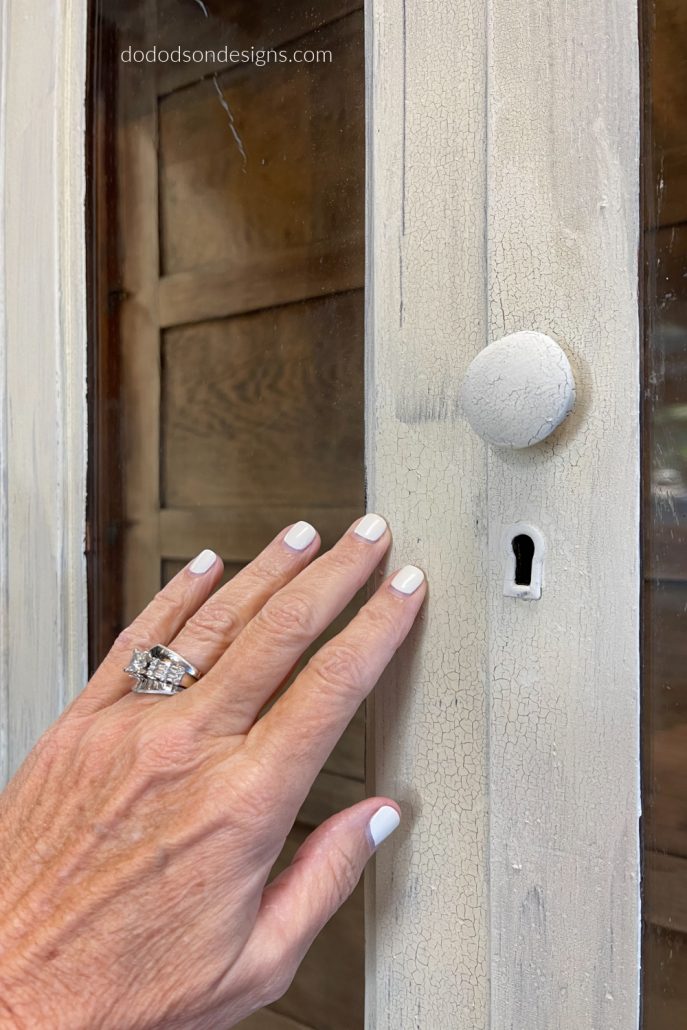
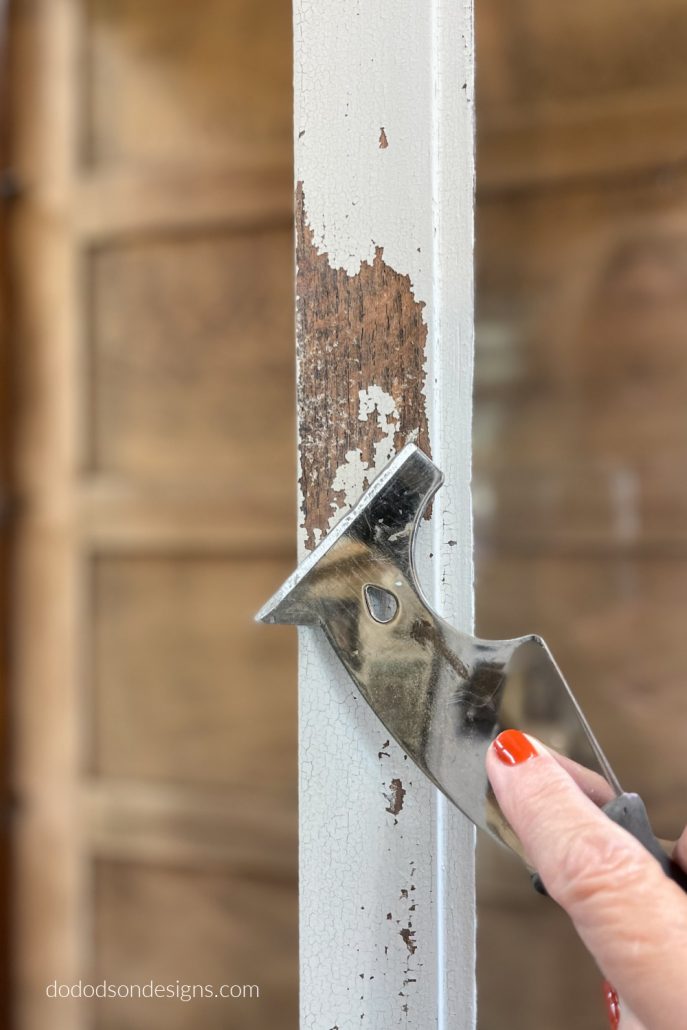
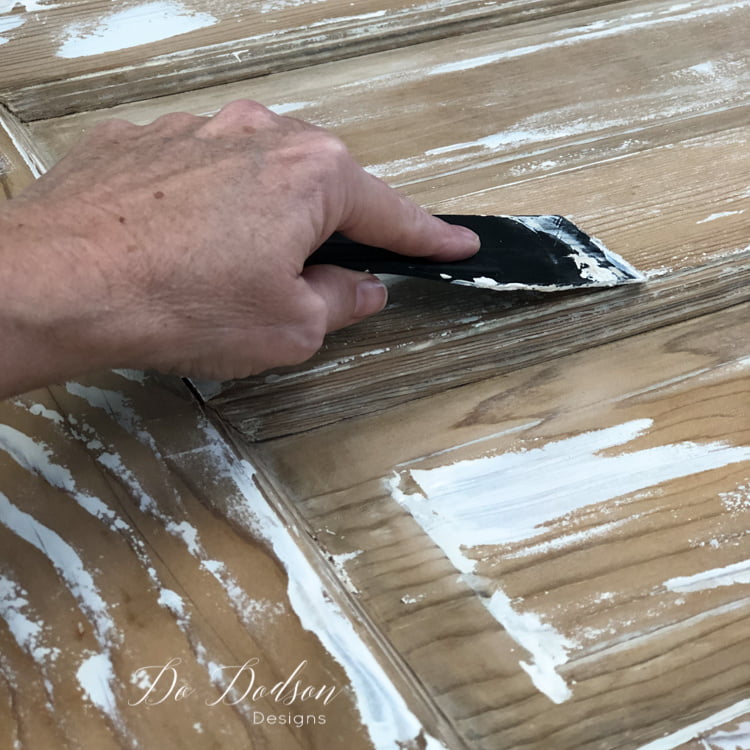
STEP 5: Brush Off Loose Paint
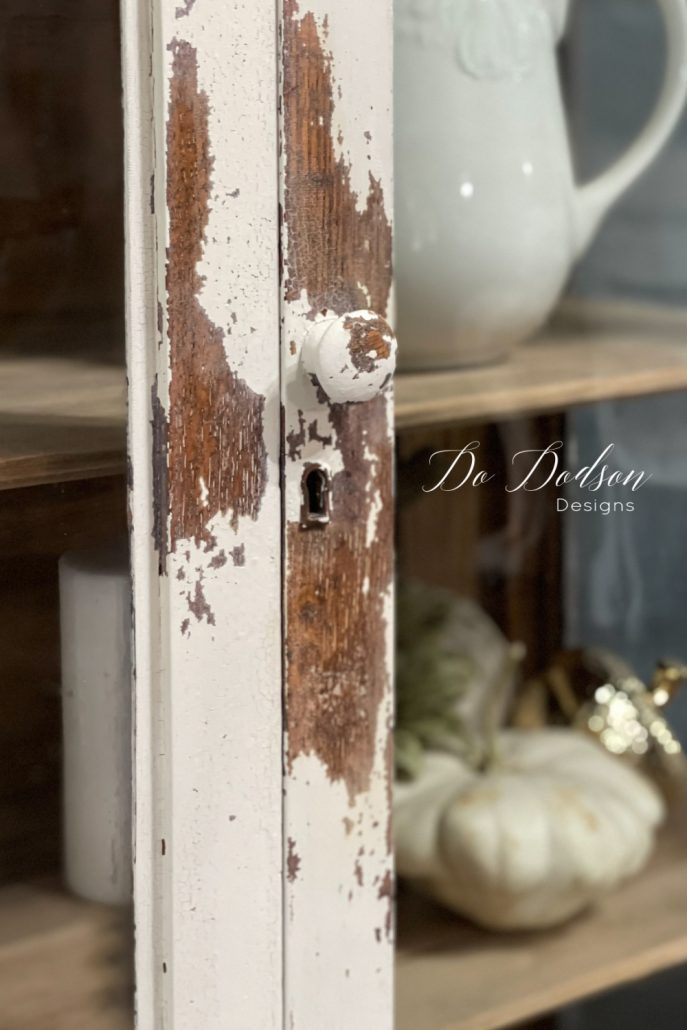
And like magic after the third coat of paint, I got the most amazing chippy paint goodness in all the right places! Remove any loose paint by scraping it with a paint scraper tool or a stiff brush.
Next, gently sand the painted and exposed wood surfaces with 220 grit sandpaper to smooth out the newly cracked paint and any worrisome lumps that were left in the paint. The newly painted surface will be a bit rough where the chipping paint meets the wood but that’s to be expected.
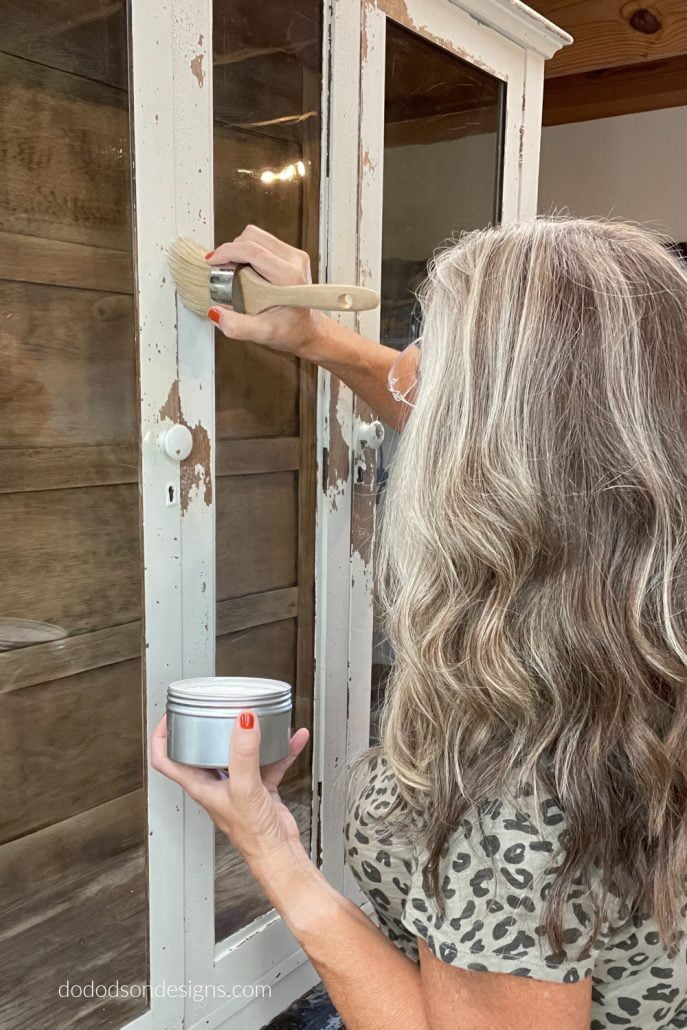
STEP 6: Finish Options
After your masterpiece has been created you’ll need to add a top coat or wax to seal the milk paint.
Milk Paint is a porous paint, therefore water, dirt, and other contaminants can get down inside of the paint and stain or damage it when left unsealed.
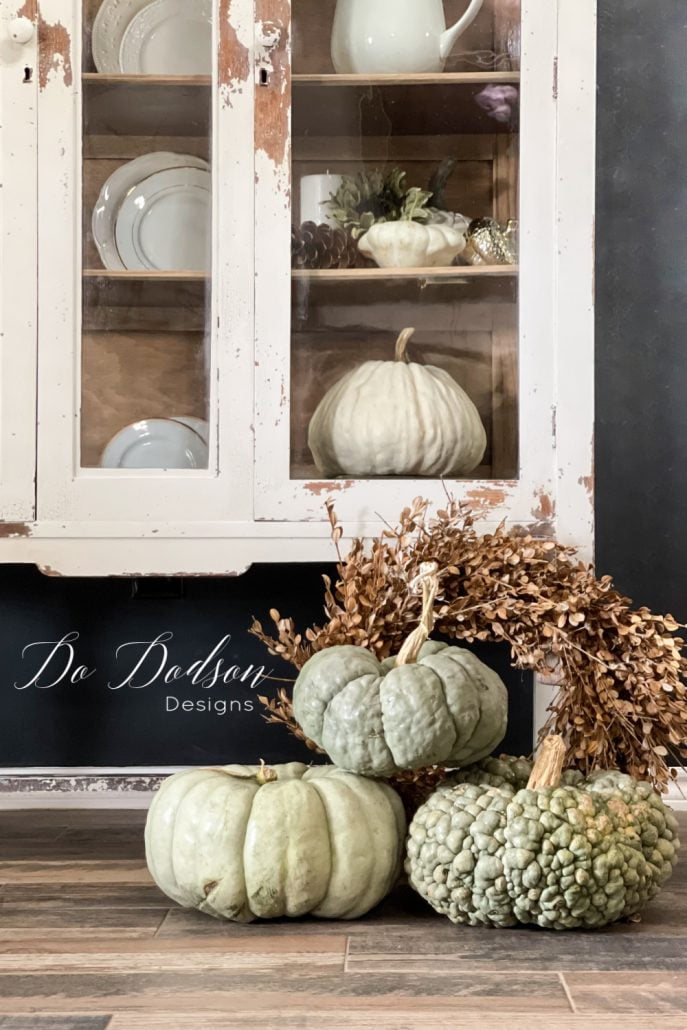
I love the feel of wax over milk paint so that is what I chose to seal this painted finish with. I think the white wax was a good choice.
Why did I choose to use white wax instead of clear wax over the chippy milk paint finish? Because the bare wood was exposed and I wanted to keep the look of the wood light. Had I used the clear wax the wood would have darkened. That wasn’t the look I was going for.
The same applies to applying a polyacrylic topcoat. Both options will darken the bare wood and are okay to use. It’s a preference and both will seal the milk paint beautifully.
Before And After Chippy Paint
10 Tips For A Chippy Milk Paint Success
- Buy a reputable brand of milk paint… I like Old Fashioned Milk Paint, & Miss Mustard Seed Milk Paint. I’m sure there are others out there but these brands are the ones that I have used and I know they produce a chippy milk paint finish when applied correctly.
- Prep your piece well. Clean and scuff sand the areas you want the paint to adhere to the most. It will chip the most over a finished or shiny surface.
- Mix only the amount of paint that you need for the job. Milk paint has a short shelf life after mixing. Do your research and know the brand you chose.
- Use a wire whisk to mix the milk paint well and continue to mix as you paint.
- Use a good quality synthetic paintbrush for application.
- Apply 2-3 coats of milk paint.
- Allow proper dry time between coats.
- Once the final coat has dried, remove the chipped paint with a paint scraping tool of a stiff brush.
- Chose the topcoat of your choice to seal your masterpiece.
- Be careful not to paint everything in your home with milk paint. It’s addictive! 🙂
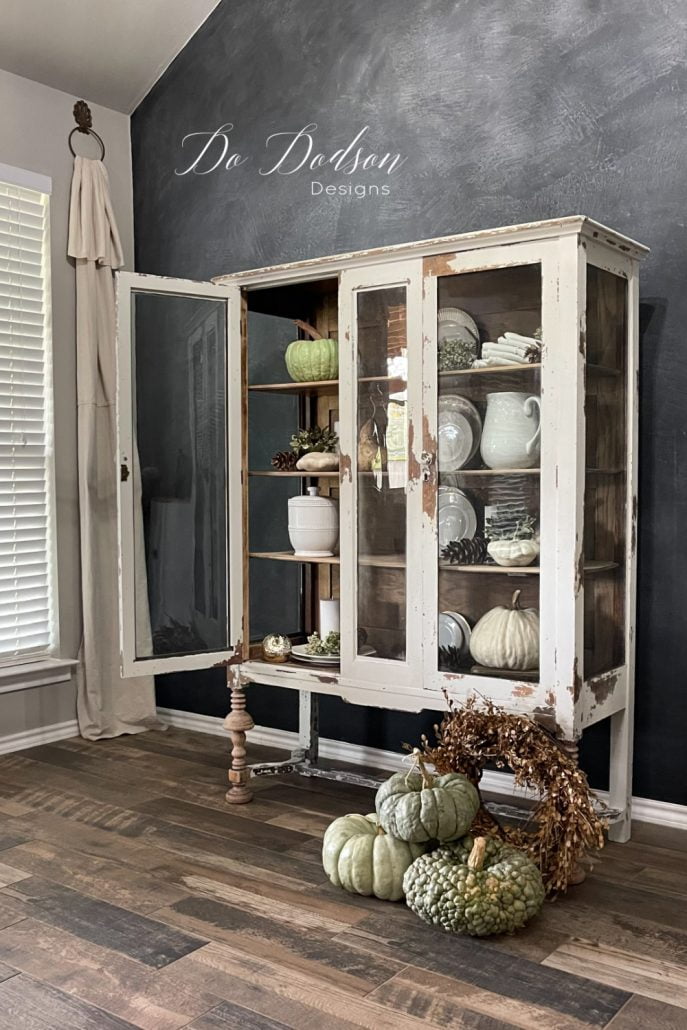
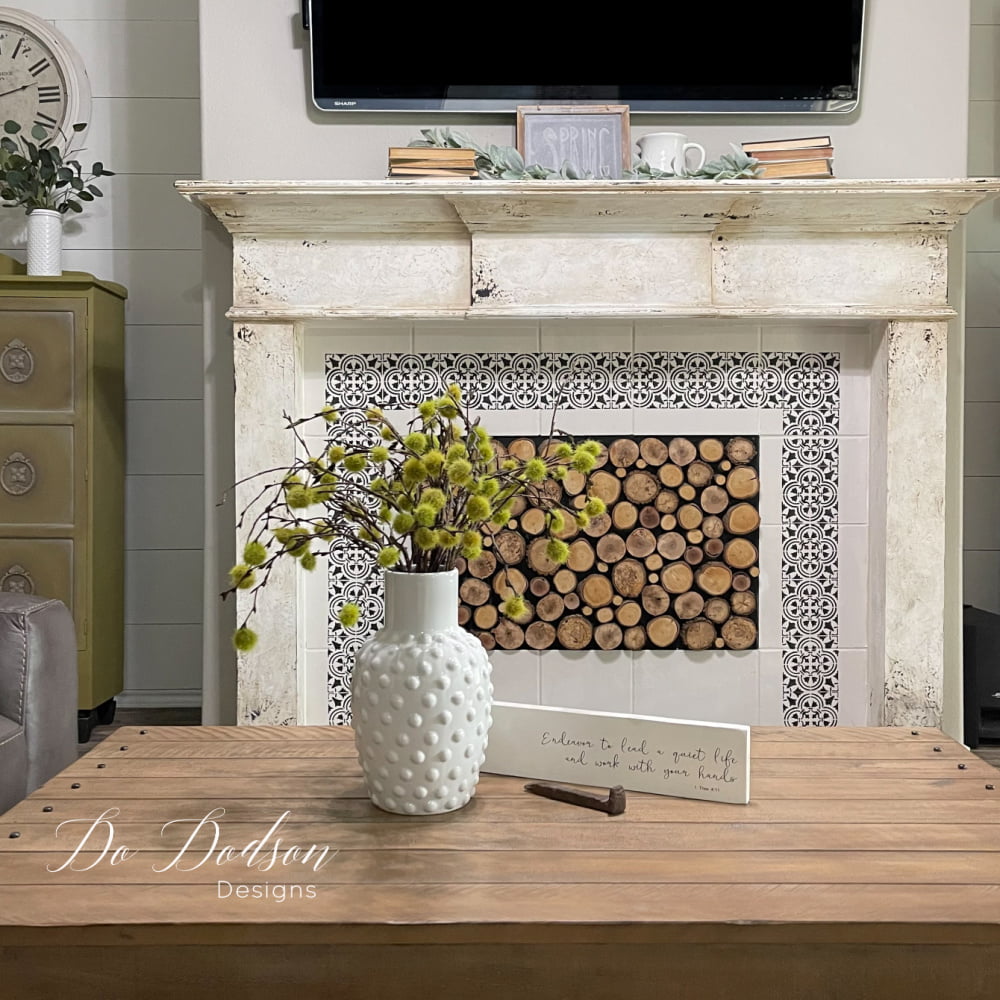
The Chippy Look
I couldn’t be happier with the results. Removing the old shiny varnish with sandpaper was a good decision and helped to prevent the milk-painted areas from chipping.
This was not my first time using milk paint and knowing what to do to get the finish I wanted was super helpful.
I share even more tips and tricks to obtain this chippy paint finish in THE ART OF PAINTING FURNITURE. My private subscription library of detailed video furniture painting tutorials. CLICK HERE to learn how to join me.
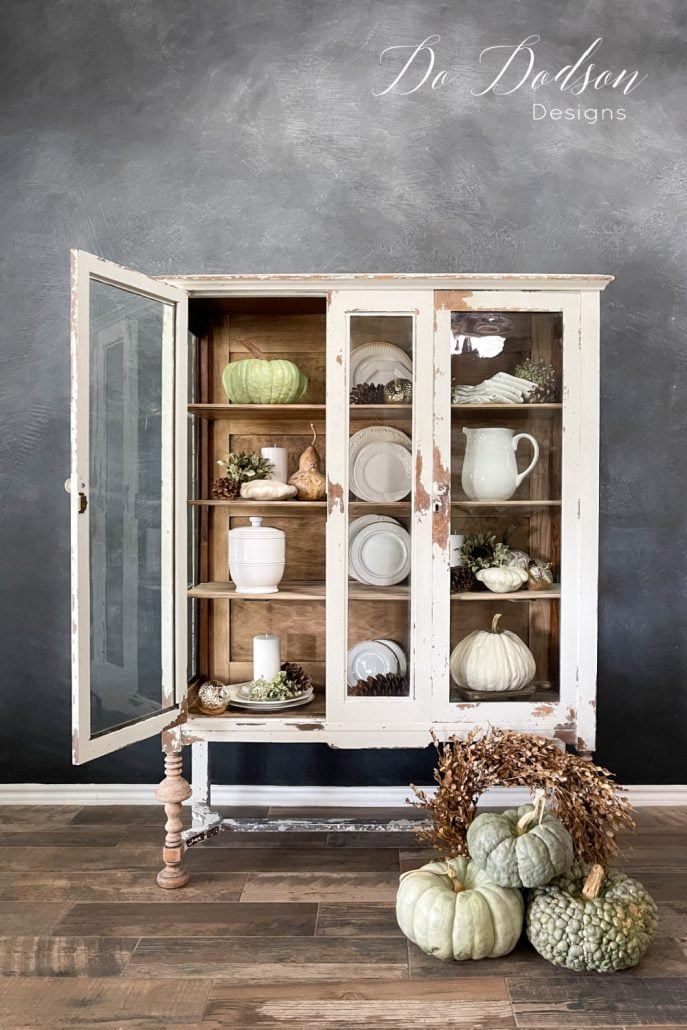
Milk paint is super unpredictable and takes some practice, patience, and a forgiving heart. Sometimes you never know what your end product will look like!
But if you want to be surprised with an authentic chippy milk paint look, this is a fun paint to work with!
Thanks for joining me today and as always I enjoy sharing my experiences with you. Have you ever tried using milk paint? I’d love to hear about your experience with this paint. Or just say hello and let me know you stopped by.
Until the next project… xo, Do
Girrrrl, this is fabulous!! I love a good chippy look on an old piece of gorgeous furniture. Your staging is perfection. 😊
I think it turned out so well! Thank you! 🙂 xo
Oh my goodness! This is so beautiful. The cabinet is stunning! Hugs to you, my friend.
Thank you, Renea! I’ll have fun changing out the decor for the seasons. 🙂 xo
I first started out painting with milk paint. Haven’t used it in awhile but you’ve inspired me to use on an old China cabinet that I have. Thanks for the inspiration Do❤️ Happy Painting!!!
Thanks for joining me, Patti! It is a lot of fun to work with. 🙂 xo
I love this! Yes, it needs to be an old piece like this to have milk paint. Keep em coming😊
I agree, Toia! 🙂 xo
Beautiful! We need a class in Canton : )
That sounds like fun! Call me. 🙂
You have the magic to do what you do Do,,lol.
This looks fabulous and I love it because it is rustic and antique looking.
Awesome job well done.
Thank you for sharing.
Take care and stay safe.
Thank you so much, Brenda!
Hi Do, With milk paint do you worry about bleed through like with chalk paint? With chalk pain or other non oil based paints I usually prime with a shellac based or stain blocking primer. How do you handle possible bleed through with milk paint?
Thanks 😊
Yes, you have a point. If you think this may be the case, prep the areas you don’t want to chip with a stain blocker first. I’ll have to do more work in this area to see how it works out. Great question. 🙂
I’ve never used milk paint. But now I’m intrigued. You are absolutely right, the piece looks fabulous! Thanks for the tutorial.
Thank you, Joanne! I’d love to hear about your experience with it. 🙂
Do, first this piece of furniture the style of it is gorgeous. Now it is stunning with the chippy finish. I love how the project turned out.
Thank you, Tammy! I’m pretty happy with it. 🙂 xo
Oh my goodness!!! I am in love with this chippy look and this piece is perfection. Well done!
🙂 Thank you, friend! We love chippy paint in our modern farmhouses. xo
Do, l ❤️It!! I really love the look of the cabinet with the makeover you gave it! I really like these types of cabinets, but I’m not a fan of the dark stain. This was a very inspirational post!! You are amazing!
You are so sweet, Holly! I’m so glad you enjoyed this post. 🙂 xo
Beautiful job.🤩
Thank you, Ann. So glad you stopped by. 🙂 xo
Do, I love this project! But I’m also obsessed with the wall behind it! How did you get that finish?
The wall! Yes, Branda. I have a tutorial on how I did it here. 🙂 https://dododsondesigns.com/perfect-chalkboard-wall/
This is fabulous thanks for all the great tips! I have never used milk paint but really want to try it! Will chalk paint work on a newly built piece of furniture that I want to age…. it is raw wood.
Hi Karen! I figured that was a typo. You can use milk paint over natural/raw wood, but more than likely, you won’t get the chipping. Milk paint absorbs into the wood and chips on finished surfaces. Also, if you’re using a light color of milk paint, you could get some bleeding of the wood tannins. I would use a stain blocker first. Have fun! 🙂
I wondered what you were going to do with this paint! I love how it turned out! I really enjoy working with milk paint. It’s easy and so fun to work with! Great job, Do!
Thanks, Kim! It is so fun to see the unknown transformation. 🙂 xo
This is chippy-Licious Do! And I love your styling. Fall perfect. XOXO
LOL, chippy-licious should be a word! Thanks, friend. 🙂 xo
Do, this is so beautiful!!! You outdid yourself! I am only wishing we were neighbors right now. Lol!
Hey, Melbs! We could have coffee and paint. 🙂 xo
Ohhhh i LOVE a distressed chippy finish & SOOO embarrassed to say🤦♀️🤦♀️ i didn’t evn know milk paint gave you a chippy finish!! Wow!!!!! Wow!!!! WOW!!! What a gorgeous piece & i thought I was the only 1 crazy enough to buy those insane pumpkins!!! Lololol this year was the 1st time in West Tx that I’ve seen some of these, much less able to purchase some. I desperately wanted some of these hard to find bluish-gray pumpkins so that nxt season i can plant their seeds for the 6th yr in a row of “trying” to grow my own pumpkins!!!!! CANNNOT wait 4 nxt season!!! Eeeeeek!!!
Hi Mindy! We could be good friends! LOL, But as I stated in the blog post, not all milk paint gives a chippy finish. So do some research and refer back to this blog. As far as the pumpkins, the wilder the better! Happy Thanksgiving! 🙂 xo
This is so beautiful!! Where did you find this piece? I’m looking for one like it and having a hard time- I love how wide it is! Beautiful job!! Thanks for sharing!
Hi Lynn! It was just luck. Now and then, I find great pieces of furniture on Facebook Marketplace. Thanks for reading. 🙂 xo
You know I love a good milk paint makeover and this one is amazing! Thanks for sharing 🙂 Pinned!
Hey Cindy! I think you were the reason I grabbed the milk paint for this project. Thanks for all your inspiration. 🙂 xo
Hi Donna! This was the perfect piece for the chippy look. I have used milk paint a couple of times and neither piece really chipped because it was raw wood but it did get the crackle. I need to use it a couple of more times to decide if i like it or not. I love this piece and thank you for all the information.
Hey, Cheryl! It does take some practice with milk paint but keep trying. You’ll get the hang of it. 🙂 xo