Hey creative friend! This week’s blog is all about turning trash to treasures with a chippy paint technique. Literally! Because we have been sheltering in place, the Dodson household has created a lot more trash than usual. I’ve heard the term “trash to treasure” in the DIY world but never really gave it much thought… until now. So, I did a little research on the subject. I was amazed at what you can actually create from items in your garbage can. 🙂 Yep… I’m painting trash today! Join me on my trashy rendition of TRASH TO TREASURE makeovers.
This post contains a few affiliate links to help you find the products I use. You are not charged extra to use any of the links, but any income I make will be used for more fun projects! To see my full disclaimer, click here.
Chippy Paint Technique: From Trash To Treasure Home Decor
Take a look around… what do you see in your home that you salvage? All you need is a little imagination and a DIY chippy paint finish to transform those items into Hobby Lobby quality home decor. A DIY chippy paint finish can be applied to metal, glass, or wood. Think of the endless possibilities! ♥

Product List For A DIY Chippy Paint Finish
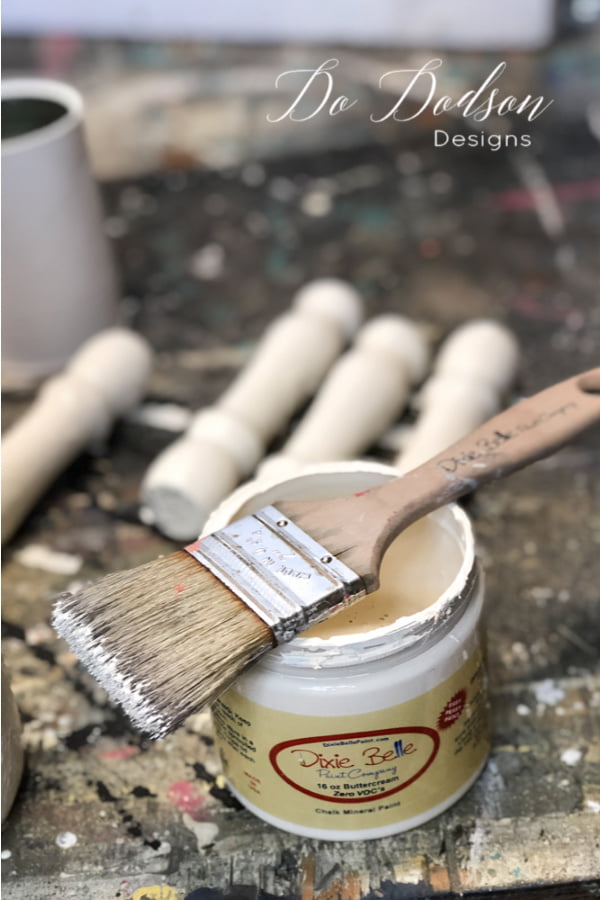
- household items (tin can, bottle, old chair spindles)
- Coffee Bean (chalk mineral paint)
- Butter Cream (chalk mineral paint)
- chip brush
- wax (candlestick)
- sandpaper R.A.D Pad
- steel wool (superfine)
- jute twine
- hot glue
*Just so you know, the can of corn was supper and the bottle of wine was dessert. 🙂
Application Of Paint
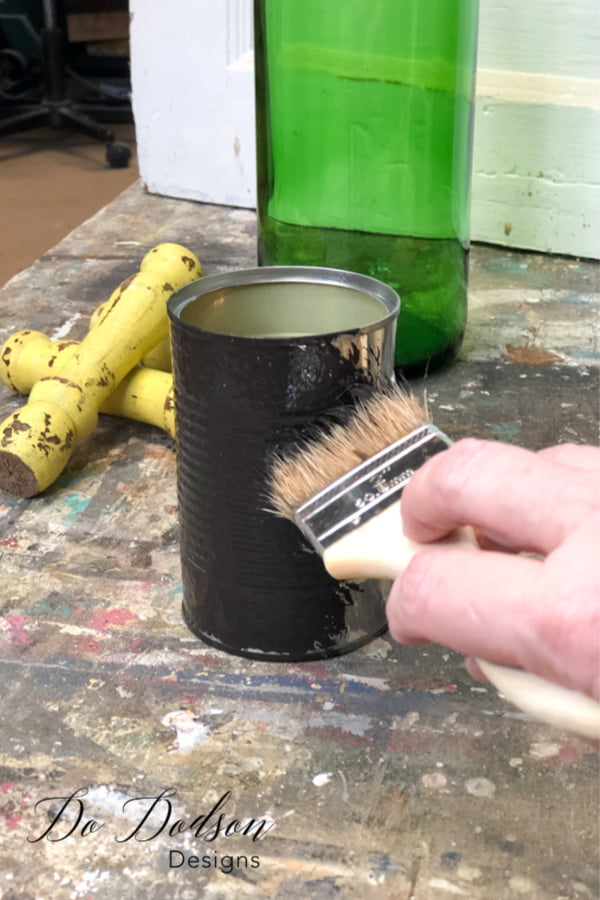
Firstly, clean the items well you have chosen with soapy water and rinse well with water. Towel or air dry. Be sure to remove any leftover glue that could be on the surface from labels that may prevent the chippy paint finish from adhering.
Next, apply a heavy coat of chalky paint using the stippling technique with a 2-inch chip brush. You’ll need to dab the paint on instead of brushing it on. This also creates texture and that exactly what you want in a chippy paint finish. So don’t be stingy with the paint. 1-2 coats will be needed depending on the color you chose. Allow the paint to dry thoroughly between coats. I don’t paint the bottoms of the cans or bottles.
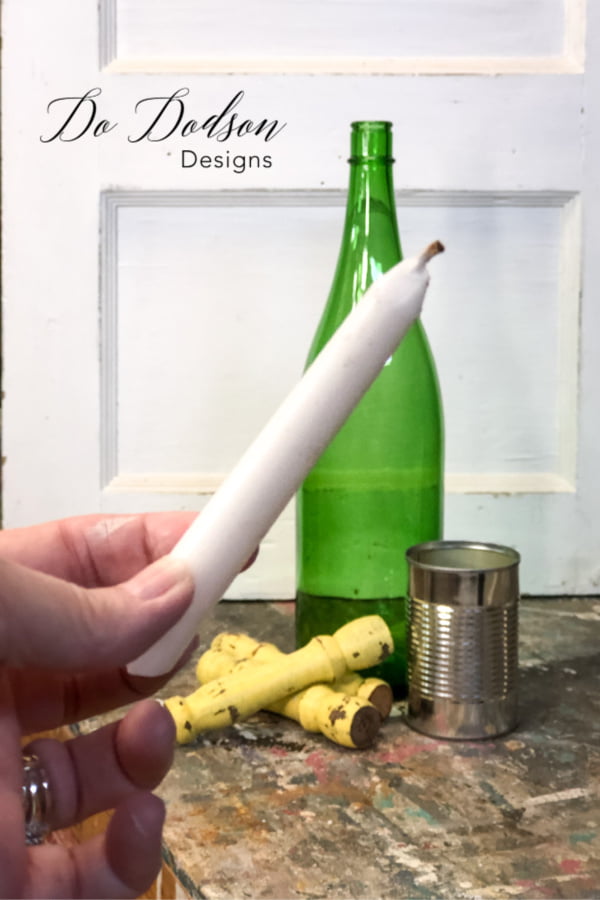
How To Use A Broken Candle Stick For A Chippy Paint Finish

Hey! I used what I had! I know that wax repels water and my chalky paint is water-based, so I grabbed a broken candlestick. Don’t ask me why I saved these things… 🙂
Thirdly, rub the wax over the first color of the paint. Rub it in the areas you want the paint to chip away. Here’s a tip… warming up the candlestick helps a lot with the application. I used my heat gun to soften them up but not melted. Just enough to rub the wax on at the end of the candlestick. Like a crayon! It won’t be smooth. You will see the wax and that’s okay. It’s there for a reason. A chippy paint reason!
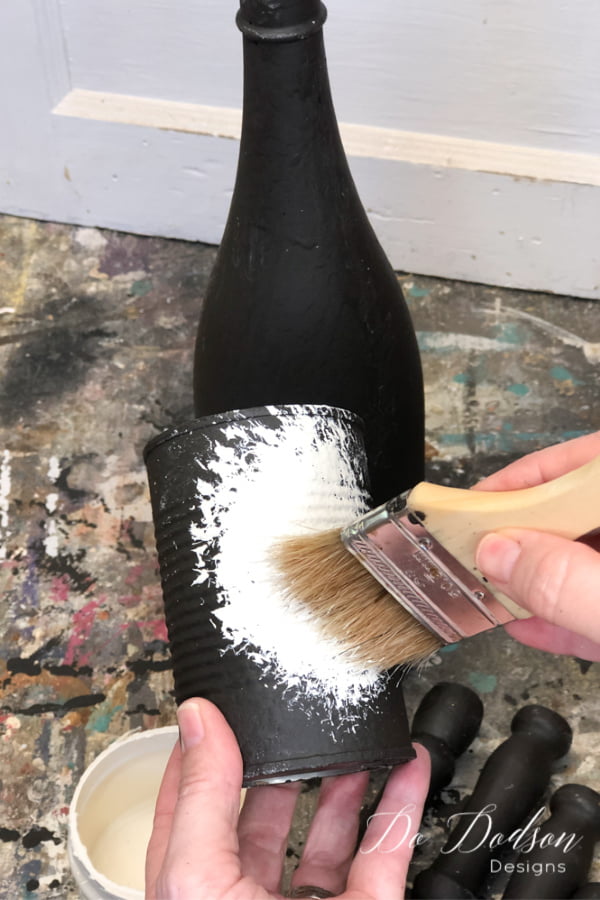
Then apply the second paint color of chalky paint over the wax using the same method “stippling” or “dabbing” just as the first paint color. You can even use the sides of the paintbrush to give it more texture. Yep, just blob the paint right over the wax from the candlestick. One thick application of chalky paint is all you will need. Don’t be stingy! Allow the second coat of paint to dry thoroughly. We want that texture for an amazing chippy paint finish.
Dixie Belle chalk mineral paint is my go-to for all my projects. It adheres to almost any surface you can imagine.
Easy Peasy Chippy Paint Technique

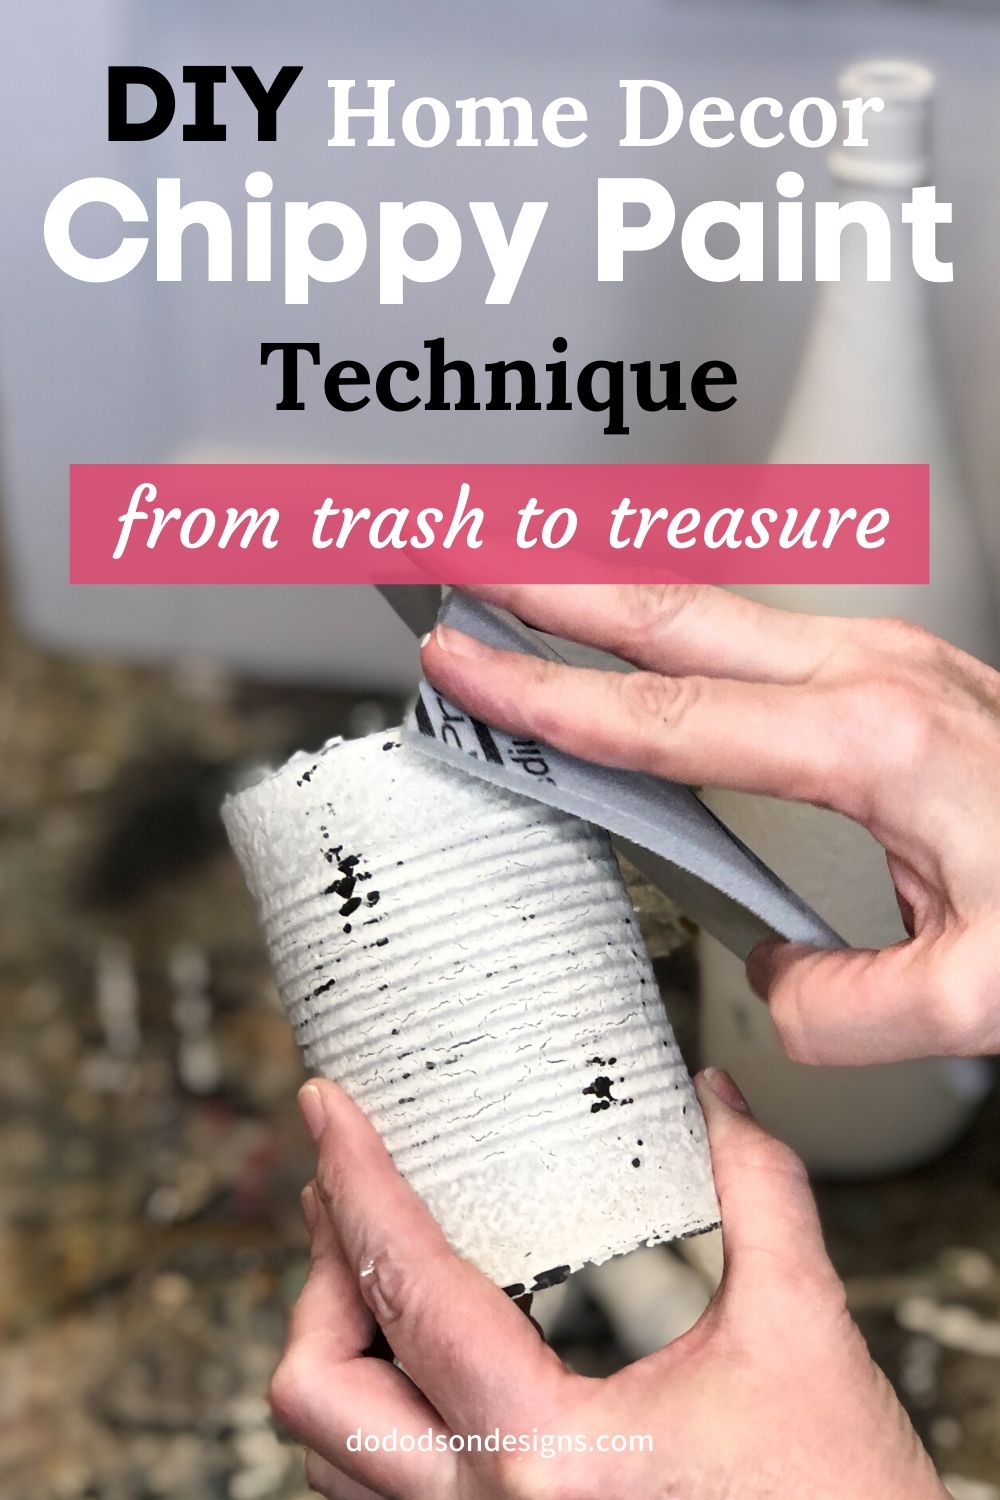
By now you should be seeing some subtle cracking in the paint after it has dried. This is exactly what you want. Applying the chalky paint on thick will make it crack. Kinda like a crackle finish but not as much. This adds even more character and textured goodness in the chippy paint finish.
Grab a piece of sandpaper or R.A.D. pad (my favorite abrasive) and go to town. As you rub on your painted surface, the wax from underneath will peel away to reveal the darker color underneath. And like magic, instant chippy paint finish! You can see how strategically placing the wax can give a realist look to your project.
How To Add A Weathered Look To Chippy Paint
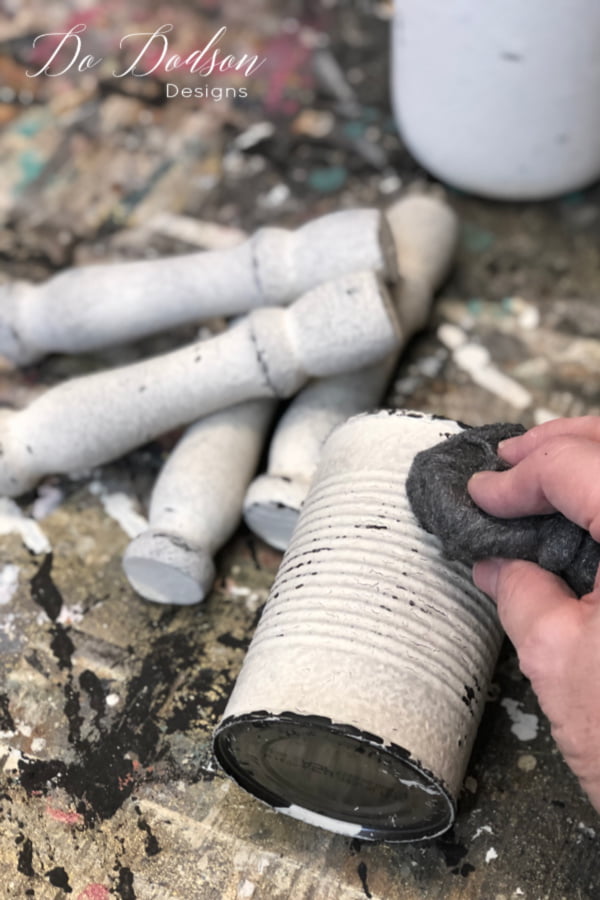
Super-fine steel wool… have you ever tried it? It’s like sandpaper that leaves a beautiful grayish color behind. It’s gorgeous and works well on other chalk paint finishes like this NO- FAIL chippy paint technique I recently did on an antique door makeover for a client.
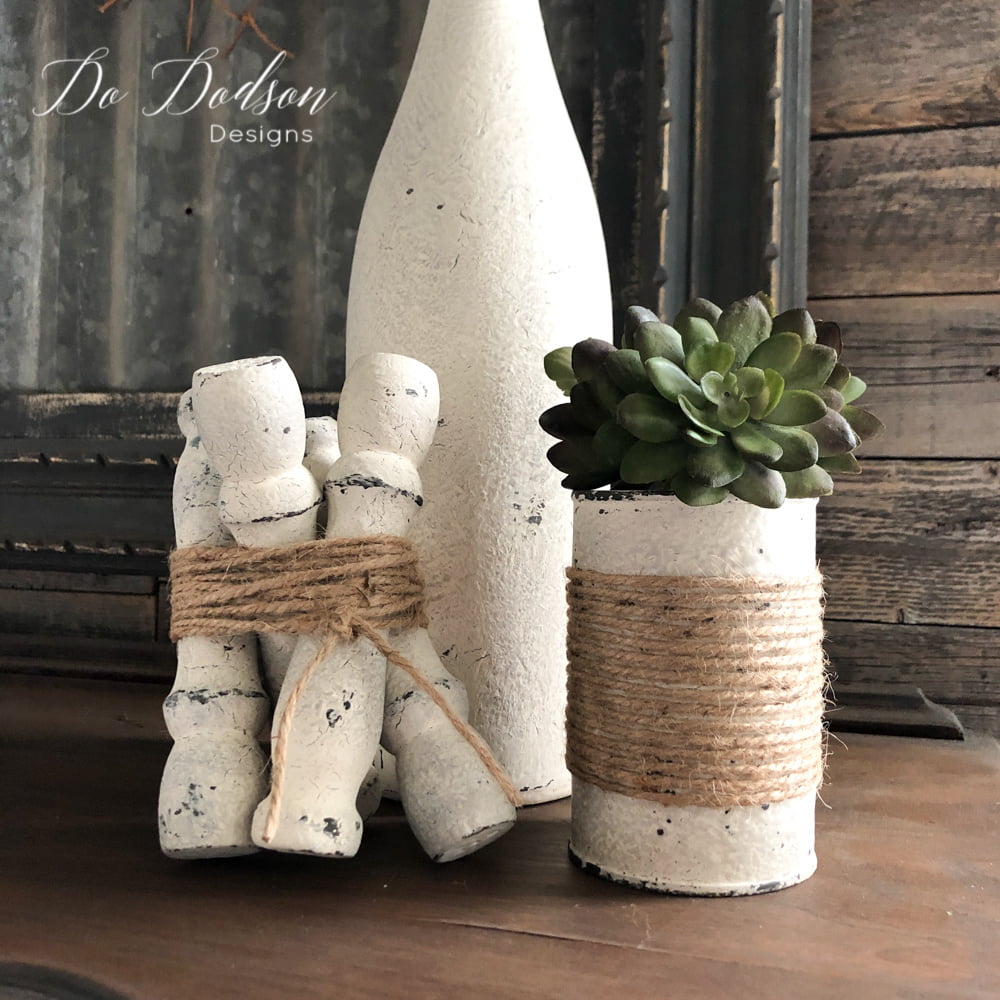
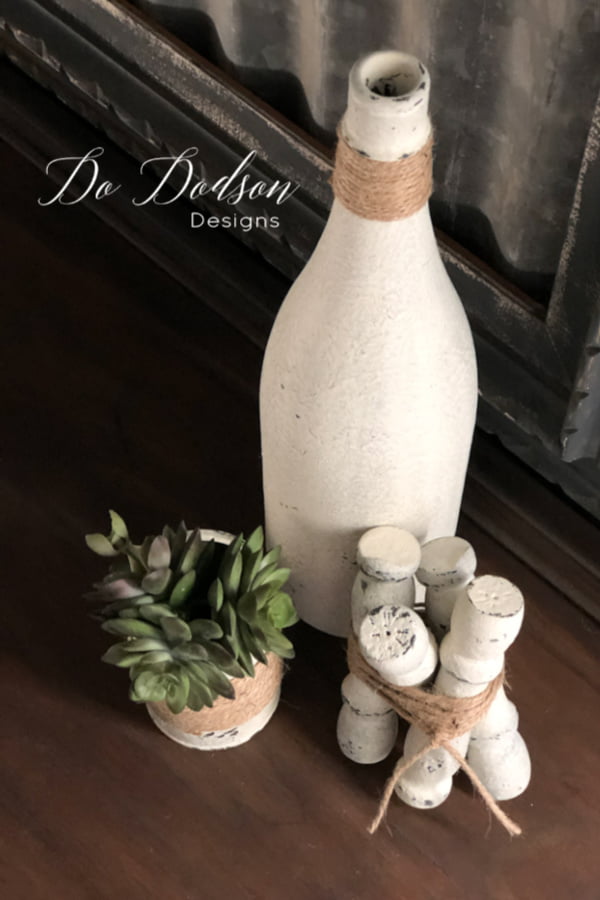
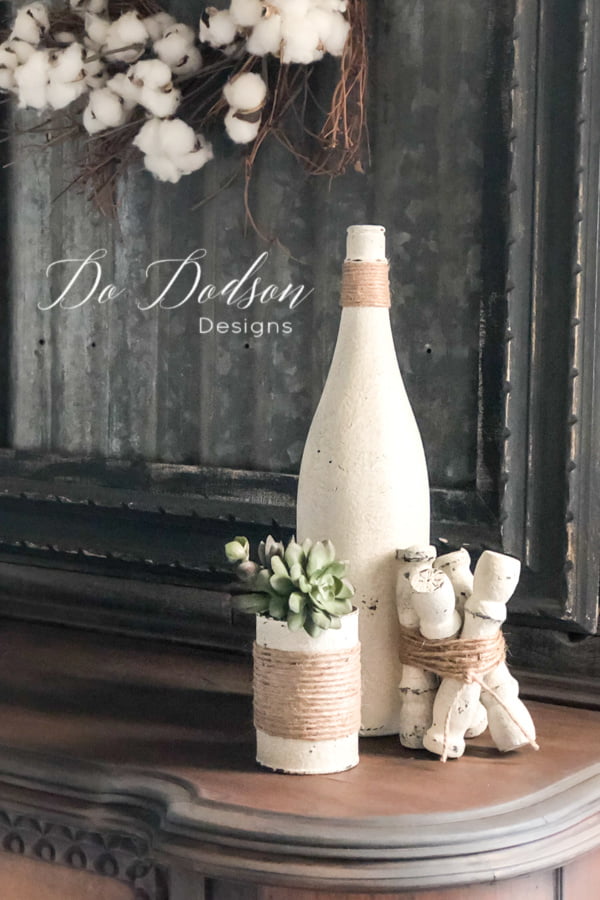
DIY Home Decor Trash To Treasure Results

Now that’s a budget-friendly DIY home decor hack. I’m pretty dang proud of how my trash turned out. I dressed my trash up a bit more by adding jute twine and secured it with some hot glue. Look out Hobby Lobby!
From Trash To Treasure
So, what do you think??? Would you turn your trash to treasure using this DIY chippy paint finish technique? I’d love to hear from you and welcome any and all comments. What would you do differently to dress up your trash? Drop me your ideas below.
Until the next project… xo, Do
Looks wonderful
Thank you, Janice. Just a little fun something, something to keep busy. xo, Do
I love this display you made ❣️
Thank you, Diane. 🙂 xo, Do
Gahhh I love it all!!! Such a fun technique…it’s been years since I used it, now I am off to try it again. Thank you for the inspiration. Love all you do!
Thanks, Tammy! I can’t wait to see what you create. You were on my mind when I painted the spindles. 🙂 xo, Do
I would definitely turn my trash to treasure! In fact, I have the bottles,cans, twine, spindles and the rest!
I literally save everything I can that I could possibly make Into something else. Thank goodness I have a huge attic and huge garage to store it all! These all turned out very nice but I especially love the can! My family thinks I’m nuts for saving all this stuff but trust me when this Virus hit us, I can’t tell you how much I’ve given to nieces and nephews to entertain their children! Yes I seriously have an over abundance but I have an Etsy shop that I will one day open with vintage as well as homemade and you never know when something will come in handy! I wish for you and whoever you may live with to have a safe environment around so that we can always take advantage of your beautiful work!
I’ll toast to you this evening when I pull out that bottle of wine!
Cheers to you, Shirley! xo, Do
I love painting my smalls. Thanks for the candle tip. The can with jute is cute.
Thank you, Cheryl. Just a fun something to keep me occupied. xo, Do
When I try to sign up for your emails, I keep getting an invalid email address message.
I’m so sorry, Barb! Maybe a glitch. Please try again. I’d love to share more with you weekly.
Do
I cannot believe that I found the face of all my trash to treasure projects ???? Hi nice to meet you teacher?
Hi Lisbely!
Nice to meet you too. Be sure to sign up for my weekly emails so we can stay in touch. I share all my projects with my subscribers first. Take care and be safe.
xo, Do