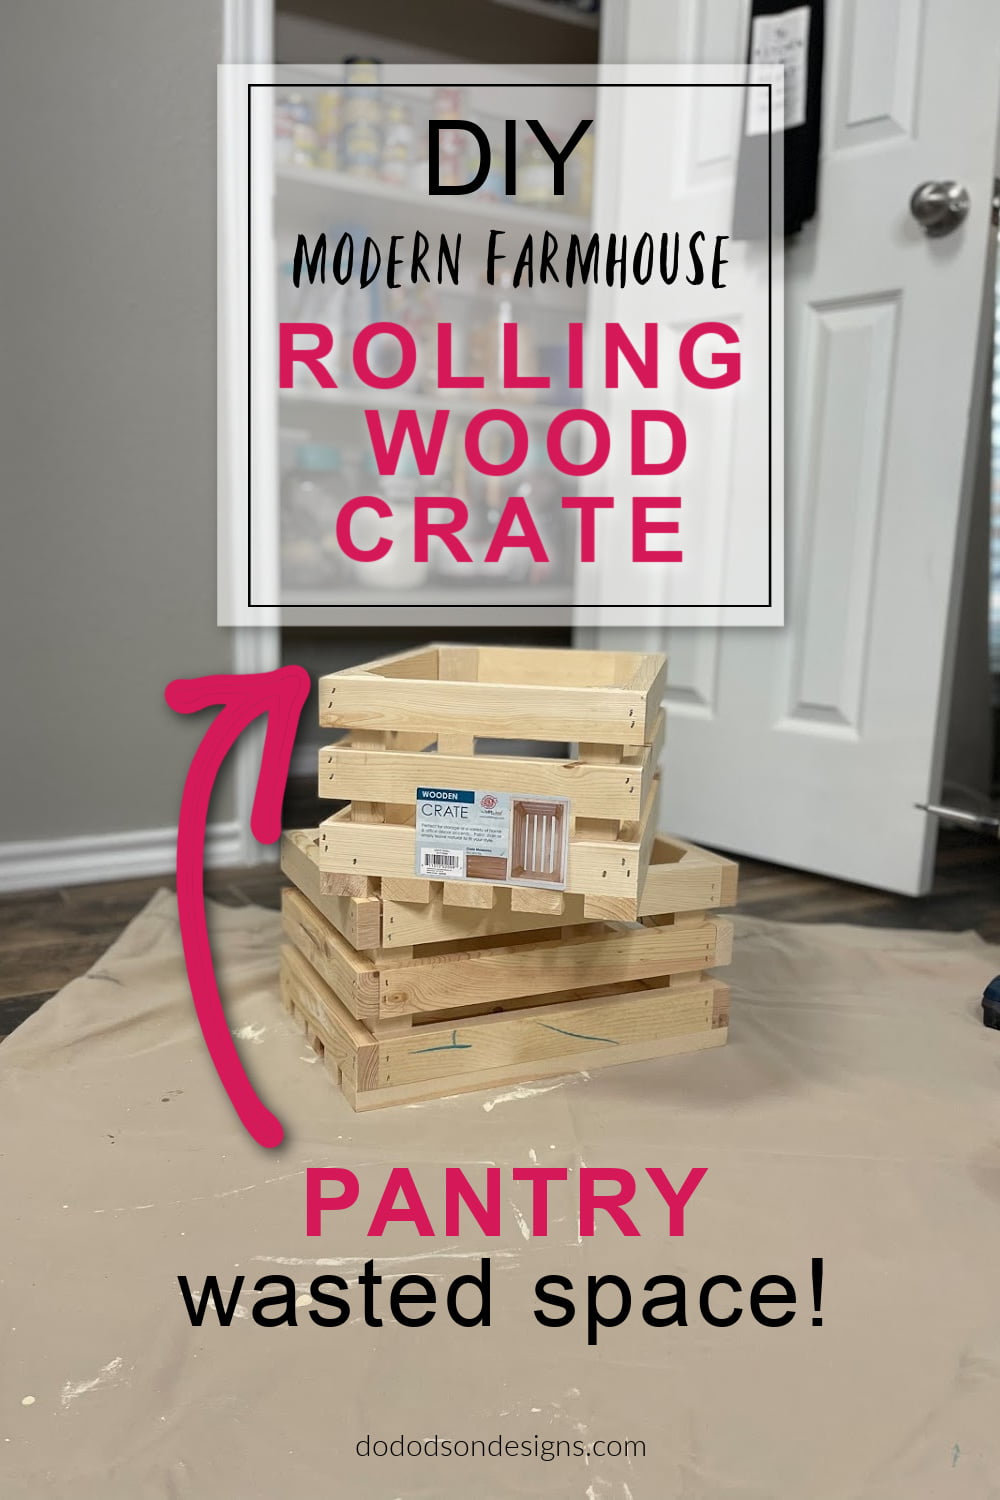
I’ve been unhappy with the wasted space in my small pantry for years now, and a pantry remodel isn’t in my budget, so I decided to do some research, and I found this idea on Pinterest. Today, I’m sharing how to make a DIY rolling wood crate that you can use on the pantry floor for organization and storage. And after making it, I discovered another purpose for it. I can’t wait to show you that too!
This post is sponsored by Dixie Belle Paint Co.
* As an Amazon Associate, I earn from qualifying purchases and through other companies as well. You are not charged extra to use any of the links, but any income I make helps me create more amazing DIY projects to share with you! To see my full disclaimer, click here!
How To Utilize Pantry Floor Storage With Rolling Wood Crates
Because I live in a small town, I frequent Walmart… a lot! It’s all we have without driving 45 to the city, and these are just the right size for the pantry floor under my shelving. Oh, and be sure to measure your space before shopping for wood crates. Yep, I made 2 trips to Walmart that day.
I also love the idea that these are unfinished wood. It’s a blank slate, and you can customize the look to match your kitchen decor.
Don’t judge my lack of organization. Somedays, the groceries are just lucky to make it on the shelf.


SUPPLY LIST:
- wood crate I got mine in the craft section at Walmart for $8.63 each
- caster wheels
OPTIONAL if you’re fancy and want a modern farmhouse look…
- sanding pad Use my discount code DOIT10 for a 10% discount
- gel stain (picklin’ white) or chalk mineral paint
- modern cabinet pulls
Before Staining Or Painting The Wood Crates
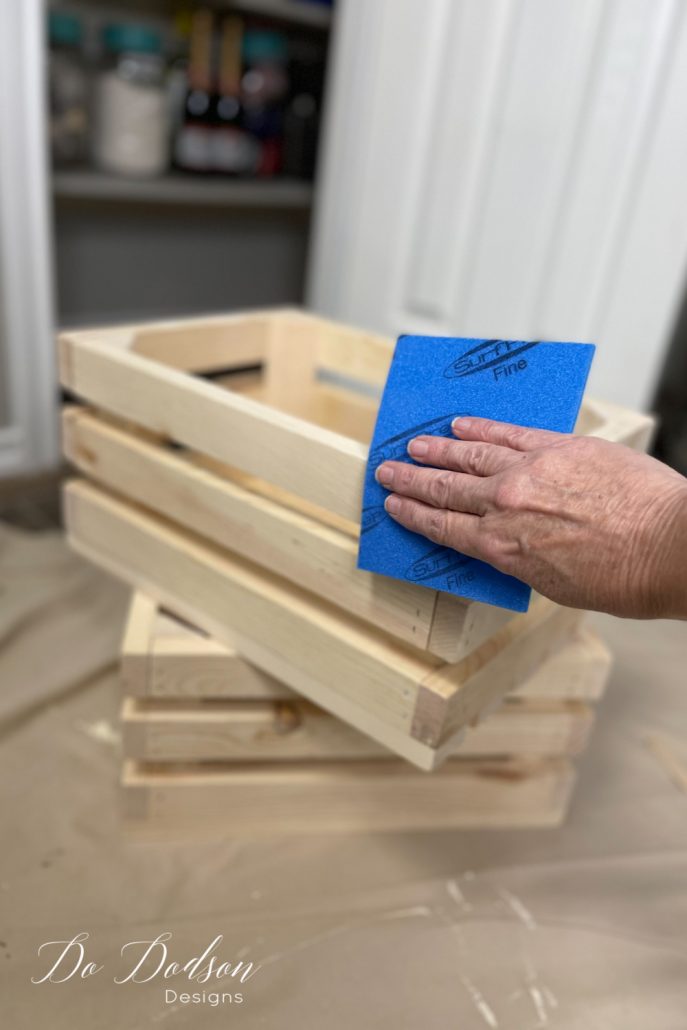
These wood crates are super sturdy and also a bit rough. It’s a good idea to sand them with a 220 grit sanding pad before you finish them out and use them for storage in your pantry.
Finishing The Wood Crate
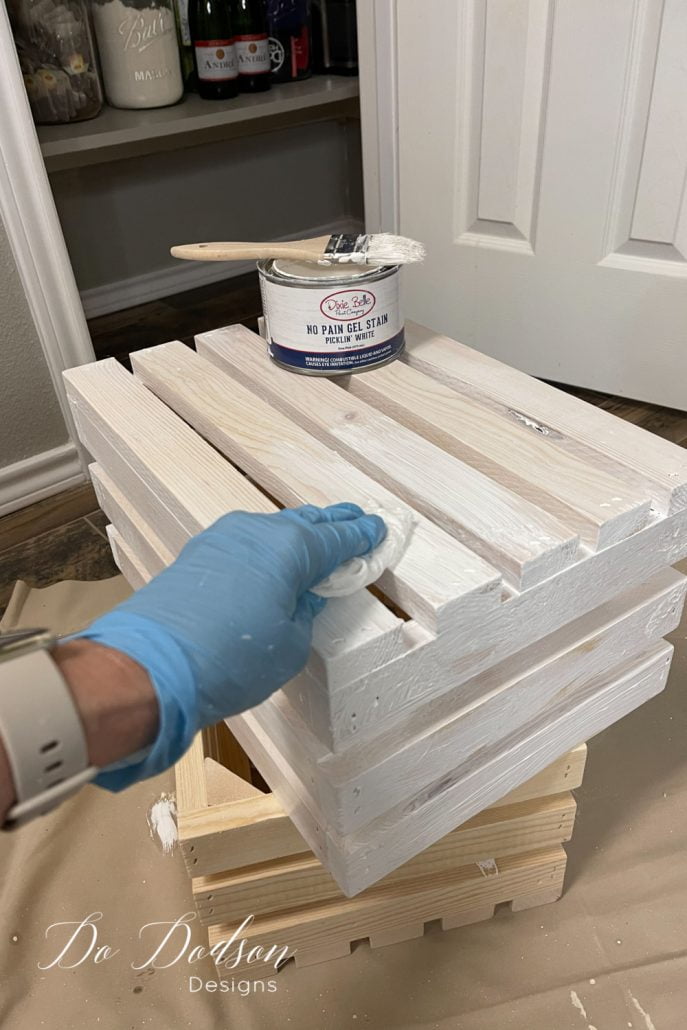
To finish my rolling wood crates, I used a gel stain called Picklin’ White, but you can paint them as well. Normally I would wipe on the gel stain with a staining pad, but instead, I used a disposable chip brush to apply it to the unfinished wood. This made it easier to get between the slates.
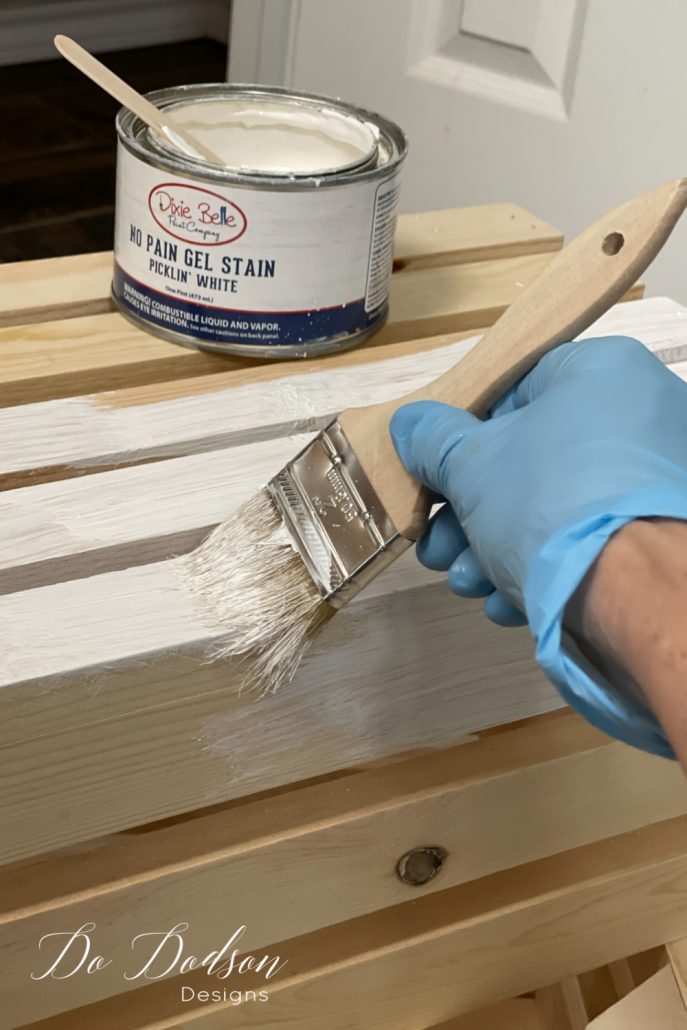
Next, I wiped the picklin’ white gel stain back with a soft cotton cloth to remove any excess. Super simple and quick. The gel stain has a strong odor so if you’re doing this indoors, make sure you’re in a well-ventilated area. And don’t forget to wear your gloves.
After staining the wood crate, I placed them outside in a sunny area to dry. This can take anywhere from a few hours to overnight, and they’re ready to go. There’s no need to apply a top coat with this gel stain. One and done!
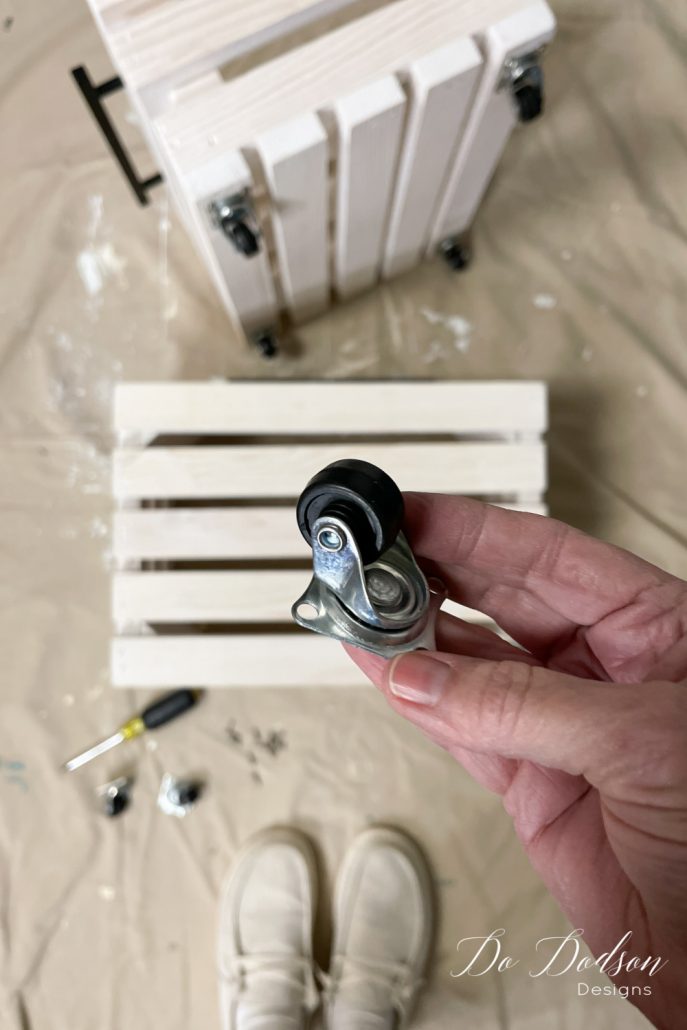
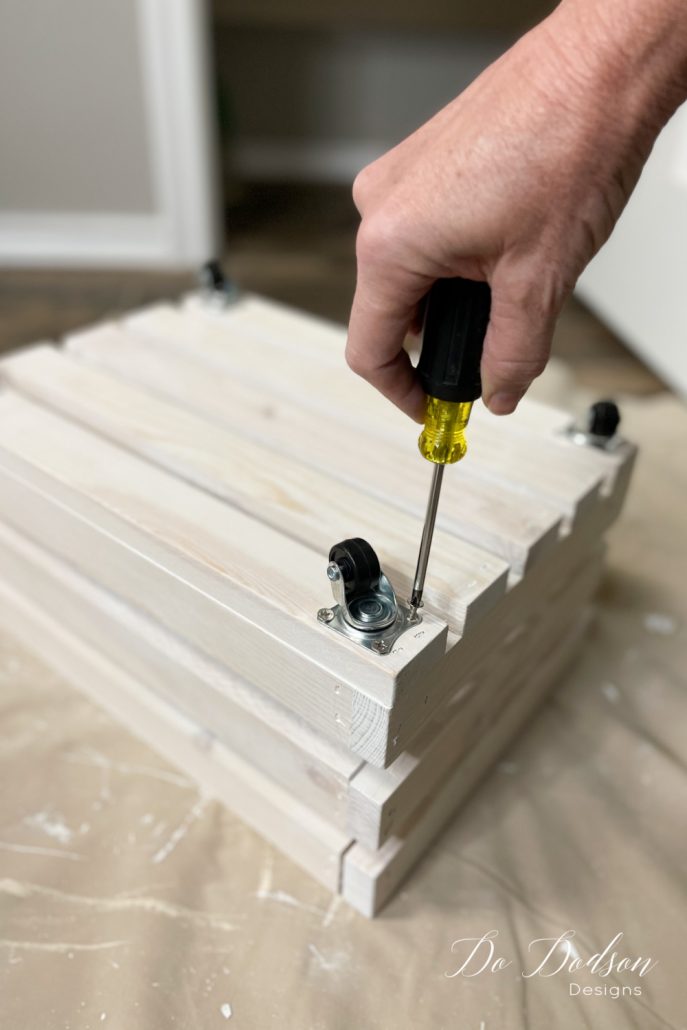
Adding Wheels To The Wood Crates
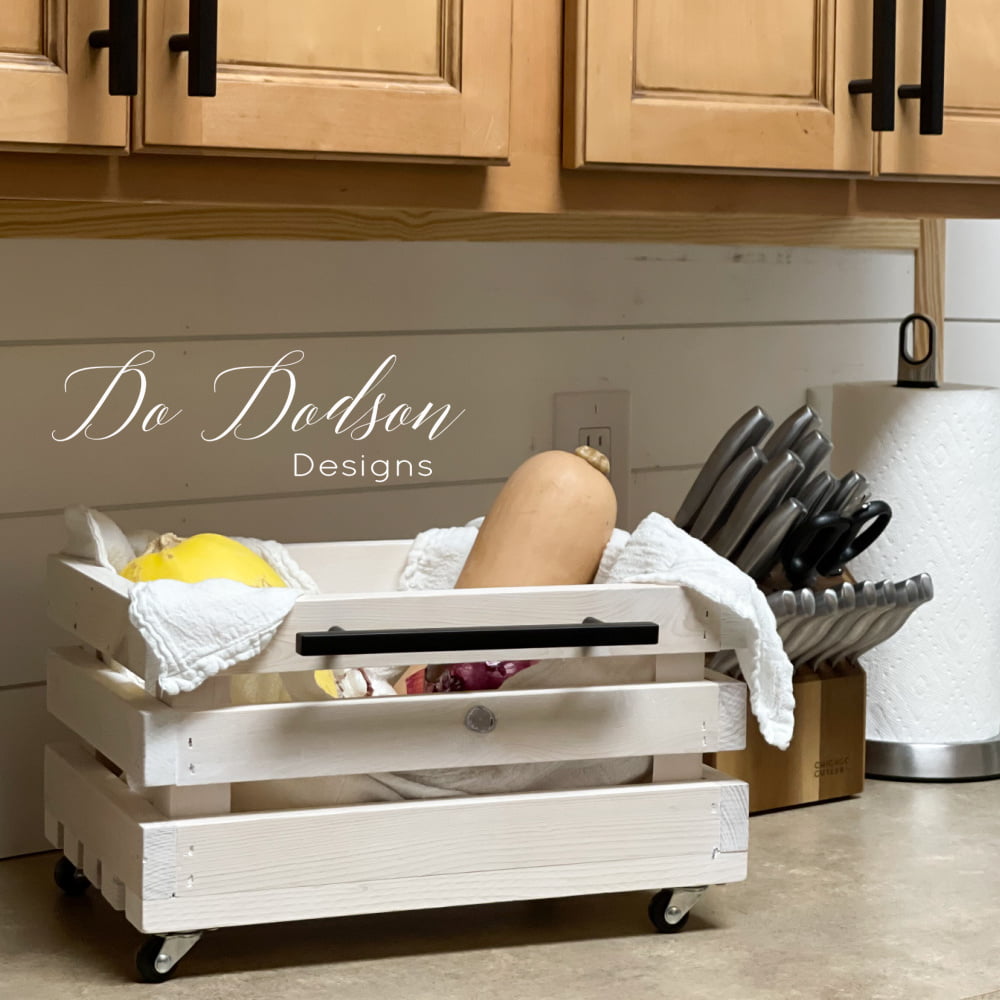
THIS is what makes these DIY wooden rolling crates so amazing! I added these tiny swivel rollers to the bottom of each crate. It doesn’t add a lot of height to the crates, which is good since I plan on using them on my pantry floor under the bottom shelf.
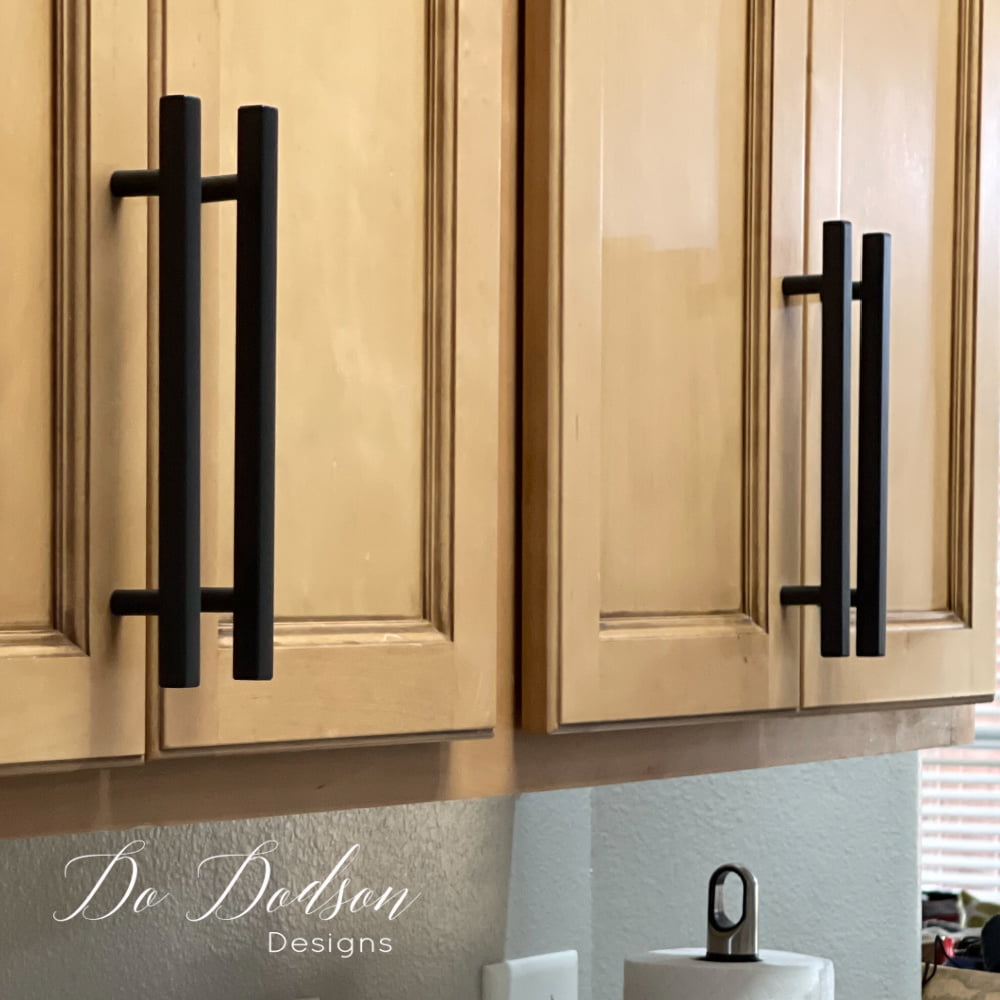
After adding the rollers to the wood crate, you won’t need to do anything else. They are ready to use, but if you happen to have some cute hardware laying around (these were leftover from my recent hardware update on my cabinets), and you want handles or pulls, add them. This cabinet pull matches the modern farmhouse look in my kitchen too. L-O-V-E
Rolling Wood Crates For Your Pantry Floor & MORE!

Here’s The MORE!
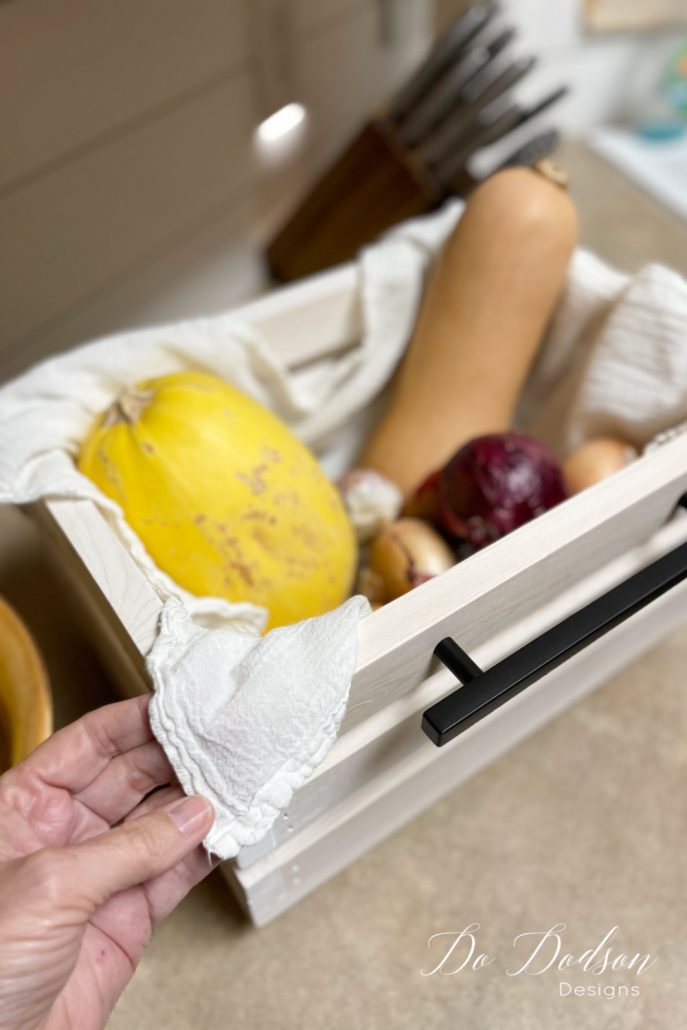
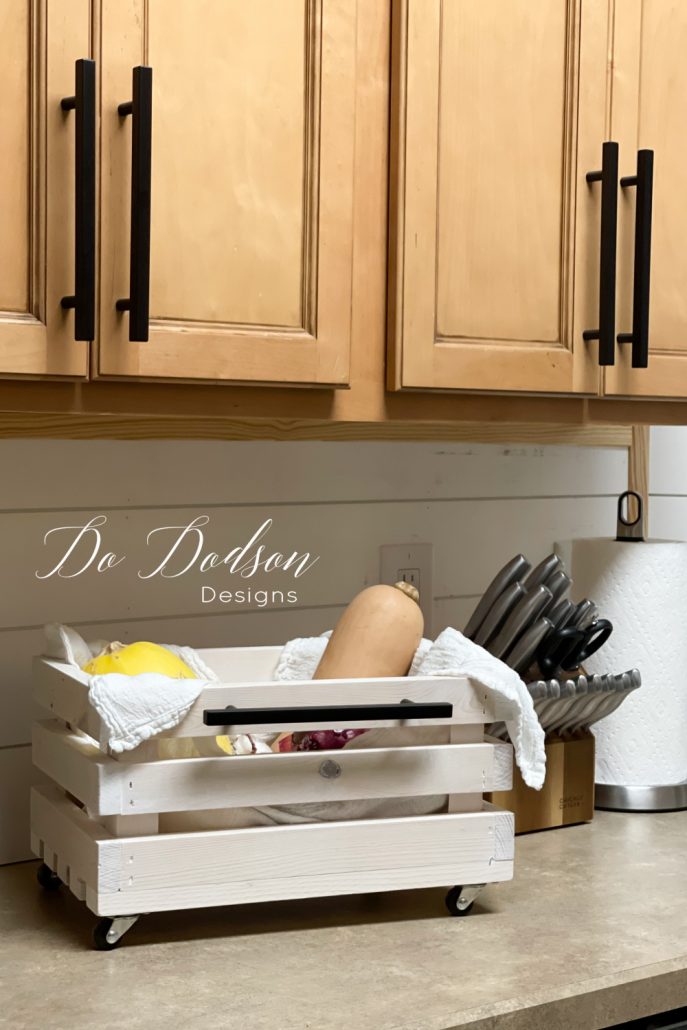
And wouldn’t you know it, these were just too DANG CUTE for my pantry floor! One of the rolling wood crates ended up on my countertop filled with veggies. Oh my goodness, I have to get more of these in different sizes.
And those pulls match my cabinets!!! EEEEK! This is my favorite DIY of 2021… so far.
Like this DIY project? I’d love to hear from you. Drop me a comment below and let me know what you would use these wooden crates for.
Until the next project… xo, Do

Love it, especially the pickling white! I would use one on my pantry floor for potatoes & onions. I could think of endless uses for these & they help to make the pantry floor look so organized, instead of the mess it is! Great idea!
My thoughts exactly, Janell! And those messy onions… thanks for hanging out with me today. 🙂 xo
Don’t store your potatoes next to you onions unless you want you potato’s to sprout eyes and taste like onions!
Thanks for sharing this! I don’t usually but sometimes the hubster will throw them together. 🙂
Love the idea. I think I’ll steal it. I too have too much wasted space under the bottom shelf.
Fantastic! I really think you’ll like this idea. 🙂 xo
Fab Girl Fab 🍅🌽🥔 Lovin this idea. My pantry has that same wasted space.
Isn’t it ridiculous? But they didn’t ask me when THEY designed it. 🙂
I love this idea. I’ve already passed it on to 2 of my friends and they loved it too! Keep those good ideas coming.
Yay, Barbara! So glad you liked it. 🙂 xo
Live these crate ideas
Thanks, Linda! I went back to Walmart to buy more to make them for gifts, and they were all gone. 🙁
Crates are Great! They have sooo many uses. I painted mine white and put them above my washer & dryer for decorating. Cuz the w/d set out too far I really couldn’t do cabinets so I did several crates and put in cute “laundry inspired” elements and greens. Now I even like doing my laundry lol! Like you I also put them in my pantry! Great minds….. 💜
Thank you for sharing that, Lori! I never thought about the laundry room. Tunnel vision took over in the pantry. 🙂
Hi there Do,,Love love love this idea! I have seen this in other diy posts but you make it so much better. Thank you for sharing all your crafty awesome home ideas.
Keep up the beautiful work you do and never stop!
Love ya girl!
Hugs
xo
Thanks, Brenda! Yes, I try to put my own spin on projects that are inspired by others. 🙂 MUAH 😘
Great idea to put those taller awkward items. The wheels makes it easier to just pull out. Such a neater look when push back under.
Thanks, Leslie! It’s working out really well.
Do, I saw crates in Joann’s the other day. I was thinking how great they would be in the pantry. Even better, you added wheels and a handle. It’s perfect!
Thanks, Tammy! They sure have helped with the storage of those awkward items. LOL, my feet get a workout because now I’m lazy and don’t want to bend over.
I love this idea. I’m going to have to do this. Brilliant. Hugs to you.
Thanks, Renea! Hugs back to you!
Why oh why have I not thought of this myself? I use old plastic milk crates and mismatch tubs in my pantry shelves.
But now I’m jealous of your wheels and your cuteness! We all need more cuteness in our lives don’t we.
Ha ha, Diane! Yes, we do! But then again, I like to repurpose, and an old plastic milk crate would work too. I have one. Hmmmmm, I’m thinking studio storage. Thanks for the idea.:) xo