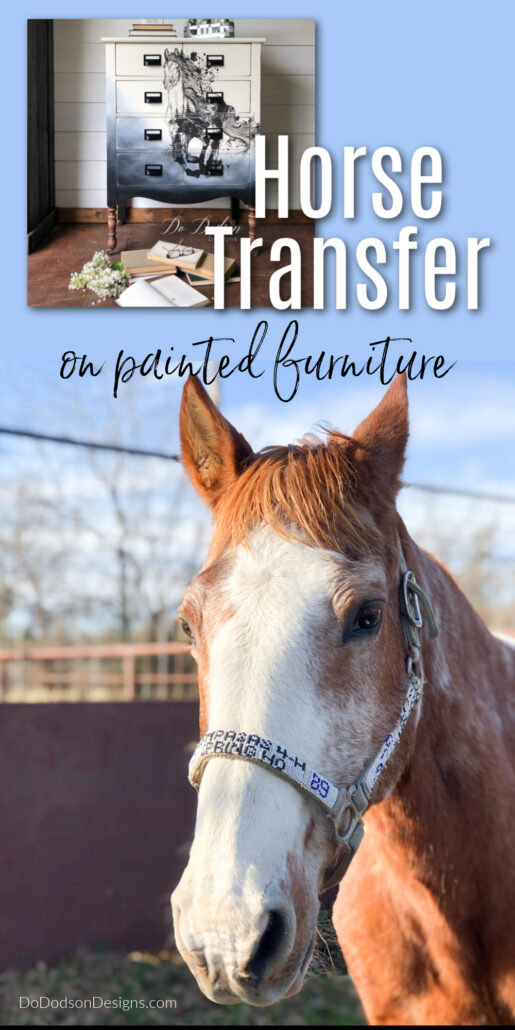
Hello, my furniture-flipping addicts! Today I’ll show you how to add a transfer to painted furniture in less than 20 minutes. All you need is a painted piece of furniture that has been cured for at least 48 hours. So, if you have painted furniture already and you’re bored with it, or it just isn’t selling, this is a quick and easy way to fancy it up a bit.
This post contains a few affiliate links to help you find the products I use. You are not charged extra to use any of the links, but any income I make will be used for more fun DIY projects that I can share with you! To see my full disclaimer, click here.
How To Add Transfers To Painted Furniture

SUPPLY LIST:
- Chest Of Drawers flat front
- White Lightning (Dixie Belle wood furniture cleaner)
- R.A.D. Pads
- Surfprep Sanding System 3X4 Electric Ray
- BOSS (stain blocker)
- Chalk Mineral Paint Buttercream & Caviar
- Fine Mist Spray bottle (water for paint blending)
- Paintbrushes
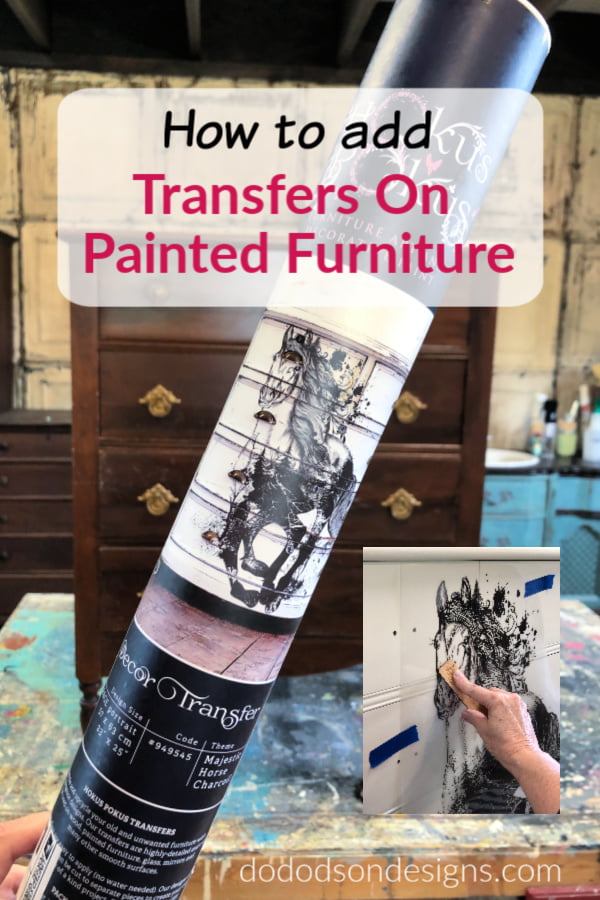
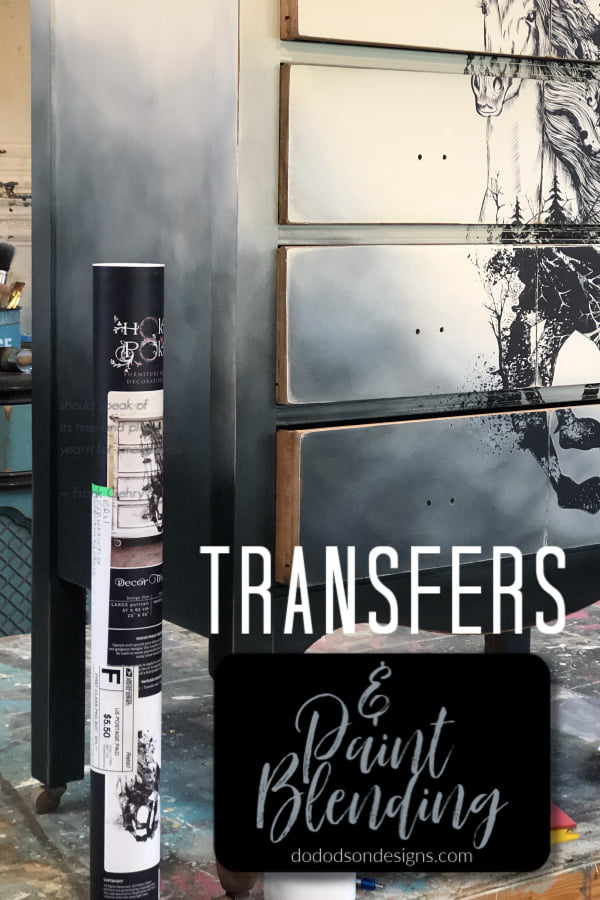
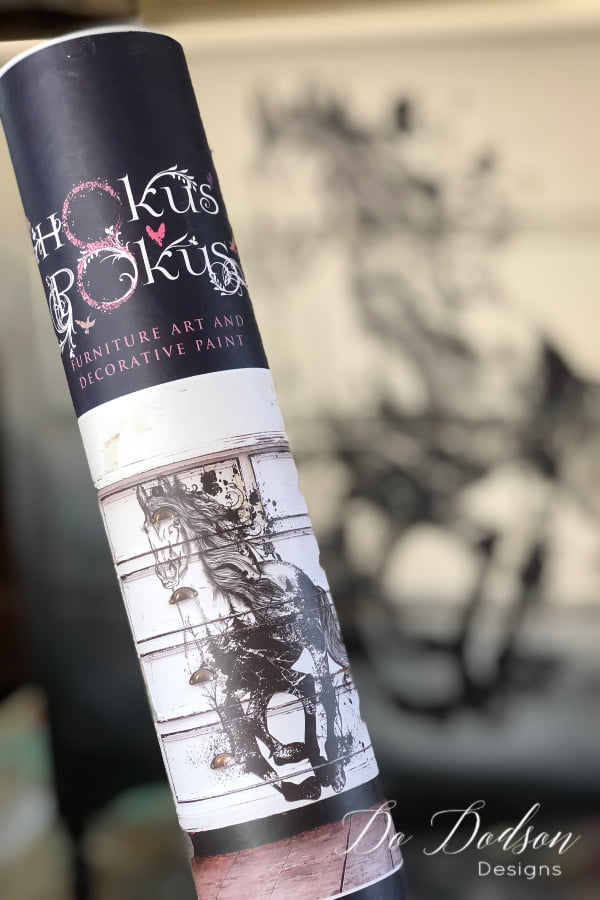
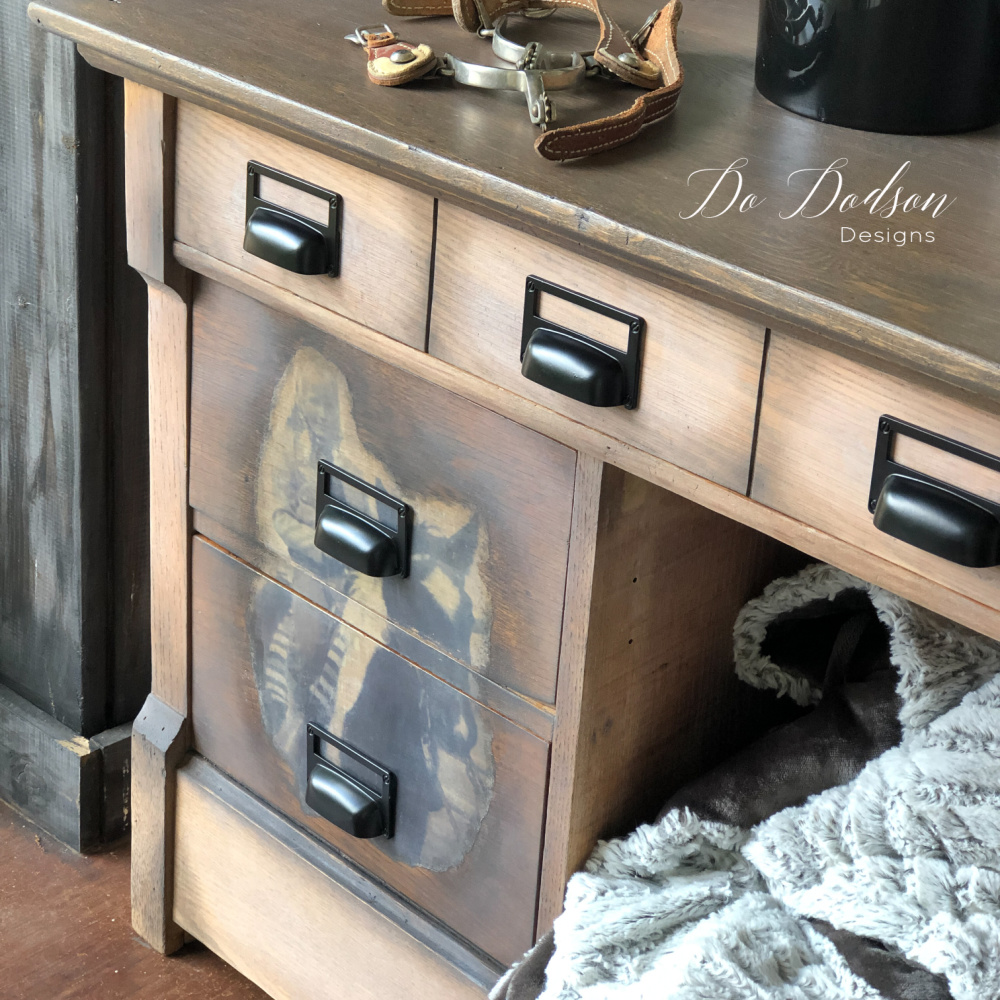
- Horse Transfer (Majestic Horse Charcoal)
- Flat Top Coat (Dixie Belle)
- Hardware Pulls card catalog
*Don’t forget to clean and prep your piece before you begin painting. CLICK HERE to learn how I get a no-fail finish every time.
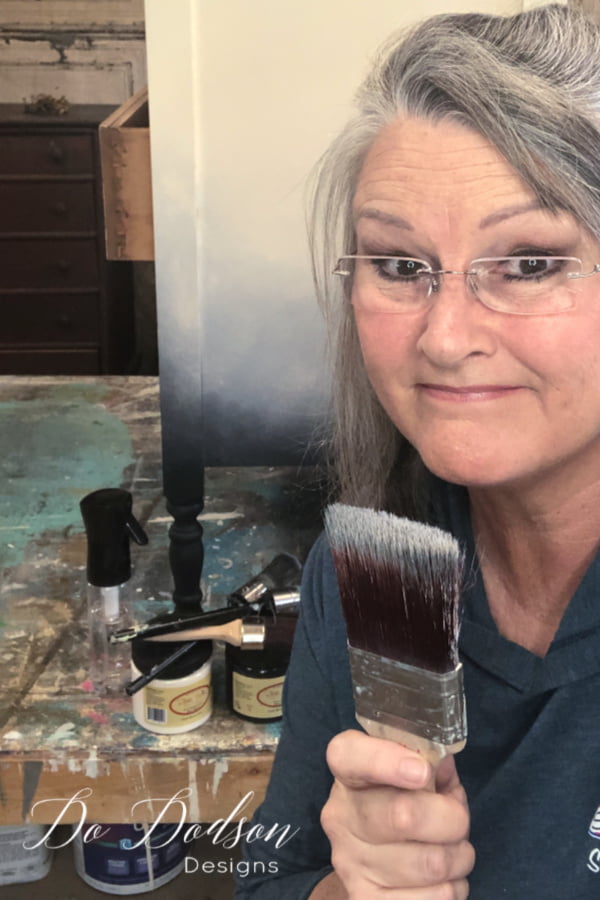
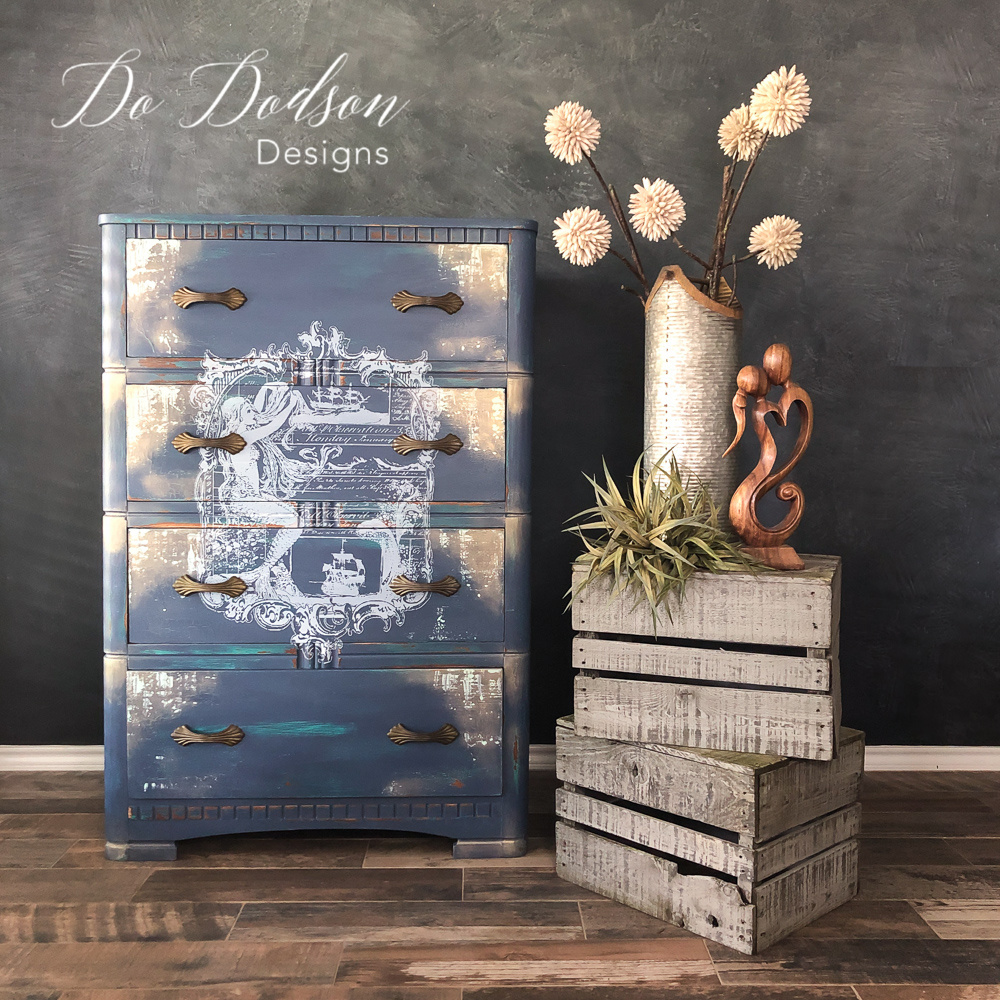
Painting Your Furniture With a Soft-Blended Look
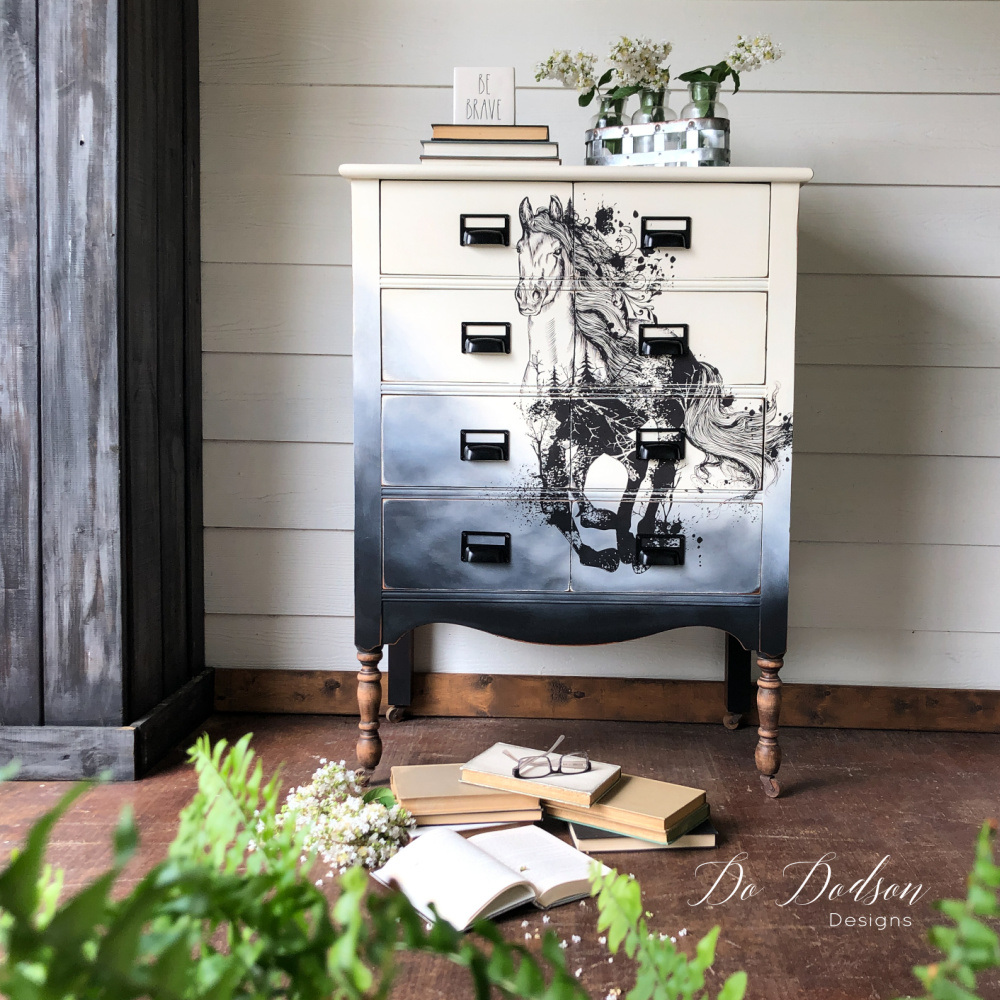
Since you’re giving your old furniture a makeover, why not set the background for the transfer that you want to apply? Try adding a soft, blended paint look that compliments the transfer. It’s not as hard as it looks. I blended black and white chalk mineral paint to create this dreamy cloud effect. Watch my step-by-step blending tutorial HERE.
*DON’T MISS THIS IMPORTANT STEP
Be sure to allow your painted surface to dry for at least 48 hours or longer before applying for this transfer because water can get trapped under the paint and cause the glue not to adhere. For best results, follow this rule.
Securing Your Transfer On Painted Furniture
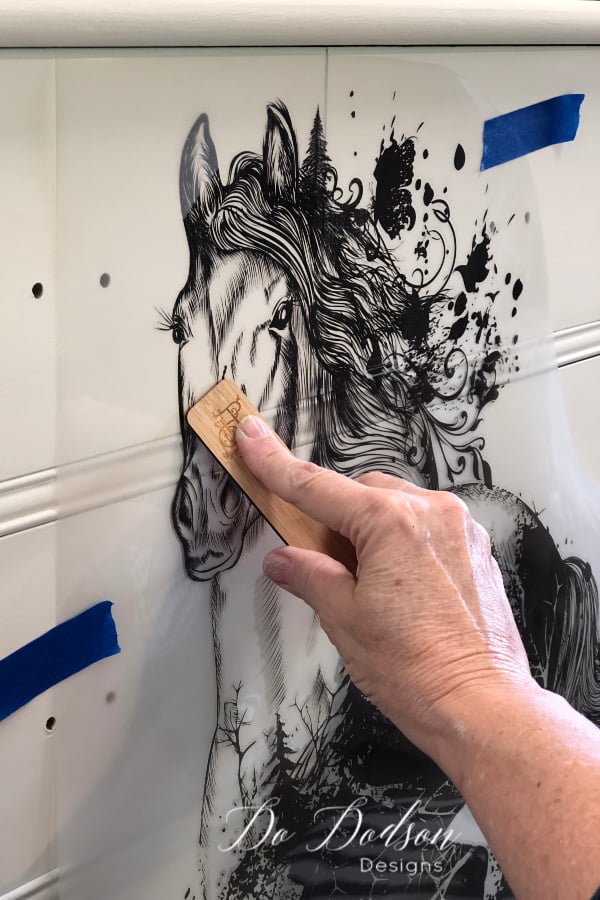
Step 1
Determine the location where you want the transfer to live on your painted furniture. I also found that trimming the excess plastic sheet around the transfer was beneficial. Oh, and you can certainly use a portion of the transfer and keep the rest of the design for another project. Using a blue painter’s tap helps to secure it when you first begin. The tape can be removed as the transfer is applied.
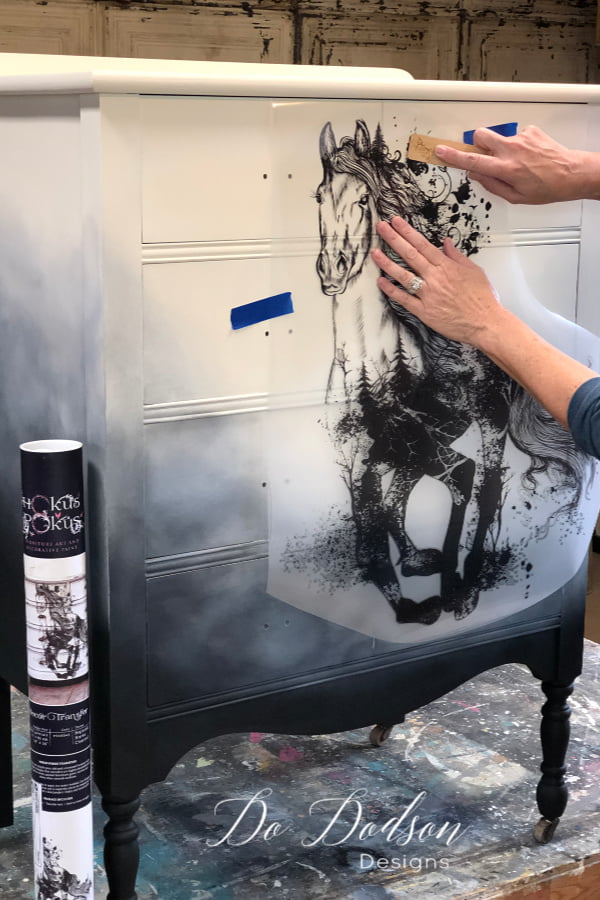
Start from the top of your design and work your way down by gently rubbing it across it with a wooden stick in the package.
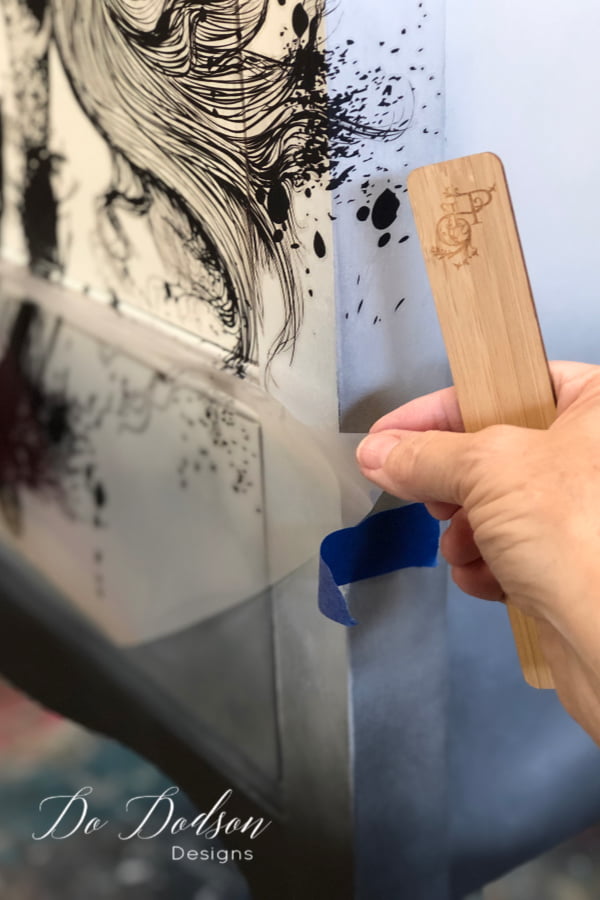
Step 2
Gently peel away the plastic as you rub. If you find that a part of the design is not transferring… replace the plastic in place and gently rub it again. This will happen! I guarantee it, but it’s not a big deal. This isn’t a perfect transfer; honestly, there’s no one product I have found on the market. I love the tiny cracks and imperfections it gives. And if you’re that close to your furniture to see it, that’s a”perfectionism” issue. And that’s overrated. Don’t sweat the small stuff; have fun with your DY projects!
This transfer is huge, and it took me less than 20 minutes once I had it in place. Super quick and easy to apply.
Step 3
Once the transfer is secure… buff with a soft cotton cloth to ensure that all the tiny areas have good contact with your painted surface; that’s it! No need to even seal this one. If you have to for peace of mind… (because I sealed this one, too), use a water-based topcoat. I love the flat finish on this piece, so I used a flat topcoat over the whole piece. If you want to distress the transfer for an aged look, go for it. Super-fine sandpaper will do the trick, but use a light hand. It doesn’t take much.
In Loving Memory Of My Horse Buddy
I’ll miss you terribly. My life is better because of you. You taught me how to trust and what unconditional love feels like. Run pain-free, my friend, and don’t look back. You will always be my forever heart-horse.
Don’t cry because it’s over, but smile because it happened.
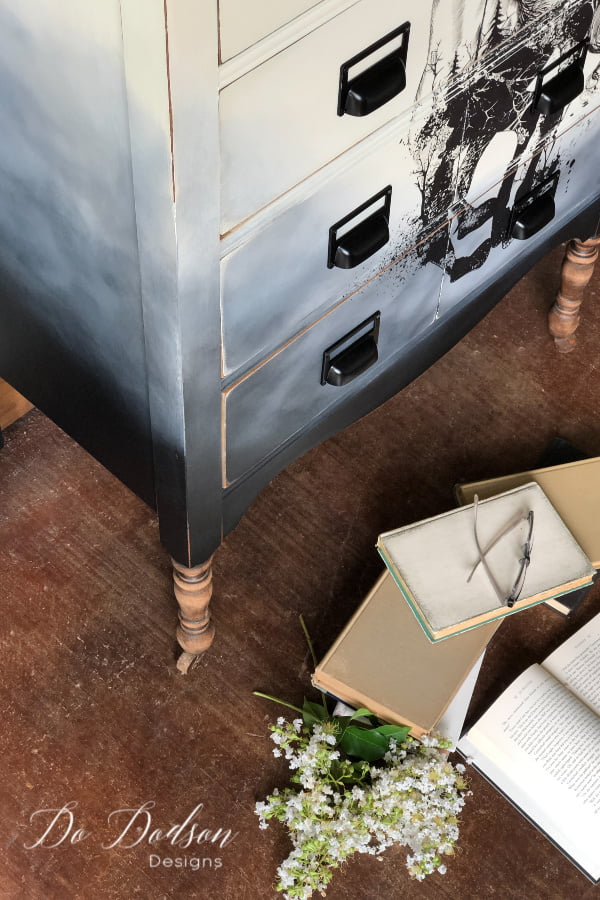
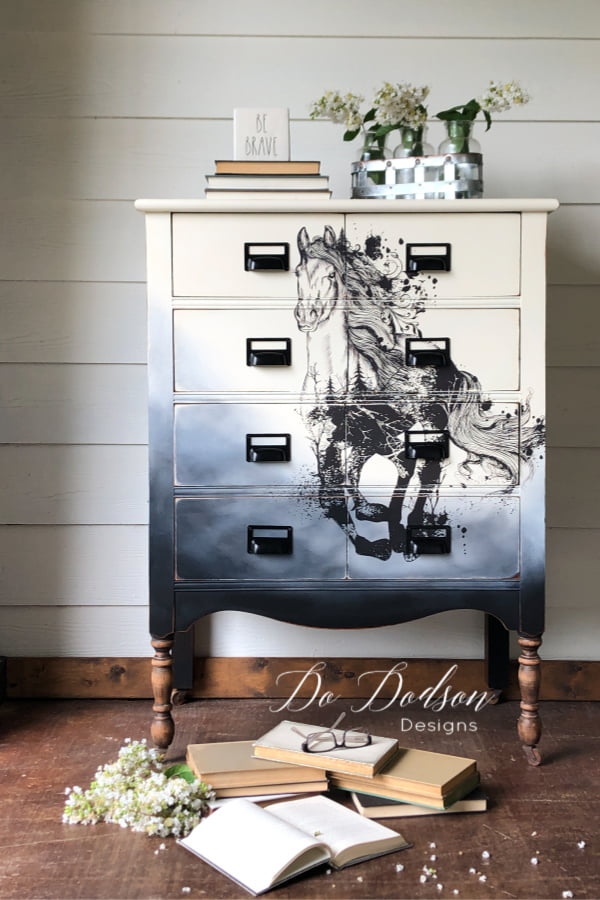
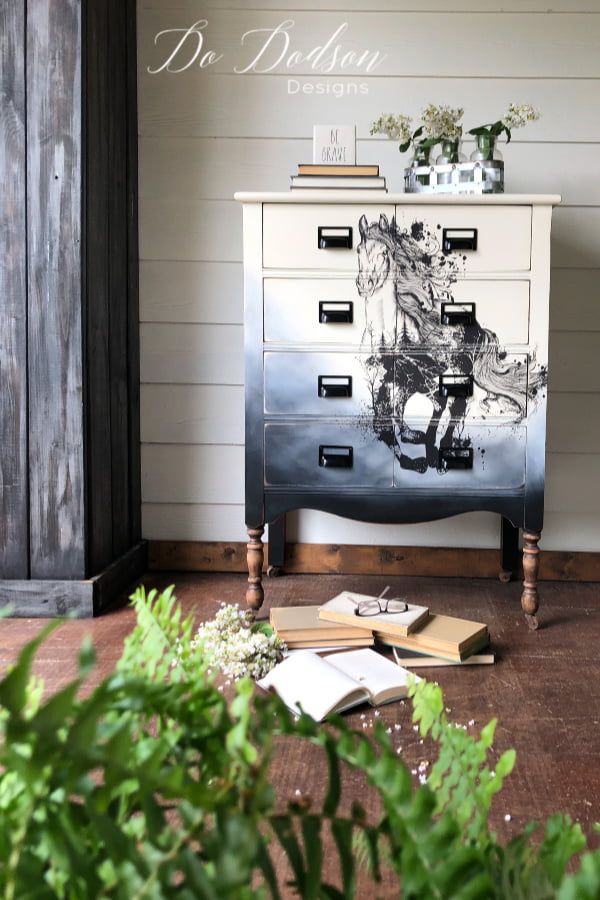
This one turned out lovely and didn’t even look like the same chest of drawers. And it now has eight drawers instead of four. Well, four faux drawers. Want to learn more about how to create this look? I did a full video tutorial in The Art Of Painting Furniture membership Library. CLICK HERE to learn more.
Thanks for joining me with this makeover of transfers on painted furniture. As always, I welcome your feedback… the good, bad, and ugly. Drop your comments below and tell me your thoughts, or if you need help, I’m here for that, too. Have a fantastic week!?
Until the next project… xo, Do
Gorgeous makeover Do! And the horse is so fitting and perfect for you. XOXO
Thanks, Denise! I have a Granddaughter that loves horses too. She just might be getting a little something-something for her bedroom. 🙂
I love that horse. You did a beautiful job. Can a transfer be applied on a piece that has been waxed?
As long as the wax has been cured it shouldn’t be a problem. Great question! xo, Do
I would really like to know how you cut (?) the transfer where the drawer meets the body of the piece of furniture
Great question! If you’re working with a flat piece, just lay it over where you want it to go and rub away. It will only stick to whatever it is transferred too and the small gaps between the doors… it will be left on the transfer paper. No cutting necessary. That way the pattern still flows. Hope this helps. Best wishes to you. 🙂
Where can I find quality Transfers besides flowers and such?
Hi Linda,
What specifically are you asking for? Patterns?
I love the horse transfer you used my daughter loves horses. Can I find furniture transfers locally or does it have to be online? I like seeing things in person before I buy them… I would like more wording transfers like poems quotes animals stuff like that… can you help? 🙂
Hi Ruby, Redesign With Prima is online, and you should be able to search for a retailer near you. https://www.redesignwithprima.com/
Love your work 💕
Your information is always so helpful.
I’m so glad I could help. 🙂
Thank you
Beautiful work I love the horses.
Thank you so much. 🙂
Denise, your blog so touched me today. My oldest daughter has had her horse since she was 10. She is now 39 and Cheyenne is 35. He has been what we call a pasture horse for many years on her small farm. I can’t imagine the loss she will feel when it is his time to leave us. I can’t imagine the loss you are feeling. I pray that she, as you have, will find the grace to accept his passing, knowing that all things happen in God’s time. Thank you for sharing.
That was so beautiful, Denise. What a fortunate young lady to have her friend all this time. I as well as your daughter will feel peace in knowing that they lived a long and full life. Pasture life is a great thing. Thanks for sharing. 🙂
I’m so sorry for your loss. Buddy loved you and didn’t want you to see him leave.
Thanks for the wonderful horse transfer. It is beautiful!
Take care.
Thank you, Lori. He was one in a million.
xo, Do 🙂
Oh Do! I am so so sorry you lost your best friend. 100 years old is a good long life and Buddy probably knew he couldn’t last another winter. He is running free pain free and I do believe all pets go to heaven. I hope so anyway. Beautiful makeover.
Thank you, my friend. Your words are true and I’m feeling much better. 🙂 xo
I just love this idea. I also have a very old horse that is in retirement. We takes walks together. He loves just to walk along with just a halter. I can no longer ride him due to his back hurting. So we walk. I hate to think of when it’s his time to go, but what a wonderful way to celebrate life with him. I’m going to remember this when it’s time.
Hi Sandie,
It is hard but beautiful at the same time. Just knowing that our horses lived a long and happy life while so many others didn’t have one. We are as blessed to have them as they are of having us. 🙂