
This painted cedar chest makeover almost didn’t happen, but I’m so glad it did. Today, I’m sharing how I gave new life to a true antique cedar chest. The before and after photos are shocking! Now for the tutorial.
Thanks to Dixie Belle Paint Co. for sponsoring this post. While I was compensated to write this post, all opinions are my own.
* As an Amazon Associate, I earn from qualifying purchases and through other companies as well. You will not be charged extra when you purchase through these affiliate links, but any income I make helps me create more amazing DIY projects to share with you! To see my full disclaimer, click here!
Is It Okay To Paint An Antique Cedar Chest?
Well, that depends. If your vintage lane chest is valuable, painting over the original finish could decrease its value. But, if you’re like me, nothing in your house, garage, or attic is of any value except to us seeking a challenge. A JANKY challenge, that is.
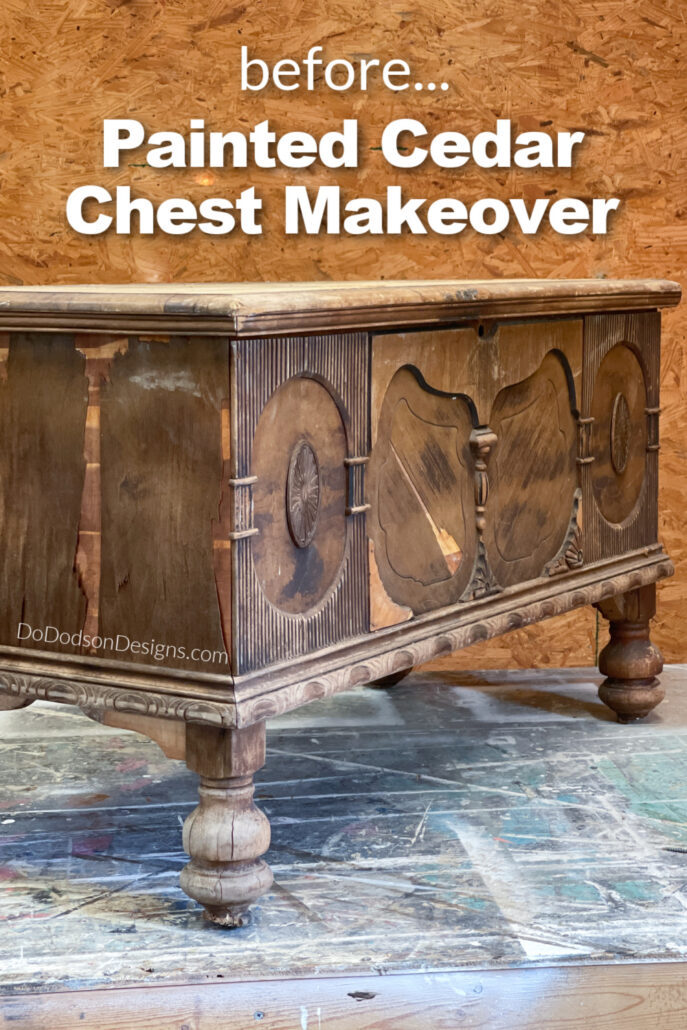
Can you believe I paid $40 for this hot mess?! But she is a looker! Obviously, paint and a whole lot of repairs can only increase the value of this water-damaged, veneer-peeling, rotten legs and moldy cedar chest.
And might I add that if it’s your furniture, and if you want to paint it, DO it!
Inspirational Painted Cedar Chest Ideas
If you want more tutorials on this subject, checkout these painted cedar chest ideas below. Get easy-to-follow furniture tutorials to inspire your next furniture ideas.

SUPPLY LIST:
- old furniture or janky ole cedar chest
- All Purpose Bondo or wood filler
- wood glue
- Endless Shore Silk All-In-One-Mineral Paint (built-in primer)
- Silk Extra Coat (Satin Top Coat)
- paint brush 2-inch mini
- applicator pads or sponges
- paper towels
- modern black furniture legs, 7-inch
- Suggested Tools
- SurfPrep Sander
- 100,180 and 220 grit sandpaper (to rip off old finishes)
- shop vac
- hammer
- paint scraper for wood
- pneumatic nail gun and compressor
- drilling and driving set for woodworking
The Prep, AKA Demo
I would love nothing more than to go into great detail about how I prepped this chest before painting it, but the truth is, it had too much water damage to even think about getting it wet.
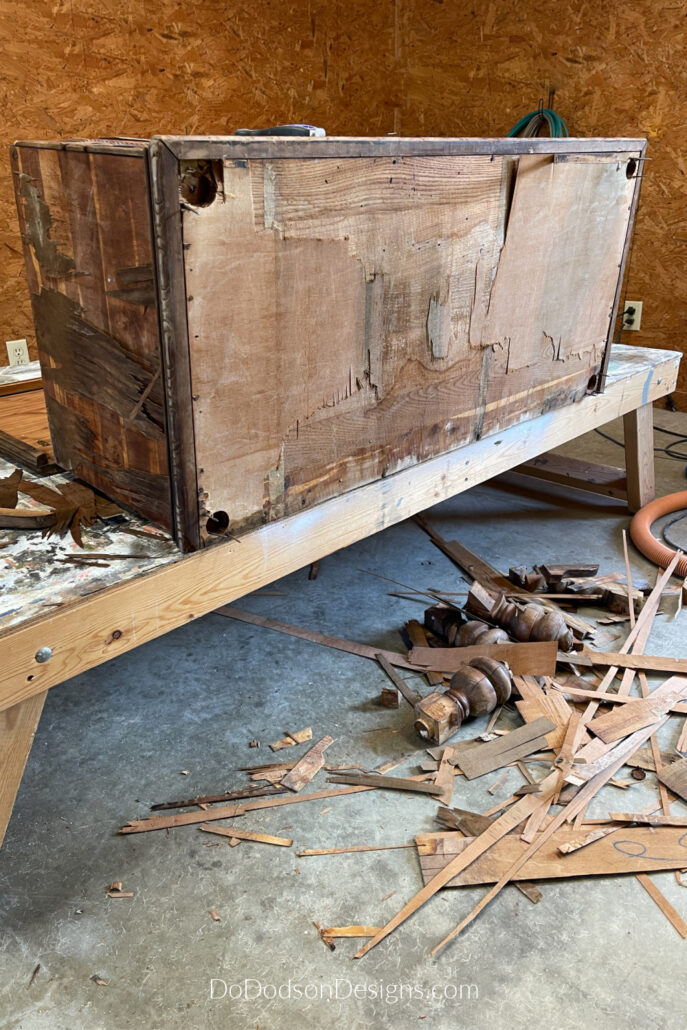
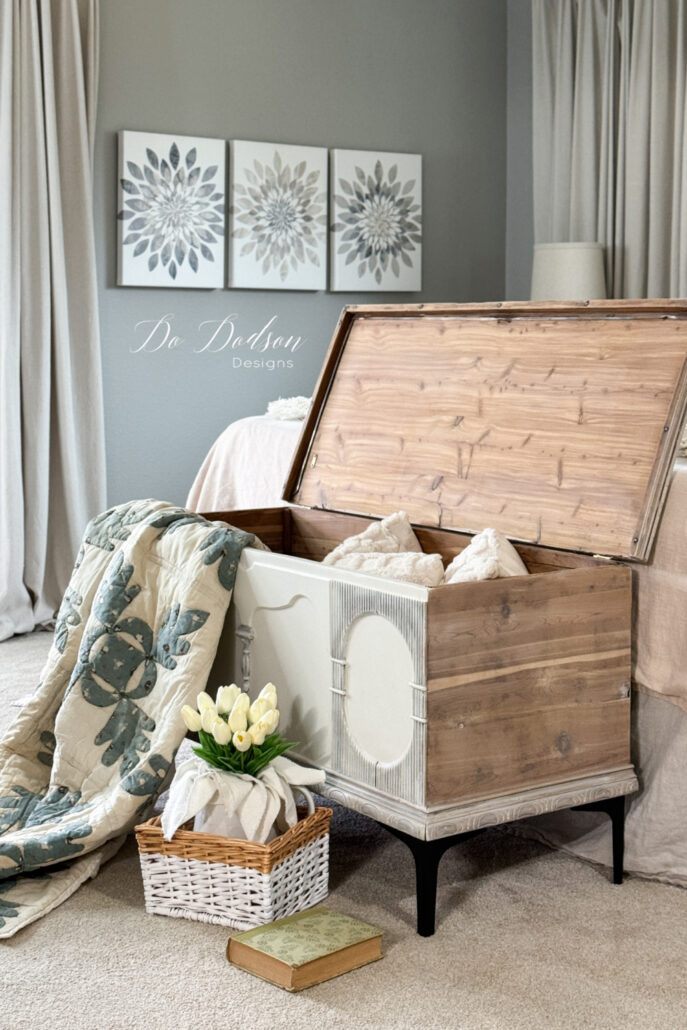
So, I started off by assessing the situation. The first thing was to remove all the veneer that was peeling. To my surprise, beautiful cedar wood was underneath the sides and the back, as well as inside the cedar chest.
I was so sad to discover that one of the legs had rotted beyond repair. Photos are deceiving; you never know until you dig into these old pieces.
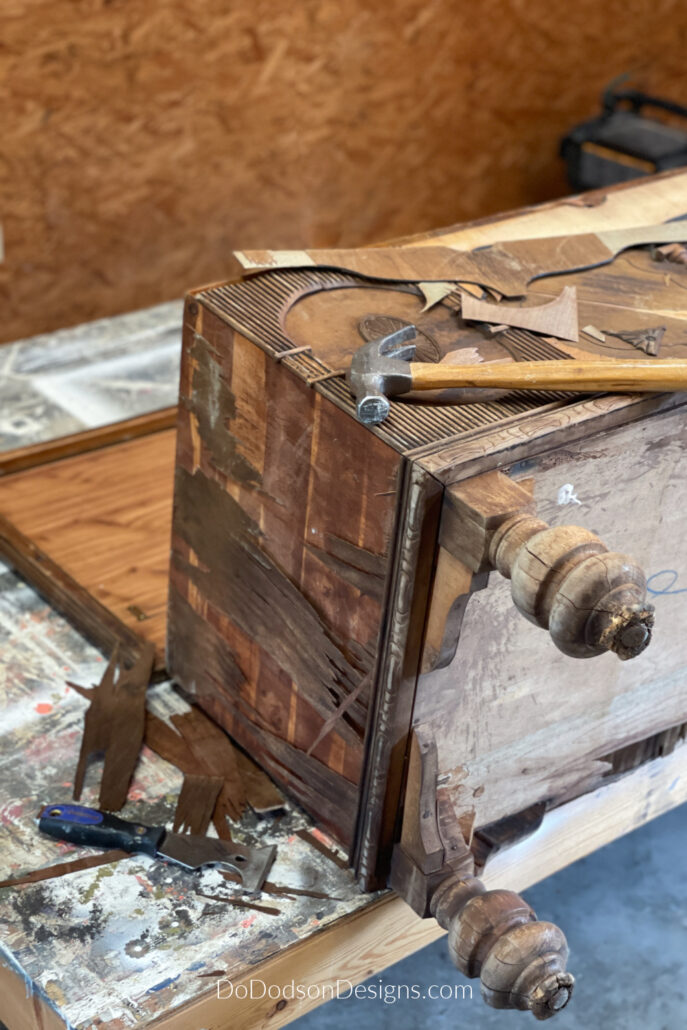
So, I got to work and spent the rest of the day removing the veneer and the rotted legs. Right about now, I started wondering why I took on this project.
Can I Sand Away Old Finishes On Wood Furniture?
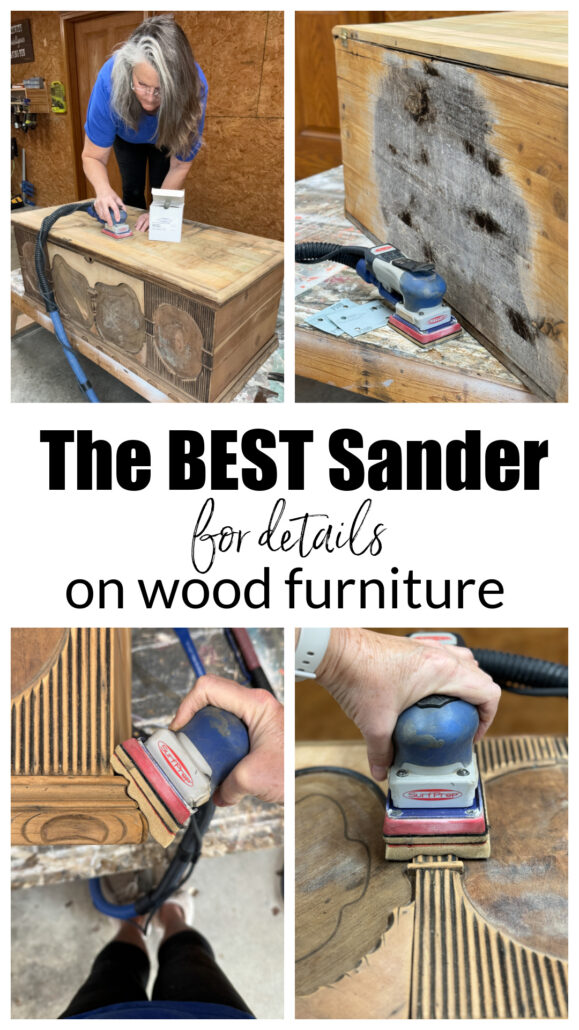
You bet you can! I do it all the time. But the condition of the existing finish needs to be right. Because this cedar chest was old and probably stored in a barn from the looks of it, the existing finish was already flaking off; it was much easier to use my SurfPrep Sander and remove it by sanding it off.
*Heads up! If you try this method on a finish in good condition, you will go through a lot of sandpaper. The finish will gunk up (sticky residue) your paper. Don’t say I didn’t warn you.
If you need a tutorial on stripping off finishes on wood furniture, CLICK HERE to learn more.
I started with my 100-grit sandpaper to rip through the old varnish. This went very quickly, and I was so happy! All that gorgeous cedar wood.
Next, I used a 180 and finished with a 220 grit for a smooth finish.
For the details, I used a foam sanding pad to get into all the hard-to-sand areas. Want to learn more about this sander, CLICK HERE.
After all that sanding, even with a vac attachment, ripping off the old finish created a lot of wood dust.
I gave the chest a good cleaning and vacuumed it with my shop vac. Now for the repairs!
How To Repair Damaged Wood With Bondo
Bondo! It’s the furniture flipper’s best friend when you have large gouges and holes in wood and need a strong bonding filler. This stuff is the best! It’s easy to use. Here’s how you use it.
Tip: When filling a large hole, use nails or screws to give the Bondo extra strength. It works best when it has something to grab a hold of. For smaller areas, it’s not necessary. See the photo below.
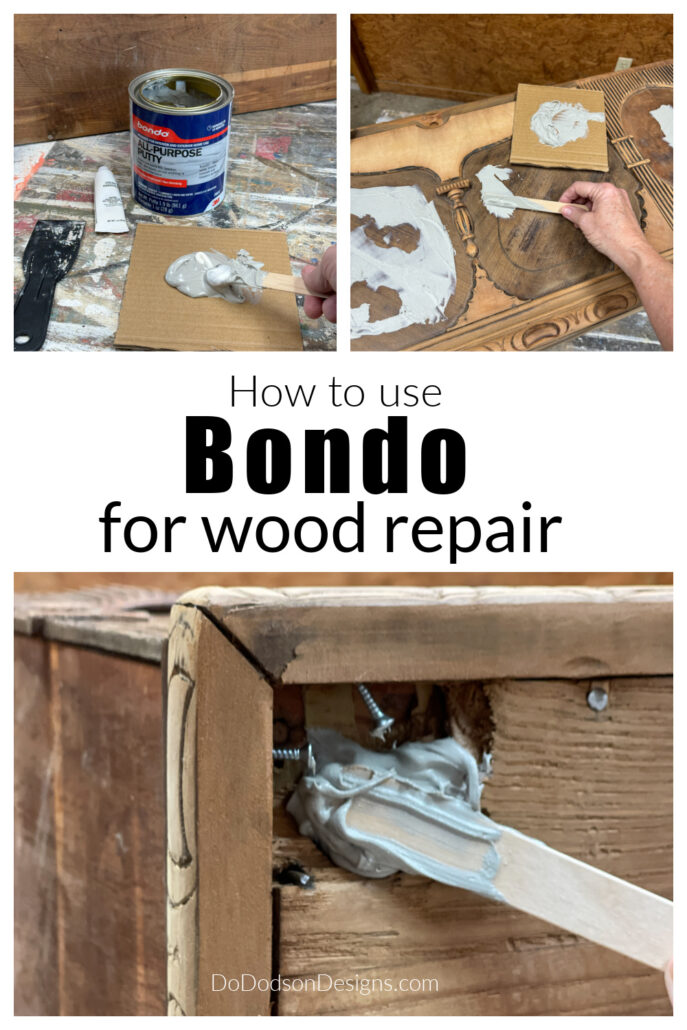
All Purpose Bondo comes in a can with two parts. The Bondo can and a tube of cream hardener. It’s a soft (very stinky) paste-like texture. Work in a well-ventilated area or wear protective gear so as not to cause damage to your lungs.
Follow these simple steps. Mix the paste and the hardening cream together per the directions on the back of the can and apply with a craft stick.
You’ll need to work fast because this stuff dries super quick. I like to mix mine on a paper plate or a piece of cardboard.
After it’s dried, sand as usual. You will need an electric sander when using this product. Hand sanding isn’t recommended. Use a good primer over the areas if you plan on painting over the repairs.
Painted Cedar Chest With Whitewash
Let’s just say that cedar wood isn’t in my wheelhouse of woods. While I love a beautiful wood grain, the red in the cedar doesn’t work for me.
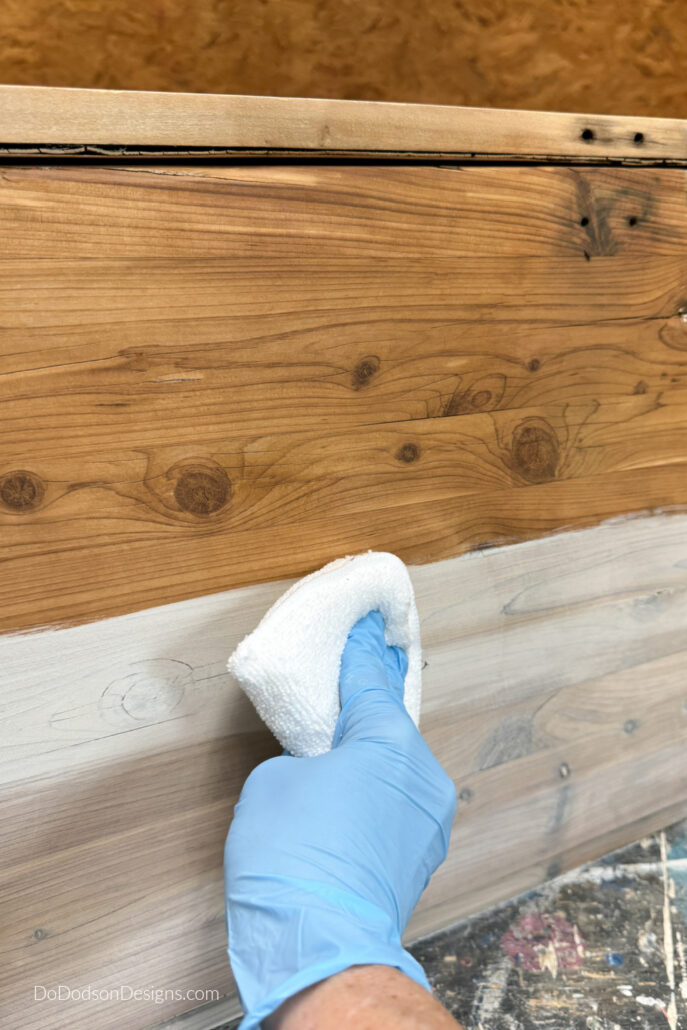
So, instead of just painting over the cedar wood, I decided to try a whitewash with a beautiful color from Dixie Belle’s Silk line called Endless Shore. It’s a beautiful off-white with a gray undertone. I hoped the gray undertones would tone down the red, and I was right. Here’s how to mix and apply the whitewash.
STEP 1: Use a small disposable bowl and add a mixture of water and paint. I would say this is about a 1:5 ratio. Mix well. It all depends on the level of transparency you want your wood to have.

STEP 2: Apply with a good-quality paintbrush. Work from one end to the other with long strokes. I like to start from the bottom because, oops. There will be a drip, and you can wipe that away quickly.
If you start at the top, a drip on the raw wood will absorb quickly and cause an uneven finish.
Use a sponge or dry cotton cloth to remove the excess whitewash. I like to do this rather quickly after applying it, but it all depends on how much you want to absorb into the wood. You can always apply it a second time for more coverage.
Painted Cedar Chest Color
With the same color of paint (Silk All-In-One Mineral Paint) that I used to make the color wash, I painted the front of the cedar chest on the areas that weren’t whitewashed. I applied two coats for full coverage with a good quality synthetic paint brush, allowing it to dry completely per the manufacturer’s instructions.
I didn’t prime it first because this paint has a built-in primer and top coat. Normally, I would use bin shellac-based primer before painting, but I’ve used this paint before, and it works well for blocking stains and bleeding through. After painting as many pieces as I have, you kinda just know it will be okay. But when in doubt, prime first.
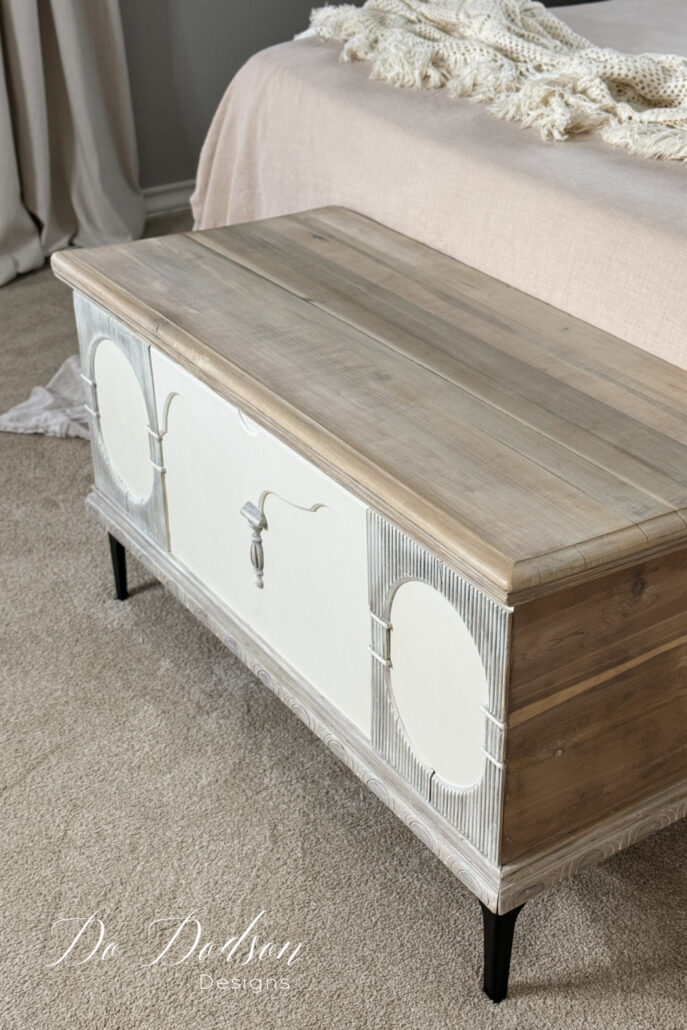
In addition to painting, I used a dry brushing technique over the wood trim that was whitewashed and fluted detailing to give it a more uniform look.
I could have removed the front veneer and decorative fluting on this chest, but the devil is in the details. Where’s the fun in a plain ole chest? I love a design challenge, and it was challenging!

Adding A Top Coat For Durability On Wood
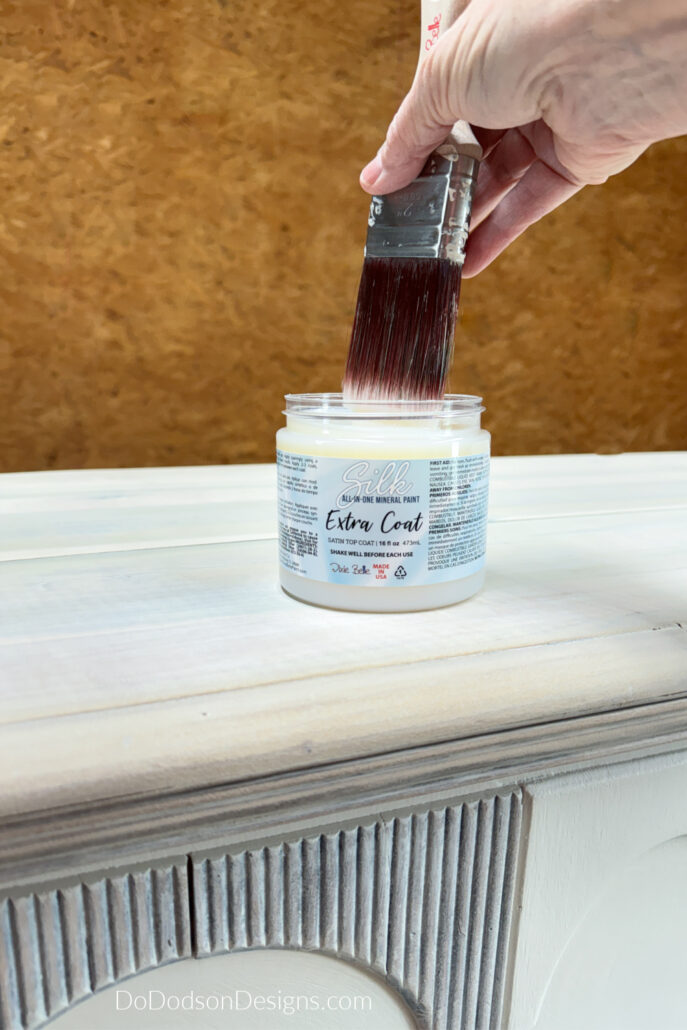
Lastly, I added a top coat over the whitewashed wood to give it a protective coat. Extra Coat is typically used to add extra protection over Silk All-In-One Paint, but because I used the paint as a whitewash, I saw no reason not to use it over the wood, too.
I applied two thin coats of the Extra Coat, allowing each to dry thoroughly.
A light sanding with fine grit foam sponge gave the wood top of the painted cedar chest a silky smooth finish.
At one point, I thought about using a stencil design over the top of the cedar chest, but I think I’ll sit on it a while before I jump into it. What do you think? Maybe the front?
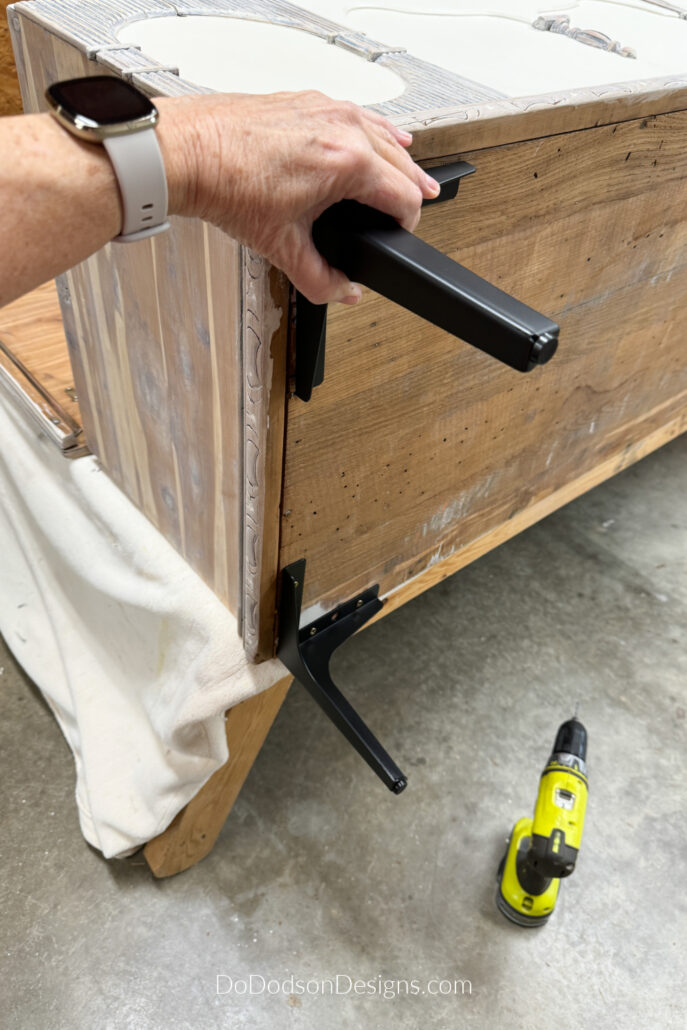
Adding Modern Legs To Painted Cedar Chest
I’ve added new legs to many dressers and various old furniture pieces in my time. But these metal legs are by far the easiest to install when you have a solid surface to attach them to. It’s a quick and easy way to update the look.
Start by deciding where you want the legs positioned. Once you have established, use a pencil or marker to mark the holes where the legs will be attached.
Predrill a small hole slightly smaller than the screws that come with the furniture legs. Be careful not to drill too deep with the drill bit—about 3/4 of the length of the screw.
Secure the legs in place with the screws.
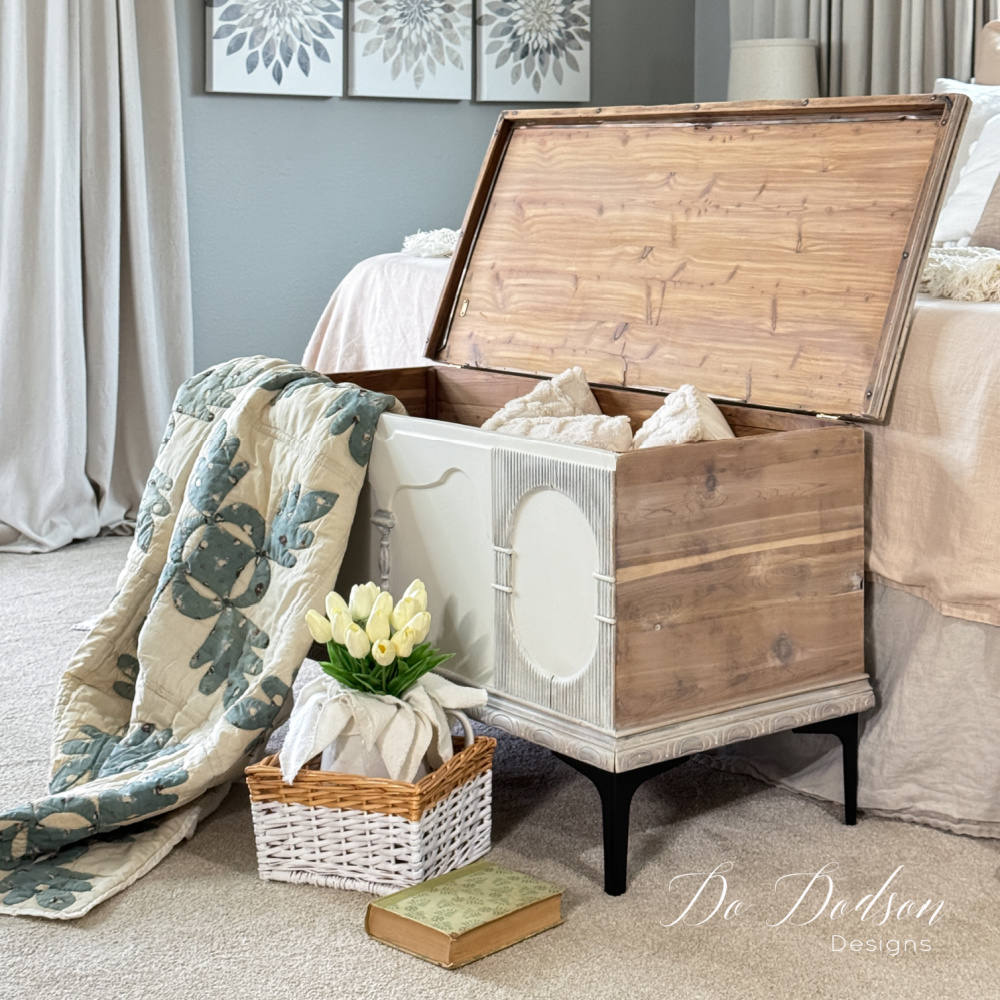
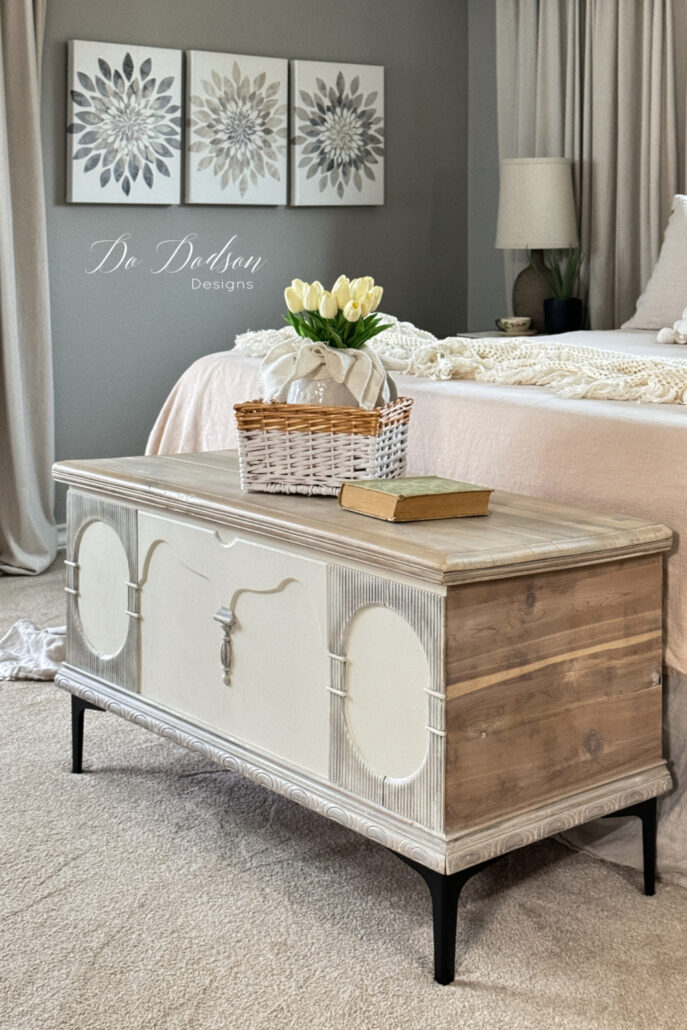
Vintage Cedar Chest Makeover
I’m so happy with the results of this makeover. The whitewash I used toned down that red in the cedar wood to where it now blends nicely with my room’s natural tones.
And you know I had my doubts, just like you. That’s why it sat in my garage for a year. Sometimes, you just gotta sit on it. Timing is everything.
I’m ecstatic to have this extra storage I need for my quilts and decorative pillows in my bedroom.
Oh, and it will also serve as a springboard for my Chihuahua, Tallulah, to get on my bed for her daily naps. How can something so tiny take up so much room in a bed? *insert eye roll
I feel like this painted cedar chest is now Instagram and Pinterest-worthy!
Can you believe this all started out as a hobby for me? Sometimes, I feel like it’s all a dream, working from home and sharing with my awesome, creative friends.
If you would, let me know what you think about painting an antique cedar trunk in the comment section of this post, or just say hi so that I know you stopped by.
Happy painting! 🙂
Until the next project… xo, Do
Lovely piece! I think a boho or Moroccan design in white on the top and sides would add a lot of interest and work well with the front design.
Hi Gayle! I can see that. Kinda like a blanket drape over the top. I’ll definitely take that into consideration. Thanks for stopping by. Have a lovely weekend. 🙂
You did a beautiful job. I’m not going to lie, when I saw those legs, I said “No way!”, but your vision was better than mine. They are perfect.
Hi Laura,
Thank you! 😊 I chose the legs based off my nightstands I recently updated. I was hoping to tie them all together. Had that not been the case, I may have chosen differently. But I’m happy with it and guess that’s all that matters. Thank you so much for reading and being a loyal reader. Have a good weekend and happy DIYing. 🙂
Was the paint a sufficient finish – no need for any form of varnish? Well rescued! Not keen on the new metal feet however, somehow not in keeping.
Thanks Audrey!
The paint I used is an all in one paint that has a built in primer, stain blocker and a top coat. I would say it’s sufficient when used one the fronts and sides. As for the tops, it would need an additional topcoat. I’m so glad you could stop by. Have a wonderful weekend. 🙂
That’s a mighty fancy spring board for Tallulah! 😆💙🐾 This is a fabulous before and after Do. Its stunning and looks amazing in your space! 💙💙💙
Well, you know me and pups. Nothing but the best! 😂 Thank you so much for the sweet words. I have you have a wonderful weekend, my friend. xo 😘
Oh Wow, Do!! What an improvement you made on that wonderful chest. I can see how you procrastinated on it initially. I would have also! It’s just lovely now, and I’m glad that it found such a good home. Well done!!!!!
Hi Caye! Thank you so much for stopping by. Yes, I think it will work well in my space. I appreciate the kind words. Enjoy your weekend. xo 🙂
I’m sure the chest said a big thank you when you were done! Old janky pieces just need a little love 🥰 Pinned!
Ha ha, my husband said a big thank you because it left his garage. Thank you, my friend. Have a great week. 🙂
I’m so happy to see that lovely piece saved and you did an awesome job. Could you add some kind of flowery wreath in the center medallions on the front? Are the sides not whitewashed or is it the lighting?
Anyway, it’s lovely!
Thank you, Wendy! Yes, I pondered about the center. I’m still undecided. The sides are whitewashed as well. It’s probably the lighting. Thanks for stopping by and please feel free to search my site for other furniture makeovers and more. Have a great week! 🙂 😘
Hi…can you tell me the paint/water ratio again? One part paint to 5 parts water??
Thank you! Lovely chest you made!
Thanks, Leslie.
Yes, one part paint to five parts bottled water. I suggest you test a spot first if you can. You may need to adjust the paint water ration depending on the type of wood. Best wishes on your project. xo 😘