Furniture stripping is NOT one of my favorite DIY projects. I was almost ready to say I loathed doing it, but then I found a product that made it way easier. Seriously, does anyone actually enjoy redoing upcycled furniture? Stripping old paint or stain from wood furniture can feel intimidating, but it doesn’t have to be.
This post contains a few affiliate links to help you find the products I use. You are not charged extra to use any of the links, but any income I make will go toward more fun projects! To see my full disclaimer, click here.
Why Stripping Furniture Instead of Sanding?
While sanding can remove finishes, stripping often works faster and protects the wood underneath.
Benefits of stripping wood furniture:
• Removes multiple layers of paint or stain quickly
• Prevents excessive sanding damage
• Gets into carvings, grooves, and detailed areas
• Helps preserve antique or vintage wood pieces
• Saves time during furniture refinishing
For many DIY furniture makeovers, chemical stripping is the fastest way to remove old finishes.
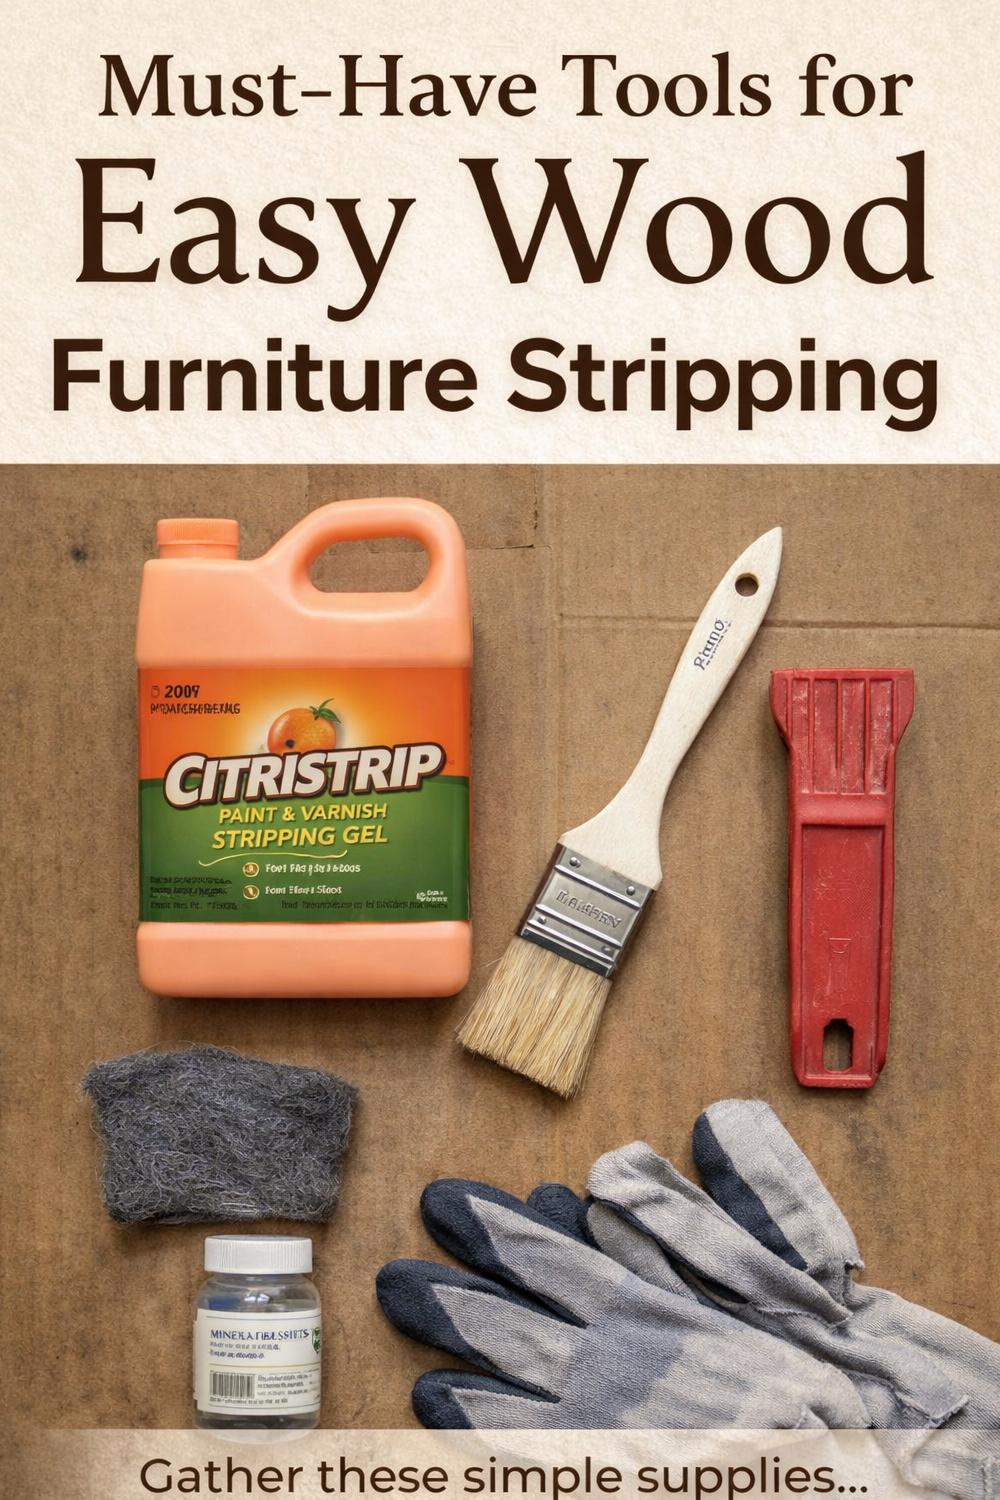
Tools And Supplies I Used For This Project
- Citri Strip Orange Gel
- plastic scraper or putty knife
- 2-inch Chip Brush
- Paper Towels or old cotton cloths
- Gloves and safety glasses
- Dust-free cheesecloth
- Denatured alcohol or mineral spirits
- Fine steel wool
- Spray bottle
- Makita Orbital Sander
- Sanding pads
- Minwax Satin Wipe-On Poly
- Milk Paint
- Purdy XL Cub paintbrush
Prepare Your Workspace
Furniture stripping can get messy, so a proper setup makes the job much easier.
Place your furniture on:
• cardboard
• a drop cloth
• or outside on a protected surface
Good ventilation is important, especially when working with stronger strippers. Thank goodness the stripper I’m using on this dresser doesn’t have that obnoxious smell.
If possible, work outdoors or in a garage with doors open.
Applying The Varnish Remover
Before applying the stripper, make sure the wood is clean before stripping. Use a 1:1 mix of denatured alcohol and water in a spray bottle. Lightly spray the wood and wipe it down with a soft cloth to remove any dirt or oil left on the surface.
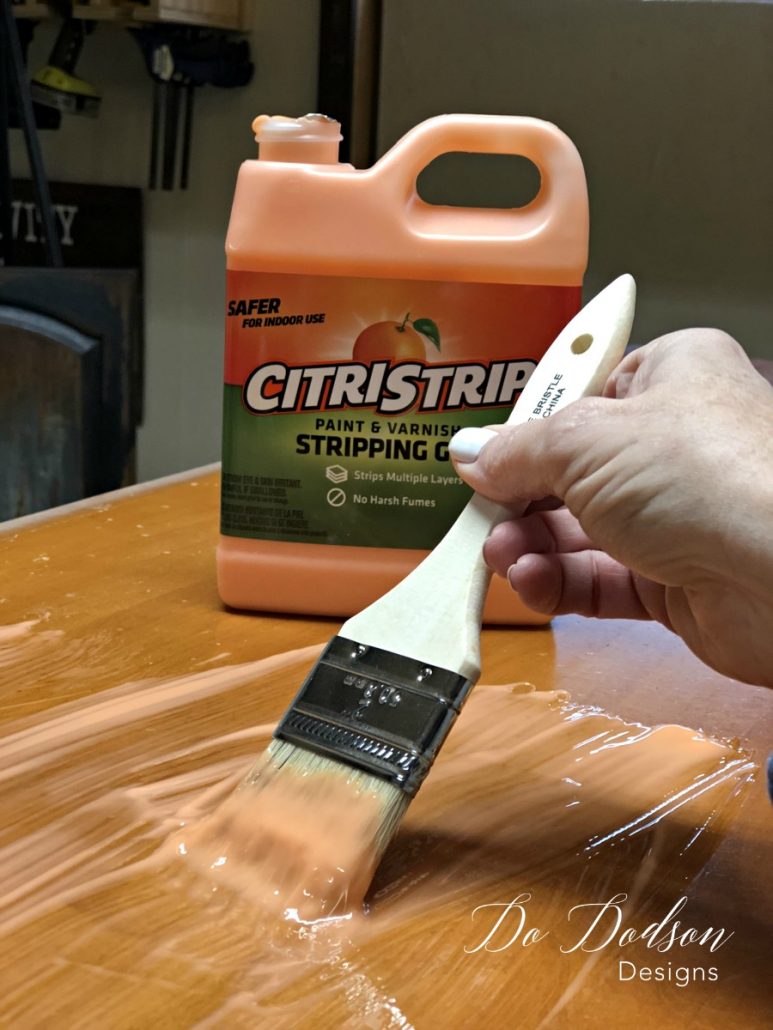
Apply a generous coat of Citristrip orange gel with a disposable chip brush to the areas where you want to remove the varnish.
*TIP After applying the gel remover, you can apply plastic cling wrap over it to keep the gel from drying out too quickly. This works well!
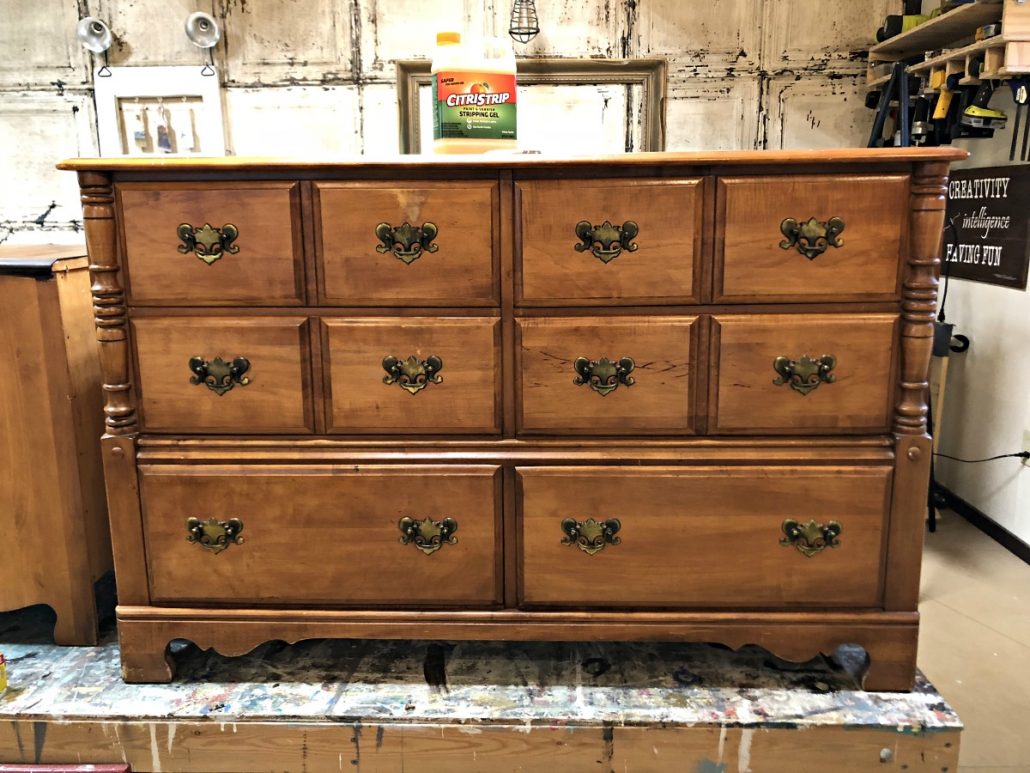
For this project, I only removed the varnish from the top of the wood dresser. The base will be painted after the dresser top has been refinished.
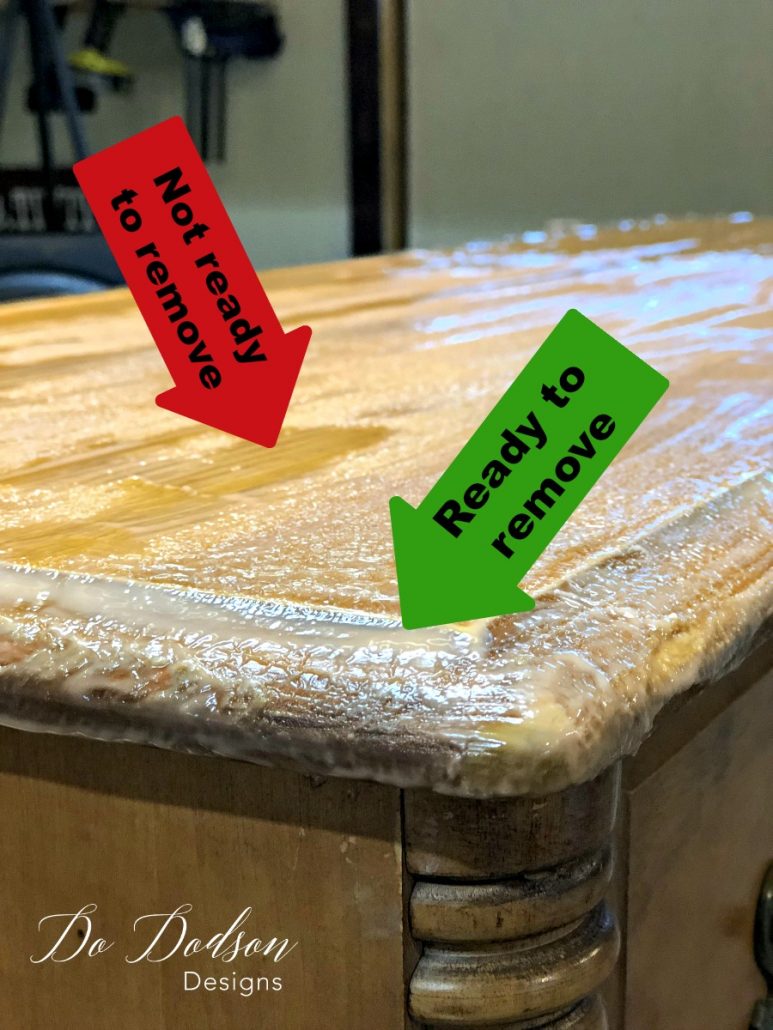
You will notice the varnish start to pull away from the wood. This can take anywhere from 30 minutes to an hour. You can see the visual differences in the varnish in the photo above. If it’s removed too soon, you need to reapply. I used a plastic scraper to remove the dissolved varnish.
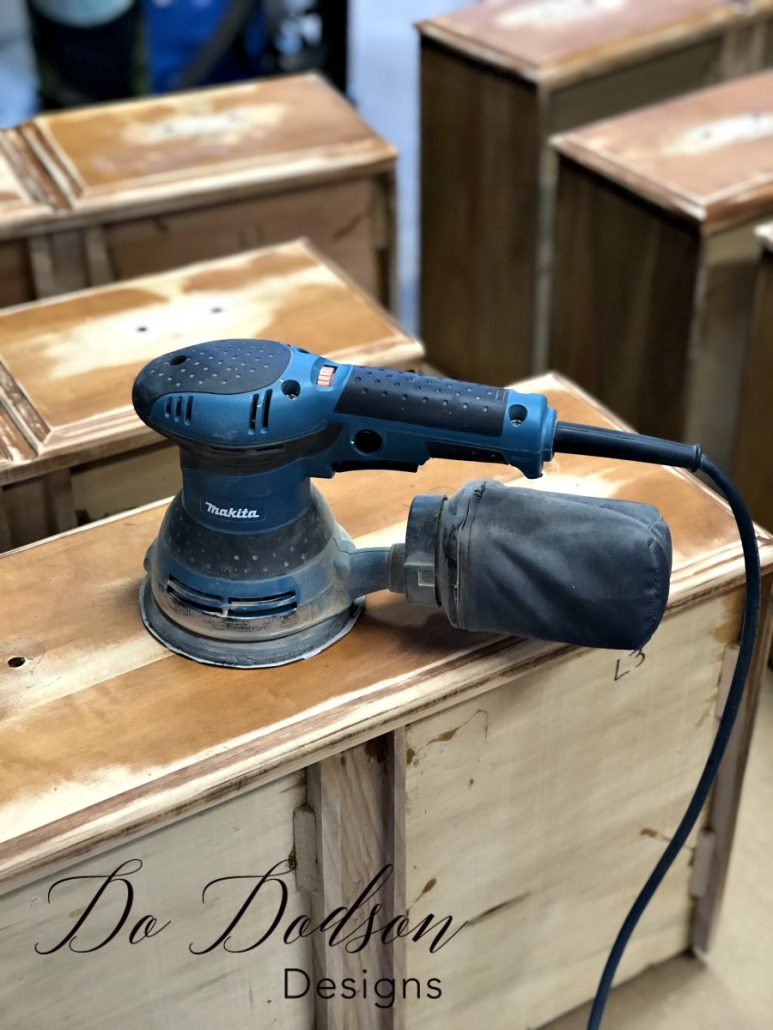
After removing all that yucky stuff, you will need to let the surface completely dry before the next step. The wood surface needs to be sanded smooth with a 220-grit sandpaper before applying the gel stain color of your choice.
I suggest you do the top of the dresser first if you plan to paint the lower part. Work from the top down. It’ll save you some grief. Stripping can get messy, and you definitely don’t want drips on the bottom of the dresser.
Below, I have linked the step-by-step tutorial for those of you who would rather learn by watching.
How To Strip Old Varnish/Refinishing Part 1 Video
How To Strip Old Varnish/Refinishing Part 2 Video
Prepping The Wood Dresser For Paint
After a quick scuff-sanding with my Makita Orbital Sander and 220-grit sandpaper, I wiped the wood surface with a denatured alcohol and water mixture. The alcohol in the mix allows it to dry quickly, so I didn’t have to wait long to paint.
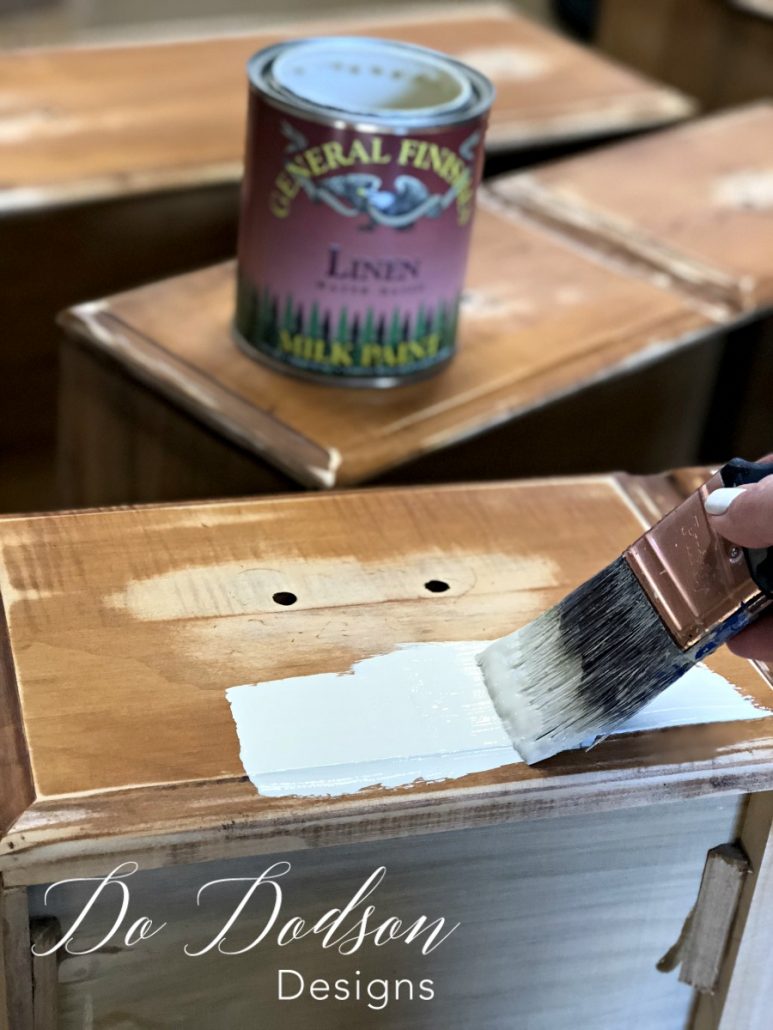
Choosing The Right Paint For Your Project
With this wood dresser, I chose General Finishes Milk Paint. It’s the perfect paint for even a first-time painter. I thoroughly enjoy using it when I can, and no primer was needed with this paint. This is not the norm when it comes to furniture painting, but there are times when I don’t always use a primer. This piece was in good shape and was light in color. Had it been a cherry wood or any red-toned stain that could possibly bleed through the paint, I would have used BIN 123 shellac Primer first.
And for more furniture makeover tutorials, here are a few more that may help you on your DIY journey.
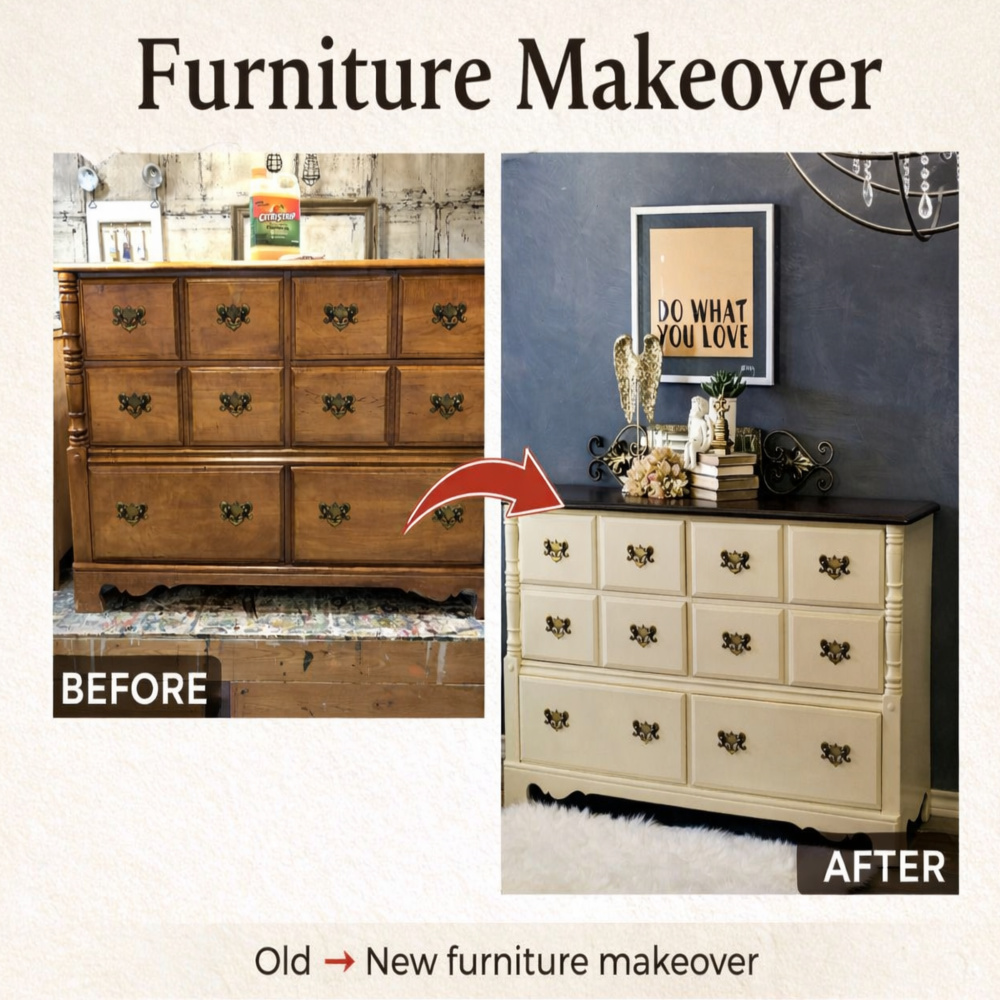
Stripping Wood Furniture | Dresser Top
She’s a real looker now! This lovely, classic look of a stained-and-painted dresser blends well with most styles.
I chose to reuse the original hardware, but you can always purchase new ones for an even more updated, fresh look.

Love this furniture stripping makeover? Let me know in the comments below, or if you have questions about something that I may have missed, I’m more than happy to help you.
Until the next project… xo, Do