
So what do you think? Would you ever use this DIY chalk paint recipe? It can be budget-friendly and an excellent option for getting the custom color that you need.
As always, thanks for joining me, and I would love to hear back from you. Please drop me a hi, hello, how are you in the comment section below, or share your DIY chalk paint recipe that you have tried.
Until the next project… xo, Do
DIY chalk paint recipes are floating all around, and that’s no secret. But have you ever tried to make your own chalk paint? Today I want to share with you the recipe that got me started in the furniture painting biz!
* As an Amazon Associate, I earn from qualifying purchases and through other companies as well. You are not charged extra to use any of the links, but any income I make helps me create more amazing DIY projects to share with you! To see my full disclaimer, click here!
DIY Chalk Paint
Here’s my secret. These two ingredients will not only make a kick-ass chalk paint recipe that is blendable like you see with some store-bought brands, but I’m also sharing how to seal the chalk paint finish once it’s painted with a paste wax you can get at most home improvement stores.
This chalk paint recipe will require a topcoat/sealer or wax for a durable finish.
If you want chalk mineral paint that doesn’t require a topcoat, CLICK HERE!
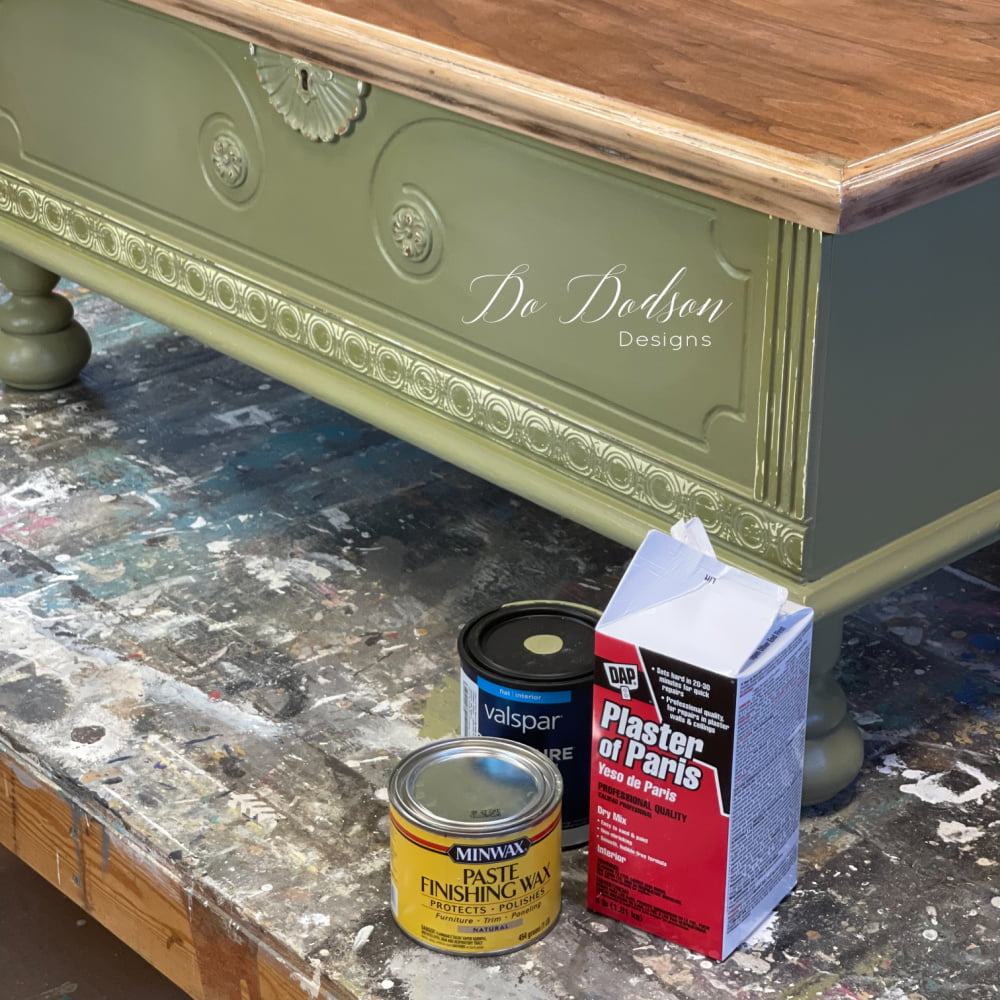
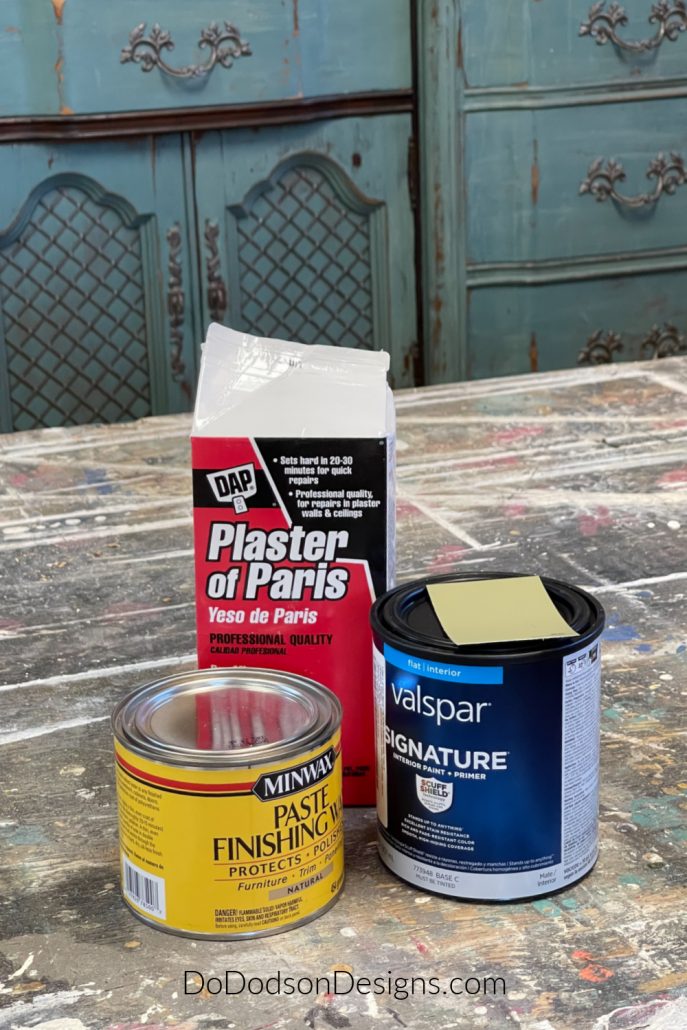
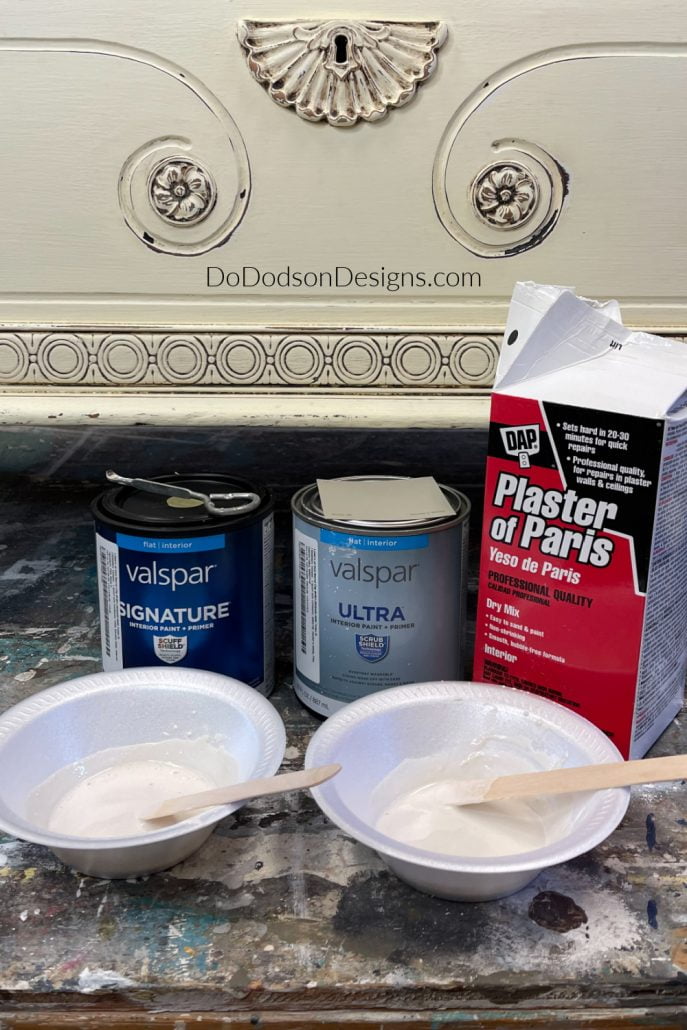
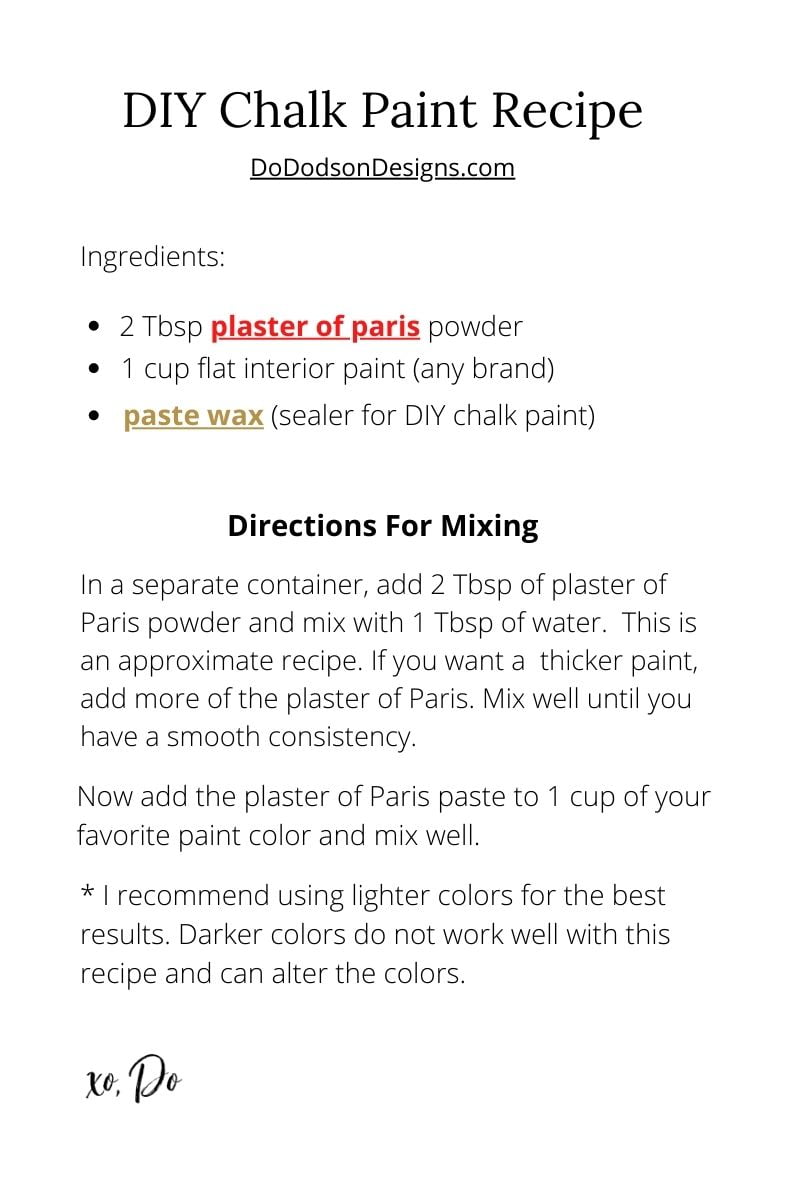
SUPPLY LIST:
- plaster of paris
- flat interior wall paint (any brand)
- paintbrush
- sanding pad or sandpaper
- paste finishing wax
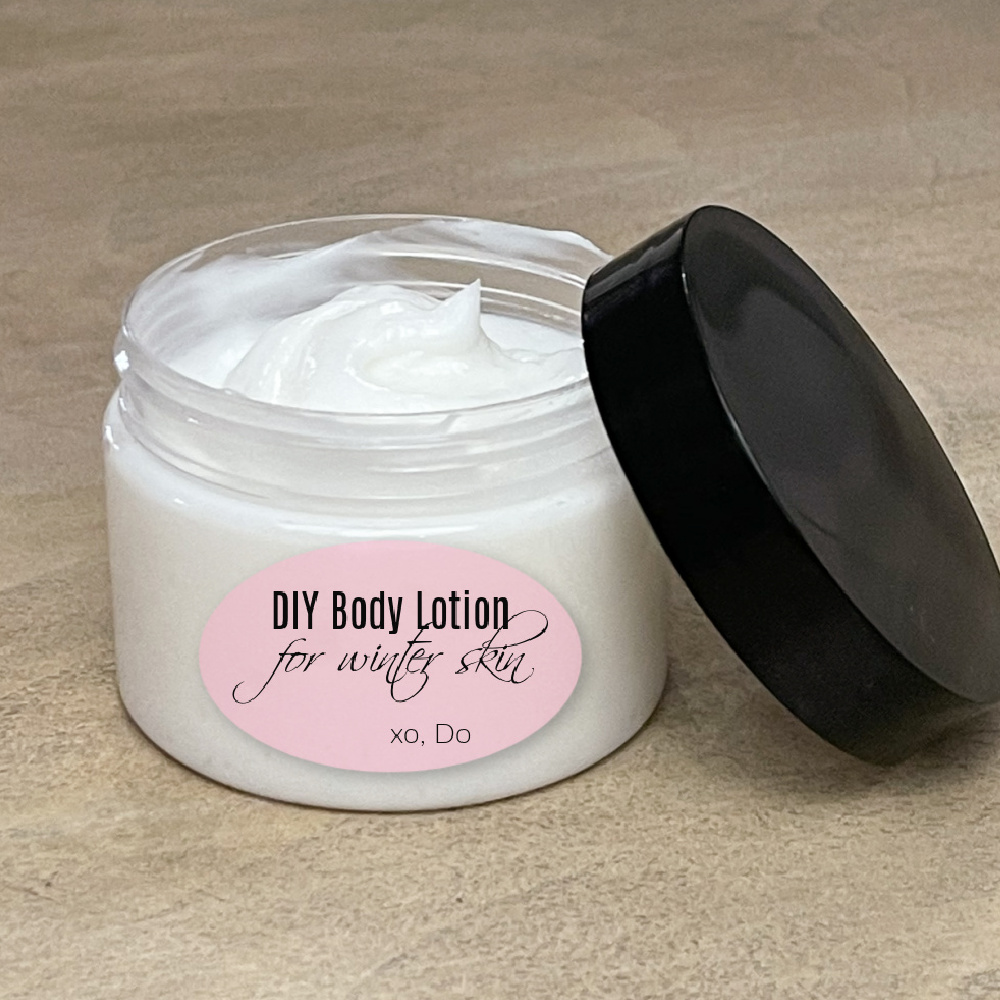
Get the recipe and save it for later here.
The recipe is almost too simple to believe, but I’ve used this very same recipe for years and still swear but the results. So much so that anytime I have a specific color that I can’t find in pre-mixed chalk paint, I head to the hardware store for a custom mix color of what I want.
I know I can be a bit of a paint color snob, and finding just the right shade or color can be tricky. But using this recipe has allowed me to get exactly the color I want for my furniture painting projects. Most paint stores now offer color matching.
* This paint recipe is best used with lighter colored paints. I would not consider using it with darker colors with a black base.
Updating The Color – DIY Chalk Paint
Just in case you’re on the fence about this whole DIY chalk paint recipe, here is an excellent testimonial from yours truly.
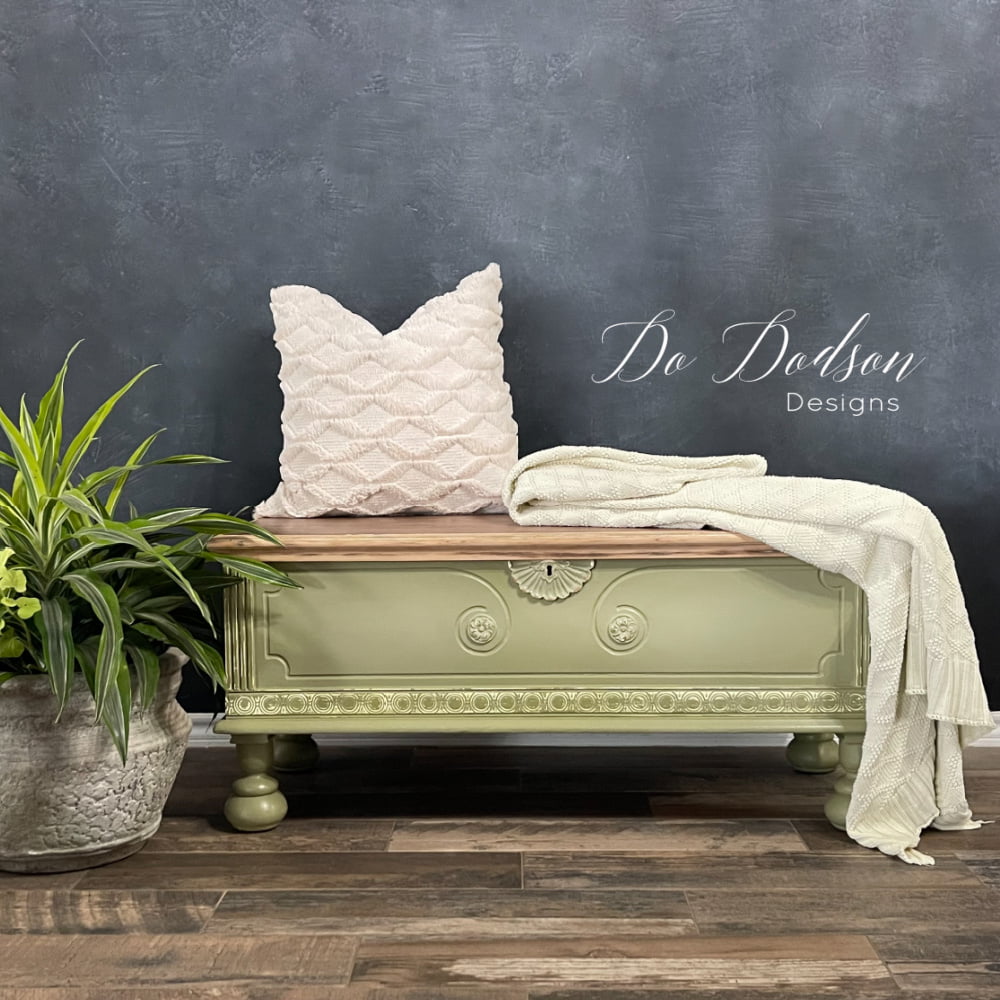
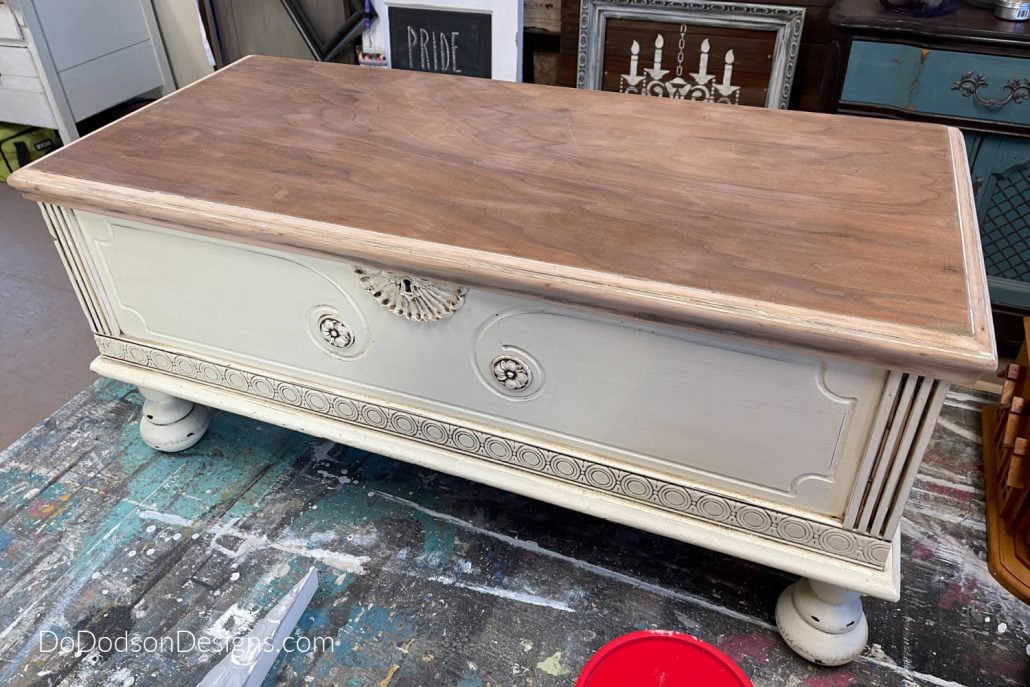
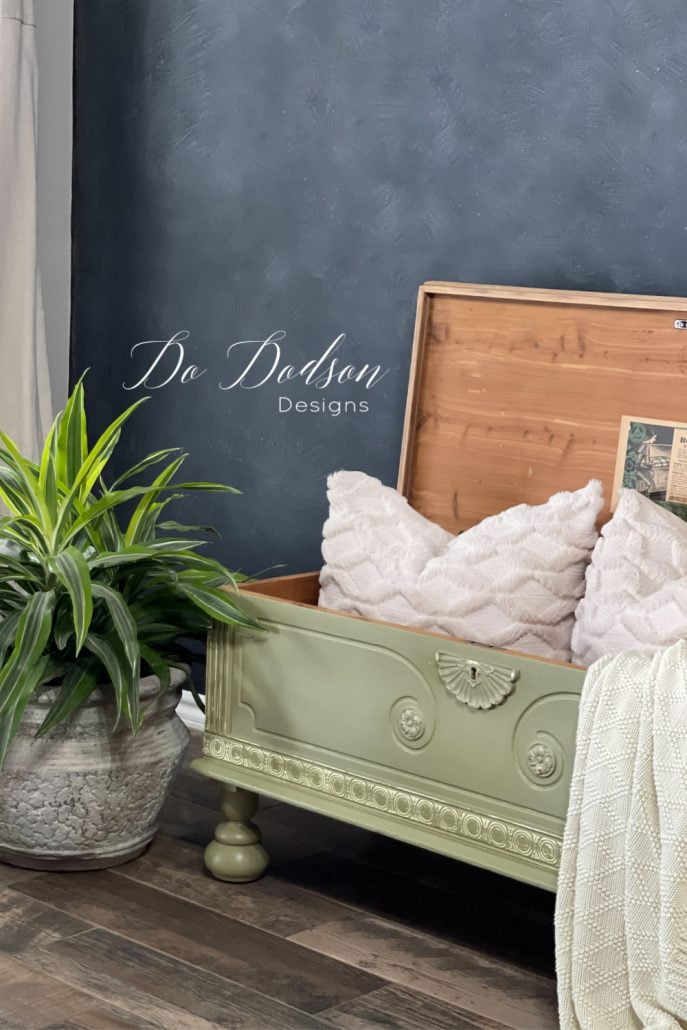
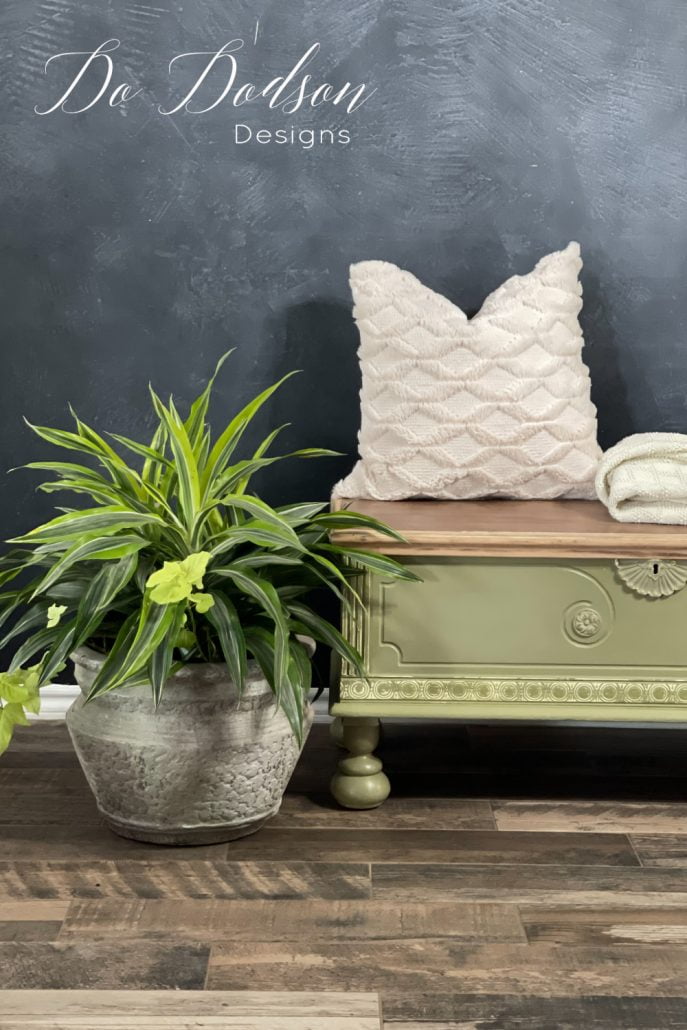
This piece is a circa 1930s Roos Cedar Chest. I painted it some ten years ago with this recipe. Usually, I wouldn’t attempt to repaint a finish like this one, but I wanted to change color. The existing paint finish was still in great shape.
CLICK HERE to learn more about this unusual cedar chest and its history.
This antique cedar chest has been in our bedroom (CLICK HERE TO SEE THE BEFORE) positioned at the foot of the bed. Our dogos used it as a “springboard” onto our bed. Not that we ever intended it to be used for that purpose, but that’s how it is when you’re empty-nesters and have three four-footed children roaming all over the house.
Because the exterior of the cedar chest had been painted (with products I’m showing you today), the prep before repainting is a bit more labor-intensive than your regular prep before painting over wood.
CLICK HERE to learn more about repainting chalk-painted furniture and what you need to know.
How To Make DIY Chalk Paint Recipe That’s Blendable
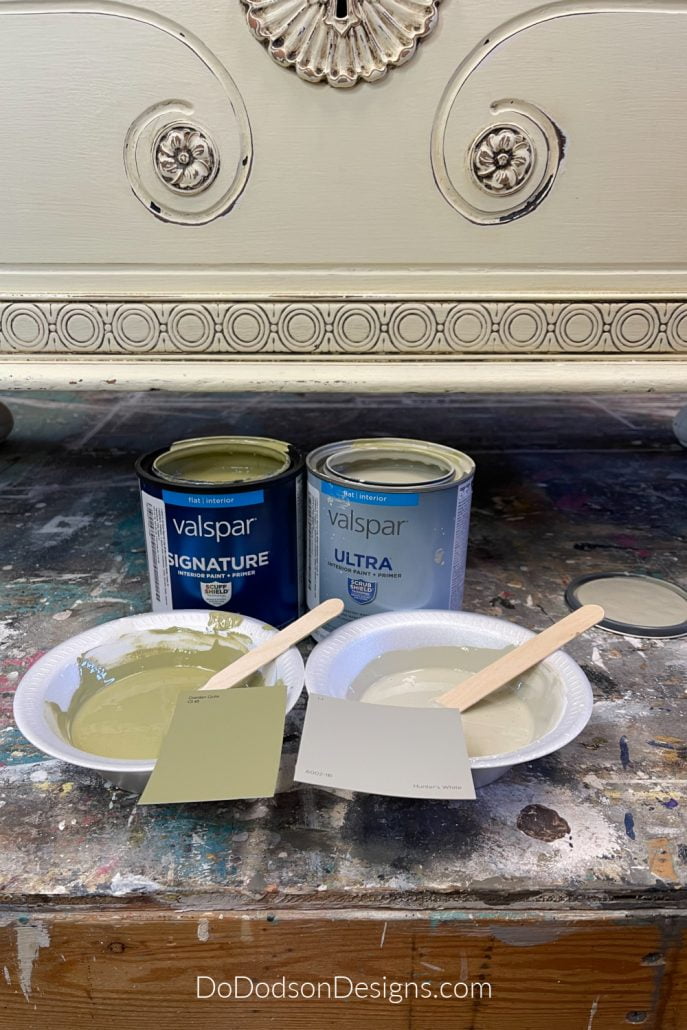
STEP 1:
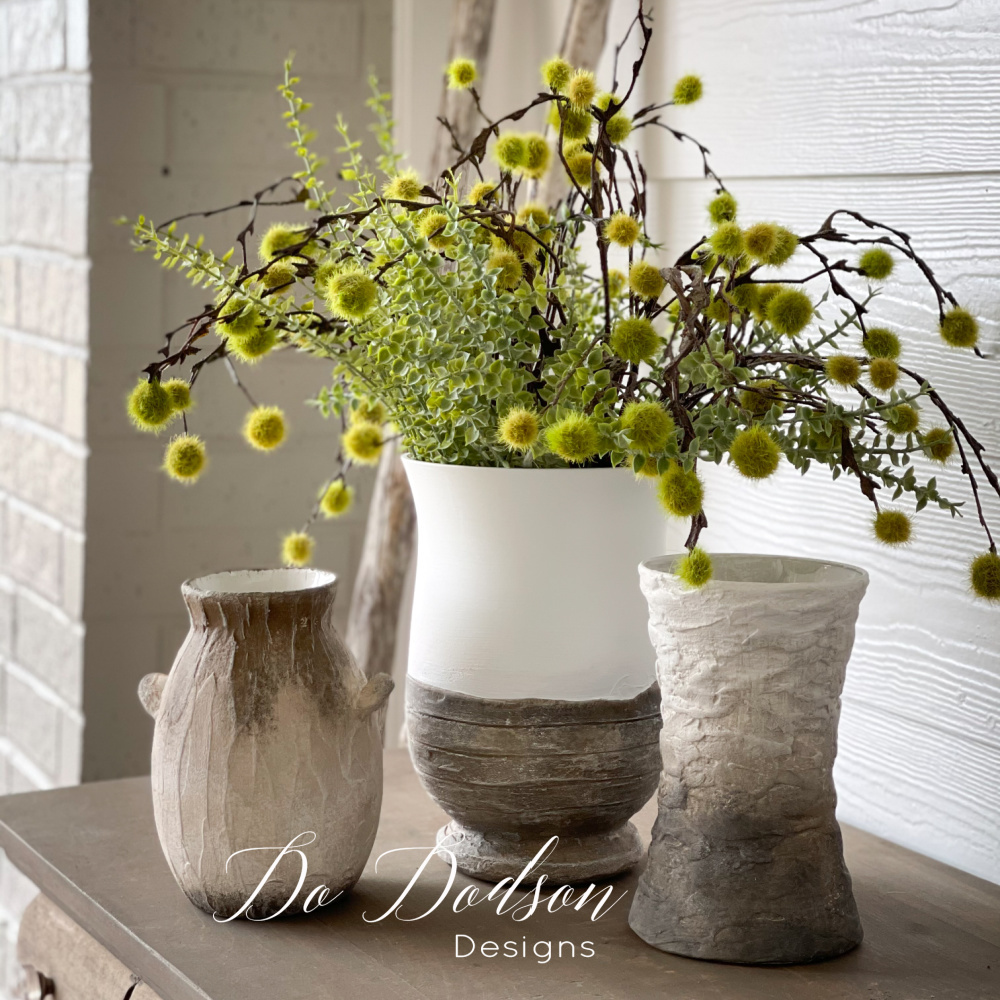
Choose your colors! I picked two beautiful shades of green.
The plan for this furniture makeover was to attempt a blending technique (blending two similar colors) “highlighting” that I have been doing with other chalk paint brands. I had never tried it with this DIY chalk paint recipe, but it turns out that it works the same. SCORE! I’m so glad I tried this!
Start with adding 1 tbsp of the plaster of Paris to a container (preferably with a lid so that you can save for later) and mix with 1 tbsp of tap water. This doesn’t have to be an exact measurement. You can make the plaster mix a bit thicker by adding less water or more plaster of Paris. Doing this will result in thicker paint. It’s a preference.
Use bottled water if your water source is from a well to prevent contamination.
FAQ: Mixing DIY Chalk Paint
“Why can’t I just add the dry plaster to the paint instead?”
Great question! I did this, and the results were gritty paint. The plaster didn’t mix (break down) as well with this paint, probably because of the ingredients and viscosity of the paint. Mixing the plaster of Paris with the water before adding to the paint will result in a smoother paint.
STEP 2:
Mix 1 cup of your favorite latex wall paint in a flat finish to the plaster of Paris and water mixture and mix well. I like to stir mine for a few minutes to ensure no lumps of plaster in the paint.
I’m not saying DIY chalk paint is perfectly smooth, but not enough that it will make a difference in your finish. It’s pretty dang smooth!
I like to mix 1 cup of paint at a time, but double the recipe if you have a larger piece of furniture you’re painting. The coverage is about the same as other store-bought brands.
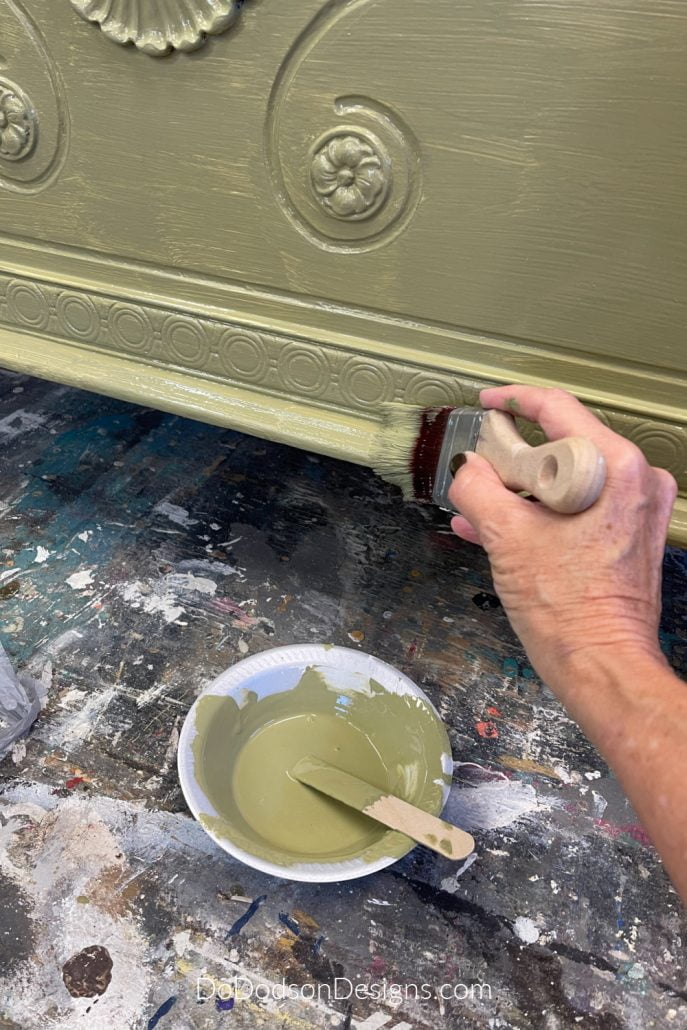
Painting Furniture With DIY Chalk Paint
STEP 3:
Paint your furniture project.
Like most chalk paints, it will take multiple coats depending on your color. Your first coat of paint will look like something like this. Remember, the first coat of paint on furniture is always the ugliest.
Always use a good-quality synthetic paintbrush for the best results.
How To Get A Super Smooth Finish
STEP 4:
This step isn’t always necessary, but I like to do it just in case I can’t see any tiny bits of the plaster of Paris that didn’t mix well with the paint. Rub your hand across the painted areas to determine where you need smoothing.
With a 220 grit or higher sanding block, lightly rub over the surface to ensure no rough areas. This will result in a super smooth paint finish ready to be sealed.
And if you want a distressed look with your chalk paint, this recipe works well for that too. Using a sanding pad also works if your paint recipe is thicker than you expected and you notice brush marks after painting.
WARNING Any dust from sanding on the paint needs to be done with caution. Make sure you are in a well-ventilated area and wearing a mask. The dust from the plaster of Paris is harmful if inhaled. It is considered a hazardous substance but generally regarded as a safe material for routine use. Be safe!
How To Use Paste Wax To Seal Over Chalk Paint Or Wood
I used paste wax to seal the DIY chalk paint, but it also works beautifully over a wood finish.
The paste wax is hard in the can, so it can be tricky if you’re working with it in the winter months. To soften the wax, remove a small amount, place it in a microwave-safe bowl, and heat it for 15 seconds. Now you have a soft wax as long as it’s warm.
To apply the paste wax, you’ll need a soft cotton cloth. Old t-shirts are my favorite, but I didn’t have any around. But I did find an old sock. It turns out this application worked even better. Don’t even try to use a brush for application. It just won’t work, and you’ll have an uneven finish.
Apply in long strokes in the same direction. I can’t stress enough that a little dab will do you. It doesn’t take much.
After the application, with a clean cotton cloth. The more you buff, the better it gets. The feel of the wax is like no other wax I have ever felt.
But not just that, it dries as hard as a rock!


So what do you think? Would you ever use this DIY chalk paint recipe? It can be budget-friendly and an excellent option for getting the custom color that you need.
As always, thanks for joining me, and I would love to hear back from you. Please drop me a hi, hello, how are you in the comment section below, or share your DIY chalk paint recipe that you have tried.
Until the next project… xo, Do

Saving and sharing this post, Do! Everyone needs to know this and try something different. Plus, this color is stunning. Especially on this piece. Love it! 🥰
Thank you, friend! It has served me well. 🙂 xo
Hi Do! Thank you for this chalk paint recipe! Would this work for kitchen cupboards?
Hi Betsy, I don’t recommend chalk paint for cabinets. I like latex-based paint. Sherwin Williams and Benjamine Moore have good quality paints for cabinets. Talk to the desk help. They are very knowledgeable about their products. 🙂
Great project Do! When I first started painting furniture, I used a homemade recipe similar to the one you have used. Mixing the dry mix with water first is brilliant! Thanks for the tips. Pinned! 🙂
You are welcome, my friend! The water trick makes a huge difference. 🙂 xo
Hi Donna! When I first started painting I also used DIY chalk paint. I think I used calcium carbonate though. I painted a changing table for my grandson and it’s still good as new. This color is beautifu what was the color before? l.
Hi Cheryl! I can’t remember. Something similar to Dixie Belle’s Buttercream.
Do, I always enjoy your posts. Sometime to learn from each of your posts. Love the color blend you created for this piece.
I feel the same way about your posts. I always learn something new. I’m so glad we can share. Merry Christmas, my friend. 🙂 xo