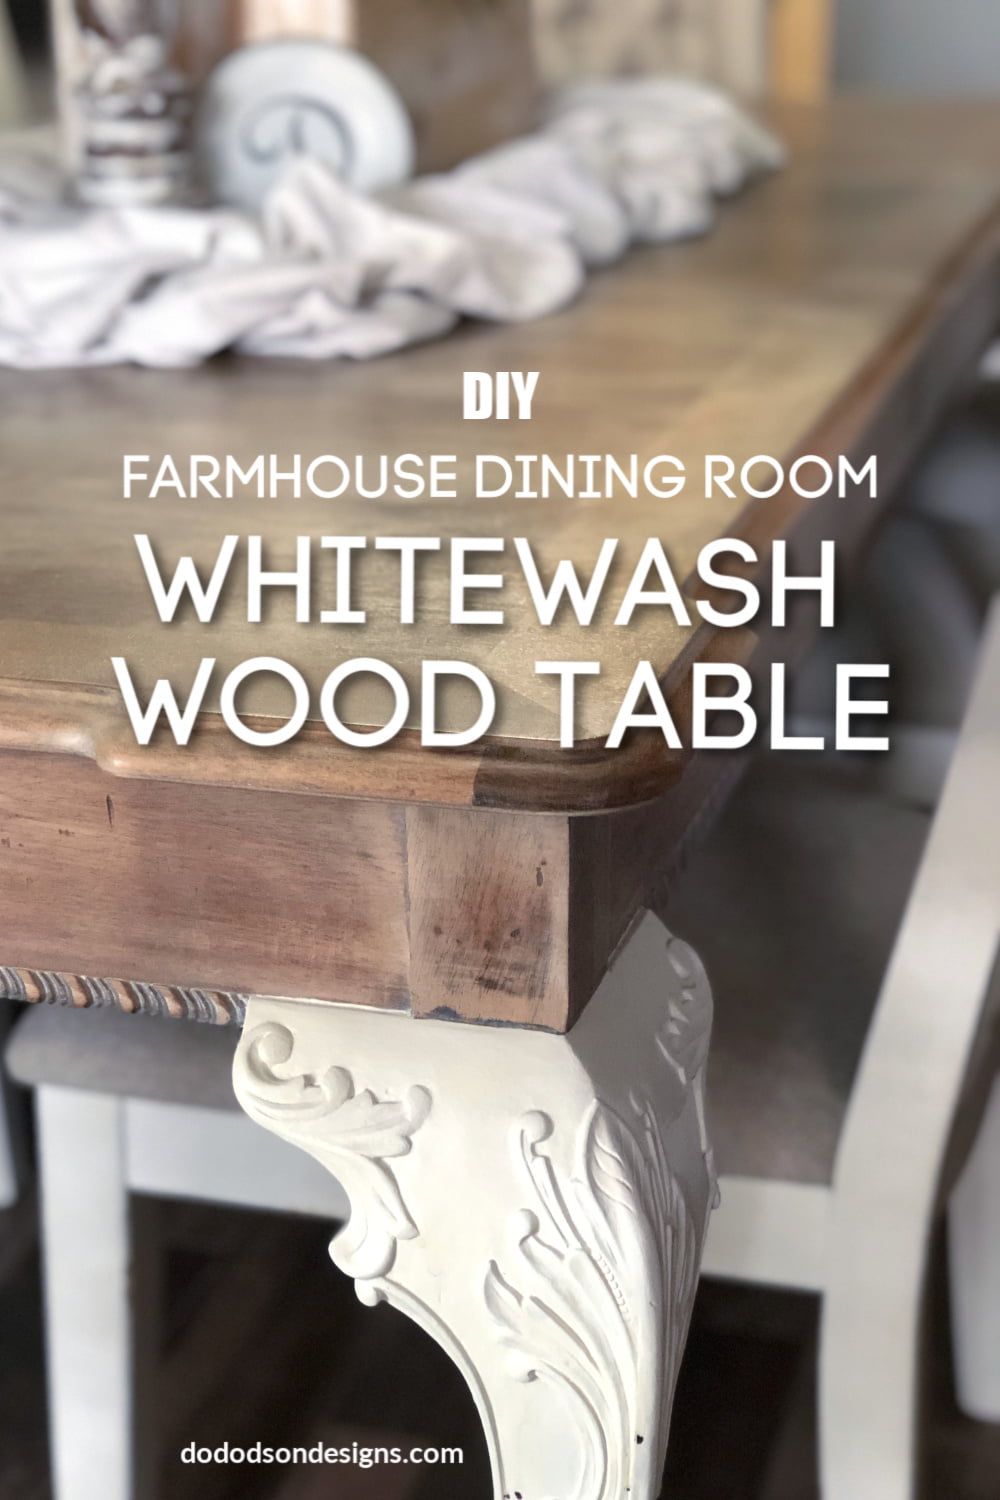
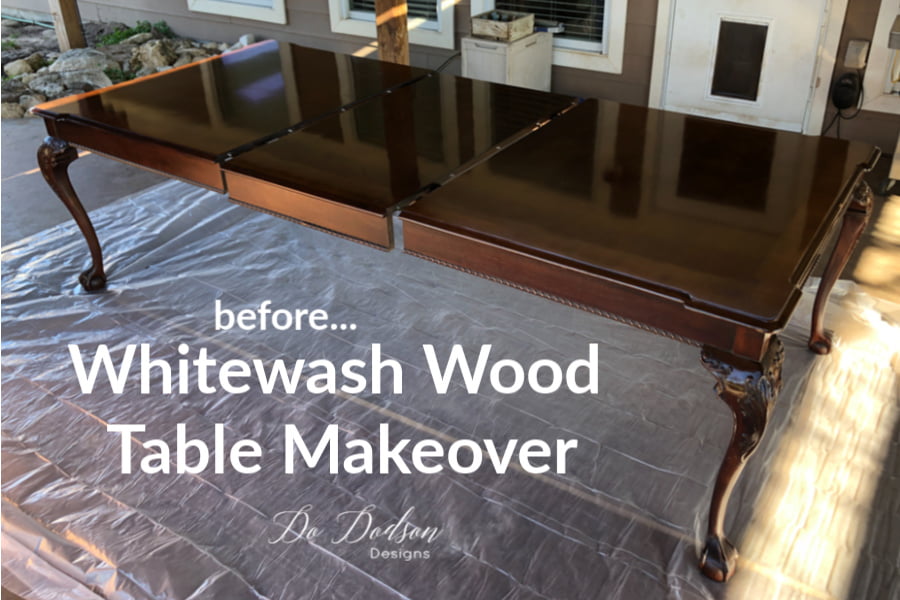
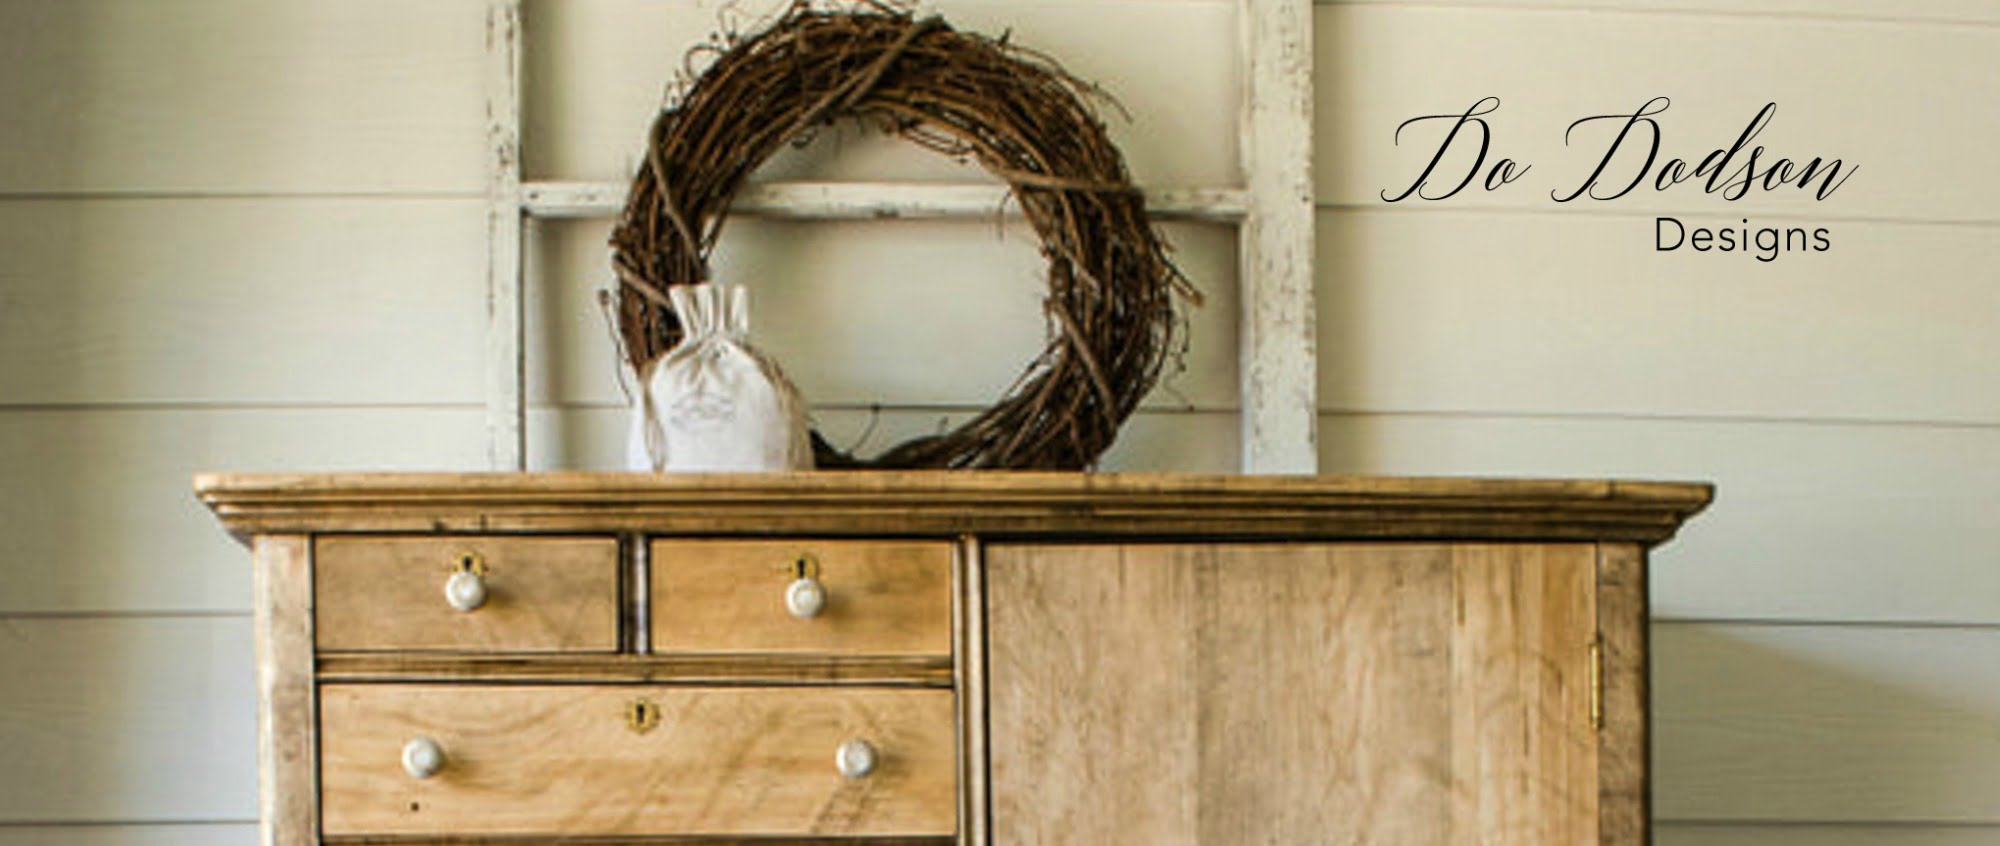
Hello, creative friend! Thanks for stopping in for another DIY furniture makeover. Sigh… it’s about all I can do as I sit here and write about my experience with this makeover. Firstly, this makeover is a family heirloom. No pressure! Secondly, it belonged to my hubby’s dearly loved “Granny Kewpie.” Yes, she was even more precious than her name. I’ve mentioned my Grandmother in many of my posts because what I do all started with her influence and a paintbrush, and his Grandmother… no doubt left a huge imprint on our hearts as well. This table was special to her and still is to my hubby. Not to mention it’s mahogany… one of the most expensive woods used on furniture. I’ll go into the details as we go, but the plans were to create a farmhouse whitewash wood table.
This post contains a few affiliate links to help you find the products I use. You are not charged extra to use any of the links, but any income I make will be used for more fun projects! To see my full disclaimer, click here.
Stripping The Wood Table Top
Saying I was scared to mess it up is an understatement. Yeah, I said it. The fearless Do Dodson was scared… scared of failure. My biggest custom job to this date. Painting for a stranger is easy—family… not so much. So much weighed on me during this makeover, but I was determined to make it work in my farmhouse dining room and preserve her memory at the same time.
This table was in impeccable condition and was only used for family dinners, and I knew the factory finish would be tough to remove. So, I used a chemical stripper to remove the heavy varnish finish.
* Be sure to work in a well-ventilated area ( or outdoors) when using these types of chemical strippers with protective equipment.
For more DIY wood projects, here are a few of my personal favories.

Supply List:
Here are the supplies you will need to re-create this DIY whitewash wood table finish.
- 2-minute Varnish Stripper
- Mineral Spirits
- Steel Wool (superfine)
- Paper Towels
- Carbide Scraper Tool (My FAVORITE scraper tool)
- Gloves (for stripping wood)
- Plastic Bowel (disposable for the stripper)
- 2-inch Chip Brush (disposable for stripper application)
- A GOOD SANDER Surfprep Sanding System Use coupon code DOIT10 to save 10%
- Denatured alcohol and water (50/50 mixture in a spray bottle for cleaning the wood before staining)
- No Pain Gel Stain (pickling white)
- Staining Pad
- Gator Hide (topcoat sealer)
- Fluff Chalk Mineral Paint
- BOSS (clear stain blocker)
- Mini Angle Paintbrush (for topcoat)
Stripping The Wood
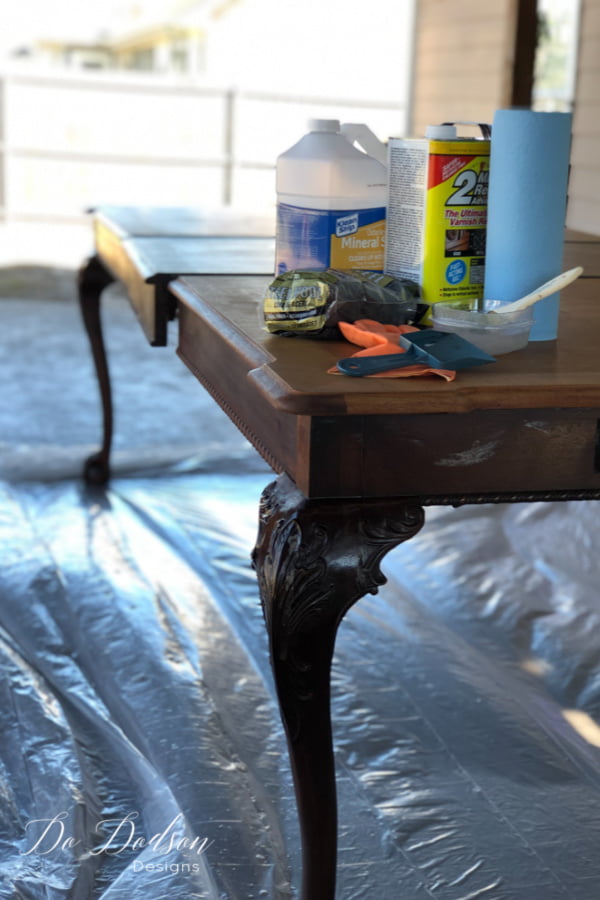
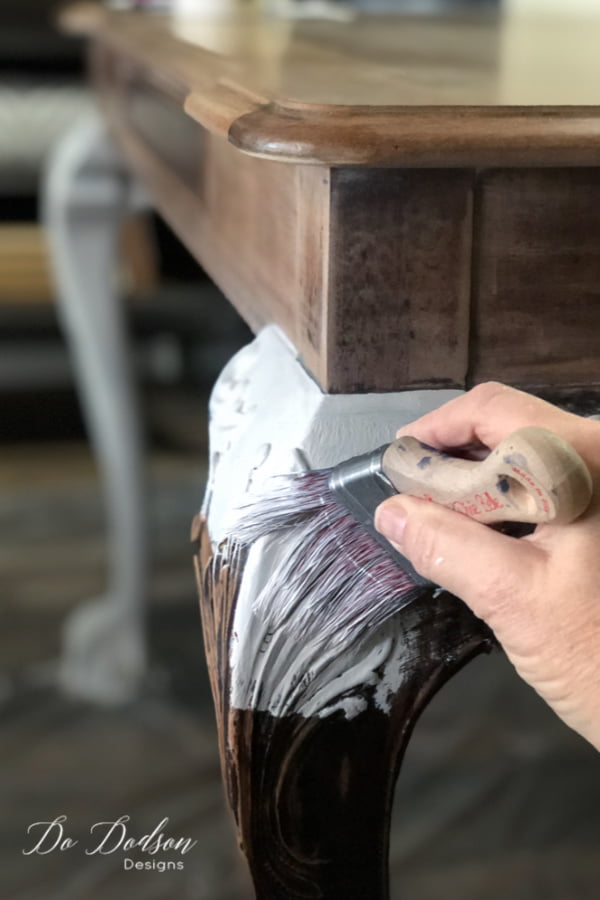
First, pour the chemical stripper into a disposable plastic container, apply it liberally to the varnish you want to remove… and wait. Pretty quickly, you will notice it working. Use a paint scraper tool to scrape it off. You’re gonna use a lot of paper towels!
Once the varnish is removed, you will notice some leftover remover on the wood. Use fine steel wool and mineral spirits to clean it up because you will want a clean surface before applying the whitewashed wood stain on the table. The freshly stripped wood will need to dry overnight before the next step.
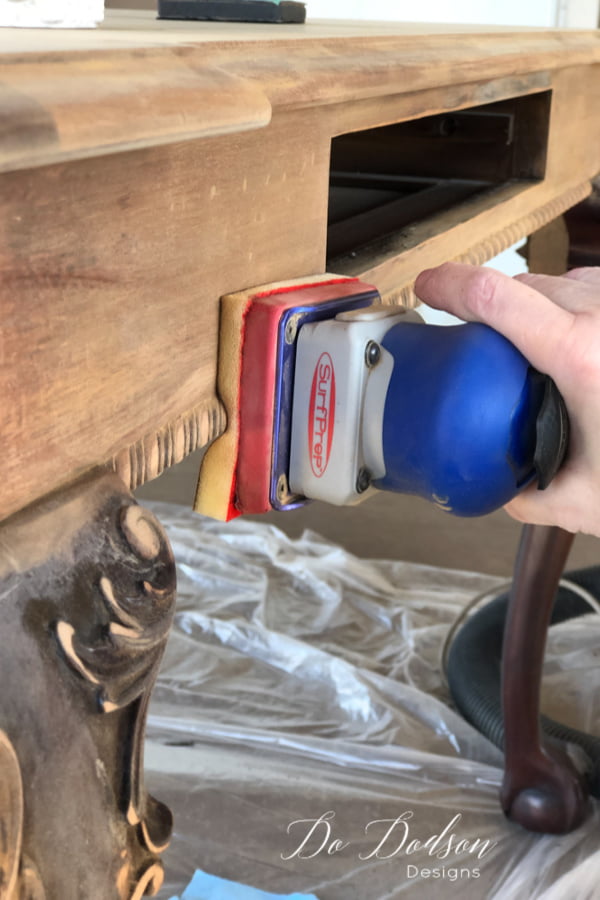
Sanding The Wood Table
Next, sand the wood table to remove any leftover varnish. I used my sander with padded sandpaper to get into the detailed wood trim and carvings. Clean the wood after sanding it with a 50/50 mixture of denatured alcohol and water.
Mix the denatured alcohol and water in a spray bottle, mist over the wood, and wipe it off with paper towels or a cotton cloth. This will remove all the leftover dust from sanding and if anything else is left on the wood. No worries about the alcohol; it will evaporate quickly, and you’ll be ready for the next step of the whitewash wood table makeover.
Whitewash Wood Pickling Stain
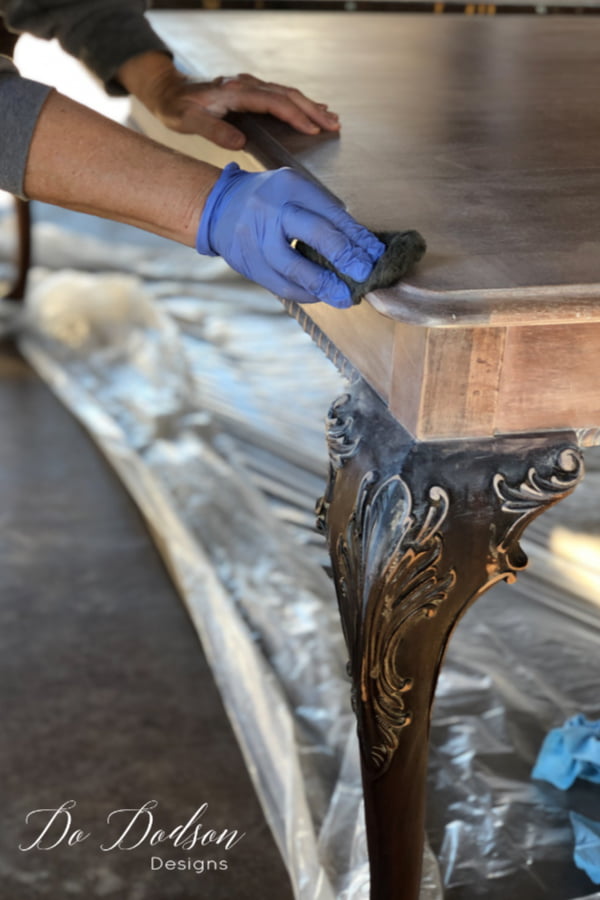
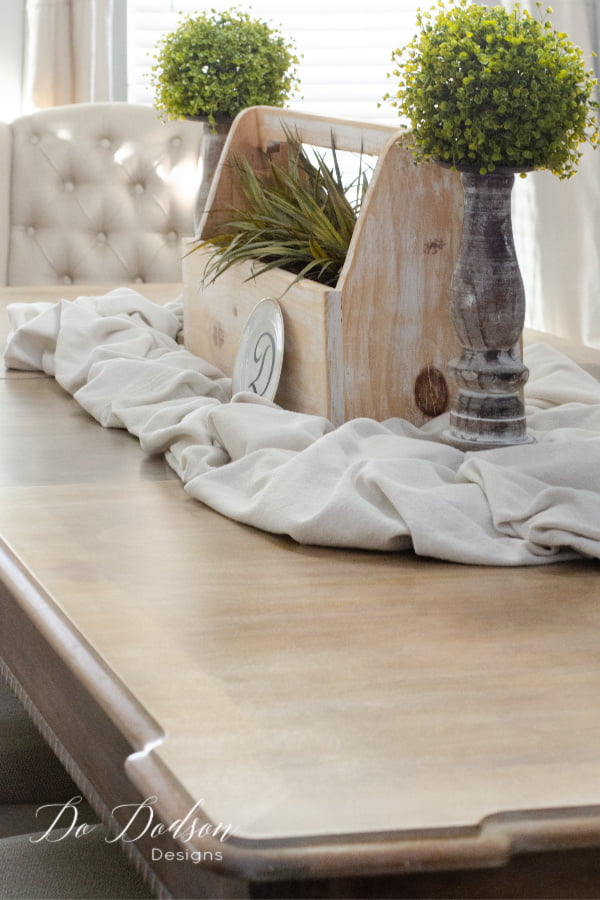
Now, the easy part! Apply the whitewash pickling stain over the raw, clean wood table with a staining pad, and wipe back any remaining stain on the tabletop with a soft cloth.
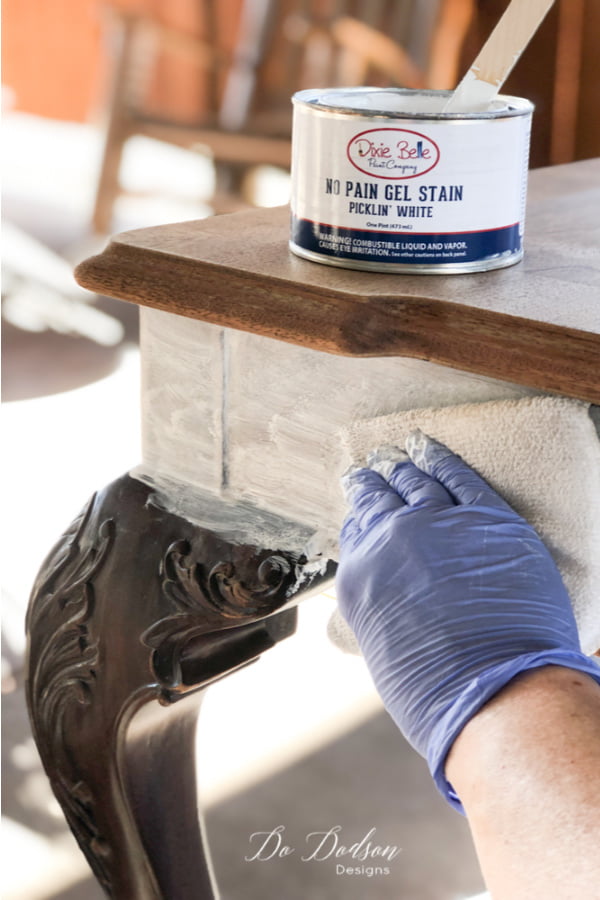
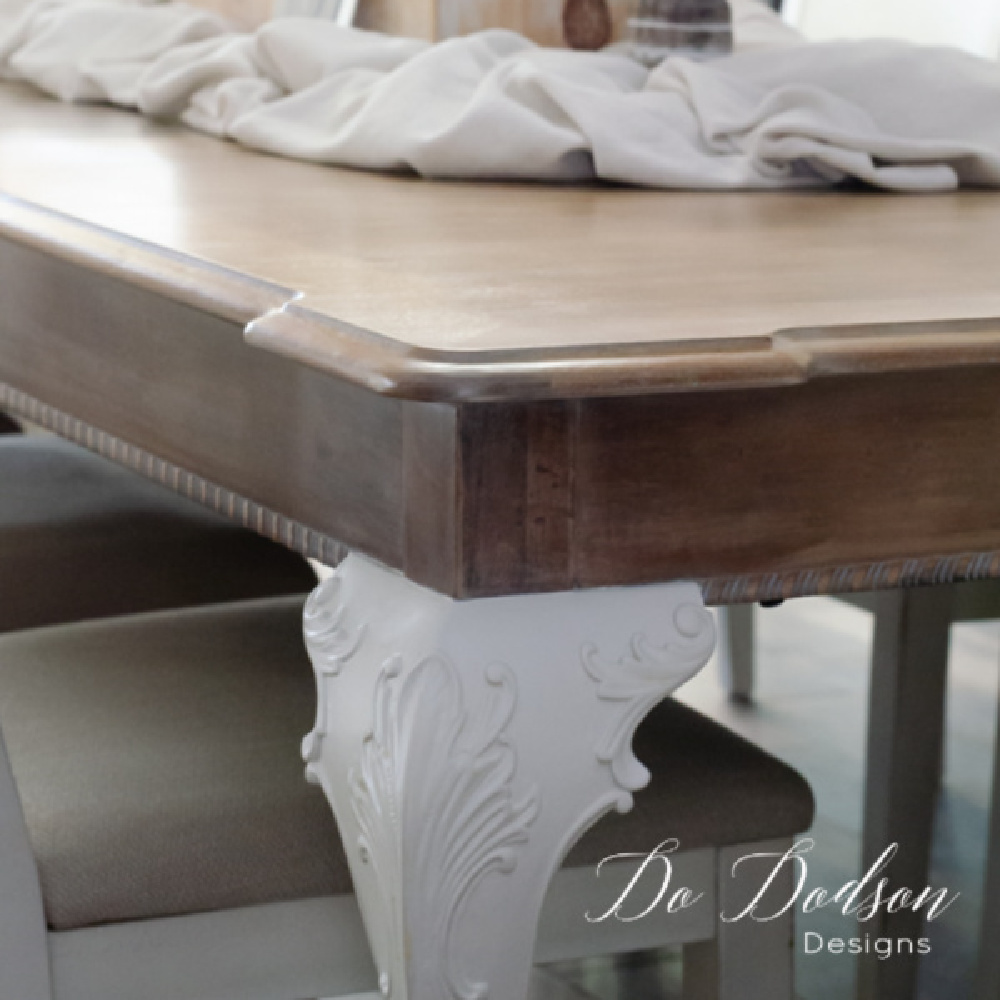
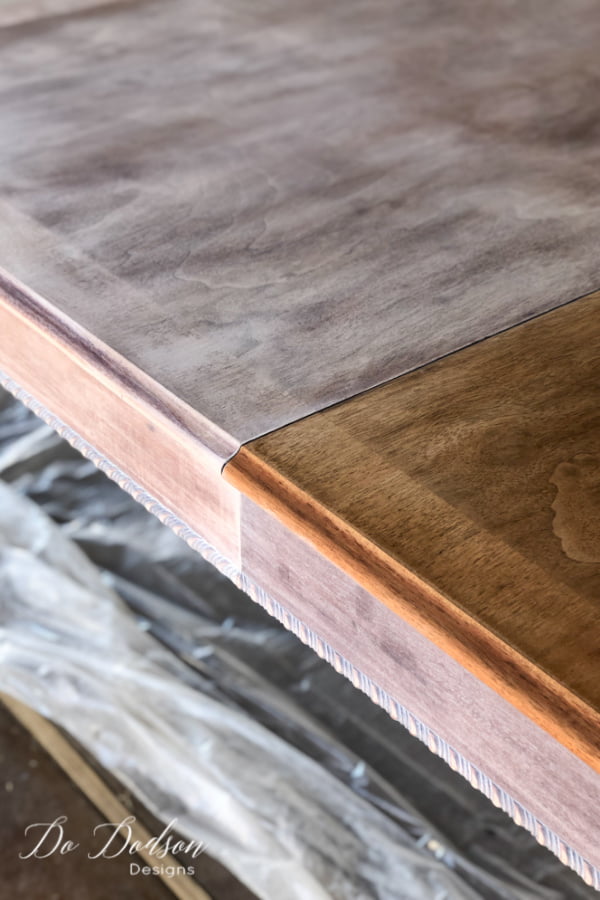
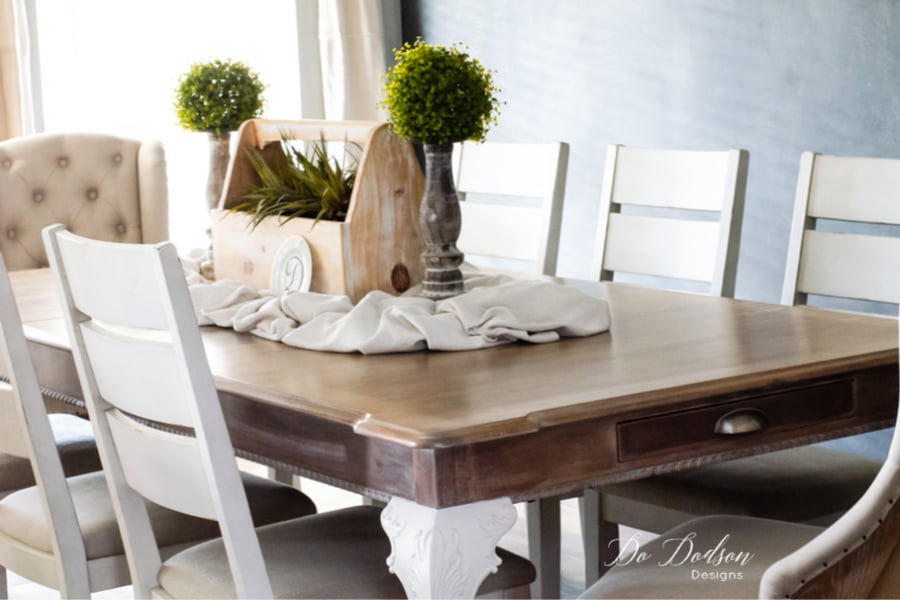
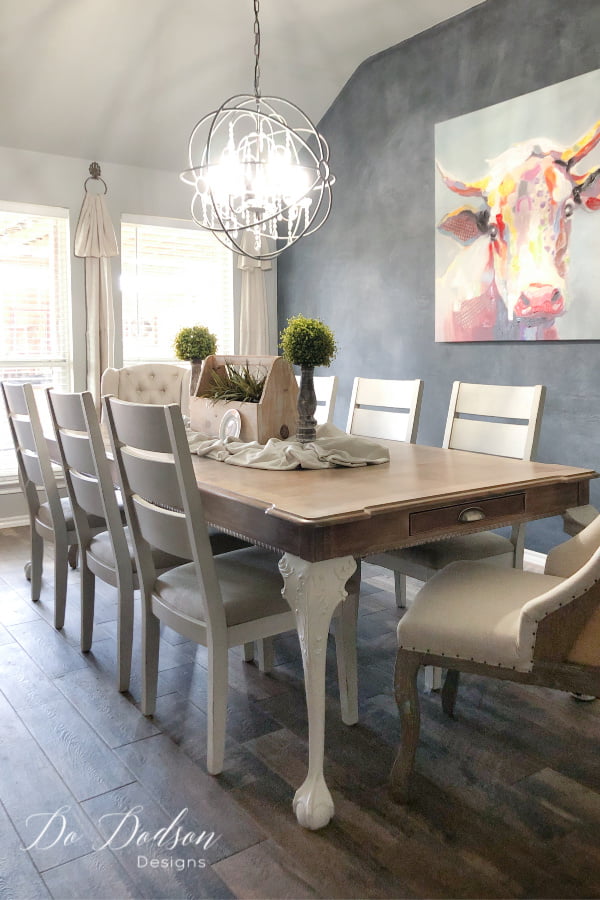
You will immediately notice a background of softness on the wood. All wood grains will be more pronounced while revealing a stunning whitewash wood. You’re in the right place if you love a farmhouse-style dining room table with a whitewashed wood finish.
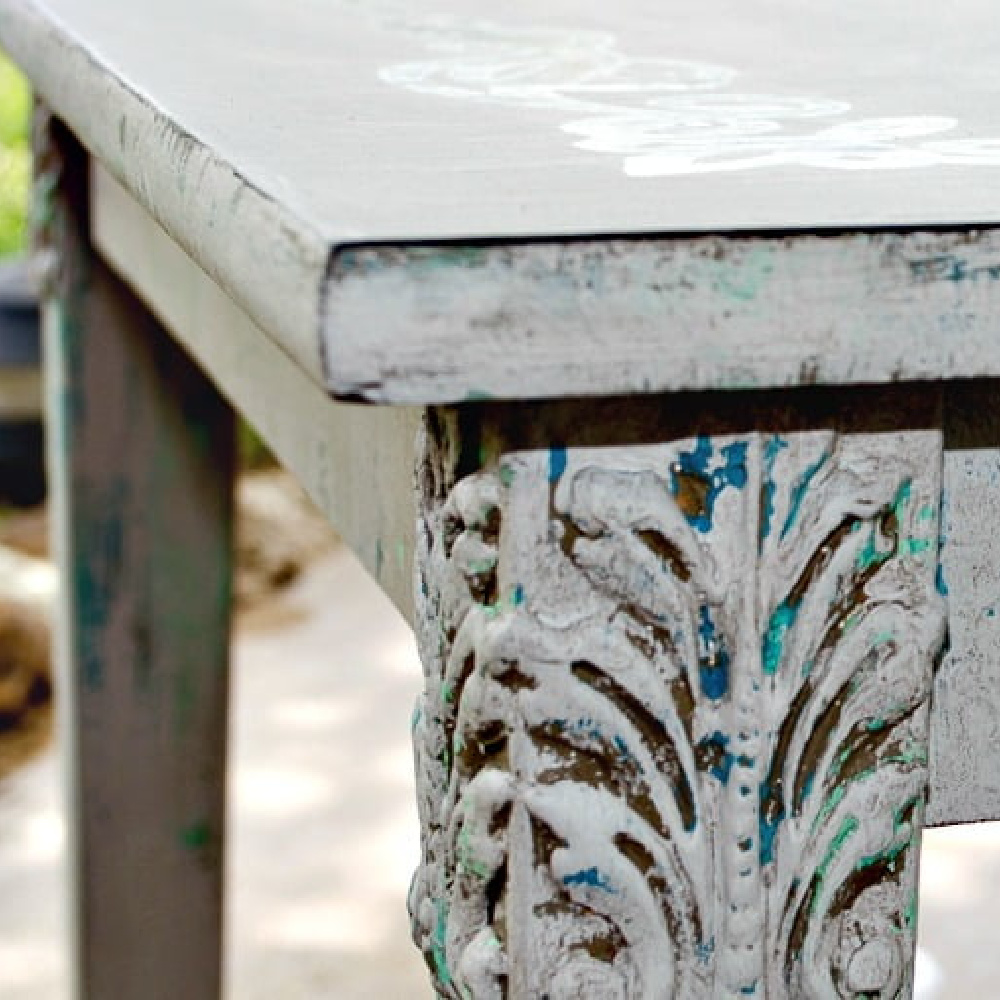
Chalk Mineral Paint For The Table Legs
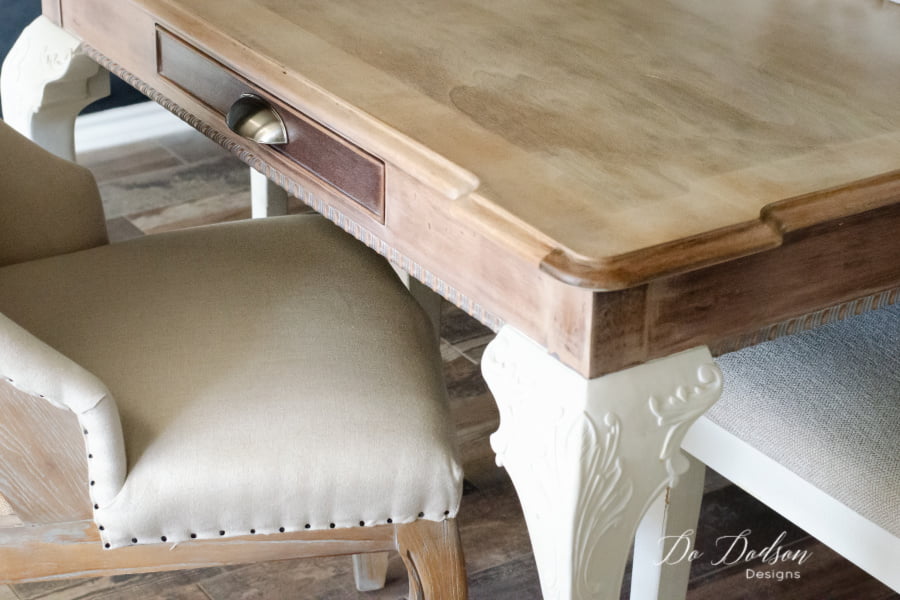
If you’re painting the legs of your table to compliment the whitewashed wood finish, be sure to use a stain blocker first before painting. Apply 2 coats of BOSS (stain blocker) in clear and allow to dry. Next, choose your favorite color (for this project, I used Fluff Chalk Mineral Paint) and apply 2-3 coats depending on the coverage needed. Darker woods will require 3 coats when using a lighter paint color. Seal with Gator Hide topcoat.
Look At All That Wood!
I did it! And I’m happy to report that no one died, AND hubby is happy with the results. He doesn’t say much about my furniture makeovers, but this table was special, and now it’s not only functional for our family dinners, but it also adds beauty to our farmhouse dining room.
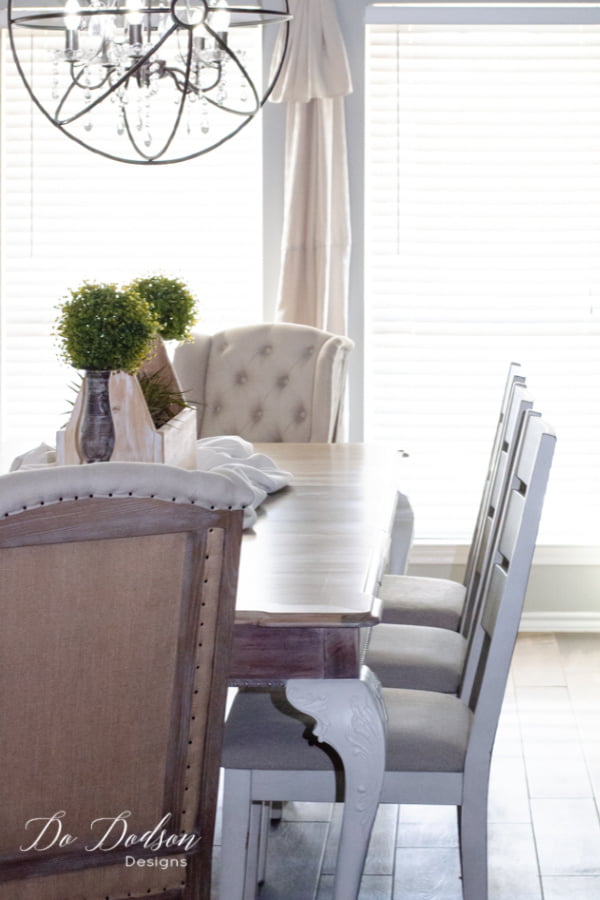
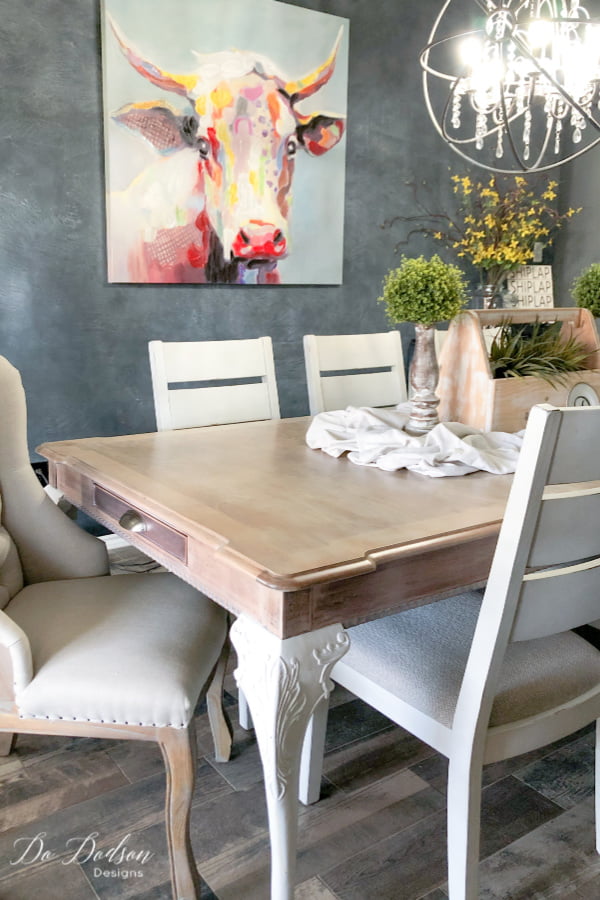
Every time I walk by our whitewashed wood table, I smile. It was worth all the nail-biting, hair-pulling, worrying, self-doubting, and back pain (this sucker is heavy) it took to accomplish this look. *In loving memory of our Granny Kewpie.
I’d love to hear any feedback or share your experiences with your family heirloom makeovers.
It’s always good to hear from you. Please drop me a comment below or say hello so that I know you stopped by.
Until the next project… xo, Do


Beautiful work, Donna. You felt the pressure for being a family heirloom but you did great! Congrats!
Thank you, Val! I am very pleased and relieved. 🙂
I don’t have a family piece yet, but my sister is giving me a large piece from my Mama to make over. This is a fabulous job you did and I love it. I think I’m going to try it on Mom’s piece. The cabinet is a large half round shape and is already nice but too dark for me. Thanks so much for showing your great work.
That’s exciting, Lori! I’m happy to hear that you’re gonna have a piece of hers. A piece to cherish and memories to make. xo, Do 🙂
Absolutely STUNNING!!!! I love all of your work. You should never worry. You are a gifted artist ❤❤❤
You are always so kind to encourage me, Donna. I appreciate you more than you know. xo, Do 🙂
Hi Do! The table looks 110% better! I love the whitewashed look. It is a magnificent piece. You are so brave!
I totally agree with you, Cheryl! 110% 🙂 It really has made a huge difference in our dining room. xo, Do
Simply lovely!. What (if anything) did you do to the drawer front? It looks different than the tabletop. Or is it the lighting?
Hi Robin, It is different. I think the wood they used to build the drawers is different but it was a happy accident. Thank you 🙂 xo, Do
Hello Do,
I want to do this to my dining table but my husband is very skeptical about me doing it. So to ease his mind I am first trying it on a coffee table that he found on the side of the road. I’ve just finished removing all the stain and boy it’s really a pretty little table. Now let’s see if I can make the magic happen as well as you did. Thanks so much for sharing your wonderful pieces with us.
Rhonda ?
That’s a great idea, Rhonda! And it’s good practice before you tackle the big project. Hopefully, the table will put his mind at ease when he sees the beautiful coffee table. That’s kinda the way I went about it too. Great minds! 🙂 Good luck my friend. xo, Do
Hello! I love your work. I was trying to look through one of your posts on pinterest, the one about tissue paper decoupage and I couldn’t manage to do it without all the videos and ads pop up?. Is there any other location you may have it that is a little easier to read. I would love to see what you did!
Hi Jessica, The info you’re reading is on my website. Yes, it can be annoying… I do understand that. All the information I give is free to you but the ads are what pays me to give you the free content. Furniture, products. photography and websites cost money and that is how I am able to do what I love. As a blogger, we are at the mercy of ads. Your grace is appreciated. “)
I can not love this enough! What a beautiful transformation.
Tammy
Thank you, Tammy! It’s always fun to try new ways of creating artistic finishes on furniture. xo, Do
Hi there, love the whitewash. I bought a bottle of mineral paint in casement color and have a lot left. Do you think I could thin it out and use that since I have it on hand? I am redoing an antique table of my Dad’s. Or do you think a stain is better? Thank you so much, love your posts!!!
Hi LeeAnn! I would test it first in a spot underneath to be sure but I don’t see why not. Thank you so much for joining me here. Good luck with your project. It sounds like a beautiful project. Send pics. 🙂 xo
I just love your table! I have an old farmhouse table that I’m dying to refurb! Just wondering what you used to apply the Gator Hide?
Thank you so much
Love from Ireland
Emily xox
Thank you, Emily. We love it so much more now.
I used a high quality synthetic paintbrush. Brushes make all the difference. I applied three thin coats with a light sanding (fine sand paper) between each coat. The final coat should not be sanded. Sanding between coats helps to remove any tiny imperfections and makes it extra smooth. I hope this helps and best of luck to you with your project. 🙂 ❤️
When I click on the links that you posted, they do to the 2 minute stripper on every single one I clicked on. For example, I wanted to see the scrapper that you use but it took me to the stripper. Thanks Donna.
Oh my goodness!
I went back to check and you’re right. How bizarre. I was able to go back in and update them so now they reflect the correct products. Thank you so much for bringing this to my attention, Kathy. You’re very kind. Happy Holidays. Here’s my affiliate link to the scrapper. It’s fantastic! https://amzn.to/41LhXHj