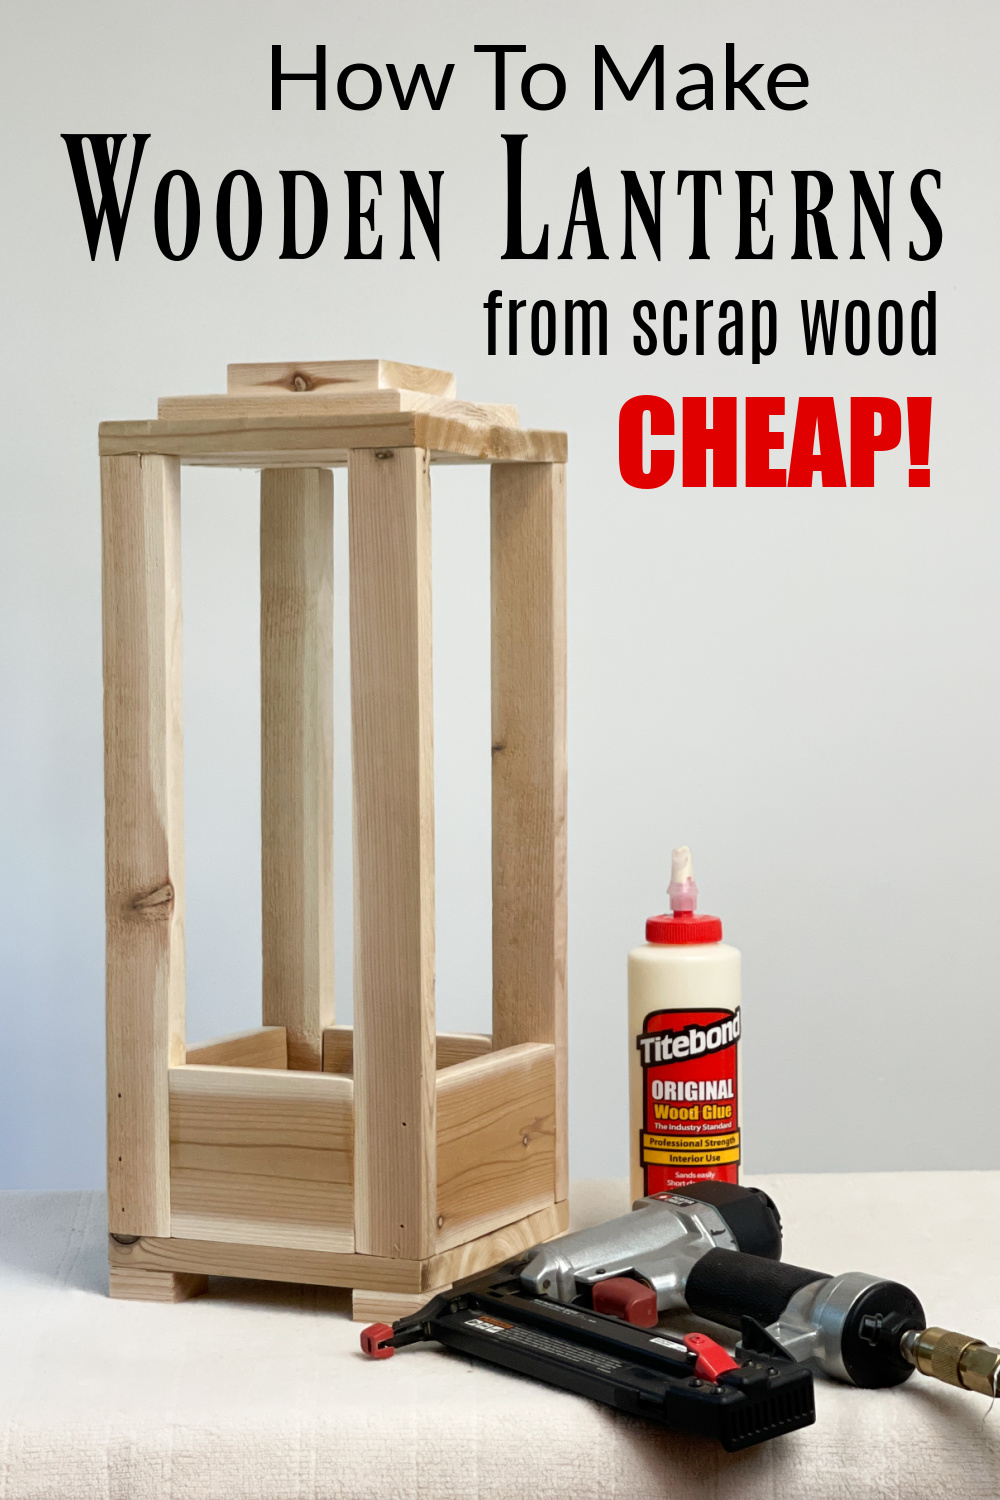
Hey triple-D friends! Want to add some style to your front porch? Making these DIY wooden lanterns are a great place to start. If you have scrap wood pieces, you can make them for almost FREE. Get the step-by-step complete tutorial here.
Thanks to Dixie Belle Paint Co for sponsoring this post. While I was compensated to write this post, all opinions are my own.
* As an Amazon Associate, I earn from qualifying purchases and through other companies as well. You will not be charged extra when you purchase through these affiliate links, but any income I make helps me create more amazing DIY projects to share with you! To see my full disclaimer, click here!
DIY Wooden Lantern
Today I’m taking you on a little trip to the scrap wood pile! We’re gonna DO a little woodworking. It’s one of my favorite places to hang out and dream about all the amazing home decor items I can create for almost free. I’m thrifty that way. That’s why they call me the scrap wood queen.
Wait! No, they don’t. I just made that up. LOL 🙂
It’s always exciting to find a very simple DIY project that I can share with you, and this one doesn’t disappoint. While I didn’t come up with this idea on my own, I would like to think as a creative; I can put my own spin on them.
For more on this subject, I found this blog post if you want to see more options. CLICK HERE for the tutorial.
Want to see more of my woodworking crafty projects? Check these out!

SUPPLY LIST:
Here’s what you will need to make these DIY wood lanterns.
- Scrap Wood (pine, cedar, whatever you have)
- Tape Measure
- Carpenter’s Pencil
- Exterior Wood Glue
- Sandpaper or Sanding Block
- Nail Gun
- Pin Nails
- Miter Saw
- Table Saw
- Painter’s Tape
- No Pain Gel Stain Picklin’ White (oil-based)
- Flameless Remote Control Candles
Gather Your Materials and Tools
Don’t worry; you won’t need a fully stocked workshop to get started – just a few key items will do the trick to create your own DIY wooden lanterns.
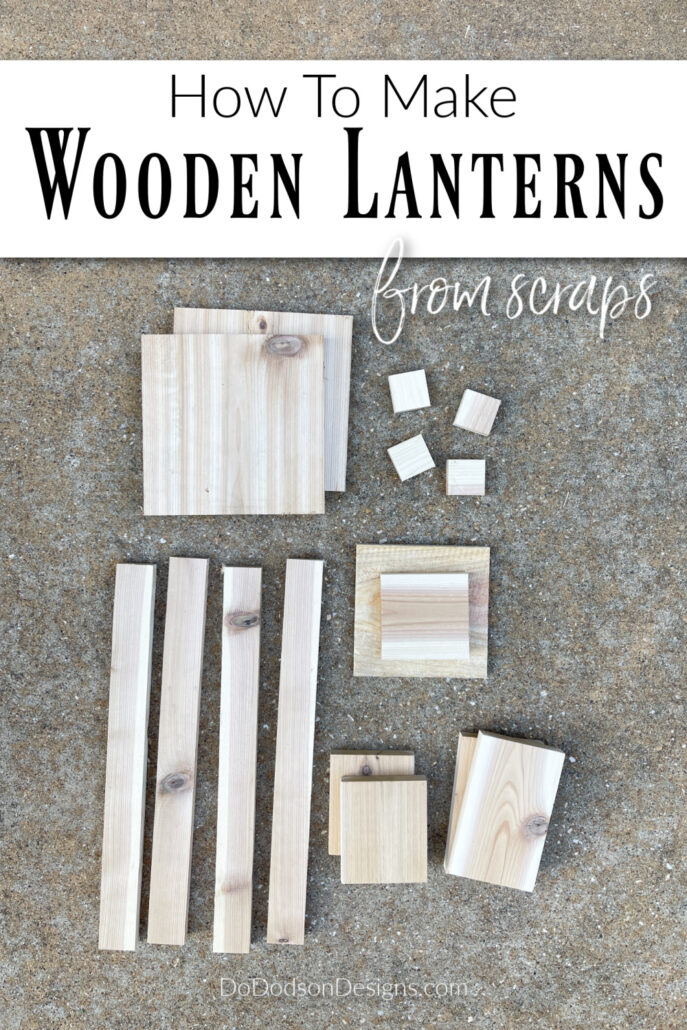
First and foremost, you’ll need your leftover pieces of wood. Look for pieces that are sturdy and have a good amount of character. Remember, imperfections can add to the charm of your lanterns, so don’t be afraid to embrace the unique qualities of each piece.
Next, you’ll need a measuring tape and a pencil. These are tools I use to help ensure that my cuts are exact.
Once you have your measurements, it’s time to cut your wood. You can use a handsaw, or a table saw, depending on your comfort level and the amount of wood you’re working with. Remember to always wear protective goggles and use caution when operating power tools. Safety should always be a top priority during any DIY project.
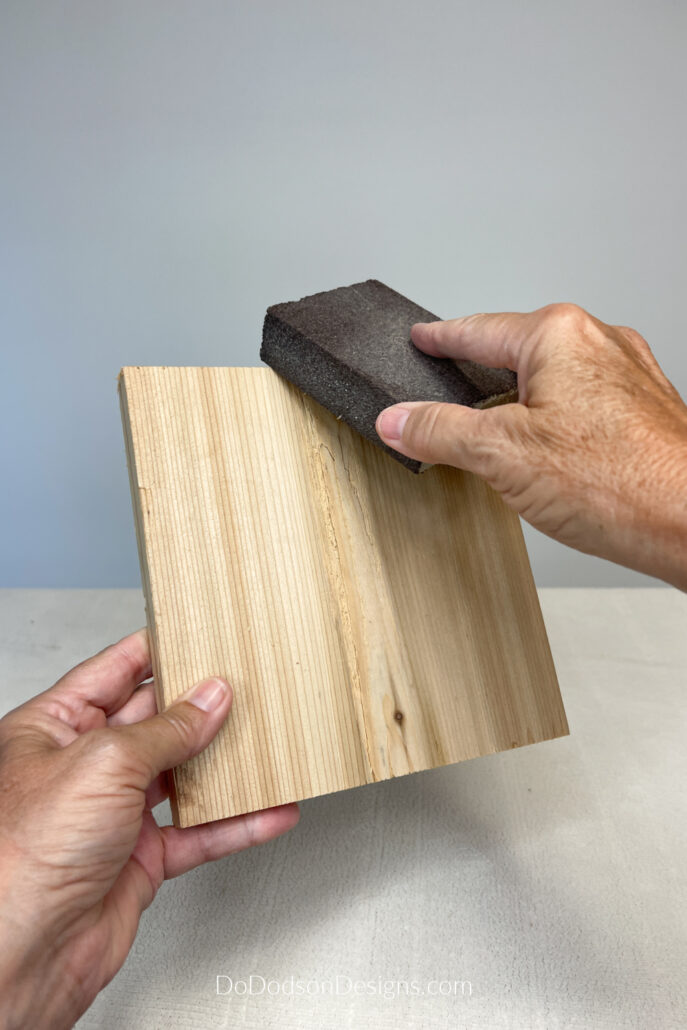
In addition to cutting tools, you’ll also need sandpaper or a sanding block. This will allow you to smooth out any rough edges or surfaces on your wood. It’s worth taking the time to sand your pieces thoroughly, as it will result in a more polished and professional-looking final product.
Gather some wood glue or a strong adhesive. This is necessary for securing the different pieces of your DIY wooden lanterns together. Choose a glue that is specifically designed for wood. Your child’s school glue might work in a pinch, but I wouldn’t trust it.
My Wood Lantern Measurements
Here are the measurements that I used, but of course, you can adjust the lengths depending on your lanterns. I used cedar fence pickets, so the measurements are approximate.
1X8 square top and bottom
1X2 tall sides – length 16 inches
1X4 sides walls – 6 inches and 4.5 inches (these will be different if the sides are not square)
2X2 – squares for the feet
The top decorative pieces were cut square and stacked.
Measure and Cut Your Wood
To create beautiful DIY wooden lanterns that will add a warm and rustic touch to your home decor, it’s important to start with precise measurements and clean cuts. This step is important in ensuring that your lantern comes together seamlessly, with each piece fitting snugly into place.
Begin by carefully measuring the dimensions of each section of your lantern and make your cuts. Take your time to measure twice and cut once. Yes. I’m repeating myself.
Next, fire up your trusty saw. Depending on the thickness of your wood, you may choose a hand saw or a power saw. Whichever you use, make sure it is sharp and in good working condition. The last thing you want is to end up with jagged edges or uneven cuts that will stand out in your finished lantern.
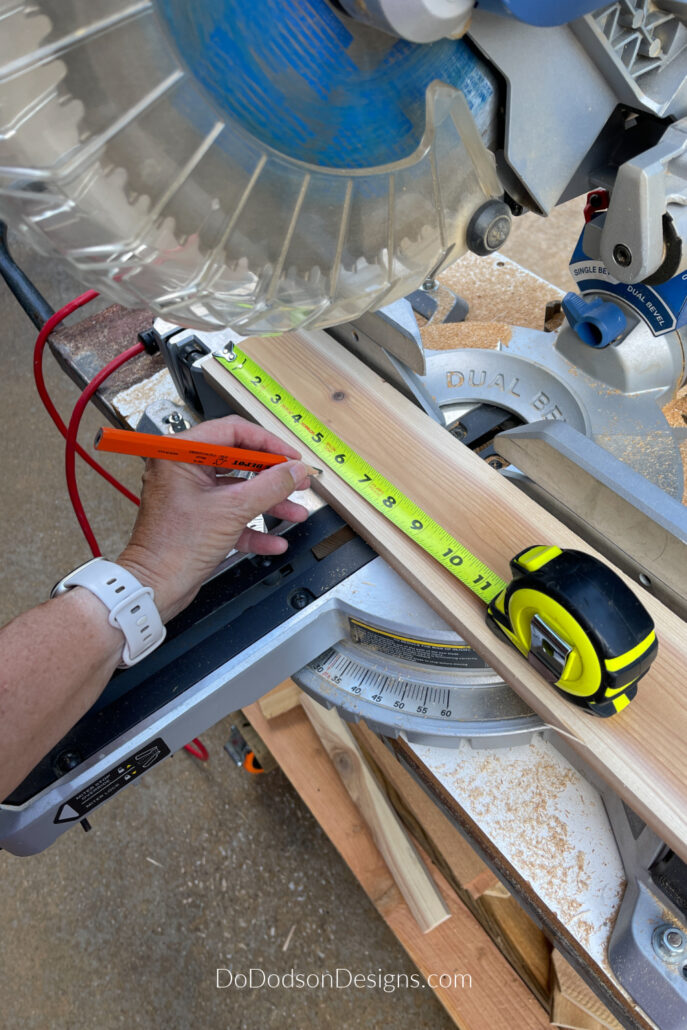
Take a deep breath and approach each cut with confidence. Steady your hand and carefully follow the lines you’ve marked, ensuring a smooth and clean cut. Remember, it’s always better to cut a tiny bit outside the line and then sand it down to the exact measurement rather than cutting too much and having to go back to the wood pile.
Prepping The Wood
After your pieces are cut, smooth out any rough edges of each piece with 220 fine-grit sandpaper. This step will not only smooth out any rough spots but also create a seamless transition between the different pieces of wood.
After sanding, wipe away any dust or debris. If you notice any gaps or blemishes, consider using wood filler to fill them in before moving forward. This extra step will ensure a flawless finish once the lantern is completed. I don’t mind the imperfections. I call that rustic!
Assemble The Wood Lanterns
Begin by arranging the cut wooden pieces on a clean work surface, making sure that you have all the necessary pieces laid out in front of you. I like doing this because it allows me to visualize in my head before I begin putting the pieces together, and we all know that creative people are visual thinkers.
Starting with the bottom piece, carefully align the edges with the corresponding sides and secure them in place using wood glue. Using light pressure is enough to hold the pieces together while the glue dries. If needed, you can also use clamps to ensure a snug fit.
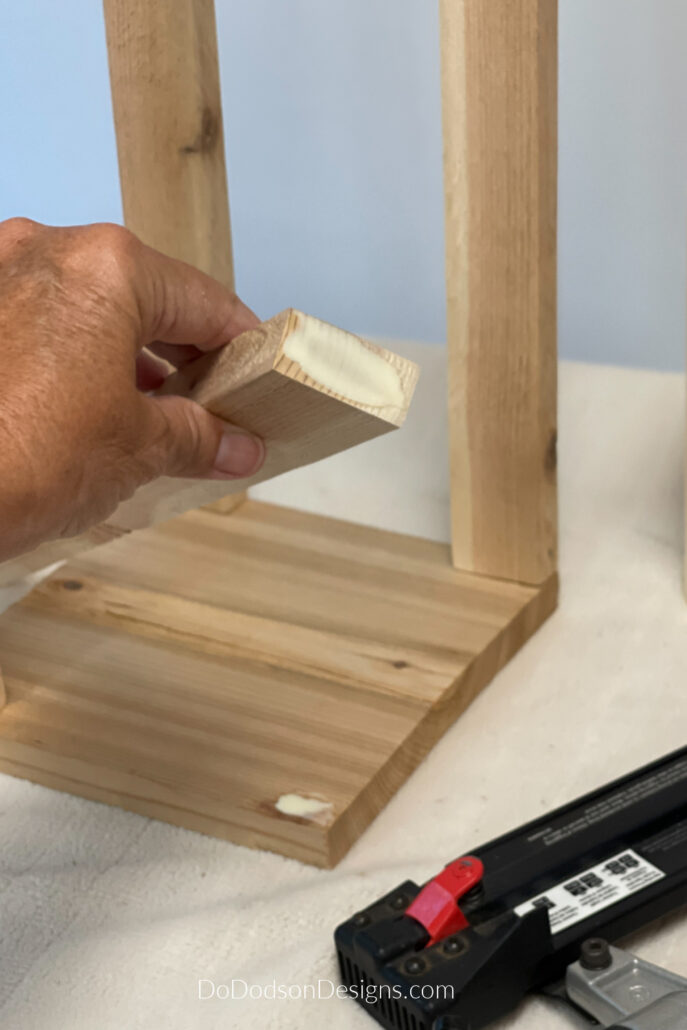
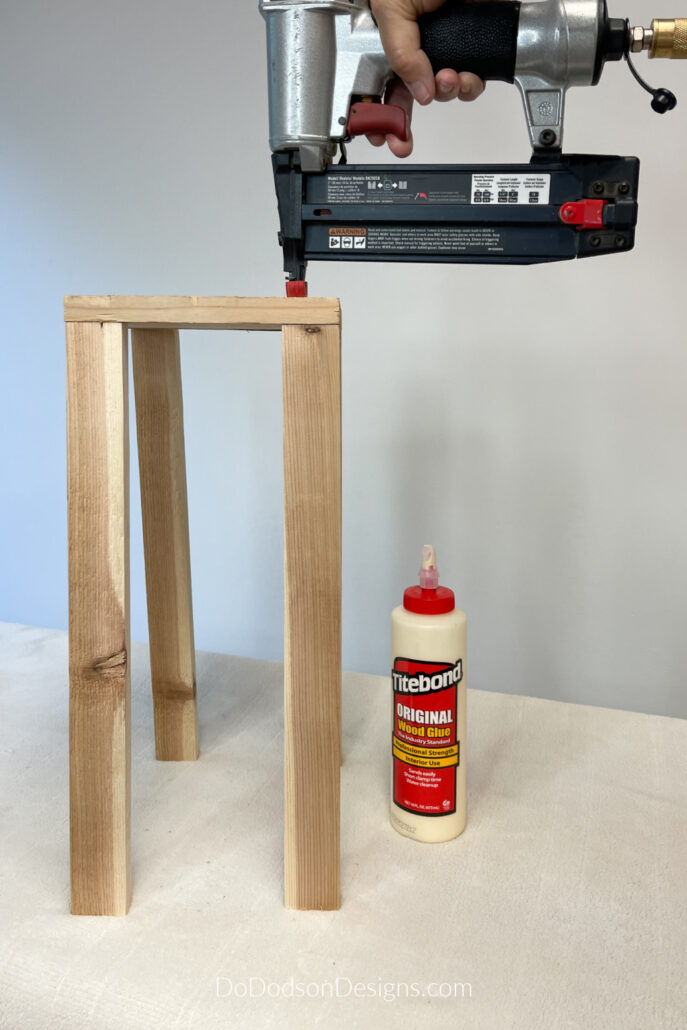
Once the bottom piece is securely attached, progress to the sides of the lantern. Apply wood glue along the edges and gently press them against the bottom piece, making sure they are perfectly aligned. For added reinforcement, you can use small finishing nails or a nail gun like I did to secure the joints. If you decide to use the good ole fashioned hammer and nails, be sure to use a hammer with a gentle touch to avoid splitting the wood.
Remember, patience is key throughout this step because rushing can lead to crooked pieces and a less-than-perfect final product. But we all know how I feel about perfectionism. It’s way overrated!
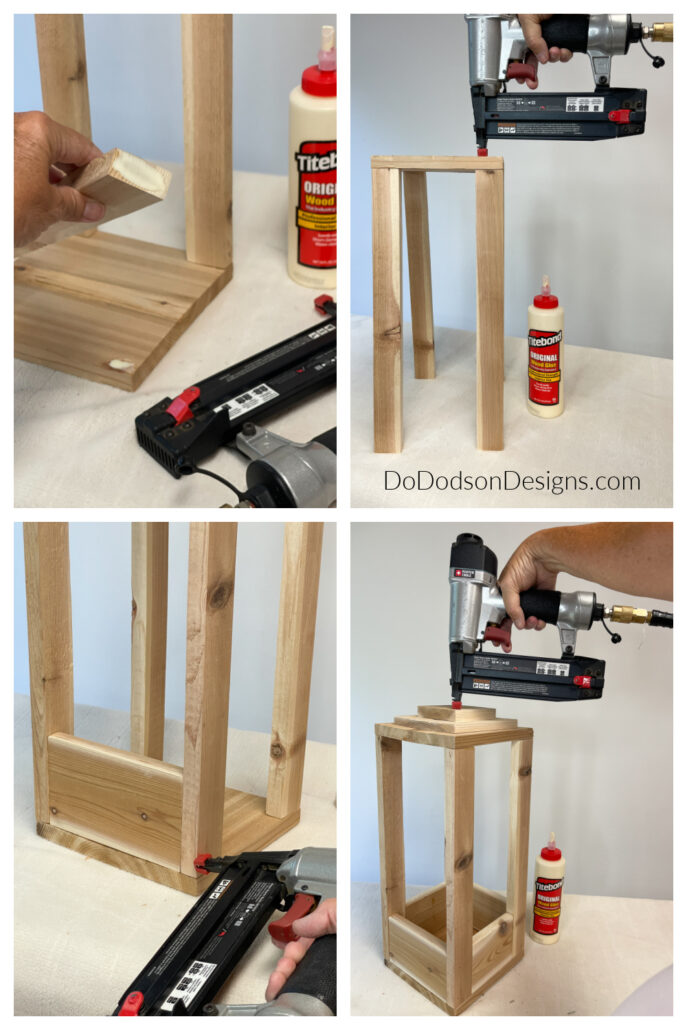
With the sides securely attached, complete the lantern’s structure by adding the top piece. Apply wood glue along the edges of the sides and gently press the top piece into place. Take a good look to see if the wood pieces are properly aligned before setting them aside to dry.
DIY Wood Lanterns With Style
If you plan on using your DIY wooden lantern outdoors, you need to choose a protective coating for your wood. While the natural beauty of the wood may be tempting to leave it as is (and you totally can), applying a clear varnish or wood stain will not only enhance the color and grain but also provide protection against the elements. You could also paint the wood or do both. Here’s how I finished mine.
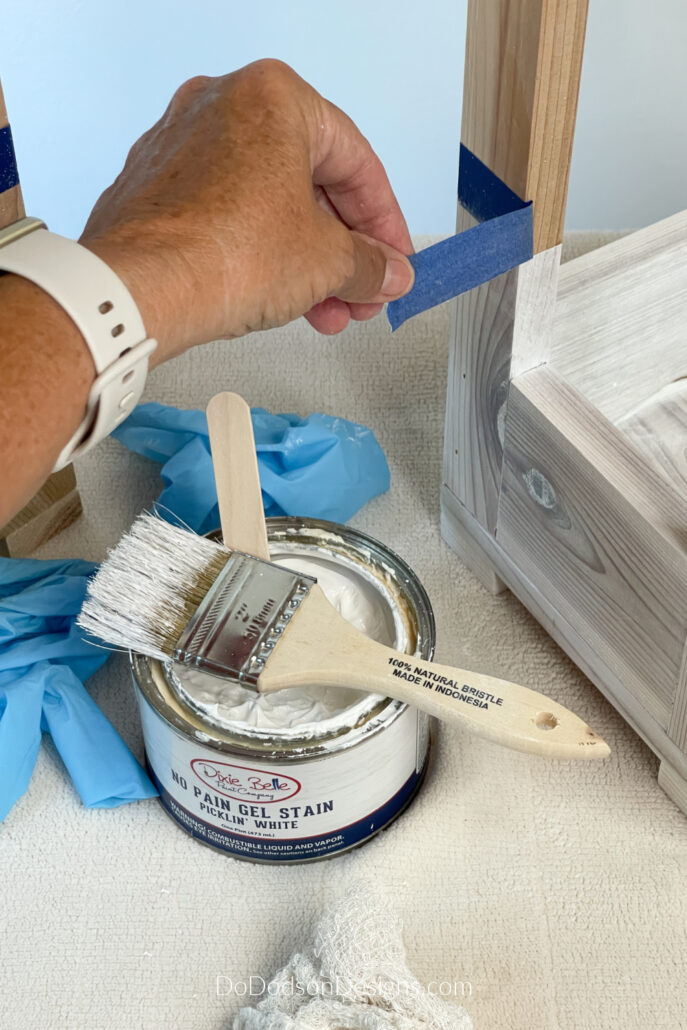
STEP 1: Apply No Pain Gel Stain by Dixie Belle Paint Co. (oil-based)
Use painter’s tape to tape off the lower 1/3 of the wooden lanterns. Next, apply the gel stain on the wood below the tape with a disposable paintbrush. After all, I aint got time to clean the brushes. I’d rather be crafting!

STEP 2: Use A Clean Cloth
Afterward, wipe away any remaining stain on the surface of the wood with a clean soft cloth, and be sure to wear disposable gloves. It will stick to your skin for days. We painters call that a badge of honor, and I have lots to brag about. 🙂

STEP 3: Carefully Remove The Tape
Lastly, remove the painter’s tape to reveal beautiful, flawless lines between the wood and the stain. I’m so happy right now! 🙂
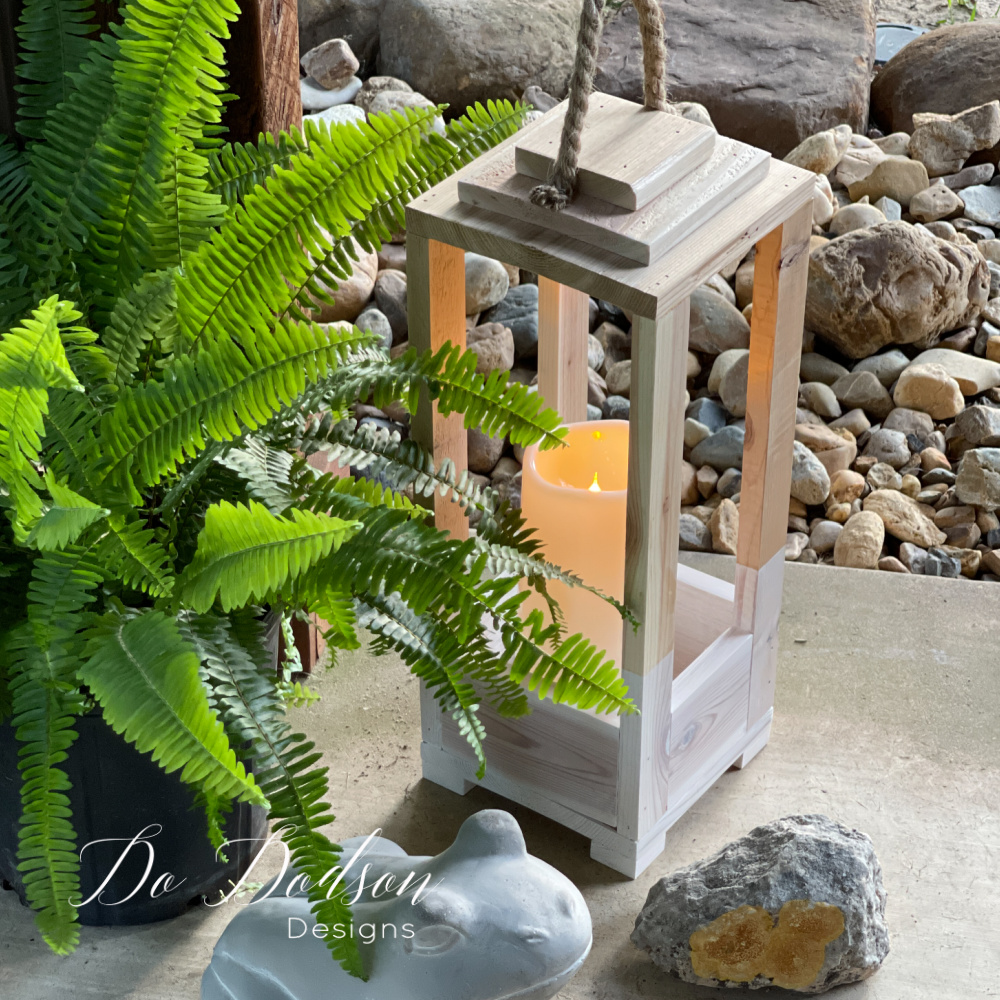
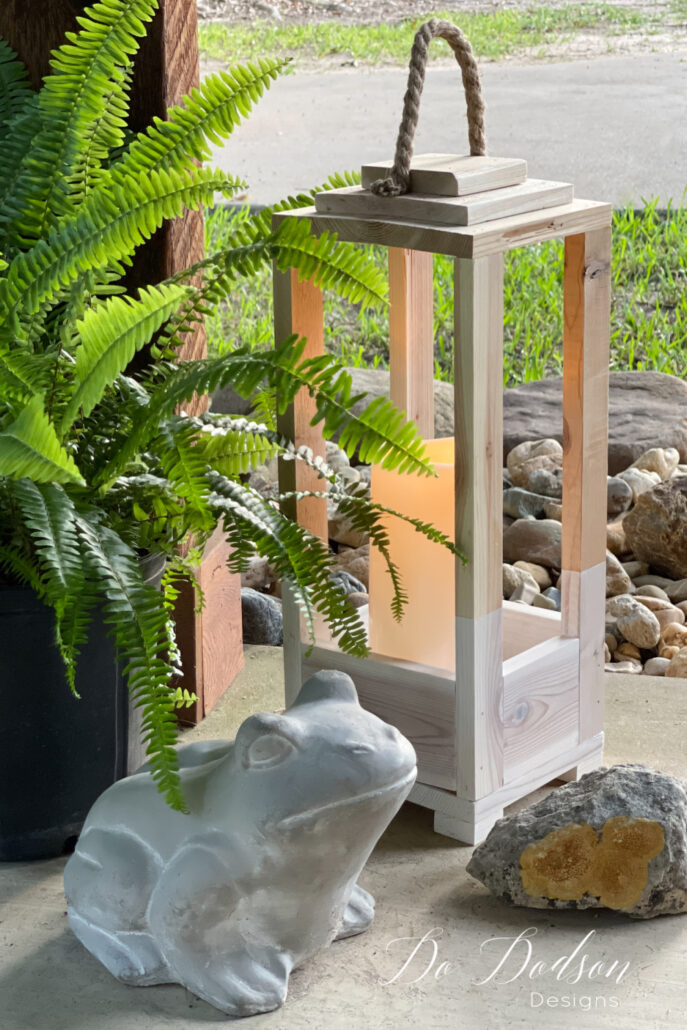
As you apply the finishing touches, keep in mind the overall style you envision for your porch or outdoor space. Consider adding decorative touches, such as metal accents or rope handles, to customize your lanterns and make them uniquely yours. I added the rope handles to mine using a staple gun.
Illuminate Your Porch with Style
After applying your finishing touches, keep in mind the overall style and aesthetic you have for your front porch or back yard. It’s these small details that will truly take your lanterns from mere DIY projects to eye-catching pieces. Consider adding a decorative element such as a rope handle to customize your lanterns and make them uniquely yours.
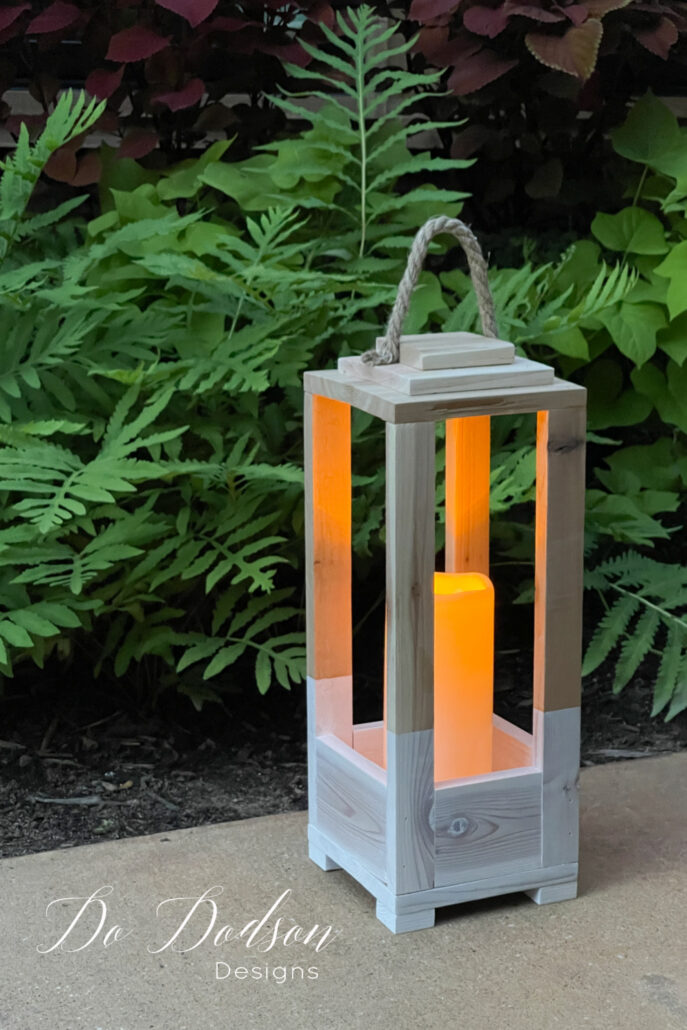
Imagine the warm glow of flameless candles from your newly crafted lanterns and providing a cozy ambiance to your porch at night. Try adding a mason jar with twinkle lights and maybe some greenery too. Whatever you decide to add inside, you can be sure that your gorgeous DIY lanterns will be the envy of everyone that sees them. Especially your bestie!
Whether your porch is modern and sleek or rustic and inviting, these lanterns will blend in with any decor style.
DIY Wooden Lantern Centerpieces
Here’s another idea. I’ve also seen these used as wedding centerpieces. Fill a small vase with greenery and add a faux candle for instant charm or centerpieces for your dining table. Fill them with your favorite holiday or seasonal greenery for a quick and easy design change. The fall is my favorite. Grab some faux leaves, tiny pumpkins, and you are good to go.
Using wood statement pieces that can be quickly changed from one season to the other is a win-win when it comes to quick decorating.

And these flameless candles! Can we please have a moment of silence? They have a remote control. Isn’t that something? The Amazon Link is listed in the products list above.
These DIY wooden lanterns were so easy to make, and did I mention fun? Once the pieces were cut and prepped, it took literally minutes to build them. Waiting on the stain to dry was the hardest part. 🙂
So, are you ready to tackle this DIY project? Let me know in the comments, or just say hello so that I’ll know you stopped by.
As William Morris once said, “Have nothing in your houses that you do not know to be useful or believe to be beautiful.” I love this quote!
Until the next project… xo, Do


What a fun project! I’ve done almost of of your wood pieces and have enjoyed doing them. These lanterns
really look impressive and just what I need on my patio. Thanks
Hi Catharine!
I’m so happy to hear you’re enjoying these projects.
I was really impressed with these lanterns. Everyone thought I bought them from Hobby Lobby. 🙂 And the flameless candles work perfectly for my breezy porch.
When and if you make these, can you please share a photo with me? Thanks for reading and best wishes on all your DIY projects. xo
Love it!!
Thank you Leslie! You know me and my scraps. 🙂 Thanks for reading.
Omygosh, this is sooo cute! Great scrap wood idea Do! Enjoy your weekend… by candlelight! 🕯️🌸 XOXO
Hey Denise,
It’s the little things that bring us joy… like a candle lit porch. Thanks for reading. 🙂 xo
Hey! Would you be willing to share the measurements and wood sizes that you used? Thanks!
Hi Laura,
I guess I got in a hurry and missed sharing that important part. Thanks for bringing this to my attention. I went back and updated the post with the measurements I used. Because I used scraps of what I had on hand, the measurements are approximate and will need to be adjusted to your project. Use your tape measure as it will be your best friend. I hope this helps and thank again. 🙂 xo
The lanterns turned out great. I am so very happy with the new lanterns for my porch. Thank you
Wonderful, Lori!
I’m so glad you enjoyed this fun DIY project. They really have brought an ambience to my night porch living. Have a great week. 🙂 xo