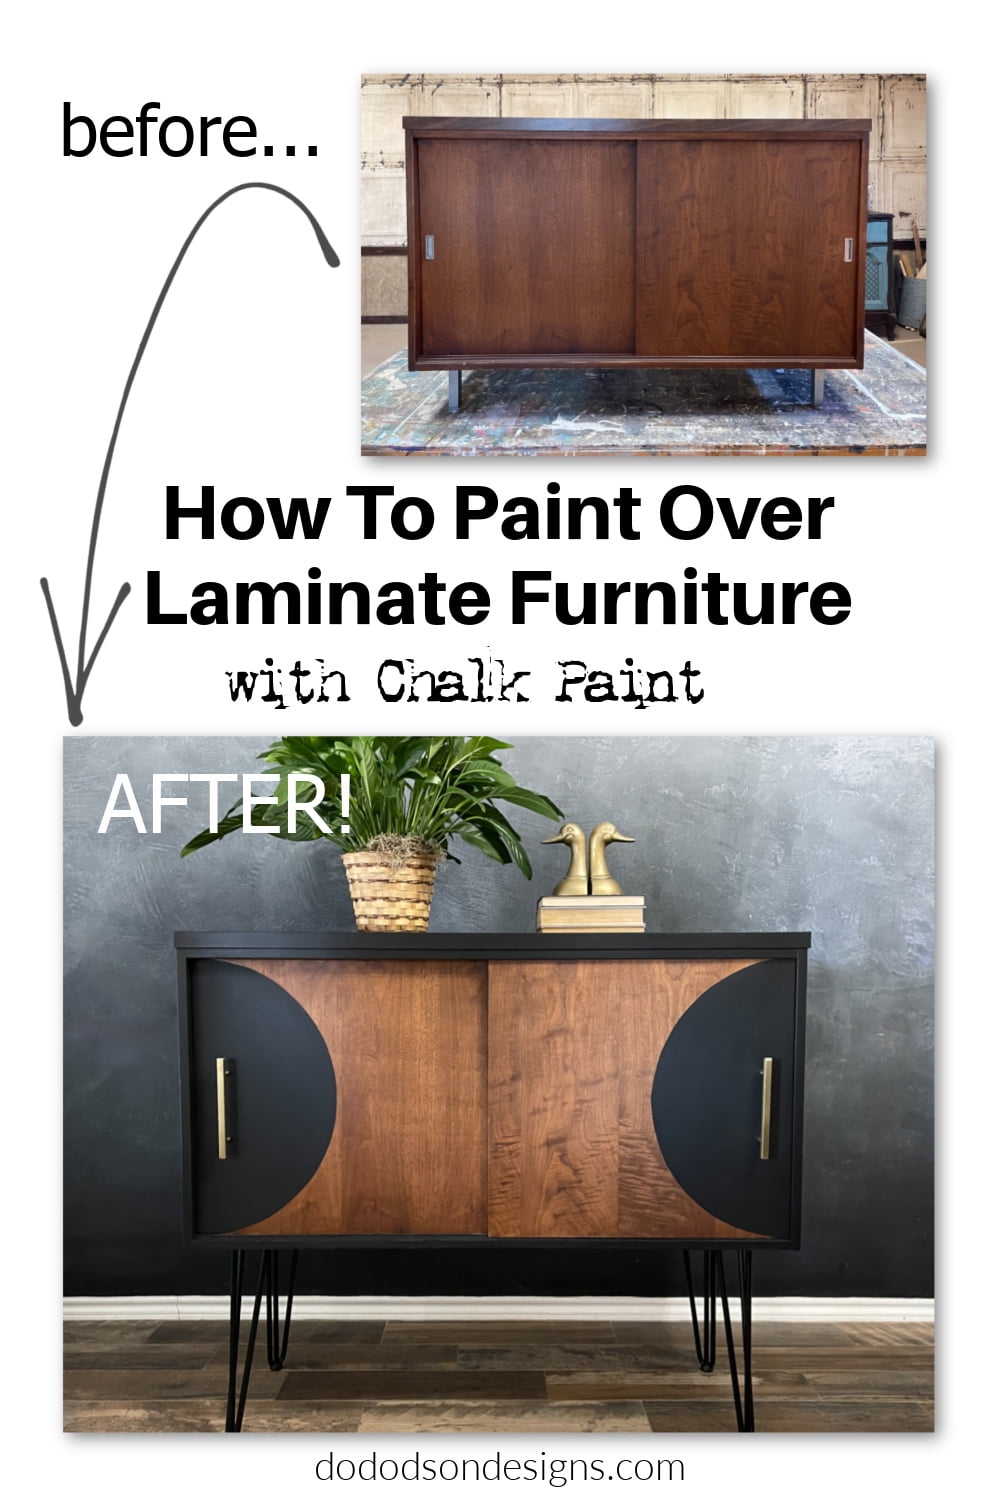
Hello creative friends! We’ve all been there when we find what we think is the perfect piece for a makeover and then find out… not so much. I found it on FB Market Place for $40, and if you know anything about MCM furniture, that’s a real steal! Yeah, baby! This credenza would be the find of 2021! wah wah… 🙁 Well, it was until I went to pick it up. That’s when I discovered it had a laminate top, but the lower half was a wood veneer. Bummer. I could still think of no reason not to purchase this piece. Today, I’ll show you how to paint over laminate furniture and made it look like a million bucks. Well, maybe I exaggerated a bit.
Thanks to Dixie Belle Paint Co for sponsoring this post. While I was compensated to write this post, all opinions are my own.
* As an Amazon Associate, I earn from qualifying purchases. I also earn qualifying purchases through other companies. You are not charged extra to use any of the links, but any income I make will be used for more amazing DIY projects to share with you! To see my full disclaimer, click here!
How To Paint Over Laminate Furniture – the right way!
I hate to repeat the same ole song and dance routine (I actually like to dance, but I’m not good at it), but you probably already know what I’m going to say if you’ve been following me for any length of time. You MUST PREP your furniture before you paint. Even more important when you’re painting over laminate furniture.

Gather Your Supplies
- Laminate Furniture
- Gloves (for protection)
- Sanding Pad (abrasives for scuff sanding) or Electric Sander
- White Lightning (powerful cleaner to remove dirt and grime)
- Synthetic Paint Brush (good quality) not that cheap stuff!
- SLICK STICK (this is the product that gives your slick surfaces something to hang on to… AKA paint)
- Caviar (chalk mineral paint)
- Satin Clear Coat(topcoat)
- Hardware Brushed Brass Cabinet Pulls
- Hairpin Legs 16 inch
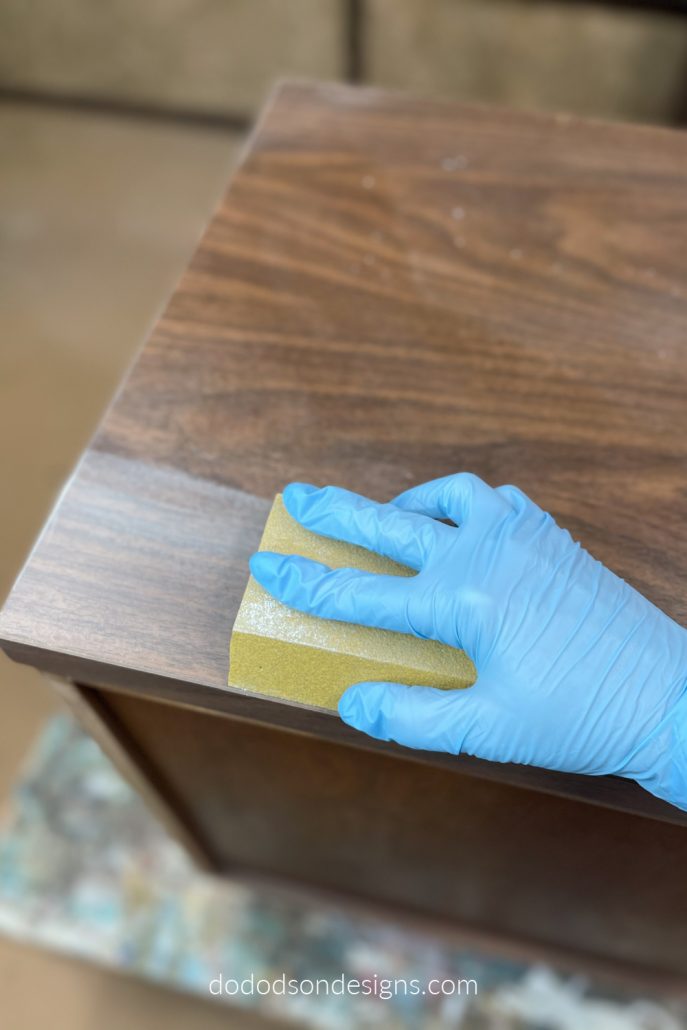
STEP 1: The Prep
Begin with a scuff sanding over the laminate surface with fine-grit sandpaper or a sanding block. I like the blocks as they are easier on the hands. And if you have an electric sander, by all means, pull that bad boy out. I’m all about quick and easy. After you have sanded the surface, you will need to clean it well. This can be done with a product called White Lightning. It cuts the dirt grime and anything else that could cause your paint finish to fail. Again, don’t miss this step. After cleaning with this product, be sure and rinse the surfaces clean with water and towel dry. Now you’re ready to proceed to the next step.
* The wood veneer on the lower was also sanded to give the wood a lighter appearance.
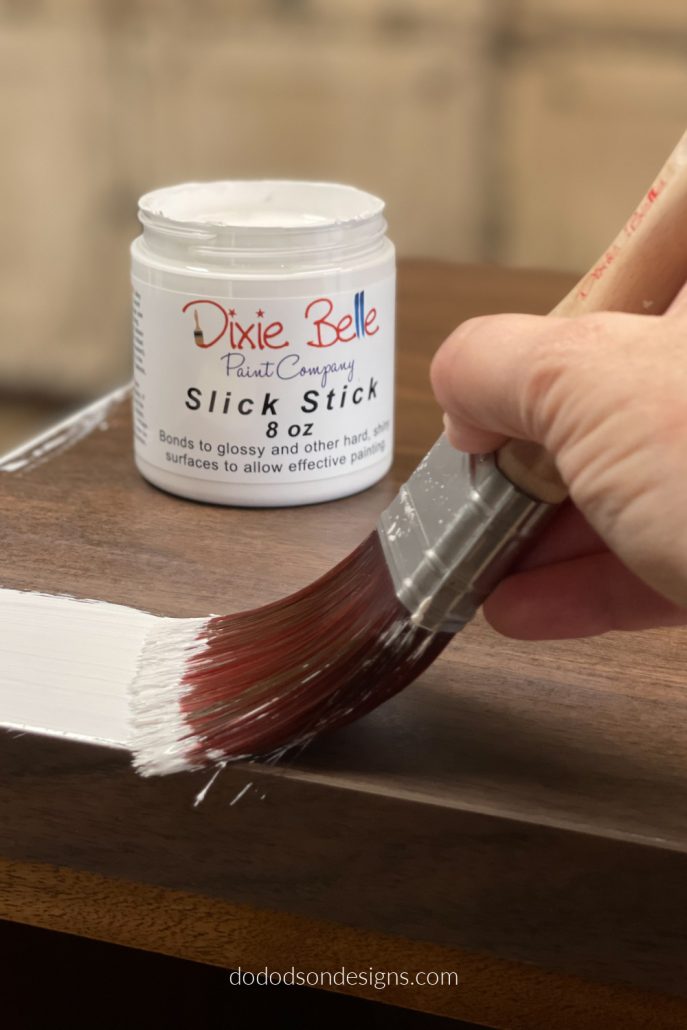
STEP 2: Creating A Bond For The Paint To Adhere To On Laminate
*Slick is a problem-solving product and is not needed for every painted surface.
How To Apply Slick Stick
Apply one coat of the Slick Stick bonding primer with a quality synthetic paintbrush and allow to dry for 2-3 hours to dry at room temperature. Apply a second coat and allow to dry overnight before painting your project.
I like to test the surface by lightly scratching my fingernail across it the next day. This reassures me that the bond is solid and ready for paint.
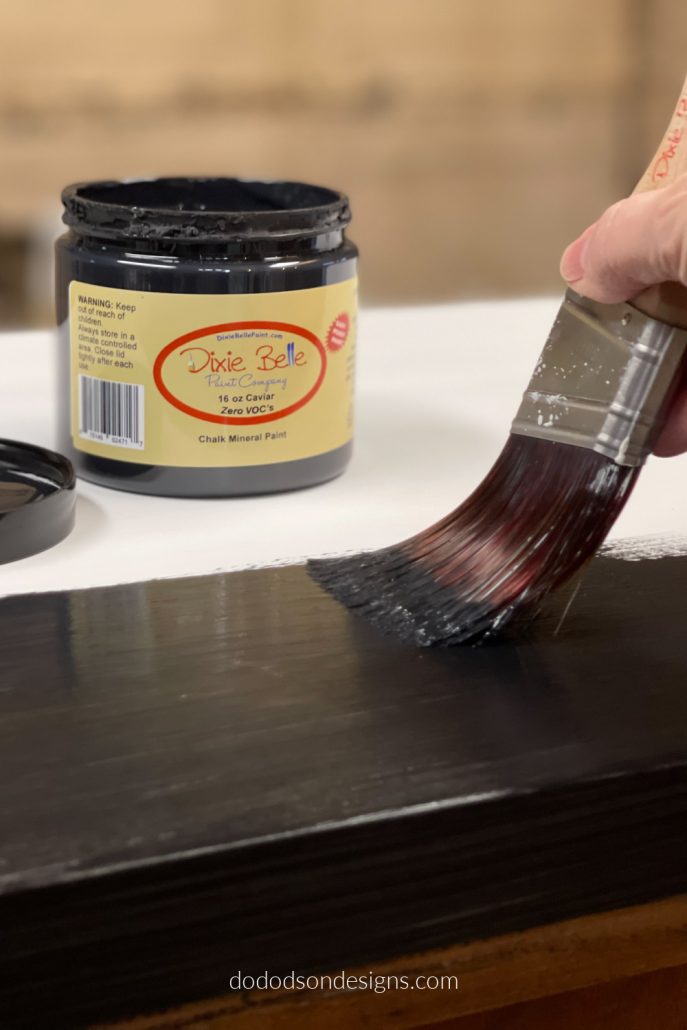
STEP 3: Applying Paint Over Laminate Furniture
Now that your surface has been prepared choose a good quality paint in your choice color and paint away! Of course, I prefer chalk mineral paint over latex, but it’s your choice. For this project, I chose to use Caviar (black chalk mineral paint) and was worried about painting over white but was pleasantly surprised when it covered it in two coats. Who doesn’t love black?
STEP 4: Apply A Top Coat For Added Durability On The Laminate
Lastly, you’ll want to add a topcoat over your newly painted laminate surface for extra durability. I used the same topcoat to seal the wood veneer.
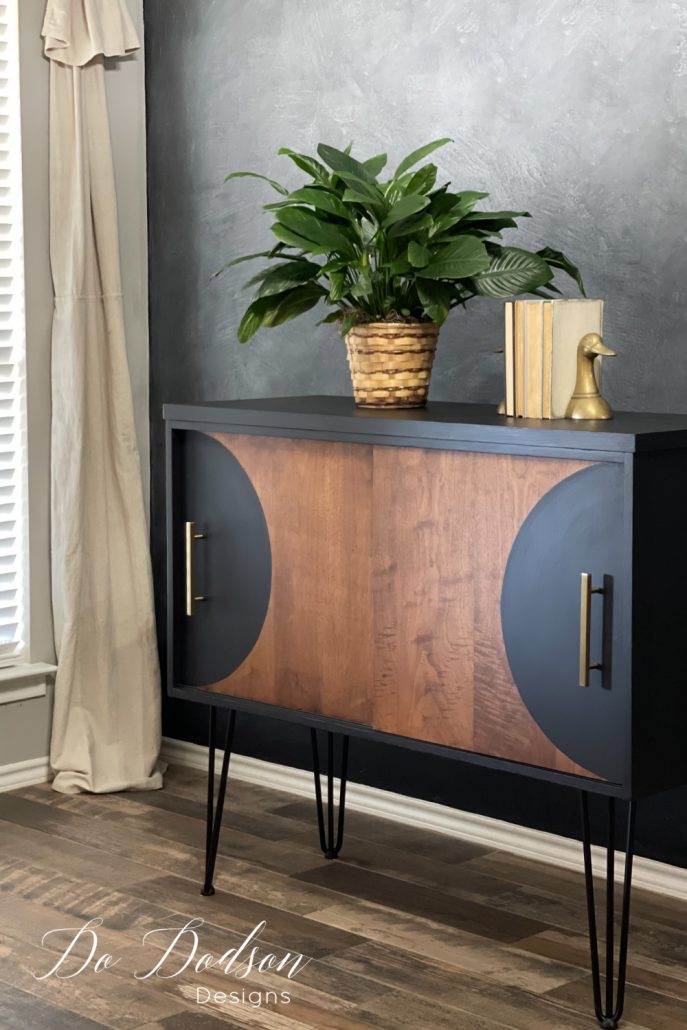
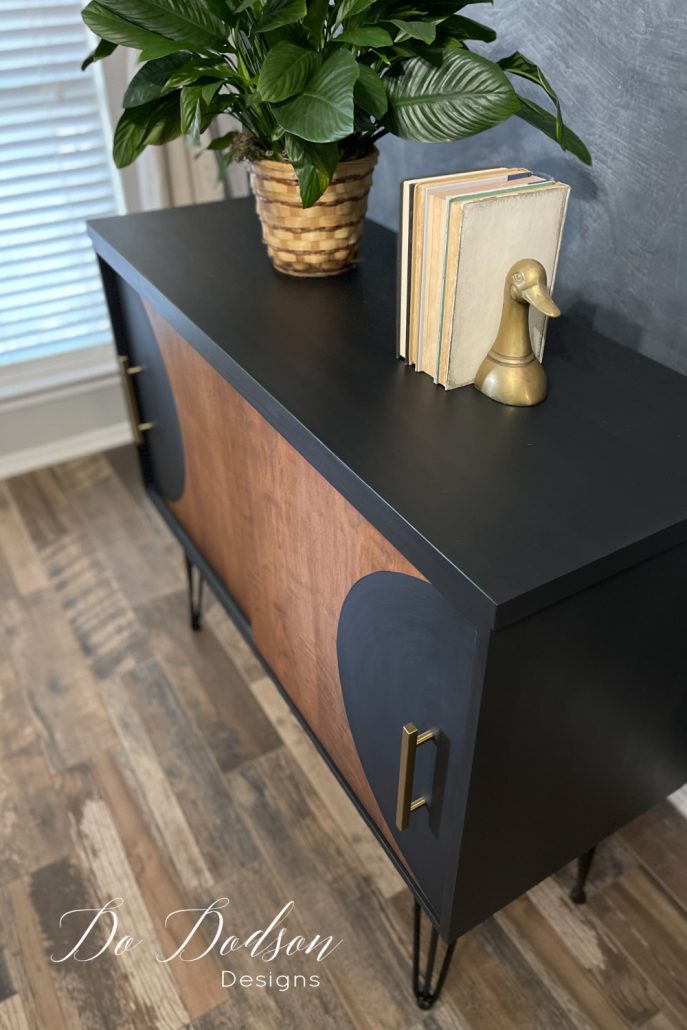
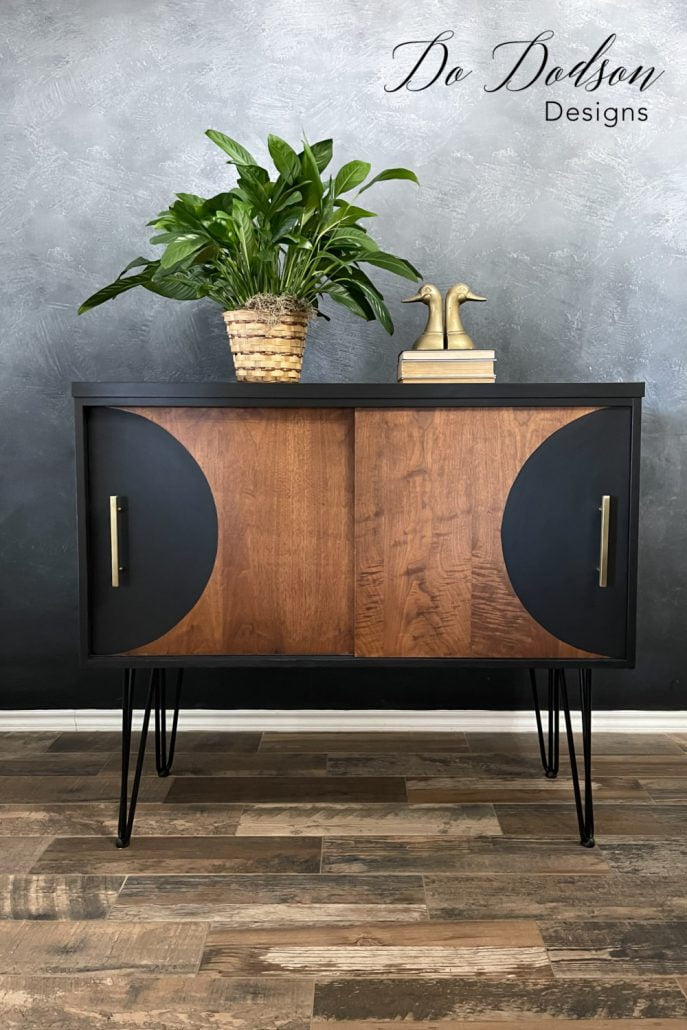
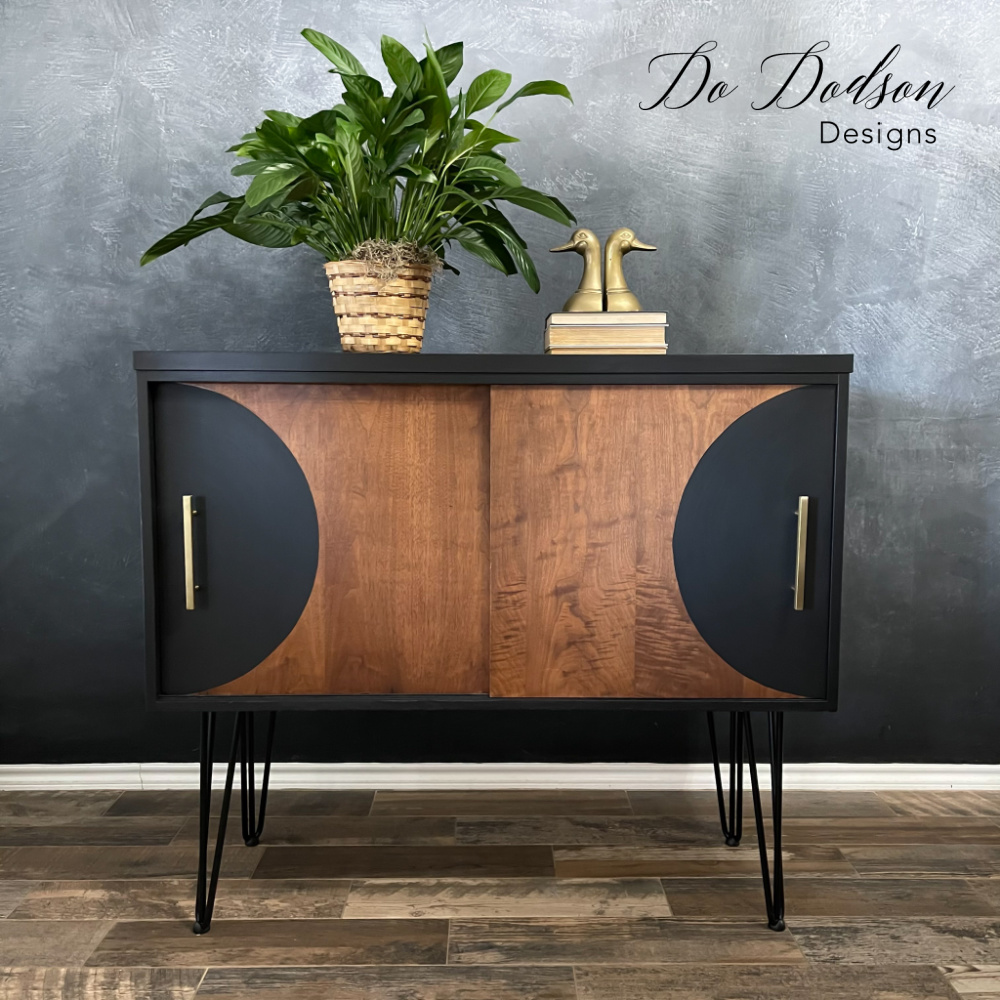
Check out the edgy design I chose for this MCM Credenza, and I’m seriously swooning over those hairpin legs. Hello, I think the 1970s wants its furniture back! And no one will know it’s laminate. It’s our secret.
Thanks again for joining me while I love on some ugly laminate furniture. Did you like this makeover or have suggestions for other design ideas… I would love to hear them in the comment section below. Have a super week. 🙂
*Would you like to learn more about painting furniture or how I created this design without a stencil? Join me in The Art Of Painting Furniture Subscription Video Library, where I share all my tips and tricks.
Until the next project… xo, Do

All I can say is I. LOVE. THIS!!! 🥰
Thank you, Karolyn! 🙂
I love the retro look and it turned out great. Thanks for the info on painting laminate. I usually avoid it when looking for used furniture, but with this info I will consider laminate in the future for my projects!
So happy to help. Yes, sometimes we pass up great opportunities because we don’t know. 🙂
Do,
as usual it turned out beautiful. I liked your tip with the painters tape for the handle too!
Thanks, Amy! Works like a charm. 🙂
Sencillo y bonito….
¡¡¡ Me encantó !!!
Thank you! 🙂 So glad you enjoyed this one.
Did you have to take those sliding doors off?
Yes, they were very simple to remove. 🙂
Hi Do, love it, as I do all your work!!😊 I’m ready to make the transition from reading about painting furniture to actually doing it! One thing that I can’t find a lot of information on is colors. I am mostly interested in what colors are trending in 2021. I do understand the neutrals, and personal color preferences. If you have any other suggestions for colors when flipping furniture in 2021 I would love to hear them!! Thanks so much! Holly
Hi Holly,
Trends are one thing… I suggest you research what colors are popular in the area you want to sell in. Example: In my area (farming) neutrals sell. If I paint a brightly colored piece, it doesn’t sell. I hope this helps. 🙂
Thanks for all the great tips Do, your my inspiration
Awe, I’m so glad you’re enjoying them. 🙂 xo
Love your tutorials- thx for sharing. Great piece 👍
Thank you, Sandy! I appreciate your kindness. 🙂
Hi Donna, I apologize in advance if I missed where you discussed with what and how you filled the rather large holes left by the previous handles. I’m just wondering how much time it took to fill them and if that held up the rest of the project?
Otherwise, I think I was as pleasantly surprised as some ot your other fans. What a great job!
Kerry Dillenburg
Hi Kerry,
In the blog post, I didn’t mention it but the product I used was Bondo. It’s my go-to with large wood repairs. The full video tutorial is available in my subscription library where I share all the details. https://members.dododsondesigns.com/join-the-art-of-painting-furniture-subscription-group/
Thanks 🙂
I like it!! Its not even my style and I think it looks great. It’s an eye catcher.
Thank you so much! I appreciate that, Joanne. 🙂
Love how you keep expanding our horizons… and paint supply collections!
Thanks, Suzzane. I like to use different products. I guess it’s creative in me. 🙂
Did you bleach the door fronts or just leave them and only paint the half circles?
Hi Jo Ann, I just painted over them. The wood veneer was still good and intact. 🙂
I’m swooning over this makeover Do! Looks like a million bucks! XOXO
🙂 Now if someone would pay me a million bucks for it I would be a happy gal. Thank you, my friend. xo
How did you cover the old handles before putting the new ones on?
This what I do for larger wood repairs. https://dododsondesigns.com/furniture-repair-wood-damage/
This is an amazing transformation, Do. Can you tell me how you did the circles so perfectly. I love this look.
thx
Cheryl
Hi Cheryl,
That technique is super simple, and I share that and all my video tutorials in The Art Of Painting Furniture. It a members-only subscription with over 45 video tutorials. You can learn more here. https://members.dododsondesigns.com/join-the-art-of-painting-furniture-subscription-group/
I’m sorry if I missed it but I’m not seeing where you address how you got the lighter wood grain on the doors from it’s original image. Is it just the lighting of the 2 pictures or did you sand it down a little and that made it lighter? A couple other people asked in your article on Hometalk too.
Hi Carol. I lightly sanded the door and left the wood natural. I added a clear top coat to seal the wood. Hope this helps. 🙂 xo
I have to agree….this is a million dollar look! I have a bedroom set that has ovals on the doors and headboard that have yellow flowers painted in them. The wood is pine, the finish is still good. I don’t know what to do with the ovals to modernize my bedroom set. Any suggestions…..I truly trust you 🙂
Well, you could strip the wood and refinish it. Stains come in all colors, so you don’t have to paint the wood if you don’t want to. I know what you’re talking about. The flowers inside the ovals draw attention, so removing those will help. I hope this helps. 🙂
Beautiful as always.
Thank you, Sylvia! 🙂 xo
Thanks Do! That credenza looks great! I usually avoid anything to do with laminate so this kinda opens up a new world for me. 😁 My son and his two children just moved out of my house this weekend. I now have two bedrooms, a bath and half of my basement back. Gotta get painting some of the furniture in my attic to fill the void.
Thanks again!
Les
Hey, Les! From trash to treasure is what I always say. If there’s a will, there’s a way. Have fun filling the void. 🙂
These projects are amazing! I love black furniture and painting a piece now in black. My favorite are the first one with the stenciling; and that last one. Adding black to that last piece gave it new life. Just love your work.
Thank you, Tammy! The black and white bone inlay stenciled dresser is headed to my daughter in laws new home very soon. It’s one of my favorites. 🙂 Thanks for joining me, friend! xo
Will this hold up for garage “kitchen cabinets” that will get a lot of use?They are white Formica with the oak trim on drawers. I was thinking a dark gray to match metal shelving in garage.
Your so talented!
Thanks, Ginny! It will if it is prepped well. You probably will need to use a bonding primer before painting. Dixie Belle has Slick Stick. Here is my affiliate link if you want to see the product. https://dixiebellepaint.com/slick-stick/?aff=80
What an amazing transformation! This dresser turned out so beautiful. I am setting a goal to do a couple of home improvement projects this year. I think we are going to start out with some kitchen cabinet painting. Thanks again for sharing your beautiful ideas! You are so inspiring!
What did you use as a top coat, Ive had a hard time getting an even sheen over black chalk paint?
Hi Evelyn, I use Dixie Belle’s Satin topcoat. Apply it with a quality synthetic brush (it does help) and apply a super thin coat. Allow drying and repeat. Do NOT overwork this product, or it will get streaky. Most topcoats are tricky to use, and it takes practice. I hope this helps. Here is an affiliate link to the product I used. https://dixiebellepaint.com/waxes-glazes-and-finishes/clear-coats/satin/?aff=80
Hi Donna Do, 🙃. This is gorgeous. I love the way it turned out.
Thank you, Cheryl. It’s always good to hear from you. 🙂 xo
This is amazing, my friend. What a beautiful transformation. Hugs to you.
Thanks, Renea. Those laminate pieces can really be beautiful not to mention durable once finished. Thanks for reading. 🙂 xo
Hi!
I was wondering about this laminate project:
It is a sofa table w a laminate top…some of the laminate is “bubbled” or raised… not a lot. So do I have to remove this laminate before
Painting it?… or sand it down where the bubbles are and fill it in?
Thank you! Peg
Hi Peg,
Laminate is typically used to cover particle board, so if you remove it, you may be left with something that isn’t durable and will not look good once painted. It’s difficult for me to advise without first laying my eyes on it. Not all furniture is made the same way. I wished I could be of more help. If the bubble isn’t minimal, you could always paint them and use a decorative runner to cover them. It doesn’t sound like an easy solution from what you are describing. You could try sanding it down, but it depends on how you raised those areas down. I wish you the best with your table. 🙂 xo
My daughter would love this piece. I love how you took this our dated piece and gave it a modern look. I love the front and those legs go perfect with it.
Thank you, Tammy. It just goes to show that you can make almost any old piece of furniture beautiful again. Thanks for reading. 🙂 xo
Do, your skills are amazing! Thanks for sharing these tips and I will definitely keep them in mind😊 Pinning!
Thanks, Cindy. I feel like it’s been forever since we visited. Where does the time do? I appreciate you. 🙂 xo
I would have liked to see a suggestion for a top coat. You listed the other products by name. Why not the top coat too if the products used are important for a proper finish.
Hi Charlotte,
I went back to check this blog post and the top coat is listed in the products list. The name is Clear Coat by Dixie Belle Paint Co. If you click on the listed products, it will take you to the product for viewing or purchase. My apologies if this was confusing to you.
I love this! Do I have to use chalk paint or can I use a paint that already has topcoat? Thanks
Hi Lulu! You absolutely can use any water based paint you like. Just as long as your prep the surface.