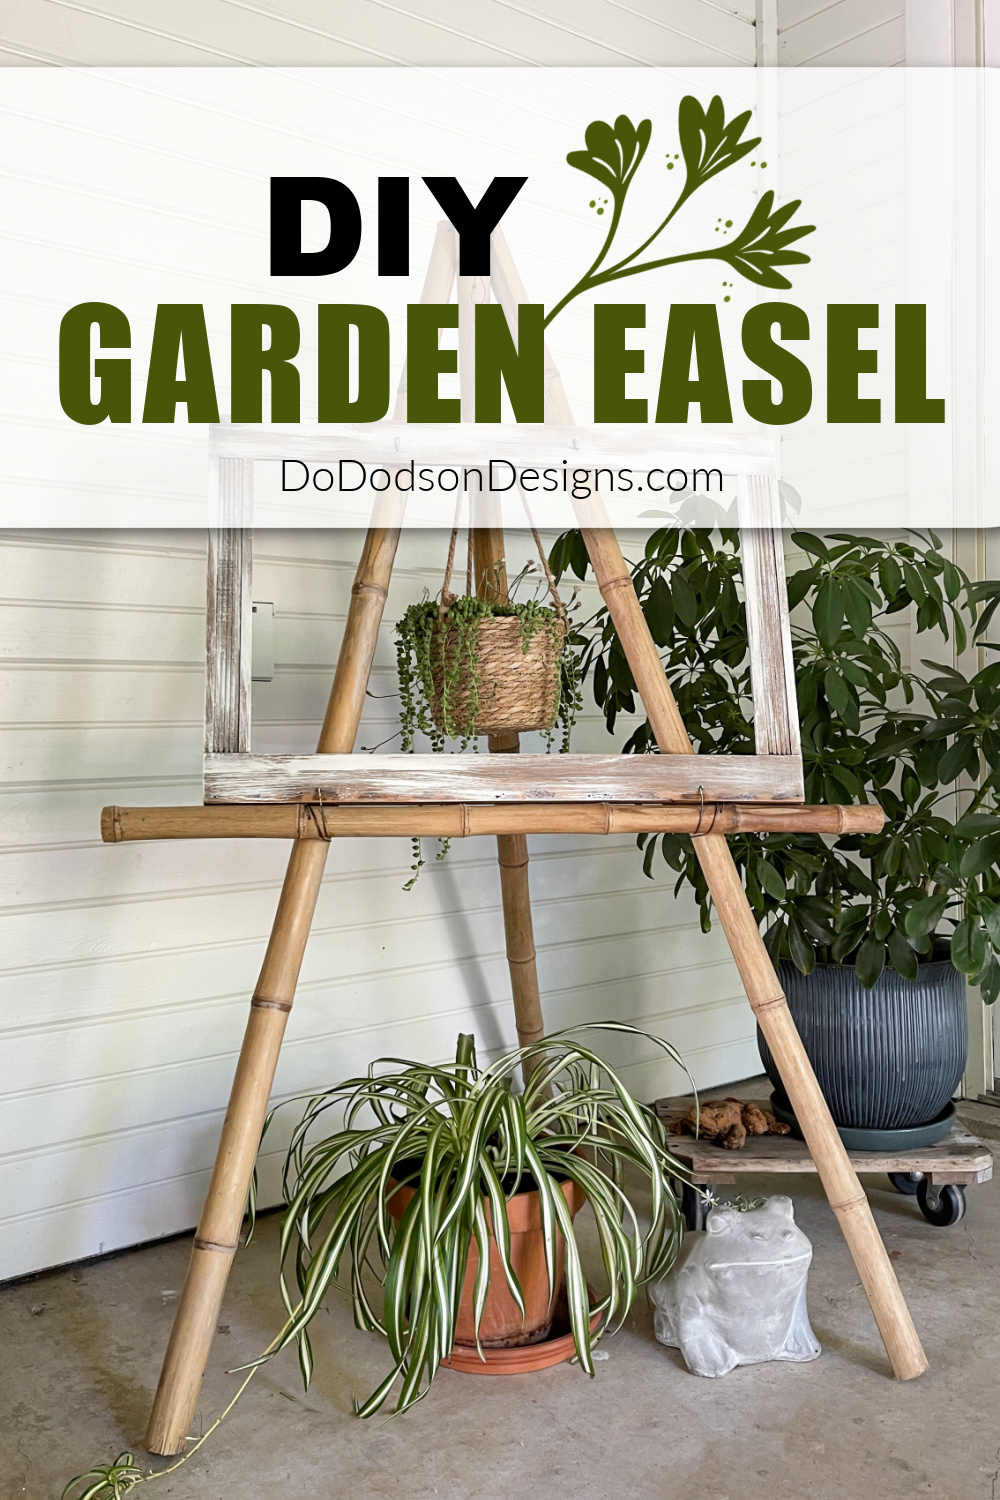
A garden isn’t just a place to grow plants. It’s also a canvas to express your creativity. If you’re looking for a new way to add personality to your backyard, I got you! A DIY garden easel is a great way to transform your garden into a work of art. In this blog post, you’ll learn how to create a garden art easel using affordable materials and simple tools. This project will elevate your garden decor to new heights and will add a new meaning to artsy fartsy.
* As an Amazon Associate, I earn from qualifying purchases and through other companies as well. You will not be charged extra when you purchase through these affiliate links, but any income I make helps me create more amazing DIY projects to share with you! To see my full disclaimer, click here!
BAMBOO Back Story | DIY Garden Easel
Because you wouldn’t believe me if I told you! So here goes!
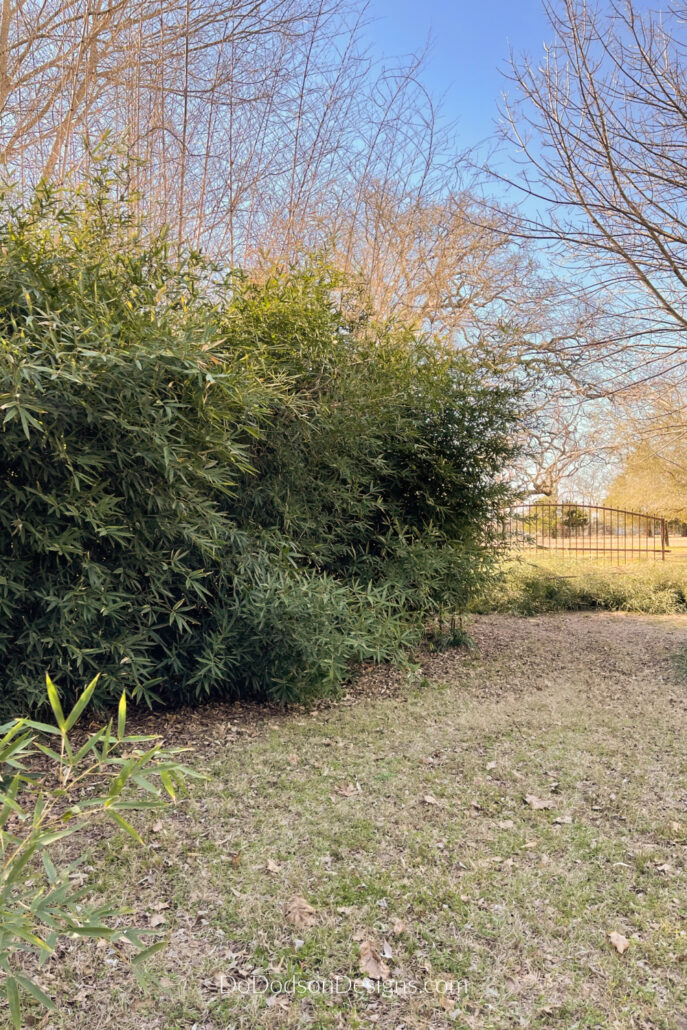
When we purchased our forever mini ranch home in March of 2022, we inherited a large patch of Bamboo at the front of the property. At first, I thought it was pretty cool. I fondly remember, as a kid going fishing with my Grandpa and toting those “cane poles” (finishing poles) while dreaming of the big catch. How cool would it be to make a few for my Grands?
Well, times have changed, and grandkids don’t fish with “poles.” It’s called a rod and reel now. Fancy stuff these kiddos have nowadays.
Well, we decided we wanted to open up our view. We have the most amazing sunsets here, and I don’t want to miss out any longer. I won’t go into details on the removal of this beast of a crop, but I did manage to save some of the largest bamboo stalks for this garden art project that I’m sharing with you today.

SUPPLY LIST:
Here’s what you’ll need to create your DIY garden art easel.
- Chop saw, circular saw, or hand saw
- sanding blocks
- drill and drill bits
- Bamboo or (weather-resistant wood)
- galvanized wire (to secure bamboo) or bolts with nuts
- wire cutters
- SILK All-In-One Mineral Paint (White Cap)
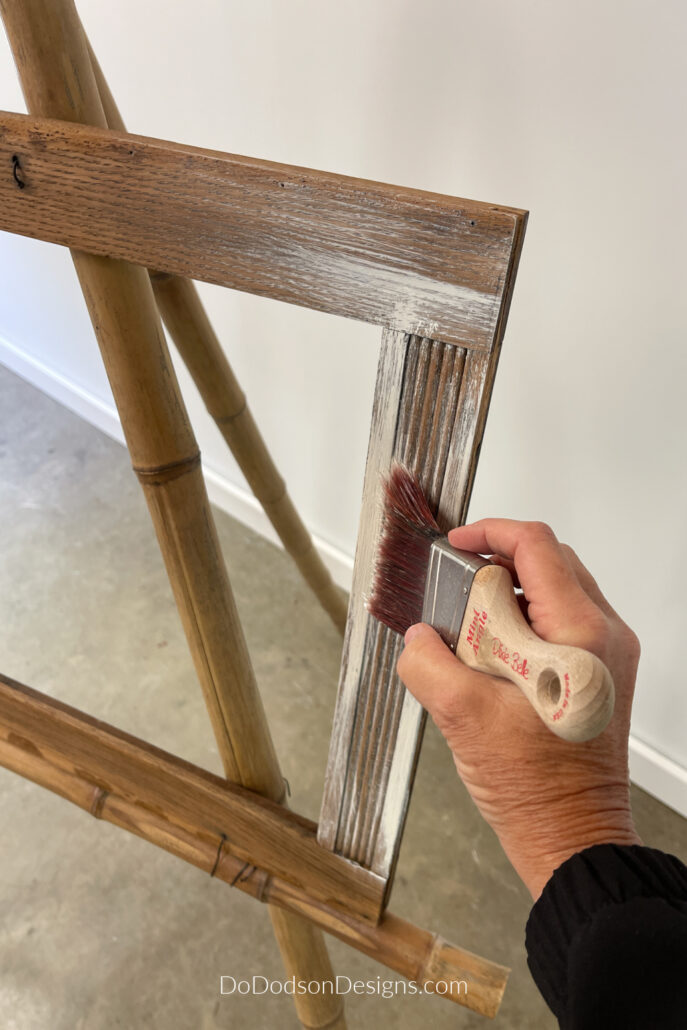
- 2-inch Mini Angle Synthetic Paintbrush
You can also use treated lumber, cedar, or redwood if you want more of a traditional easel.
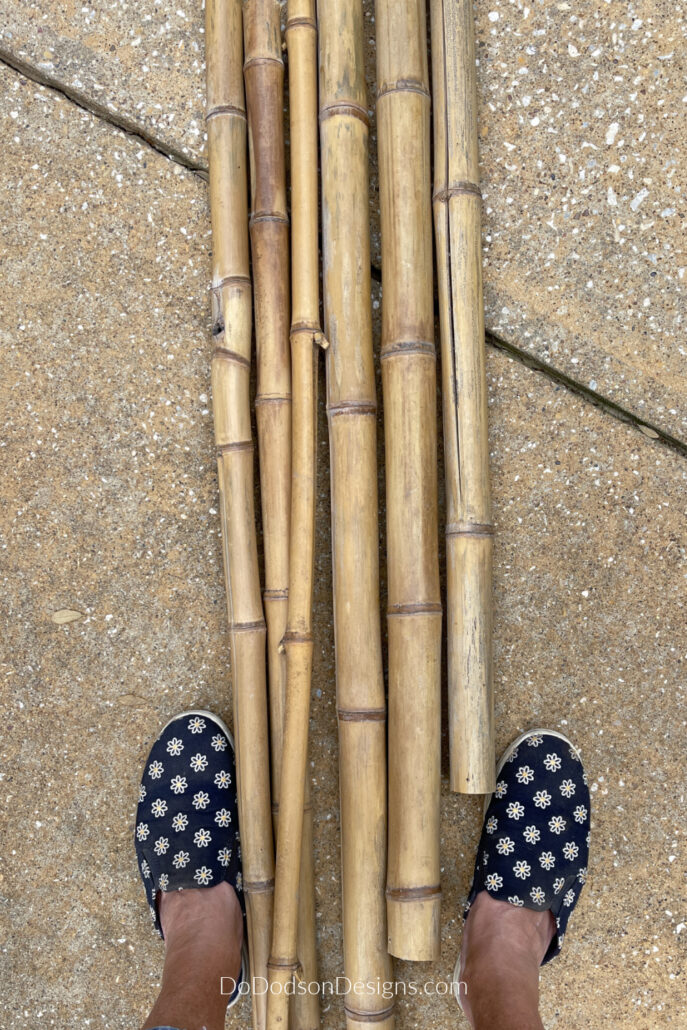
You don’t have to cut down a forest of bamboo to make a garden easel like I did.
Choose Your Materials
When I decided to make a garden easel for my garden, I considered the options for materials.
It’s important to choose the right materials for your garden project. The materials you select will ultimately impact the look and durability of the finished product. Here are some things to consider when choosing your materials:
First, decide on the type of wood you want to use. Cedar and redwood are popular choices for outdoor projects because they are naturally resistant to decay and insects. However, they can be expensive. Pine is a more affordable option, but it may require a protective finish to prevent weather damage. You can also use treated lumber, but it has a tendency to warp over time.
Heck, use some old branches from a tree. Those are FREE!
I’m not opposed to using weathered scrap wood, as it can add a rustic look to your garden.
Next, consider the thickness of the wood. Thicker wood will provide more stability, but it will also be heavier and more difficult to work with. Thinner wood may be easier to maneuver, but it may not be as strong.
When selecting hardware, choose screws or bolts with nuts that are designed for outdoor use. Stainless steel or galvanized hardware will resist rust and corrosion.
Now that you have your materials selected, the next step is to measure and cut your wood.
Measure and Cut Your Wood
Before you start cutting your wood for your garden art easel, be sure to have all the necessary tools on hand. You will need a saw (either a circular saw or a jigsaw), a measuring tape, a pencil, and safety gear such as gloves and goggles. It may also be helpful to have a clamp to secure your wood while cutting.
Begin by measuring and marking your wood where you need to cut it. Double-check your measurements to ensure accuracy, and then make your cuts using a saw. If you are unsure about the best way to cut your wood, consult online tutorials or ask for guidance at your local hardware store.
Remember to take your time and work carefully when cutting your wood. Measure twice; cut once.
Once you have all of your pieces cut, be sure to sand any rough edges or surfaces. This will ensure a clean and smooth finish for your garden easel.
Now that your pieces are cut and sanded, you’re ready to move on to assembling your easel. Get your screws, drill, and other necessary tools ready, and let’s get started on building your DIY garden easel.
Assemble Your Garden Easel
Once you have all of your pieces cut, be sure to sand any rough edges or surfaces. This will ensure a clean and smooth finish for your easel. Now that your pieces are cut and sanded, you’re ready to move on to assembling your easel. Get your screws, wire drill, and other necessary tools ready, and let’s get started on building your DIY garden easel.
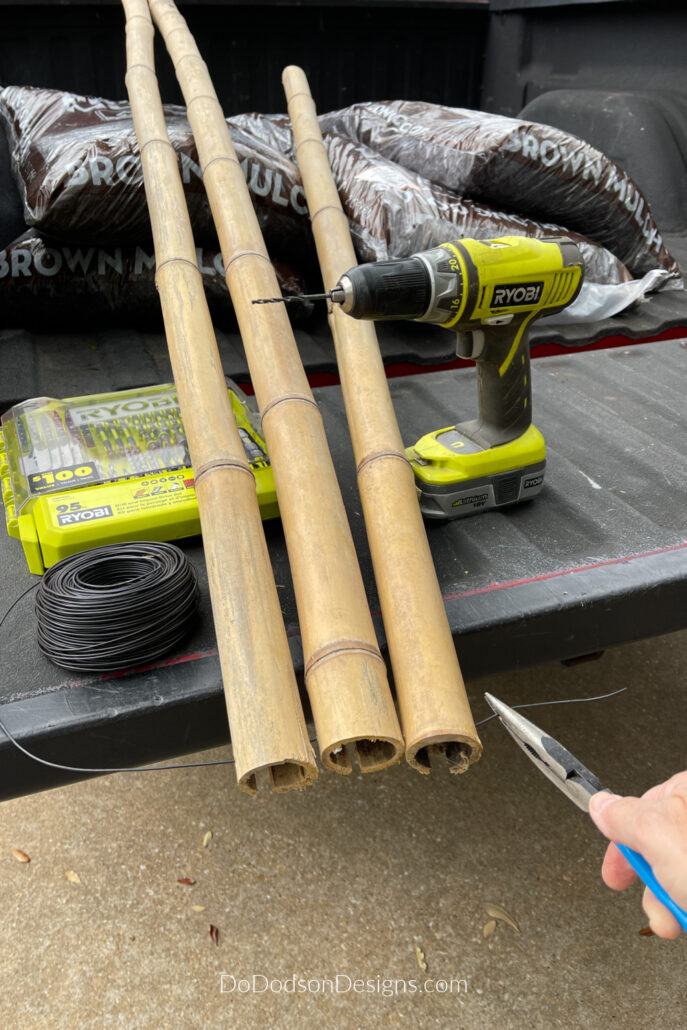
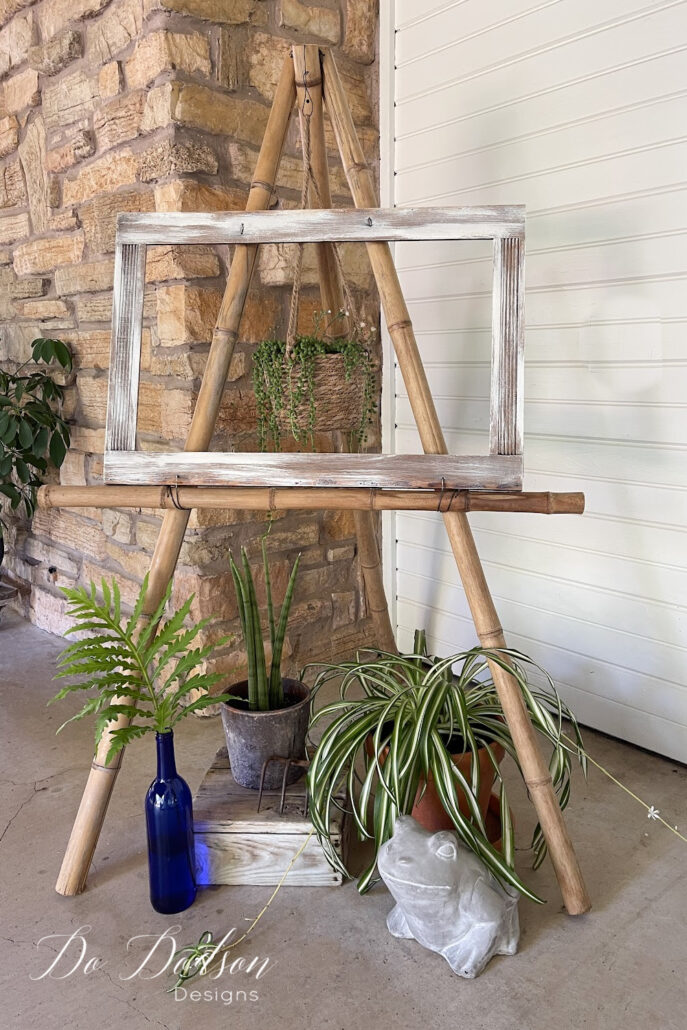
STEP 1: First, I cut all three pieces of bamboo (or wood) the same length and laid them side by side. The length depends on how tall you want your easel to be. Mine are about 5 ft. Then, I used a wood bit with my drill to make holes through each piece.
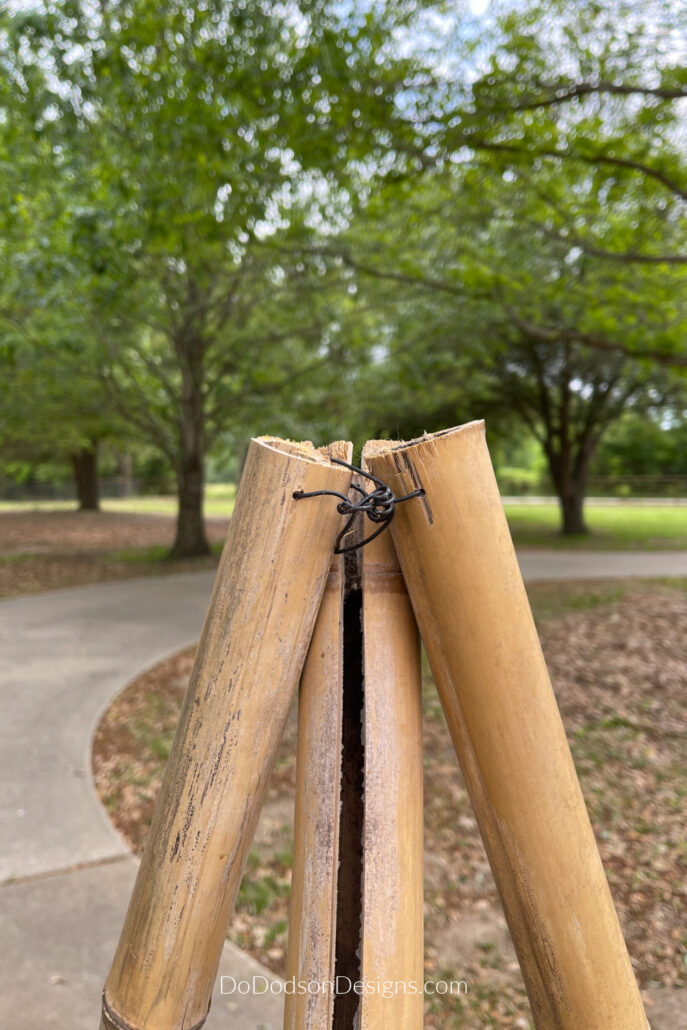
STEP 2: Next, secure the three wood pieces with galvanized wire and secure the wire at the back by twisting it tight. As you can see, it ain’t pretty! It won’t be visible from the back, so I’m not gonna fuss about it. I wired them loosely so that I could adjust the legs.
You can also use a long bolt with a nut if you’re using lumber for your easel. The only difference is that the boards will be all in a line.
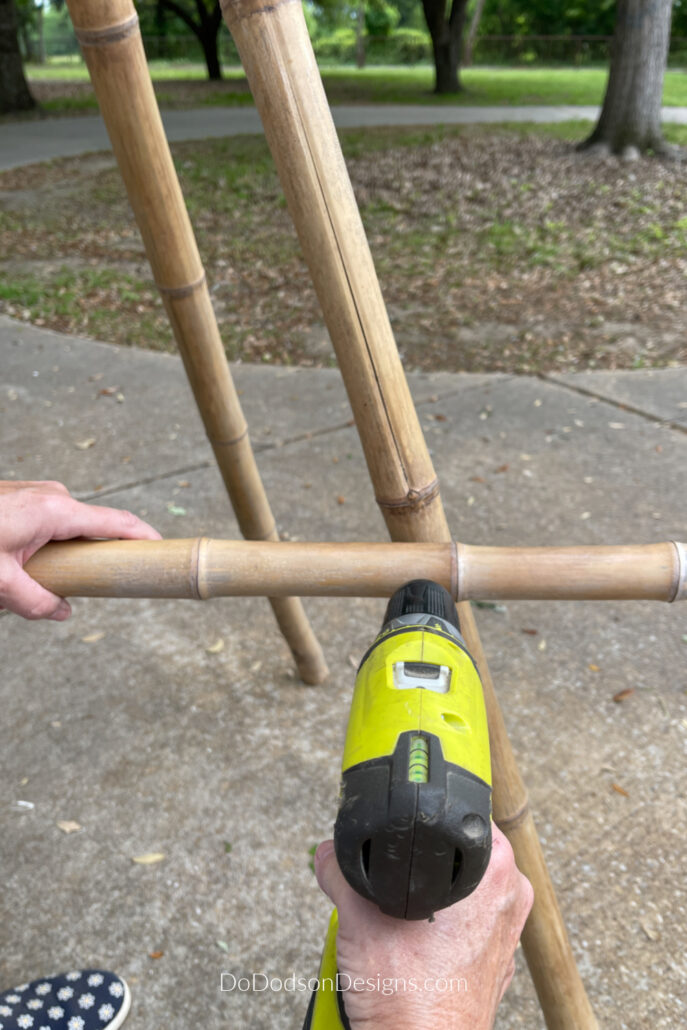
Next, attach a support piece across the front of the easel to stabilize the front legs. Drill holes and secure with wire.
Once your frame is assembled, it’s time to add the frame that will hold your easel together and give it even more stability.
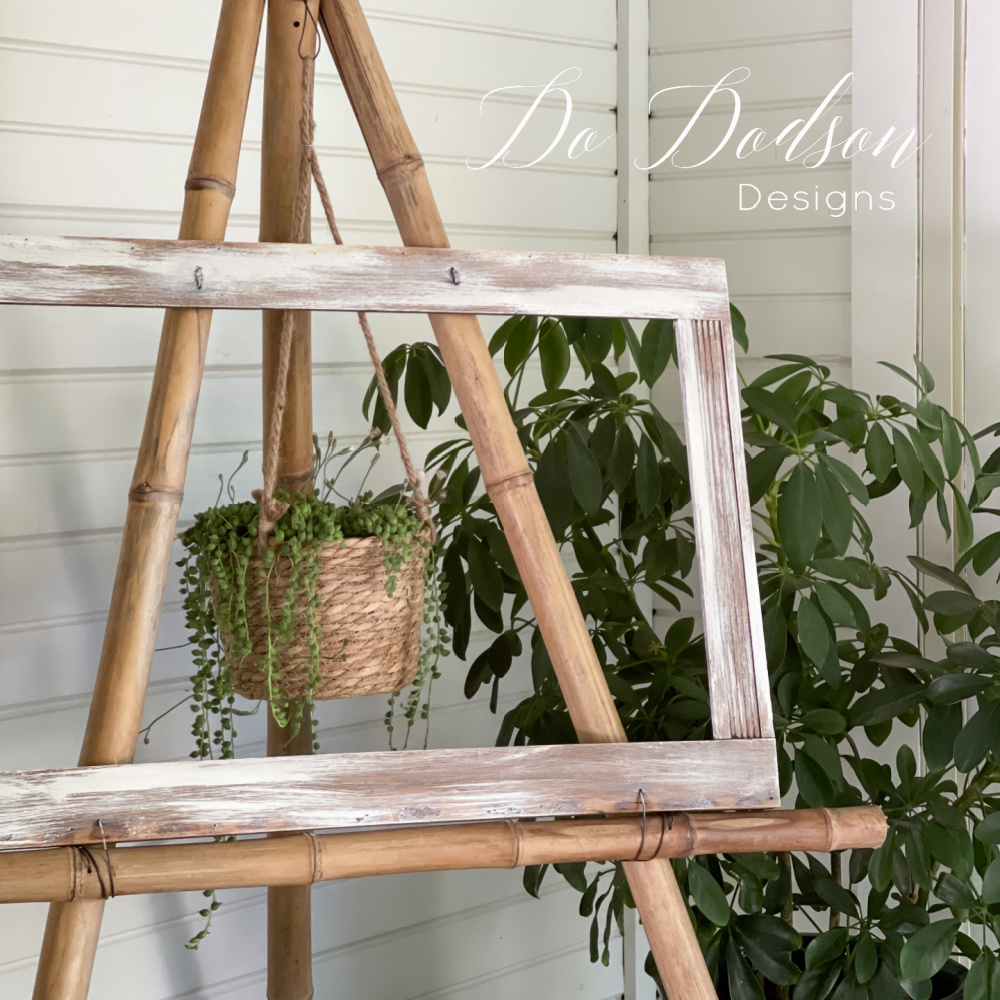
Adding A Frame To The Garden Art Easel
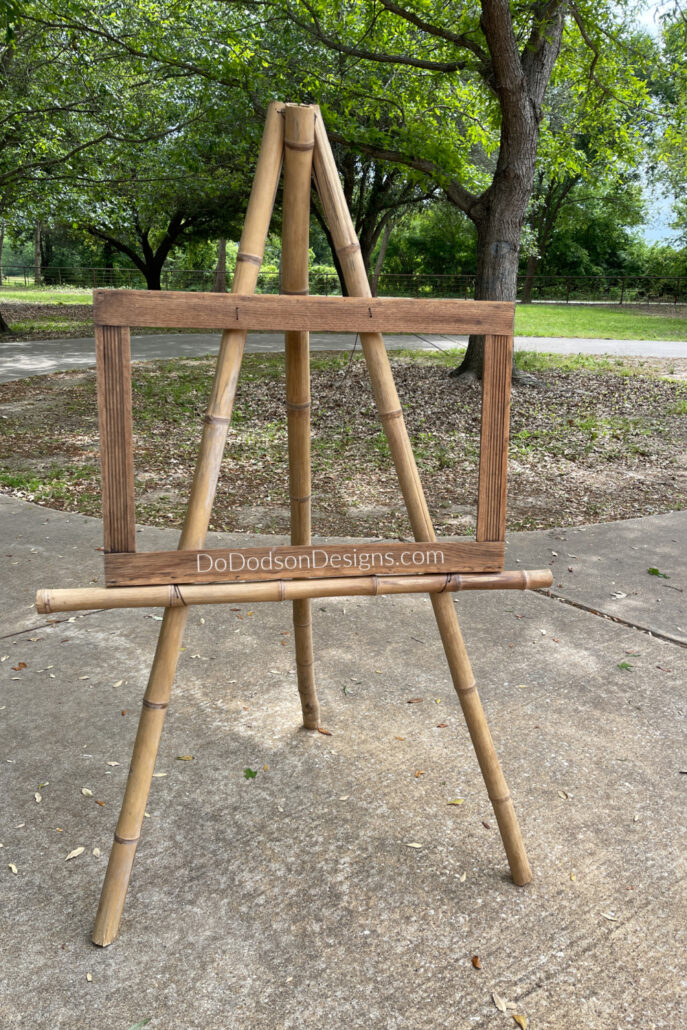
After the easel was up and secure, I decided it needed a frame for the artwork. After digging around in my shed, I came across a wood frame I had salvaged from a broken mirror. It was a perfect fit!
Again, I used the same method of drilling holes and securing the wood frame from the backside to create a frame without a canvas making sure it was level and evenly spaced. My garden is my canvas!
If you want, you can attach a chain to the back of the easel so that you can adjust the angle of your artwork easel. Use a drill to make a small hole in the back of the top support beam and thread the chain through. Secure the chain with a knot or clamp, and you’re ready to move on to customizing your easel.
With your easel assembled, it’s time to make it your own by adding a personal touch with paint or other decorative features.
Customize Your Garden Easel
With your easel fully assembled and ready to use, it’s time to add a bit of personal flair to make it truly unique. One way to do this is by choosing a color scheme that complements your backyard decor. Or leave it natural. It’s totally up to you.
Whether you opt to add a coat of paint, a bold beautiful color can go a long way in making your easel stand out, especially if you use your garden easel on your patio to display your favorite hanging basket. I chose to leave my natural to allow the bamboo to blend in with my garden, and then I changed my mind. LOL
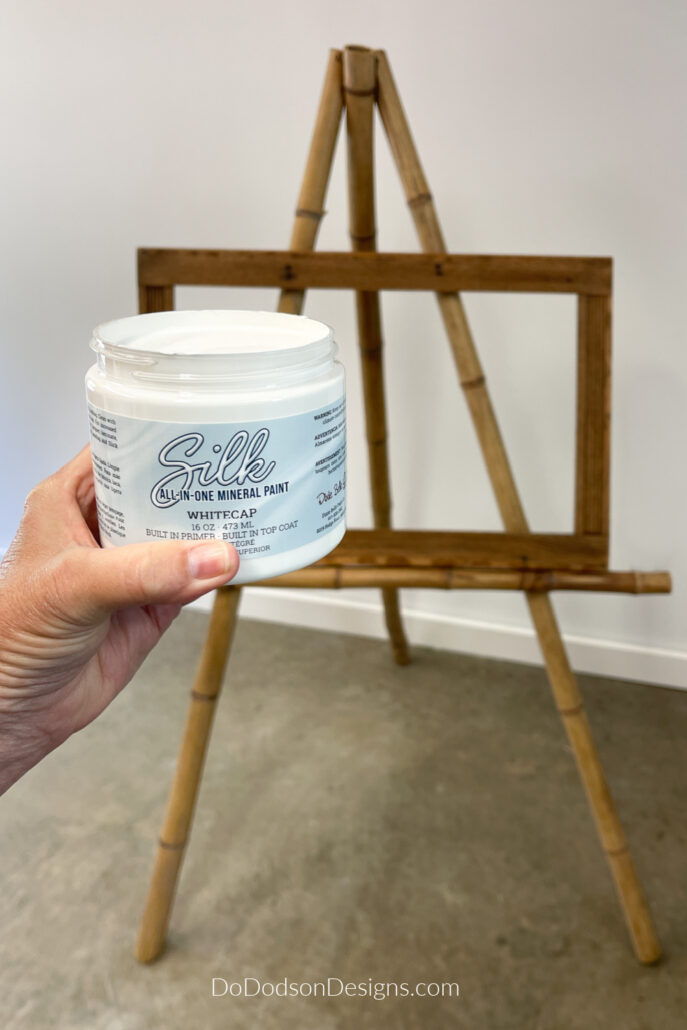
The frame appeared to blend in with the stand, so I chose Dixie Belle’s White Cap from their SILK All-In-One paint line. I used their mini angle synthetic paintbrush (my fave) to dry brush the paint lightly over the wood giving it that rustic vibe I love.
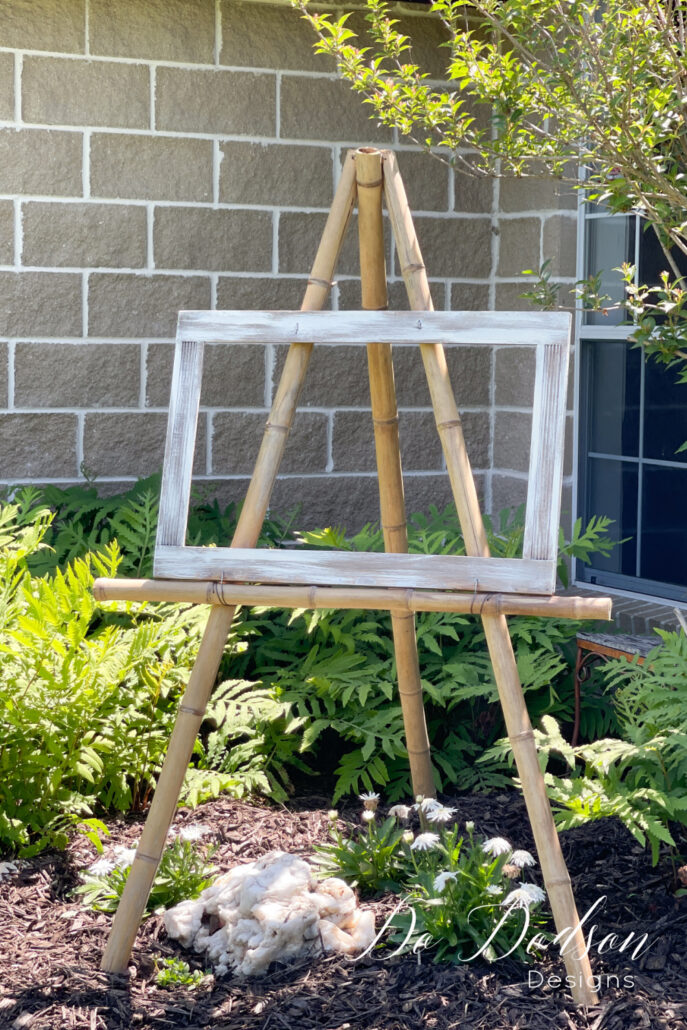
Now, the frame stands out.
Painting the frame allows you to create a one-of-a-kind masterpiece that reflects your personal style and tastes. Get creative!
No matter how you choose to customize your easel, the end result is sure to be a stunning addition to your backyard decor. So, go ahead and let your creativity run wild – the possibilities are endless!
Enjoy The Transformation
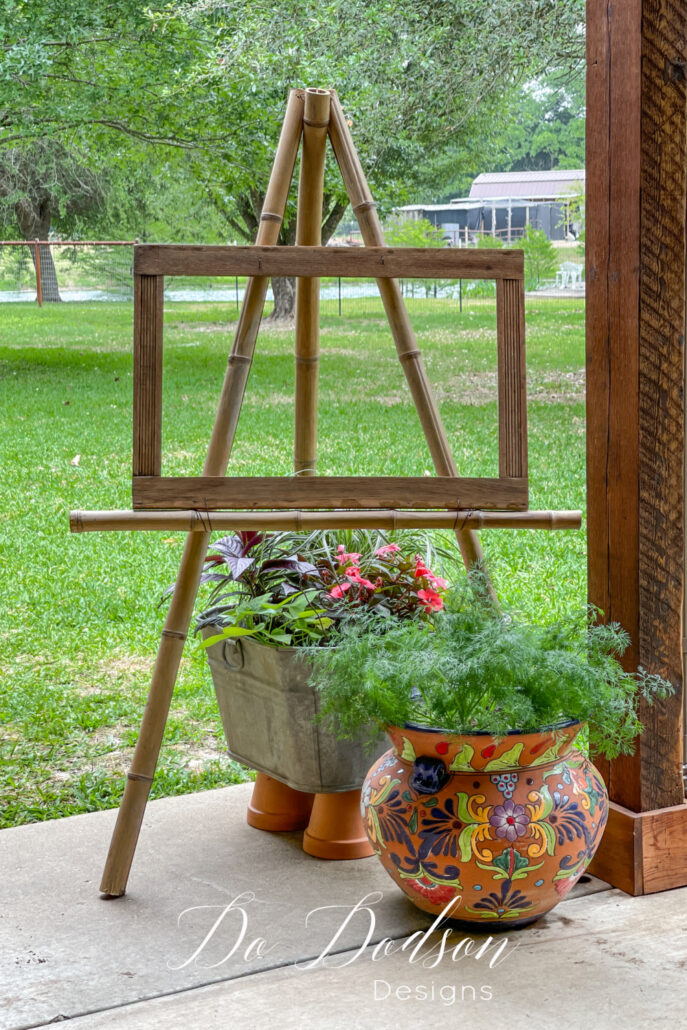
Transforming my gardens into a work of art has been an exciting project, and creating this DIY garden easel has really elevated my garden decor to new heights. I have been dreaming about digging in the dirt ever since we moved into our forever home, but like art, it takes time, and so are the gardens.
I can hardly wait until next year. I found the perfect clematis vine for this area, and I think it will grow beautifully up and around the garden easel.
And if you don’t have a garden and need a clever way to display your hanging basket, this works too!
I may go back and add more paint colors to my frame, but for now, I’m happy with it.
And just like that, in just a few short hours, I created a masterpiece for my backyard gardens.
So, don’t wait any longer if you love the idea of adding this charming feature to your outdoor space. You won’t regret it.
And as always, I love hearing from you, and I would love to hear what you do to make this DIY garden easel your own. Let me know in the comment section below.
Until the next project… xo, Do

I love your artistic garden easel Do! Super cute idea! 🌸🪴🌱
Thanks, Denise!
It felt so good to get outside after being cooped up for so long. Now, off to the gardens! Have a fantastic week, my friend.
xo 🙂
I love your creativity! I get so inspired by your use of everyday items and turn them into something special. I try to do the same. My latest was a table/desk badly abused by previous owners. We had remodeling done recently. I drove the guys crazy with me following them and picking up the scraps from the new window frames. (The old windows went to habitat for humanity.) I have a huge supply of pieces! Endless possibilities!
😆 I totally understand. This scraps have amazing potential. Thank you for the kind words and keep on creating. Happy Mother’s Day! xo 😘