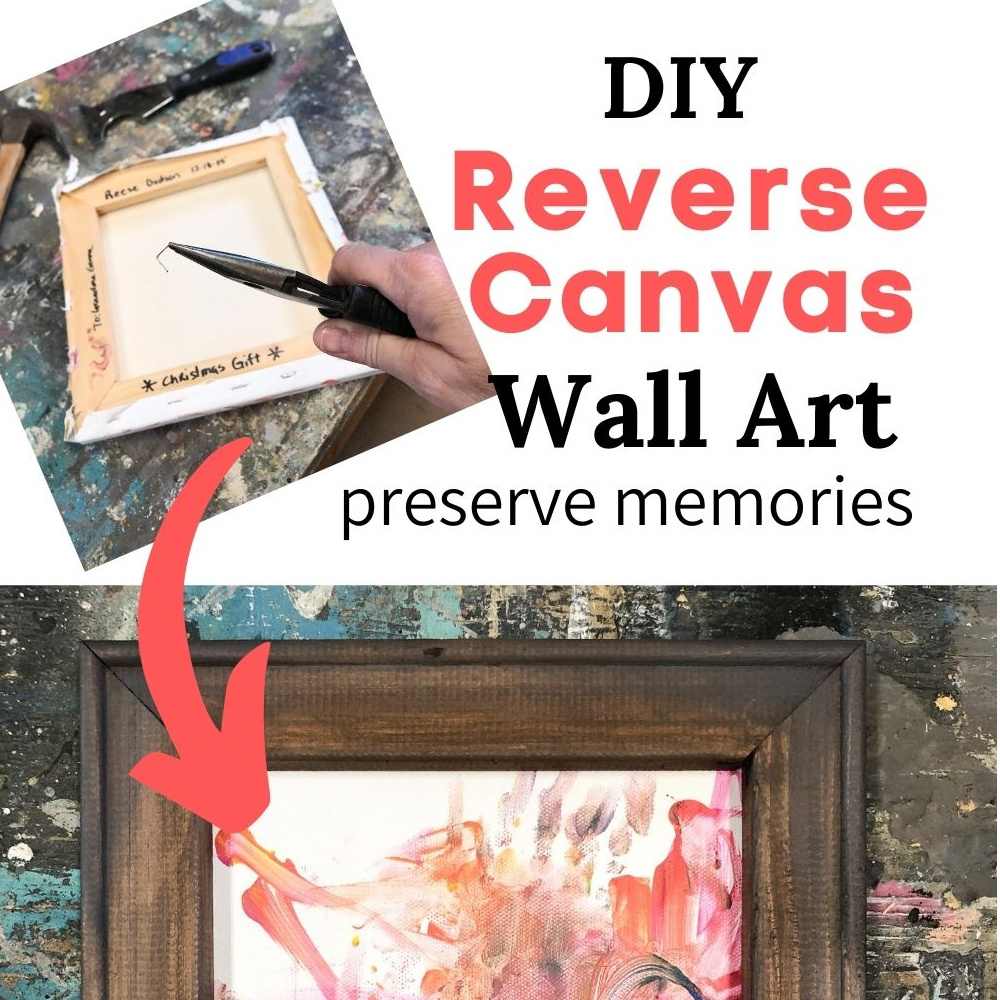
Hey creative friend! I’m so glad you’re here. Today I’m sharing how I created a simple DIY floating frame for my new canvas wall art. While I am totally in LOVE with this canvas, it still needed a little something to make it really pop off of my chalkboard wall, and I found this idea on Pinterest. I think it will complement my modern farmhouse style perfectly. Here’s how I did it.
This post contains a few affiliate links to help you find the products I use. You are not charged extra to use any of the links, but any income I make will be used for more amazing DIY projects to share with you! To see my full disclaimer, click here!
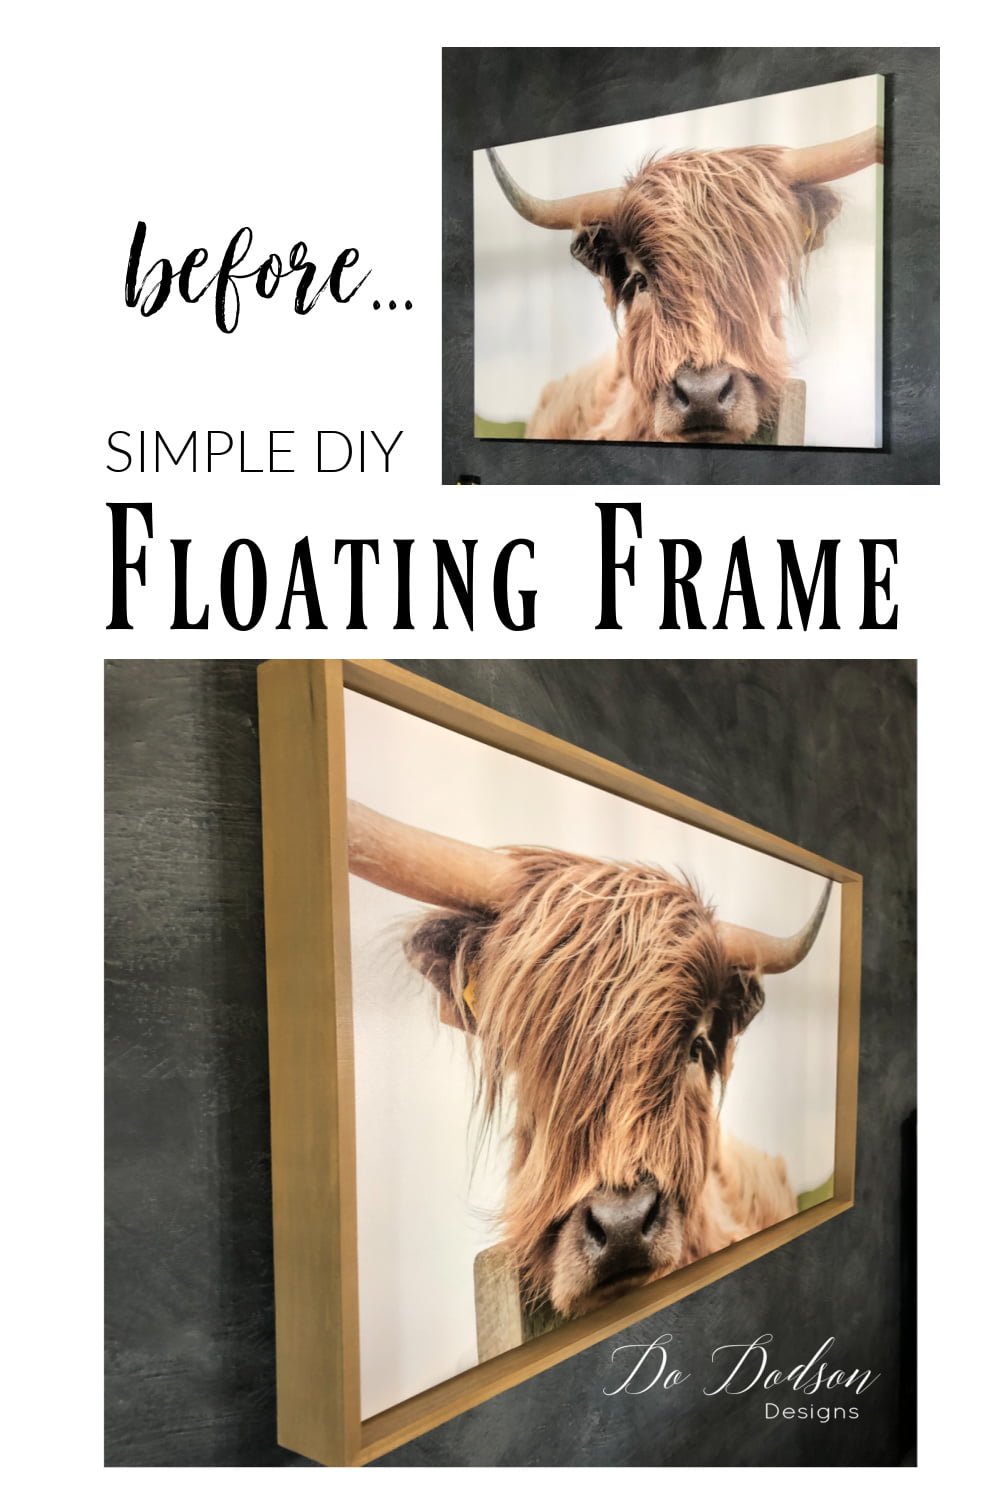
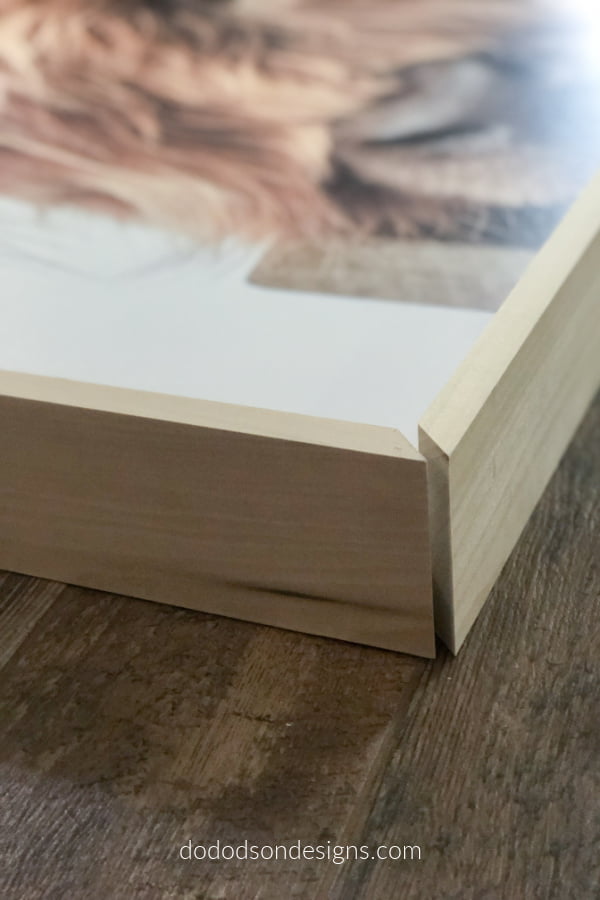
Simple DIY Floating Frame For Canvas
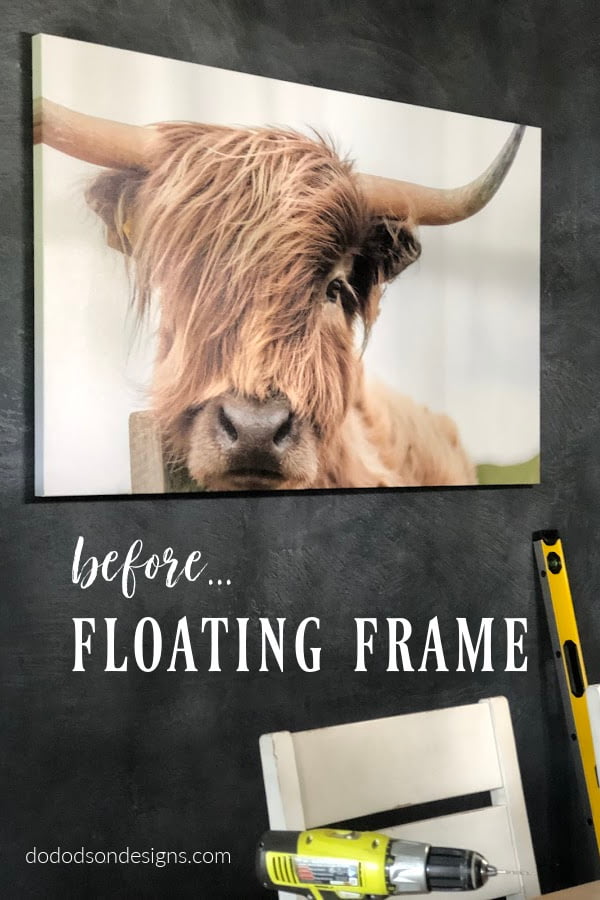
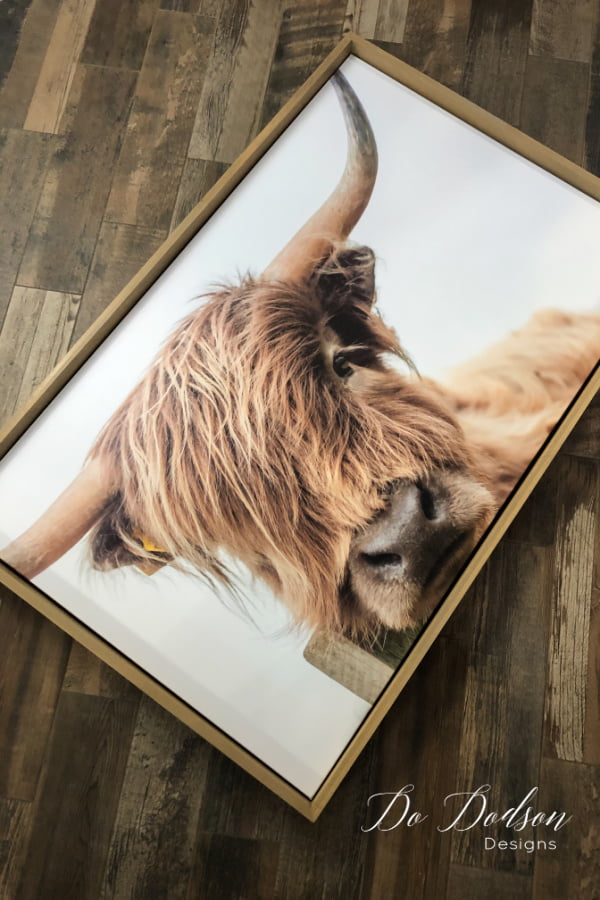
So, here is the before adding the floating frame. You can see the canvas is very plain but adding a wood element to this farmhouse beauty made all the difference in its presentation. I wanted a WOW statement on my wall.

Product List For This Project
- 1 X 4 Poplar Wood (the length depends on the frame size)
- Compound Miter Saw or Miter Box
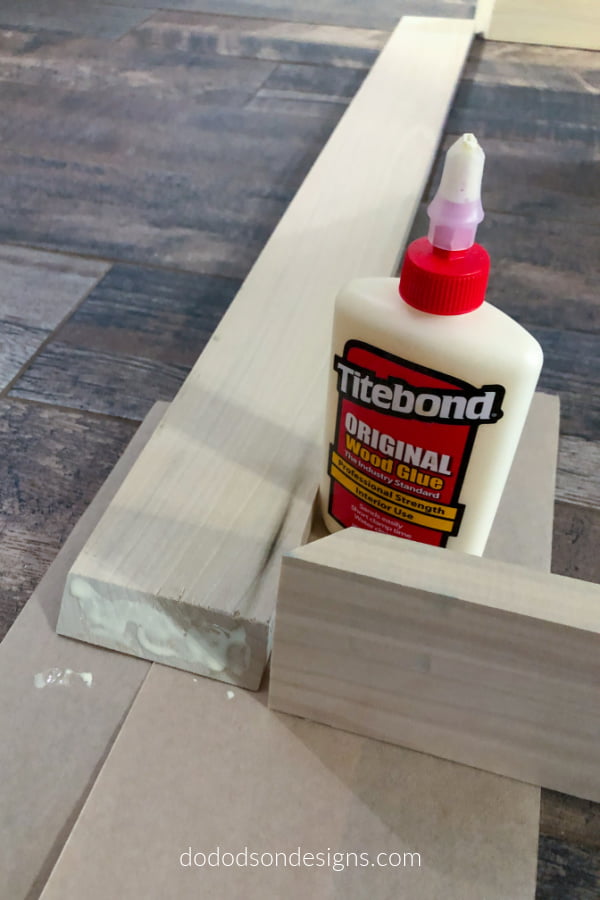
- Wood Glue
- Kreg 90° Corner Clamps (not necessary but it’s a cool tool)
- Pneumatic Pin Nailer (or the old-fashioned hammer and nails)
- Cordless Drill or Screwdriver Set
- L Brackets (black)
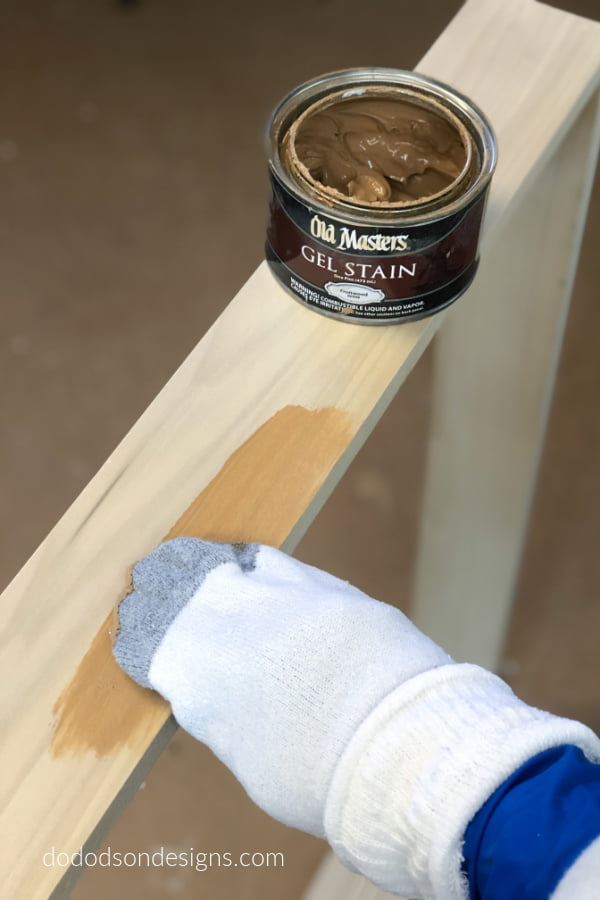
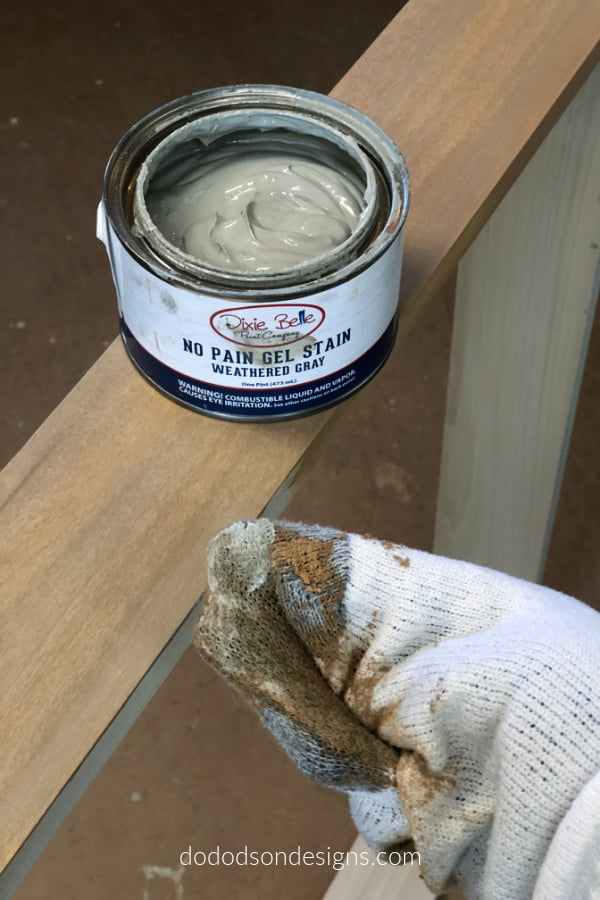
- Weathered Gray Gel Stain and Old Masters Fruit Wood Gel Stain
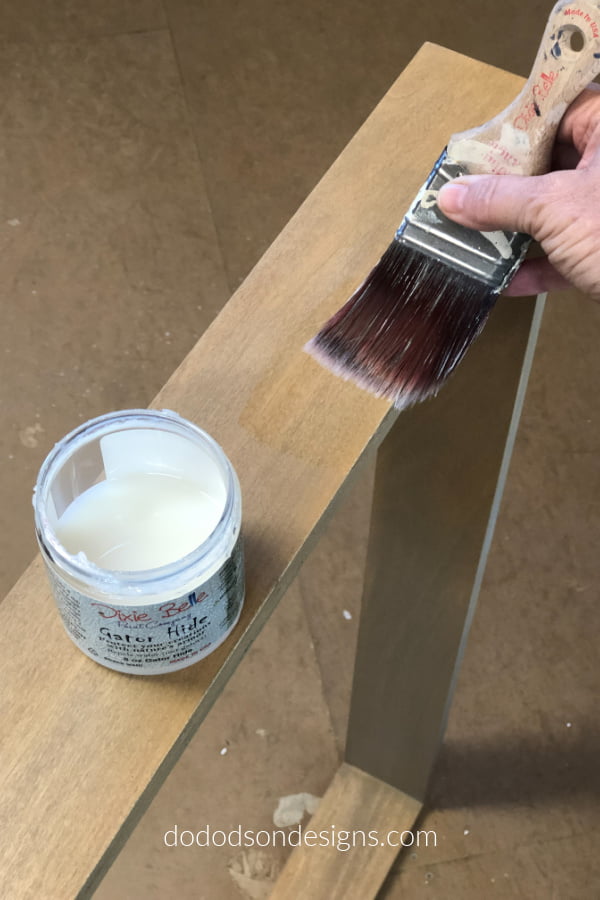
- Gator Hide (topcoat)
- Paintbrush
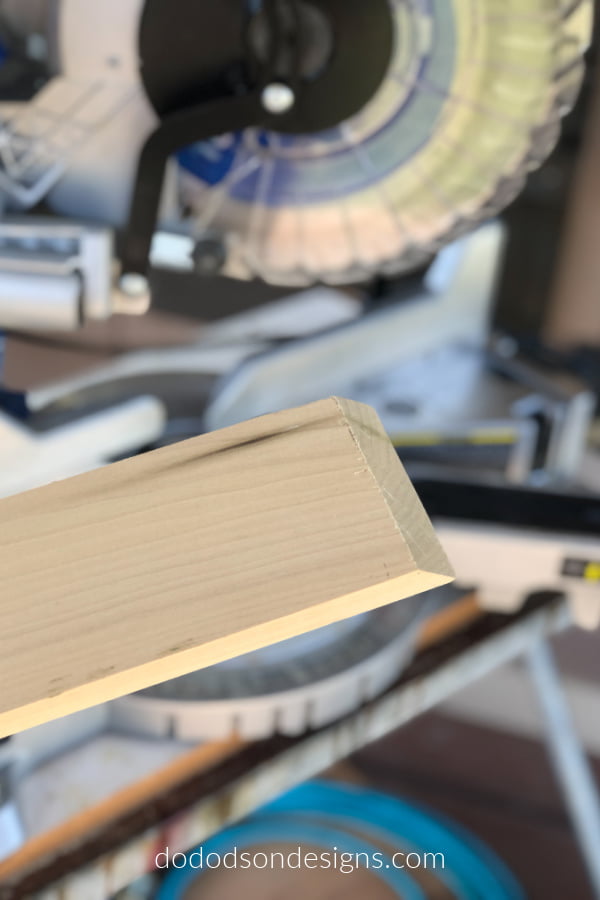
Cutting The Lumber For The Floating Frame
Okay, so let’s talk angles for a minute. First off, you don’t have to be this fancy with your cuts. A simple square cut is perfectly acceptable and still looks great. I just wanted to try this bevel cut to see if I could do it. When I upgraded to a new miter saw last year, I knew it would come in handy at some point. I have to say it was a challenge, but I learned a lot during the process. It’s all about precision.
Tips For Cutting The Perfect Fit
- You don’t have to measure the canvas for the board’s length needed for this kind of project. I find that laying the boards next to the canvas and using a pencil to mark the cuts is more accurate. You will get a much better fit with this method. I tried both. Be sure to allow room for the L brackets that the canvas will float on inside the frame. (I’ll show you later)
- Make sure your saw blade is made for trim or fine cuts. A 10-inch blade should have at least 40 teeth—a 12-inch blade at least 60.
- 45° miter angles are not always perfect. If the gap is small when the ends are butted together (about 1/16th of an inch off), recut one side of the miter. If the gap is larger, recut both sides, or they won’t line up correctly.
Building The Floating Frame
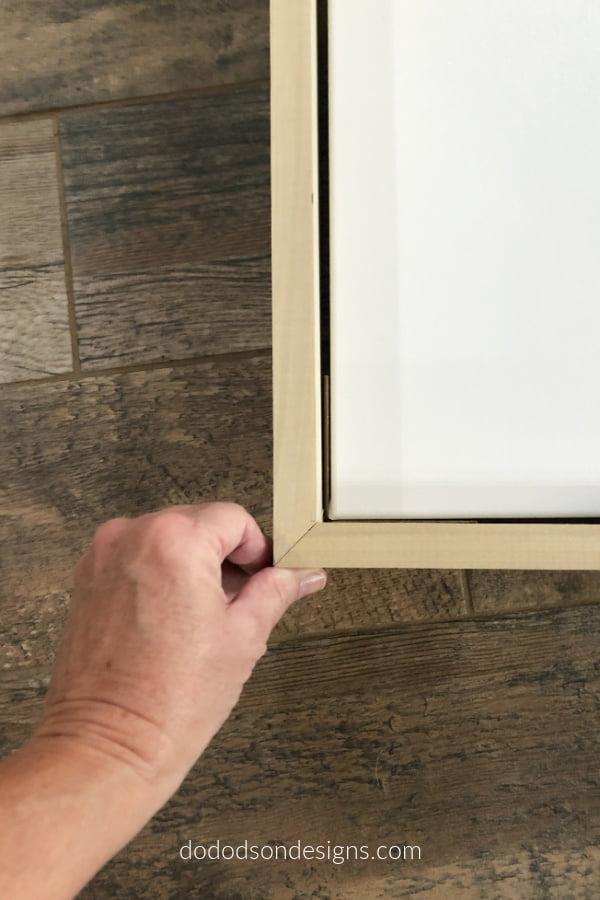
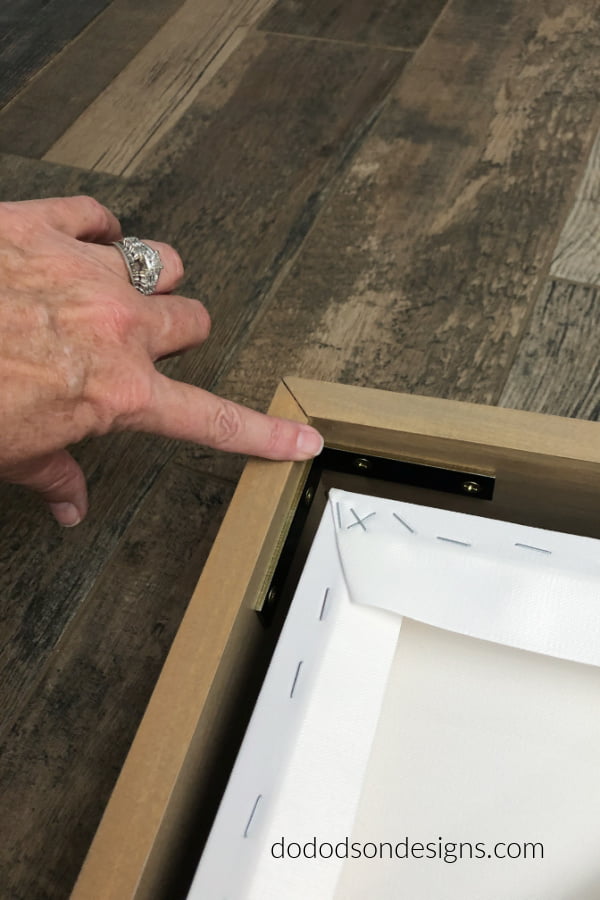
Insert the L brackets (corner brackets) inside the frame base and next to the canvas to check for a good fit before constructing the floating frame. If modifications need to be made, this is the time to make adjustments. You’ll want a snug fit for the canvas but not too tight or loose inside the frame. Always do a dry run of the fit to make sure the ends line up first. Now is not the time to get in a hurry. (almost perfect is okay) You know what I always say… perfectionism is overrated.
Tips For A Seamless Fit On Your Floating Frame
- Apply a thin layer of wood glue to each end before assembling.
- Use a damp cloth to remove any excess wood glue on the surface.
- Pin nails to secure the joints.
- While the glue is still wet, use 220 grit sandpaper to smooth any rough edges for a professional finish. The sawdust from the sanding will adhere to the glue and fill in any tiny gaps.
- Fill the tiny nail holes with wood filler and sand them smooth. I used stain-grade wood filler for this project.
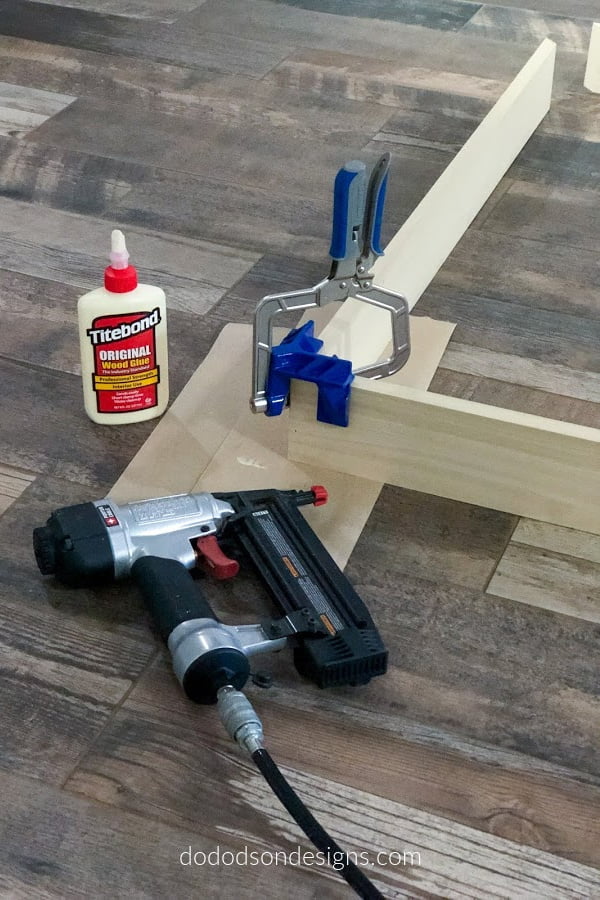
This cool new toy in the picture above helped to hold the ends together and added another set of hands which was very helpful because of the size of the frame. It also helped to ensure that my corners were at a 90° angle. Not necessary, but helpful if you do a lot of woodworking with corners. Again, a simple square cut will also work for this floating frame, and if you’re a beginner, I recommend starting with simple first.
Adding A Weathered Finish To The Floating Frame
To finish off the wood on this floating frame, I used two colors of Gel Stain, blended the two on the wood to create a rustic weathered finish, and added a Gator Hide top coat for protection and durability.
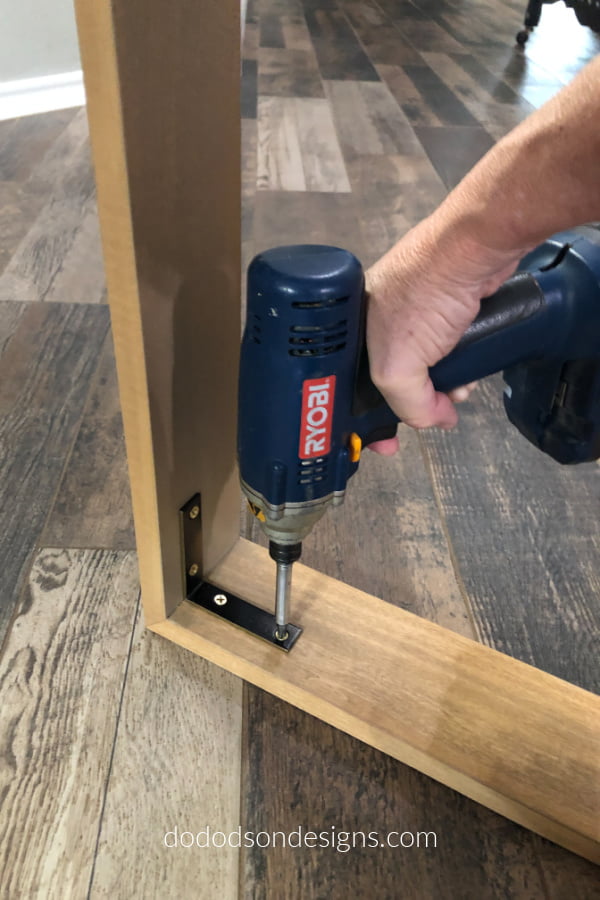
Adding The Spacers Inside The Frame…L Brackets
Next, attach the L brackets to the inside corners of the floating frame base. This is what the canvas will sit on to create the gap between the canvas and the frame and gives the appearance of the floating canvas inside the frame. These L brackets come in black, but I had these gold ones on hand and decided to give them a quick finish with black Rust-oleum spray paint first. Using black will minimize the advisability of the metal inside the frame.
You may need some help inserting a large canvas like this one into the frame. Take your time. It should be snug enough that it doesn’t fall out. The L brackets are the only thing holding the canvas in place.
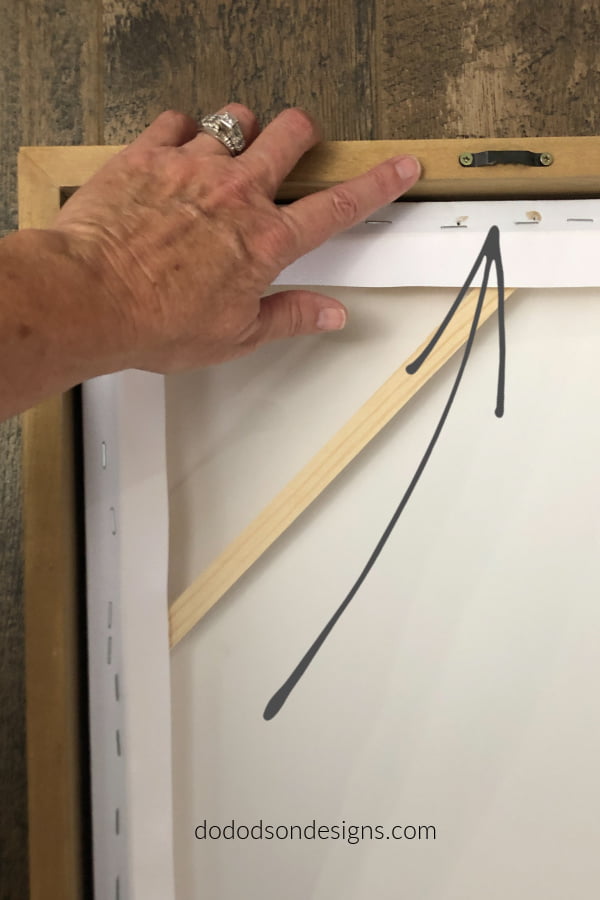
Re-Use The Frame Hangers On The Canvas
Most canvases come with wall hangers already mounted on the back. Simply unscrew them and reattach to the floating frame where you want them.
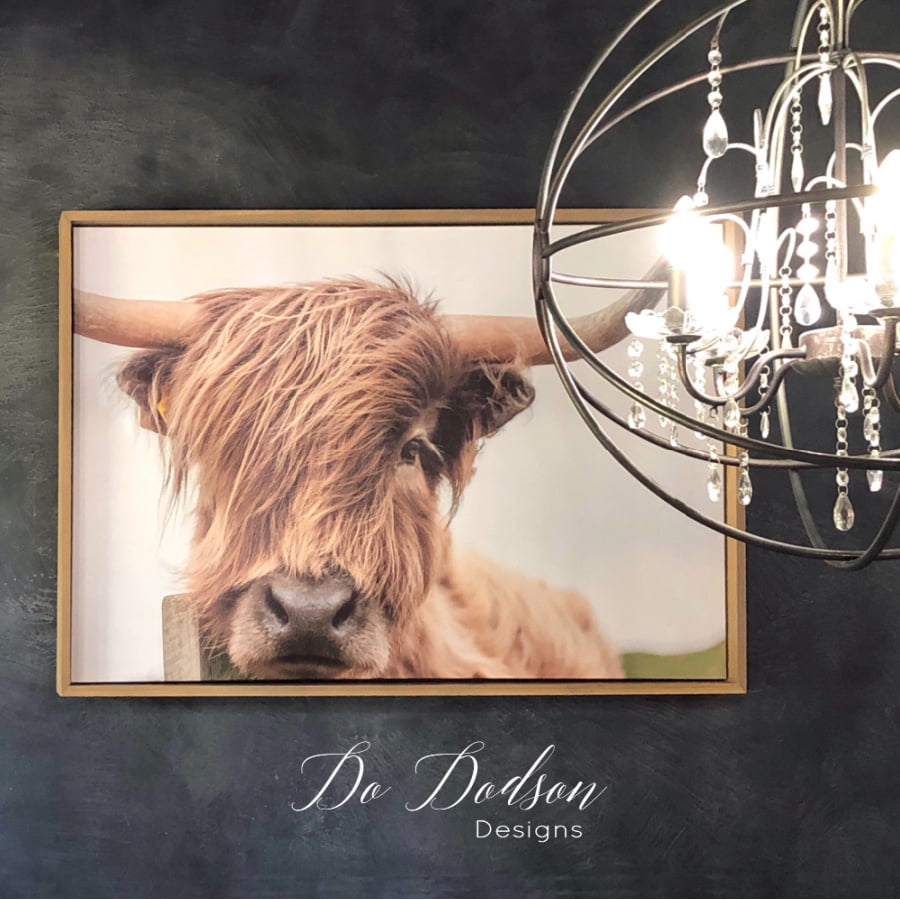
Adding A Floating Frame Made All The Difference
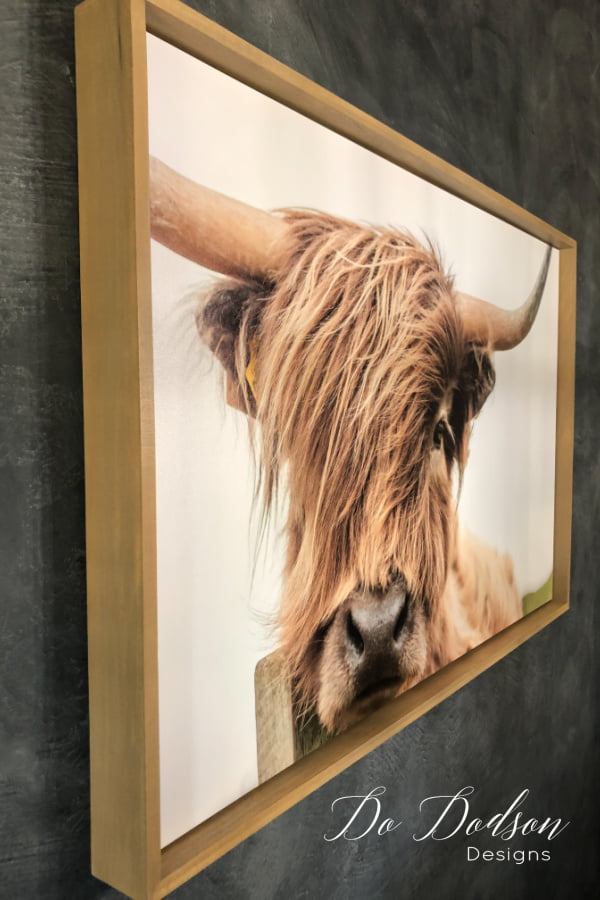

Wow! Can you believe what a difference this floating frame made to my Highland Cow Art? I couldn’t be more pleased with the results. The miter cuts are definitely pretty but can be challenging for a first-timer. Hindsight is 20-20, and I should have used a smaller canvas for the first time. Sometimes you gotta go big or go home! Ha! That’s what gets me into trouble every time, but thank goodness it all worked out.
I’d love to hear your feedback on this project. Do you love working with wood? Afraid of the power tools? So was I at first. I’d love to hear about your experiences. Tell me about it in the comment section below.
Until the next project… xo, Do

Hola…!!!!!!! Quedo hermosisimo….. una idea GENIALLL para realzar un cuadro . Creo que buscare a cual de mis cuadros podre hacerle este hermoso trabajo ..Gracias
Hi Marta! I’m glad you enjoyed this. Thank you so much. 🙂 xo
I think it made a huge difference to frame your picture, also. It looks fantastic! Great job mitering and great job altogether!
Thank you, Marilyn! I’m pretty happy with the results. Thanks for stopping by. 🙂 xo
That is one handsome stud that frame really bring out his pretty brown eyes lol😘
I agree, Betty! I feel in love with his hair. 🙂
Hi Do
The L brackets hold the picture, I would do the square frame(easy one) ..that came out beautifully! You are so talented! 💗💗
Thanks, Lori! Both styles are beautiful. Thanks for stopping by. 🙂 xo
Tou said you used 2 color combo for the stain. Do you mind sharing the colors, in your list it only shows one. Thank you
Hi Suki! You’re right! I didn’t realize that so I went back and updated that post. Thanks so much for letting me know. I used Dixie Belle Weathered Gray and Old Masters Fruitwood gel stain.
Here are the affiliate links to those products. https://amzn.to/3Ctg1qG https://dixiebellepaint.com/no-pain-gel-stain-oil-based/?aff=80
Thanks again. 🙂 xo
This frame turned out beautiful around the art. It really dresses up the canvas art.
Thank you, Tammy. I agree. 🙂 xo
Hi Do I love the frame, confused how the picture attaches to the frame? Does it just click inside the L brackets?
Hello Kerry,
Thank you. Yes, I didn’t want to make it permanent. I have had no problem with it remaining in place. 🙂
Hi, Do! I’ve been wanting to try this for a long time, and with the weather turning colder, this is a perfect project. I keep wondering, though, if the L-brackets are visible on the sides of the canvas. It doesn’t appear to be so in your photos, but I want to make certain before I try this project. Thanks!
Hi Mary,
The gap between the board and canvas is dark. If you’re concerned, use black L brackets. Mine do not show. I sure do enjoy mine. I have it hanging over my coffee bar and admire it every morning. ☕️