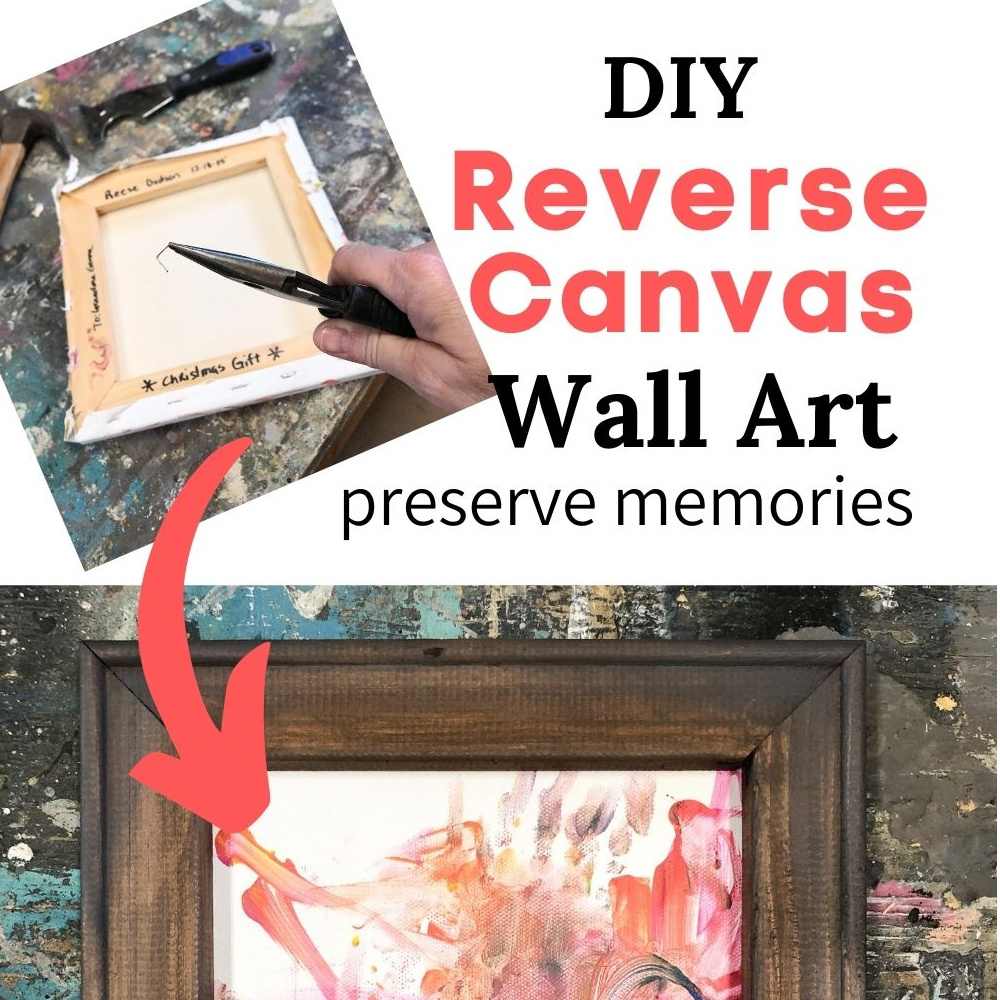
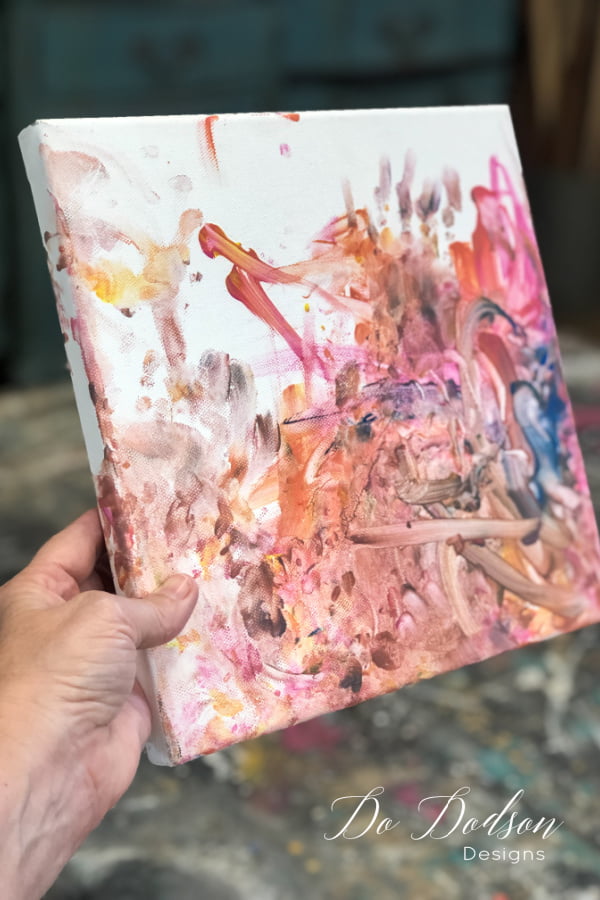
It doesn’t take much to melt this Grandma’s heart. A few years ago, my Grandkids created these finger-painted masterpieces. I can still see in the painting how tiny their hands were. They grow up too fast, and preserving their work is important to me. I’ve wanted to frame these since… forever. And then I discovered that the canvas itself was stretched over a perfect frame. This DIY hack is called a reverse canvas and it’s a classy way to display their artwork.
Estimated reading time: 4 minutes
This post contains a few affiliate links to help you find the products I use. You are not charged extra to use any of the links, but any income I make will be used for more fun DIY projects that I can share with you! To see my full disclaimer, click here.
Reverse Canvas Wall Art – How To DIY
The term reverse canvas simply means you’re relocating the canvas to the back. The back of what? Check this out!

Clear Coat For Protection
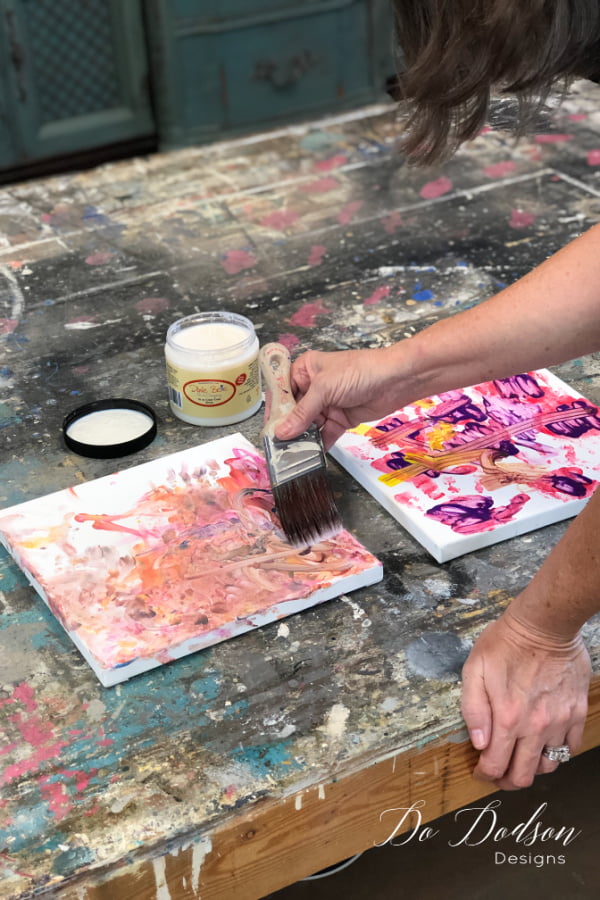
To start with, you will want to protect that precious artwork with a clear coat. Since the canvas isn’t going to be behind glass, this clear coat will help protect it and give it a shiny appearance. I found that it also enhanced the colors of acrylic paints. Not sure this step is necessary, but I want to make sure these masterpieces are around for a long time.
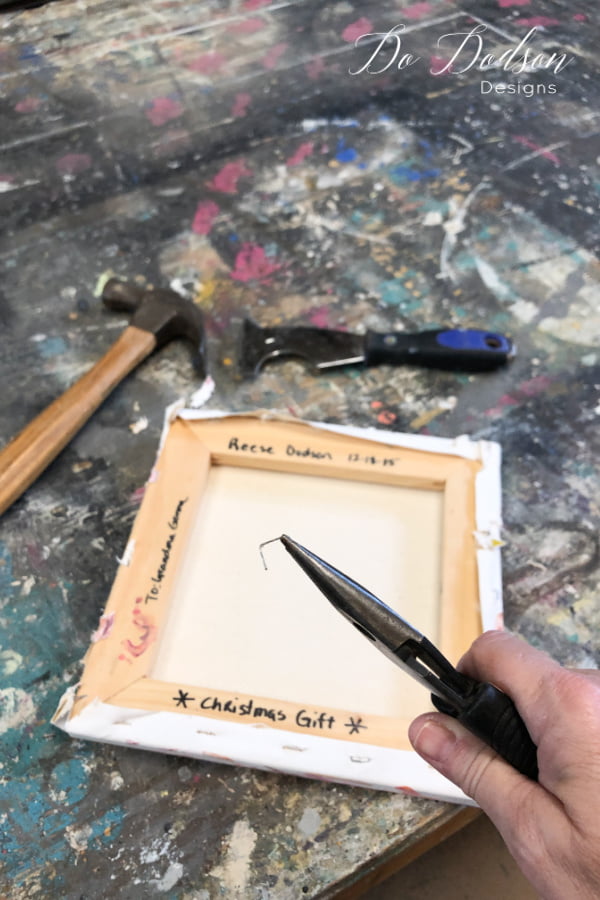
Removing The Canvas
Next, you’ll gently remove the staples from the back of the canvas that holds it to the frame. You can use whatever you have to get this part done, but a hammer and something to pry them up will do the trick. You might want to grab a pair of pliers, too, to pull out any stubborn staples. I found a few!
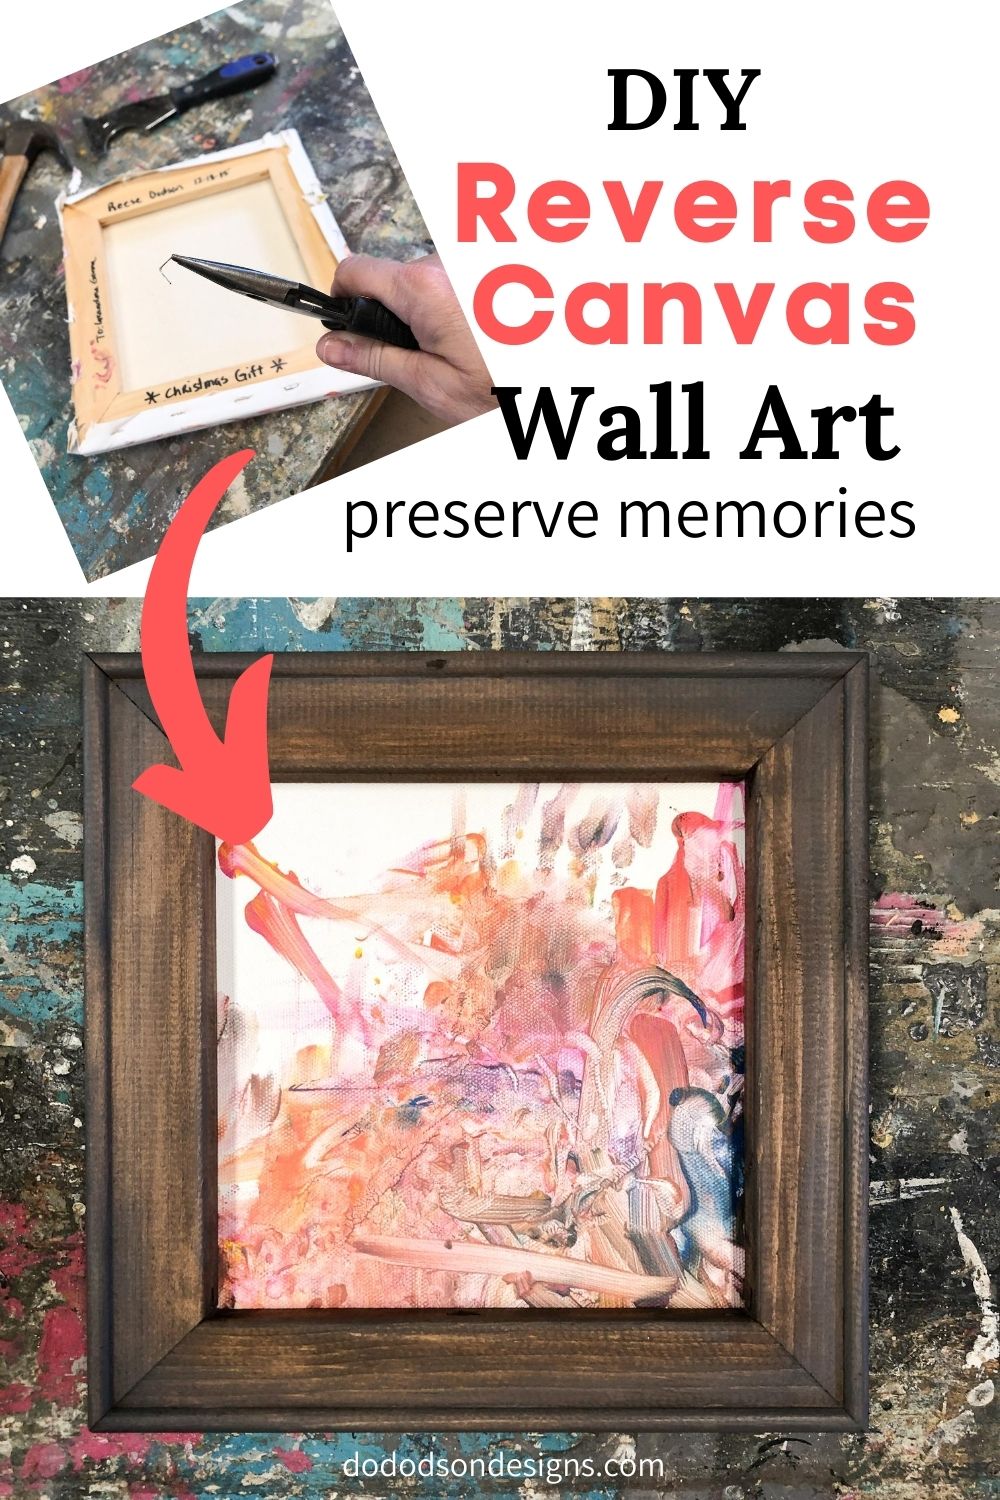
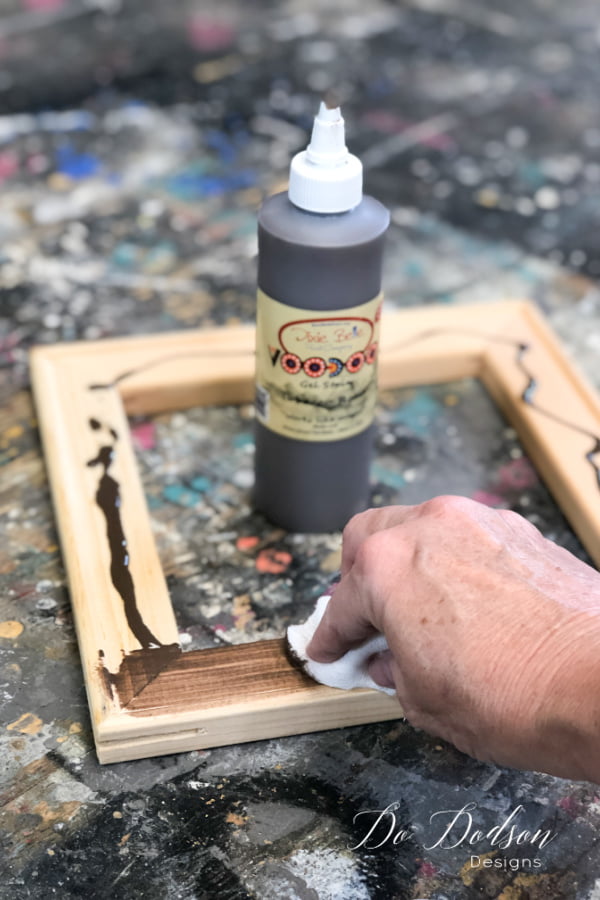
Staining Your Reverse Canvas Frame
Now that you have revealed your frame… isn’t that incredible? Who would have thought it? It’s time to add a beautiful finish to the frame. I chose to stain and added some wax to finish my frame. You most certainly can paint it too.
* The frame itself will not be quality like you find in a store, but I found that when you paint or stain it, you overlook the imperfections in the wood once it’s hung on the wall. I like things a bit rustic anyways, and getting a reverse canvas frame for free is totally in my budget!
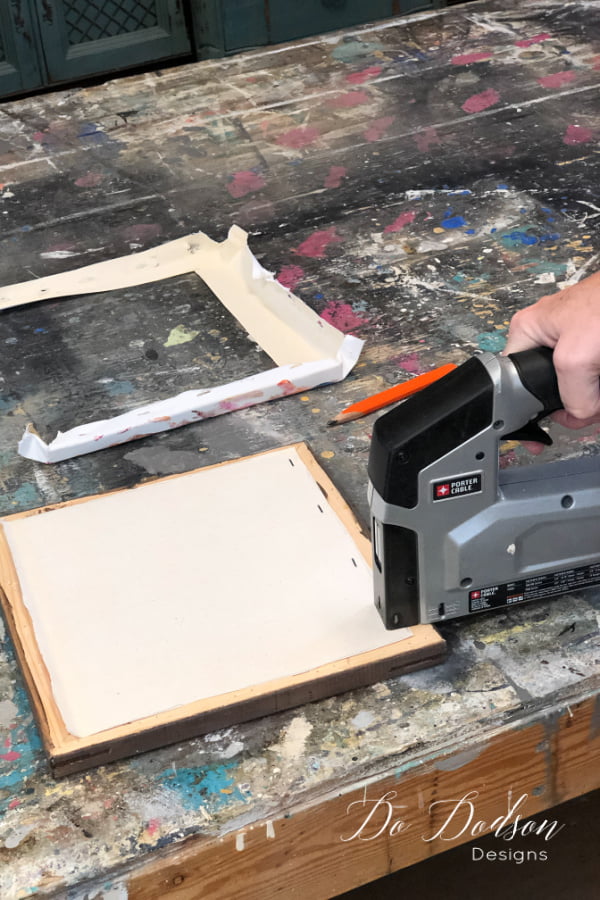
Reattaching The Reverse Canvas To The Frame
Next, you’ll need to measure and cut the canvas so that it’s just a bit smaller than the back of the canvas frame. Before cutting, I made sure that my artwork displayed how I wanted it in the frame from the front side. Once you have cut it to fit, restaple the canvas to the back of the frame. Then, add a picture frame hanger on the back, and you have an instant reverse canvas!
Reverse Canvas Hack For Wall Art
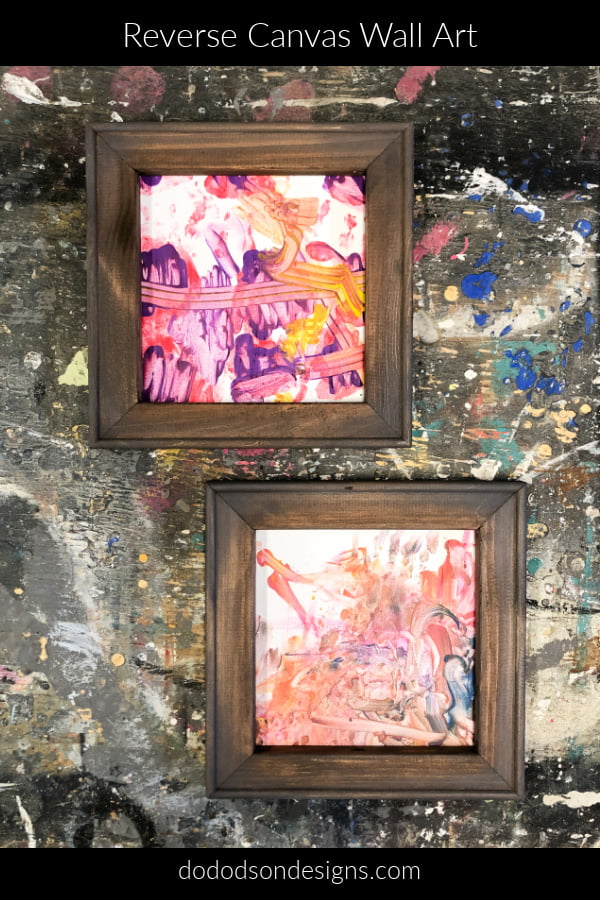
Oh my goodness, I love this project so much! What a great way to create a budget-friendly gallery of finger painting for all your little artists in your family. The only thing missing is their signatures. Hmm… gonna have to work on that. Got any ideas? Please, I’d love to hear your ideas and suggestions. Let me know in the comment section below.
Until the next project… xo Do


I love this idea, Bo!
I would get the small hanging wood label from Joanne’s and use little chains to attach to the bottom of the frame. Since I have 5 grandchildren artists, I’d have them sign their name on card stock or onion skin paper, decoupage the dated signature to the small wooden label and display together.
Popsicle sticks attached with ribbon could also be used and stapled on the back of the frame, but I prefer a more classy look of wood and chain..
Thank you for sharing you wonderful ideas, Suzie! Nameplates! I knew someone could see beyond. I appreciate this so much. xo, Do