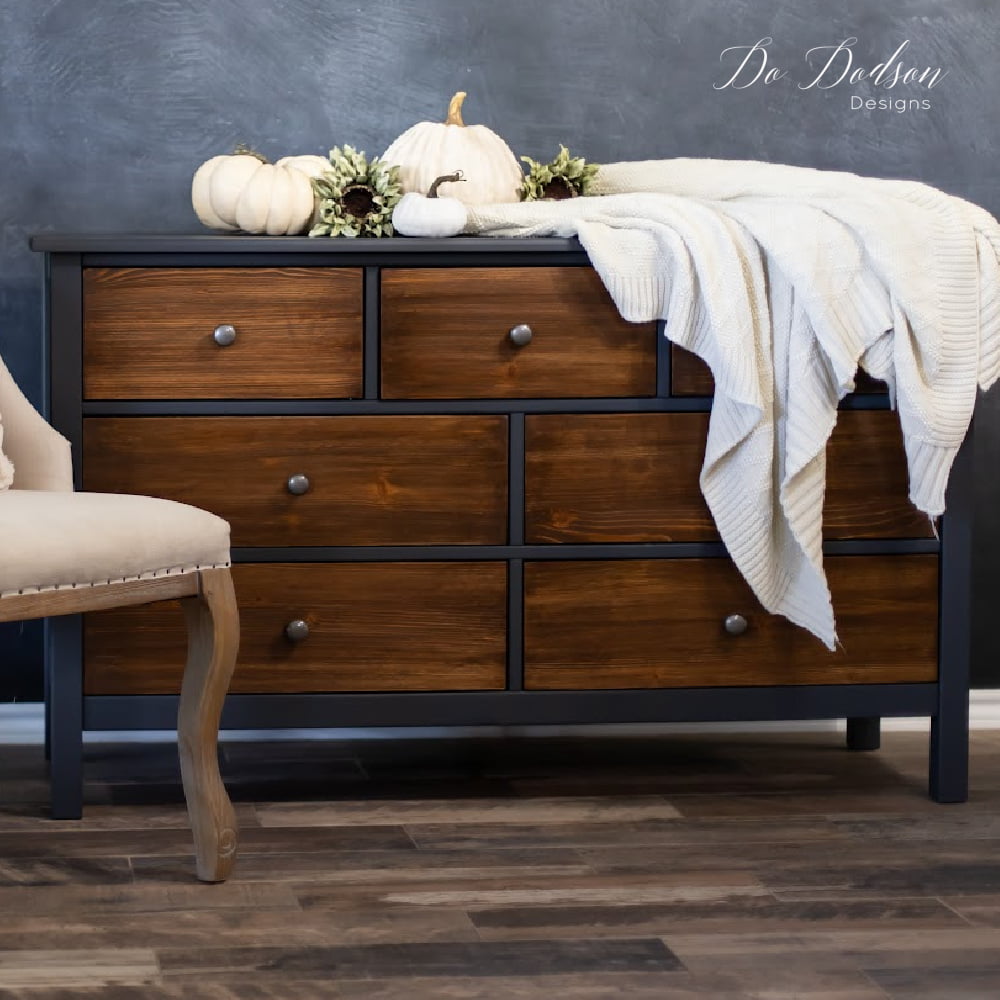

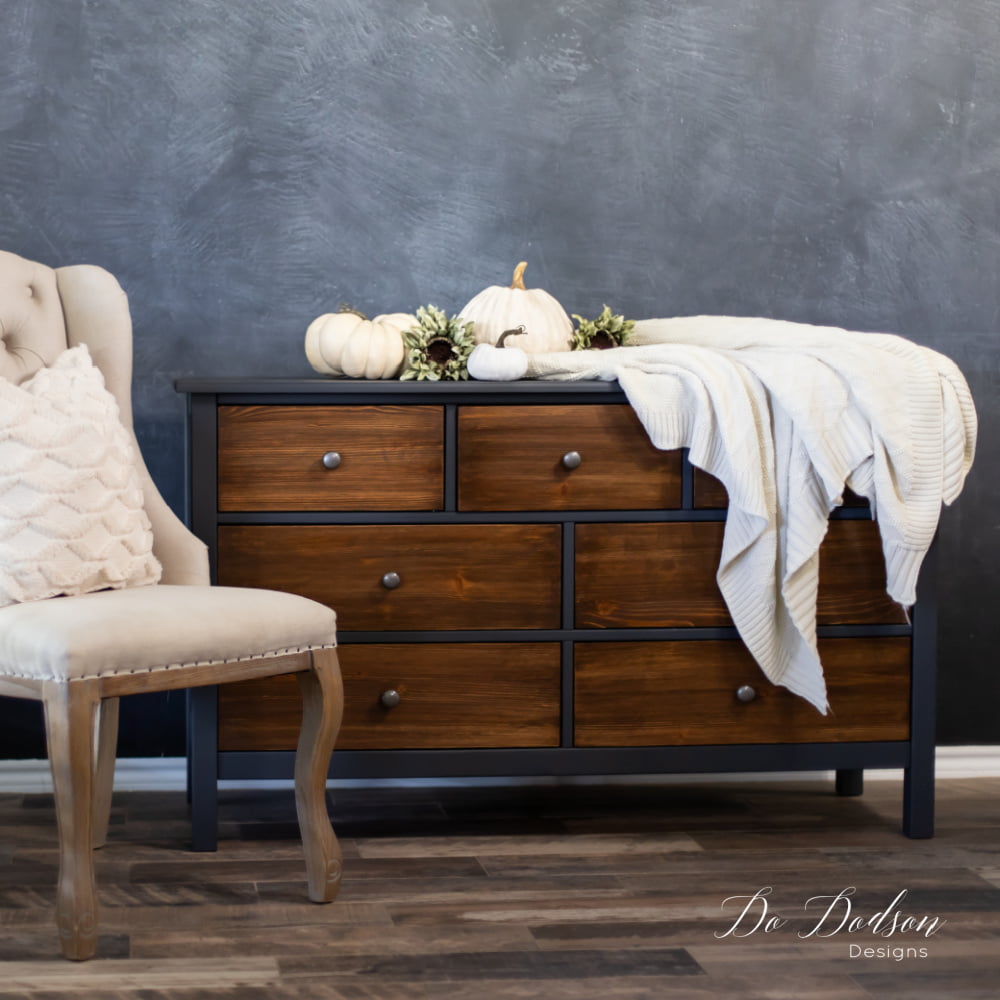
Hey creative friends! I have many reasons to be in love with this dresser makeover, but the #1 reason is that this black-painted dresser with wood drawers will be going into my 7th Grandchild’s nursery! EEEEK! And today, I’m sharing with you how easy it was to transform it from a plain ole wood dresser into a timeless look that will grow right along with #7. It’s a BOY!
* As an Amazon Associate, I earn from qualifying purchases and through other companies as well. You are not charged extra to use any of the links, but any income I make helps me create more amazing DIY projects to share with you! To see my full disclaimer, click here!
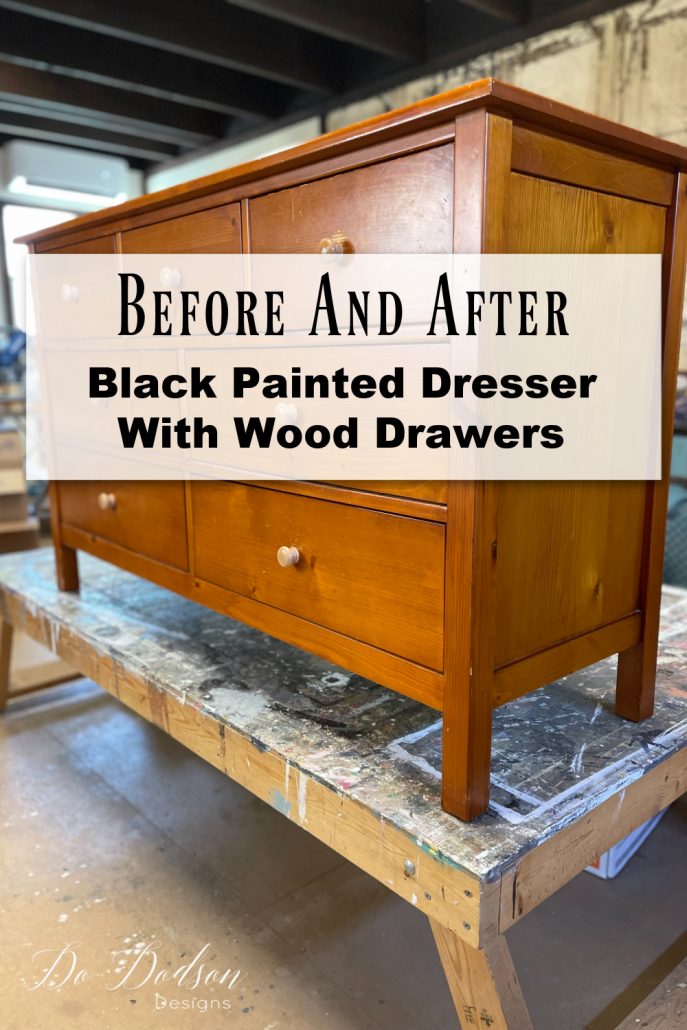
Before The Dresser Makeover
Can you say U G L Y? I’m just saying.
So, “we,” actually my daughter in law decided that she wants a more sophisticated look for the baby’s room. Since we are having a man child, this style and choice of color will also make it easier to transition from baby to young man. They grow up way too fast! And he isn’t even here yet. 🙁

SUPPLY LIST:
- Black Sands All-In-One Silk Mineral Paint
- pristine clean (furniture prep before painting with Silk All-In-One Mineral Paint)
- synthetic paintbrush
- Surfprep Sanding System (Use my Discount code DOIT10 to save 10%)
- R.A.D Pads (for scuff sanding)
- gloves
- low lint cheesecloth (roll)
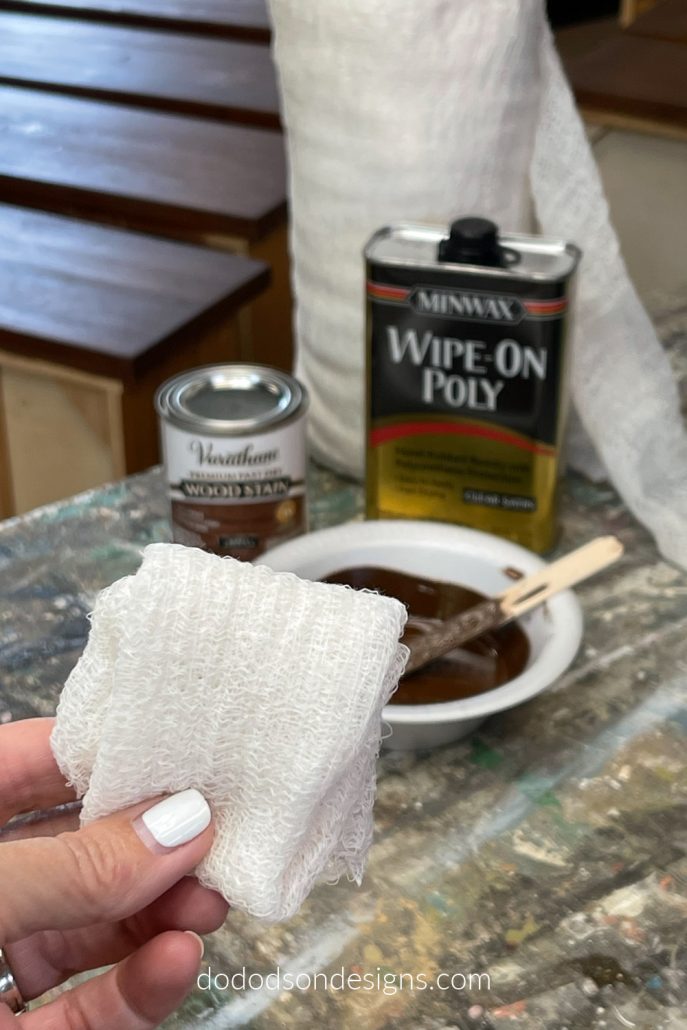
- varathane wood stain (early American)
- Minwax rub-on polyurethane (satin finish)
Stripping Away The Old Finish Without Chemicals
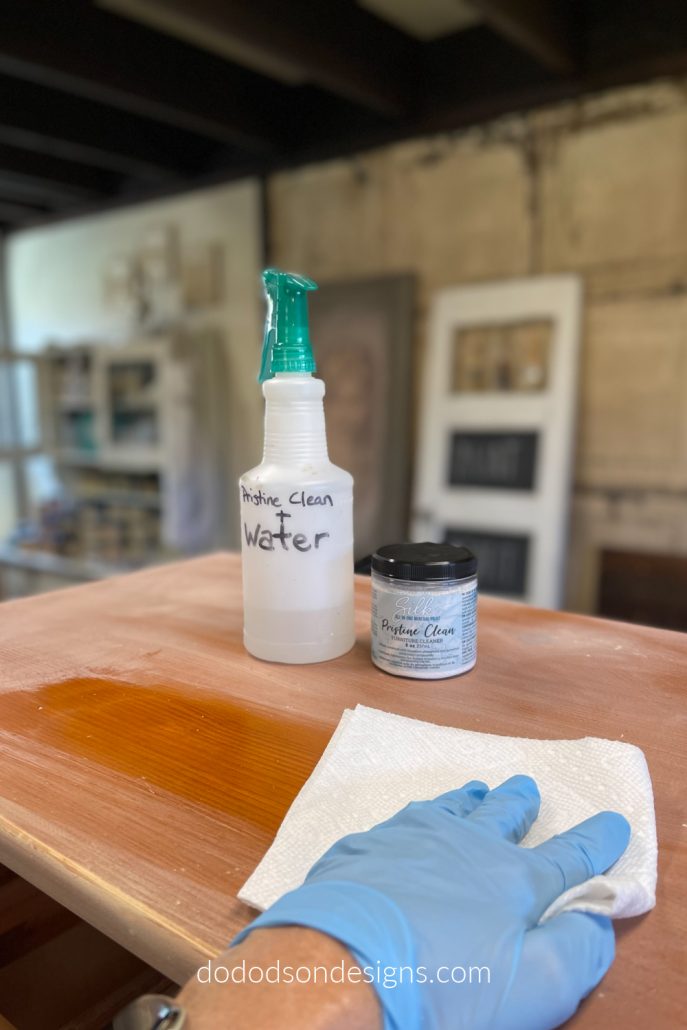
I started this makeover with a simple cleaning of the wood with a good cleaner to remove all the gunk that the naked eye can’t see. The prep is so important, and I want to ensure that the black paint on this dresser stands the test of time. It’s for a boy, remember?
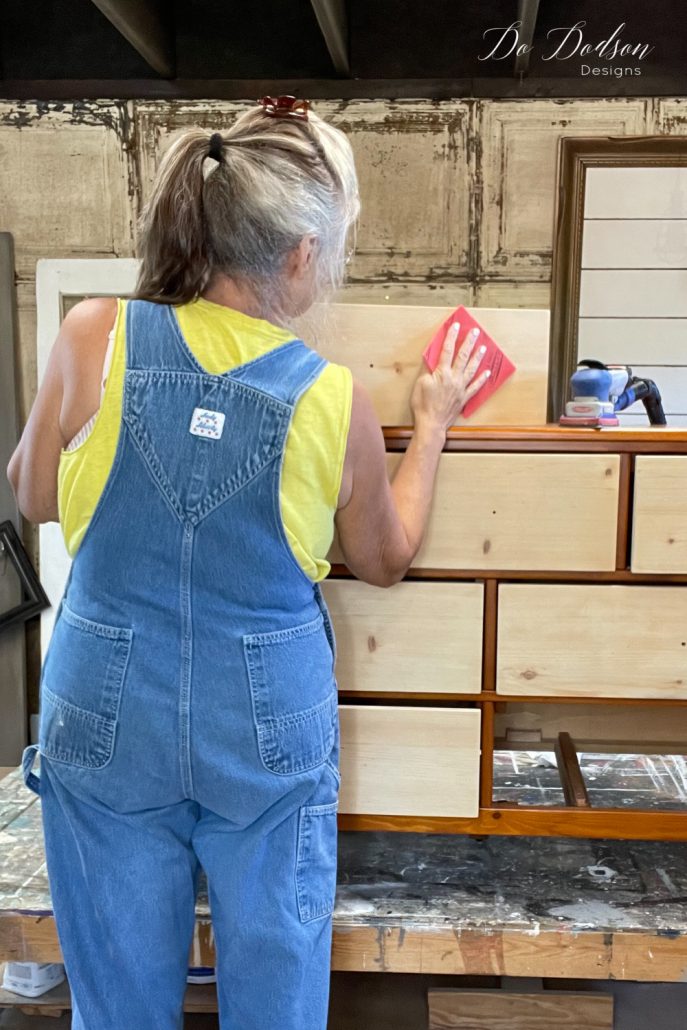
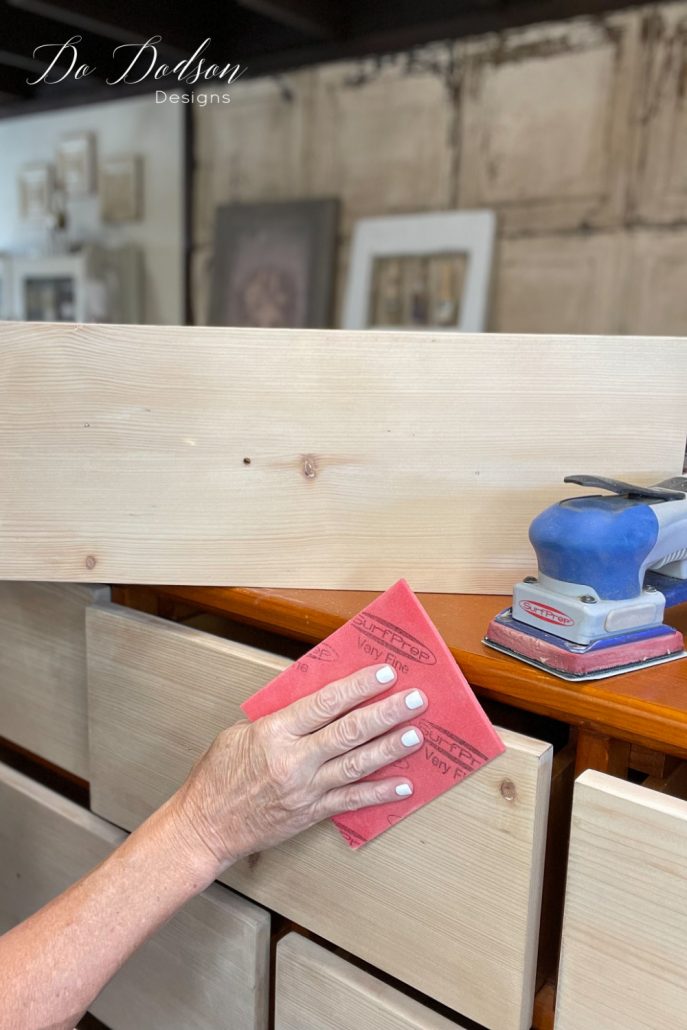
After cleaning the dresser thoroughly, the drawers were sanded down to the raw wood with my all-time favorite tool. The Surfprep electric sanding system speeds up the progress when stripping off an old finish. You can use a chemical stripper if you choose, but I like fast and easy for me. CLICK HERE to learn more about this sanding system.
*To strip away (remove) the old finish, I used a coarse sanding pad on the wood drawers. It’s the equivalent of 100 grit sandpaper.
Prepping The Wood For Stain – Black Painted Dresser
After removing the existing finish, the wood was a little rough due to the course abrasive pad. So, I gave it a light sanding with a fine sanding pad about the equivalent of a 220 grit sandpaper. This will leave to wood grain slightly open and prepare it for staining.
Clean away any leftover dust from sanding the wood with a damp cloth, mineral spirits (if you’re using an oil-based stain), or a tack cloth. You want the wood dust-free before staining the wood.
Staining Wood Drawers – Black Painted Dresser
Let’s talk staining pads… I like using a low-lint cheesecloth to apply oil-based stains. That’s what I’m using on this project. I simply folded one sheet into a small pad to apply the stain. Super easy, and I used one pad to stain all the drawers.
Don’t forget to wear your gloves!
No messy clean-up… just dispose of it in the trash when you’re done staining.
After the stain has dried, apply a polyurethane topcoat. I like the rub on polys. You can use the same method of application with the poly by using the low lint cheesecloth.
I applied 3 coats of polyurethane for these drawers and lightly sanded between coats with a super fine sanding pad. Wipe away any dust from sanding before applying each coat. The last coat of polyurethane does not need sanding. Using this method will result in a smooth finish.
Black Painted Dresser – Silk All-In-One Mineral Paint
For the prep… Silk All-In-One Mineral Paint you MUST scuff sand the wood before application. That means you’ll have some prep. SHOCKER! What have I always told you? There is no such thing as no prep. Just DO the dirty work, and you won’t be sorry.
Scuff sanding is super easy and doesn’t require a lot of effort. Simple rub across the wood surface of your furniture with 220 grit sandpaper. Just enough to knock off any shine from the existing topcoats or finishes.
Next, you’ll want to wipe down (remove) the leftover dust from scuff sanding as well as anything on the wood that you can’t see. Again, use the Pristin Clean degreaser to ensure no oily gunky stuff is left on the wood before you paint.
Brushes Matter! Silk All In-One-Mineral Paint
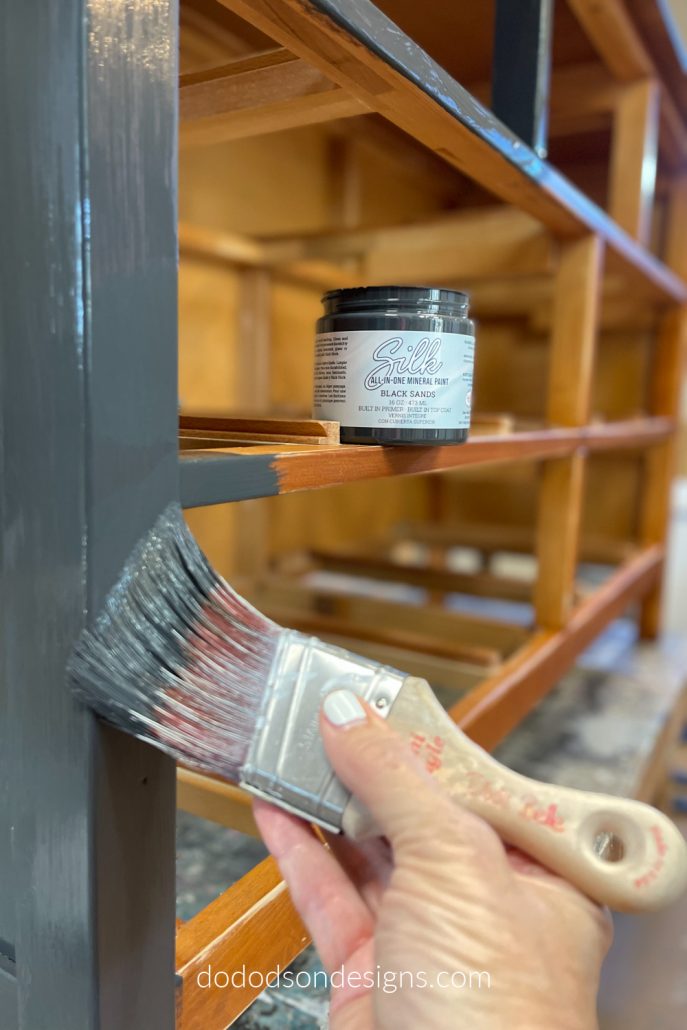
The last part of this black-painted dresser makeover is obviously black paint. We chose a beautiful color called Black Sands. One of the easiest paints I have ever painted with. I highly recommend this paint if you’re a beginner.
In my honest opinion, this paint should be applied with a good quality synthetic paintbrush for best results.
STEP 1 Apply 2 thin coats with a dry synthetic paintbrush. No water should be used with this paint unless you’re planning on spraying the paint with a spray gun. I don’t have the recommendations for that, but you can find more info on Dixie Belle’s website.
STEP 2 Rinse and repeat! Two coats are recommended for a durable finish, and I agree. The paint will cure in about 30 days to a super hard finish.
I repainted a dresser for my hubby last year that still looks like the day after I painted. He’s really hard on furniture.
The durability of this paint? I give it a 10! That’s why I’m using it on my new man-grandchild’s dresser. If he is anything like his Dad and Gramps… this will be a good test. Boys will be boys!
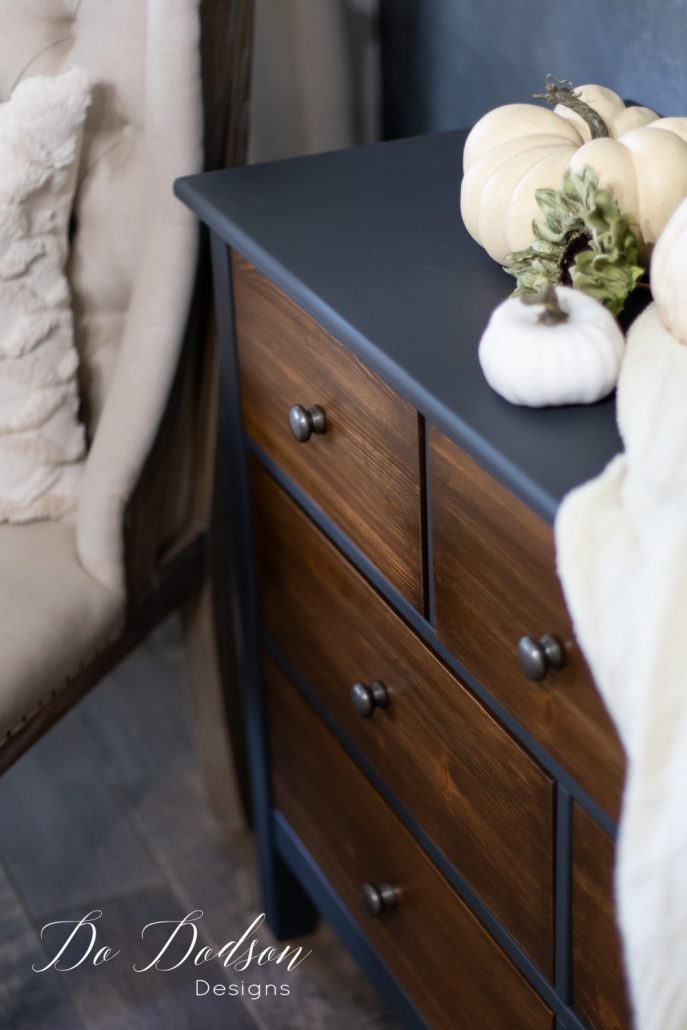
Black Painted Dresser With Stained Wood Drawers
I’m so proud of the way this black-painted dresser turned out, and I can’t wait to see how it looks in his nursery. I promise to share pics of the room once we get it settled in there. EEK!
The dresser knobs will be replaced with dinosaur pulls found on Amazon. CLICK HERE to see them. The nursery has a Triceratops theme. 🦖 How stinking cute is that???
The Sophisticated Look Of Black And Wood

What a special project, and I’m so blessed to have a daughter in law that has allowed me to share some special love with my man-child-to-be.
As always, I would love to hear from you and about the projects you got going on. Have you ever done a special project that you’re proud of? Drop me a comment or just say hi. Don’t forget to share on Pinterest. I would appreciate that so much! 😘
Until the next project… xo, Do


your grandsons dresser is just too beautiful. I’m fixing to do a project and use my Silk paint for the first time and I can’t wait. Enjoy that grandson when he arrives!
Thank you so much, Barbara! We are excited. Silk paint is a great starter paint, and I can’t wait to hear about your experience with it. Keep me posted. 🙂 xo
The dresser is beautiful! When using this silk paint on mahogany, must a blocker be applied first to avoid bleed??? Thank you!
Hi Pam! Great question. While the Silk has a built-in stain blocker, I would recommend using a good shellac stain blocker due to the bleeding tendencies of those types of wood. It’s always better to be safe than sorry later. Good luck with your project. 🙂
Do you need a top coat of any kind?
This paint doesn’t require a topcoat but if you are need extra durability due to heavy usage, I would recommend using Dixie Belles Gator Hide top coat.
Also, how much paint to you need for a dresser this side? Thanks 🙂
Hi Karan,
I would say 16 ounces. You’ll need two coats if you’re using a dark color.
Love this deatiled easy to follow tutorial. Just did this project with my own orangey old dresser and couldn’t be happier with the results. Thank you, Donna!
That’s wonderful, Lori! Look at you go. Isn’t it a great feeling to be able to change the looks? I haven’t purchased new wood furniture in 20 years.