Today I wanted to share another project for all you furniture flippers and creators that sometimes pass up a great buy for what you feel is an impossible fix on wood furniture repair jobs. Let me tell you this; almost everything is salvageable if you’re willing to put in the work and time. I tend to be drawn to the underdogs (appropriate for today’s blog post, Ha!) and find great satisfaction in bringing a piece that is destined for the dump back to life.
This post contains a few affiliate links to help you find the products I use. You are not charged extra to use any of the links, but any income I make will be used for more fun projects! To see my full disclaimer, click here!
Wood Furniture Repair That’s Do-able
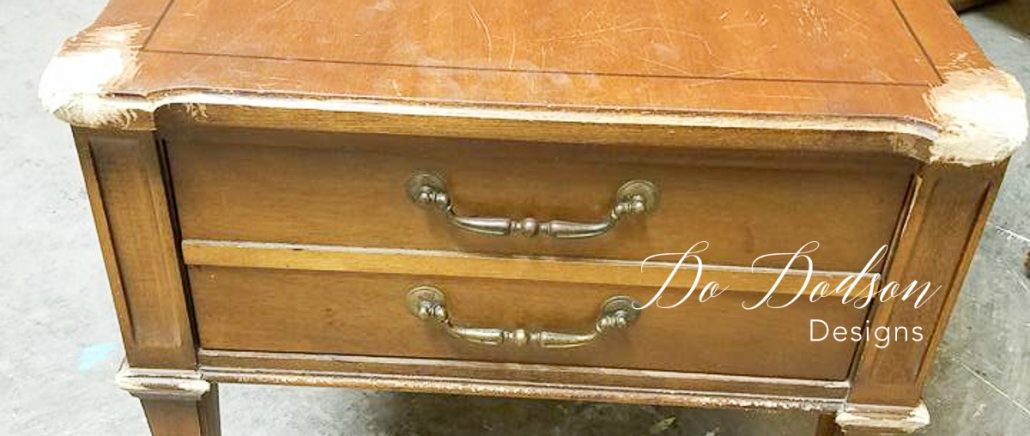
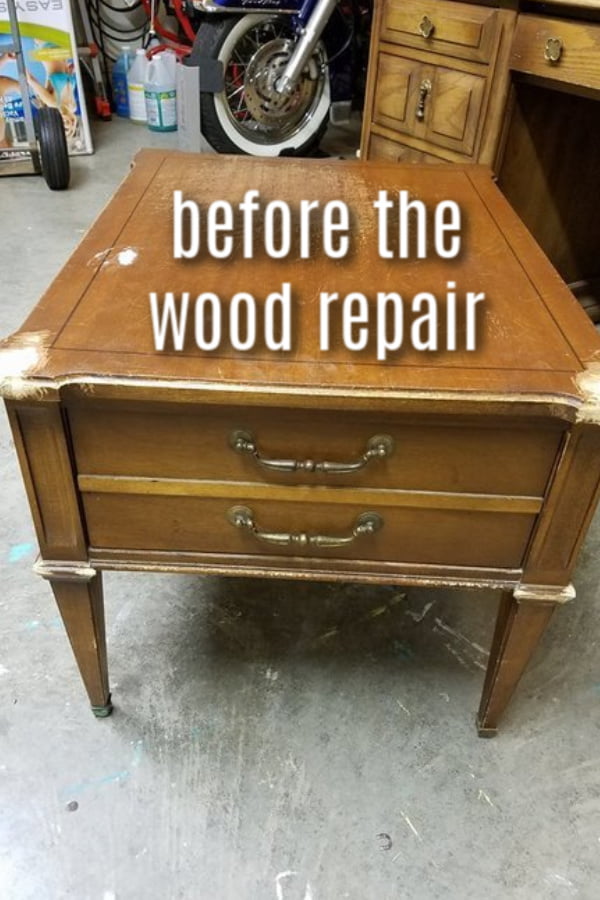
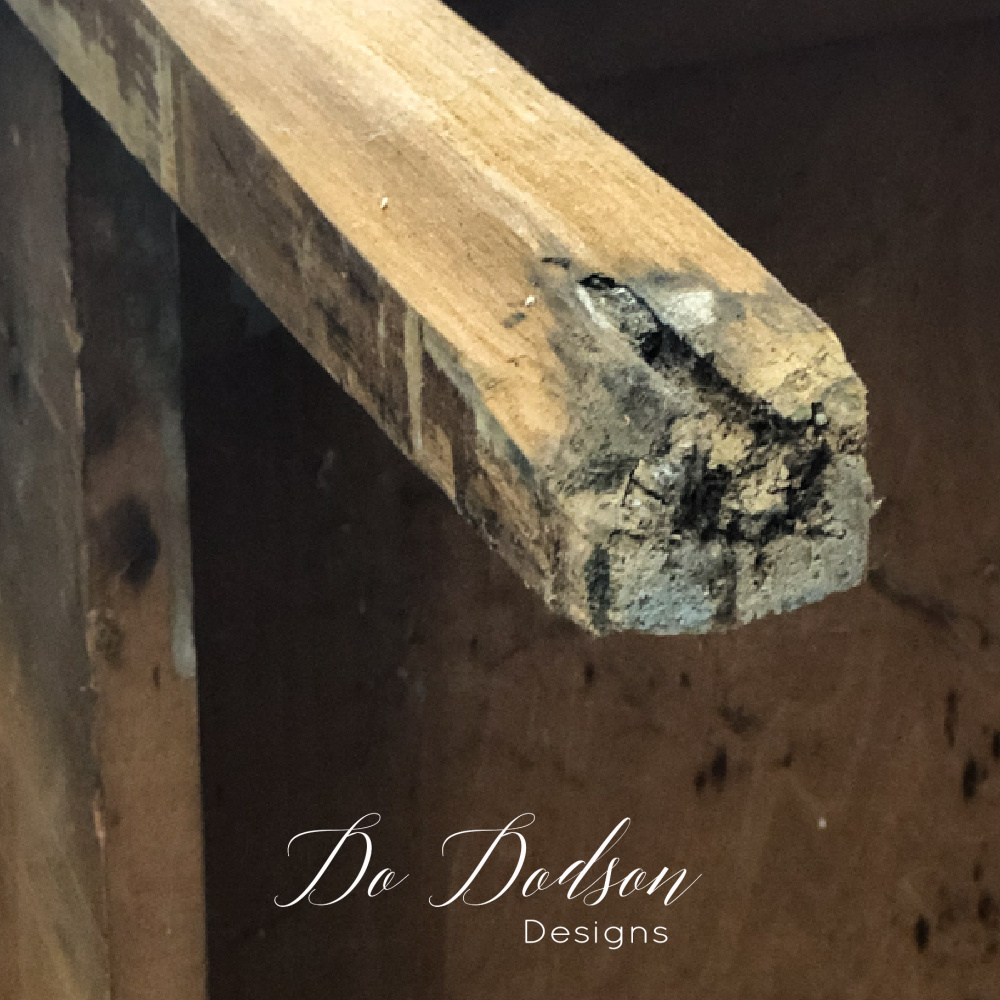
I frequently visit my local Goodwill store, and when in another town, it’s always fun to see what other neighborhoods will donate. This Goodwill wasn’t the best I have ever been to; however, this little table had my full attention. It was solid wood, sturdy, and no structural damage. The obvious issues were the gnawed edges that appeared to be chewed by a giant woofer.
It had serious wood damage. When purchasing furniture with these issues, I have a “3-time” rule. If I look at it three times, it’s mine. The only thing that drew me back the 3rd time was the price tag. $5!!! Score! The first time was, WOW! No way. The second time was… maybe, but who has time for that? The 3rd time, that’s was all she wrote. Done deal! Load it up! My head was already in creative mode, and I had just purchased a metallic paint that I was itching to try.
Those poor corner edges of the wood table were mutilated! I can only imagine the size of that woofers teeth!
Remove Damage Wood
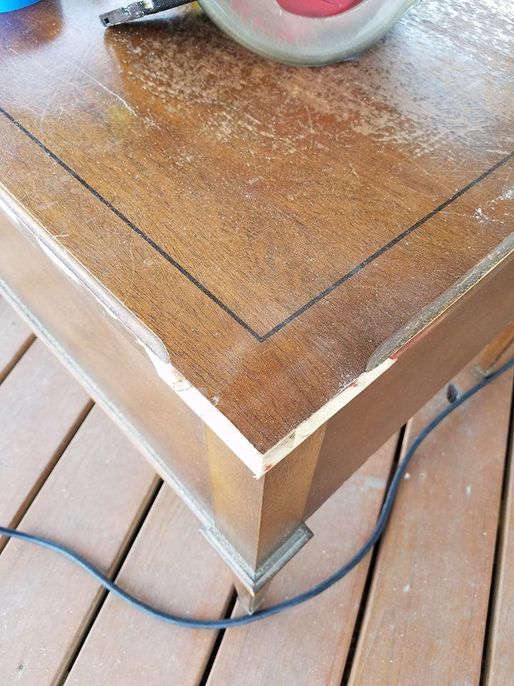
The first thing I did was to tackle the damaged wood edges on both front corners. If you look closely at this table, you can see that all 4 wood corners have a curve. This worked well for me because it was easy to remove the damaged wood by cutting most of it away with my circular saw. One corner was worse than the other so I had to come up with a plan to make them all look the same. So, the best option was to cut away the curved area on all four corners. That left me with one corner that needed some wood filler. I can do that!
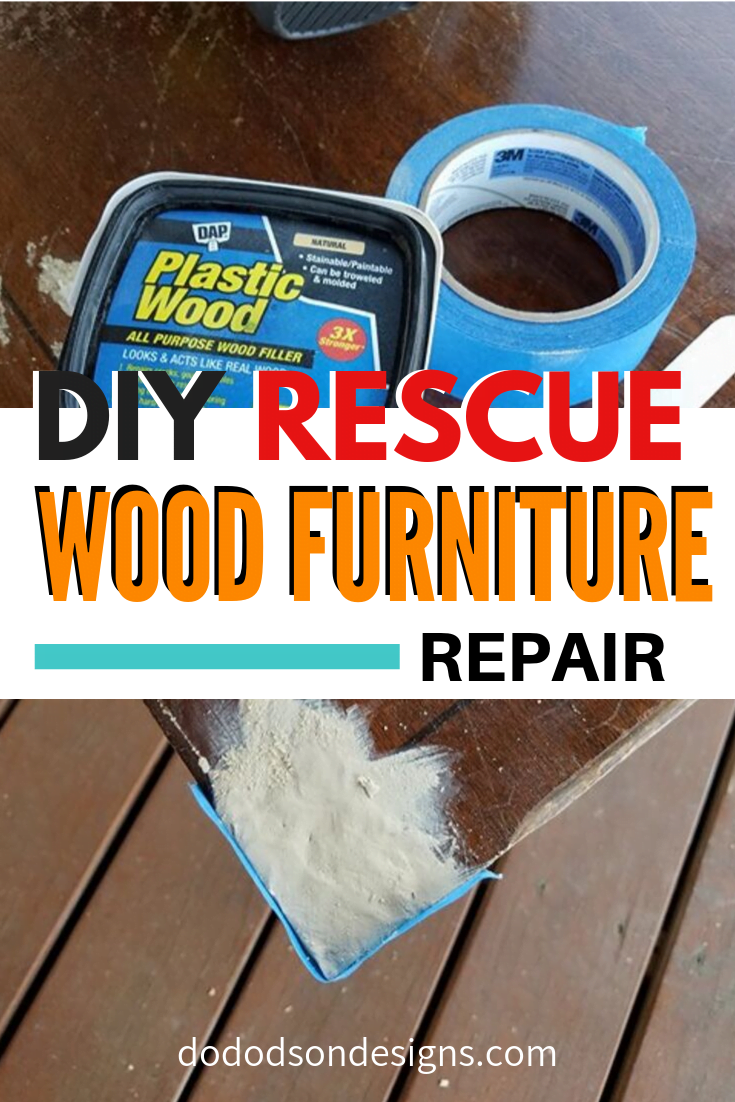
Wood Fillers For Wood Furniture Repair
Product list:
- Plastic Wood
- 3M Painter’s Tape
- Orbital Sander
- Modern Master Pewter
- Rustoleum Metallic Gold Spray
- Minwax Polycrylic topcoat
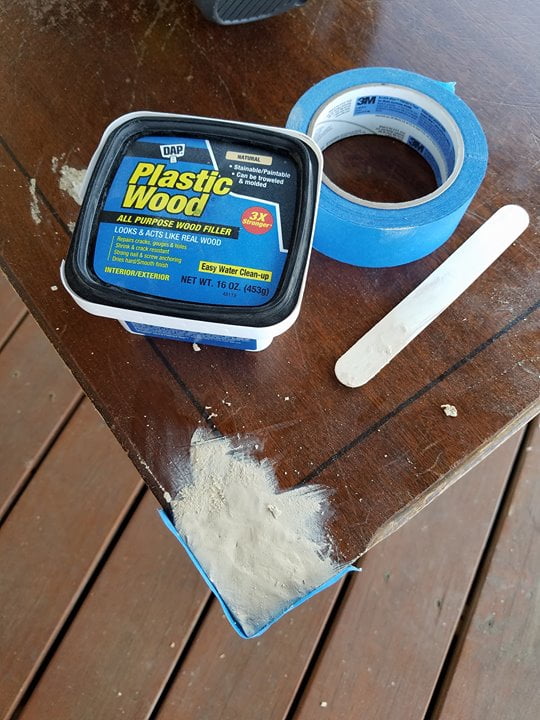
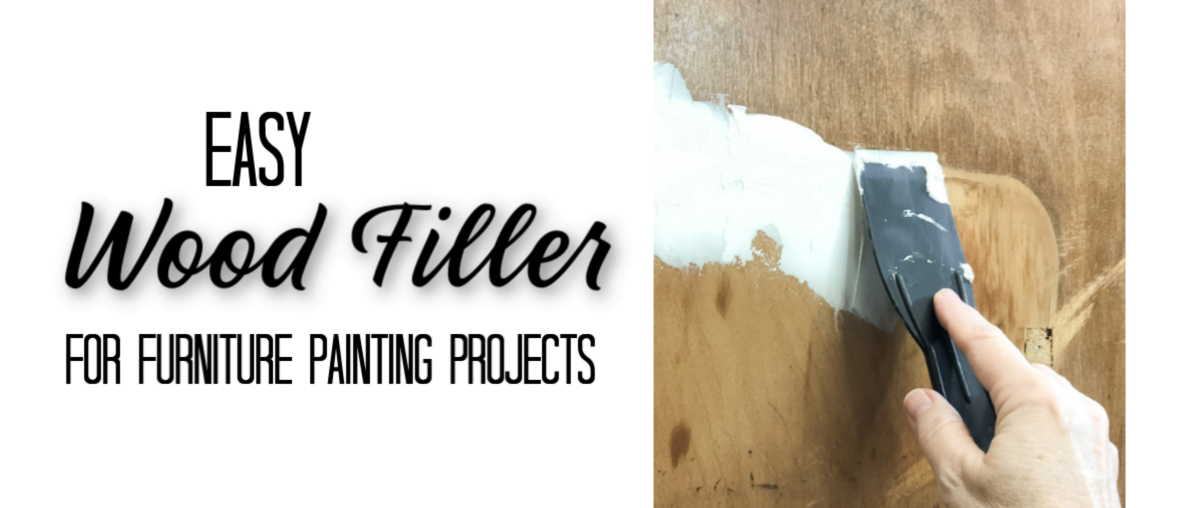
My favorite go-to product to repair holes, gouges, damage, and minor mishaps like this, is Plastic Wood. It’s one of my go-to’s for years on wood furniture repairs like this one.
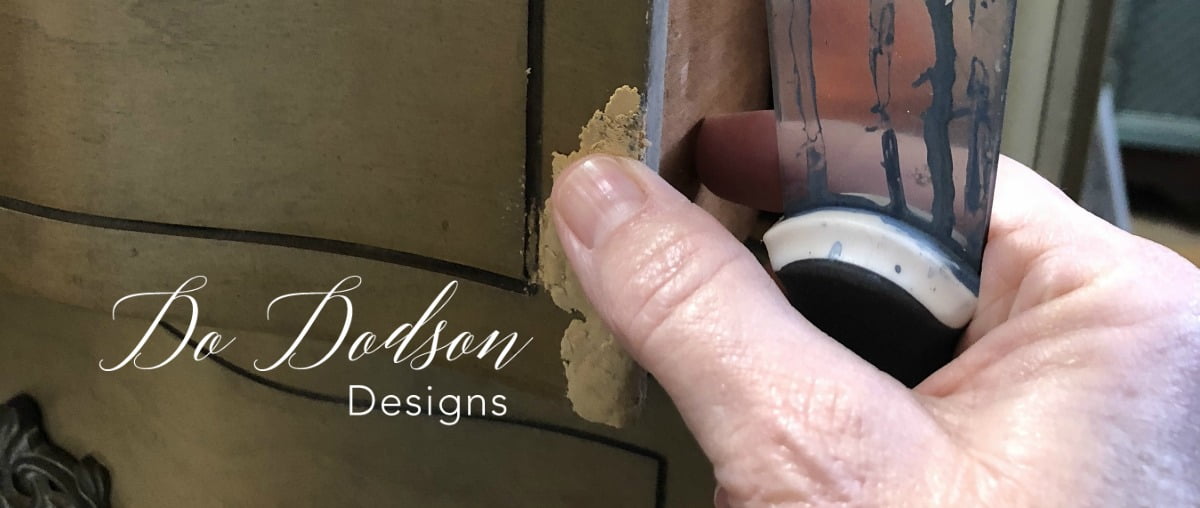
Start by cleaning the damaged wood well. This can be done by gently sanding the damaged wood and wiping it with a cloth to remove left-over dust from the sanding. Wood fillers will not stick to dirt and grime and need a clean surface to adhere to. Next, apply the wood filler to the damaged area to fill the holes and leave a small amount just above the wood table’s line. I used painter’s tape to secure the corners and hold the wood filler in place while it dried. You can also use craft sticks to secure the corners. After 24 hours, remove the tape and sand the wood filler smooth with 220 grit sandpaper.
TA-DAH! The Doggie Chew Toy
I’m really pleased with how well it turned out. It even surprised me, and I’ve done many sad (should have passed up) makeovers. I used Modern Masters Metallic Pewter paint with a black/gold metallic glaze for an accent. The handles were sprayed with Rustoleum Metallic Gold Spray Paint, and I top-coated the whole project with Minwax Polycrylic in a satin finish.
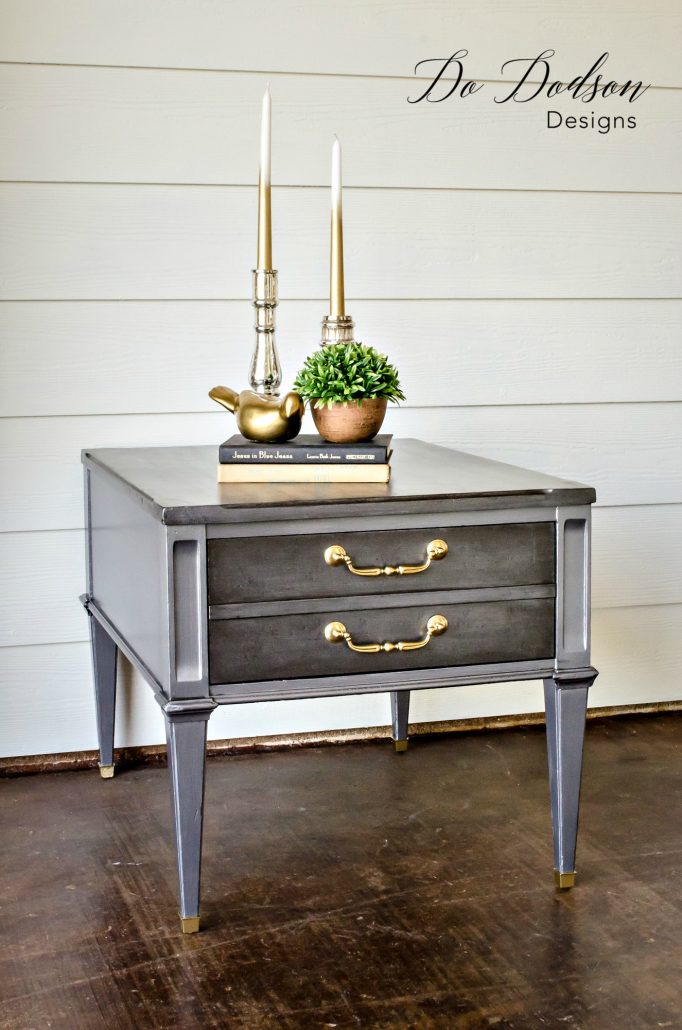
Pretty nice for a doggie chew toy! This shows that there is always a wood furniture repair solution most of the time, even when you think it’s not possible.
I hope you enjoyed this makeover and if you have questions about something I didn’t cover, please feel free to leave me a comment below. I’d love to hear from you.
Until the next project… xo, Do
Just wondering if you have an idea for using a large vanity mirror that’s been chipped and some patches of silver missing. Love all your info. Thanks, Sharon
These are my favorite make overs! I’m so glad others enjoy the ‘destined for the burn pile’ one’s as well! Beautiful and usable piece at the end.
Thanks, Wendy! It gives me great satisfaction to resue the really bad ones. xo
Very nice. I have been using wood filler but, just may take a try with the plastic wood.
Thanks, Johnna. Let me know how you like it. Stay safe. xo, Do
Donna,
Your experience and talent are truly wonderful. You are so generous with your info, hence my question:
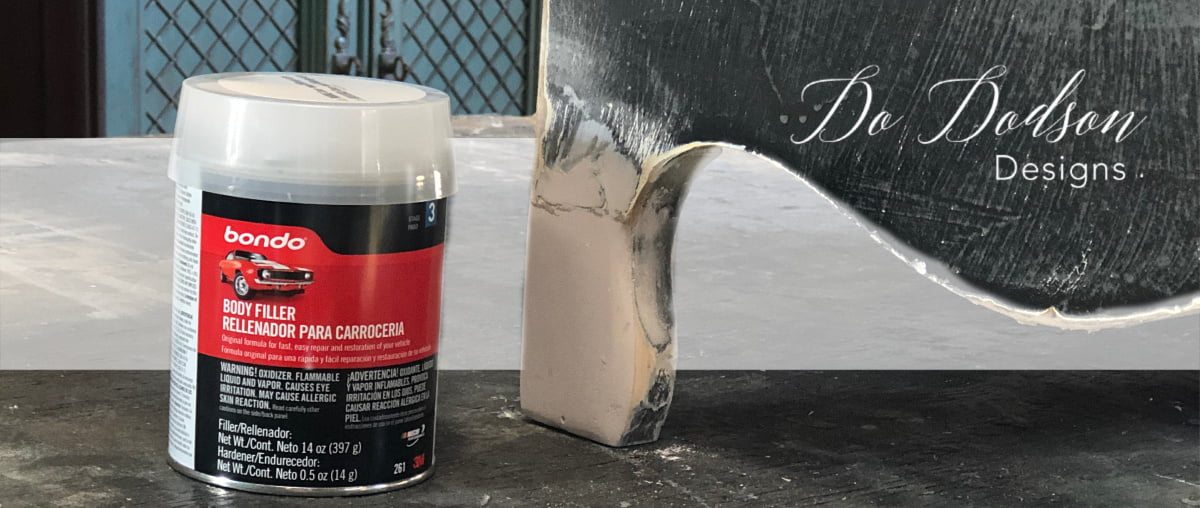
I have 12 old wooden, slatted shutters with pretty extensive weather damage to the frames. Want to paint & use them indoors for decor. Is the “plastic “ wood appropriate or is Bondo a better fix?
Hi Deb, I would say if the damage is extensive and possible rotting, use Bondo. Plastic wood is good for minor repairs. Good luck with your project. 🙂