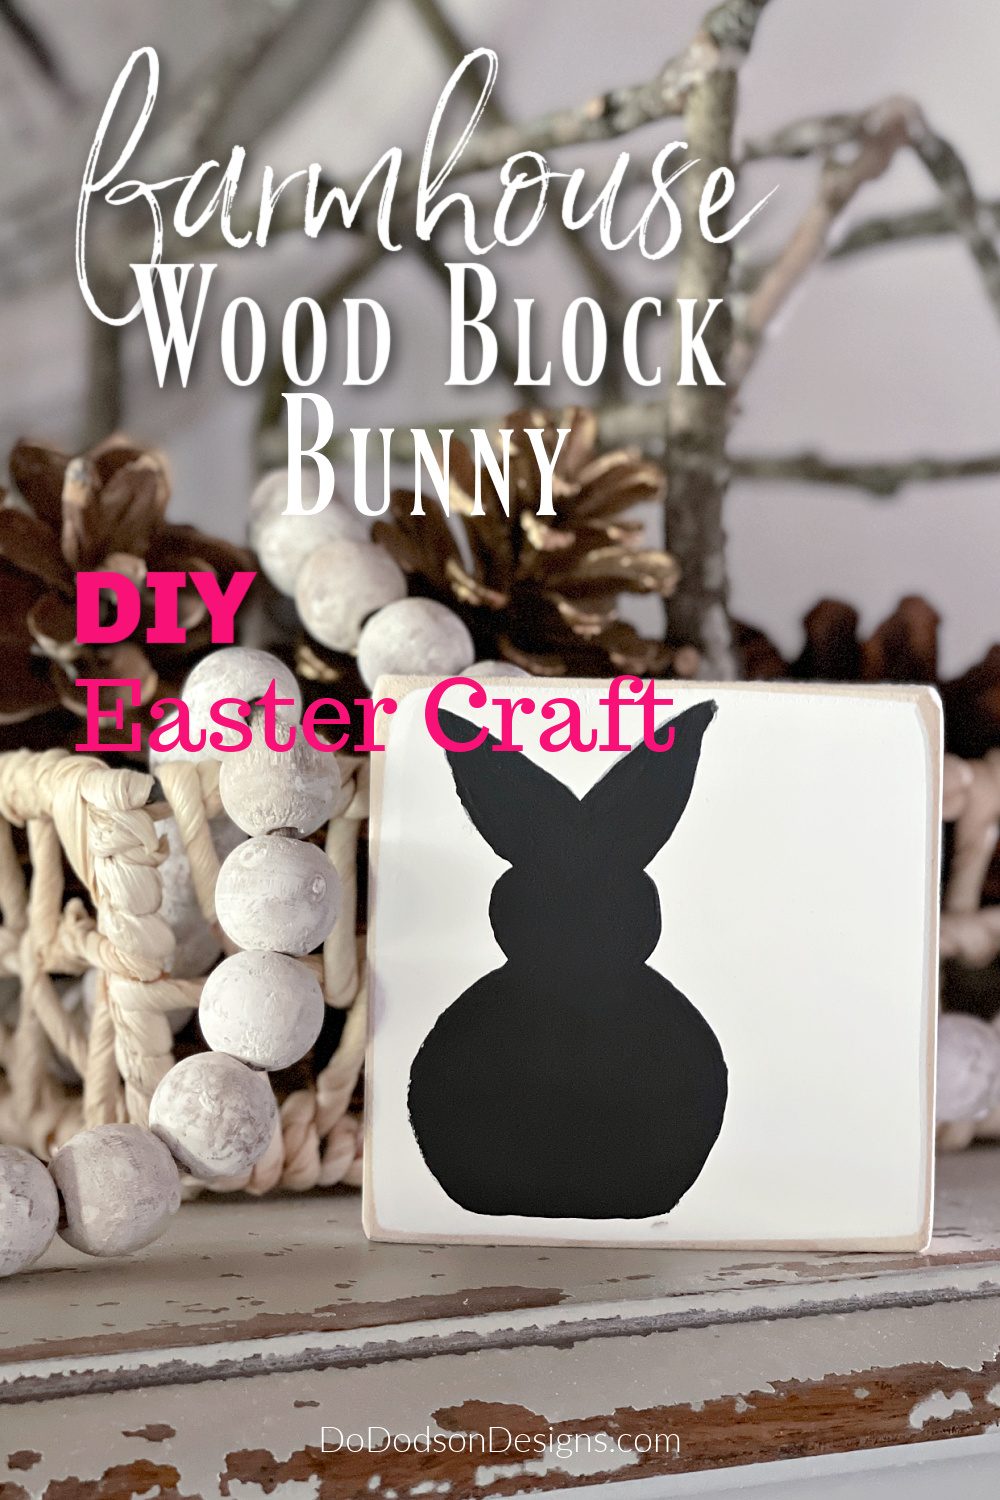
Hey triple-D friends! It’s almost Easter, and I’m still creating. Are you looking for a budget-friendly way to add some Easter charm to your home? Well, look no further than this DIY wood block bunny craft! With just a few simple materials, you can create a charming and rustic decoration that will add a touch of Easter spirit to any room. Today, I’ll guide you through the easy steps to make your own bunny and offer suggestions for personalizing it to your unique style. So, get ready to roll up your sleeves, and let’s get crafting!
Thanks to Dixie Belle Paint Co for sponsoring this post. While I was compensated to write this post, all opinions are my own.
* As an Amazon Associate, I earn from qualifying purchases and through other companies as well. You will not be charged extra when you purchase through these affiliate links, but any income I make helps me create more amazing DIY projects to share with you! To see my full disclaimer, click here!

Gather Your Materials
It shouldn’t be a shock to you that I went shopping in my wood pile for the perfect scrap wood pieces. I always have plenty of leftovers from other wood projects. They’re my FAVE!
Before we dive into creating the adorable wood block bunny, let’s gather our materials. Luckily, this craft doesn’t require too many supplies, and most of them can be found at your local craft store or maybe even in your own home! If you craft, more than likely, you’ll have everything you need.
SUPPLY LIST:
Here’s what you’ll need:
- A wooden block (any size will do, but a 4×4 inch block is recommended for this project)
- Sandpaper or electric sander
- Chalk Mineral Paint (Midnight Sky) or acrylic paint (in your desired colors)
- Paint brushes (a larger one for the base coat and smaller artist brushes for adding details)
- A pencil
- Scissors
- Post-it notes, cardstock, or thick paper (for creating your template)
- Cotton balls (tail optional)
If you love Easter bunnies, CLICK HERE to learn how to make them from my favorite fabric.
Cut Your Wood Into Square Blocks
It’s time to cut your wood blocks. The wood I’m using is 1 X 3.5 inches. It’s what I had on hand. You could also use 2x4s. 2X4s make great shelf-sitters.
My scrap wood just happened to be already primed and painted. Lucky me!
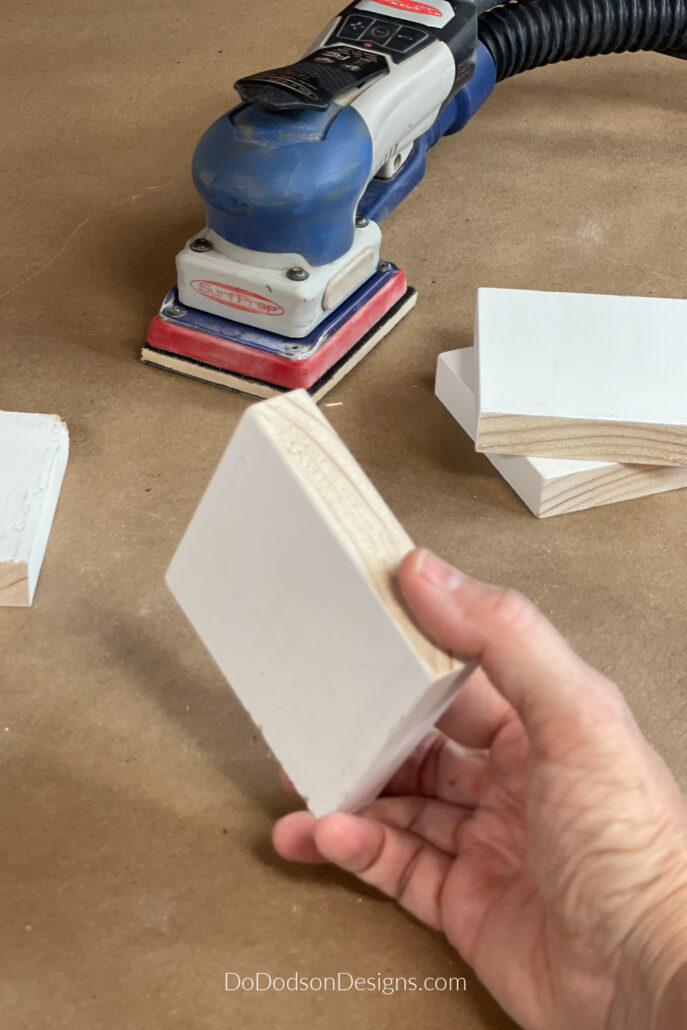
This step is crucial to ensure that your bunny blocks come out looking polished and professional. With a sharp saw, carefully cut the block. Take your time and work slowly to avoid any mistakes. Measure twice and cut once.
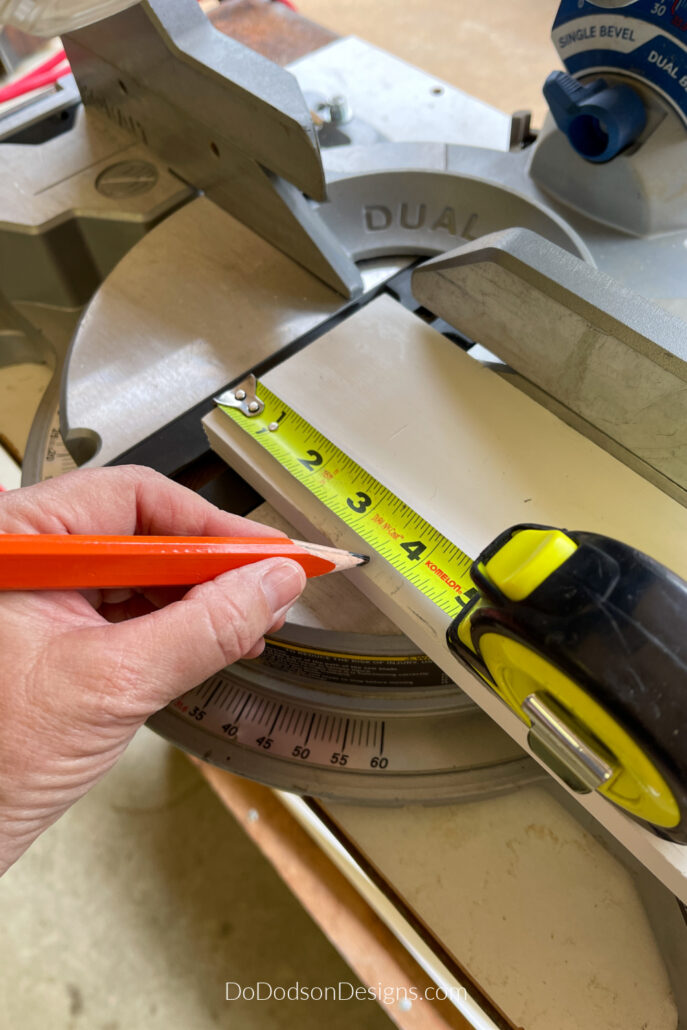
Cut each wood block into a square. A square works best for me, but you can make these any size you want.
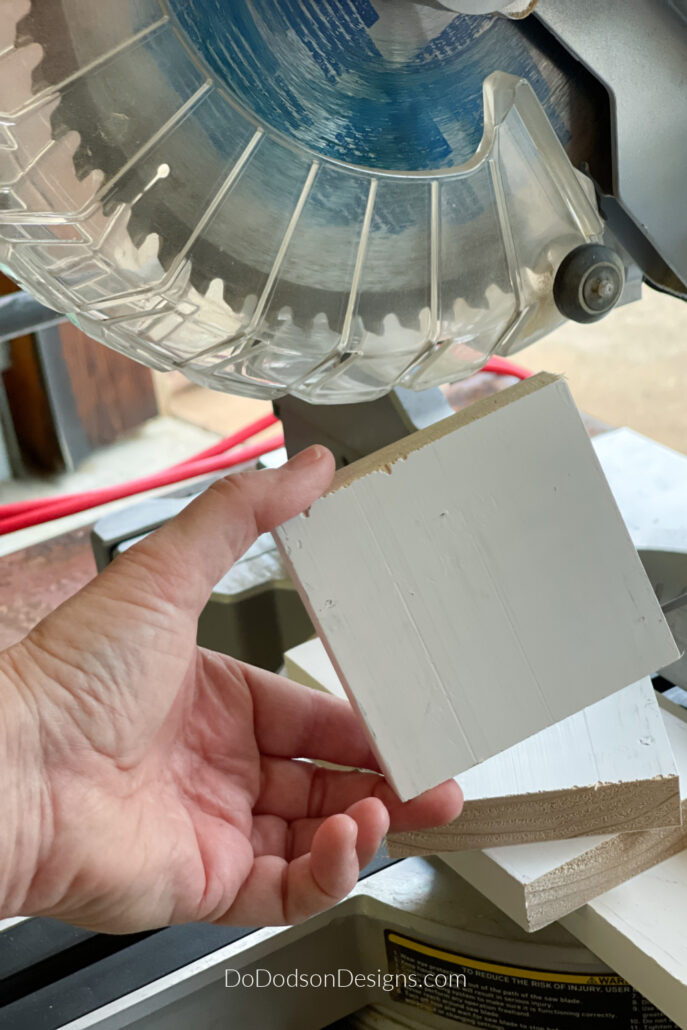
Once you have all of your wood blocks cut, smooth out any rough edges with sandpaper. You want your bunny to be as smooth and flawless as possible.
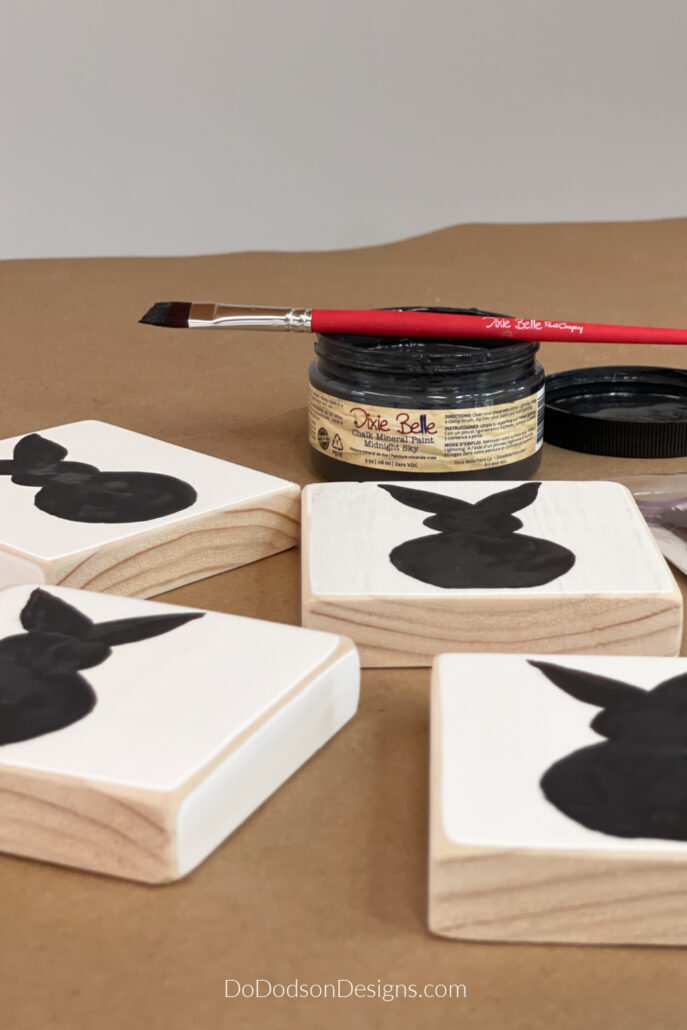
Paint Your Wood Blocks
If you’re using wood scraps and you want your wood blocks white, it’s always a best practice to use a good quality stain and tannin blocker before painting them white. Doing this will ensure that your white paint stays white and that there is no nasty bleeding of the wood tannins. Not a good look on white.
I recommend Cotton if you’re looking for pure white chalk mineral paint.
Create Your Wood Block Bunny Template
To create the template, first, draw the bunny shape on a 3×3 post-it note. Remember to leave room for the ears and tail if you choose to include them.
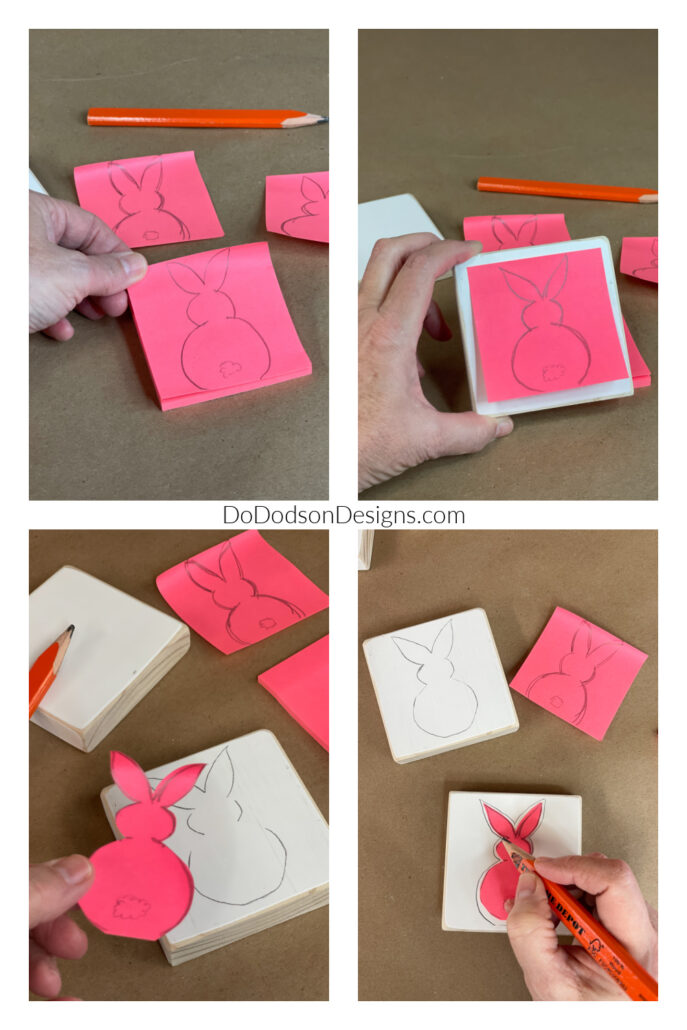
Trust me when I say this was a total desperation move on my part. I couldn’t find any scrap paper, so I grabbed what I found in the junk drawer. Turns out, a post-it note is a perfect size, and it had a sticky backing. Who knew??? SCORE!
If you’re using regular paper instead of the brilliant post-it note idea, I suggest that your piece of paper be the same size as the wood or a bit smaller than you want your bunny to go on. You can either create your own shape or use a stencil. It’s totally up to you.
Once you have drawn out the bunny shape you want, cut it out and trace around it onto your wood block.
With your block ready, you can move on to the fun part – painting your wood block bunny.
Paint and Assemble Your Wood Block Bunny
With your blocks ready, you can move on to the fun part – painting your bunny.
Before you start painting, consider your color palette. This will depend on your personal style and the décor of your home. If you want a classic look, choose white or pastel colors. If you want something bold, opt for bright hues. With your colors selected, paint each block using a small brush. Be sure to paint both the front and back of each block and let them dry completely.
I chose the traditional black and white for my design. Neutral always works well with my farmhouse style.
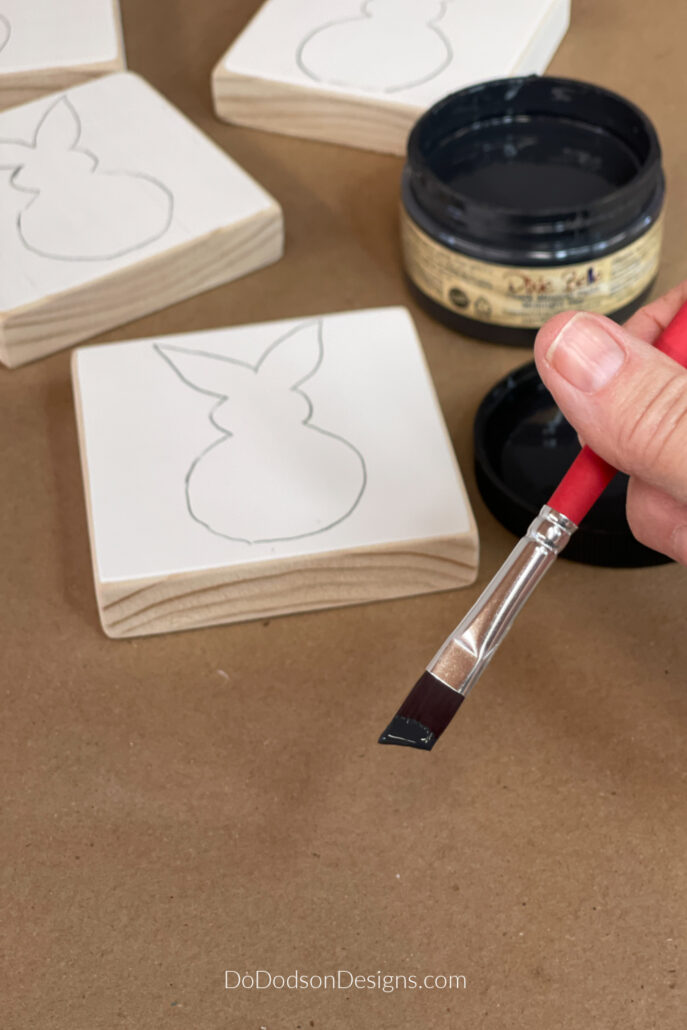
Use an artist brush with a chiseled edge to get around the tight areas and to get a clean edge on your sweet little bunny.
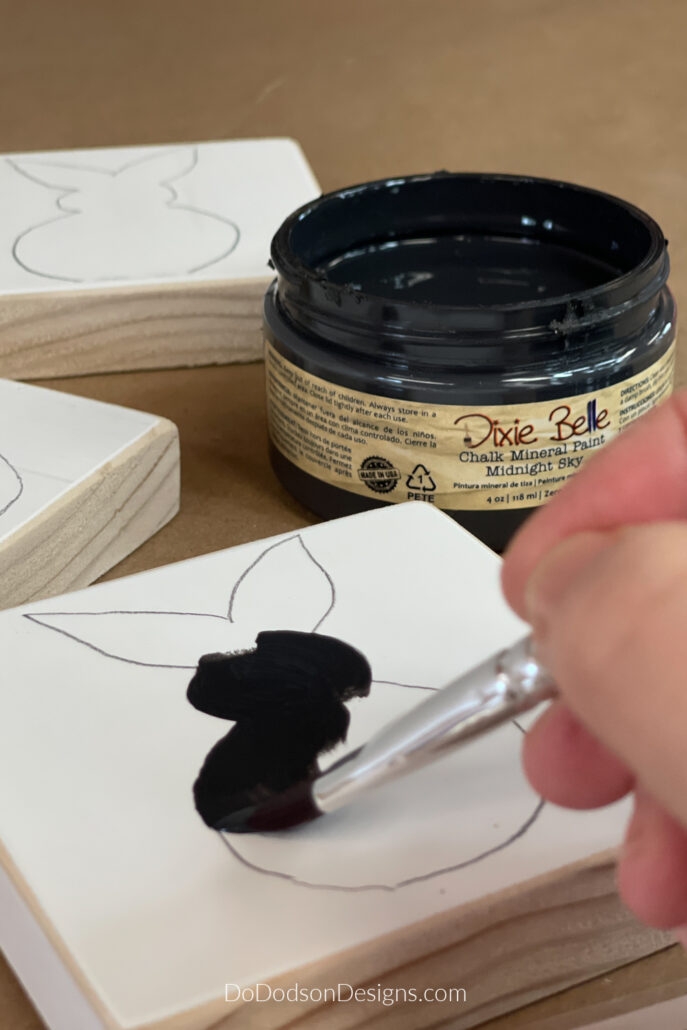
Dixie Belle Artist brushes are a good choice when painting your crafts with chalk mineral paint. I use them all the time.
Add Your Personal Touch
It’s time to add your personal touch. The possibilities are endless. You could add a tail or even personalize it with your loved one’s name. Get creative and have fun with it.
In the next section, we will explore different ways to incorporate your DIY masterpiece into your décor.
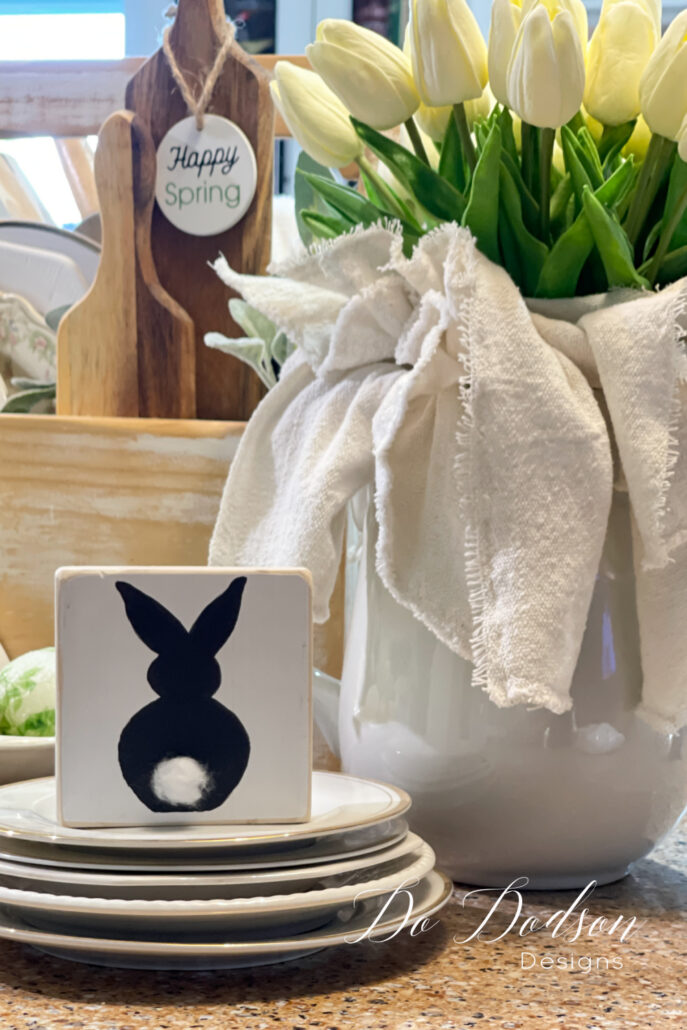
Display Your Finished Wood Block Bunny
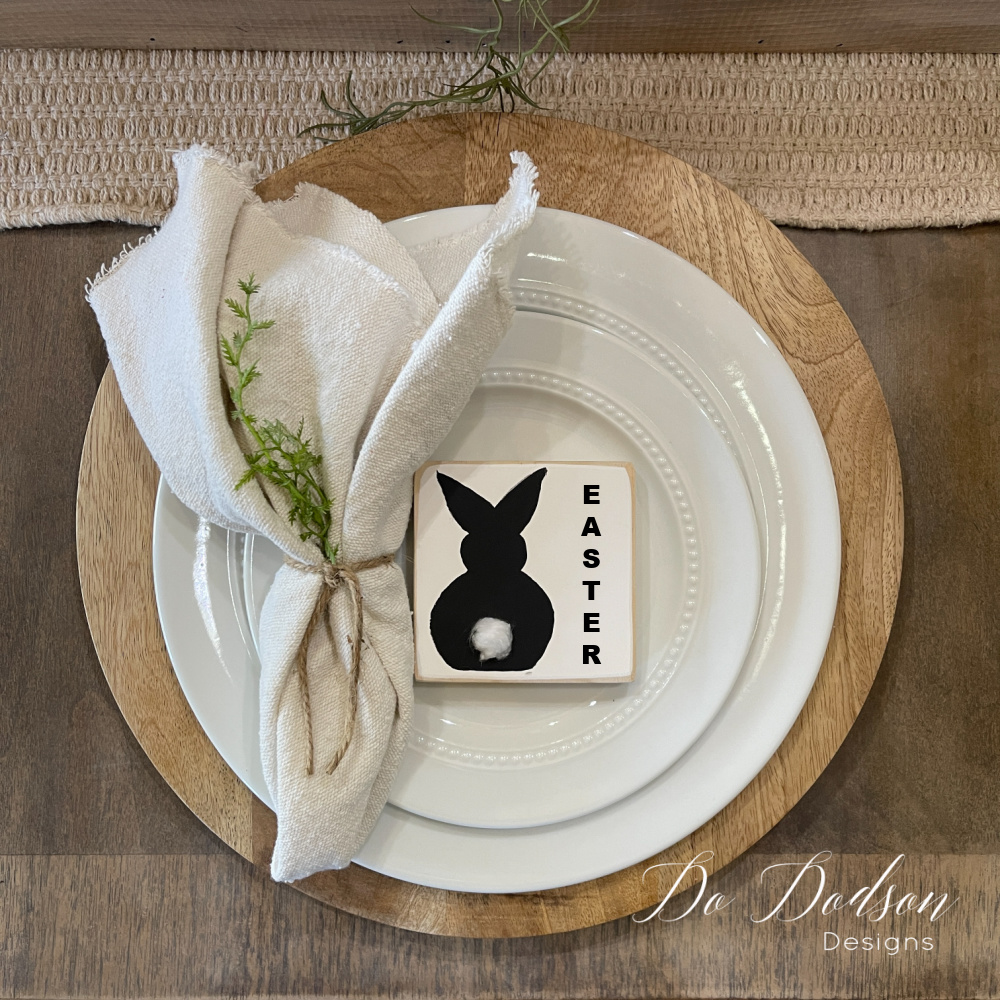
Now that your bunny is complete, it’s ready to be displayed in your home. There are various ways to showcase your DIY wood block bunny in your décor. One option is to use it as part of a bookshelf display. Place it among your favorite books, and it will add a whimsical element to the space.
Another idea is to incorporate it into a centerpiece. Place it in a basket with fresh flowers, and it will make a charming addition to your table.
Or use them to decorate your place settings at Easter Dinner and let your guest take them home as a gift. A thoughtful gift that will have your guests wowed by your creativity.
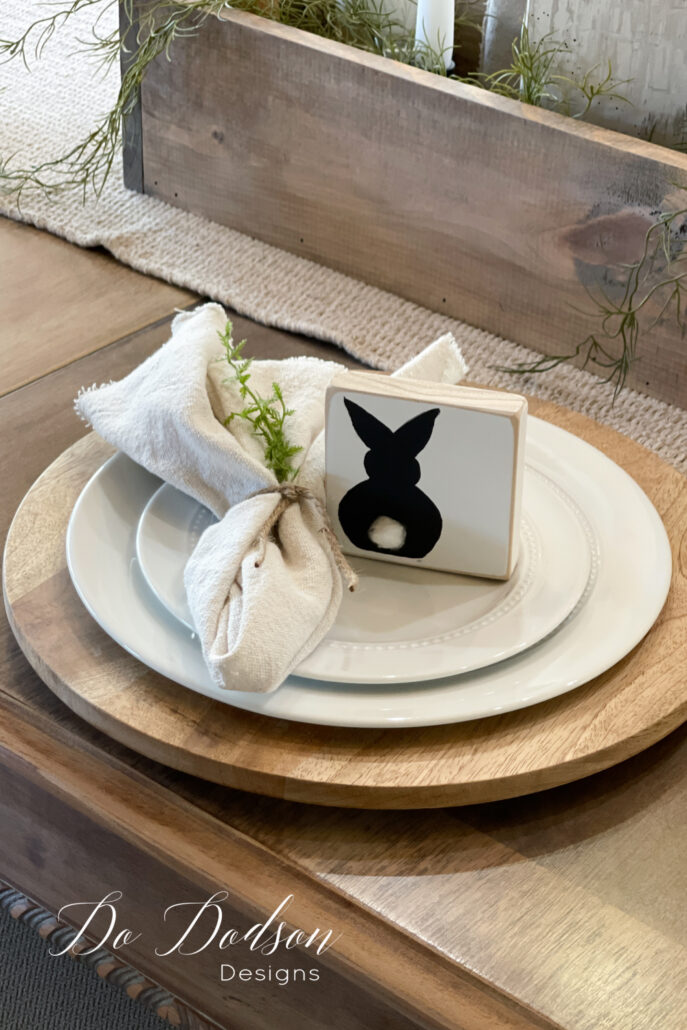
No matter how you choose to display your wood block bunny, it’s sure to be a conversation piece in your home. I know you can’t wait to find the perfect spot to show off your finished creation.
Creating your own wood block bunny is a simple and enjoyable Easter craft that can add a unique touch to your decor. By following my easy-to-follow guide, you can personalize your bunny to match your individual taste and create a charming rustic look without breaking the bank.
As you display your finished product, know that you have created a piece that is special to you and your home. So, why not give it a try and hop into the spirit of Easter this season? As Thomas Edison once said, “The best way to predict the future is to invent it.”
I hope you enjoyed today’s hippity-hoppity craft. Oh, and don’t forget to PIN this crafty idea. I think these bunnies could be used for Spring and Summer decor. What do you think? Let me know in the comment section, or just say hi so that I know you were here. I’d love to hear from you.
Happy Easter!
Until the next project… xo, Do

Do, such a cute idea for a sweet display! Simple and pretty.
Pretty simple, like me. Happy Easter, my friend. 🙂 xo
So cute! Love your inspiration!
Aren’t they sweet? I could make these all day long. Happy Easter, my friend. 🙂 xo
Such a great idea. I love it. Super cute.
Thank you, Renea! Happy Easter. 🙂 xo
Do, this is such an easy and darling project for Easter. You really show how easy it is to use paint to make great projects.
Thanks, Tammy!
It’s important to me that my projects and crafts can be replicated or inspire others to DIY. It was a quick and easy way to add to my Easter decor. Happy Easter, my friend!
xo, DO 🙂
I have collected bunnies for years. I just love this little guy. I am inspired…now to find that piece of 2 x 4 I know I have around here somewhere…
Hi Sherry,
Have fun creating bunnies. 🙂 xo
I absolutely love ur projects Do…and as u I love DB chalk paint. I have tried others but I’m partial to DB…thank u so much for sharing ur projects with us!! I have learned so many different techniques with ur tutorials!!
Hey 👋 Donna! I’m so glad you’re enjoying them. It’s fun creating and even better when you get feedback. I appreciate you. Have a fantastic week.
xo, Do 😘