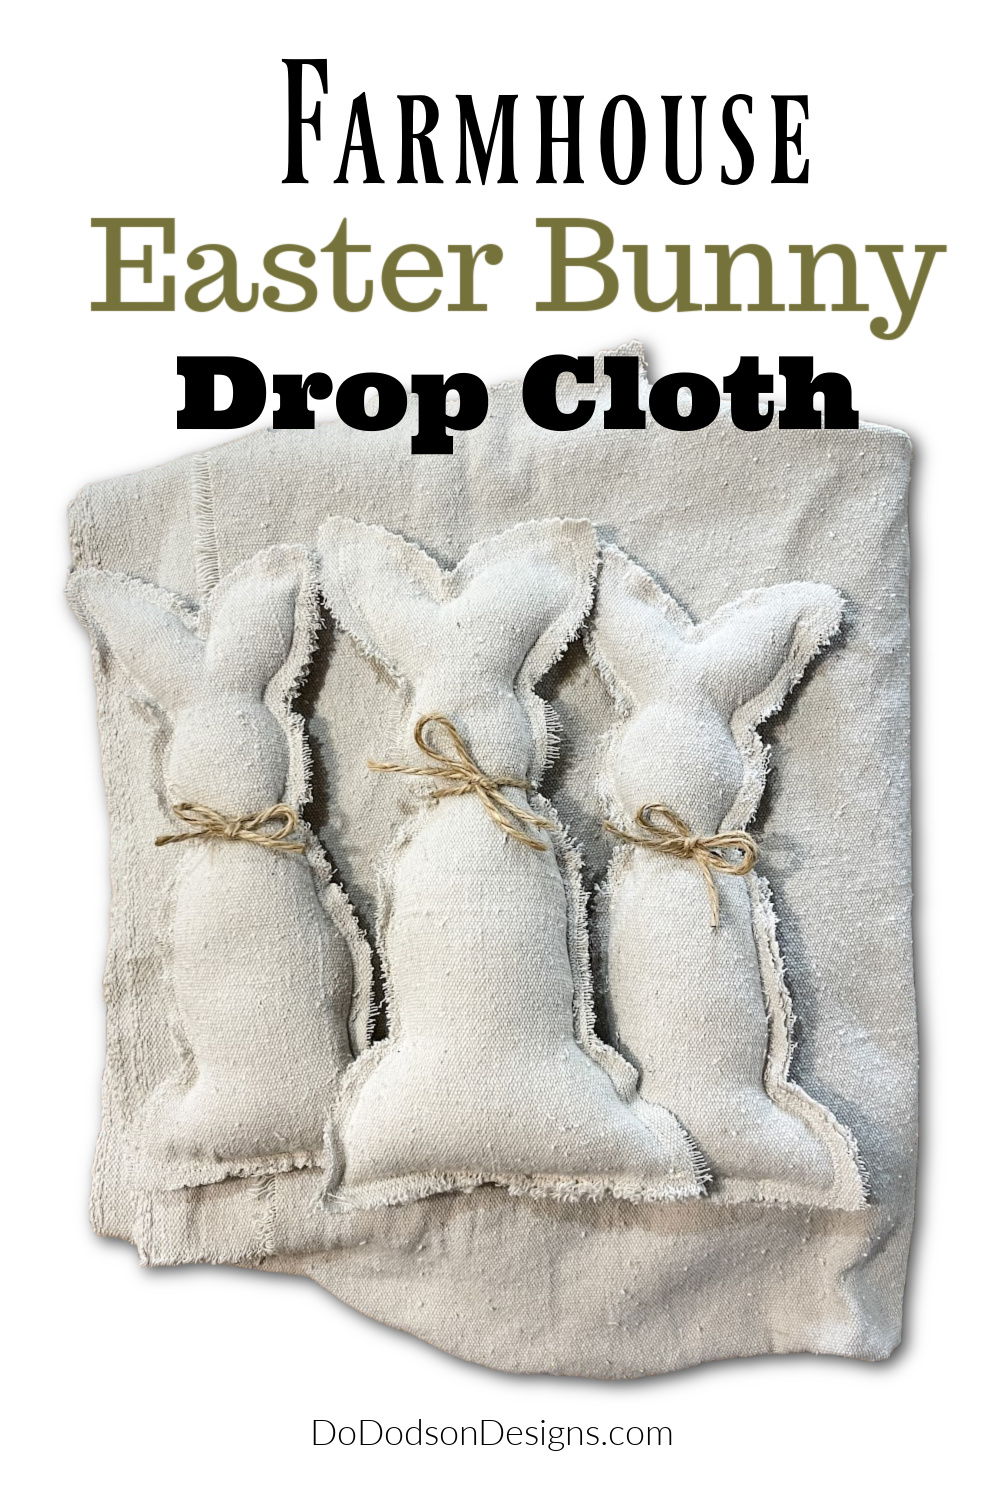
Welcome, triple-D friends! Today I’m making the cutest and easiest DIY drop cloth Easter bunny from scrap fabric. I used a drop cloth for my farmhouse bunnies, but you can use different fabrics. But I’m warning you. If you make one, you’re making more.
* As an Amazon Associate, I earn from qualifying purchases and through other companies as well. You will not be charged extra when you purchase through these affiliate links, but any income I make helps me create more amazing DIY projects to share with you! To see my full disclaimer, click here!
Easy Craft Decor For Easter
When I decided to look for a cute Easter craft idea to use up some of my fabric scraps (because I have issues throwing things away), I found this idea on Pinterest, of course.
I was thinking they would look cute in the Grandkid’s Easter baskets, but that was until I made my first one. I was totally hooked and began cutting one, two, three, and four before I stopped.
These are mine now. I guess I’ll have to make more. Darn it. LOL
I’d like to use an old quilt that I salvaged from my Mom too. Those would make adorable farmhouse bunnies.
If you love drop cloth projects, here are a few of my favorite DIYs.
SUPPLY LIST:
Here is what you’ll need to make a drop cloth Easter bunny.
- drop cloth or fabric of your choice
- sewing machine or needle and thread
- pinking shears
- Poly-Fil stuffing
- bunny pattern (I made my own)
- jute twine or ribbon
- cotton balls or a pom pom
- hot glue gun
Simple Drop Cloth Easter Bunny Tutorial
Easy To Follow Instructions
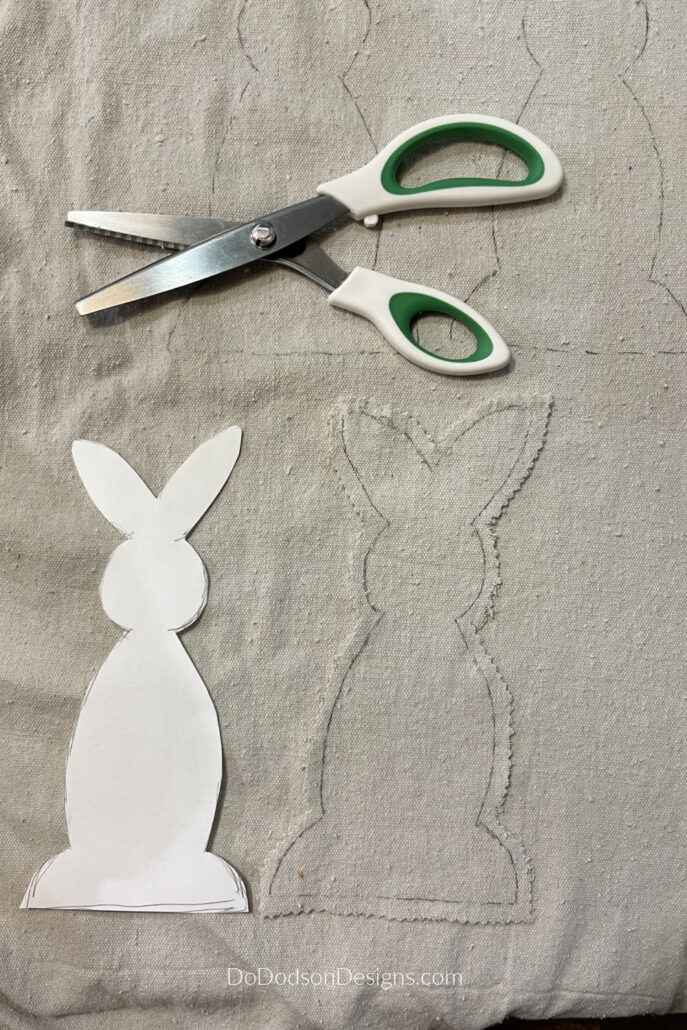
STEP 1: I made this simple bunny template out of paper. I grabbed a sheet from the junk drawer and went to scribbling. After a couple of attempts, I was happy with how it looked.
STEP 2: Lay the bunny shape paper figure on top of your fabric and trace around the bunny with a marker or sharpie. I was a bit worried that I made the bunny a bit on the small size, so when I traced the outline, I made it larger. I was winging it.
Cutting The Fabric
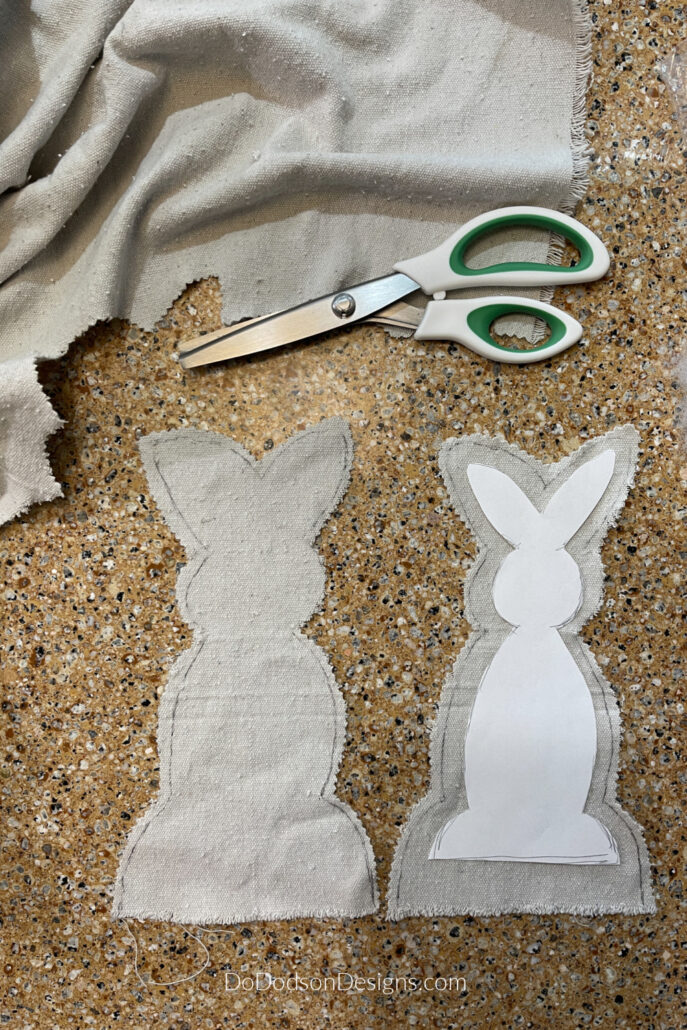
STEP 3: Using my pinking shears, I carefully cut around the bunny and left a seam allowance of about 1/4 inch. The pinking shear will make a zigzag cut that keeps the fabric from fraying. It will have a bit of fraying, but it actually adds such a softness to the material. Especially drop cloth. You will need two pieces for each bunny. Add one bunny on top of the other (double layer of fabric) with the finished side of the fabric facing outward. We won’t be turning these inside out. This is so easy!
Pull away loose strands from the edges and cut any extra long frayed edges to make the cutouts look uniform.
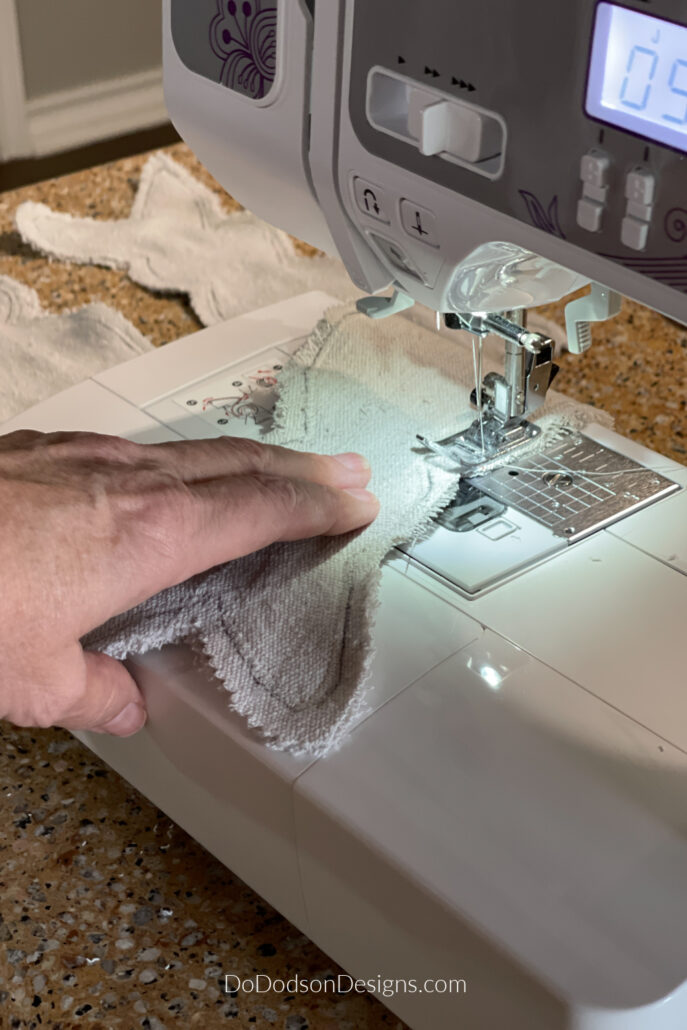
STEP 4: Set your sewing machine to a zigzag stitch. I like to make a test stitch on a scrap piece of fabric before actually sewing a new project to make sure I have the right setting.
Take your two pieces and sew around the bunny but leave the bottom open for stuffing. You can use straight pins to secure the two pieces together before sewing, but I found it was more work than it was worth.
If you don’t have a sewing machine, no worries. You can use a needle and thread and do a simple stitch. It will work too.
Stuffing The Little Cuties
STEP 5: Now, stuff the drop cloth bunny with poly fil. You can use a pencil or a blunt-ended object to push the stuffing all the way up into the ears and throughout the body.
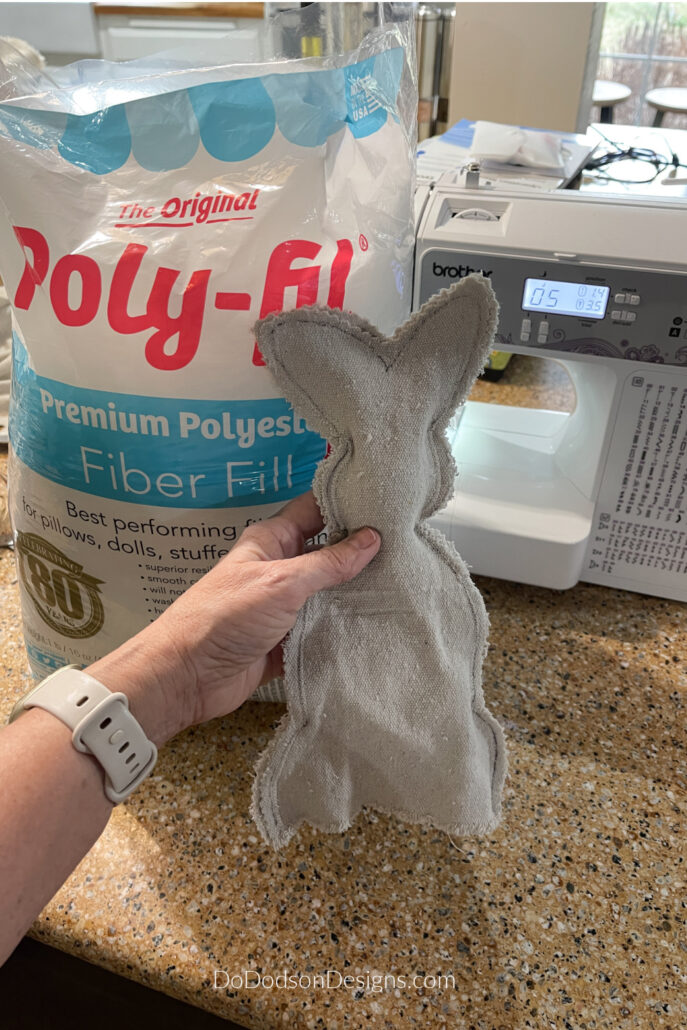
Don’t overstuff your bunnies unless you want extra fluffy ones. I like mine a bit on the thinner side. It makes it easy to stuff them into Easter baskets or in home decor displays.

STEP 6: After you have your Easter bunny filled, go back to the sewing machine and sew the bottom of the bunny closed.
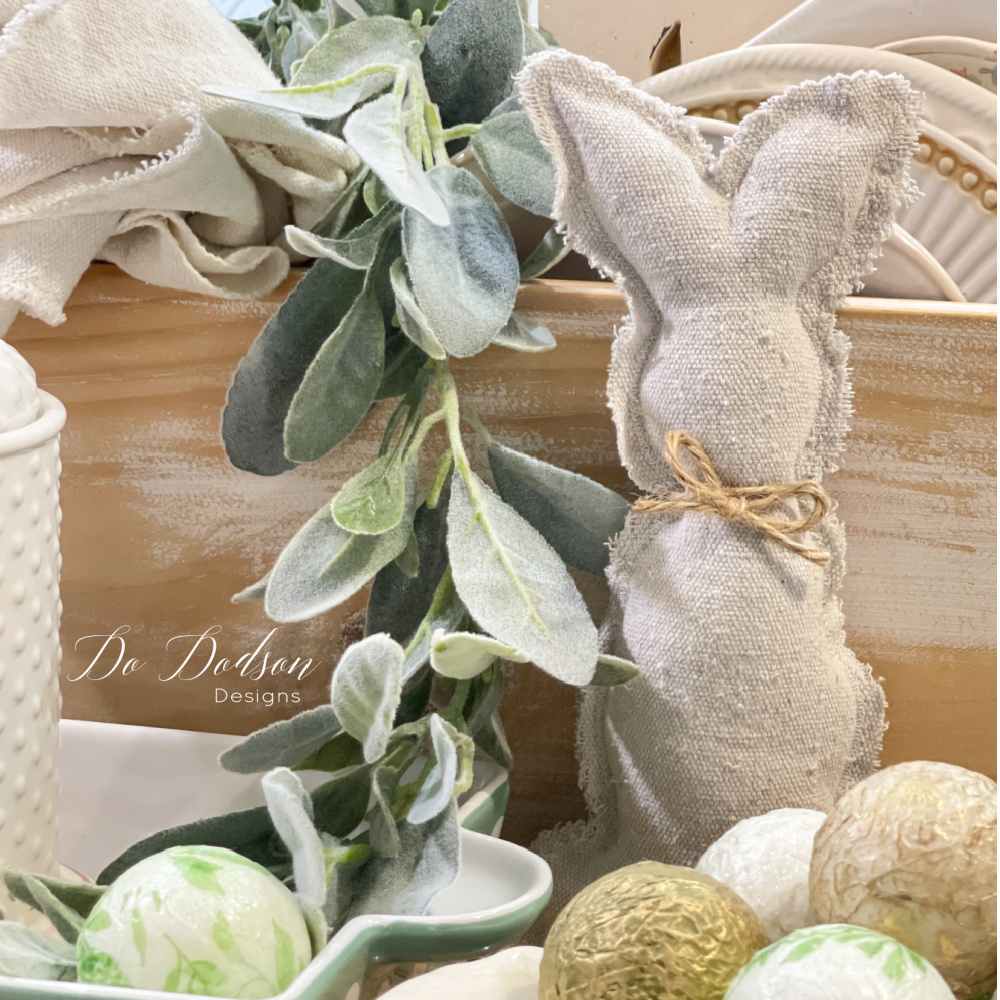
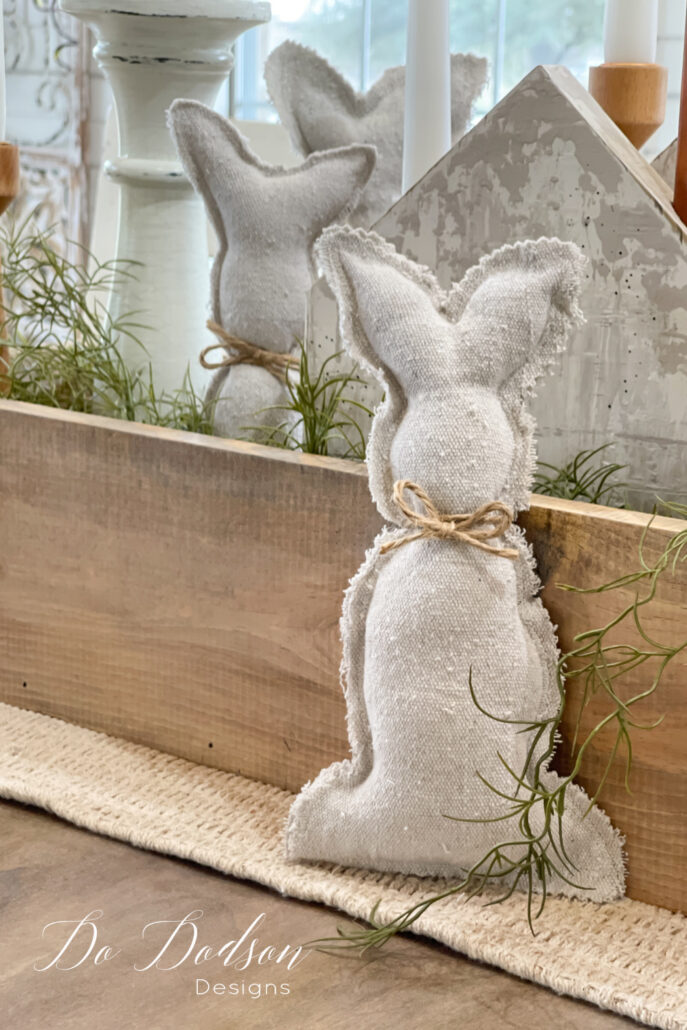
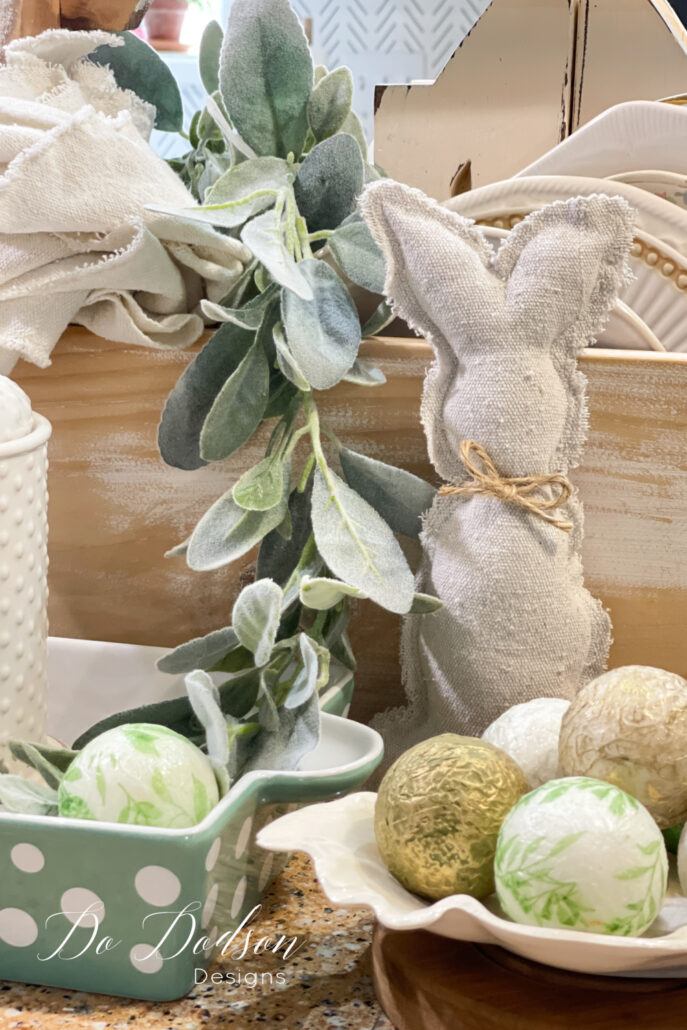
I totally got so excited that I missed adding cotton balls for the fluffy tails. I’m adding those now. Secure the tails with a dab of hot glue. I tied a piece of twine around my bunnies’ necks for a farmhouse look.
You might prefer the look of a piece of ribbon tied in a cute bow too.
Are these little guys adorable, or what?! Just add Easter eggs! They’re the perfect complement to your Spring decor.

I hope you enjoyed this DIY tutorial on how to create a cute drop cloth Easter bunny. Now that you know how easy it is, I want to hear all about the bunnies you plan on making for your Spring display in your home.
Or just say hello so that I know you stopped by. I love hearing from my fellow DIYers.
Happy Easter!
Until the next project… xo, Do
They are the cutest little bunnies ever Do! I’m sure your grands will love them! Pinned 🙂
Hey Cindy! They are the sweetest! Time to sew more. Happy Easter, friend. 🙂 xo
Oh Do, this was BRILLIANT! And great for a beginner sewer! TYTYTY
I needed a party favor for my Easter Brunch and now I can make a bunch of these and use in the center piece and when guests go to leave I can give them each a perfect bunny. What a great baby gift, too! Huge Thank YOU!
Happy Easter
Ohhhhhhhh Susan, what a great idea. I know your guest will love to take home a keepsake. Have fun at your brunch. Happy Easter! 🙂 xo
These are stink’n adorable Do! I looove sewing (not really great at it tho… lol) and wish I had more time to do it! You’ve inspired me! 🐰🤗
Hey Denise, the good thing about this project is that it’s quick and easy and doesn’t take much time. You should try it. 🙂 xo
Cute as a button!!
Thanks, Leslie! They are cute. Thanks for reading. 🙂 xo
So cute!! May I pls ask a side question, Ive wanted to buy a sewing machine for the longest time! But there are so many options! Is there one you recommend? Ty so much in advance!! Many blessings to you and yours!
Hi Lily! Thank you! I really like my Brother. There’s a link to what I have under the products list in this post. It was worth the money and fairly easy to use. 🙂 xo
So hoppin’ cute! I totally see how they can become addictive.
Thanks for reading, Diane! Have a great rest of the week. 🙂 xo
Your Bunnies are very cute I am going to make several. Thank you
Hi Lori, I’m so glad you enjoyed this fun tutorial. Let me know how your bunnies turn out. 🙂 xo