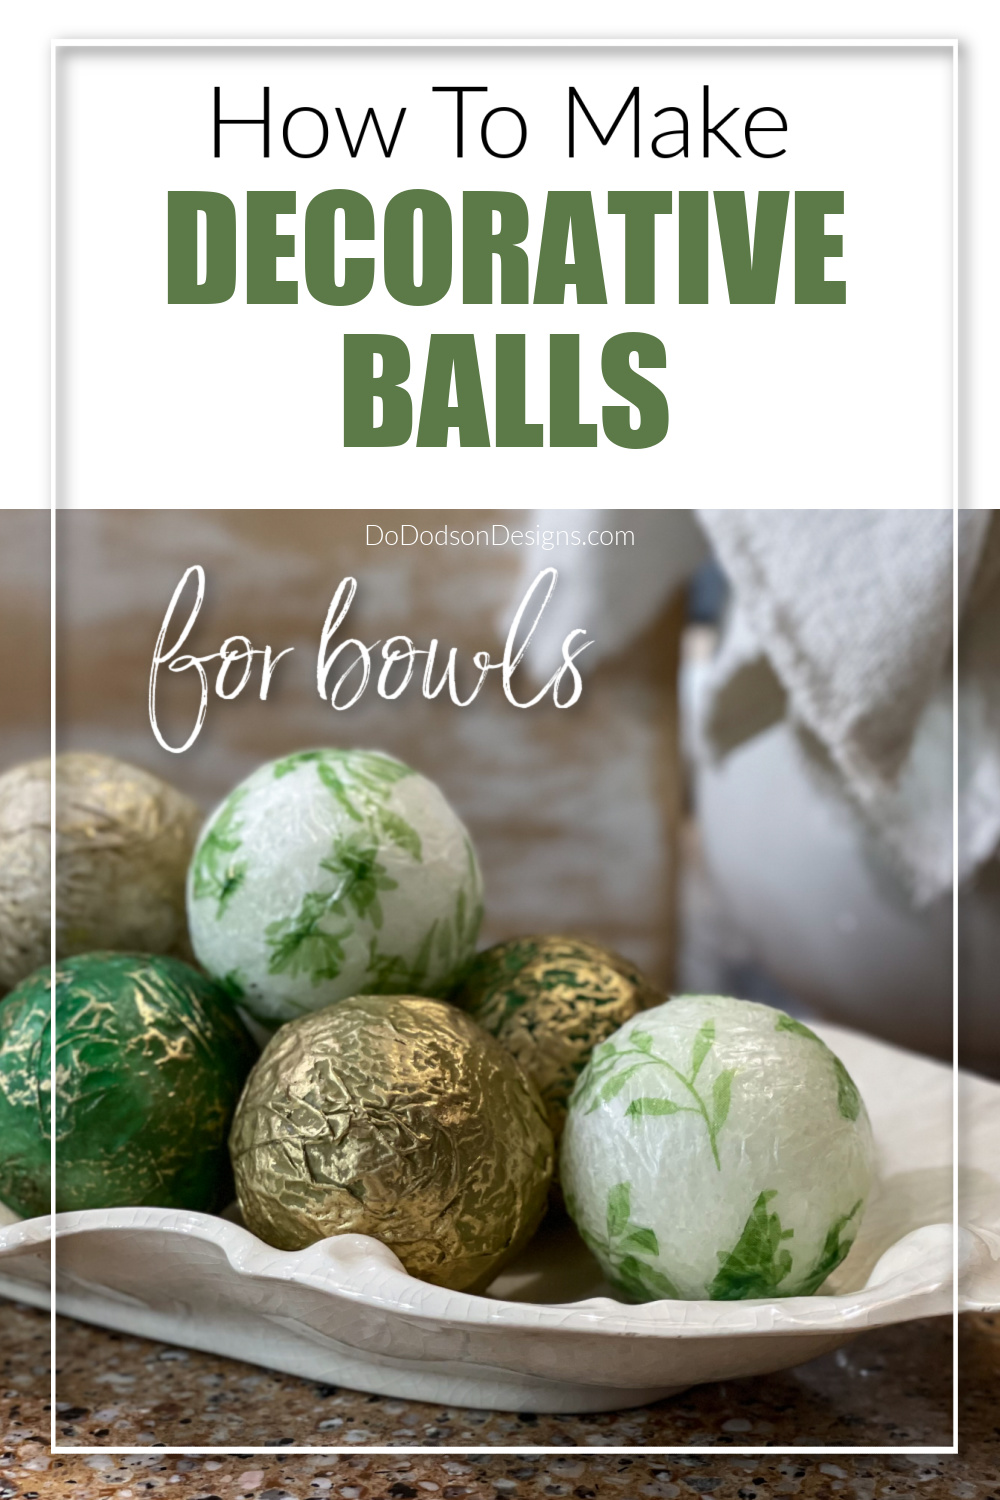
Hey triple-D friends! Today I’m sharing how to make decorative balls to add to your home decor that is fun, easy, and cheap. Personalizing your own balls can be so much fun, and you can see how they would work in some unexpected places in your home.
Thanks to Dixie Belle Paint Co for sponsoring this post. While I was compensated to write this post, all opinions are my own.
* As an Amazon Associate, I earn from qualifying purchases and through other companies as well. You will not be charged extra when you purchase through these affiliate links, but any income I make helps me create more amazing DIY projects to share with you! To see my full disclaimer, click here!
How To Decide Colors, Types, And Different Sizes
I’ve always loved the look of decorative balls used in home decor and decided it was about high time that I took a stab at making them. Plus, it’s a great project for those like me that love to DIY everything. Well, almost everything.
Before you get started creating, you’ll want to consider color. I suggest looking around your home at the colors that you currently use in your home. Are you a neutral lover or fancy bright and bold colors? What about prints? I recommend choosing colors you can use in multiple ways around your home.
What about the type of decor ball? You can use everything from fabric, jute, moss, beads, tissue paper, napkins, glitter, and buttons, to mention a few. The ideas are limitless.
And then you’ll need to decide what size of ball you would like to use. I like using styrofoam balls for my projects because they come in many sizes and are lightweight.
Consider this. Are you going to use them as bowl fillers? What about used as a vase filler? They can also look great when used as beautiful centerpieces. How about nestled into a basket with other items? You can see how you can let your imagination go when decorating with these decorative balls. Just a few things to think about before you purchase your supplies.
STEP 1: Gather Your Supplies
I chose to use small styrofoam balls with tissue paper. You can find these items at your local Dollar Tree (the most budget-friendly) craft supply store or Hobby Lobby. I used my kitchen counter as my work surface.
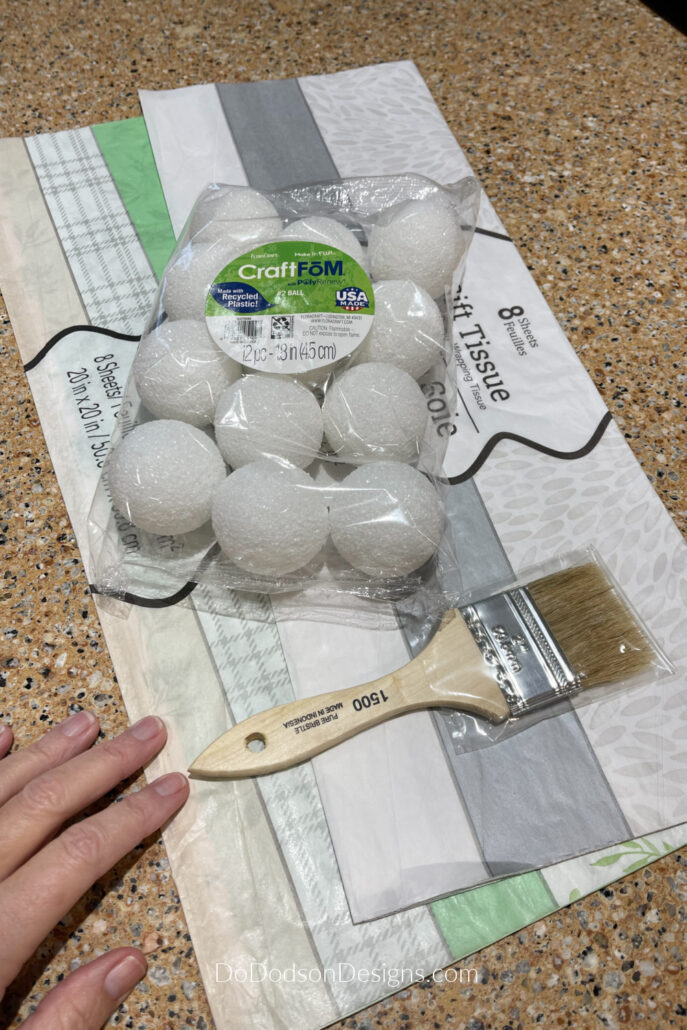

Supply List: Here’s what you’ll need to recreate this DIY home decor project.
- basic styrofoam ball (comes in multiple sizes)
- Gator Hide Top Coat or white glue (mod podge)
- decorative tissue paper
- small artist paint brush
- gold gilding wax
* For this kind of decoupage project, I usually use glue or mod podge, but I was lazy and decided to try what I had on hand, and I’m so glad I did. Who would have thought that a top coat would work??? SHOCKER! Don’t be afraid to experiment!
STEP 2: Apply Glue or…
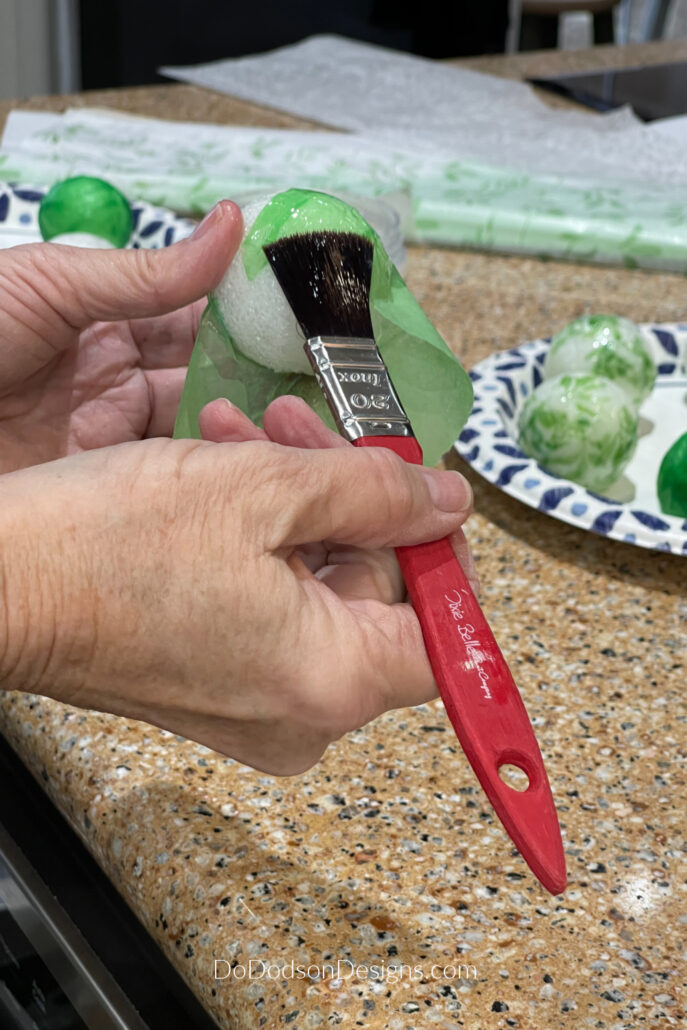
Apply the Dixie Belle Gator Hide Top Coat (or glue of your choice) to the styrofoam ball with a small paint brush. Because styrofoam has many tiny holes, you’ll need to apply a good amount. Let the glue soak in.
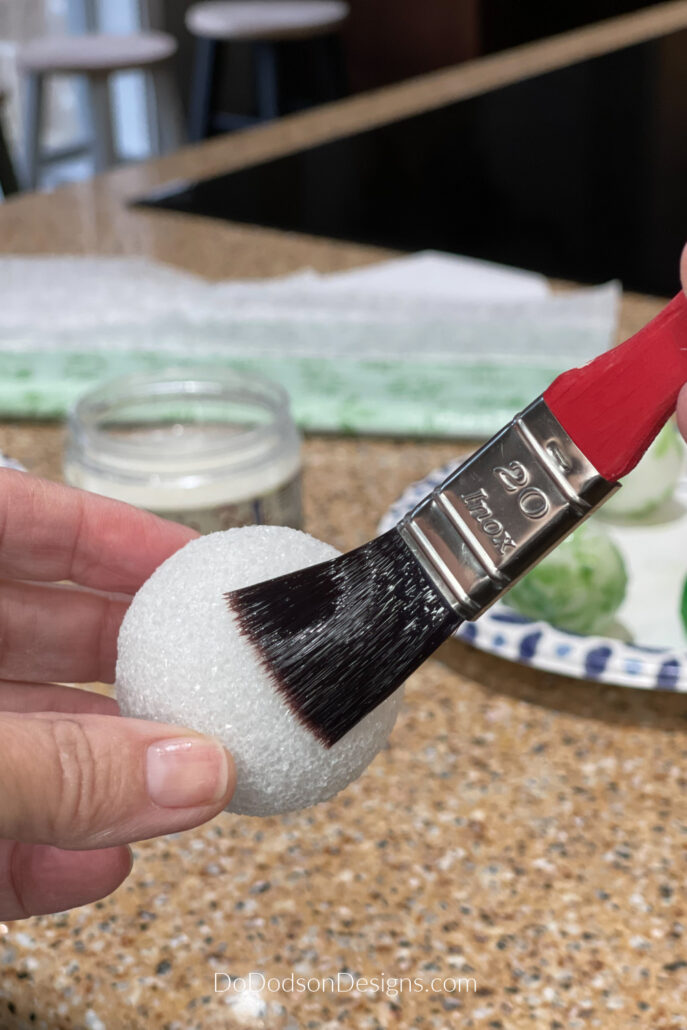
I know by now you’re thinking she must be out of her ever-loving mind to be using a topcoat as glue. Stay with me on this, and I’ll explain why it works with tissue paper.
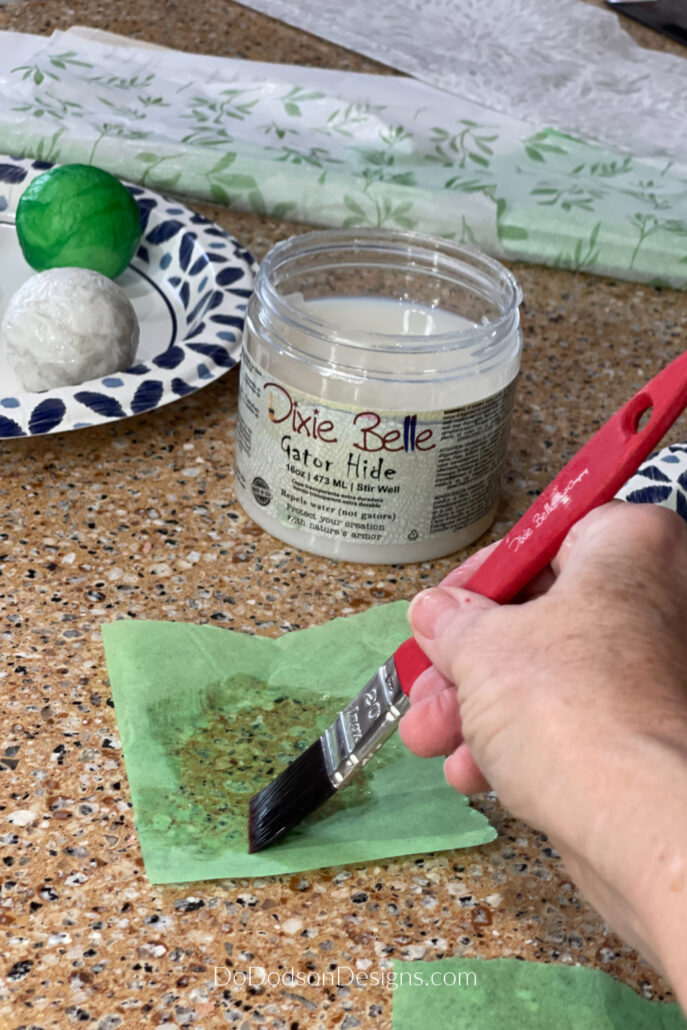
STEP 3: Apply Tissue Paper
Next, tear off some decorative tissue paper. Smaller pieces work best. Apply a thin amount of glue to the tissue paper and press the wet tissue paper onto the ball with the same paint brush used to apply the gluing material. The tissue paper literally melts onto the ball.
Continue to apply the tissue paper, overlapping until the ball is fully covered. Overlapping the tissue paper will create texture and is very pretty once dried.
The balls will be wet much longer than if you had used mod podge, but they will dry overnight. I sped up the process by using my hair drier to dry them enough that they didn’t stick to the paper plates, and then placed them in a warm, dry area to cure overnight.
The next day I was pleasantly surprised at how beautiful they were and how hard the tissue finish had become. As it was drying, the tissue paper buckled up a bit on the surface as it dried and made a beautiful textured finish. I seriously can’t make this up.
When I started this project, I doubted the Gator Hide would work, but I pushed on anyway. Stranger things have happened, right? So, if you have Gator Hide on hand, don’t be afraid to try it.
STEP 4: Embellish Decorative Balls
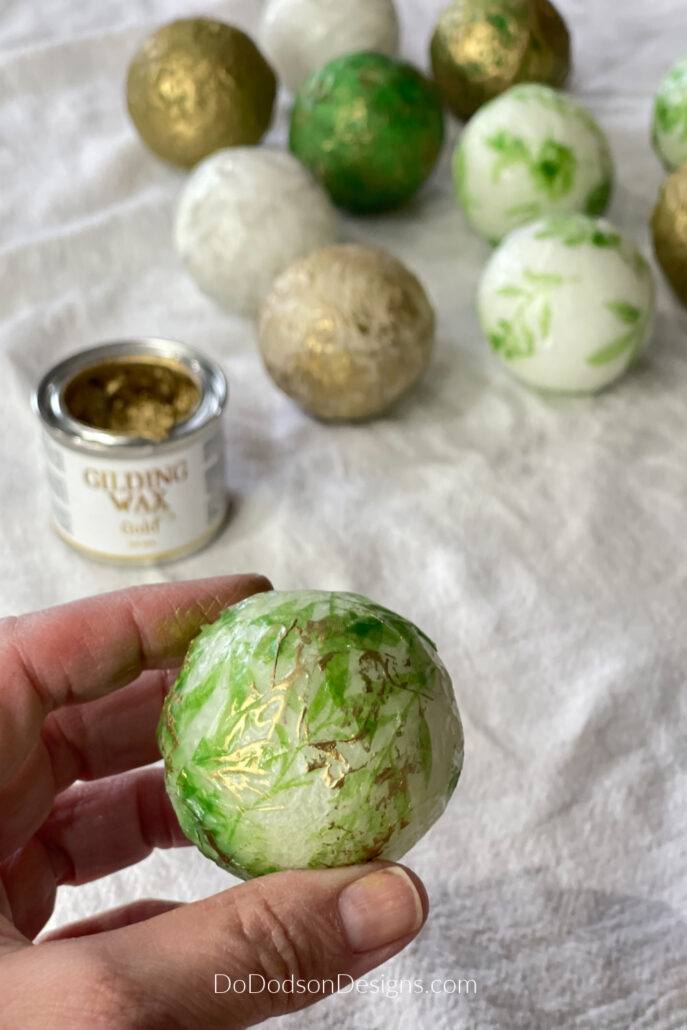
The decorative balls were beautiful as is, but I wanted to give them a little extra something. So I headed to my furniture painting cabinet to find something, and there it was. GOLD gilding wax!
This gilding wax is super easy to apply. It’s soft and spreadable; my favorite application tools are my fingertips. Use as much or as little as you like. After applying, use a soft cotton cloth to buff but if you want it to stay the way you applied it, skip the buffing step and let it dry.
At first glance, mine resembled tiny cabbages or brussel sprouts. LOL, I think the gold made a huge difference.
Pinterest Worthy Decorative Balls
I’m seriously proud of this project. Unconventional approach? Yes, but it worked, and I used what I had to find that it’s a great option when you want a hard, durable finish on your fancy decorative balls.
I have no worries when the Grands get a little frisky and use them as throw toys for the dogs. In my house, I know that will happen at some point!
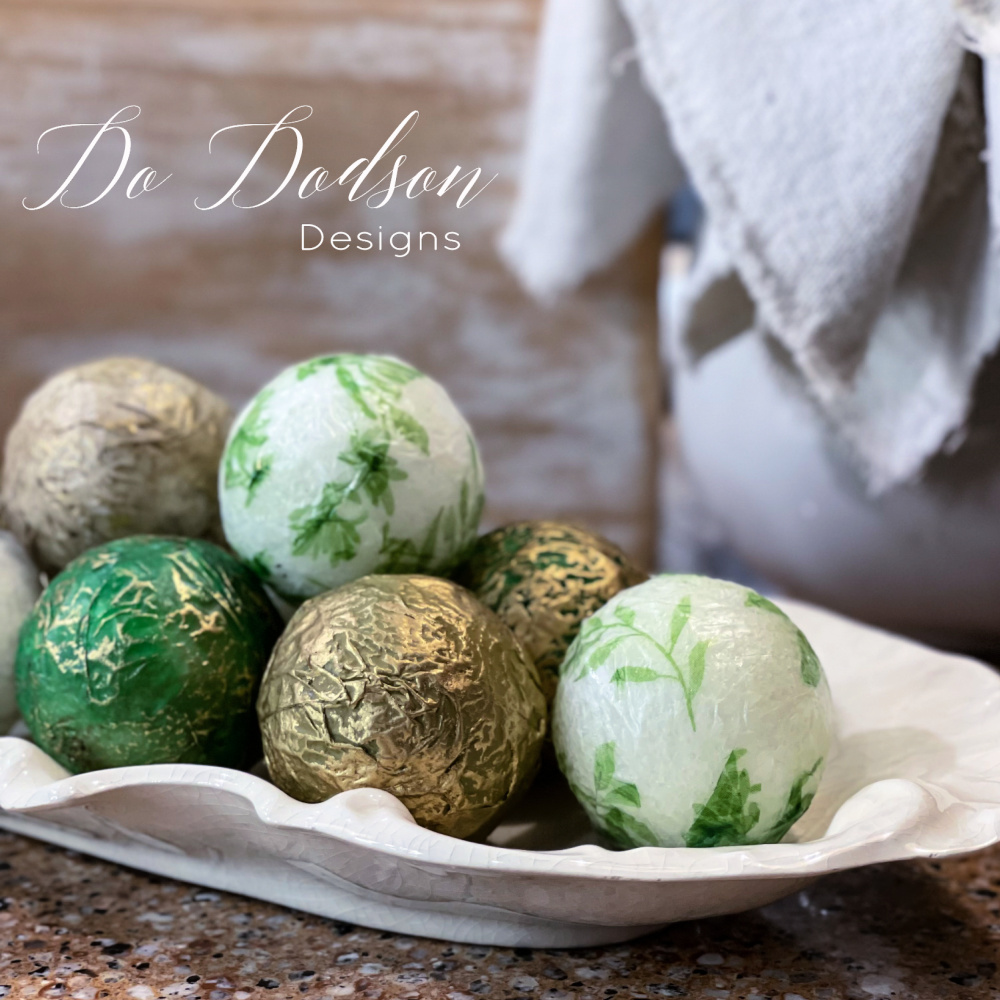
Learning how to make these decorative balls can open up new decorating ideas. Pop these beautiful balls in baskets, bowls, vases, or on the mantel and pair them with your other decor.
And let’s not forget they can be used for the holidays (Valentine’s Day, Easter, Christmas, or even special events like a baby shower or Birthday. What woman wouldn’t want these as a gift? My mind is working overtime now. LOL, the creative brain never rests. Am I right?

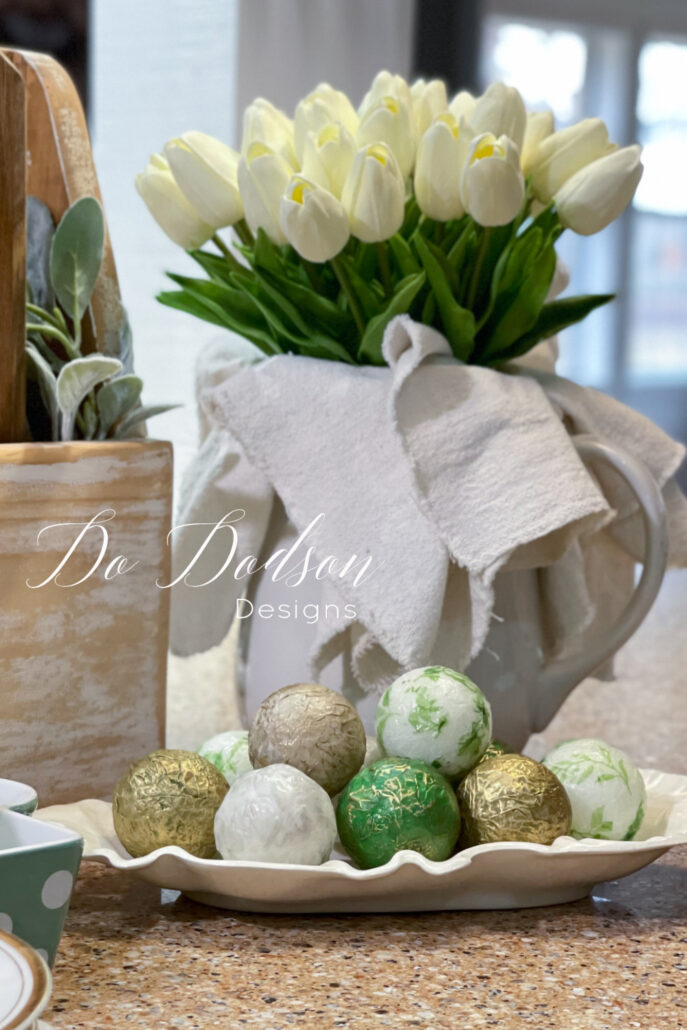
I’ll be using mine in a vintage china bowl for my Spring decor. Come on, Spring! I’m ready for you! After that, I can see using these for Summer, Fall, and Christmas.
Hey, thanks for joining me today, and I hope you enjoyed my how-to make decorative balls with tissue paper. Let me know what you think about using a top coat that is meant for furniture. I can take it! LOL, or just say hi so I know you stopped by.
Until the next project… xo, Do
DO, you have great balls!! 🤣 Such a cool and fun project. There are so many pretty tissue papers out there and this is a great way to use them. xo
LOL, maybe we should call them orbs. 🙂
Your decorative balls look amazing Do! You never know they were made from styrofoam! 😃
Not bad, huh? I think I’ll try making different sizes. Have a great week. 🙂 xo
Oh, they are gorgeous! In love with these!
Thank you, Leslie! I’ve always loved the look but not the price. Win, win! Have a great week. 🙂 xo
Hi Do! I love these and I love to decopauge. You are right about the creative brain. It never turns off. ❤️
Hey Cheryl! It’s always so good to see your familiar name (face). I feel like we’re old friends. Virtual creative buddies. 🙂 Have a beautiful week, friend. xo
Do, you have the prettiest balls around! They turned out stunning. I would have not thought to use Gator Hide on them. It is so much fun to experiment with the Dixie Belle products.
He he 🙂 I may have to start referring to them as orbs. Have a great rest, my friend. 🙂 xo
Love these, cannot wait to try them. Thank you for sharing all of your great ideas!
Hi Sharon! I love these little quick projects. So satisfying to get quick results. Have a great week. 🙂 xo
Love these ‘orbs’ Do!! Can you tell I read the comments 😉 They are so creative! Pinned 🙂
Orbs it is, my friend. 😂