Hello creative friends! I have to admit that when I discovered these unusual little figures, they were a bit creepy for my taste. Especially the garden variety. That was until I saw them being used as Farmhouse Christmas Decor. Game on! You know how I love my wood projects, so here is my spin on a DIY wood block gnome. I think you’ll agree this one is a lot cuter and not so scary. And I took some time to create a video tutorial of the process for you because I’m sweet that way. 🙂
WATCH THE VIDEO TUTORIAL HERE
This post contains a few affiliate links to help you find the products I use. You are not charged extra to use any of the links, but any income I make will be used for more amazing DIY projects to share with you! To see my full disclaimer, click here!
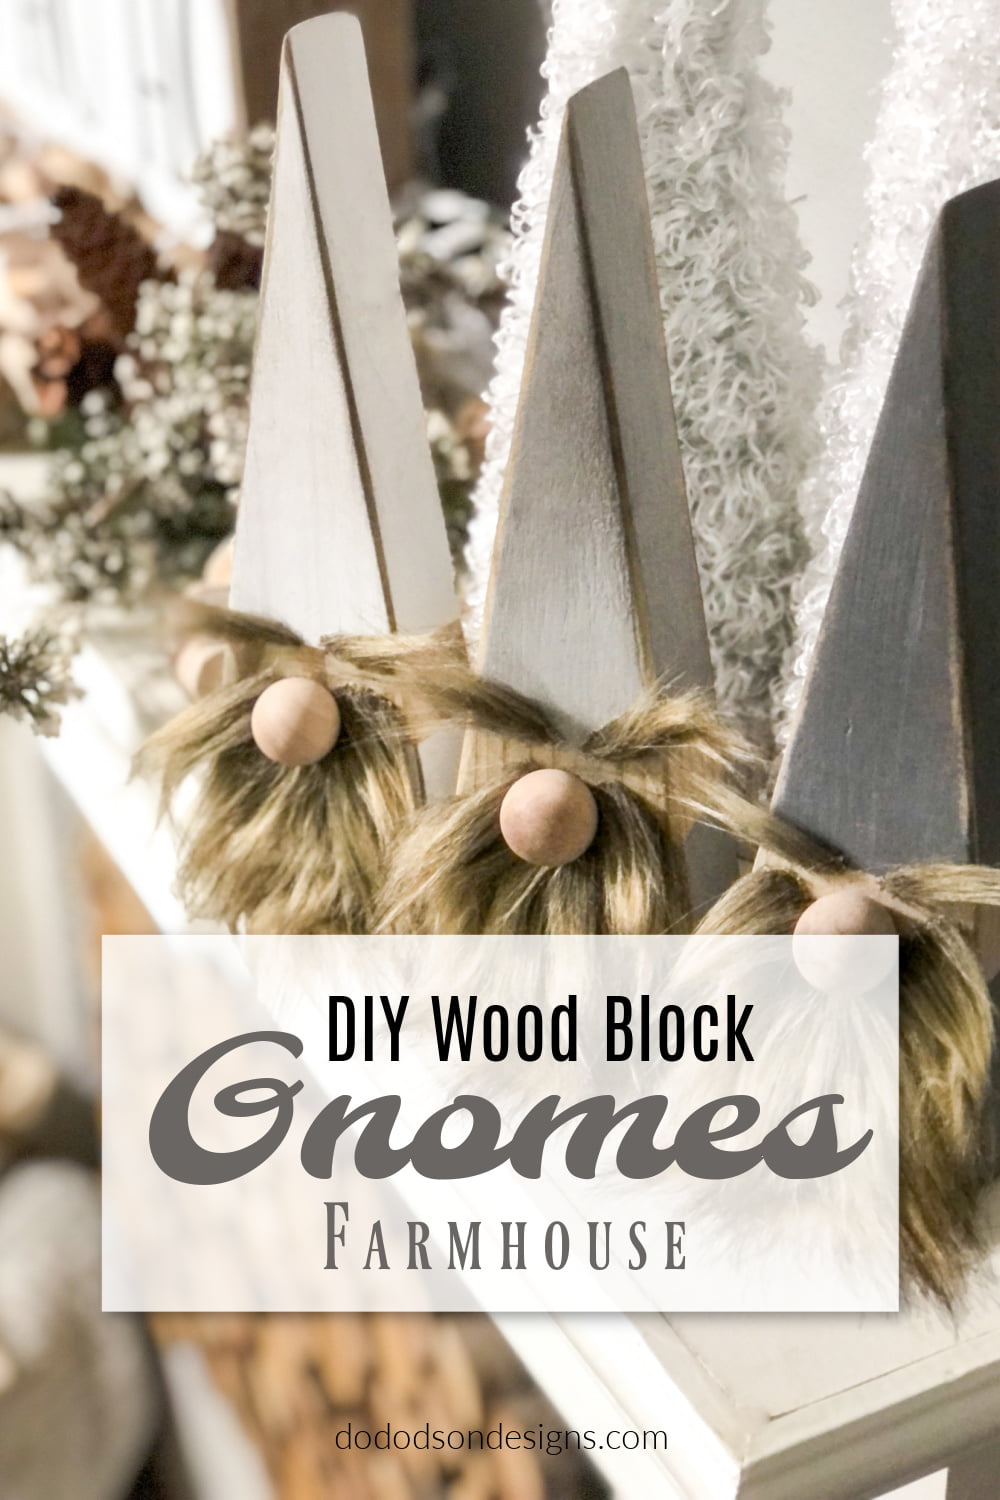
Wood Block Gnomes – DIY Christmas Craft
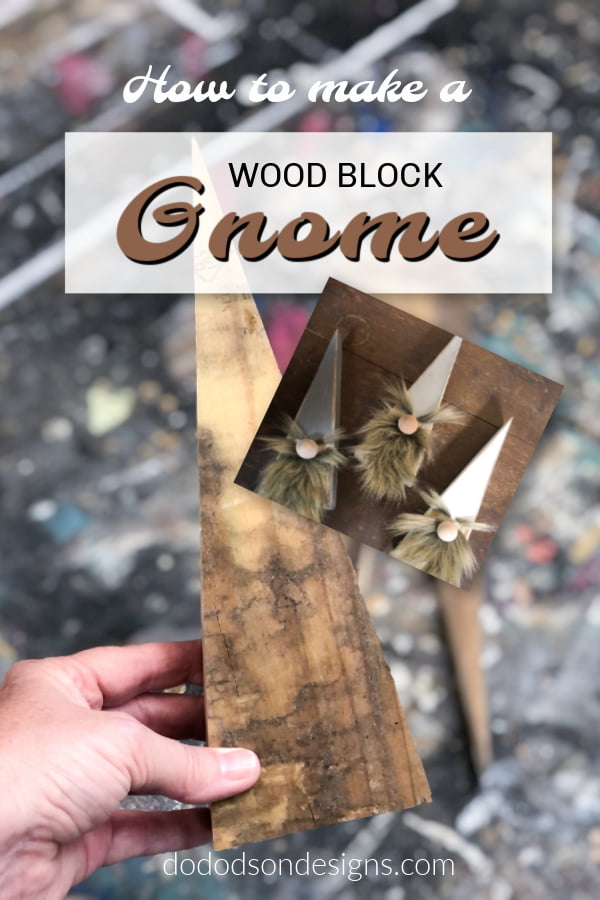
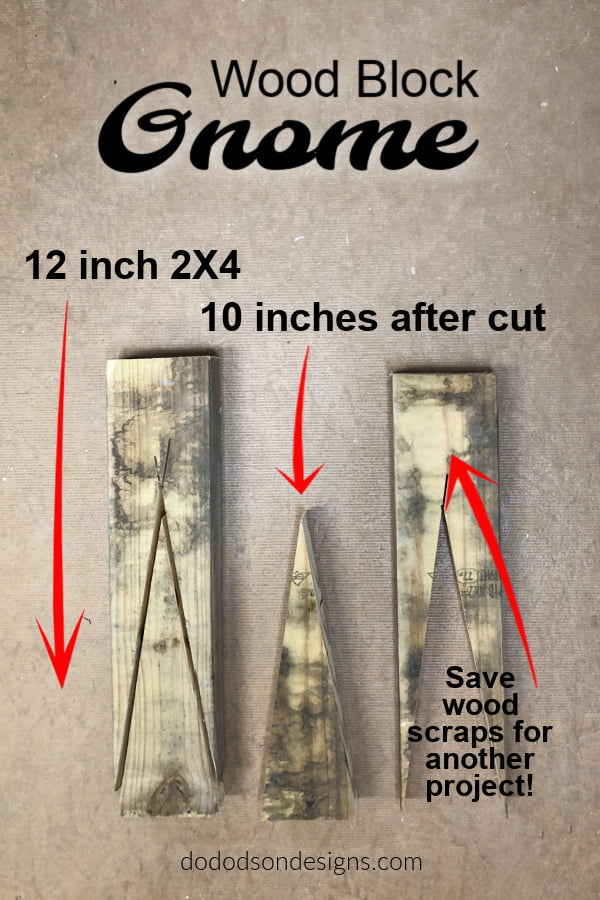
First, I’m not afraid to admit that I found this piece of wood on the side of the road. SCORE! So, not only were these woodblock gnomes fun to make, but they were super inexpensive. Also, being made out of 2X4s means they are heavy enough to sit alone on a mantel. I like to salvage whenever you can, and I made these for less than $3 each. To cut the body of the woodblock gnome, see the diagram below for the exact dimensions I used.

Product List For This Project
- 2X4 board (12 inches long) The triangle body will be 10 inches once cut.
- Faux Fur Sheet (Hobby Lobby 40% off coupon)
- Wood Ball Knobs (for the nose)
- Chalk Mineral Paint (Cotton, Driftwood, Gravel Road)
- Paintbrush
- Sanding Block
- Craft Glue
- Craft Knife
Painting The Wood Block Gnome
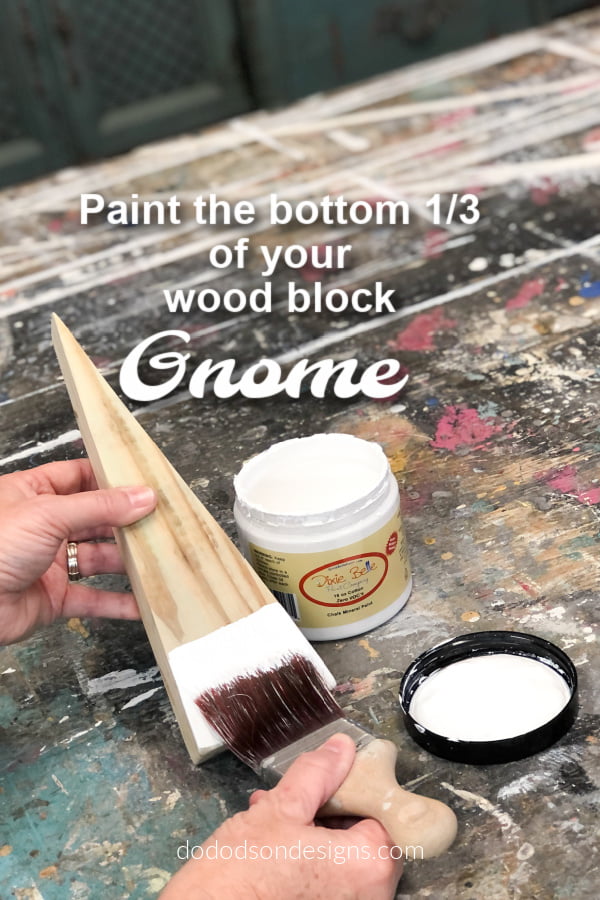
Once you have your 2X4 cut in a cute little triangle… about 10 inches from top to bottom, it’s time to paint. Painting the gnome’s body is important, and you want to get these measurements right, or else you’ll have an even funnier-looking woodblock gnome, if that’s possible. Divide your woodblock into thirds in your head. The bottom third will be the body of your gnome. Paint that area all the way around the triangle.
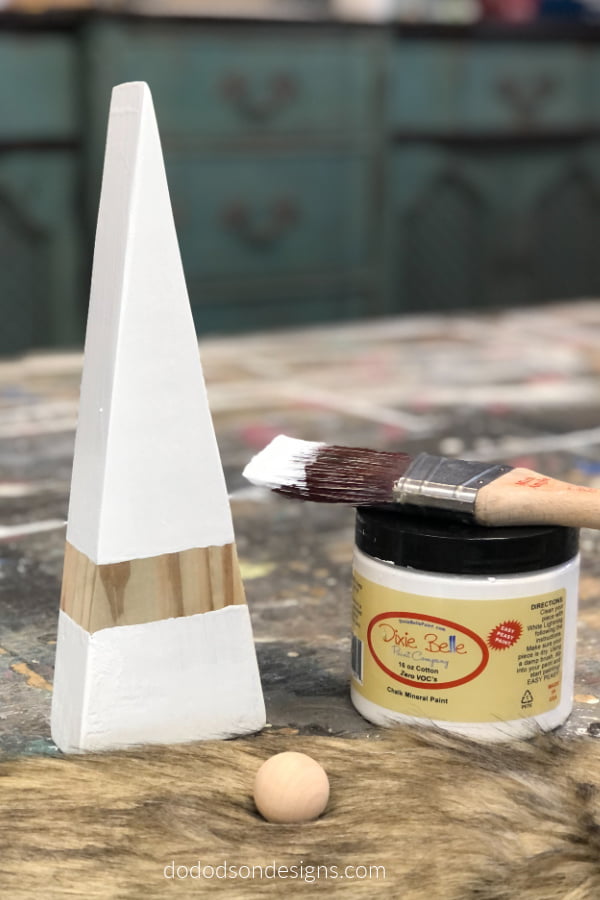
Now, for the face. Paint the upper part (the hat) but leave about 1-inch space for the face. This wood will be left unfinished on the face unless you want to stain your wood before painting. It’s your gnome; get creative. For this project, I’m keeping a natural wood look to go with my farmhouse Christmas decor. It also matches perfectly with the unfinished wood ball knobs that will be used for the nose. Once the paint is dry, give it a good sanding to add distressing if you like. I likey!
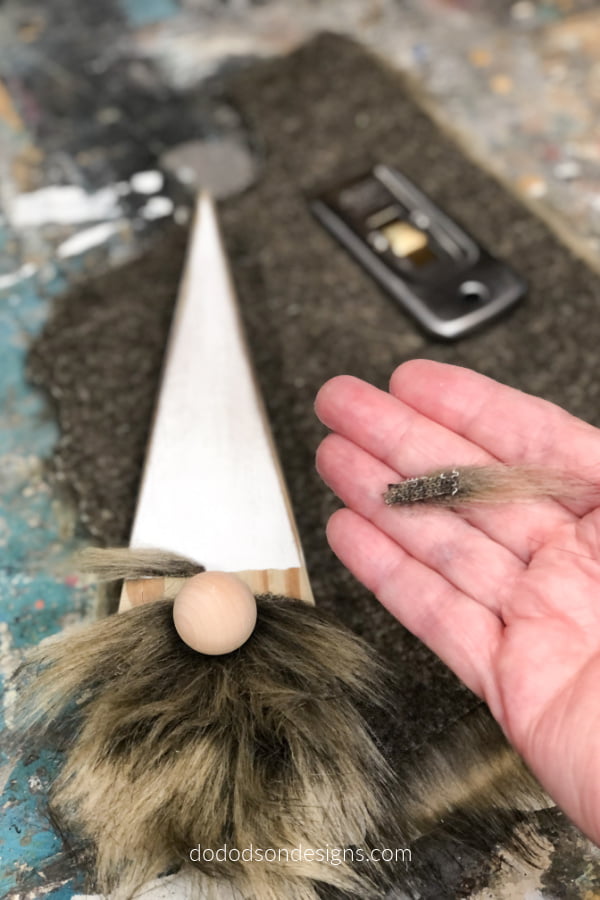
Cutting The Faux Fur
Always cut the faux fur from the backside. Be sure to watch the video tutorial on how to cut out the beard, mustache, and eyebrows for your wood block gnome. It’s just easier that way, and I wanted to make sure you understood about cutting the fur. Scroll back up if you missed the ☝ VIDEO ☝
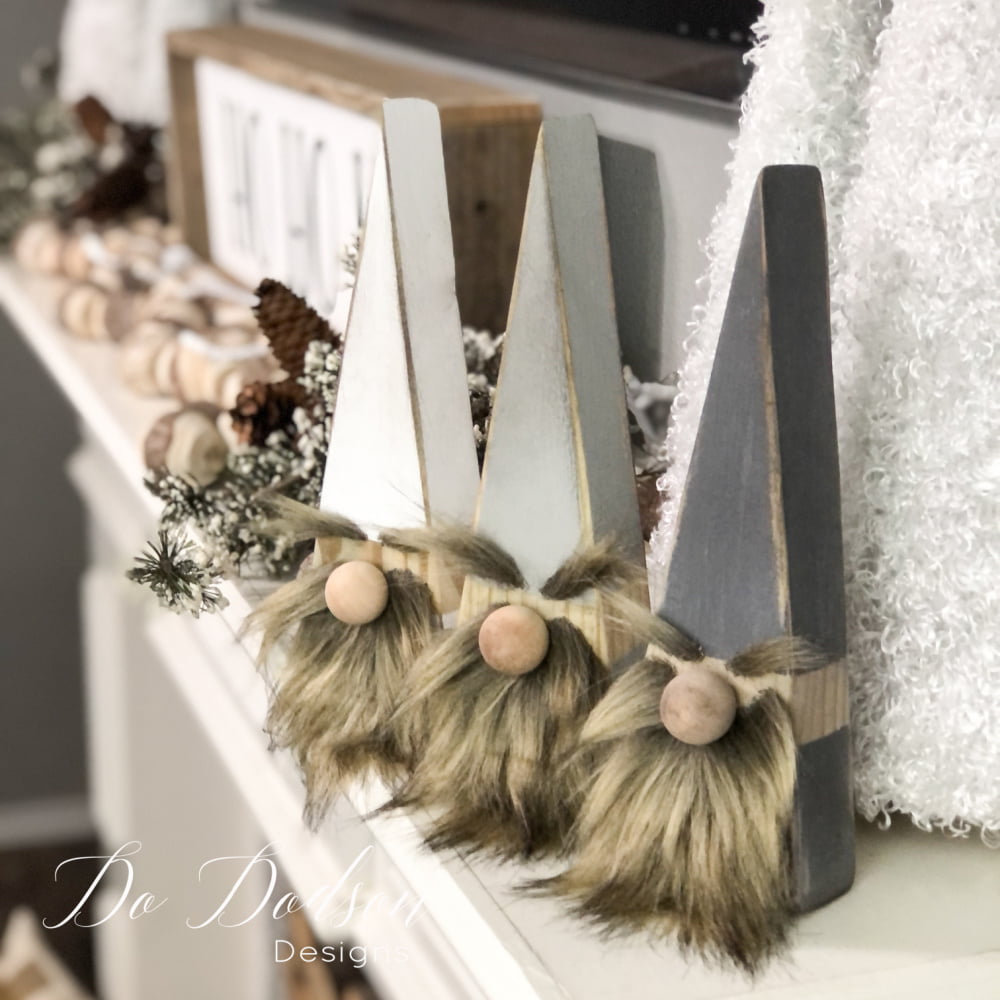
The Finished DIY Wood Block Gnomes
They look like Si from Ducky Dynasty! 🤣🤣🤣 But, oh, so cute! 🤣
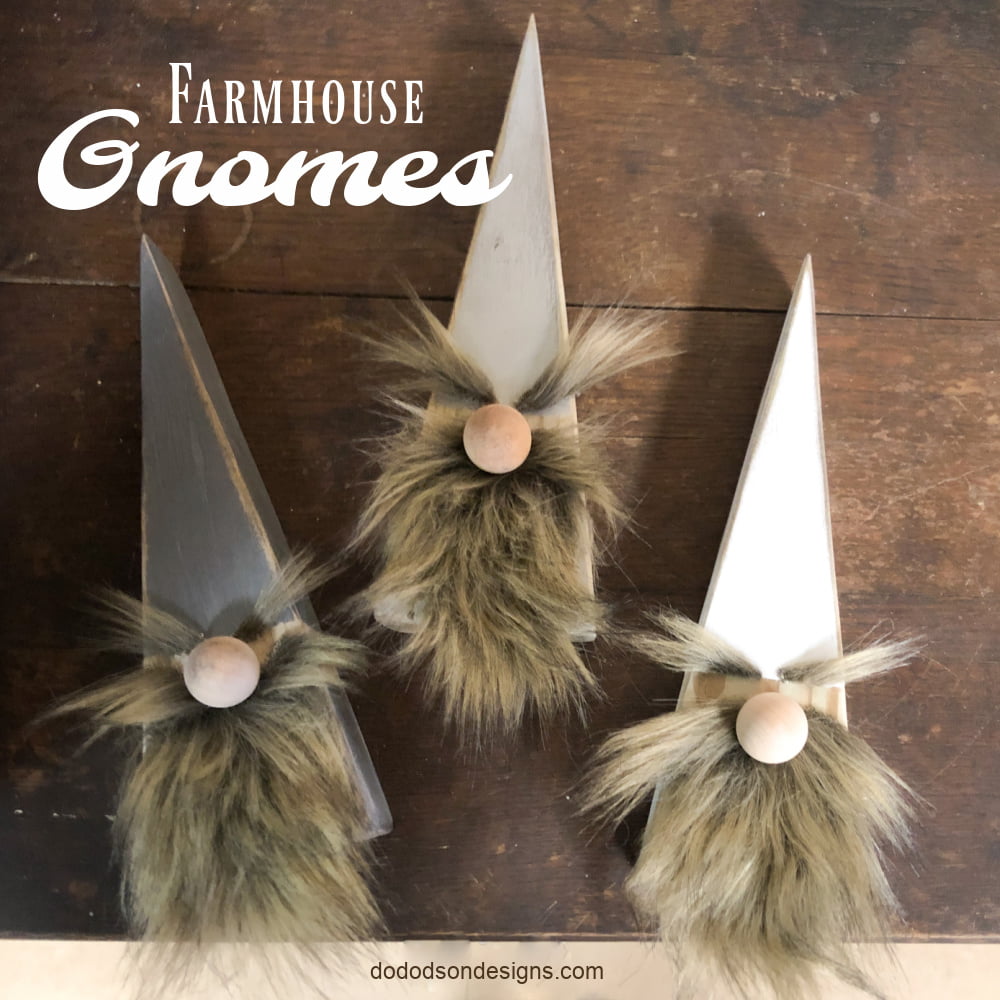
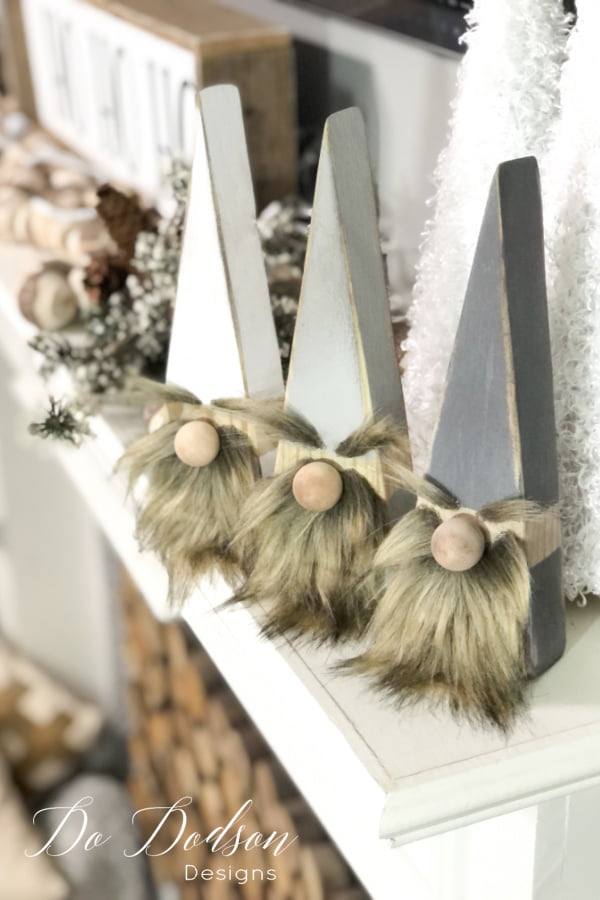
How do they look? These wood block gnomes are about as adorable as they can get. I really love the natural wood with the paint and that subtle but whimsical feel. These little trolls took me literally 15 minutes each to make. Well, that depends on the dry time with the paint. Always waiting on the paint to dry. *insert eye roll
Thanks again for joining me today on another adventure with woodworking craft ideas. As long as my wood stash stays plentiful, you’ll be hearing from me again. I’m sure of that! Merry Christmas, everyone! LOVE and blessings.
Until the next project… xo, Do


These made me smile!! I can almost hear them gigglin’ underneath all that there hair!!! Too cute and not scary at all! Thanks for sharing these gnomes!😍
They’re just too funny.
Do, I couldn’t access the video. Didn’t see a link to it… Thanks!
Hi Karolyn, I just checked and the video is there. It’s not a link but an actual video. It’s at the top of the page. There is a short advertisement in the beginning. Maybe that’s why you missed it. PLease try again. 🙂 I appreciate you.
I don’t think the video link is working for the fur cutting. I love your site and enjoy all your work!!
Thank you so much for all that you do
Thank you, Tonka! Hmm… I just checked it and it works for me. There is an ad that runs just before the video starts. Try it again. 🙂
Gnomes are too cute. Kids/grandkids would have fun with this project.
Hi Joanne! I agree! Maybe make these instead of Christmas cookies. 🙂
Having difficulty cutting a triangle. What type of saw did you use as my saw does not cut that triangle perfectly. Thanks
Hi, Peggy! I hear you on that. It can be a challenge if you don’t have all the fancy saws. I used my circular saw but was careful to have help holding the boards when cutting the angles. Be careful! xo 🙂
They do look like Si! Just too adorable! Thank you for another great idea and project Do. You are incredible!
I’m so glad you enjoyed them! They make me happy. I’m think I need to make them hats for Christmas. What do you think?
so cute
Thank you. Doris! 🙂 xo
You have sooo given me and idea for my great nieces and nephews Christmas ornament this year. I have many wood triangles leftovers from the ornaments I made them two years ago.
Thanks
I’m thinking you’ll see some happy little faces when they receive these ornaments! 🙂 xo
Iam having trouble opening the video,love these little guys
Hmmm, I’m not sure why you’re having trouble. My apologies. I just checked it, and it’s working on my end.
These are so cool! Love that there’s so much to make out of scarp wood! You’re such a great crafter. 🥰
Another woman’s junk is my treasure! LOL 🙂
Hi! The only video I see is painting furniture. Am I blind?
Hi Kim, It’s working for me now. There may have been a glitch. Try it again. Sorry. 🙂
I have tried watching the video 5 times. And each time there is a different video. Furniture. Jeans. Dresser. Brushes. Decoupage.
Is there a different place to watch the fur cutting video by chance?
Thanks!
Hi Leah,
The video tutorial is posted at the top of the blog post mark WATCH THE VIDEO TUTORIAL HERE. It’s a separate video. I went back and viewed it with no problems. I’m so sorry you’re having issues.
Hello,
I cannot seem to watch the video either. The WATCH THE VIDEO TUTORIAL HERE isn’t a link for me.
Thanks
I’m so sorry, Rachel. I went back in and it worked for me. Just a reminder that there is an advertisement that runs 10 seconds before the video starts and you’ll need to adjust the sound. I hope this helps. 🙂
What kind of saw are you using to cut the wood? I wish you would show that part as it’s the most challenging!
Hi Merissa,
You are correct. It is challenging to get these angles. I used a table saw with a tapering guide. I do realize that not everyone has these big tools. This can also be done with a jig saw, or circular saw. You’ll need clamps to hold the board in place while you cut. I hope this helps, and I’ll try to do better in the future by showing the cuts. Thanks for reaching out and letting me know. I appreciate all feedback. 🙂
There is no video for me either 🙁 It does not show up at all. I’m so bummed, as I have my wood cut and items purchased.
Hi Amanda,
Thanks so much for reaching out. I went in and checked the video player on both my mobile and my PC and it’s working for me. These things can be glitchy at times. Definitely try it again. Those little gnomes are so cute and super easy to make. I don’t want you to miss out. Thanks for understanding. 🙂
I just wanted to reply and say that I still can’t view it on my computer, but was able to on my phone. I thought I would share in case anyone else was having difficulties. I think I’m going to bring it up on my ipad so I can see it better ;). I’m so happy since I had purchased all of the supplies and the wood was cut!
Hi Amanda,
That is so strange. I’m not sure why it’s doing that with you, but I’m glad you could view it. Thanks for letting me know.
Also, if you don’t mind, let me know how your project comes out. It’s fun to see others having fun. 🙂 xo
I really want to make some news! Do you know what angles to cut at?
Hi Julia,
I don’t, but if you measure from the center of the 2×4 and angle the line 10 inches from the top, you’ll get the angle. Each gnome is 10 inches tall. I hope this helps. 🙂 xo
Hi very cute!! What angle/degree did you cut??
Hi Julia, thanks!
I’m not sure what the angle is but the easiest way is to cut a 10-inch 2X4 and find the center. Draw a line from the center down to the bottom of both sides. It works for me. Have fun creating.
The video doesn’t come up for me either…
I’m so sorry you can’t view it, Clara.
I went in and checked my settings, and it appears to be working on my end. There is a short commercial before the project begins, but it starts right after that. Please go back and try again. I don’t want you to miss out on this cute DIY. Thanks for letting me know. 🙂
I don’t see the video as others have said. Even where it says view video here there is nothing to click on.
Hi Leslie,
I went to check and I can view it on my mobile. The video player will play an ad first and then you’ll see the tutorial after it ends. Sorry for the confusion.
I hope this helps. 🙂
If selling the gnomes for profit, how much would you charge?
Hi Maureen,
Consider the cost of supplies, your time to come plate them, overhead (your store or booth) and location. After you factor in all of that, you need to make at least 50% profit. But that’s just me.
Good luck!
Couldn’t access your video and tried to find it on your youtube channel, but couldn’t locate it. Love these little gnomes and would like to make them. Any ideas how to find the right link? Thank you, Lee
Well, poo! I went back and checked it and it appears to be working for me. Maybe try again or use another device. Sometimes technology doesn’t play well.