
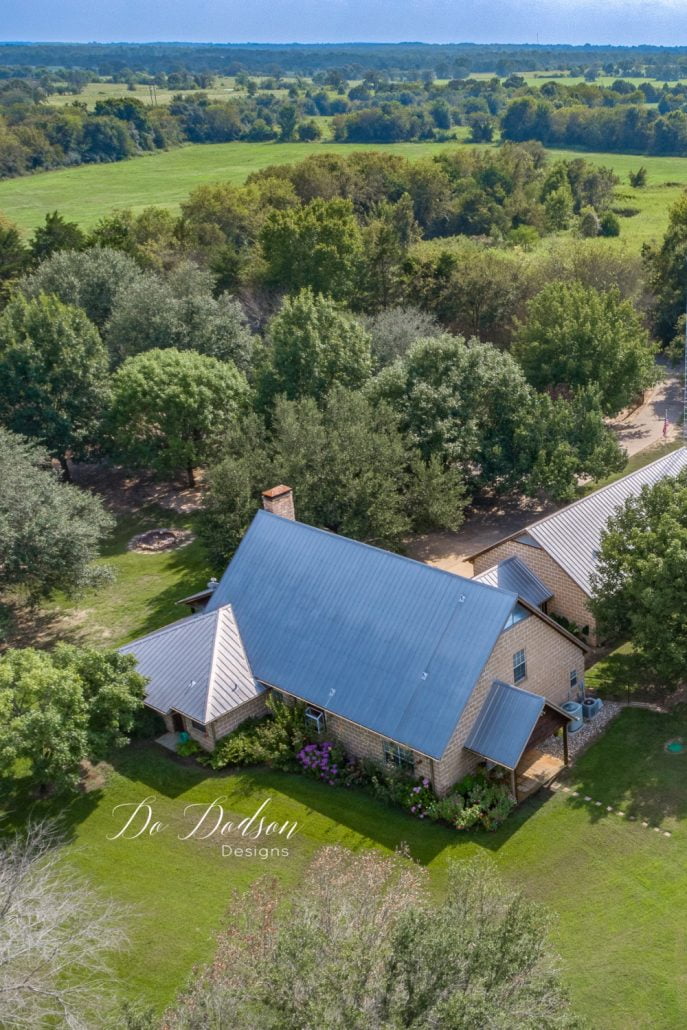
I knew immediately I wanted to make these small scrap wood block houses after we made one of the biggest decisions in our lives—the big decision to make one last move. Our forever, last, I’ll never move again, home. That’s right! We are selling our smallish house in town (I still can’t believe it) and moving to the ranch. This simple DIY wooden craft project was inspired by the outside of our new ranch home. I’ll give you a sneak peek of our new home later in this post. 🙂
* As an Amazon Associate, I earn from qualifying purchases and through other companies as well. You are not charged extra to use any of the links, but any income I make helps me create more amazing DIY projects to share with you! To see my full disclaimer, click here!
Easy DIY Scrap Wood Block Houses
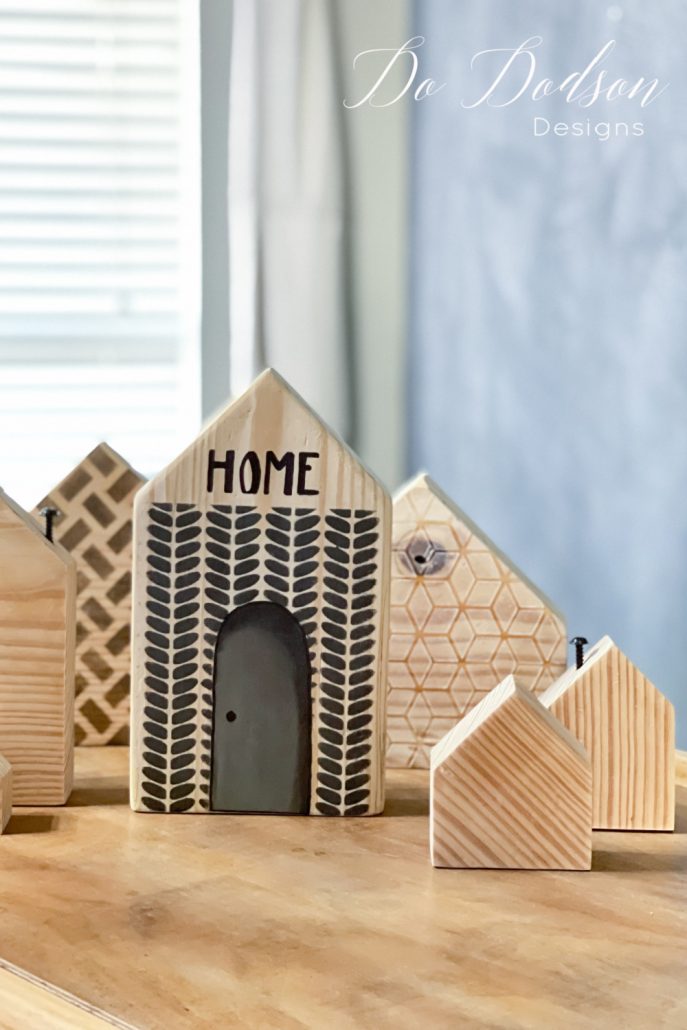
Got scrap wood laying around? You know I do! I have wanted to make these primitive wood block houses for a while now. It’s a super easy woodworking craft that anyone with minimal skills can do, and it took me about 20 minutes, minus the dry time with the paint. You can paint, stencil, decoupage, or even add your favorite transfer. Leave them unfinished if that’s your jam. I like that look too. Very minimalistic.
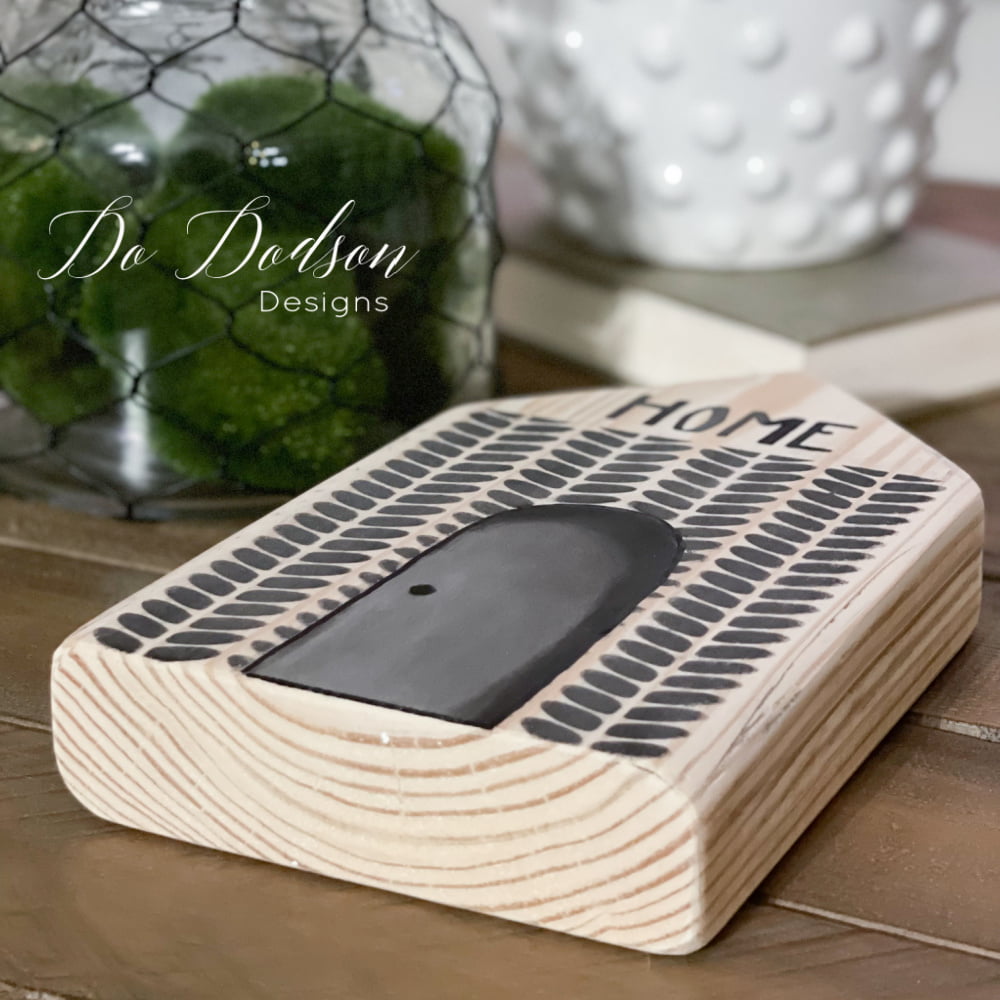
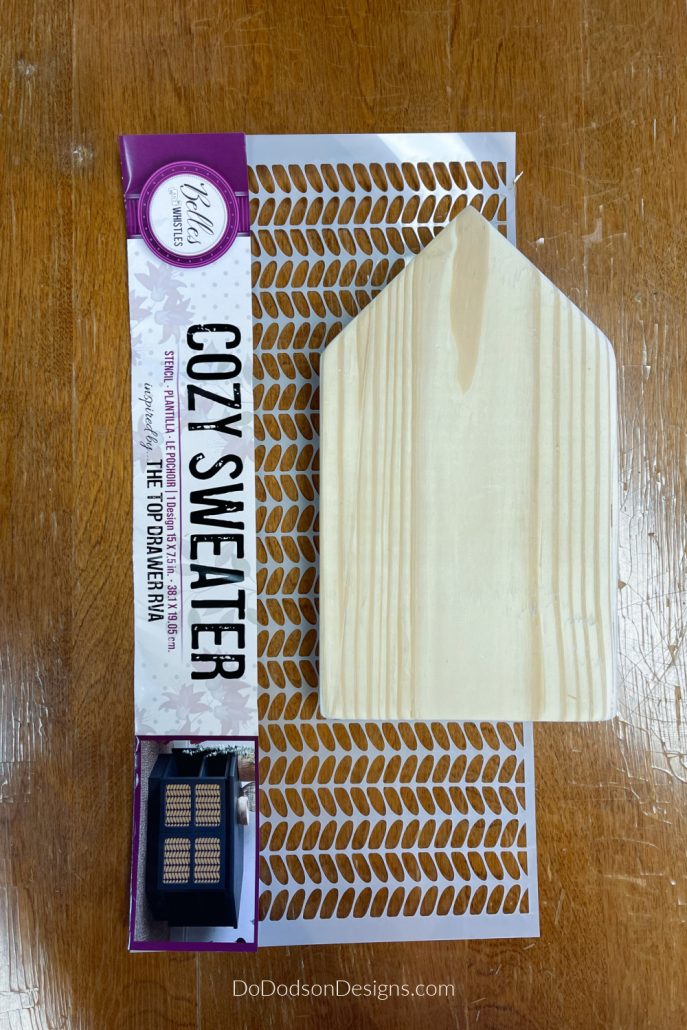
Today I’m using the NEW Belle’s And Whistles stencil inspired by my friend Melissa from The Top Drawer RVA. I love the cozy feel of this pattern, and it makes a fun, whimsical brick look on these wood block houses. Well, I think it does.
It kind of looks like my new ranch home.

SUPPLY LIST:
- wood scraps (2X6, 2X8, 2X10, 2X12 boards) These makes the best shelf sitters.
- Cozy Sweater Stencil
- Trippy Blocks Stencil
- Basket Weave Stencil
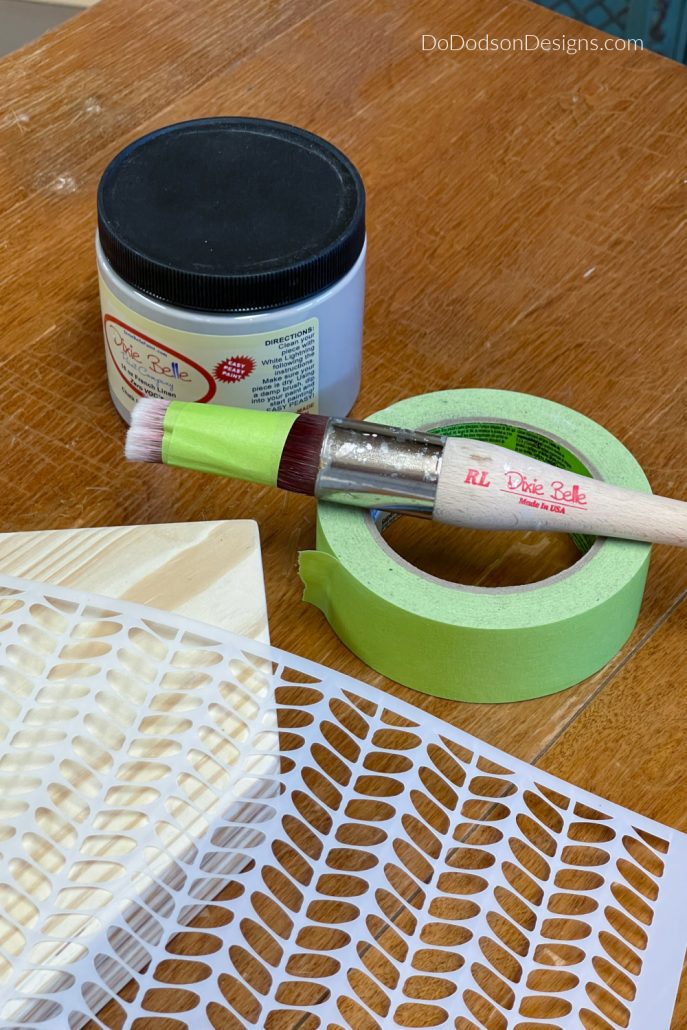
- round small synthetic paintbrush
- stencil brush
- artists brushes
- painter’s tape
- french linen chalk mineral paint
- coffee bean chalk mineral paint
Painted Wood Block Houses
STEP 1 Cut your wood blocks into the shape of a house and give them a light sanding with 220 grit sandpaper.
Don’t overcomplicate the shape of wood block houses. Pull out your kindergarten skills and have fun.
It’s three simple cuts, two 45 degree angles, and a straight cut. That’s it. You can do this!
STEP 2 Use a stencil brush to apply the design you want on your wood block houses. If you don’t have a stencil brush, improvise and use painter’s tape around a synthetic paintbrush. It works great!
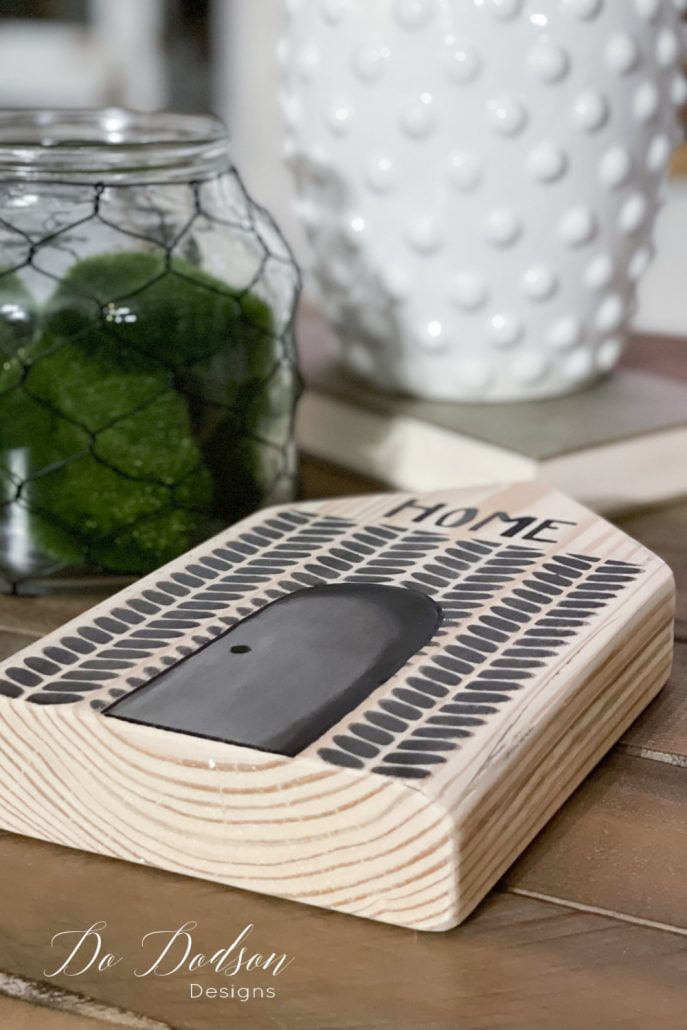
How To Create A Unique Door On The Wood Block Houses
STEP 3 If you want to create a door or window, use a pencil to mark the area where you want your doors or windows to appear on the wood block.
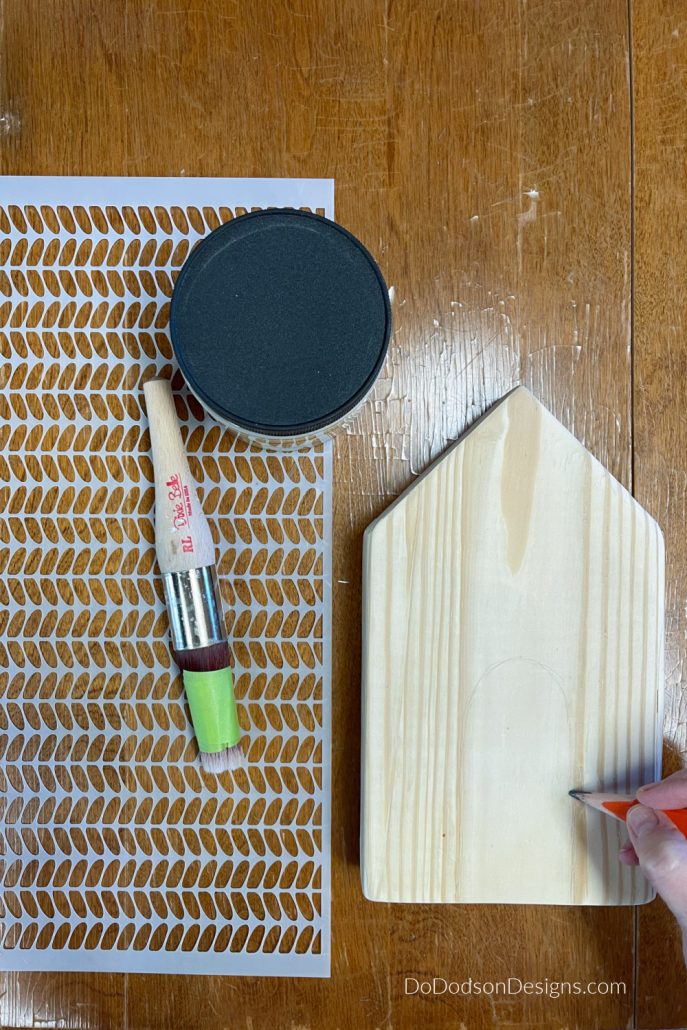
STEP 4 Lay the stencil over the wood block houses and use painter’s tape to cover the areas where you want the outline of the doors or windows to be. Then secure the stencil in place using painter’s tape to keep it from slipping as you stencil your design.
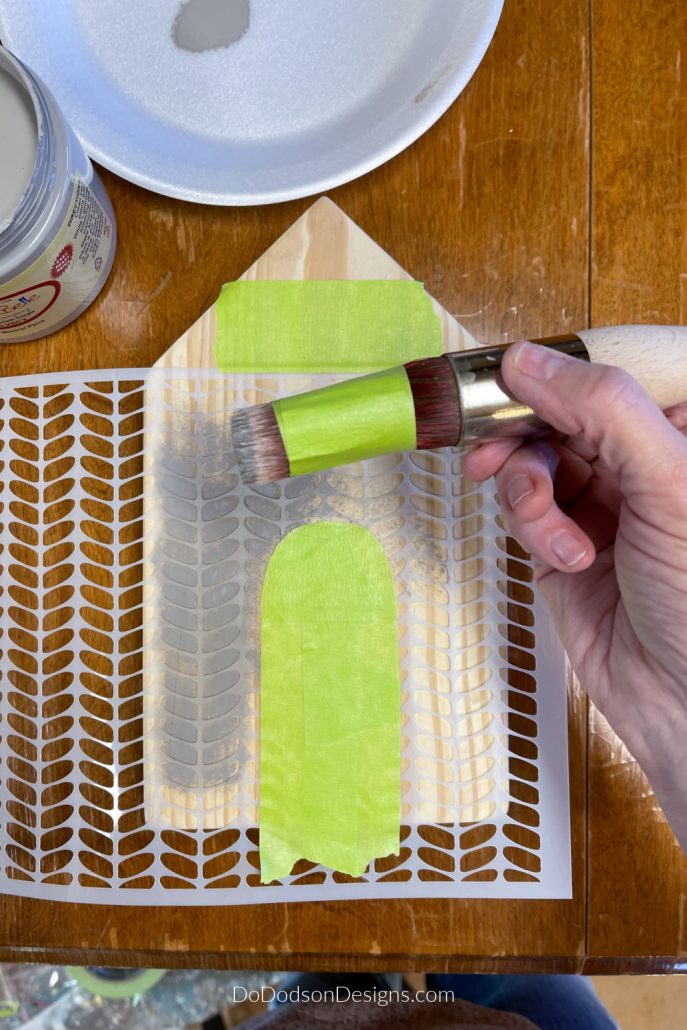
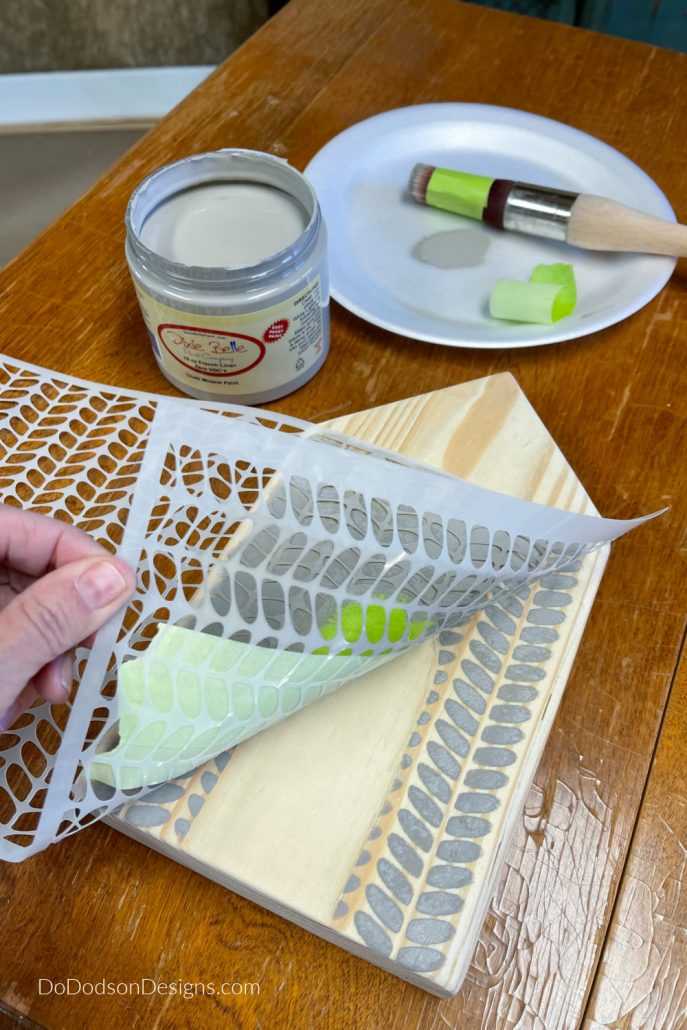
STEP 5 Carefully stencil on your design. Use a minimal amount of paint to prevent bleeding under the stencil. Less is more. You can always go back and reapply more if needed. I like to use a paper plate or paper towel to blot the excess paint from the stencil brush before applying. Only the tips of the bristles should have paint. Tap the ends of the paintbrush or stencil brush lightly over the stencil using an up and down motion. DO NOT paint over the stencil with a back and forth motion. This will cause bleeding due to the paint that will build up around the sides of the stencil.

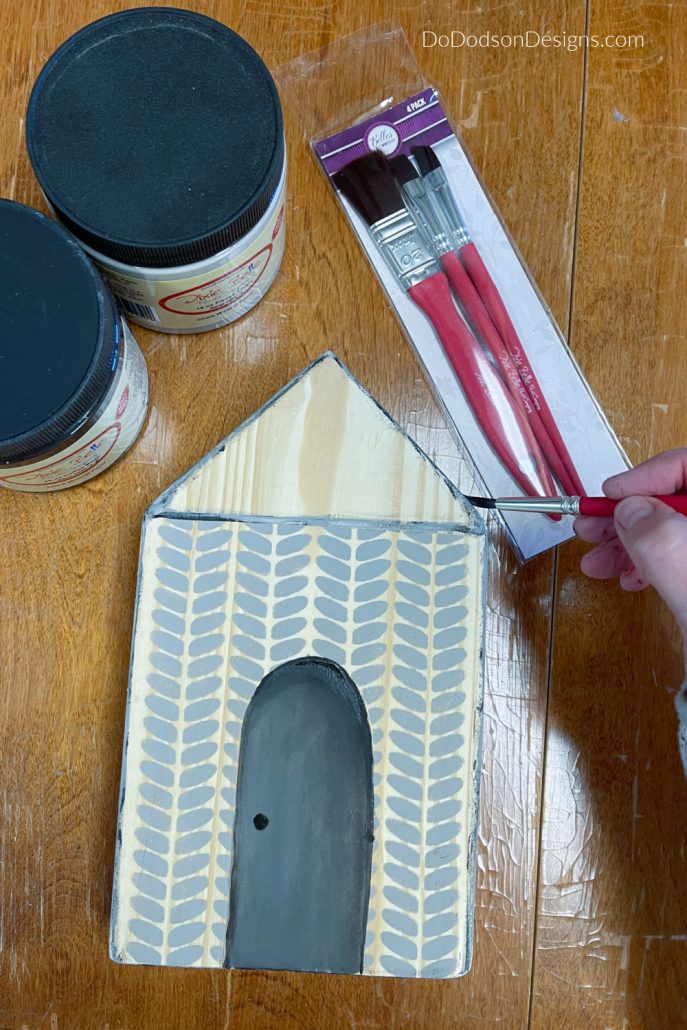
Painting A Door With Depth On Wood Block Houses
This is fun! It may take some practice, but you can do this. I see nothing wrong with practicing before applying this technique to your wood block houses.
With a small artist brush, use a darker color to outline the door. Depending on how you want the light to reflect on your painted door, you use a dark color and blend the lighter color into the darker to give it depth. You can use a little water on the tip of your artist’s brush to blend the paints into each other. I use this same blending technique when painting furniture.
Practice makes perfect! Try it.
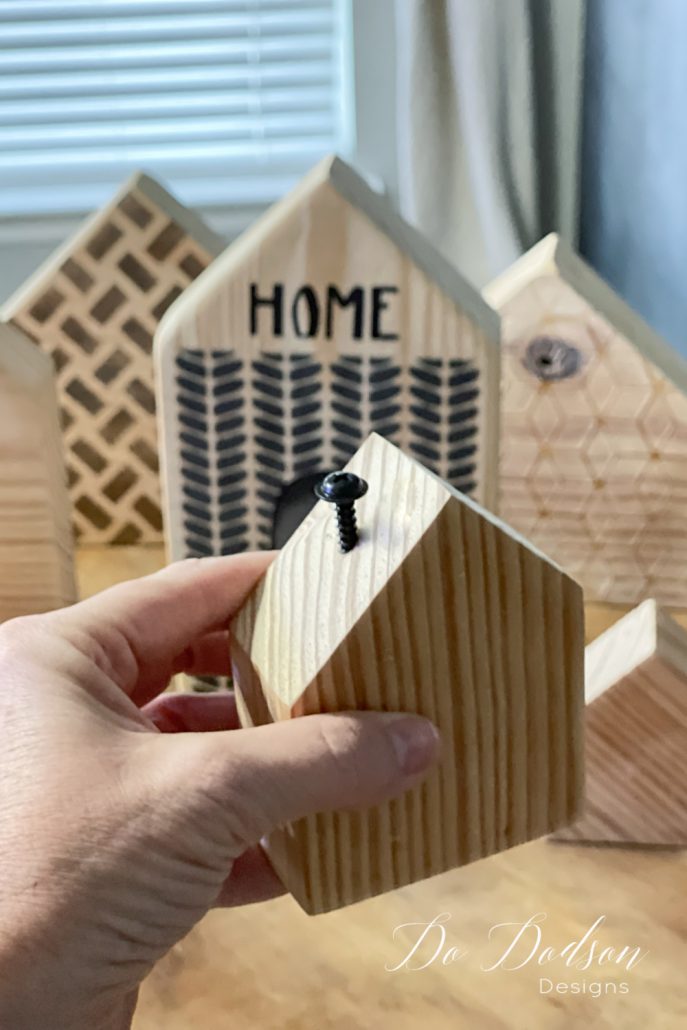
DIY Wood Block Houses With Character
I couldn’t decide what paint colors I wanted on my wood block house, so I made a few attempts. This is the one I liked the best! Wouldn’t they make great gifts?
Exciting News! My Inspiration For The Wood Block Houses
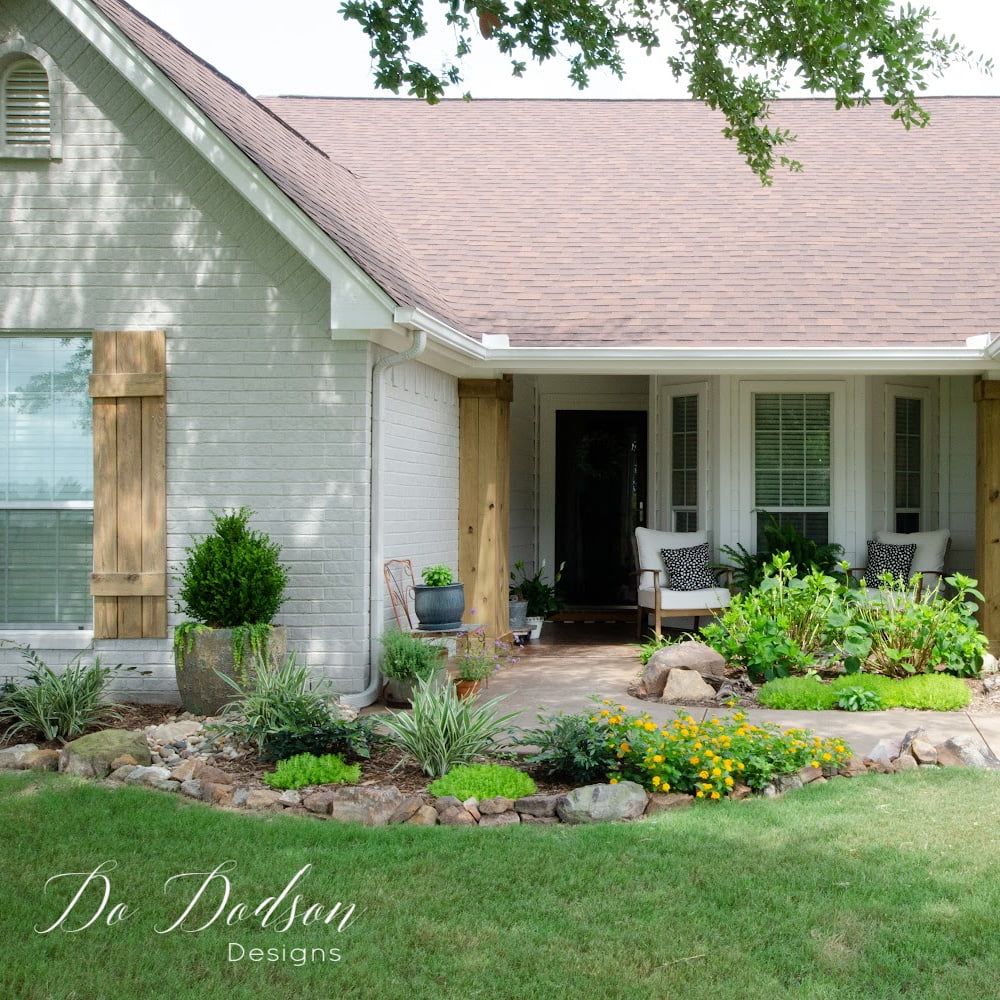
Welcome to the new home of Do Dodson Designs! To say I’m excited to share our NEW OLD HOME with you is an understatement. It’s a total fixer-upper! Didn’t I just finish a full update on our old home? UGH! It never ends.
Over the next few months, I’ll be sharing the transformation of this rustic ranch home and how we will refine the rustic to make it into the farmhouse ranch home of our dreams. Well, at least mine. There will be a lot of knotty pine wood painting involved, and as usual, hubby is dealing with it. LOL, Not very well, but he’s trying.
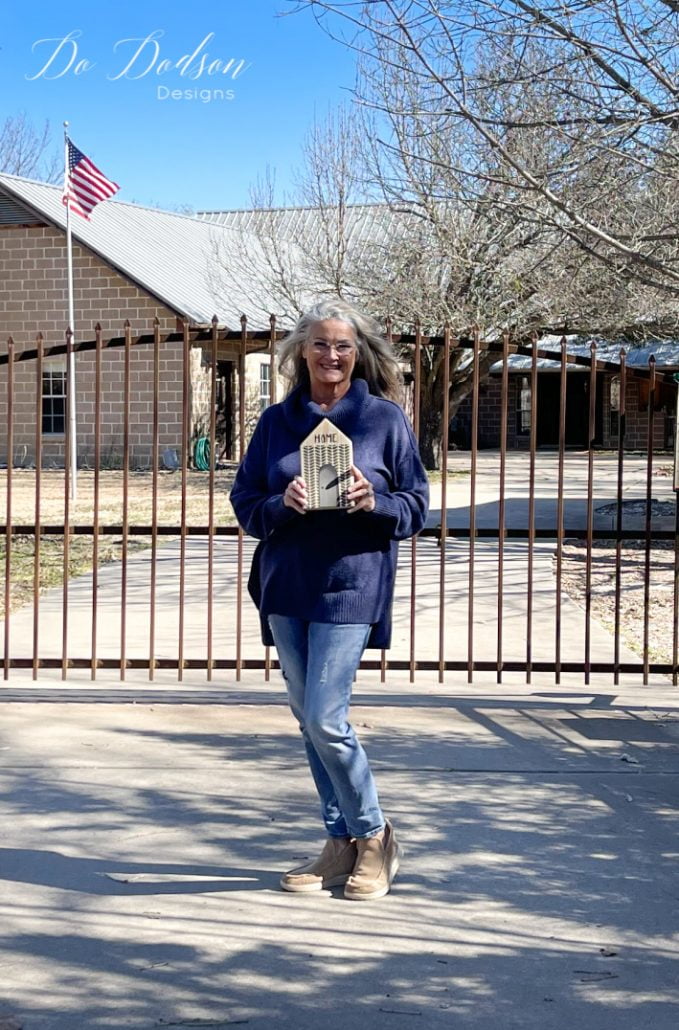
HOME SWEET HOME
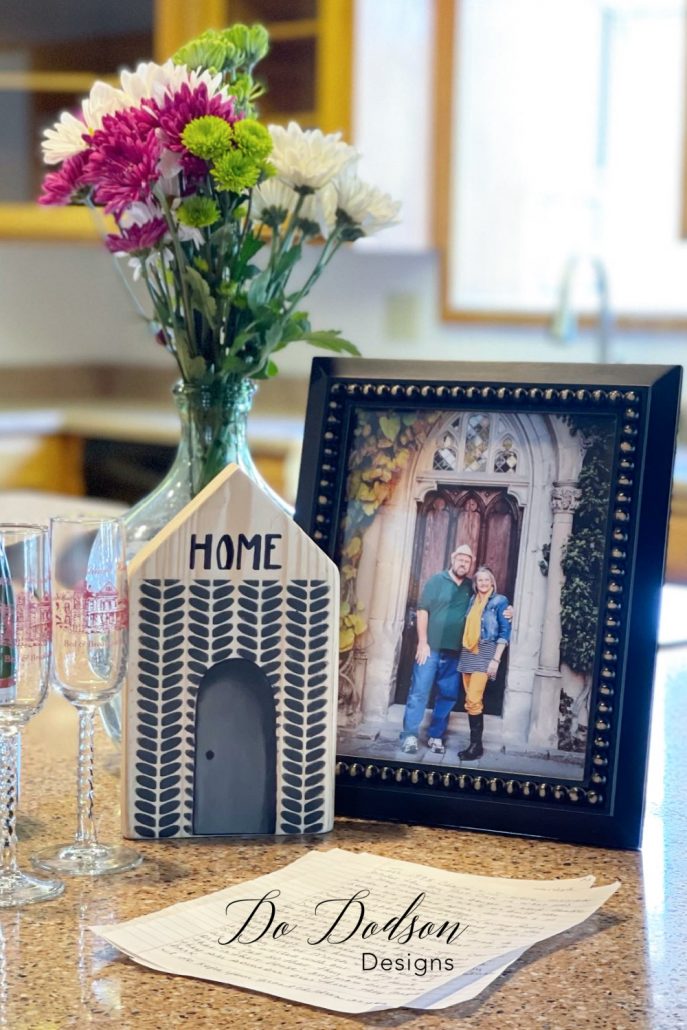
We celebrated last week as we began writing the final chapter of our lives in this adventure. It may sound silly, but I felt the need to celebrate with champagne and fresh flowers. It was my gift to our new home. I hope it loves us as much as we will love it.
Thanks for joining me today, and I hope you enjoyed the DIY wood block houses. I had fun making them and sharing our exciting news with you. I promise to share everything! Am I crazy or what?
Until the next project… xo, Do

Congratulations, my friend. Hugs to you
Thank you so much, Renea. We are very excited about this move. 🙂 xo
Yay!! I’m so excited for you. Love the arial view and that gated drive! Fancy, fancy 😊
But who will paint that fancy gate AND fence???
Just beautiful and so exciting!!! You were right to celebrate!
Thank you, Tricia. I’m looking forward to sharing more. 🙂 xo
Oh, how exciting! I can’t wait to see all that you do to make that home yours!
It is exciting! I would love for you and our blogger gang to come to visit after we get in. The door is always open. 🙂 xo
Hey Do! How exciting for you. I’ve lived out on a ranch for over 47 years. My husband and I recently bought a house just outside of town! We’re exchanging roles, you and I. I love living on the ranch and will miss this place so very much. It’s so amazing to live “in the country!” The “town” house is very nice and close to brand new. So, we have just moved things I want to keep in, a little at a time. It is absolutely the easiest way to move EVER!!!! I guess when we actually move to LIVE there, I won’t have a lot left to do. We’re even putting in yard fences and two workshops. A tiny one for me, and a larger one for him (a concession). Wishing you and your husband all the best! You will have room for all you want. Your new house is lovely!
Oh my goodness. yes! We are exchanging roles and I’m doing it just like that. I grew up in the country and moved to town 15 years ago when the kids had all gone thinking this would make me happy. I have come to realize I need country life so I’m no stranger to how amazing it is. WE will live in town until we get it fixed up and move slowly. I want to decorate slowly too. Today I’m moving a few plants to give the place a little life. Thank you so much for sharing your story. You made my day. Blessings to you and the best of luck on your transition. 🙂 xo
So excited for you! Beautiful location. You will have so much fun making it yours.
It’s the journey that is fun for us, and I hope it never ends. Thanks for reading. Blessings to you. 🙂 xo
Do, you always have the best projects! I love that stencil.
Yes! I love that stencil too. It’s perfect for those cozy winter projects. Thanks for reading. 🙂 xo
CONGRATULATIONS!! I’m so excited for you! Can’t wait to see more!!
Thank you, Holly! I’m excited to share it with you. We are blessed. 🙂 xo
Your new place is beyond words! Do you have a spare room?
I DO! 🙂
What a beautiful home! Will be making the wood block houses and a few extra to give to sisters. Thanks for sharing and keep posting !!! Enjoy
The woodblock houses will be a sweet gift to give to your sisters. I’m sure they will love that you made them. Handmade is always the best gift—a gift from the heart. 🙂 xo
Congratulations Do! I know you will have many projects there to keep you busy!
Thanks, Neva. Just a few. 😉
Amazing and your ranch is absolutely gorgeous… look at all the land and greenery! Can’t wait to see what you do with it and a HUGE CONGRATS my friend. XOXO
Thank you, Denise. It’s going to be quite the adventure. I’m a tree hugger. 🙂
Congrats. Enjoy every minute. I love all your projects. Thanks for sharing them with all of us.
Happy Valentine’s Day.
Thank you, Cathy! Happy Valentines Day to you too. I’m glad to hear that you’re enjoying my (projects) madness. 🙂 xo
This is such exciting news Do!! I’m so excited for you and I can’t wait to see the projects you have up your sleeve for your new home!! It’s just so beautiful!!
It’s a huge undertaking but we have made a lot of progress in one week. 🙂 xo
Omgoodness, I forgot to say how much I love the wood block house you made!! So stinkin’ cute!! Pinned 🙂
Thank you, Cindy! It’s fun to use up old scraps of wood. Now I want to make a whole village. 🙂 xo
Just gorgeous & beautiful new ideas. Thank you so much & God bless!
Thank you, Grace. Wishing you a blessed Christmas season. 🎄❄️💚