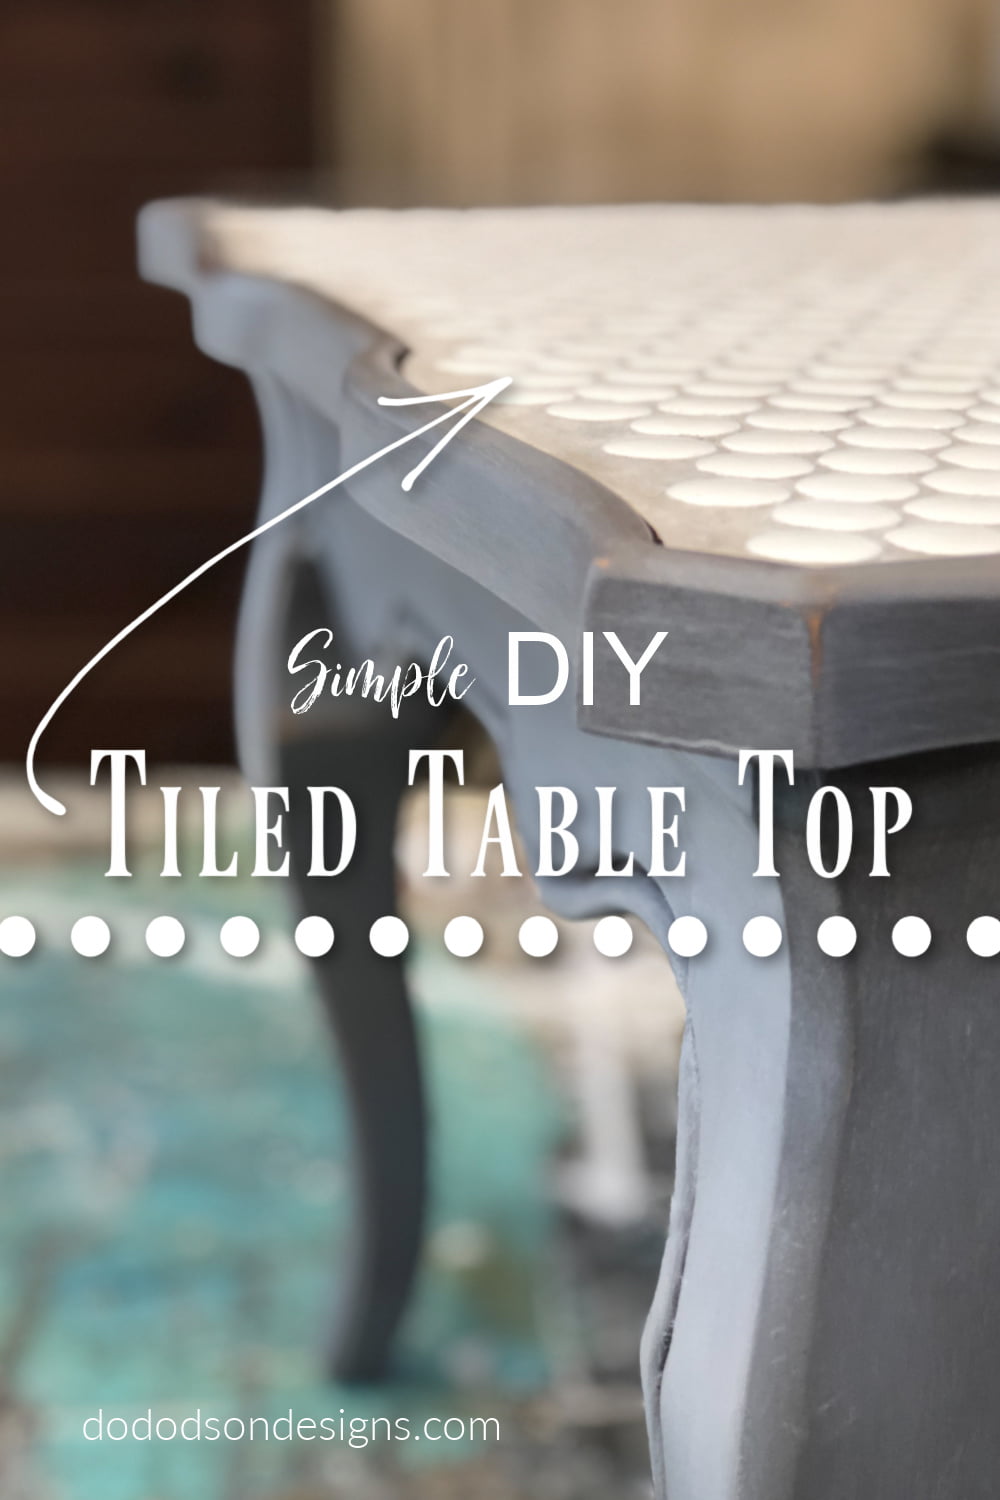
Hello creative friends! Today I’m sharing with you my experience and my very first attempt to DIY a tiled table top. And I’m bringing some knowledge to the table (pun intended 😆) of the products and tools needed to complete this project. I learned a lot when I created a mosaic tabletop a few years ago. But as always, I do my best to find budget-friendly projects that are fun and DO-able. One thing I have learned along the way is… there’s always a DIY hack.
This post contains a few affiliate links to help you find the products I use. You are not charged extra to use any of the links, but any income I make will be used for more amazing DIY projects to share with you! To see my full disclaimer, click here!
Choosing The Right Table Top For Tile
Check this out! The table I am using today is called a pie crust table. I ain’t even joking. I had to call up a good friend that deals in antiques to find out more about this unusual table. All I knew is that it was the perfect design for a tiled table top. I found out that these tables originated in England around the mid-18th century. They’re known for their raised, carved, or molded scalloped edge that resembles the crimped edge of a pie. It makes me hungry. 🙂
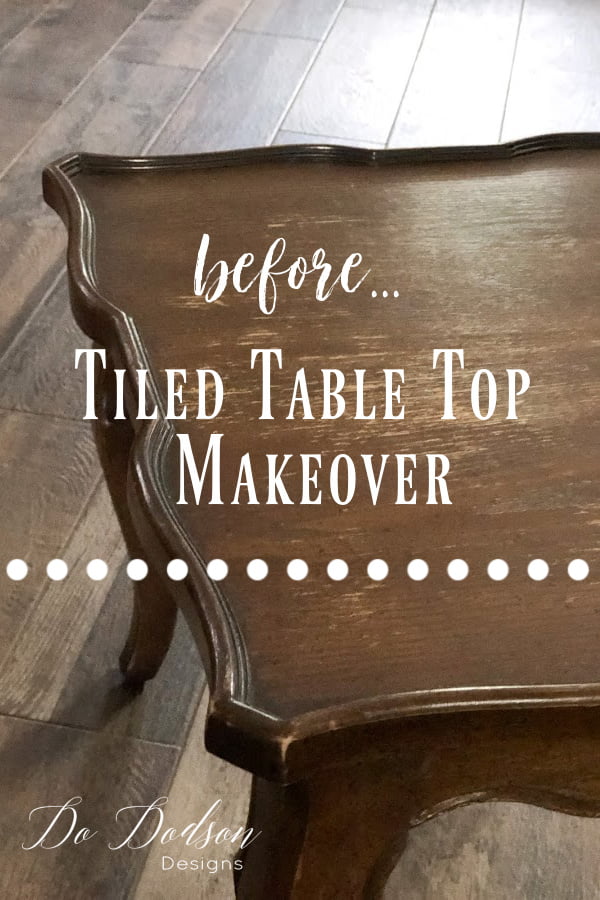
Lucky for me, this little cutie I found for $5. I can’t tell you how many of these tables I find and pass up because they’re “NOT MY STYLE.” Well… we are about to change that.

Gather Your Supplies
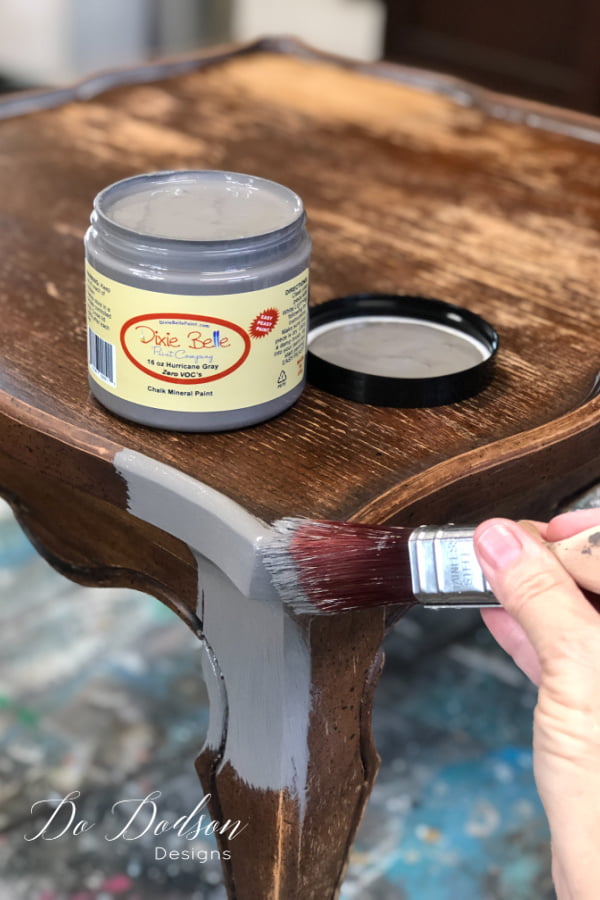
Before starting any furniture painting project, be sure to clean and prep your wood piece first. CLICK HERE to learn about the mistakes I made and how to prevent them. You’ll thank me later.
- Pie Crust Table ( yes, they are actually called that)
- White Lightning (removes the nasty before painting)
- Sanding Pads
- Hurricane Gray (chalk mineral paint)
- Paintbrush
- Brown Wax
- White Wax
Products For Tile Table Top
- Ceramic White Glazed Penny Tile (most home improvement stores)
- Ceramic Tile Adhesive (or wood glue) or (E-6000 industrial strength adhesive)
- Tile Trowel (I used a rubber kitchen spatula)
- Grout Float (I used a rubber kitchen spatula)
- Pre-Mixed Grout
- Grout Sponge (I used my kitchen sponge)
Paint Before Tile
For this project, I painted the table first. My thought was that if I painted after tiling the table top, I’d be taking a chance of getting paint in the grout lines, and THAT would be a mess. So, I painted it first! I don’t suggest painting where the tile is being applied.
Measure Before Shopping For Tiles
*TIP… measure the inside of the tabletop before purchasing your tiles to get an idea of the layout and design you want. Be sure and take your tape measure with you to the store because you’ll need to lay them out while you’re there (I did it in the middle of the aisle :)) and measure them before purchasing. If you’re lucky, you won’t have to cut any of them to fit. That’s how I roll. You can always fudge a little with the grout line, and it will still look great. 4X4 tiles are the easiest to work with. The penny tiles I chose just happened to work out. Since they came in sheets with a mesh backing, they were quick and easy to apply.
Gluing The Tiles To The Table Top
The glue! Guess what? You don’t have to use ceramic tile adhesive if you don’t want to. The tiles can be glued using any glue used for wood and glass that doesn’t set instantly. Therefore a fast-drying glue (super-glue) isn’t a good choice. However, you can use wood glue or even E-6000 craft adhesive. Just as long as you have a little wiggle in the dry time, add it to the back of each tile (four corners and a dab in the middle if you’re using 4X4 square tiles). E-6000 is what I use when creating mosaic tabletops.
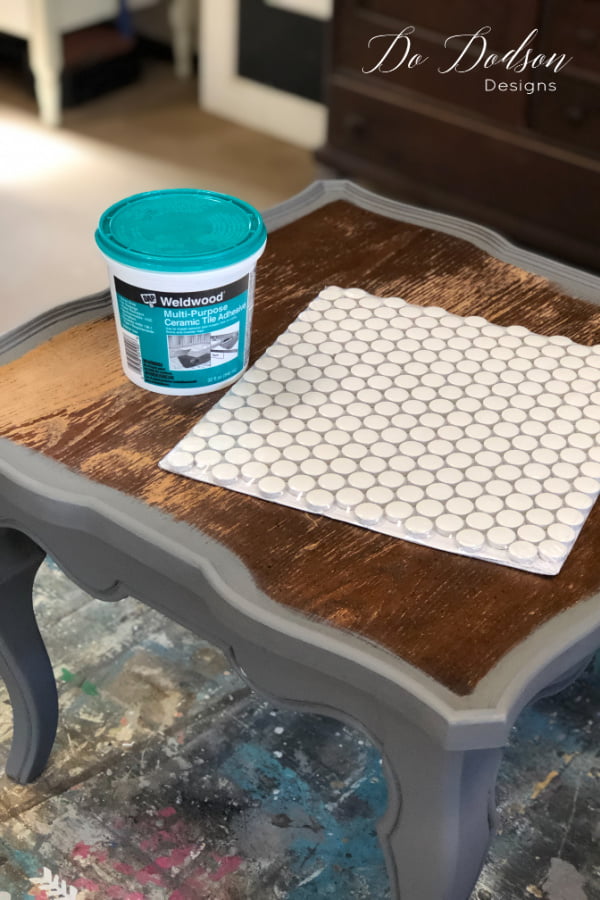
Applying The Ceramic Tile Adhesive
All the tile experts will tell you that you need a special tool (tile trowel) to apply the adhesive. Ya, right. Here’s my thought. The tile isn’t going on a wall but rather on a flat surface. It just needs to stick.
Here’s my tool hack. Use a soft rubber scraper (a rubber kitchen spatula will work too) and apply a thin, even coat (if you’re using this adhesive) across the table top, and apply the tiles. Once the tiles are in place, please give them a little wiggle to set them and make sure they have good contact with the table top. Allow the adhesive to dry 24 hours before applying the grout.
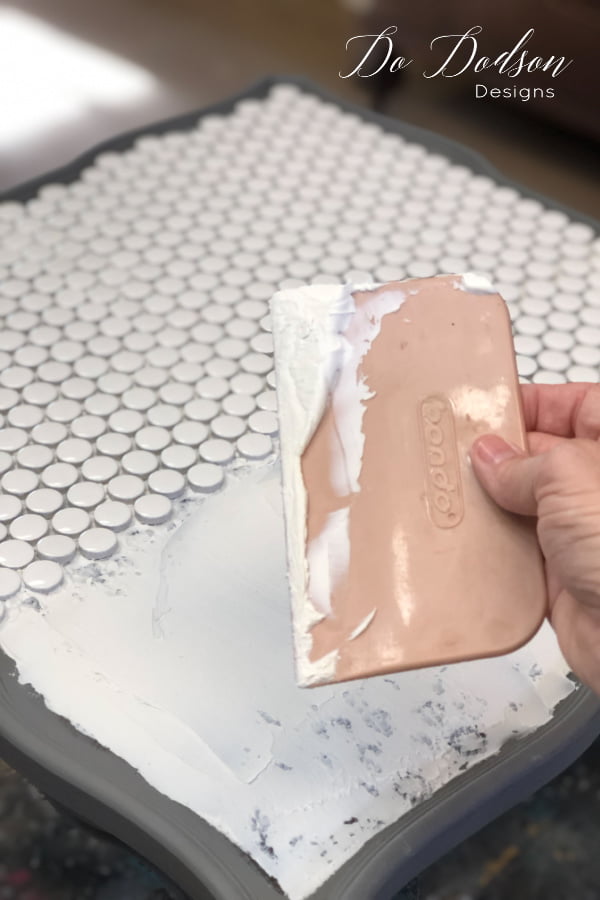
Grouting The Tiled Table Top
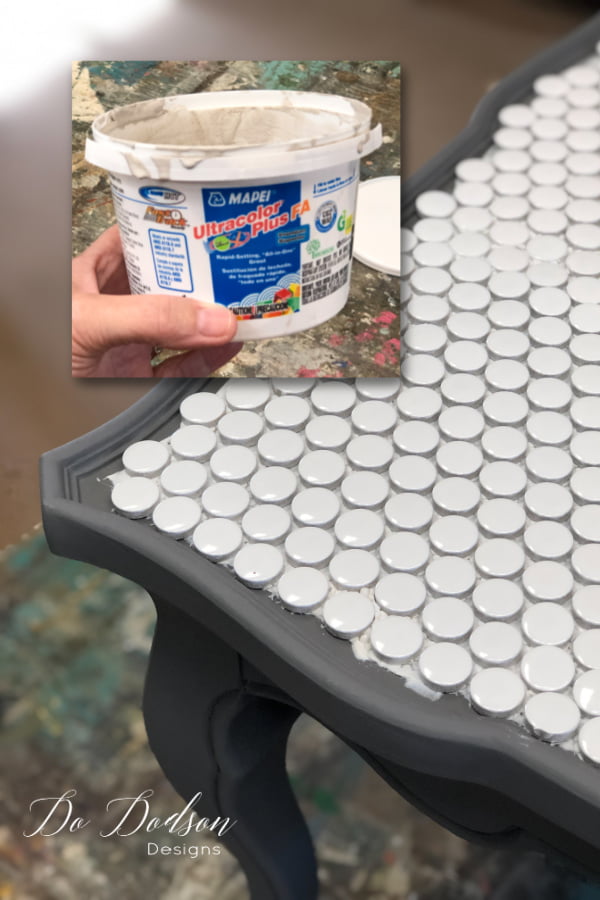
Today, grouting tile has never been easier. I purchased a small container of gray-colored grout that I thought would go nicely with the penny tile. This grout just happened to be in powder form, and all I had to do was add water to the container and mix. The grout will have a consistency of wet cement after being mixed. Always follow the directions on the container. You can also use a pre-mix grout. That’s what I prefer to use, but this is all that was available in gray. And most grouts will have a sealer already in the mix but read the label or ask for help. This will prevent you from having to apply a sealer for grout protection.
With the same soft rubber scraper, apply the grout over the tiles… pushing it into the tiles’ gaps. Make sure you fill in all the gaps. This will take some time. You will use a lot of grout if you’re using penny tiles like these. Again, I suggest using the bigger square tiles if this is your first time to tile a table top.
Cleaning Up The Extra Surface Grout… 2-3 times
The first cleaning… After about 30 minutes after applying the grout (after it sets up a bit), you’ll need to do your first cleaning. Use a damp sponge (not wet) and carefully wipe across the tiles to remove the excess grout being careful not to disturb the grout lines too much. Frequently wash the sponge out with water and repeat wiping away the leftover surface grout. You will not remove all the extra grout but most of it. There will still be a film that is noticeable on the tiles.
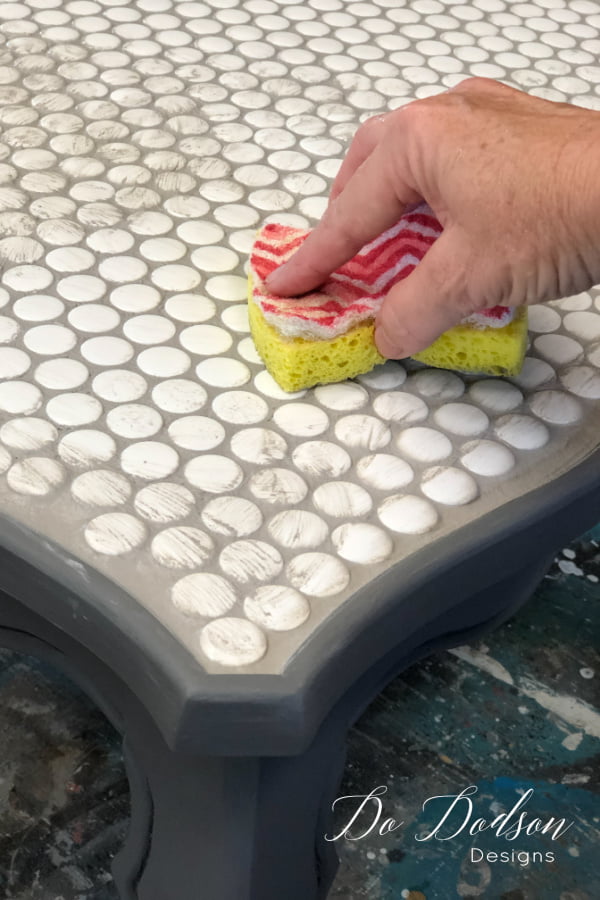
The second cleaning… After another 30 minutes (give or take), go back and clean up once again with a damp sponge. You should notice that the grout is starting to harden but not set up solid. If you notice a few grout areas that you missed, you can always apply a little with your finger to cover the imperfections. Repeat if necessary and allow to dry for 24 hours. Now is a good time to touch up the paint if needed.
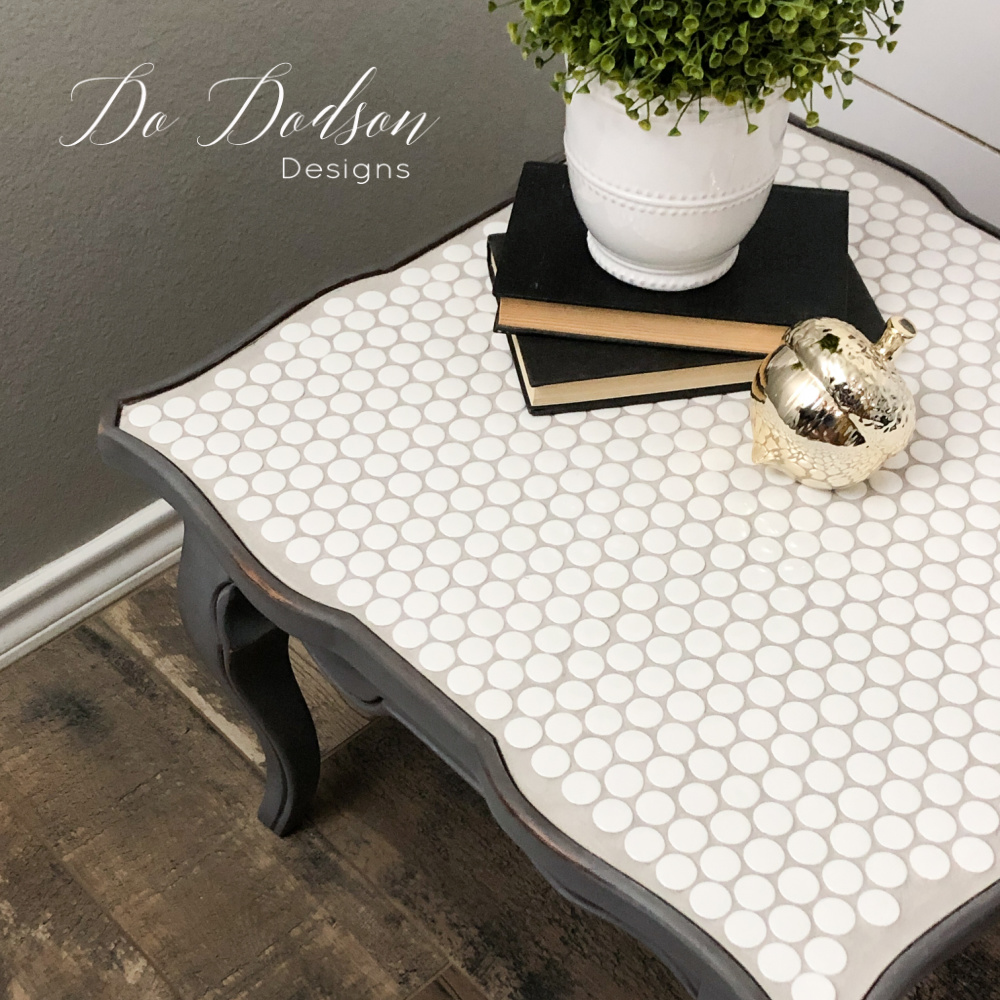
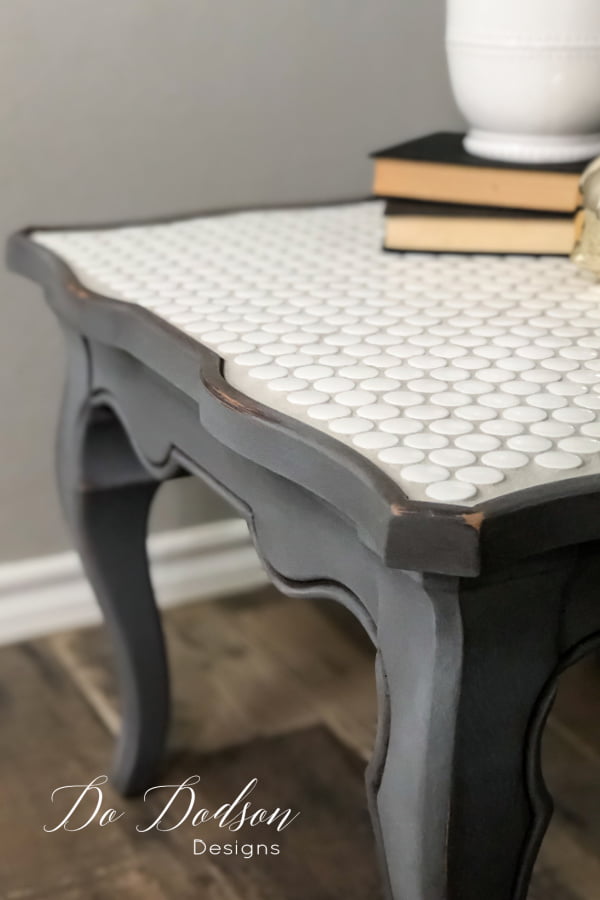
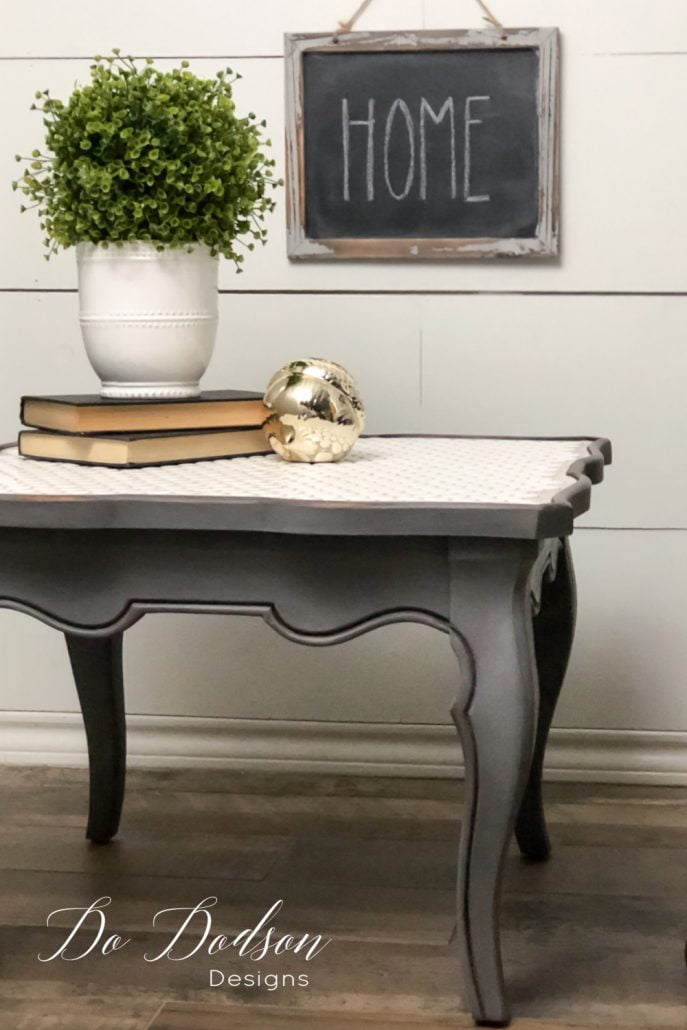
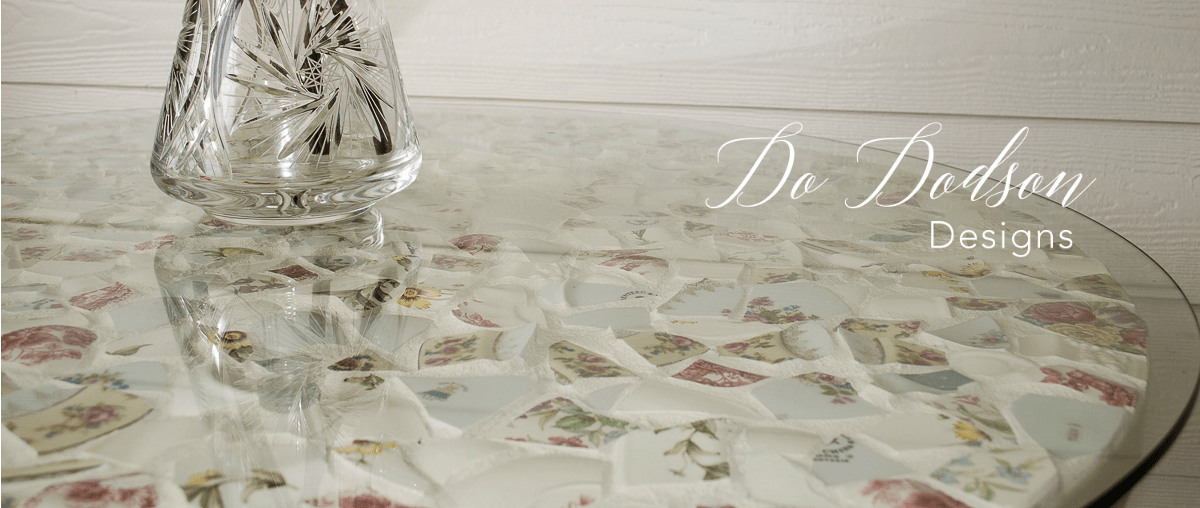
The Completed Look
The results are a lovely tiled table top that you can be proud of. And it wasn’t hard at all. The total cost of the penny tiles and glue for this project was about $30. But if you go with a basic 4X4 white ceramic tile, you’ll pay about .15 cents each.
So, that’s it! Thanks for joining me today, and I hope you enjoyed this tiled table top makeover and learned that it really isn’t as hard as it looks. Budget-friendly, and it’s saving our landfills. Don’t you love a good salvage project?
Until the next project… xo, Do
So, that’s it! Thanks for joining me today, and I hope you enjoyed this tiled table top makeover and learned that it really isn’t as hard as it looks. Budget-friendly, and it’s saving our landfills. Don’t you love a good salvage project?
Until the next project… xo, Do
Hi Donna, I once made a tiled tray and it really isn´t a difficult project if you don´t have to cut de tiles, as you said in your explanations. Funny name for this kind of table but it you think about it kinda makes sense! I´m not a classical person but i liked this table´s style, it has a lot of potential and fits well in any ambiance. It turned wonderful with the tiles on its top! Thanks for sharing!
Thanks, Val! It for sure wasn’t my style but adding the tile with paint was a huge improvement. 🙂 Have a blessed day my friend.
this looks great and simple I love to try this as a gift to my friends
Hi Jenny! You will get the BBF award if you do that. Go for it! 🙂
Love the table top and how you finished the rest of the table. It’s beat as so unique. I just love watching what you do. Thanks for the information as always.
Hi Terri, Thank you! I love finding new ways to decorate on a budget. Glad you enjoyed it. 🙂
Oh my goodness, what a fun project! My wheels are turning now…humm? Love this!
Thanks, friend! It was a fun change from just paint. 🙂
Very nice choices, Do! The table looks GREAT and the tile is so pretty. Glad you shared this post.
Thanks, Marilyn! Glad you enjoyed it. 🙂 xo