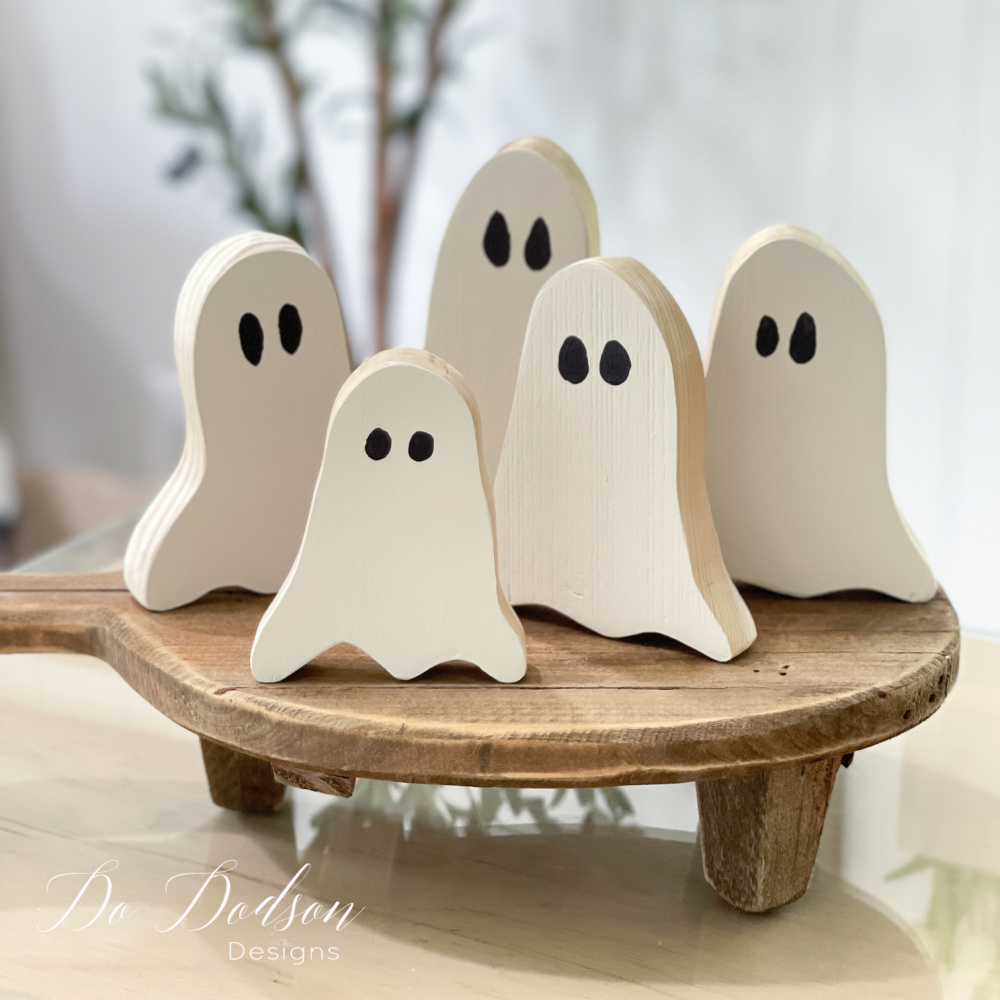
Hey, triple-D friends! I still have my hand in my scrap wood stash this week. My plan is to make these friendly ghosts and stash them all over my house for Halloween. So cute! Get ready to see how I add a touch of Halloween magic to my living space (and so can you) with this simple yet charming DIY project: wooden ghosts.
Thanks to Dixie Belle Paint Co. for sponsoring this post. While I was compensated to write this post, all opinions are my own.
* As an Amazon Associate, I earn from qualifying purchases and through other companies as well. You will not be charged extra when you purchase through these affiliate links, but any income I make helps me create more amazing DIY projects to share with you! To see my full disclaimer, click here!
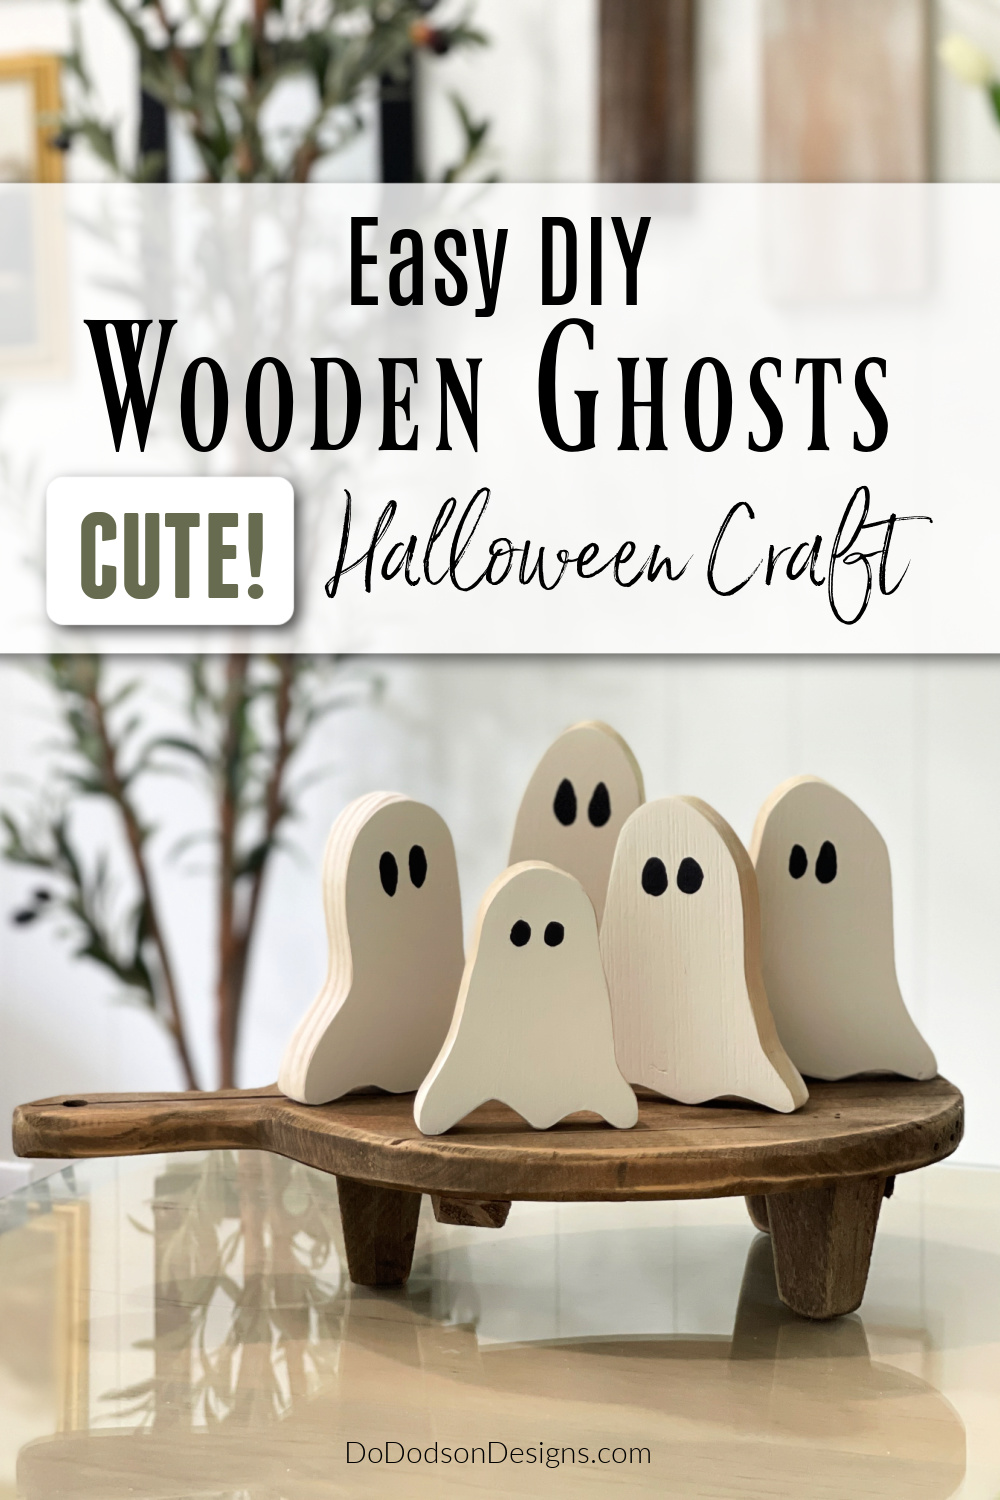
DIY Wooden Ghosts | Halloween Decor
If you love crafting with wood, this project is for you, especially if you love creating your own Halloween decor and want a level of cuteness instead of the scary stuff.
Don’t get me wrong, I love a frightening display, too, but sometimes you gotta do cute.
With a dash of creativity and some basic woodworking skills, you have the power to create a mood that truly captures the spirit of Halloween. So, get ready to roll up your sleeves and hop on this spooktacular journey, where everyday materials and a sprinkle of DIY magic will transform your home into a charming Halloween experience.
If you missed my last DIY ghost decor projects, I listed them below so you can check them out. You can never have too many Halloween decor ideas. You’re gonna love these!
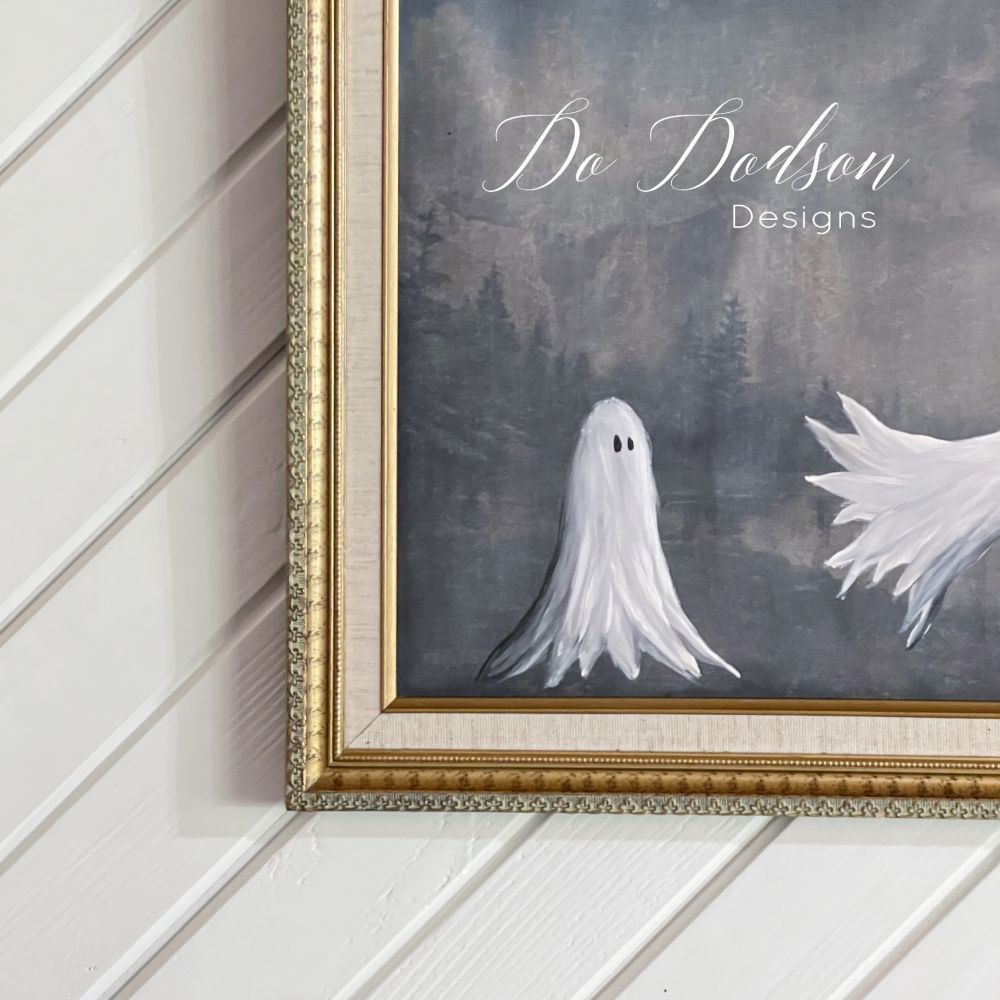
3. Ghost Painting On Thrifted Art
My inspiration for this project was these adorable DIY Wooden Ghosts.

SUPPLY LIST: Materials And Tools
The first step is gathering all the necessary materials to create your DIY wooden ghost decorations, which isn’t much. Don’t worry; you won’t need any supernatural abilities to find them—just a trip to your scrap wood stash or call that creative friend who saves everything. AKA as a hoarder of craft supplies.
- Scrap Wood 1×4 or 1×6
- Pencil
- JigSaw
- Drop Cloth Chalk Mineral Paint
- Caviar (black) Chalk Mineral Paint
- Artist Brushes or small paint brush
- Electric Sander (220 grit sandpaper)
- Clamps
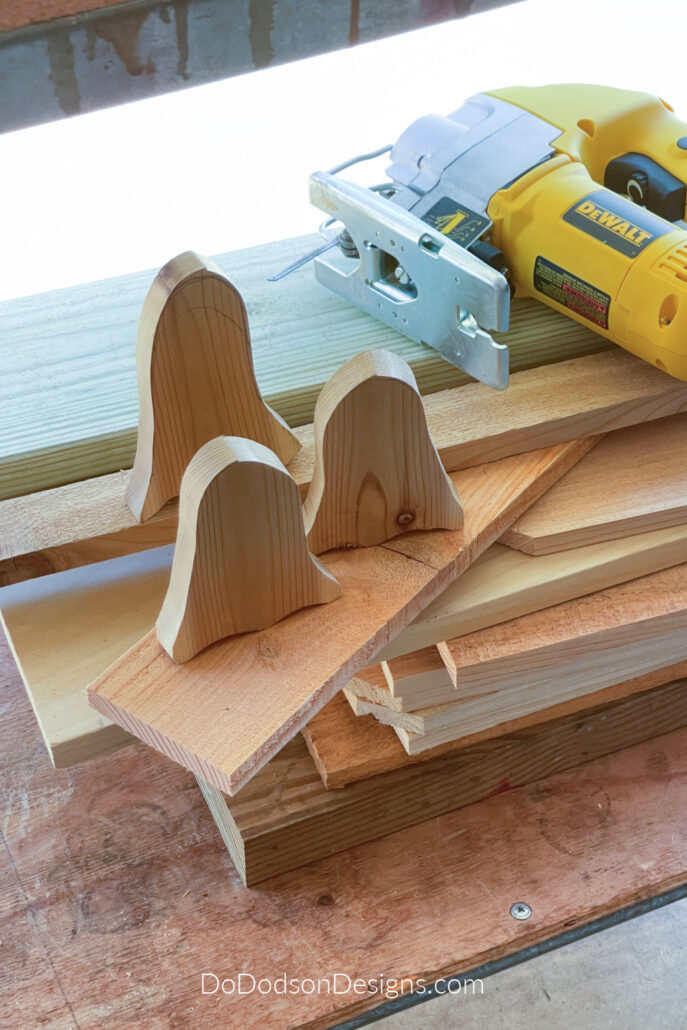
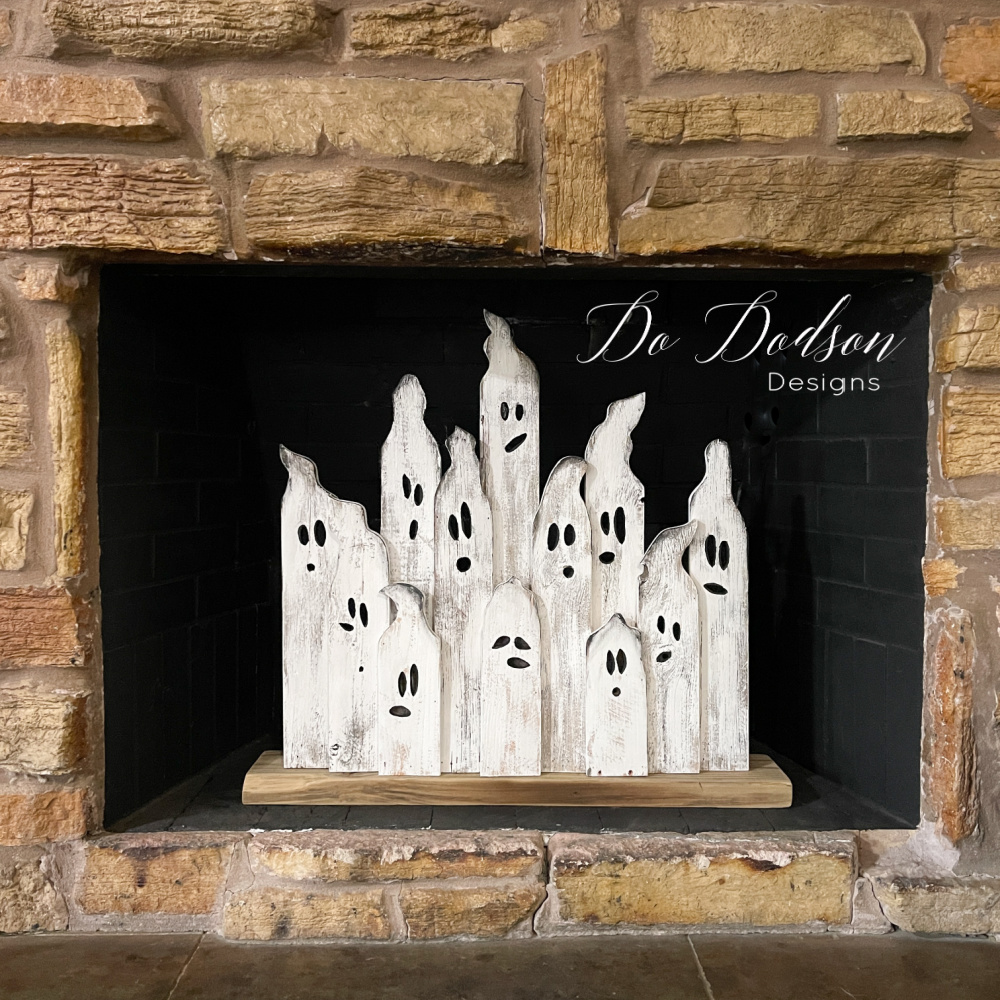
STEP 1: Designing And Cutting Out Your Ghost
First, you’ll need some wooden boards. Look for pieces about 1/2 inch thick and large enough to cut out the ghost shapes you desire and can stand on their own. You can choose to use recycled wood or opt for new materials—it’s up to you. Just make sure the surface is smooth and free of any rough edges.
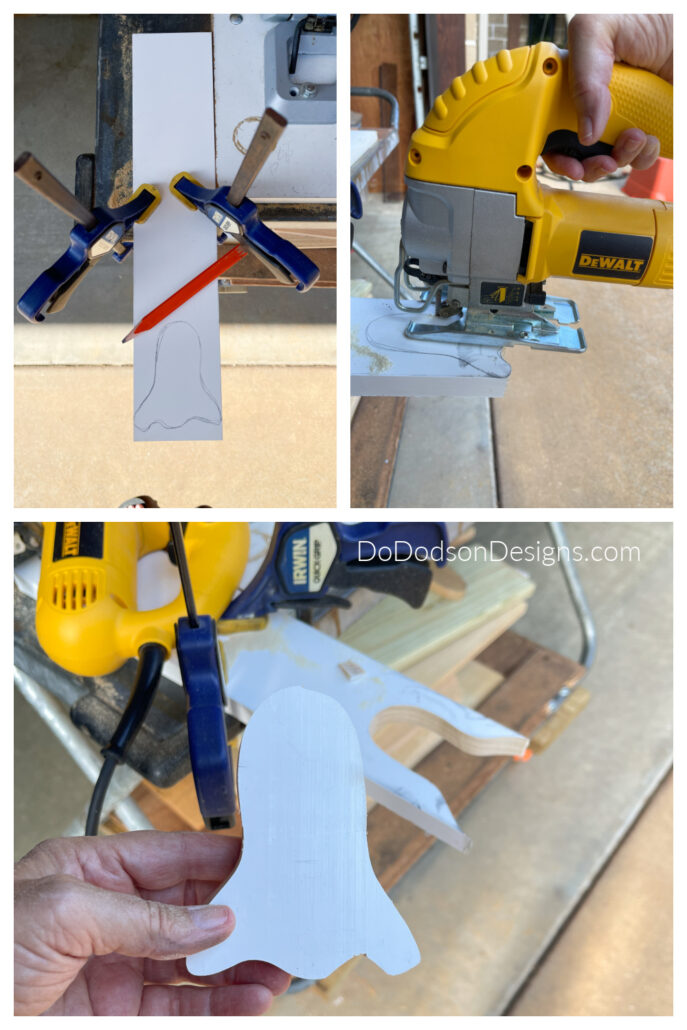
Begin by transferring a ghost template onto your wooden board using a pencil or a marker. If you don’t have a template, you can easily draw one freehand or print out a ghost silhouette from the internet to use as a guide.
To design my ghost’s shapes, I drew with my heart. I used a pencil to create a rough outline of each ghost. You can always trace the outline after creating the first ghost, but I have an issue with this: they all look the same. I want my little wood ghost family to all be different and have their own personalities. It’s totally up to you.
Can’t draw a ghost? Come on, you remember how to draw a ghost. You did it in art class. I like to close my eyes and see it in my head first. Try it! It helped me.
Next, you’ll need a jigsaw. This will be used to cut out the ghost shapes from the wooden boards. If you don’t own a jigsaw, don’t fret—reach out to friends or family members who might be willing to lend you their tools for this thrilling project. But always have supervision when working with power tools if you’re not familiar with how to use them. Safety first!
I find that using clamps to secure the board while cutting works well.
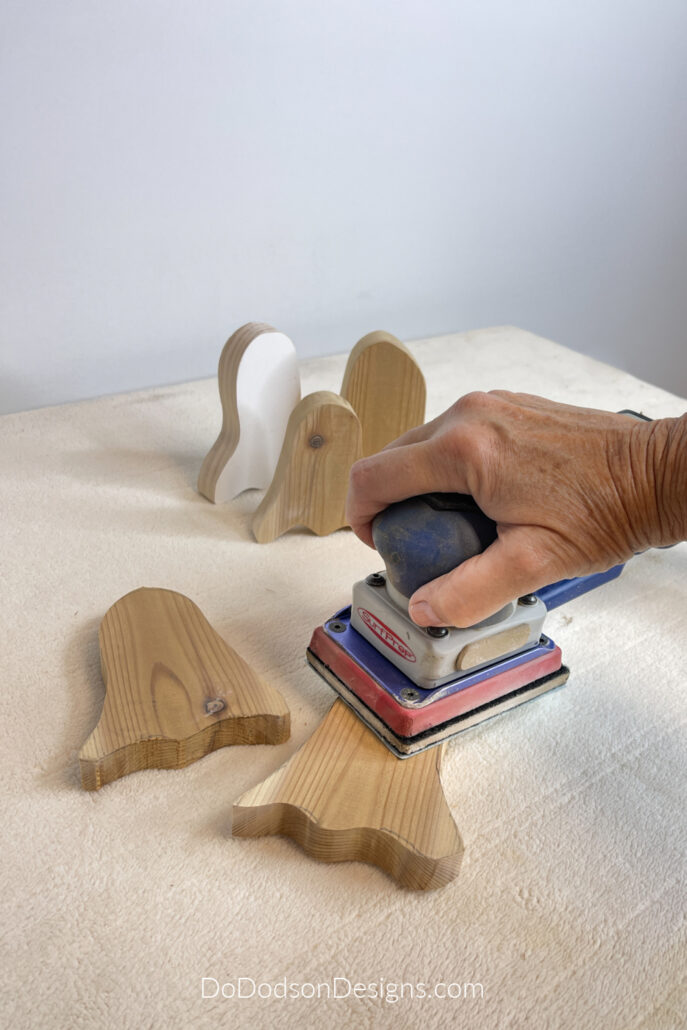
STEP 2: Sanding The Wood Ghosts
Once you’ve cut out all the ghost shapes, it’s time to smooth down any rough edges. Use sandpaper or an electric sander to smooth out any jagged or uneven areas. Be meticulous in this step to achieve the desired polished and professional look. Pay close attention to the curves and corners, ensuring they’re as smooth as possible and that they have an even bottom to sit on. I’m pretty sure my Granddaughters will want to play with these DIY wooden ghosts, and that’s totally okay with me. 🙂 I think I have an idea for a game we can play.
Choose a medium to fine-grit sandpaper, which will help you achieve the desired level of smoothness and get the wood ready for paint.
Remove any remaining wood dust with a cloth or soft brush before the next step.
STEP 3: Painting The Wooden Ghosts
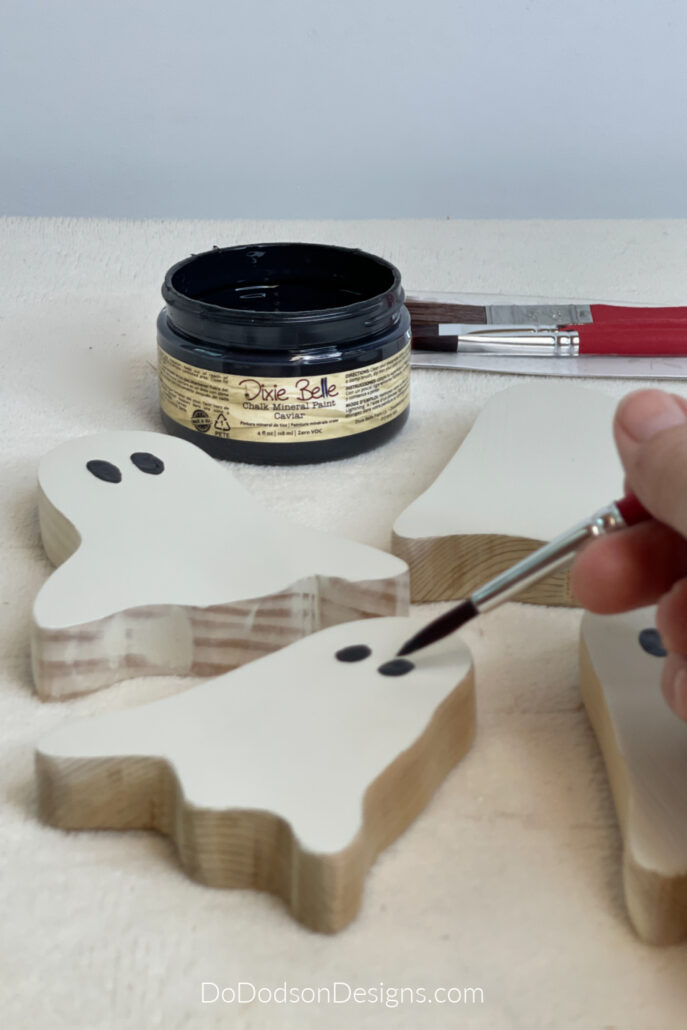
When it comes to painting your DIY wooden ghosts, let your creativity shine. You can opt for traditional white for a classic ghostly look or experiment with vibrant oranges, purples, or greens to add a touch of Halloween whimsy. Alternatively, you can paint each ghost with a different design or give them individual personalities with unique facial expressions.
Usually, I would use a primer over bare wood to block the wood tannins before painting. I chose to skip this step because this is a craft project, and I’m using a creamy white (Drop Cloth) instead of a true white. I’m not worried about it.
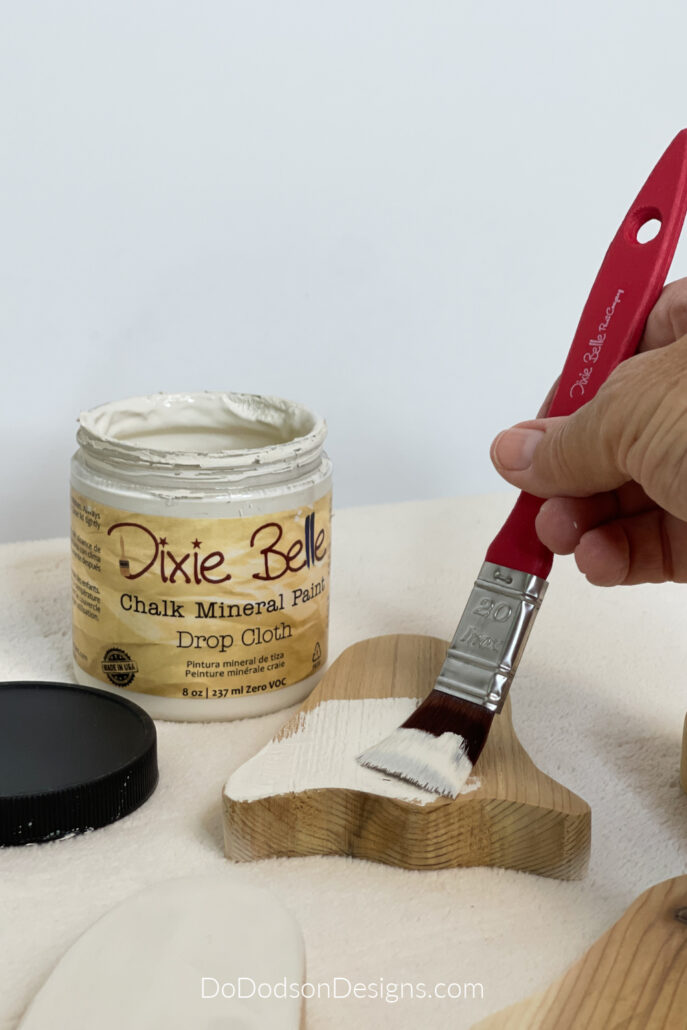
Take your time and apply two thin layers of paint with a small paintbrush, allowing each coat to dry completely before adding the next. This will help achieve a smooth and professional finish.
Once you’re satisfied with the painted appearance of your ghosts, allow them ample time to dry. This is crucial to prevent smudging or smearing because it almost always happens to me. Messy crafter here.
Don’t forget you can paint each ghost with a different design or give them individual personalities with unique facial expressions. A small artist’s brush works well for the eyes.
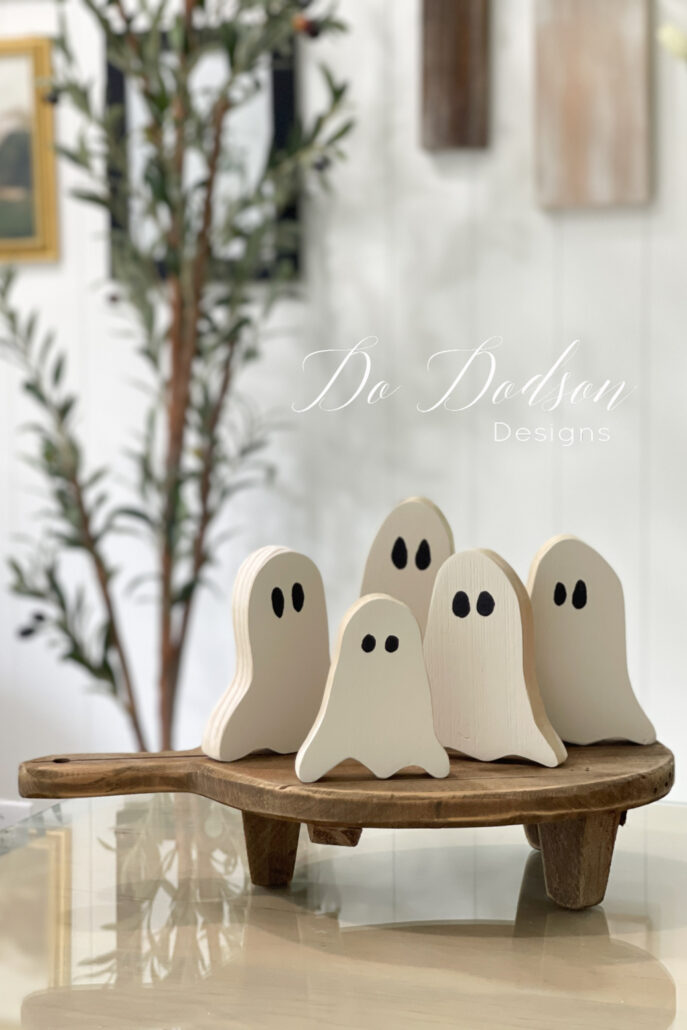
Displaying Your DIY Wooden Ghosts
With your wooden ghosts now beautifully sanded and painted, they are ready to be positioned and admired. Try showcasing your hauntingly delightful creations throughout your home in all areas of your home and in some unexpected places, too.
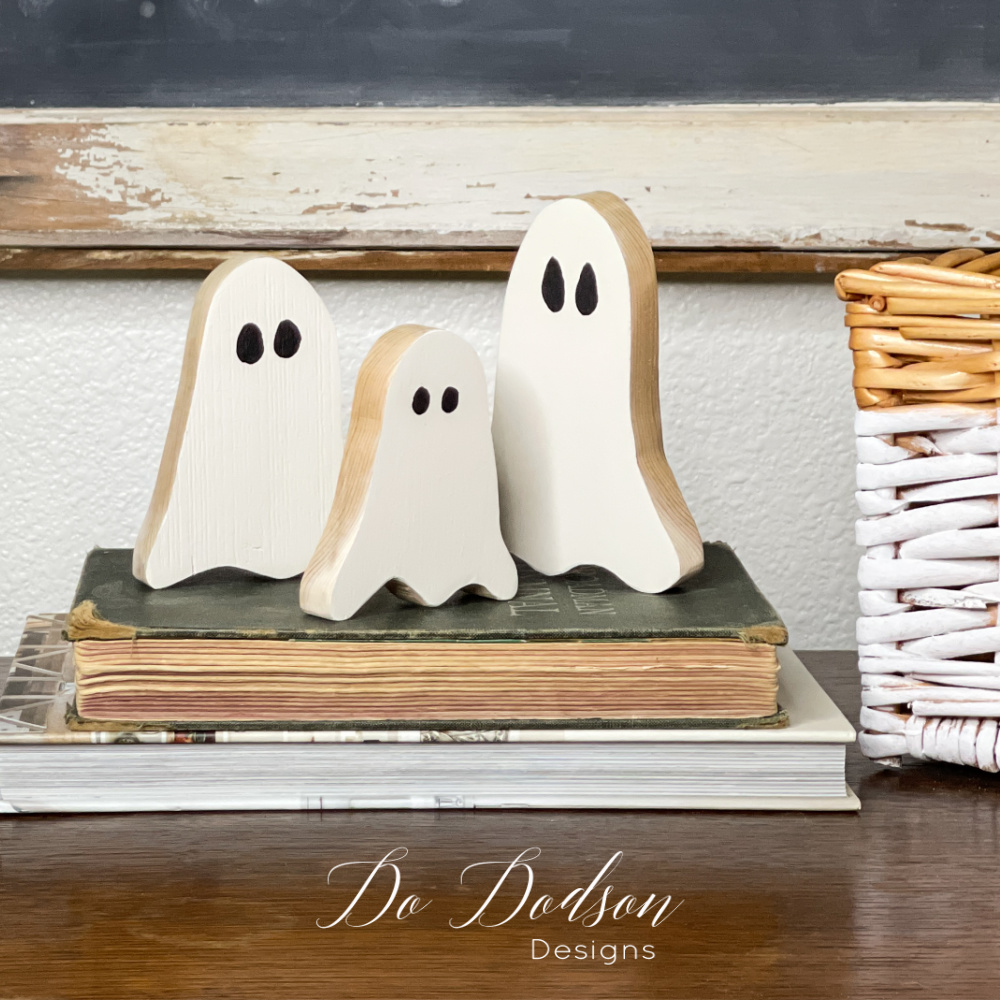
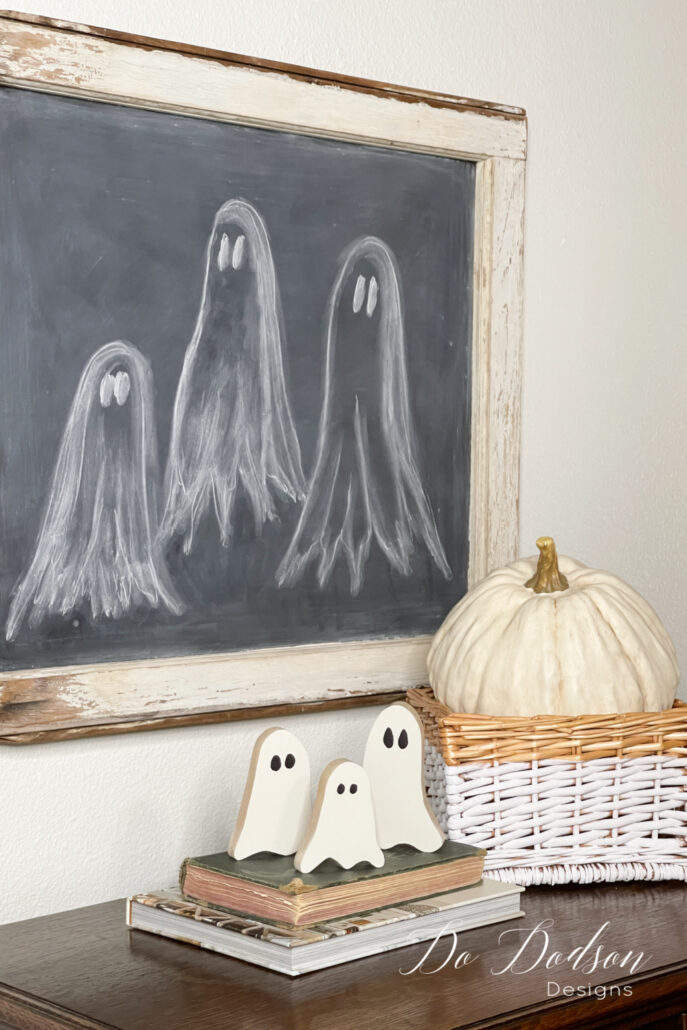
Book Stacking Display
Start by choosing the ideal spots to display your wooden ghosts. Consider the layout and flow of your home, identifying areas that could benefit from a touch of ghostly charm. Perhaps your entryway could use a spooky companion to greet visitors, or your mantle could be transformed into a centerpiece of eerie elegance. The possibilities are endless, but the key is to select locations that will maximize the impact of your wooden ghosts and create a cohesive Halloween atmosphere.
Stacking them on top of books is always a good thing.
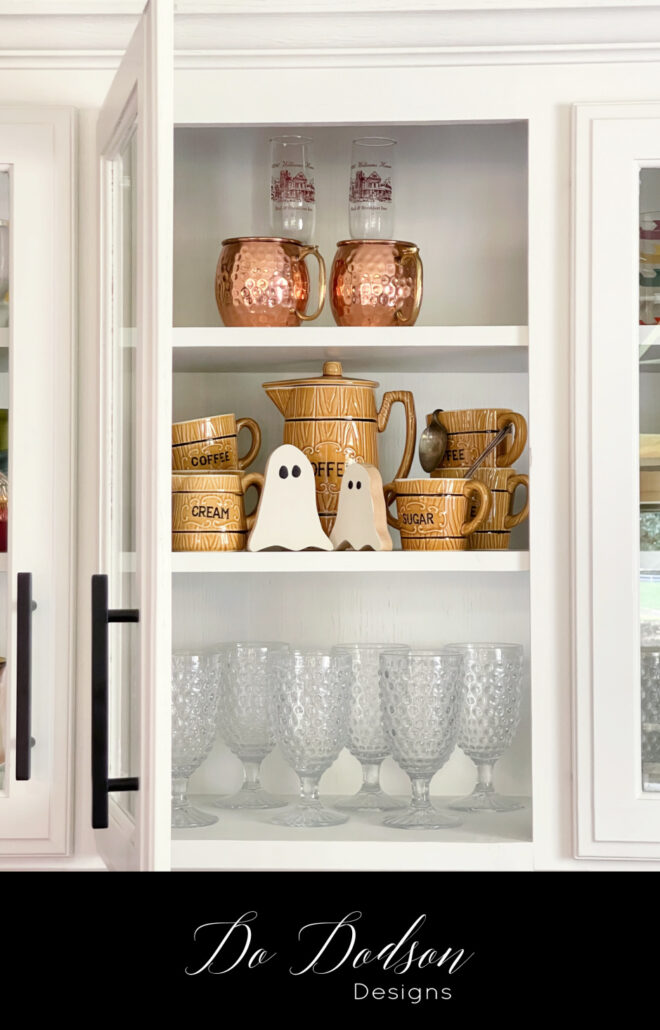
Some Kitchen Fun With DIY Wooden Ghosts
Another fun way to display these cuties is to choose high and low areas. Some of your taller guests will appreciate your humor. The uppers of our kitchen cabinets are the perfect place to nestle in a few of these little Boo thangs.
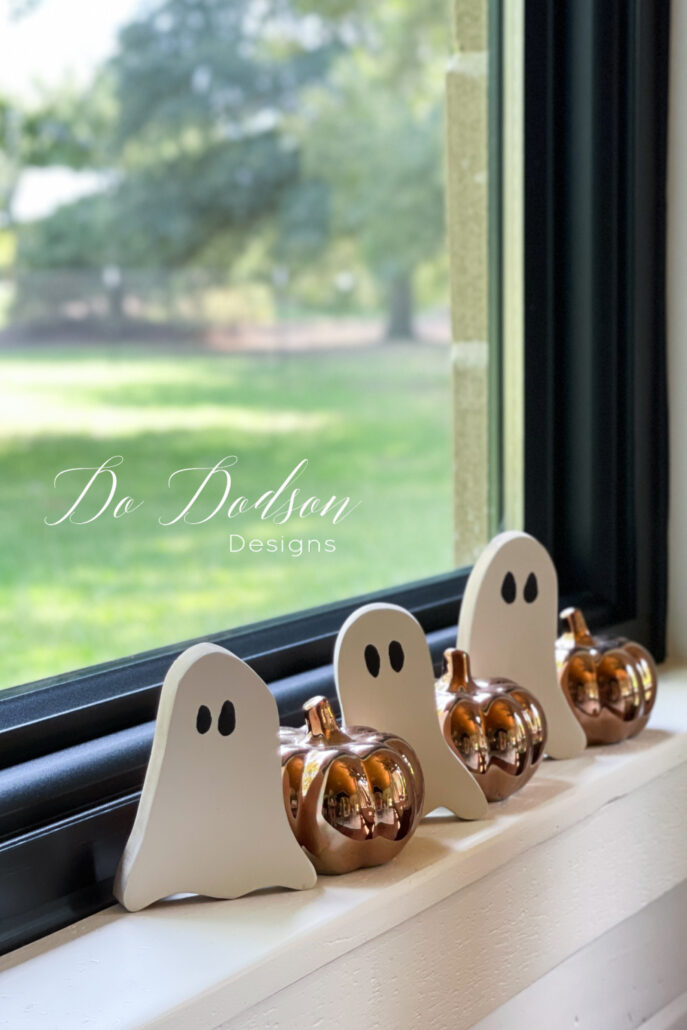
Window Display Ghosts
And for the little spooky guests, a window sill is the perfect place to add some spooktacular!
BOO Thang In The Guest Bath
Consider incorporating other decor elements to make your wooden ghosts stand out even more. Surrounding your ghosts with complementary pieces can enhance their presence and create cohesion with your existing home decor.
Don’t forget the bathroom! I never met a bathroom that didn’t need a little Boo humor for Halloween.

Don’t Forget To Decorate For Yourself
Last but not least, I added a few on my work desk to remind me that I’m still a child at heart. Some of my fondest memories of Halloween included the ghosts we made from Mom’s white sheets. The sheets were never seen again, LOL.
Remember, a little creativity and basic woodworking skills are all you need to make your home stand out this Halloween.
I may use these wooden ghosts to play “hide and ghost seek” with my Grands. Wouldn’t that be fun?
Here’s how to play it.
Hide all the little wooden ghosts all over the house. Find places that are unusual but somewhat visible to the naked eye. Have your guest search for them; the one who finds the most ghosts will win a prize. Or you could give a prize for each one found.
I can’t wait to play this with my grandkiddos. Knowing my adult kids, they will want to play, too. With four boys, there’s always competition. 🙂
Thanks for joining me today as I share my DIY wooden ghosts tutorial with you. I find it’s the simplest DIY projects that have the most meaning for me. Now, every year, I can pull these little wooden ghosts from the attic to use and reminisce about the memories of the years past with my family.
Like this project? I’d love to hear from you and your thoughts. Or just let me know you stopped by in the comment section. It’s always nice to hear from my readers.
Don’t forget to PIN and share this with all your ghost-loving friends.
Happy Halloween!
Until the next project… xo, Do
So simple and sooo adorable! And I love your idea of hide and ghost seek with the grandkids. Super fun! Have a great day my friend and thanks for sharing! XOXO
Thank you, Denise. Sometimes, simplicity is all we need and a fun game that makes us smile. Have a wonderful weekend, my friend. xo 😘
The ghosts are so darn cute!! We will be traveling to see our granddaughter who turns 3 the end of October. Your ghosts and your fun game idea inspired me. I’m gonna get some ghosts cut out, sanded and painted then take them with and have our grand daughter put the eyes on the ghosts and we’ll make a game of hiding them or moving them around the house. I think she will love the ghosts and the game. She likes to do projects. Thanks for all the fun Halloween creations.
Joanne, that warms my heart. I think it’s so important that children learn from their Grandparents. Even if it a small piece of salvaged wood. Have fun with your little one. ❤️