
Learn how to make this cool DIY wood ghost display from scrap wood. It’s an easy DIY Halloween project for woodworking lovers who love to create decor.
Thanks to Dixie Belle Paint Co. for sponsoring this post. While I was compensated to write this post, all ideas and opinions are my own.
* As an Amazon Associate, I earn from qualifying purchases and through other companies as well. You will not be charged extra when you purchase through these affiliate links, but any income I make helps me create more amazing DIY projects to share with you! To see my full disclaimer, click here!
DIY Wood Ghosts Halloween Decor
I admit I love Halloween a lot, and so does my hubby. So much so that we actually got married almost on Halloween day. Who does that??? Me! We had a haunted reception, with the wedding party going on a haunted train ride afterward. 🙂 It was a super fun night and one we will never forget.
If you love Halloween as much as we do, I think you’ll enjoy making this DIY wooden ghost display that will send chills down your spine! LOL, more like a smile on your face. It’s harmless. I do my best to make kid-friendly, creative decor that is not too scary.
Today, I’m sharing a step-by-step with easy-to-follow instructions on creating adorable wooden ghosts using old pieces of fence pickets. Whether you’re a beginner or an experienced DIY enthusiast, this woodworking project can be completed in a few hours, making it the perfect way to add a touch of hauntingly cute decor to your Halloween festivities. So, grab your tools, and let’s get crafting!

Supply List:
- Scrap wood (1×4 cedar or pine fence pickets)
- 2X6 piece of lumber (for the base)
- Chop Saw
- Drill
- Clamps
- Jigsaw
- Electric Sander or Sandpaper
- Cotton Chalk Mineral Paint (white paint)
- Caviar Chalk Mineral Paint (black paint)
- Paintbrushes
- Artists Brushes
For more beautiful DIY wood ghost inspiration, check out the links below.
Gathering Your Materials
Before you get started on your DIY wooden ghost project, you’ll need to gather a few materials. Don’t worry; the items required are simple, and more than likely, you’ll have leftover wood from another wood craft project.
The beauty of this wood craft is that it embraces imperfections, so don’t worry if your scraps are a bit weathered or have some character. In fact, those imperfections will only add to the charm of your creation.
How To Get Free Wood For Crafts
Do you want free wood for craft projects? Wood fences don’t last forever, and when new ones are built, the owners of these fences are more than happy to give away the old ones. As long as you are willing to haul it all off, you, too, can have an endless supply of fairly good quality wood.
I’m still using fence picket scraps from 5 years ago. SCORE! I get so giddy when I can create amazing decor for almost nothing, and so can you.
Step 1: Creating the Ghost Outline
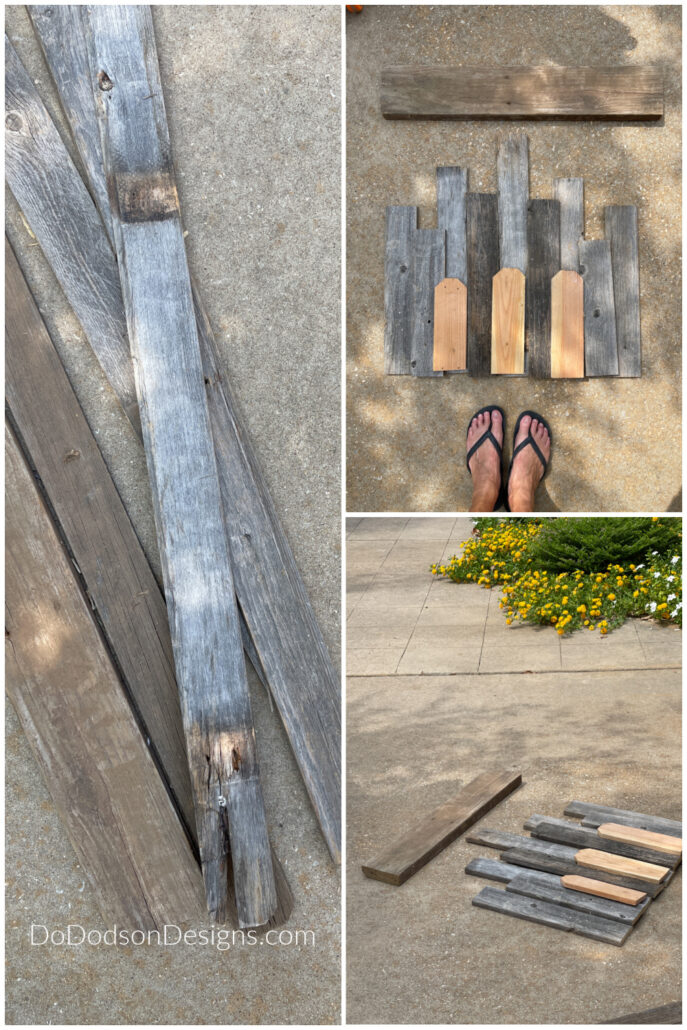
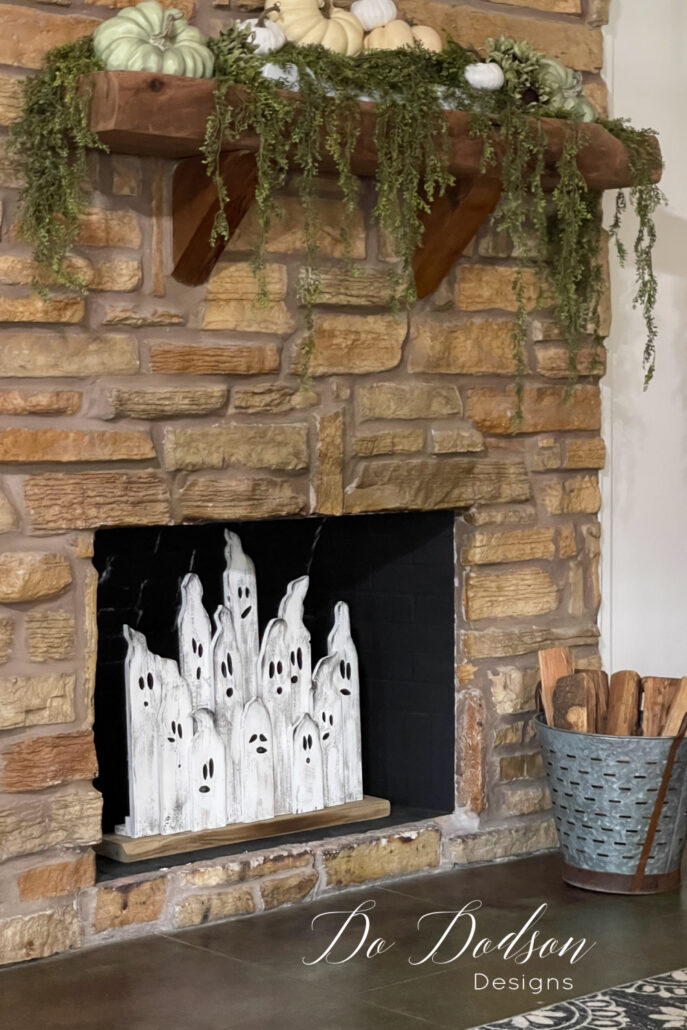
Because my display is going inside our fireplace, I measured the height and width of the fireplace before cutting my wood pieces to the desired lengths.
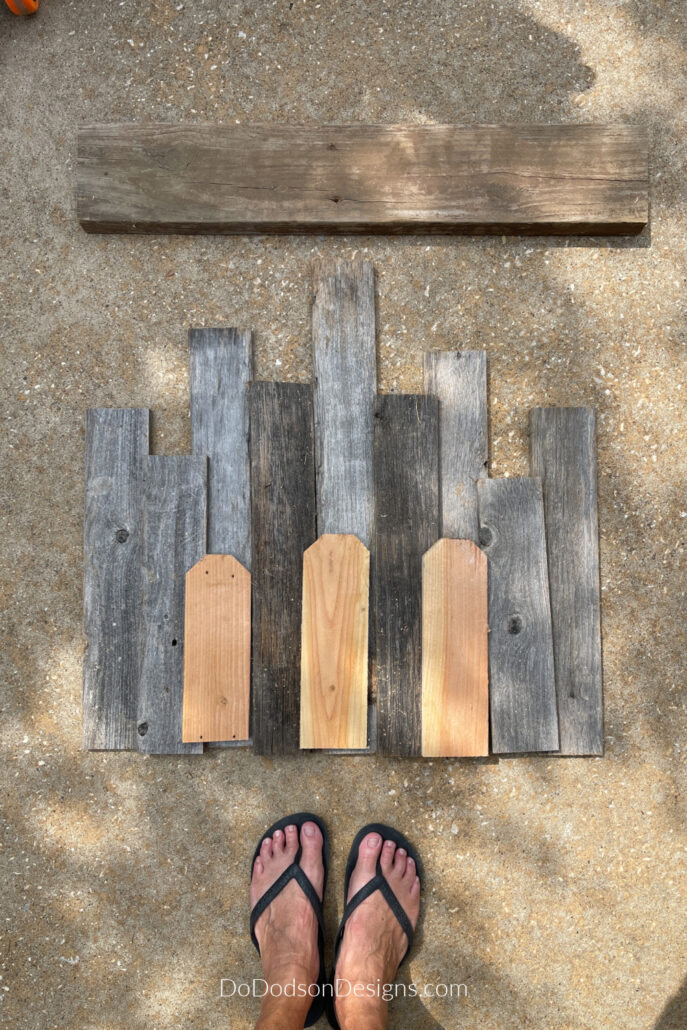
You’ll want to stagger the height of the wood ghosts so that each one is visible with the tallest to the back, so I suggest you do a dry run and lay them out to get an idea of the height differences before cutting each board.
Also, you’ll need a 2×6 board for the DIY wood ghost base with 2 more wood pieces to attach the ghosts to. The length of the base is totally up to you. I chose the 2×6 because it’s heavy enough to support all my little ghosties. 🙂
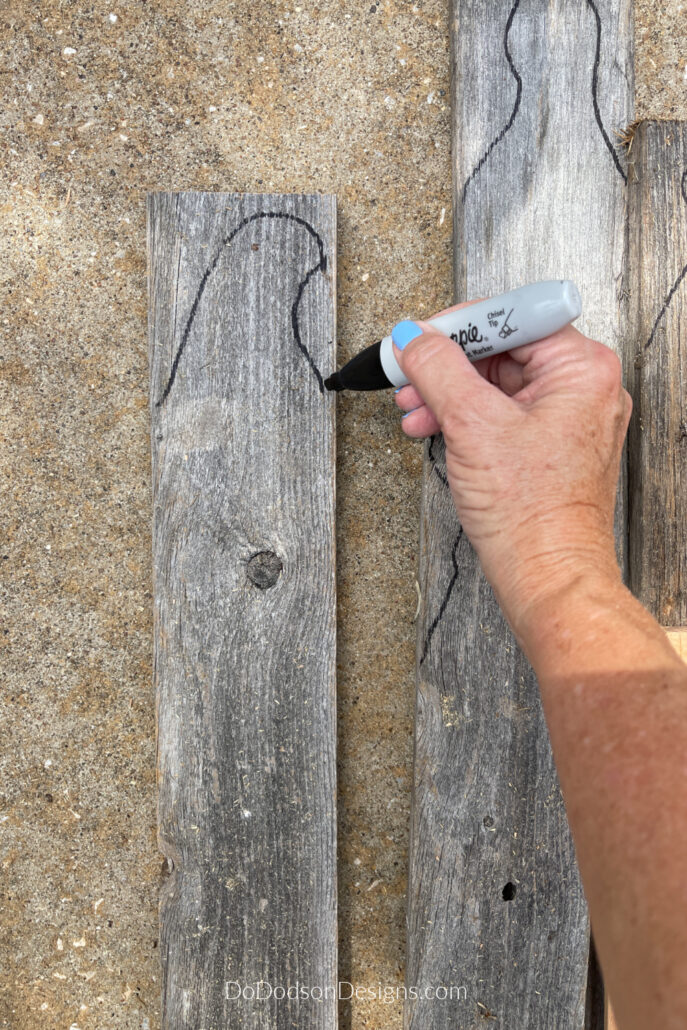
The first step is to create the ghost shape of the head. Use a pencil or a sharpie marker to draw the outline of a ghost. Feel free to get creative with the shape, whether you prefer a classic ghost silhouette or a more whimsical feature. Use your imagination when creating your DIY wood ghost.
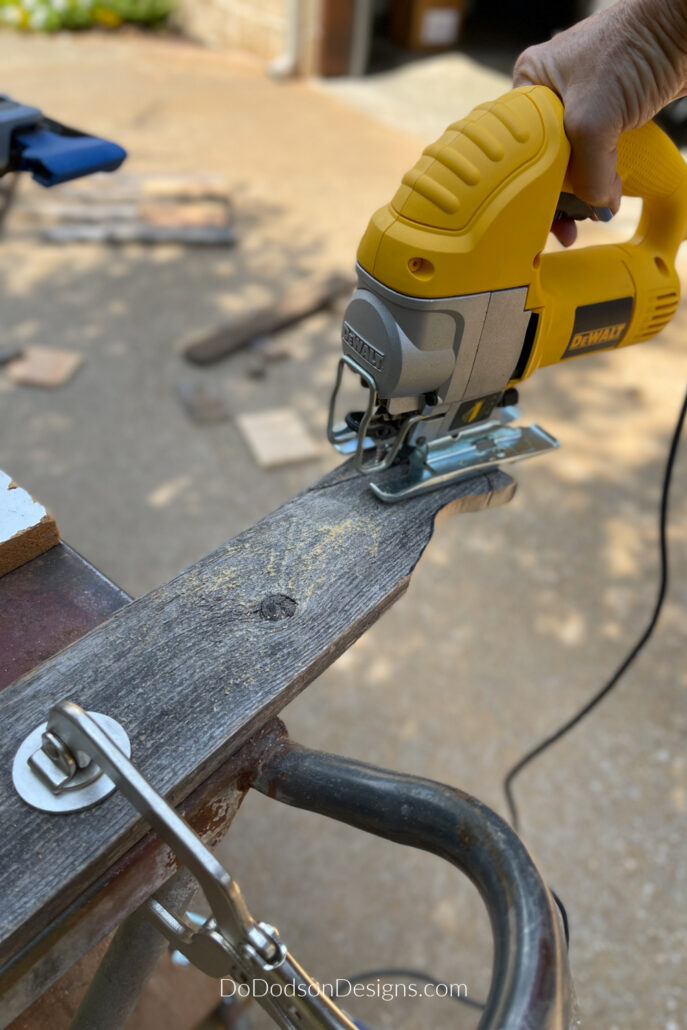
STEP 2: Cutting Out The Ghost Shape
Next, grab your jigsaw and carefully cut along the drawn outline. Take your time and follow the lines as closely as possible to achieve a clean and precise cut. If you’re new to using a jigsaw, remember to prioritize safety by asking for help and always wear protective goggles and gloves.
Because I work alone and only have two hands, I find using clamps to secure the boards to a steady surface makes cutting with a jigsaw much easier. Using a jigsaw takes some practice but is not difficult once you get the feel of the saw.
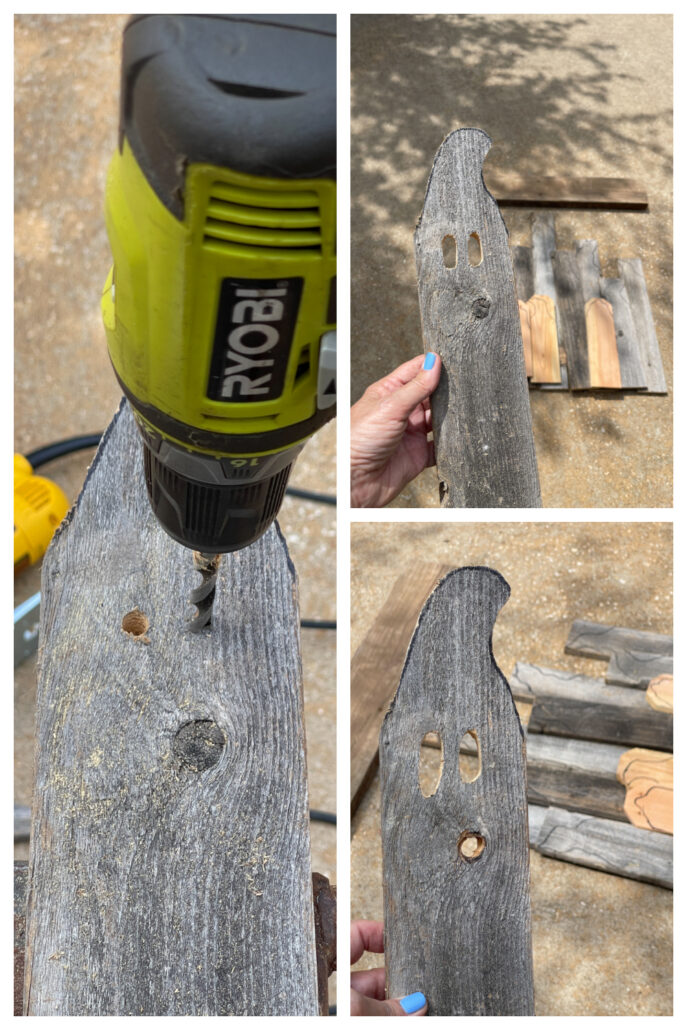
For the faces, draw the eyes and mouth in fun shapes. Change them up!
Next, you’ll need a drill and a large bit to make a hole in the eyes and mouth so that you can slide the blade of the jigsaw into the hole to make the cutout.
STEP 3: Sand To Remove Rough Edges Of Your Ghost
After cutting out your wooden ghost, preparing the wood is important to ensure a smooth finish. Inspect your wood for any large splinters or rough spots that could cause harm. Use 150-grit sandpaper to carefully remove these imperfections, taking care not to damage the overall shape of the wood.
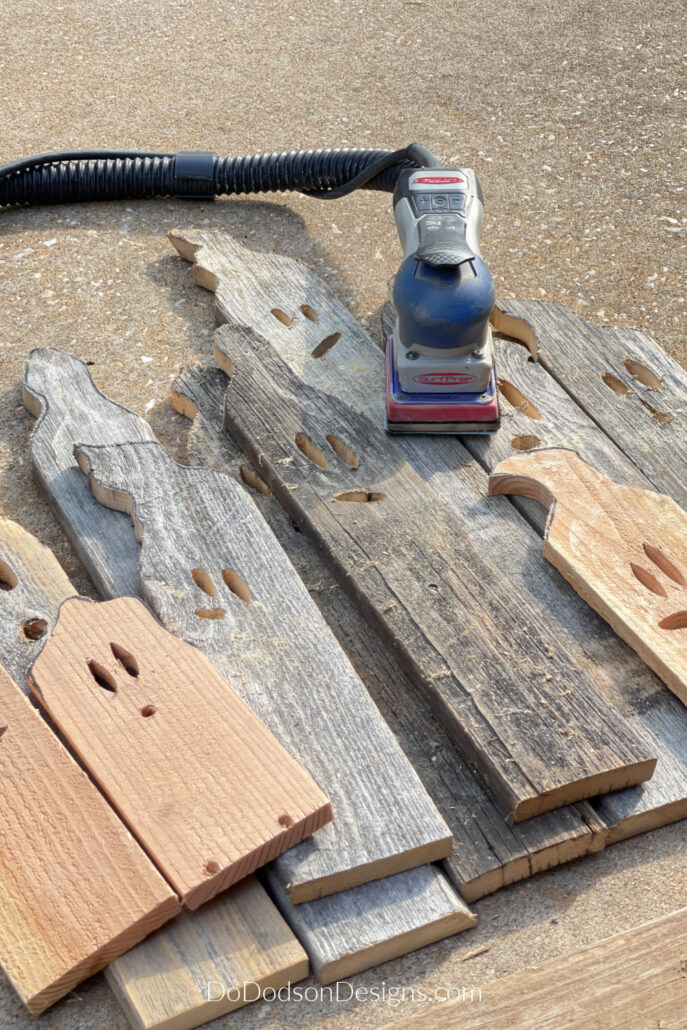
Once you’ve addressed any major roughness, it’s time to focus on creating a clean canvas for your ghostly creation. Take a piece of 220-grit sandpaper or a sanding block and gently rub it along the surface of the wood. This will help to smooth out any remaining rough edges and make the fence pickets easier to work with.
Use sandpaper to sand inside the eye and mouth cutouts for best results.
STEP 4: Painting The DIY Wood Ghost
Now, this step is optional if you love the look of natural wood after it’s been sanded. I personally love the natural wood look but opted to paint mine white, thinking they would show up better against the black background of my fireplace.
I used Dixie Belle’s Cotton (white) chalk mineral paint using a dry brush technique to give the wood a cute ghostly appearance. Full coverage isn’t needed for this look, but if you prefer more, be my guest.
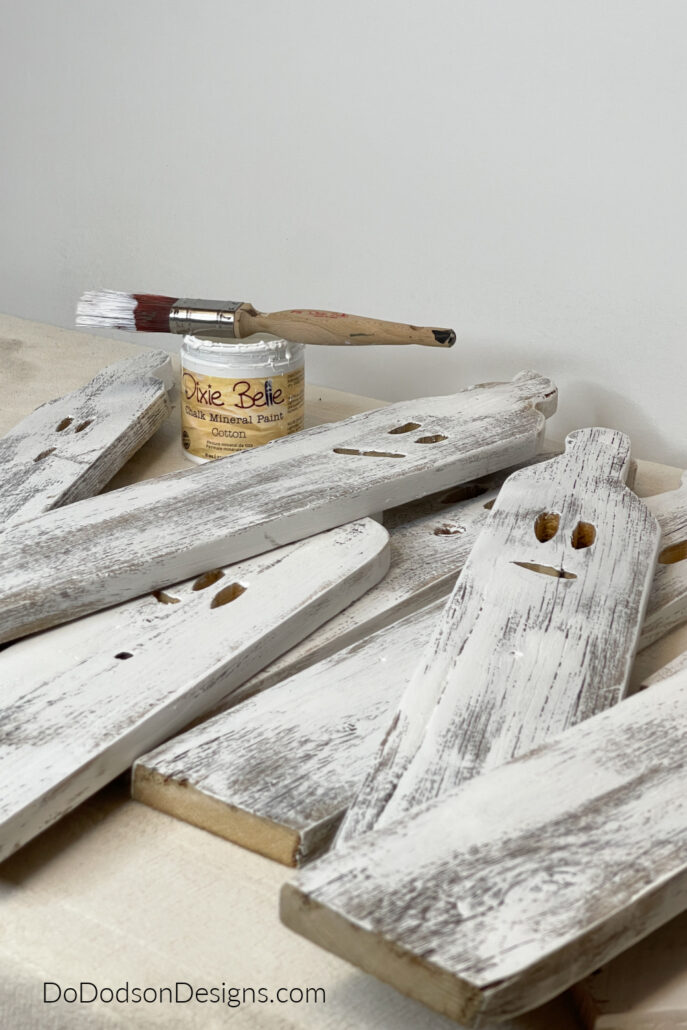
I used a small artist’s brush with Caviar (black paint) to make the features stand out for the inside of the eyes and mouth.
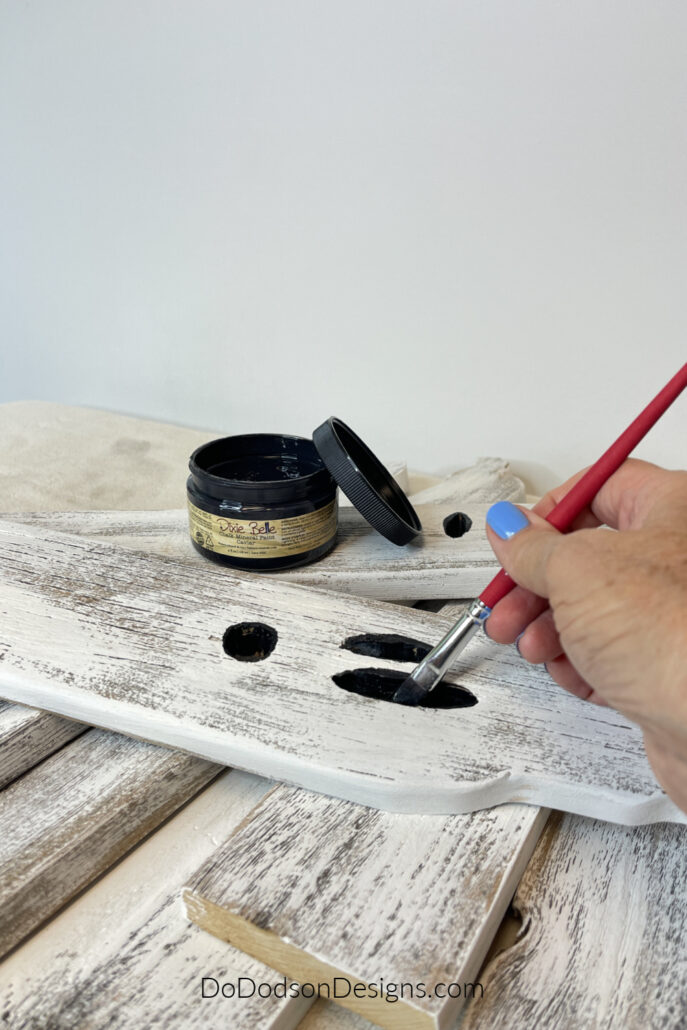
With the same brush, I accented and added shadowing to the top of the ghost. Details are important, so don’t miss this step.
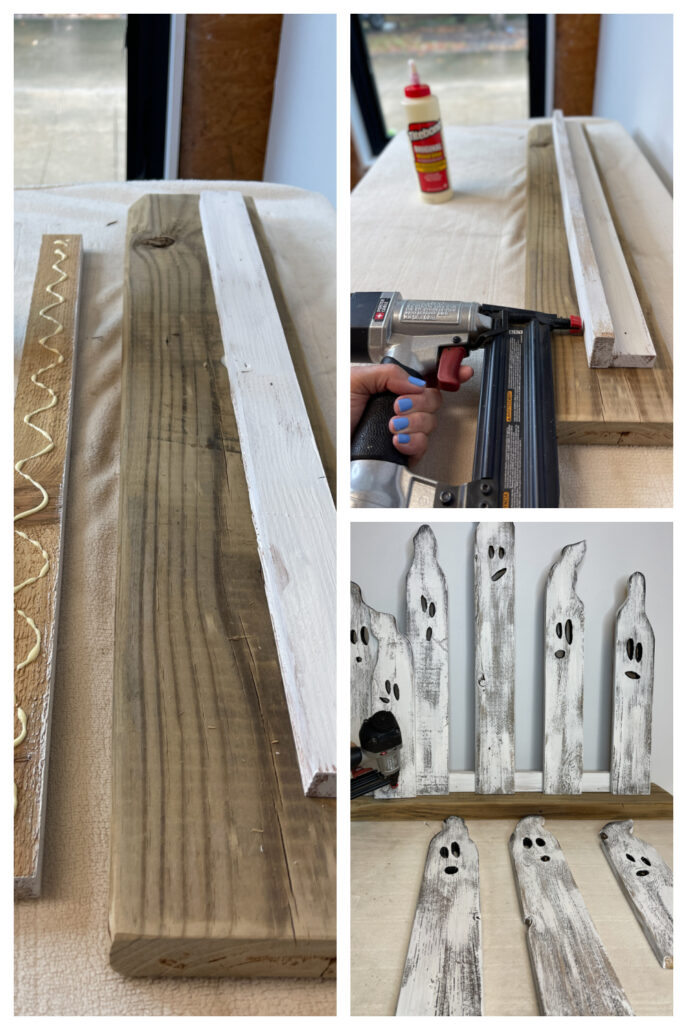
STEP 5: Making The Base Stand (Assembly)
The base for this DIY wood ghost display is simple but effective. I used one 2×6 board and two 1×2 wood strips.
Use wood glue and nails to secure them to the 2×6, with one strip sitting on its side and the other piece lying flat elongated on the 2×6. The flat piece will be the back brace.
Once you have the base built, start adding the wood ghost, with the tallest in the middle, staggering them while securing them with nails. Using a pin nailer makes attaching the ghost quick and easy. But you can use the old fashioned hammer and nails.
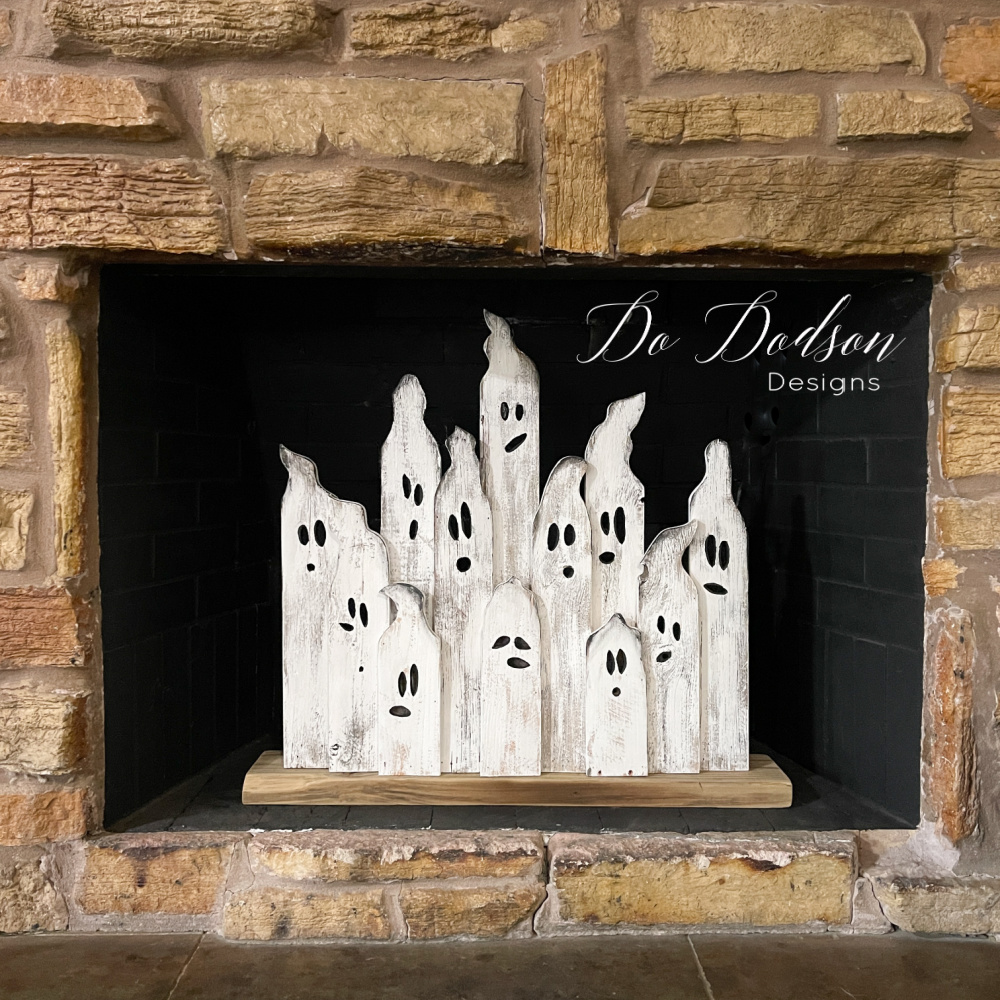
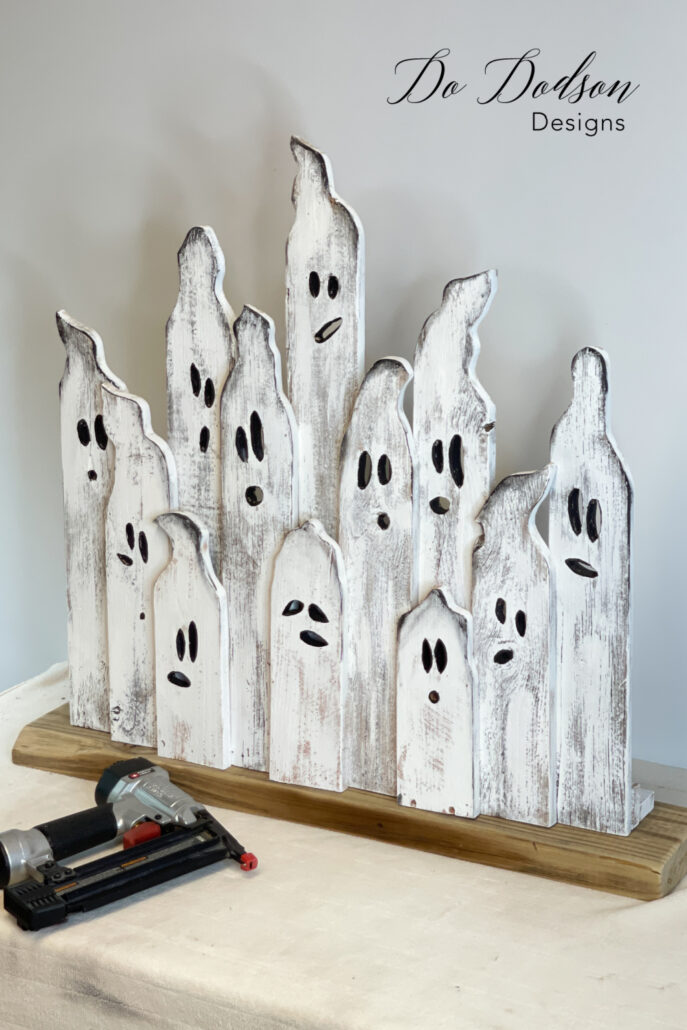
Before you know it, you’ll have the cutest DIY wood ghost display ever! I’m pretty stinking proud of this project, and it turned out better than I thought it might. But I always feel this way when I create. You too?
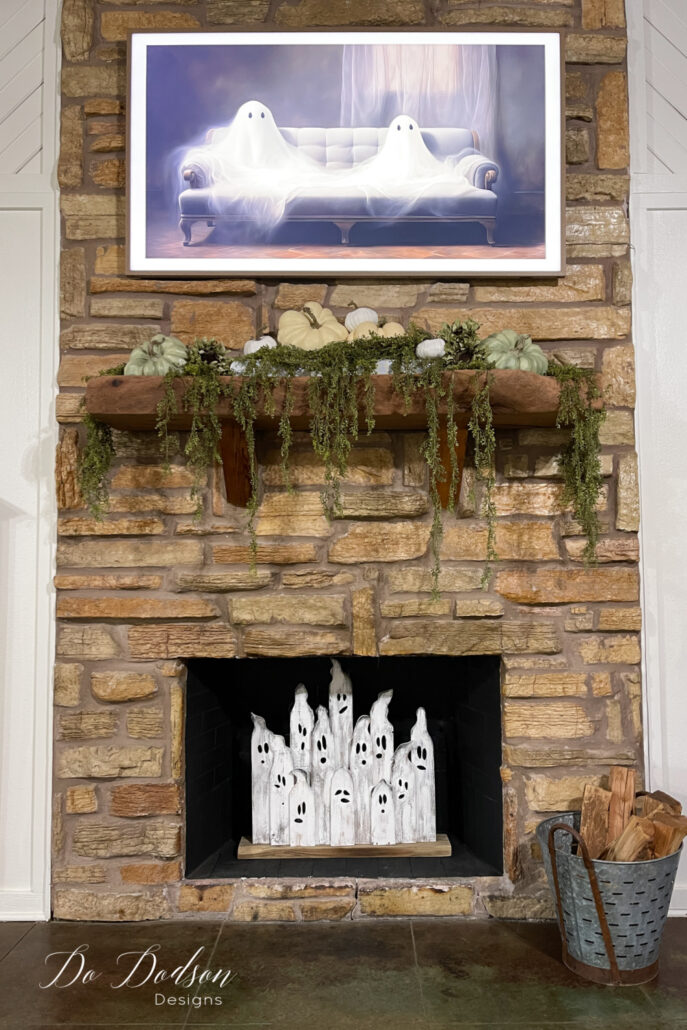
Halloween Scrap Wood Ghosts
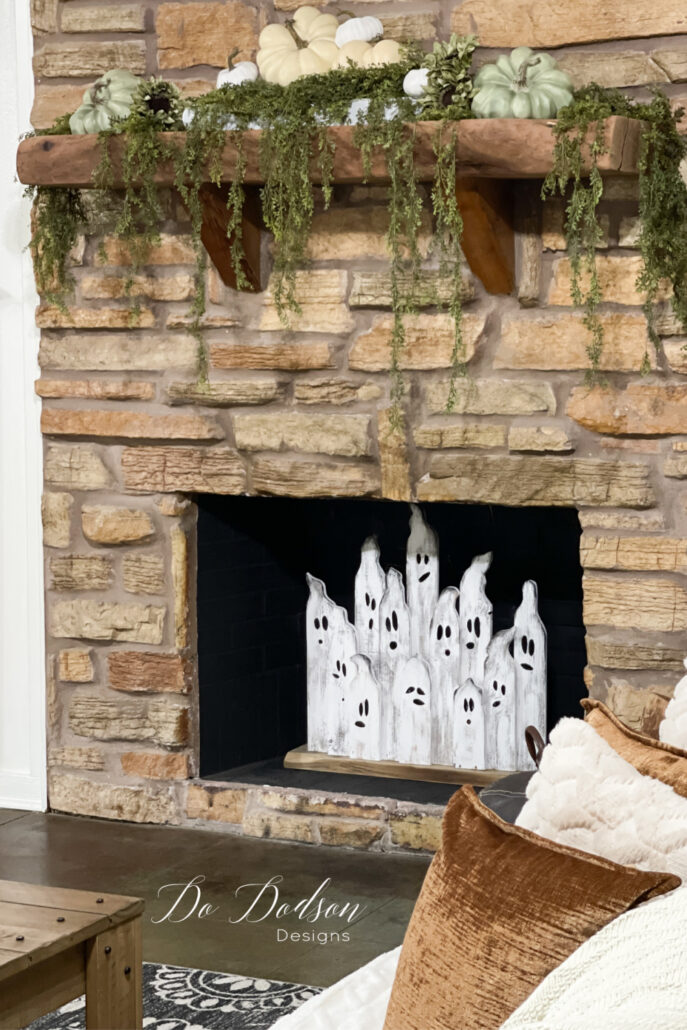
Now comes the fun part. Find that special place in your home to display your DIY wood ghost stand and enjoy. The cuteness is almost too much to handle! I especially like the way the heads of the ghosts look like flames. One of the reasons I chose the fireplace and that we almost never burn. We live in Texas. It’s considered a decorative feature. LOL
I always enjoy coming up with fun ways to decorate for the holidays, especially Halloween.
I’d love to hear what you think of this cute DIY wood ghost idea. Got scraps? Why not make a piece that you can use every year? This would also work well on a covered porch or even on a mantle above the fireplace. Where would you use it in your home?
I’d love to hear your ideas and don’t forget to let me know you stopped by. Happy decorating!
Until the next project… xo, Do

Okay Do, you have outdone yourself!
Total cuteness overload! I am in love. And you’re right, making something wonderful is great, but making it for FREE is downright giddy-producing.
Hi Diane! I’m so glad you enjoyed this almost FREE project. 😁
This is such a cute idea Do! Love your little ghosties! 👻
Thanks friend! It filled the fireplace space perfectly. 🙂
I love your ghosts display in your fireplace. Thanks for the inspiration; I need to make one for my fireplace.
Hi Kathy. I’m excited to see what my grandkids think about it. Thanks for reading. xo 🙂
Do, that is the best Halloween DIY I have seen!!! So cute. You create the best wood projects. Thank you for sharing.
Thank you, Cheryl!
It’s always good to know what I do is being enjoyed by others. As always, thanks for stopping by. 🙂 xo
OMG. . .stunning. . .wish I could see a bigger straight on picture of just the wooden ghosts and no fireplace background.
Hi Arleen,
There’s a photo on this blog post without the fireplace background. Maybe you missed it. I felt the same as you and that’s why I added it.
Thanks for reading. 🙂
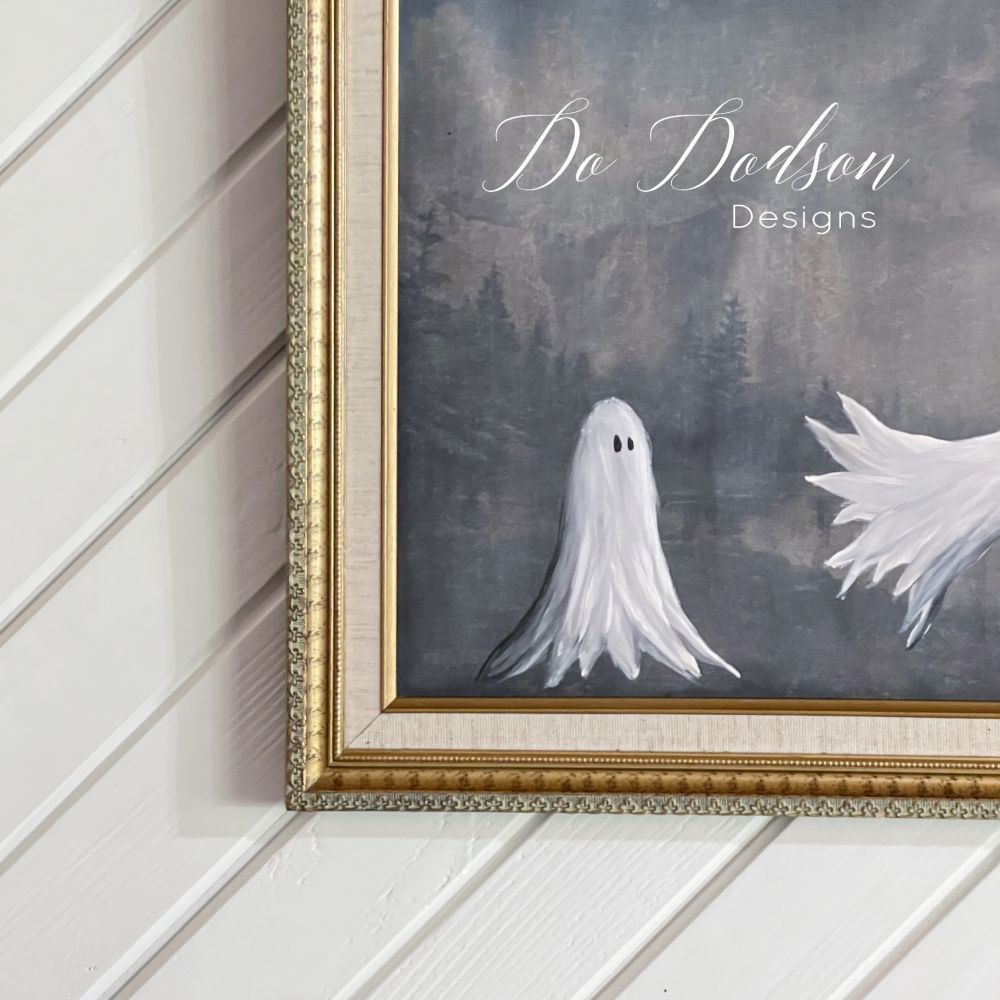
The ghost family is adorable! And a perfect home for them. The ghostly print over the fireplace makes for a perfect display. Thanks for all the Halloween cuteness.
I bet your wedding was a blast.
Thanks Joanne!
The print over the fireplace is actually an uploaded image to our Samsung Frame TV. It mimics a photo. I love being able to change the art work whenever I want.
Thanks for stopping by. 🙂 xo
Do, another amazing project! I love your ghost projects. This project looks fun, affordable and
perfect in the fireplace, mantel or on a porch. It’s very creative, my friend.
Thanks, Tammy! I love when an idea in your head comes together. It’s a fun way to decorate for Halloween with small kiddos. Sometimes the spooky stuff can be a bit much for the littles.
These are so fun Do! Your creativity just spills out! Pinned 🙂
😂😂😂 You should see my studio. I’ve been spilling out a lot lately. Thank you, Cindy. xo 🙂
Love these ghosts Do! I need to make some for our fireplace!
I guess it works best here in Texas. We don’t use the fireplace often. Glad you enjoyed these. xo 😘
Okay, Do. I see ghosts….and condoms, now that you mention it!!!! They are SO cute! Either way! I love that you put it all out there, for all of us to enjoy. Thank you for brightening my day!
Laughter is food for the soul. Especially in DIY. ANYTHING goes! 😁 I’m glad you see the humor in it.
Love your ghosts. These cannot be condoms. Condoms have happy faces.
🤭🤣 Winning comment! I agree.