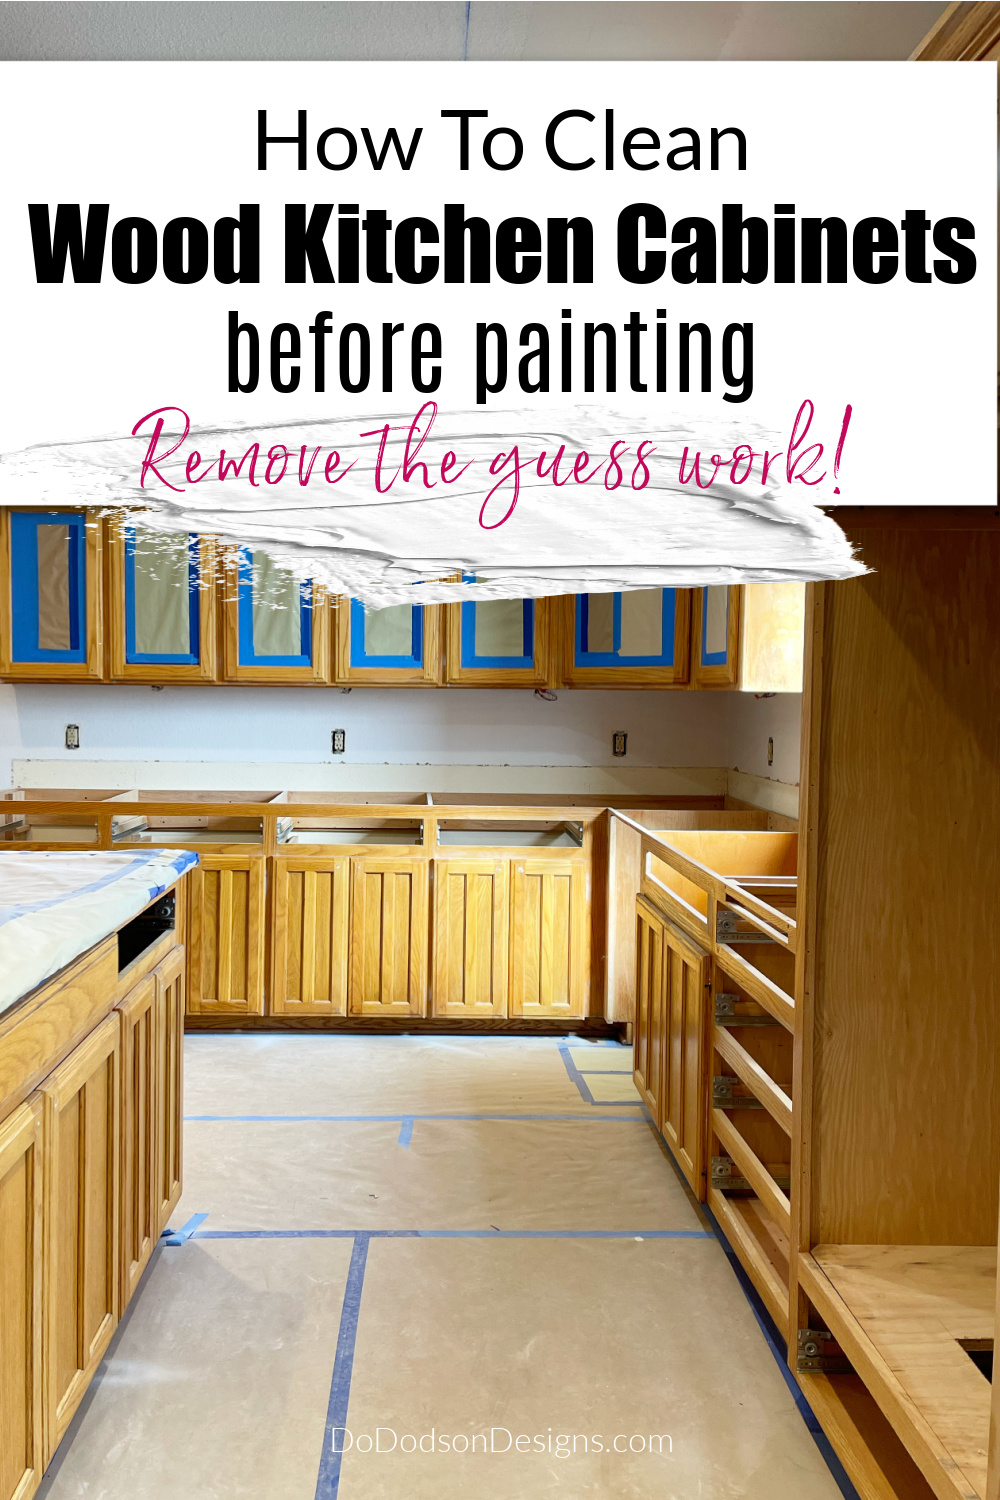
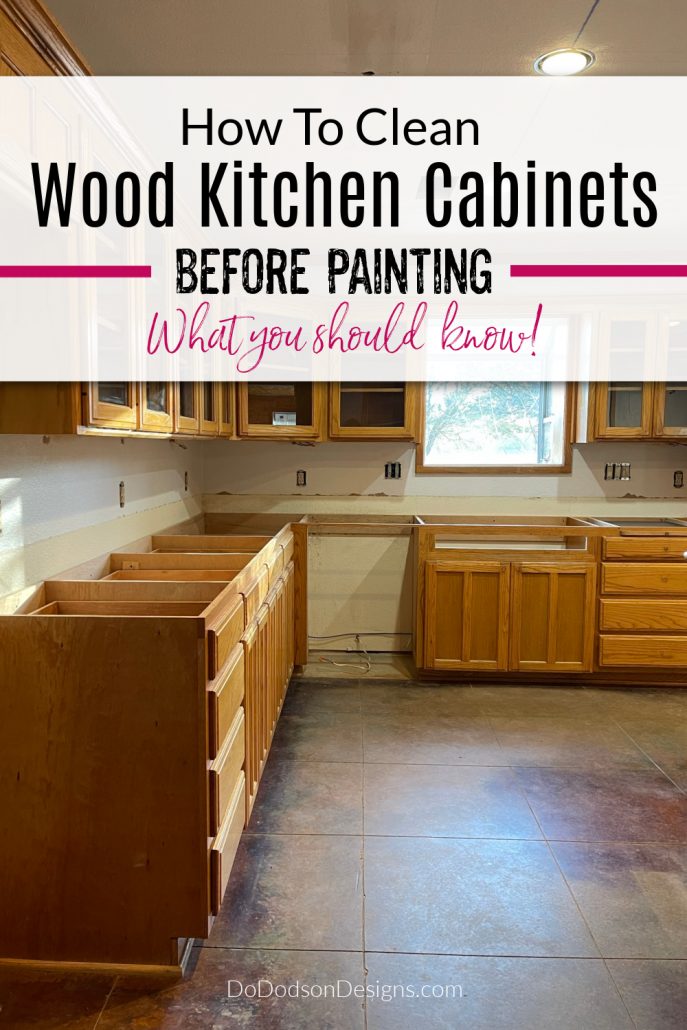
We had just signed the contract on our forever Ranch Home in the country, and I was already dreaming about painting the kitchen cabinets white. It was a massive kitchen reno, and I knew it would be a lot of work. There was no way I would be able to complete the project before the closing date of our old home, so I hired a professional painter to speed up the process. I figured that I could tackle cleaning the greasy cabinets. How hard could it be to clean kitchen cabinets? Right? In this blog post, you will learn how to clean kitchen cabinets before painting.
* As an Amazon Associate, I earn from qualifying purchases and through other companies as well. You will not be charged extra when you purchase through these affiliate links, but any income I make helps me create more amazing DIY projects to share with you! To see my full disclaimer, click here!
It’s All In The Prep Work
I did a lot of research on cleaning kitchen cabinets and even reached out to a few cabinet painters and got some advice. I wanted MY cabinets to have a good finish. You know, the paint finish that stands the test of time, and a hubby, seven grandkids, and three dogs.
Because I paint furniture for a living, I do understand a thing or two about this crucial step. I’ve always said that your paint job is as good as your prep. Problems with paint on any surface can be due to a failed prep. Learning how to clean kitchen cabinets before painting is THE most important part of getting the best results.
First Step – Gather Your Supplies To Clean And Prep
Here is a list of what I used to tackle dirty surfaces, grease, and stains.
- scouring pad (scotch bright pad)
- scrapper tool
- plastic bucket (for water)
- clean cloth (lots of them)
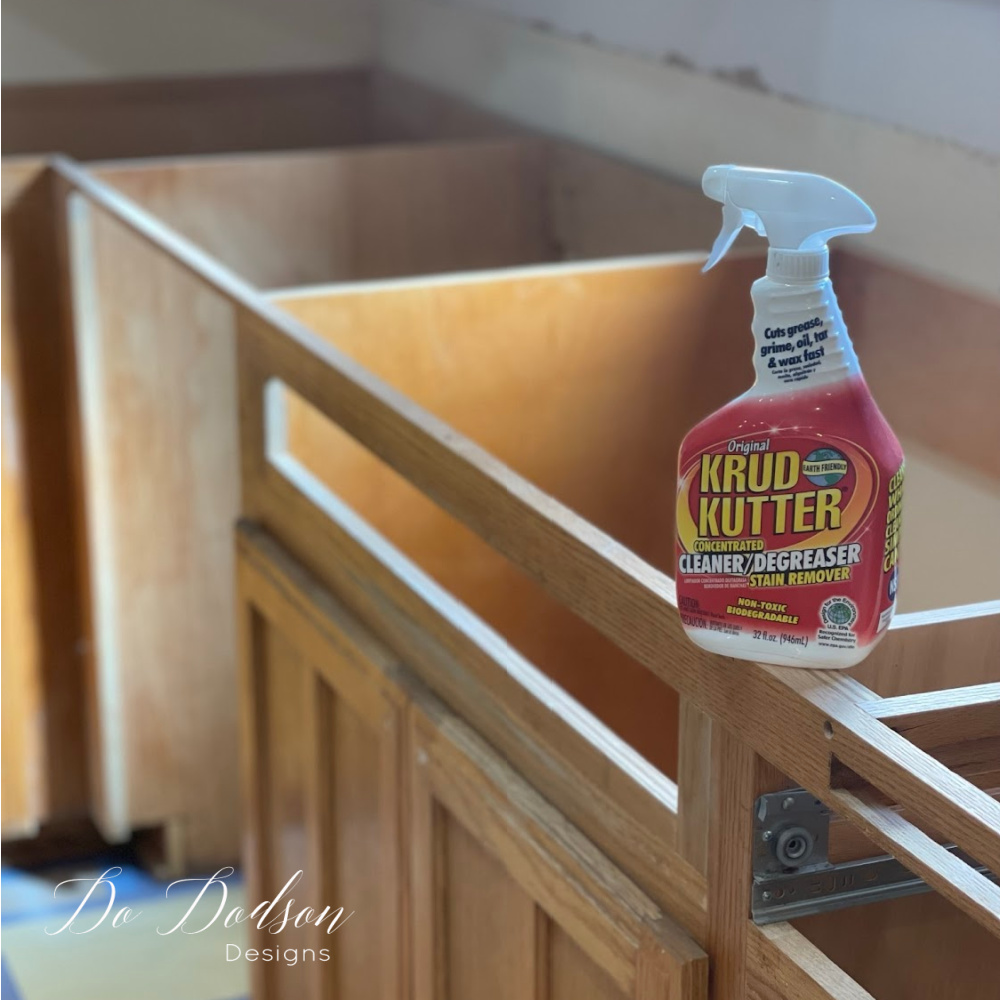
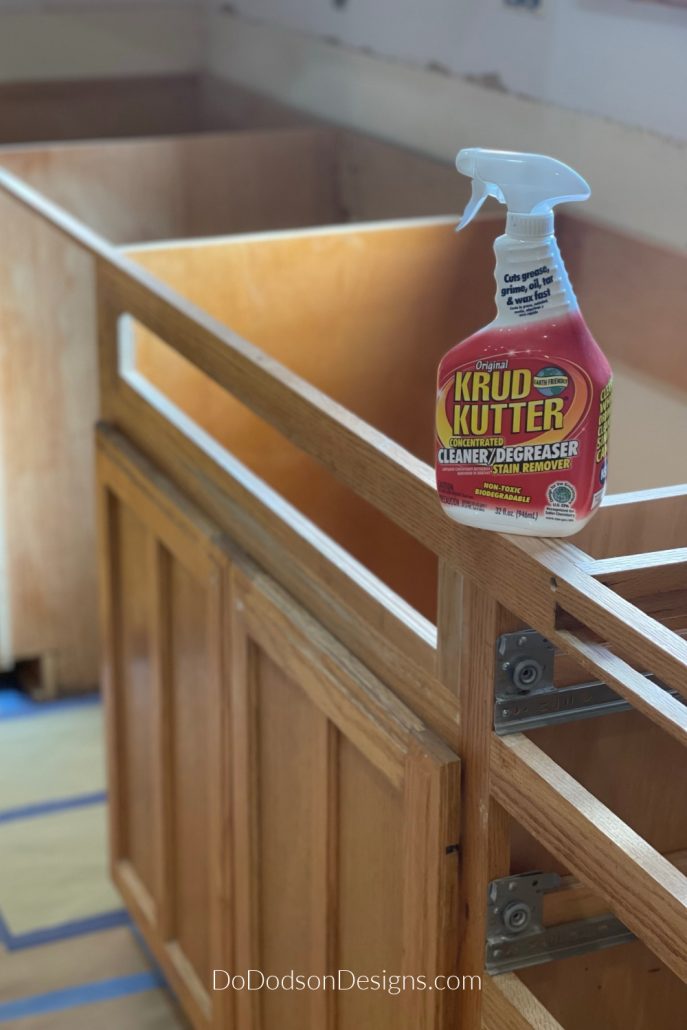
- Krud Kutter (heavy-duty cleaner)
- spray bottle
- sponges
- rubber gloves
- plastic drop cloth
- wood filler
- sanding blocks
- shop vac
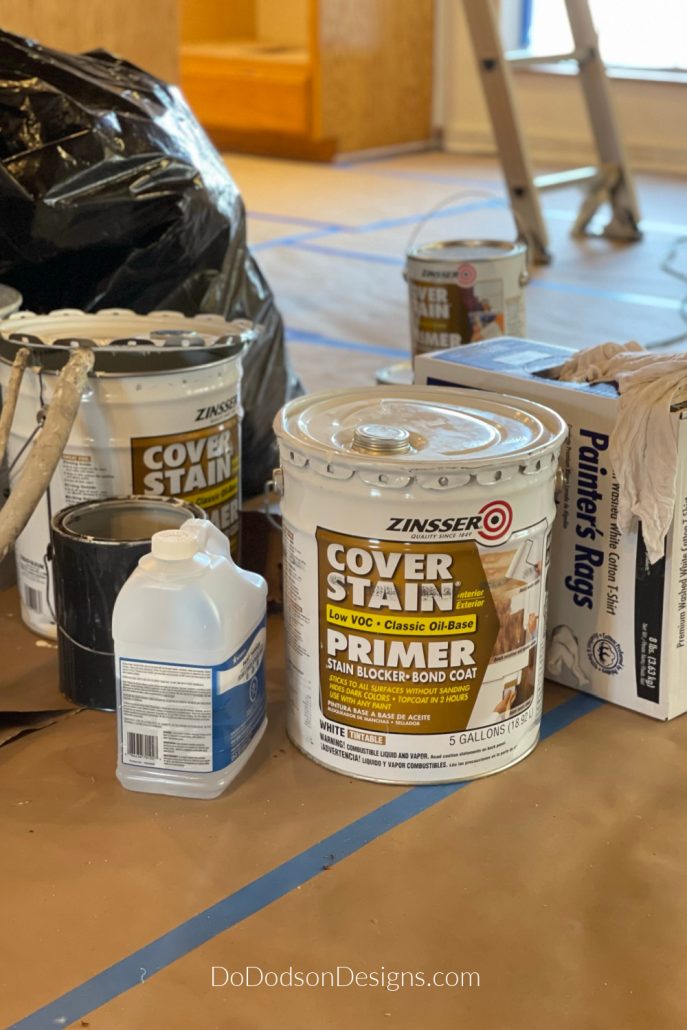
Paint & Primer Used
Inspect The Wood Cabinets Before Cleaning
The first thing is cabinet inspection. Since every cabinet cleaning job is different, inspecting first is always best. You’ll want a heads-up if there is anything unusual and will want to tackle it first. No surprises.
Look for the heavy grease areas above and below the cooktop or stove. Inspect the surface of your cabinets to determine areas that will need a heavy-duty degreaser. I find the best product for cleaning these areas is Krud Kutter.
Don’t forget the cabinet doors. Lots of dirty, grimy hands have opened and closed those drawers. Our skin naturally produces oils, which, mixed with everyday things we touch, stick to everything. Sorry for the graphic picture. I’m a retired nurse and a bit of a germaphobe.
If you plan to paint your wood cabinets inside (like I did), don’t forget to look under the sink area. Many people store cleaning supplies there. It’s pretty typical to find spilled dish soap and other household cleaners that need to be removed.
Surface Preparation
Step 1: Remove all items from the cabinets. I know that should be a no-brainer, but don’t assume the cabinets, even in a new home, will be empty. I was amazed at what I found.
Step 2: Vacuum any visible dirt or debris from the cabinets.
Important Things To Look For
Before cleaning, things like candle wax, crayons, dried food (yuck!), and anything else sticking to your cabinet surface should be removed. These things most definitely can cause adhesion problems for your paint.
Mixing The Degreaser – Cleaning Solution
Step 3: Fill a large bucket with warm water and don your gloves. Protect those hands. If the wood cabinets are old (that’s why we are painting them), they tend to get dry and brittle. The gloves protect you from the dirty nasty water you are about to endure and wood splinters. Ask me how I know.
Step 4: I use Krud Kutter! I swear it’s the best degreaser I have ever used. Refer to the directions on the bottle for mixing the correct ratio of Krud Kutter and water for best practices, or you can do like I did and add whatever you thought you needed to your bucket of water. It worked! For the extra greasy areas around the stovetop, I used full strength.
I also found that adding the degreaser solution to a spray bottle made it easier to get into hard-to-reach areas. The bucket is okay for the base cabinets but not so good for the uppers. Use a weaker solution for the areas of cabinets that have less traffic. They won’t be as dirty, but I promise there is dirt that you can’t see. So, please don’t assume they are clean because they look clean.
I have read that mineral spirits and Dawn dish soap are also effective, but I haven’t tried either. When I find something that works, I stick with it.
Effective Cleaning – Important Step
Spray the degreaser solution directly on the wood cabinets. Start from the top of the cabinet and work your way down. Water runs downhill, and so does dirty water, so you’ll need to protect your flooring with plastic drop cloths due to the amount of water (spillage happens) and the cleaners you’ll be using. We were fortunate that this home had stained concrete floors, so a little water didn’t hurt them. They needed a good cleaning too.
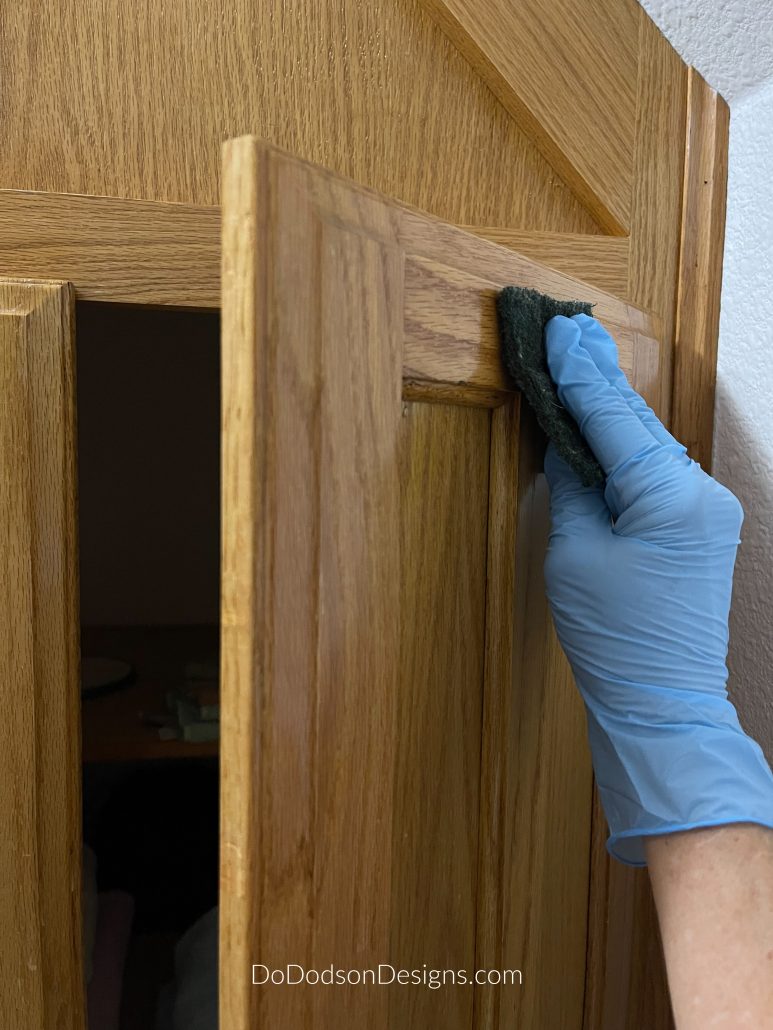
Step 5: Using scotch-bright pads, start scrubbing the cabinets in gentle circular motions with your soapy water degreaser solution. I like to do one cabinet at a time, inside and out. After sufficient scrubbing, use a soft cotton cloth and clean water to remove any residue from the degreaser. I did this step a couple of times in areas that needed extra scrubbing. Wipe away any water remaining on the cabinet with a dry cloth.
You can also use a damp cloth with some degreaser solution on the toe kick of the cabinets too. Don’t forget this area.
After Cleaning, Look For Areas That Need Wood Repair
Since you will be painting the cabinets, going from wood to white or light color paint, the paint will show every flaw, every ding, and every nail hole. People sometimes hang items from their wood cabinets, so be ready with good wood filler and 120-grit to 220-grit sandpaper to fill those nail holes and make them smooth.
My painter LOVED me for doing this. Not all painters will allow this, but he knows me, and we swap tips and tricks. A good painter is hard to find.
Scuff Sanding The Surface Of The Cabinets
All wood cabinets should be scuff sanded after cleaning. This will smooth out the rough areas to better prepare the wood for the primer and paint.
We chose not to add a filler to cover the wood grain on our golden oak cabinets. I’ve seen it done, but I like the look of the wood grain visible after painting. It adds to the farmhouse charm in my kitchen.
Primer Before Painting – Why I chose An Oil-Based Primer
I get asked all the time, do I need a primer for my kitchen cabinets before painting? The answer is always yes. After a careful discussion with my painter, we decided an oil-based primer would be best for one reason. Wood absorbs odors, and these cabinets had a smell. I wanted my cabinets to be clean and fresh, so the additional pain in the butt of an oil-based primer was worth it. Besides, I wasn’t the one spraying. LOL
The cabinets were sprayed with two coats of primer. STINKY STUFF! All the safety equipment was in place—a full-face respirator with a disposable suit. I felt terrible for my painter, but it’s what he does best, and I knew he would do a way better job than me. I know when to hire a professional.
Zinsser Cover Stain Primer is also great for blocking nasty stains. I had my heart set on white cabinets, so this was the best “insurance policy.”
Successful Paint Job
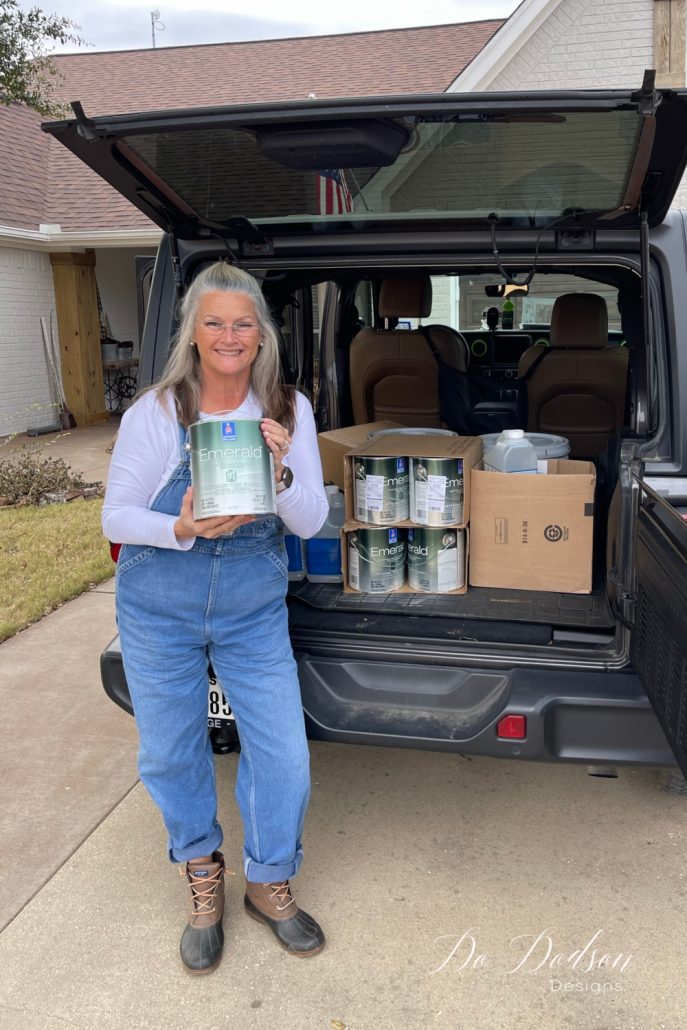
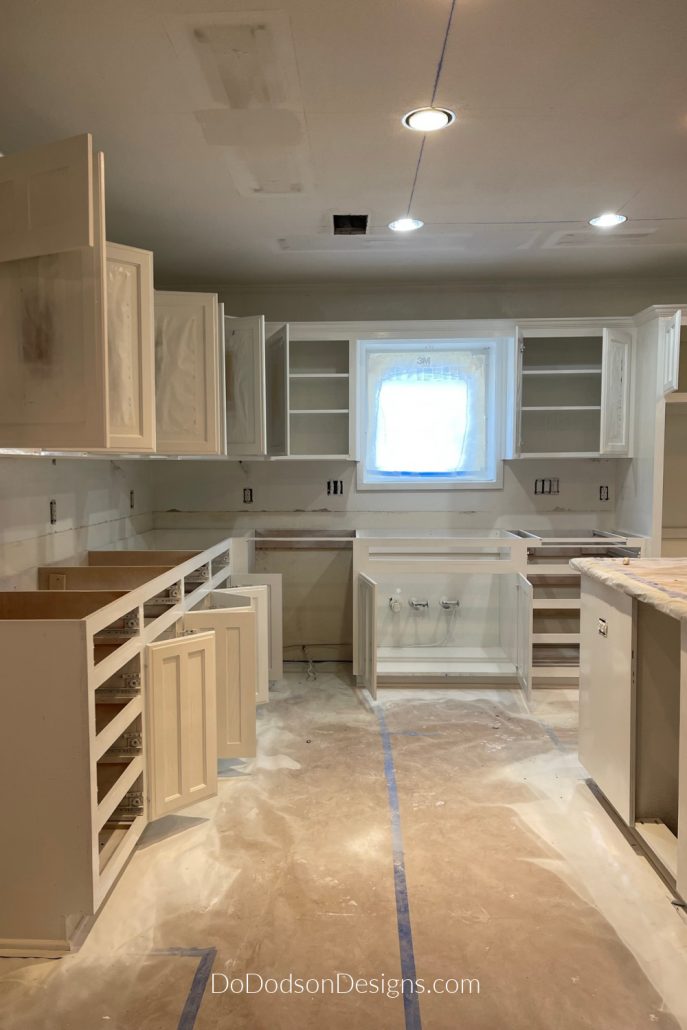
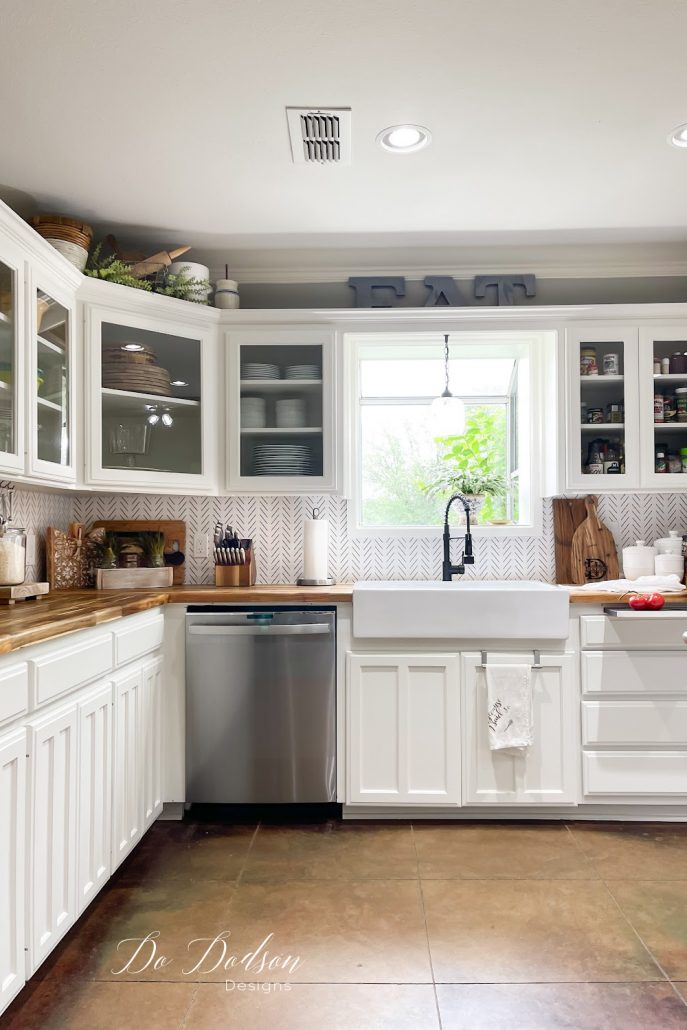
The cabinets were painted with the color SW 7008 Alabaster White. This type of paint dries super hard and is recommended for trim and cabinets due to its hard finish once it’s cured. Super durable! I’ve used this paint in our other home, and I think it’s the best paint on the market for the job. It gives a smooth finish with factory finish results. I’d say that’s a huge success in my book.
I am NOT a professional cabinet painter, and I want to lay that out there. This is the method we chose to paint our kitchen cabinets, and I like the results of the sprayer. Working side by side with my painter helped me to complete what seemed like a monumental task in record time.
The Before & After Results
I’ve always said that paint changes everything, and I wasn’t wrong with this one.
CLICK HERE to see the before & afters of our Ranch Home Reno and how drastically different our ranch home kitchen looks today.
Painting kitchen cabinets isn’t easy, and you should always research before diving into a major painting project. Always weigh the pros and cons of DIY. Or you can do what I did and work with a professional painter. Me doing the cleaning and prep was the best option to save some money.
Secretly I think HE (my painter) was happy to have my help. I’m pretty sure we both feel the same about the prep. We just want to paint!
Thanks for joining me today, and I hope you found this post to be helpful. If you have questions I didn’t cover here, please feel free to leave me a message below, and I’ll be happy to help you with any painting project.
Until the next project… xo, Do

Wow, your cabinets look fantastic. Really made you kitchen look so happy and an area you want to be in. Just beautiful!
Would these products work well on laminate cabinets? Sorry if this is a repeated question. Just want my kitchen to look like this. Thanks!!
Thank you, Janet!
I lOVE my kitchen and you are correct. It’s easy to spend time in this kitchen. It makes me happy.
I have a post on painting laminate furniture that hopefully will answer your questions. It’s all about the prep. 🙂 xo
https://dododsondesigns.com/how-to-paint-over-laminate-furniture/
This looks great! Is your backsplash a tile or something else?
Hi Stefan,
Would you believe it’s peel and stick wallpaper? Here’s how I did it.
https://www.dododsondesigns.com/peel-and-stick-wallpaper-backsplash/