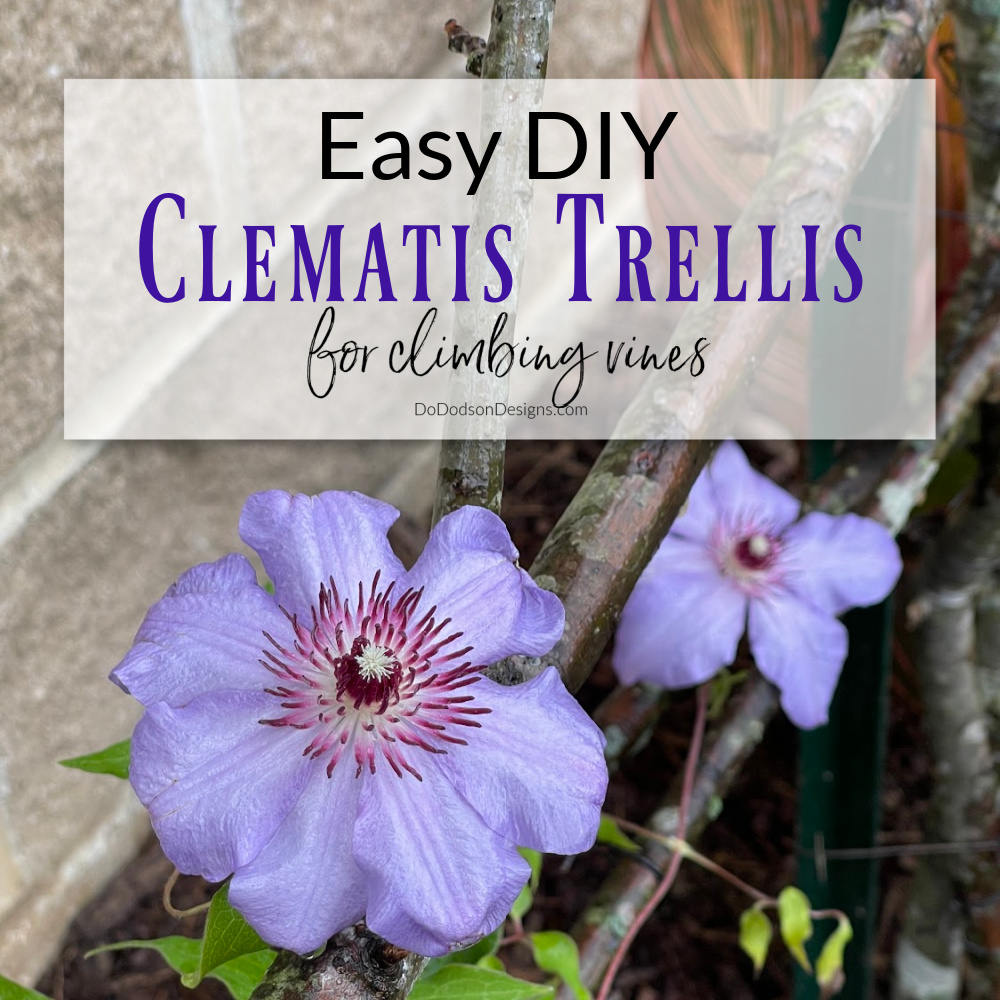
Hey, triple-D friends! I’ve been in the gardens again, and this time, I’m making a rustic trellis for my new clematis plant to grow on. No store-bought trellises for me! With a few branches and a little imagination, you can create a stunning DIY rustic trellis for your clematis vines. Today, I will guide you through each step, from gathering your materials to watching your clematis flourish on its new trellis.
* As an Amazon Associate, I earn from qualifying purchases and through other companies as well. You will not be charged extra when you purchase through these affiliate links, but any income I make helps me create more amazing DIY projects to share with you! To see my full disclaimer, click here!
DIY Rustic Garden Trellis
Repurposed branches can create a stunning focal point in your outdoor space. I’ve always loved creating with my hands, and this project does not disappoint if you love to garden. Seriously, you can’t mess this up!
I’ve created many trellises in my lifetime, but until now, I just never really felt like they were share-worthy. That’s until we moved back to the country, and I decided to create the gardens of my dreams. I’m in the beginning phases of revamping all of them and creating some new ones too, but I hope to continue to share more of the transformation of our property along the way.
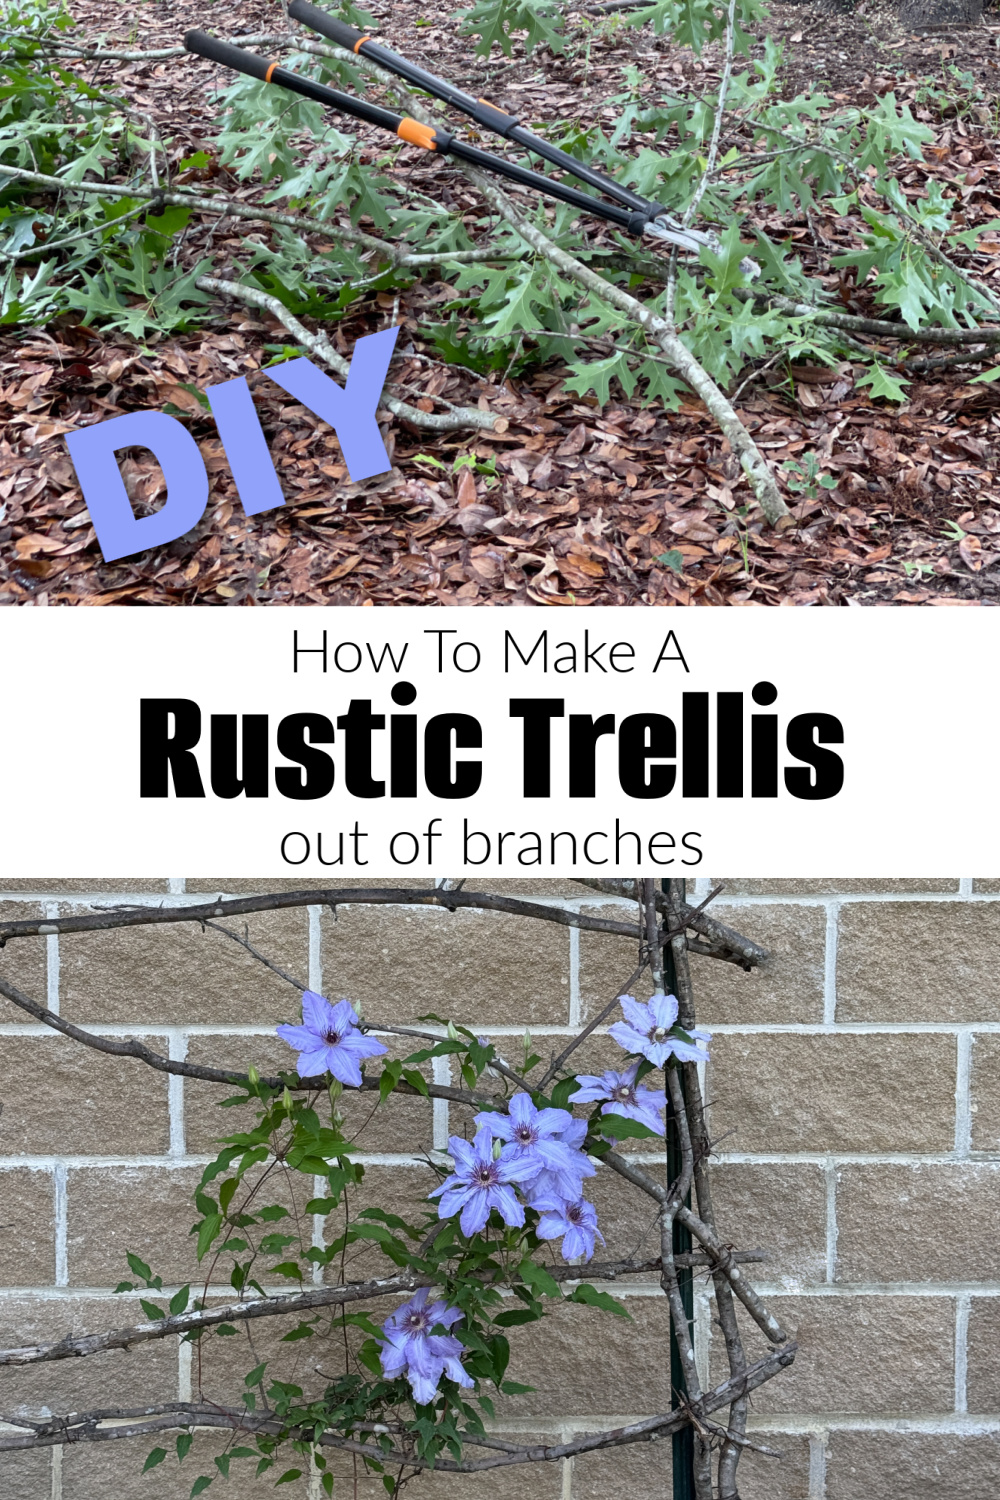
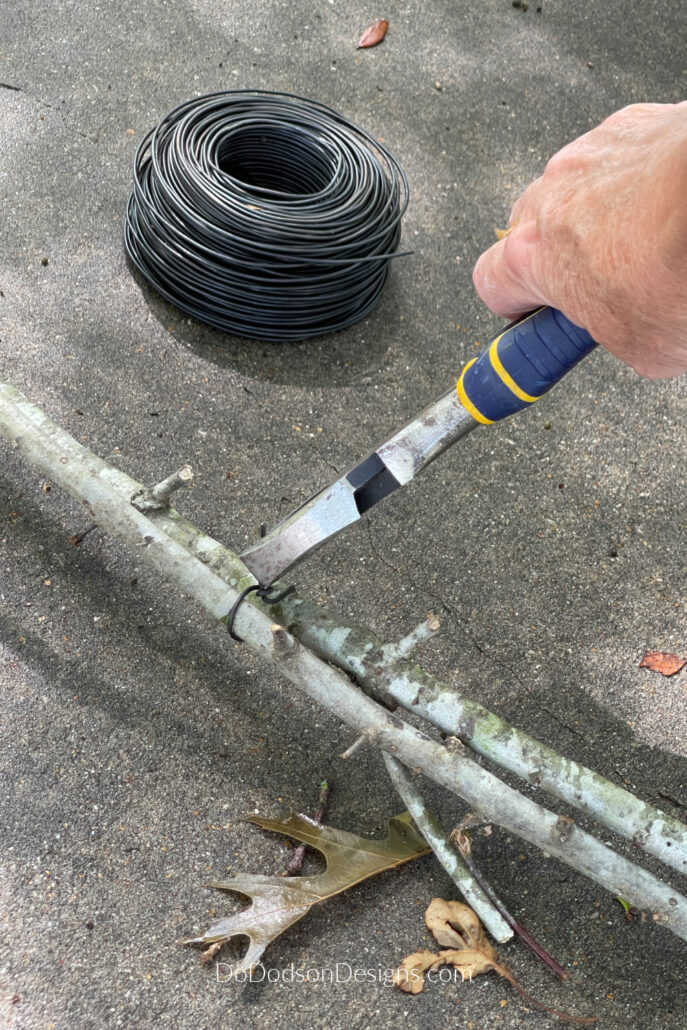
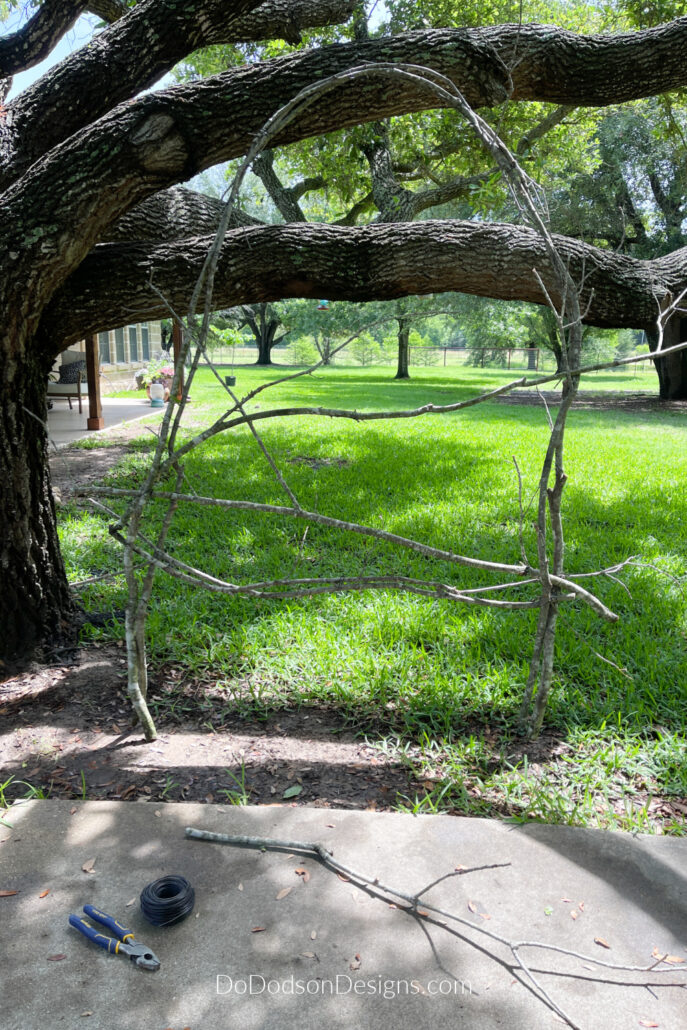
The one thing to REMEMBER when building a rustic trellis is that you must use GREEN BRANCHES. The greener, the better. These branches were cut the same day that I built the trellis, and here’s why.
Green branches bend! I’ll explain more later in this post.
CLICK HERE for more rustic trellis ideas.
SUPPLY LIST:
Here’s what you will need to make a rustic trellis for your garden vines.
- Heavy Duty Branch Cutters (for larger branches)
- Pruning Shears (for smaller branches)
- gloves (protective hand gear)
- Combination Wire Cutter Pliers
- Tie Wire or twine
- Green branches from a tree (1-2 inches)
- Fence Post (garden stakes)
Gather Your Materials
Before you start building the trellis, it’s important to gather all the necessary materials. The good news is that you don’t need much to create this rustic DIY project. The main material you’ll need is green branches. You can collect these from your own backyard or woodland area or ask your neighbors if they have a tree that could use a little pruning.
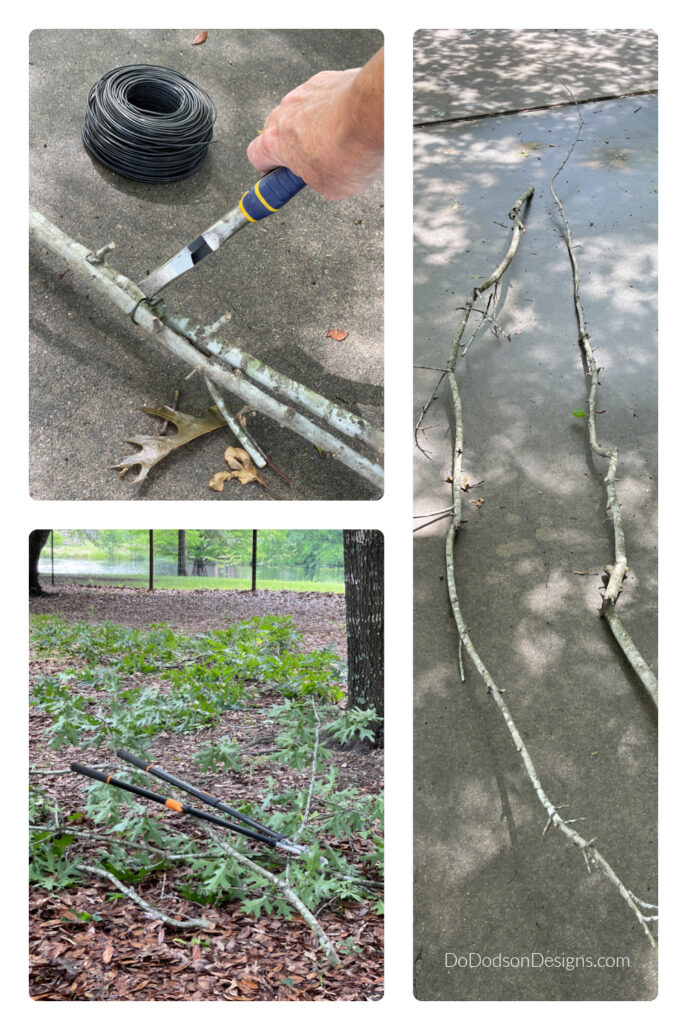
Make sure the branches are strong and sturdy enough to serve as a rustic trellis. You’ll also need some basic tools, such as branch cutters, wire cutters, and pliers. Additionally, you’ll need some wire or zip ties to fasten the branches together. I used the tie wire I already had on hand. Well, I “borrowed it” from my hubby’s stash in the garage. 🙂 I do it all the time.
Once you have all your materials gathered, you’re ready to move on to preparing the branches.
Prepare the Branches
To ensure that your rustic trellis is strong and durable, it’s important to prepare the branches properly. Begin by assessing each branch to make sure they are sturdy enough to bear the weight of your climbing plants. Branches with cracks or weak spots should be avoided as they might break under pressure.
Next, use pruning shears to trim away the additional small growth from your chosen branches. Make sure that they are all cut to about the same length to maintain symmetry and balance in your trellis.
Once your branches are prepped and ready to go, it’s time to assemble them into a trellis structure. This is where your tools and fastening materials come into play. With a few simple steps, you can create a beautiful and rustic trellis that will support your vines and add that rustic charm to your garden space.
Assembling Rustic Arched Trellis
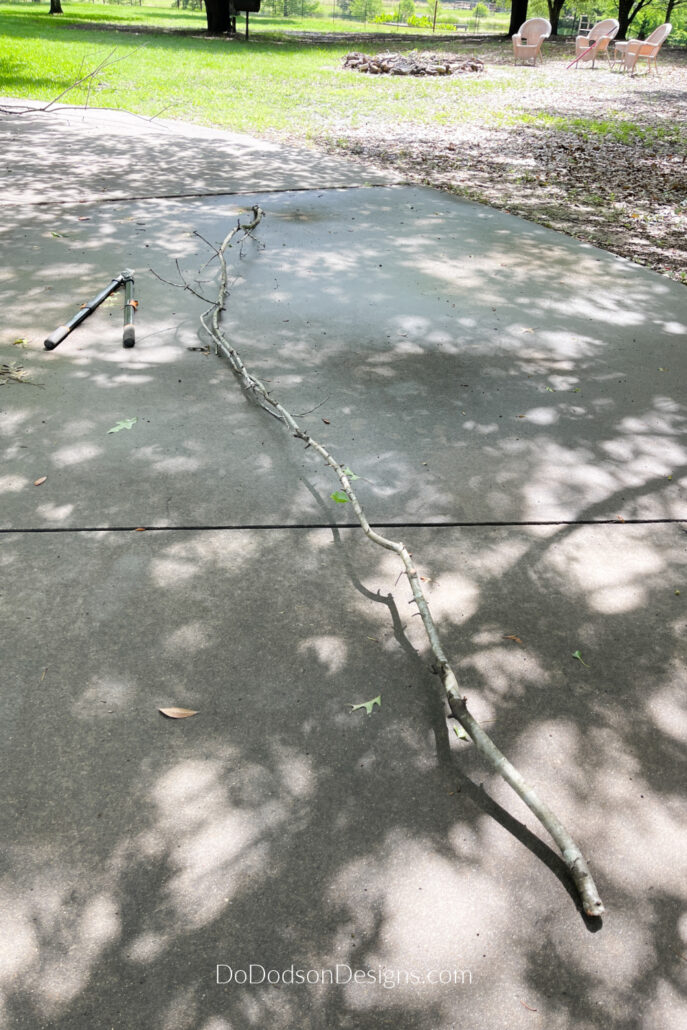
Now that you have the necessary branches, tools, and fastening materials, it’s time to assemble your trellis. Begin by laying out your branches on a flat surface to visualize the structure and ensure that it is symmetrical.
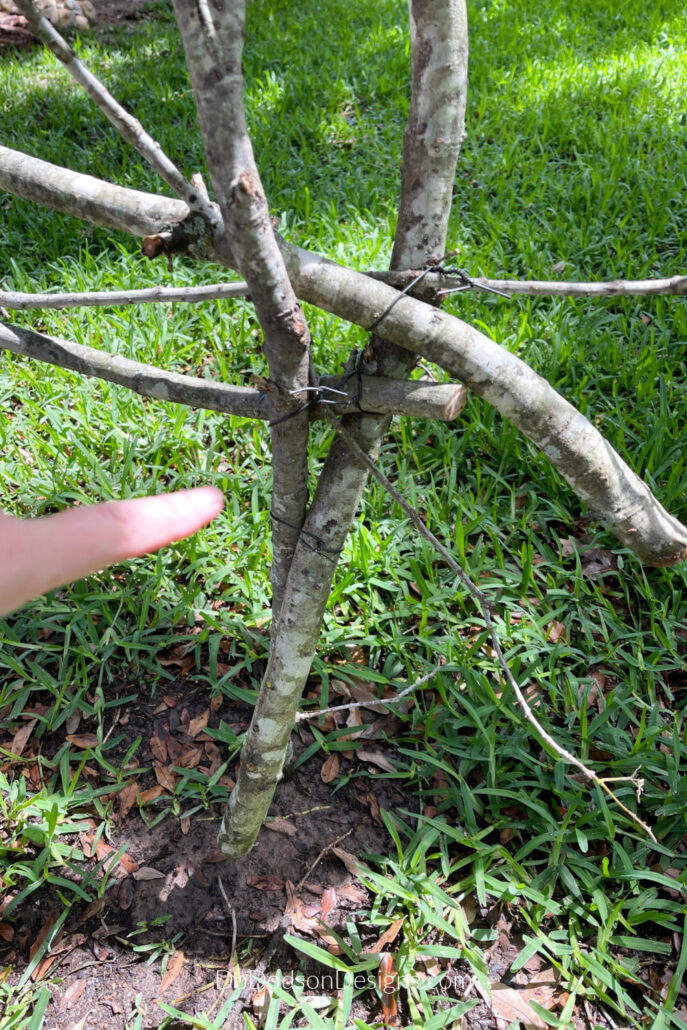
I started with two branches similar in size and laid them together, with the smaller ends overlapping each other. These two branches will be the arch for the trellis. Secure the two branches together at the smaller ends with your wire.
It may take some practice to tie the branches together, but it’s not hard once you get the hang of it. Make sure that the wire is twisted tight around the branches.
It’s important to note that you should avoid nails and screws, as they may split the branches and compromise the integrity of the trellis. If you use wire or twine, tie the branches together tightly to prevent them from shifting or pulling apart over time.
Now, you can begin constructing the arch for the trellis.
Creating An Arched Trellis
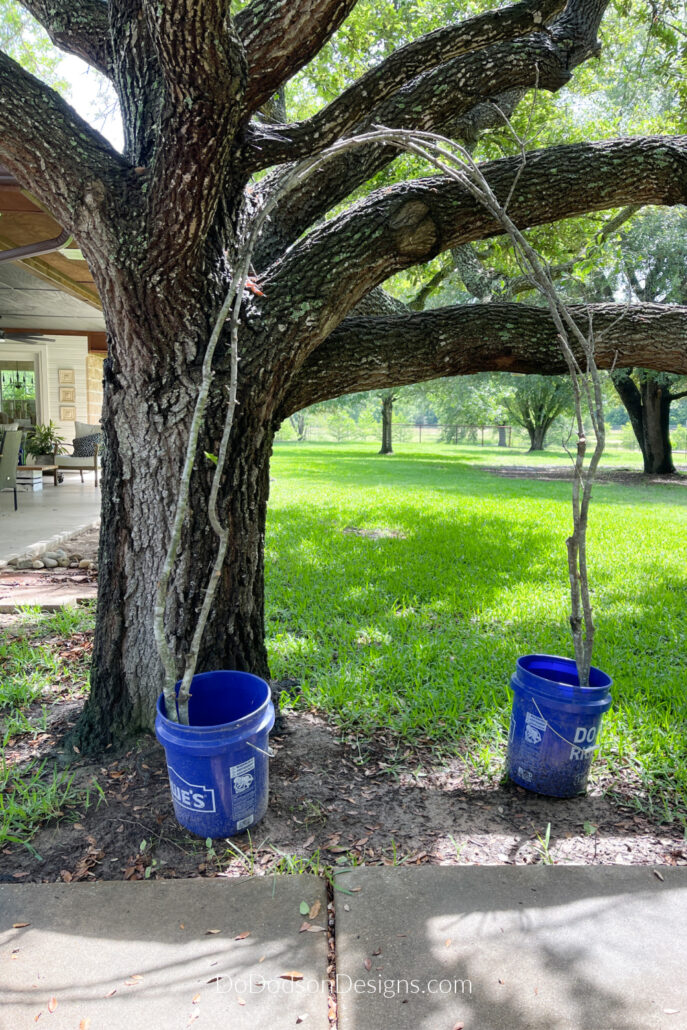
When building an arched trellis by oneself, necessity is the mother of invention, and I am the Queen of doing just that!
Don’t laugh! It actually worked out pretty well. After assembling the main branches for the arch, I used two 5-gallon buckets and a tree (to lean against) to form the arch. It would have been super helpful if I had had an extra set of hands, but I didn’t. It’s like bending wet wood but easier.
The next step is securing the branches with the tie wire. I’ve seen others use twine or zip ties, but I prefer the wire. I feel I can secure the branches together better using this method, and I believe it makes a sturdier trellis. I used two arched pieces for extra strength.
The branches will dry out over time, and the wire will hold them in place more securely. You can even go back after they have dried and tighten them if needed.
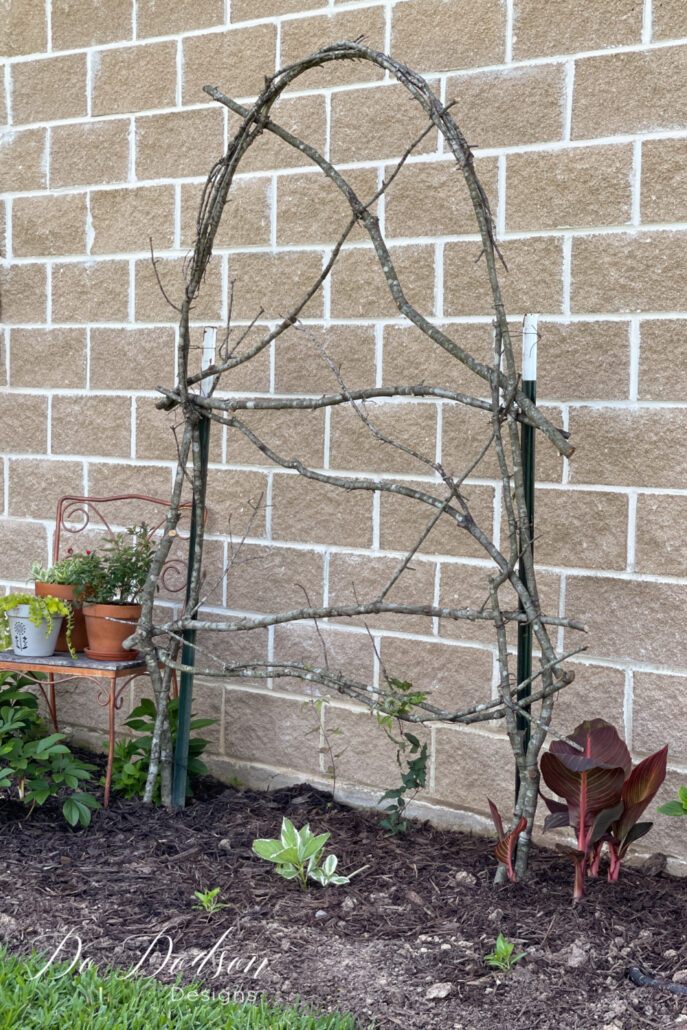
Creating A Rustic Trellis Design With Branches
Next, use branches as cross pieces to secure the arches together to create the shape you want. The length of the branches and the arch will determine the height of your rustic trellis. Use the same method with the tie wire to secure them in multiple places for strength.
Once you have your first cross piece in, you can add branches to give your rustic trellis a design you love. Mine is fairly random.
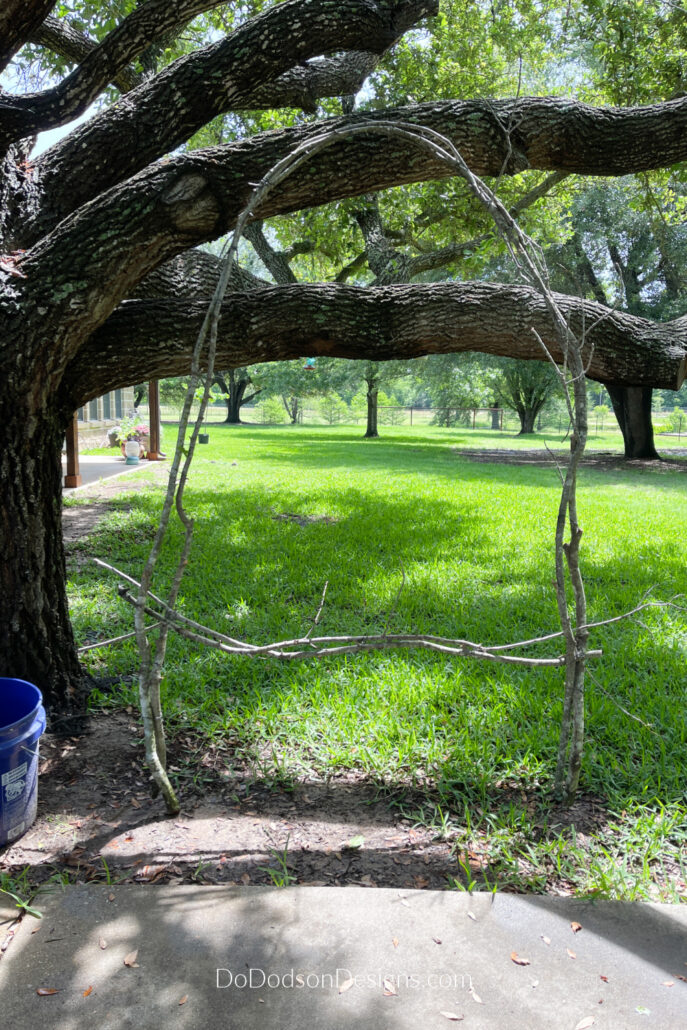
I continued adding random branches, intertwining them and securing them with wire until I was happy with my design.
As you assemble your trellis, take breaks to assess your progress. This will help you make necessary adjustments and ensure the trellis remains balanced and level. Once you have finished connecting the branches, give the trellis a final once-over to check for loose branches or fasteners.
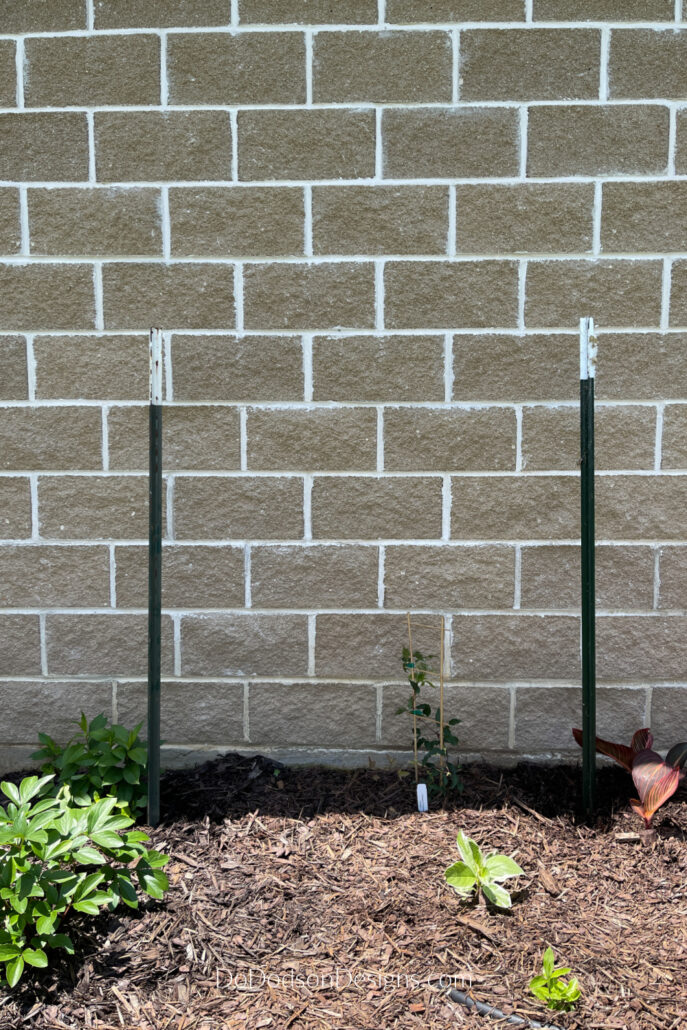
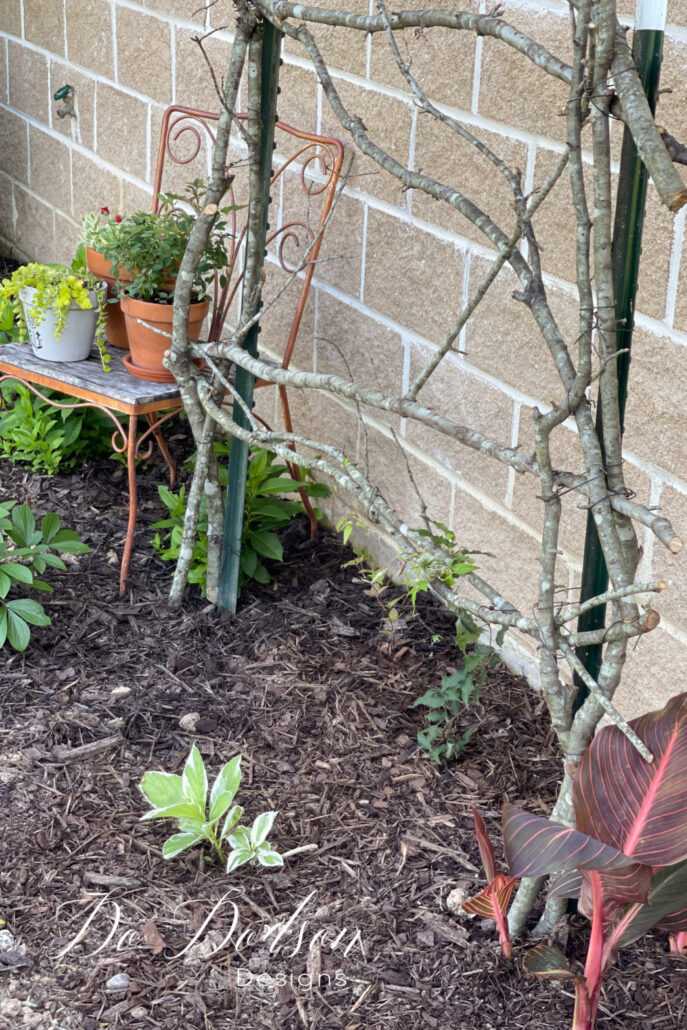
Secure Your Trellis To The Ground
Now that you have repurposed branches to build a rustic trellis for your garden, it is important to keep it secured in place for its longevity.
I chose to use an above the ground method to secure the trellis in my garden. Doing it this way will keep the branches from decaying in the ground and preserve the life of my trellis.
You can use heavy-duty garden stakes to secure the trellis too, but I had some leftover fence posts that worked well. Make sure whatever you use is deep enough in the ground that it will hold up the trellis and the vines that grow on them. Some vines can get pretty heavy when fully mature.
Next, use wire to tie the branches to your support posts. You can also attach the trellis to a nearby wall for additional support if need be. This one isn’t going anywhere!
Additionally, check the trellis regularly and make sure it’s still in good condition. Replace any broken parts or reattach any loose wires to prevent any accidents from happening. I’ll probably add to the structure of this trellis with additional branches before the vines become established. I was in a hurry to plant my clematis.
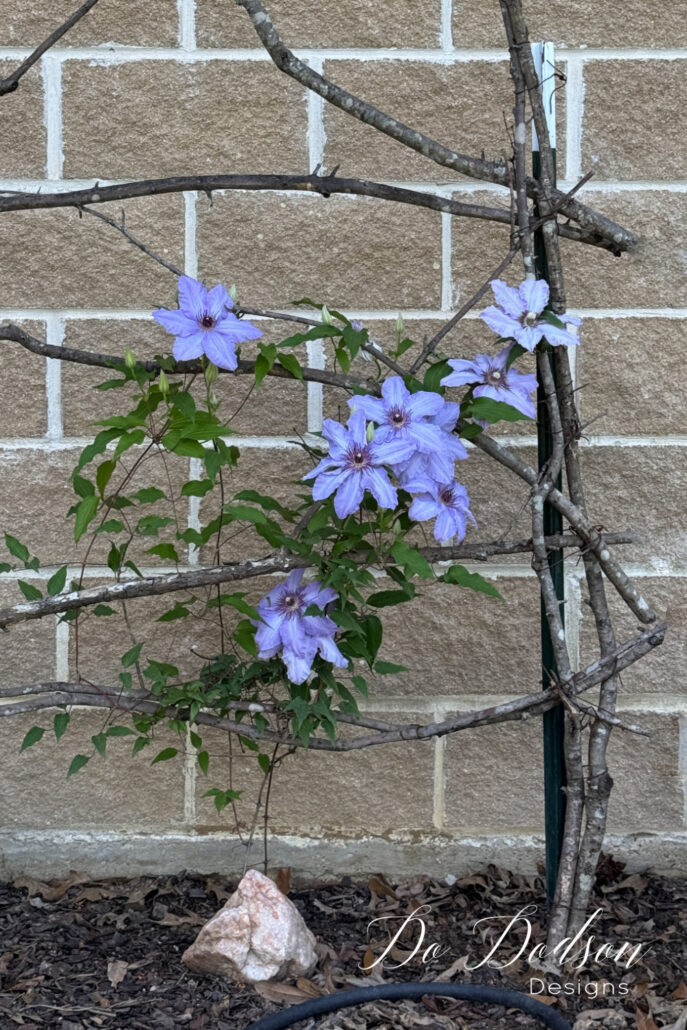
Watch Your Clematis Flourish | Branch Trellis
Once you have your rustic trellis secured, grab your favorite vine and plant away! Now you can sit back and watch your trellis come to life.
This is my first time growing a clematis, but with proper care, I’m certain my clematis will thrive and provide a beautiful addition to my garden. I’m super excited!
If you’re planting a clematis, be sure to install the trellis first so that you won’t damage the vine during the installation.
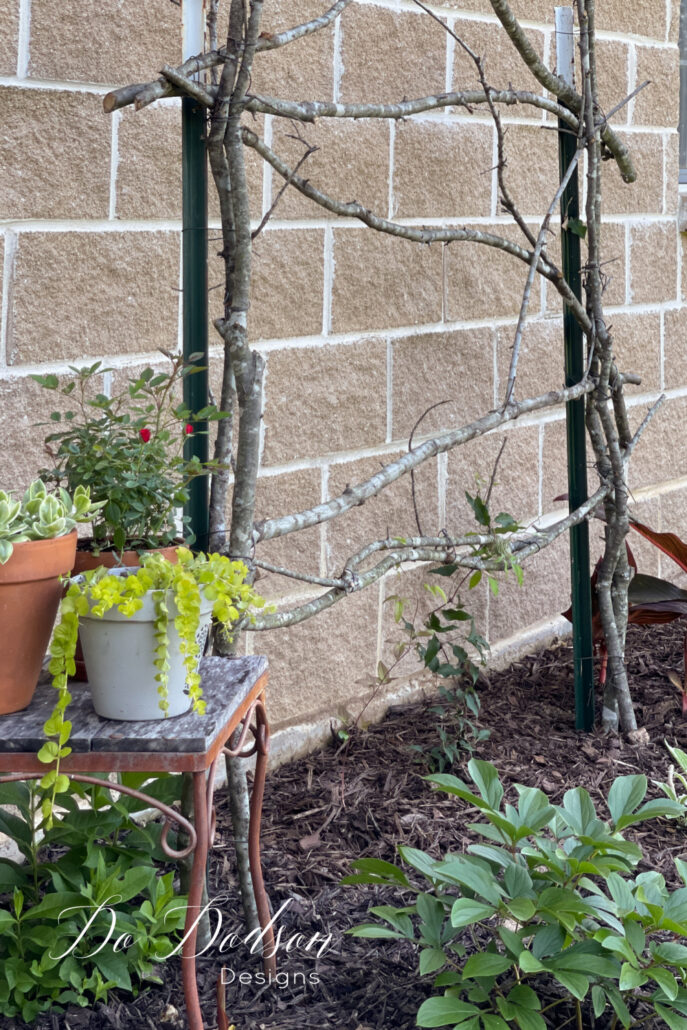
* Update… It’s been two years, and my clematis vine is well-supported and has 24 buds that have started blooming. OMG! I’m so excited! My patience has paid off big time.
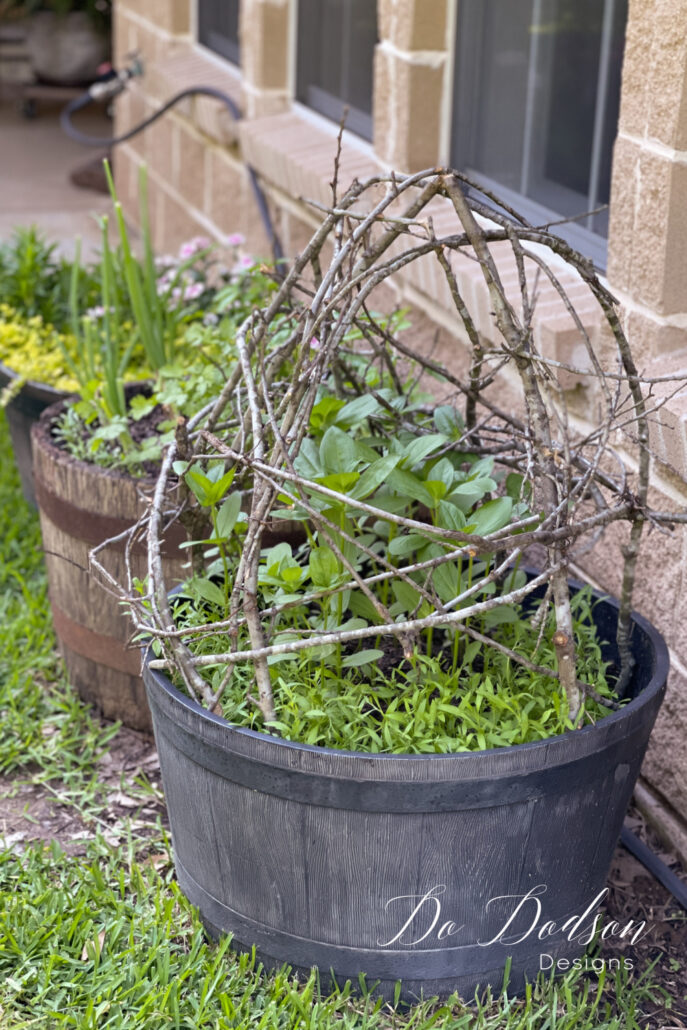
Branch Trellis In A Pot
In addition, I had a lot of leftover branches, so I took a shot at creating a support structure for my zinnias in this large pot. I used the same method except without wire. What do you think?
Because the branches were green, I intertwined them by bending them and shoving the arch pieces into the dirt along the pot’s insides. I can’t wait to see how this works out!
What a great day I had to create these rustic trellises with tree branches. I love the idea of sustainability; using natural branches to create a support structure without killing a tree is everything. Am I a tree hugger??? You better believe it! In my younger days, I was a tree climber, too. 🙂
Do you love this idea? Let me know in the comment section below, and feel free to share your gardening tips and tricks. What have you created in your garden that you could share with me and other fellow DIYers?
And don’t forget to share and PIN this idea on your favorite DIY Gardening board. Your future clematis plant will thank you for the support. 🙂 LOL
Until the next project… xo, Do


I love this idea. It’s great.
Thanks Renea,
I love using what I have to create rustic structures in my gardens. 🙂
Do, this is such a great and creative idea.
Hi Tammy,
An inexpensive way to support your vines. I’m hoping that the vines cover most of it. Thanks for reading. 🙂 xo
I needed this idea Do! My zinnias are popping up and they will need the support. Thanks for sharing – pinned!
Hey friend! It worked like a dream. I was just trimming branches to make another one this year. Unfortunately they don’t last all year but well into Fall. Love those zinnias.
I’m doing this for my raised garden for my pole beans next year. I’m very happy that I will have plenty of limbs since I had to cut down mulberry tree starts out of my spruce trees.
Hi Brenda,
Funny thing you mentioned this. I’m creating my raised garden beds for next year and that’s a great idea. Thank you for sharing. I’m excited! I’ll be sharing that project next Spring. 🙂
Love this idea, I volunteer at a garden center for special needs, this will be something we can think about adding.
Thanks
What a wonderful idea. They can work with their hands to create their own unique version of a trellis. Could be smaller for those that are more challenged. Please share with me if you decide to do this. It would make my heart so happy to know I’ve helped them to create. ❤️
I love this idea Do! I can’t wait until the weather starts warming up here and I can start gardening! XOXO
Oh my goodness yes! It’s 82 here today. Very unusual. Cold again tomorrow but it has my mind working overtime with projects outside. Thanks for reading, Denise. Have a beautiful weekend. 😘
I love this idea! I have plenty of branch sticks falling to do this. Thanks for the idea, my sweet friend. I admire all the beautiful work you do in your yard.
Hey Wendy!
It’s therapeutic for me as it is for a lot of us creatives. Coffee in the garden is heaven on earth. Enjoy your weekend. xo Do 😘