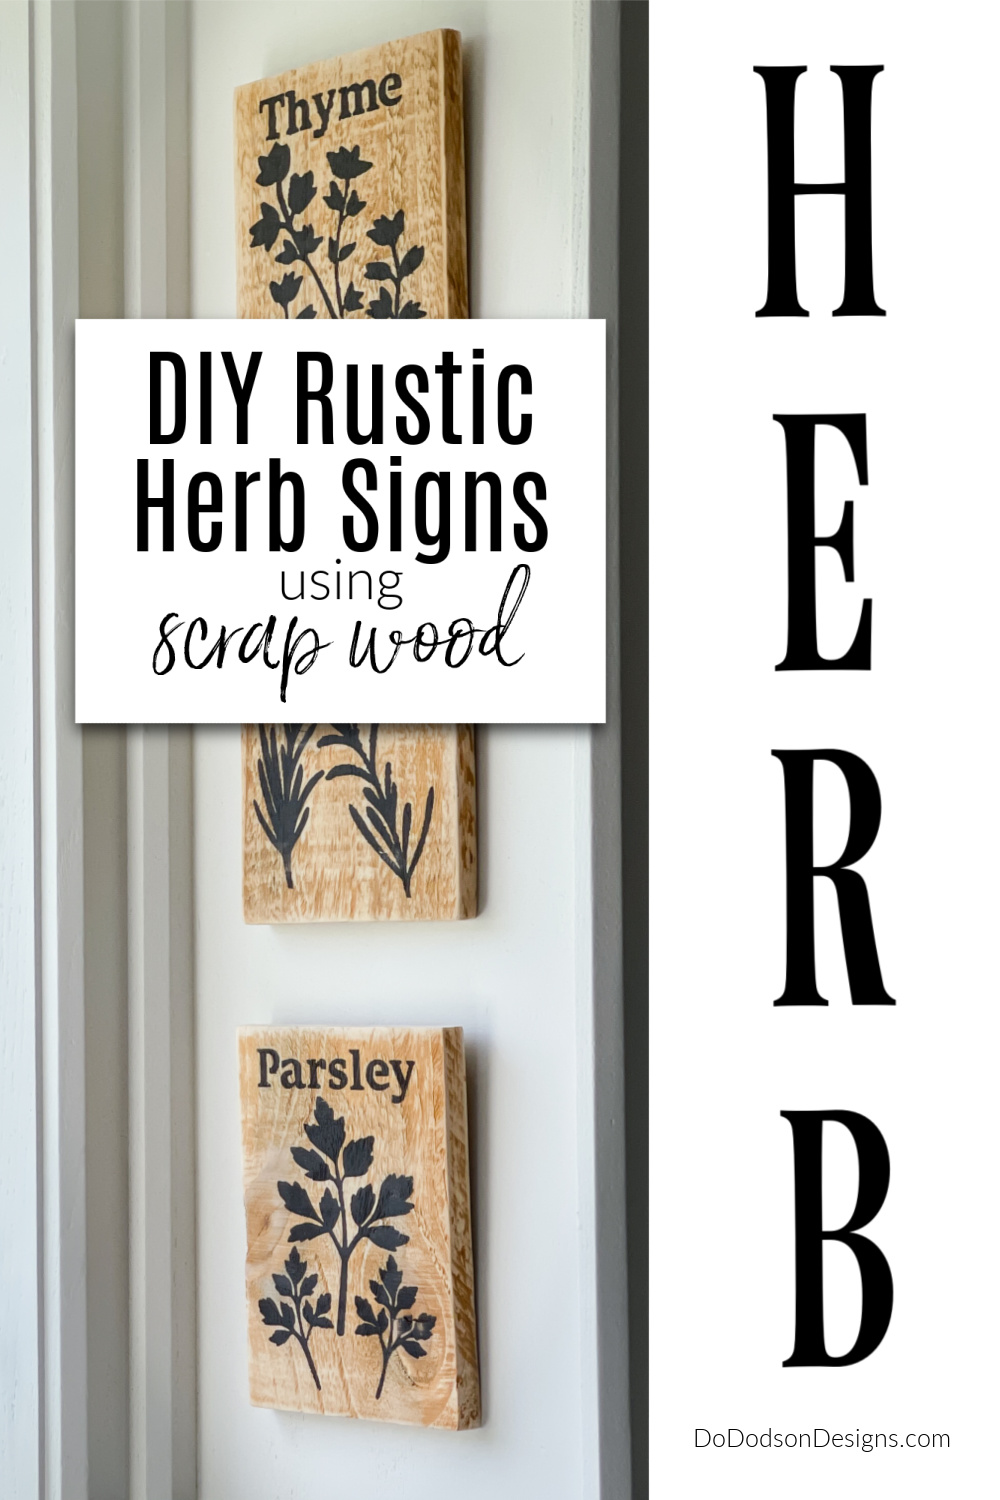
Hey triple-D friends! Transforming scrap wood (my fave) into a rustic DIY herb sign can add both beauty and functionality to your kitchen or garden. In this post, I’ll show you the step-by-step process for creating your own wooden herb sign using stencils, chalk paint, and other materials that you may already have at home.
Thanks to Dixie Belle Paint Co for sponsoring this post. While I was compensated to write this post, all opinions are my own.
* As an Amazon Associate, I earn from qualifying purchases and through other companies as well. You will not be charged extra when you purchase through these affiliate links, but any income I make helps me create more amazing DIY projects to share with you! To see my full disclaimer, click here!
DIY Herb Signs
If you have been following along with my DIY journey very long, you know all about my scrap wood addiction. I think it drives my husband insane. 🙂 I never met a piece of scrap wood I didn’t like or couldn’t use or make something from it.
NEVER, EVER throw away your wood scraps. You just never know when that one piece will be the perfect fit for your project.
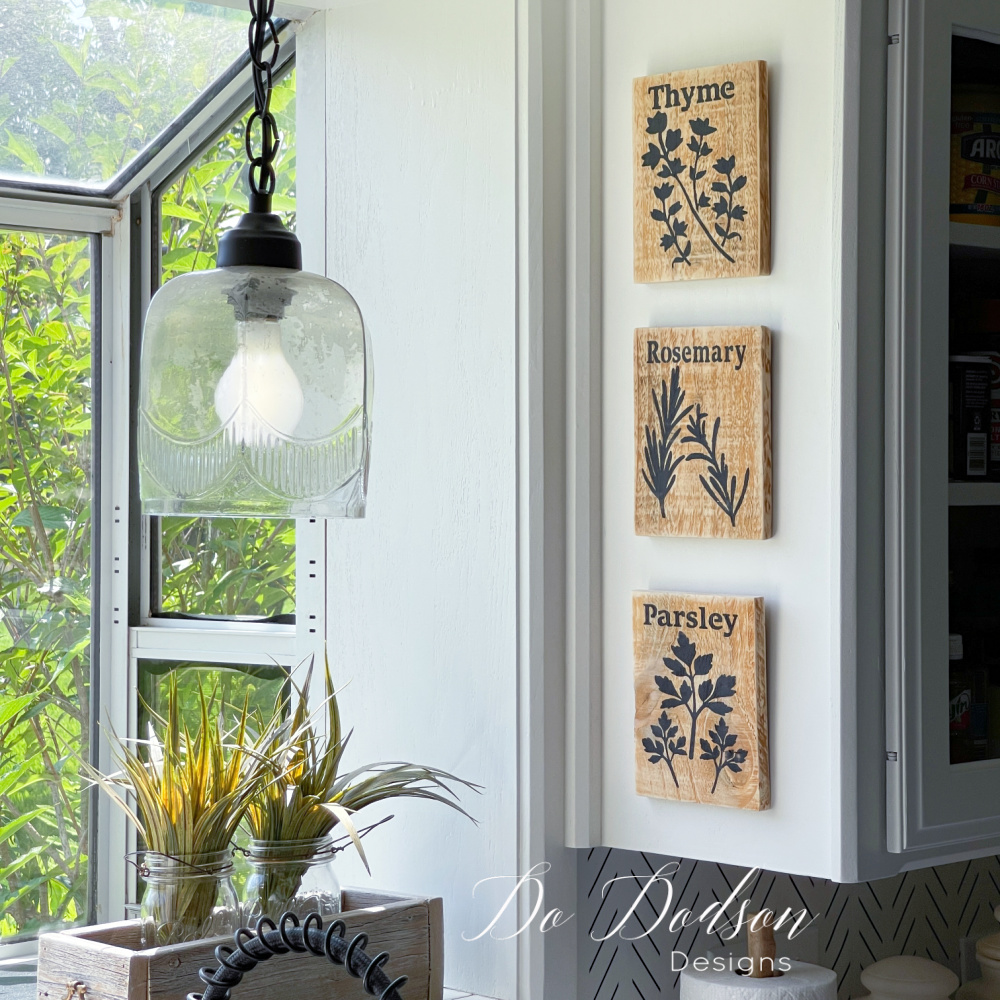
Today I’m using some old cedar fence pickets and transforming them into a functional and beautiful addition to my kitchen and or maybe my garden at some point.
With just a few simple tools and materials, you can create your own sign using stencils, chalk paint, and other resources you may already have at home. Get ready to embrace the joy of DIY projects and add a touch of charm to your home with this herb garden stencil.

SUPPLY LIST:
- Scrap wood (fence pickets work great)
- Tape Measure
- Carpenter’s Pencil
- Sandpaper or Sanding Blocks
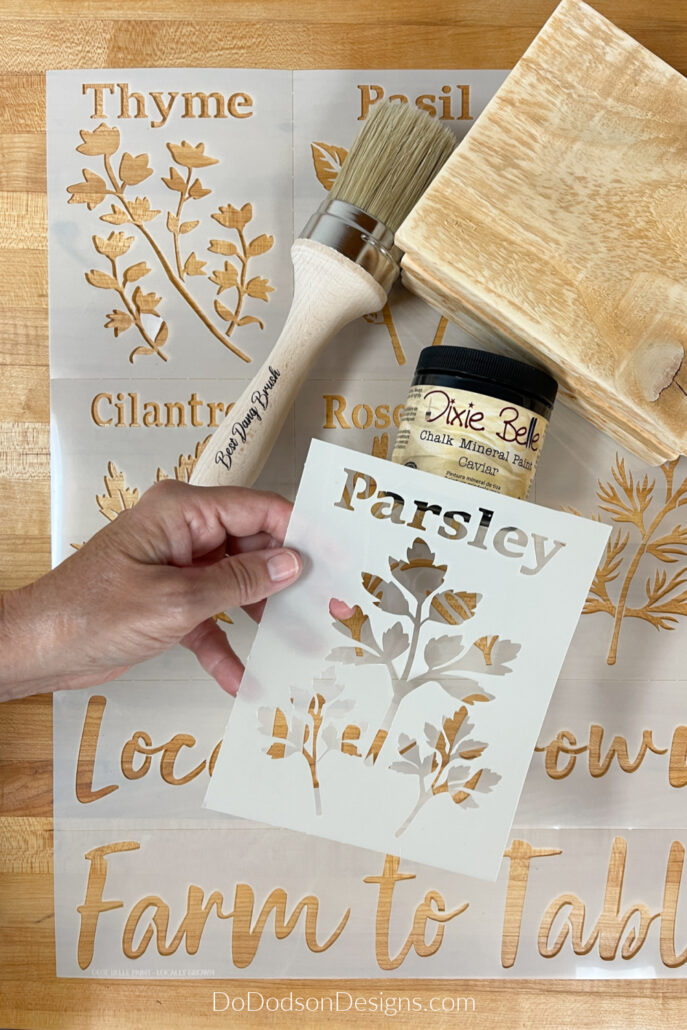
- Locally Grown Stencil by Dixie Belle Paint Co. REUSABLE
- Caviar Chalk Mineral Paint (my favorite black paint)
- Stencil Brush (Best Dang Brush) or Sponge
- Picture Hangers
Gather Your Materials
Before diving into creating your rustic DIY herb sign from scrap wood, you’ll need to gather a few basic materials. Here’s what you’ll need:
- Scrap wood: Choose a piece that’s roughly the size you want your finished sign to be. Keep in mind that smaller pieces may work better if you have limited space in your kitchen or garden.
- Sandpaper: Depending on the condition of your scrap wood, you may need to sand it down before painting or staining.
- Paint or stain: Decide whether you want to paint your sign a specific color or stain it to maintain a natural look. Consider using chalk paint if you want a rustic, farmhouse-style finish.
- Stencils or lettering: If you want to add text to your sign, gather stencils or lettering that fit the space you have. You can find these at a craft store or create your own using a printer and cardstock.
- Chalk: If you’re using chalk paint, you’ll need chalk to write your herb names on the sign.
- Paintbrushes: You’ll need a brush for applying paint or stain to your sign, as well as smaller brushes for touch-ups and details.
- Screwdriver and screws: To attach your sign to a wall or post, you’ll need a screwdriver and screws.
Now that you have all your materials, it’s time to prepare the scrap wood for your rustic DIY herb sign.
Prepare the Scrap Wood
Before you start designing your DIY herb sign, it’s essential to prepare your scrap wood. First, remove any nails or staples from the wood using pliers or a hammer. Next, use sandpaper or a sanding block to smooth out any rough patches or splinters on the surface of the wood. If your wood is particularly dirty, use a damp cloth to wipe it down and let it dry completely before sanding.
Once your scrap wood is prepped, take the time to measure and cut it to the desired size for your signs. Remember to factor in the space needed for lettering and artwork. With your scrap wood ready, you’re now ready to move on to the exciting part – designing your sign!
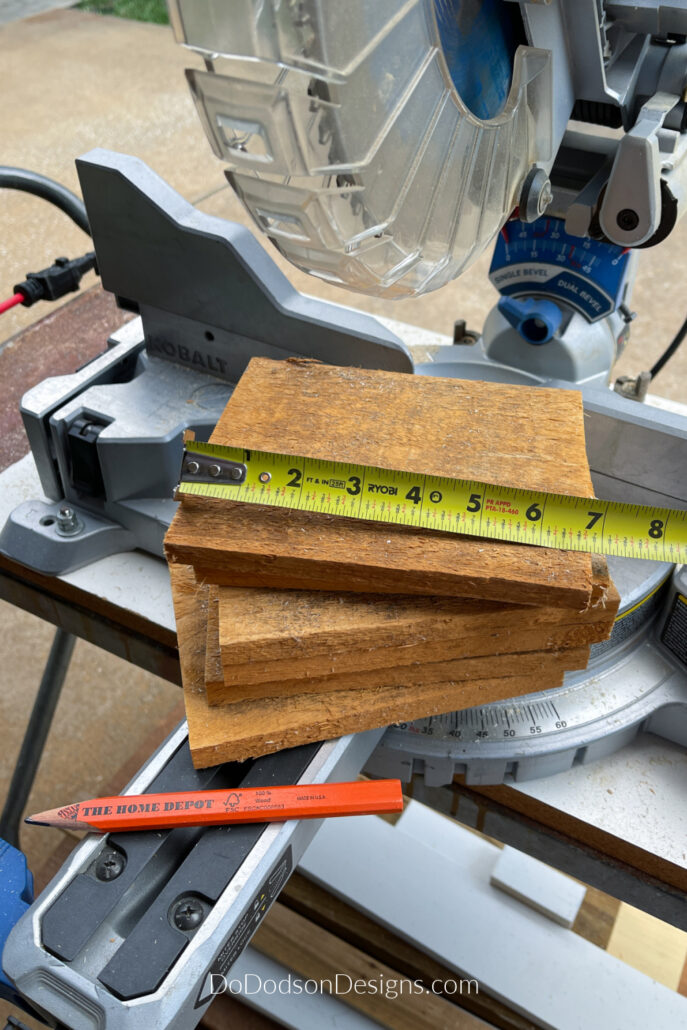
For this project, I used a fence picket that measured 5 1/2 inches in width. If you don’t have this size in your scrap pile, you can purchase a 6ft board at Home Depot or Lowes for about $3. One board will make 6 DIY herb signs with a bit left over. SAVE IT!
Cut six pieces, 6 and 3/4 inches X 5 1/2 inches. You’ll only need to make one cut since the fence picket already measures 5 1/2 inches. SCORE!
Design Your Herb Sign
Before diving into the design process of your DIY herb sign, make sure you have a clear vision of what you want it to look like. Consider the overall aesthetic of your home, your personal style, and the purpose of the sign. Are you going for a rustic look or something more modern? Do you want bold, brightly colored signs that stand out or neutral farmhouse designs that are more subtle and blend with your decor?
For me, I chose to go neutral with the natural wood with a black stenciled design.
Make sure your stencil design fits comfortably within the dimensions of the wood you’ve chosen. You may need to make some adjustments to your original idea to make it work with the size of your wood.
With your design complete, you’re ready to move on to the next step – stenciling and painting your sign.
Stencil and Paint Your Sign
This is where you’ll bring your vision to life on your scrap wood.
First, choose a stencil that aligns with your design. You can purchase these stencils or create your own using a printer and a craft knife.
Next, place the stencil over the wood and secure it in place with painter’s tape. This will help to keep the stencil in place and prevent it from moving while applying the paint.
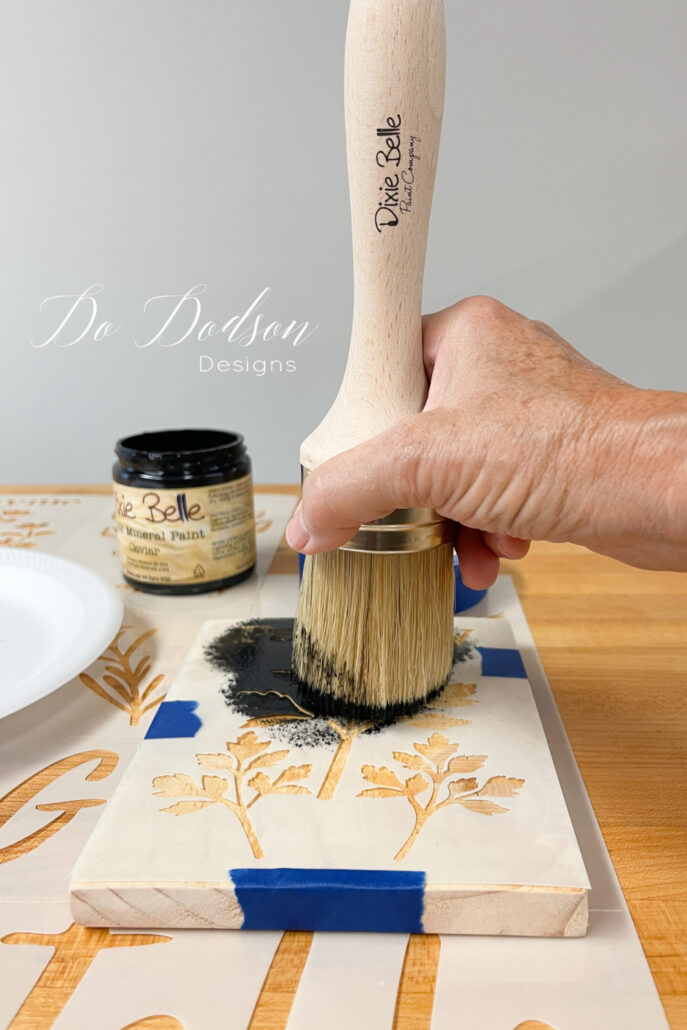
How To Stencil On Wood
Use a stiff, flat paintbrush (Best Dang Brush) or sponge to fill in the stencil with a pouncing motion and very little paint, taking care not to go outside the lines.
After applying a small amount of paint on the bristles of the brush, use a paper plate or any flat surface to offload a bit of the paint. This will prevent bleeding under the stencil and give you a crisp and clean design. Less paint is better, and you can always add more.
Add tape all the way around your project to prevent accidentally getting paint on the bare wood if you don’t trust yourself. I’m a risk-taker! LOL
Once the open areas on the stencil are filled in, carefully remove the stencil.
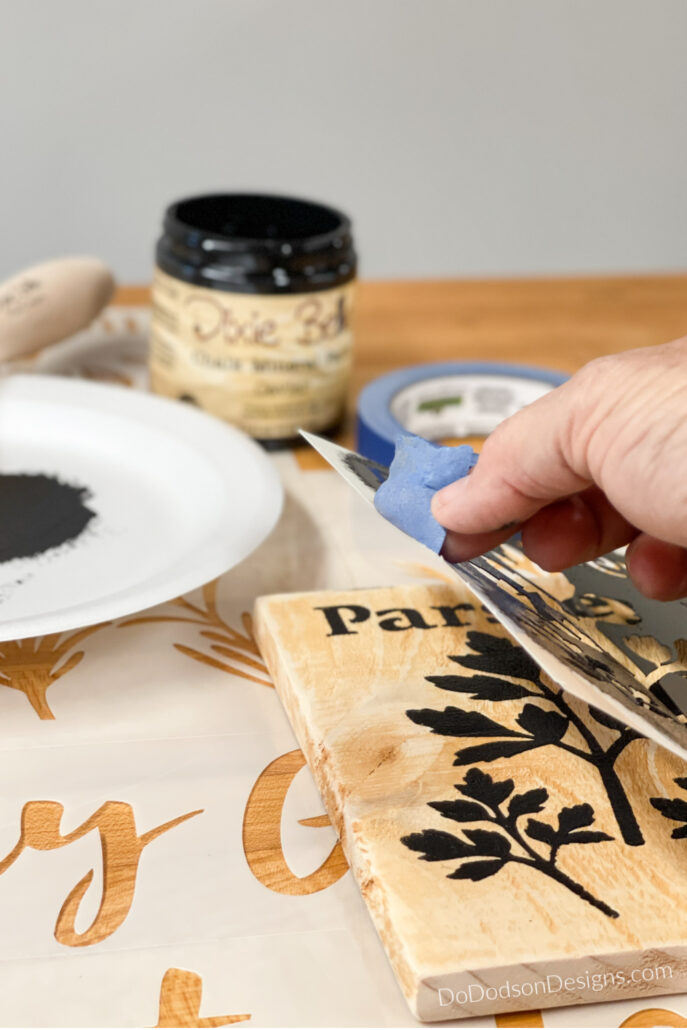
When I say very little paint should be applied over the stencil, this is because the more paint you use, the more likely you are to get bleeding of the paint under the stencil. CLICK HERE to learn more about how to prevent paint from bleeping under stencils.
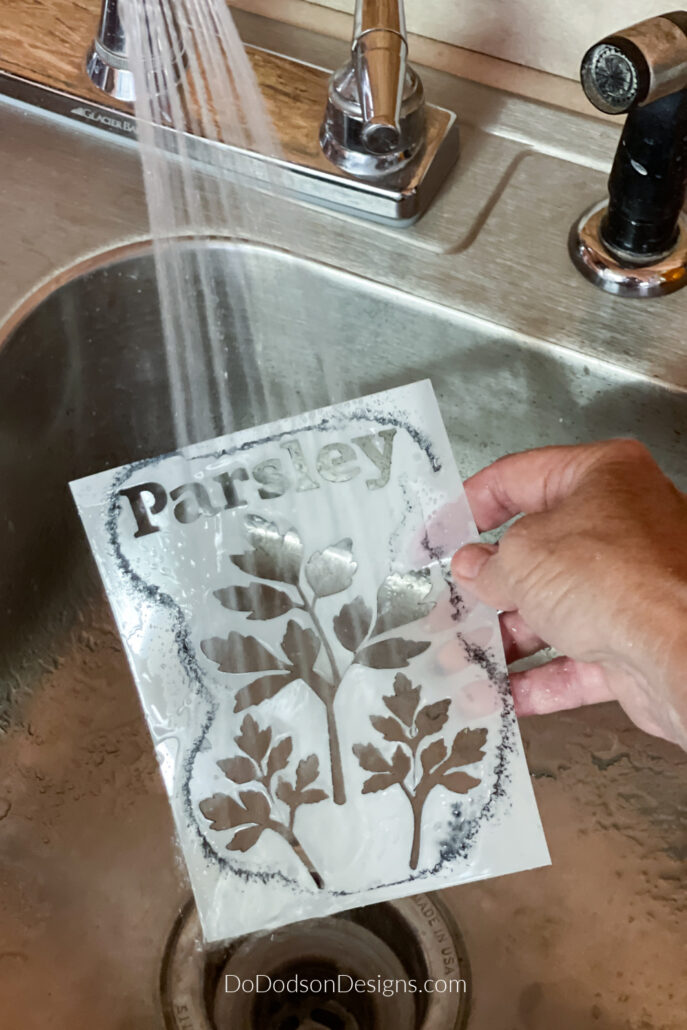
Immediately after stenciling, rinse the reusable stencil with water and mild soap if needed so that you can use them again and again.
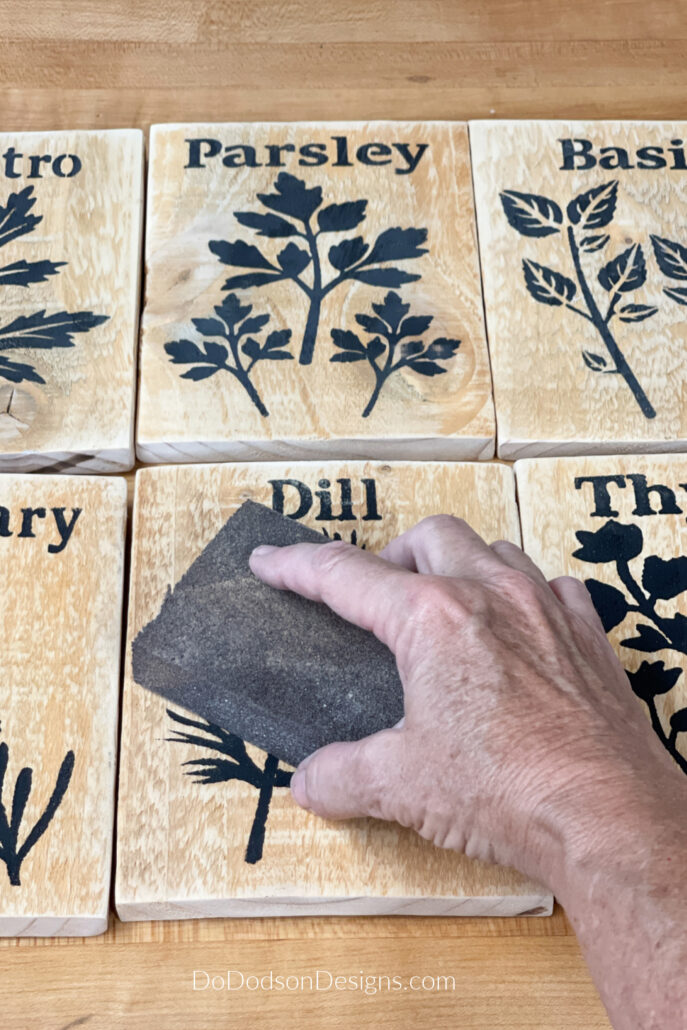
Add Finishing Touches
To give your DIY herb sign that extra rustic touch, consider adding some finishing touches. Distressing the wood with sandpaper can give it a worn and weathered appearance, which is perfect for a rustic aesthetic. You can also experiment with different stains or finishes to see what looks best with your chosen color palette.
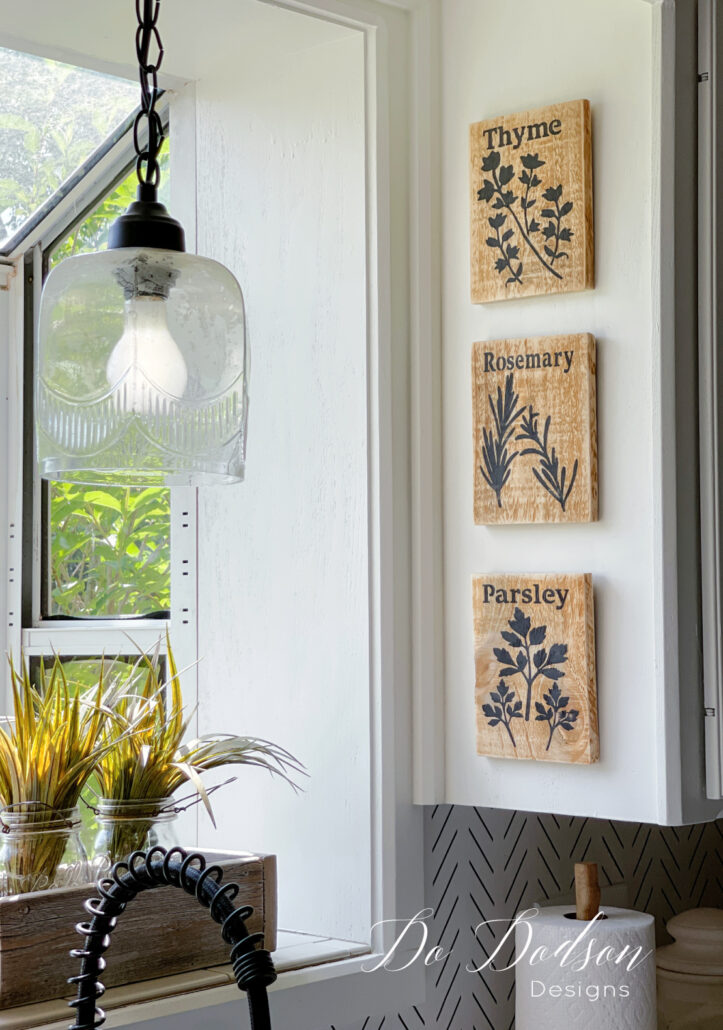
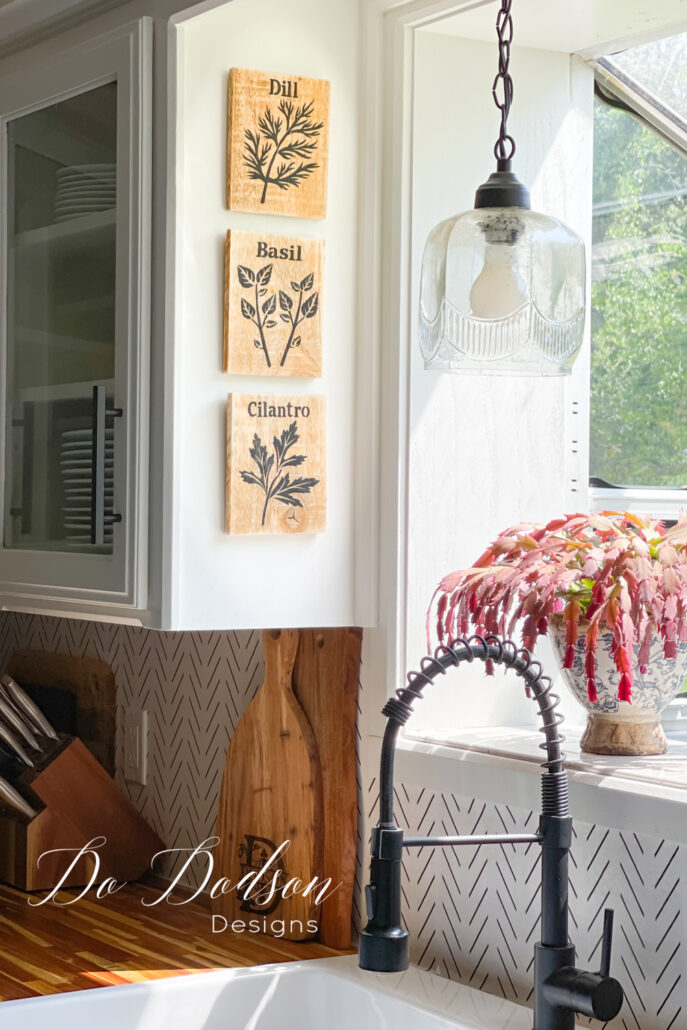
Once you have finished adding any final touches, your rustic DIY herb sign is ready to be displayed in your desired location. Mine are going in MY FARMHOUSE KITCHEN!
You could also use these in your garden as markers. Simply add a wood stake to the back with nails or screws. These scrap wood signs will most certainly do well outside in the garden, and the chalk mineral paint used with the stencil design will not wash off. It will weather nicely.
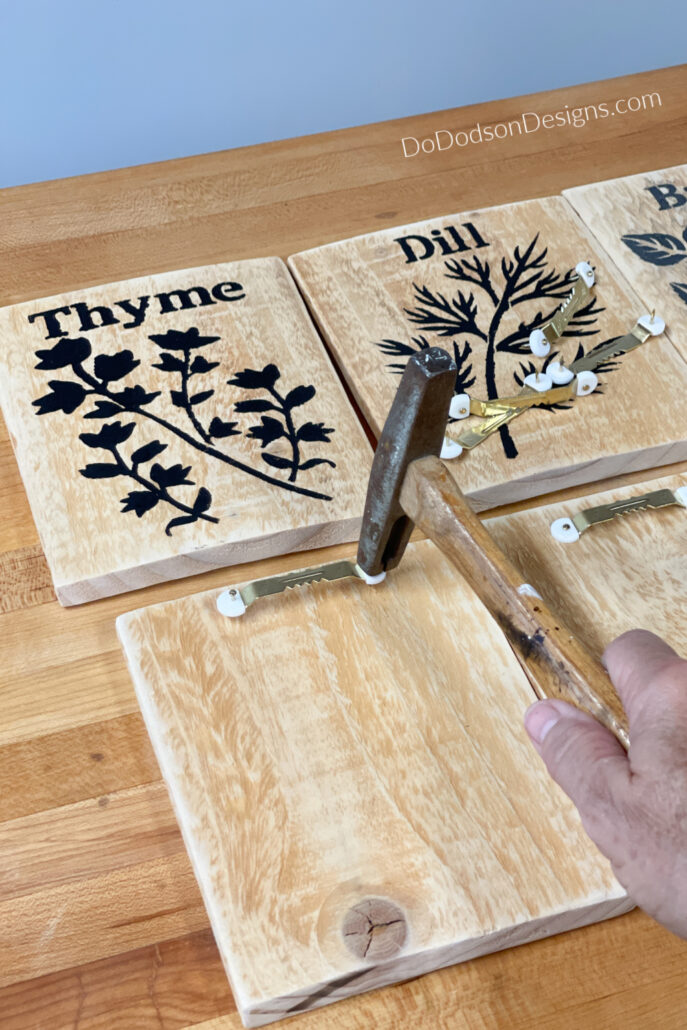
Add Hanging Hardware
It’s totally up to you at this point, but if you want to hang these on the wall, I recommend the sawtooth hangers. They are super easy to install.
Find the center of the wood object you want to hang and secure it in place. The saw tooth helps to level the frame or sign on the wall.
There are a variety of sawtooth hangers to choose from and can be found at most home improvement stores or stores that sell hardware. I got these from Walmart, and I like the addition of a holder for the nails. The nails are super tiny and sometimes difficult to maneuver.
Display Your DIY Herb Sign
After creating a rustic DIY herb sign from scrap wood, it’s time to think about how to display it. There are plenty of options to choose from depending on your personal taste and available space.
One idea is to hang your sign on a wall using picture hangers or a sawtooth hanger. This is a simple and classic way to display your creation. You can opt for a more subtle approach by positioning it on a shelf or adding some contrast by placing it against a colorful backdrop or patterned wallpaper.
Whatever your chosen method, make sure your herb sign is displayed in a prominent spot where it can be admired and appreciated. Once you have finished adding any final touches, you’ll be able to step back and marvel at your handiwork.
DIY Herb Sign Kitchen Decor
Creating this rustic DIY herb sign from scrap wood was a lot of fun. These made a great addition to my kitchen. I’m still adding trying to figure out how to style around my farmhouse sink, but I think I found a winner with these scrap wood signs. Don’t they look great will my peel-and-stick wallpaper backsplash?
It’s an easy project that can add beauty and functionality to your kitchen or garden, and I found another clever way to use those scrap wood pieces. I love this little herb sign made by another talented blogger. CLICK HERE to see it.
You could even make them as gifts for family or friends. I bet your bestie would appreciate a set of these!
If you have a storefront, consider making them to sell. These types of scrap wood projects are sure to sell out quickly!
By following these simple steps, you can turn materials you may already have at home into personalized and charming signs. Remember to share your creations with others and inspire them to take on their own DIY projects. With a little creativity and resourcefulness, you can transform simple materials into something remarkable. As the saying goes, “One person’s scrap wood is another person’s treasure.” Actually, it’s mine! 🙂
Don’t forget to let me know that you stopped by in the comment section. I love hearing from you.
Until the next project… xo, Do

Your herb artwork looks beautiful. Love them!
Thanks, Tammy! Gotta love those scraps. 🙂 xo
These hebs signs are adorable and I know my readers will enjoy this project! Sharing it in my Weekend Post this week! Thanks for the great ideas Do!
I sure have enjoyed them in the kitchen. Going on 2 years and I haven’t moved them yet. 🙌🏻 That’s rare!
Love these! Where can I find instructions on how to prep the wood scraps to make them look like yours before the stenciling? Thank you!!
Hi Amanda! Thanks for reading. The boards I used were pre-stained cedar pickets from an old fence we tore down. To get this look, stain the boards to color of your choice and allow to completely cure. This could take a week or so. Then with a wood sander and 220 grit paper, lightly sand until you get the desired look. I hope this helps. 🙂