Hey Triple-D friends! Today I’m transforming empty glass bottles into stunning vases. I literally cringe at the thought of throwing these beautiful bottles away. But they don’t even have to be beautiful. Any bottle will do. So, why not turn them into chic vases instead? Today, I’ll show you how to upcycle your glass bottles into stunning pieces of home decor that you can be proud of. Not only is this a fun and creative DIY project, but it’s also a budget-friendly way to add some style to your living space. I can’t wait to show you this simple DIY bottle vase project.
Thanks to Dixie Belle Paint Co for sponsoring this post. While I was compensated to write this post, all opinions are my own.
* As an Amazon Associate, I earn from qualifying purchases and through other companies as well. You will not be charged extra when you purchase through these affiliate links, but any income I make helps me create more amazing DIY projects to share with you! To see my full disclaimer, click here!

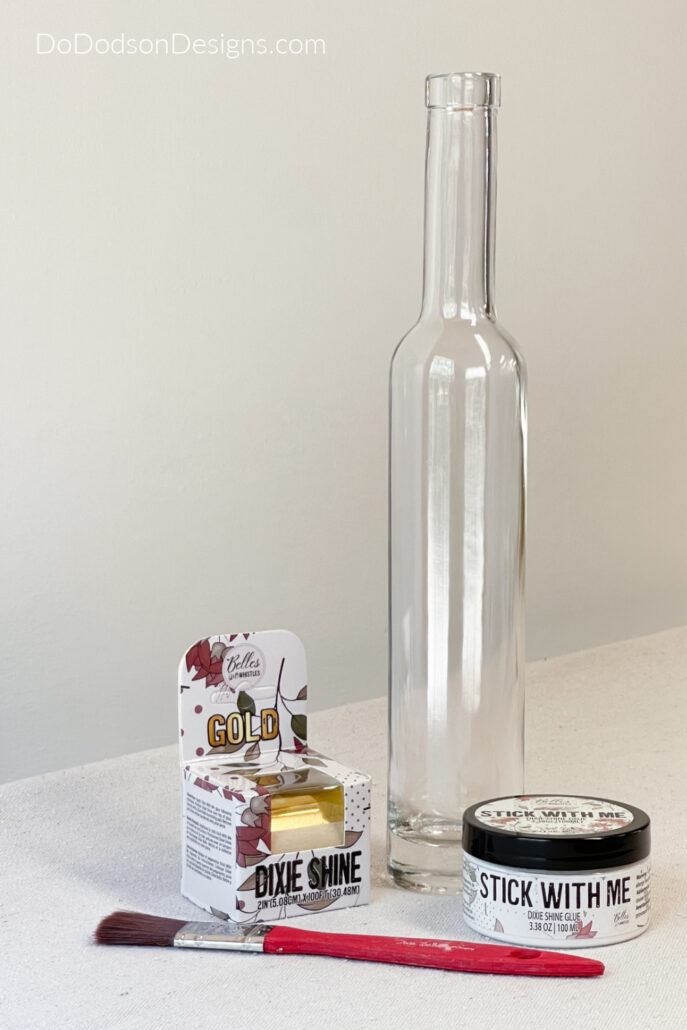
SUPPLY LIST:
Below are the supplies you’ll need to create your very own DIY bottle vase that you can use to showcase live plants that love water.
- bottles (wine bottles, soda bottles, old milk jars, mason jars, etc.)
- Painter’s Tape
- Dixie Shine Gold
- Stick With Me (Dixie Shine Glue)
- Craft brush Artist Brush
- Burnishing / Finishing Pad
- 9 Guage Aluminum Craft Wire (Gold) or Copper
- Wire Cutters
- Pothos Cuttings or Long Stem Florals
For more crafty DIY bottle vase ideas, CLICK HERE for another great step-by-step tutorial.
Turn Any Glass Bottle Into A Show Stopper
A wine bottle makes great flower vases, but I’m not much of a wine drinker. It gives me headaches. But I have friends, and I never miss an opportunity to grab an empty wine bottle.
Disclaimer: If you’re making these with friends, friends don’t let friends drink and craft. LOL
Before you begin upcycling your empty glass bottles into chic vases, it’s important to choose the right bottles. Any glass bottle can be transformed into a vase with a little creativity, but some shapes and sizes are better suited for certain styles.
For a sleek and modern look, choose tall and slender bottles, such as wine or liquor bottles. These are perfect for displaying single stems or minimalist arrangements.
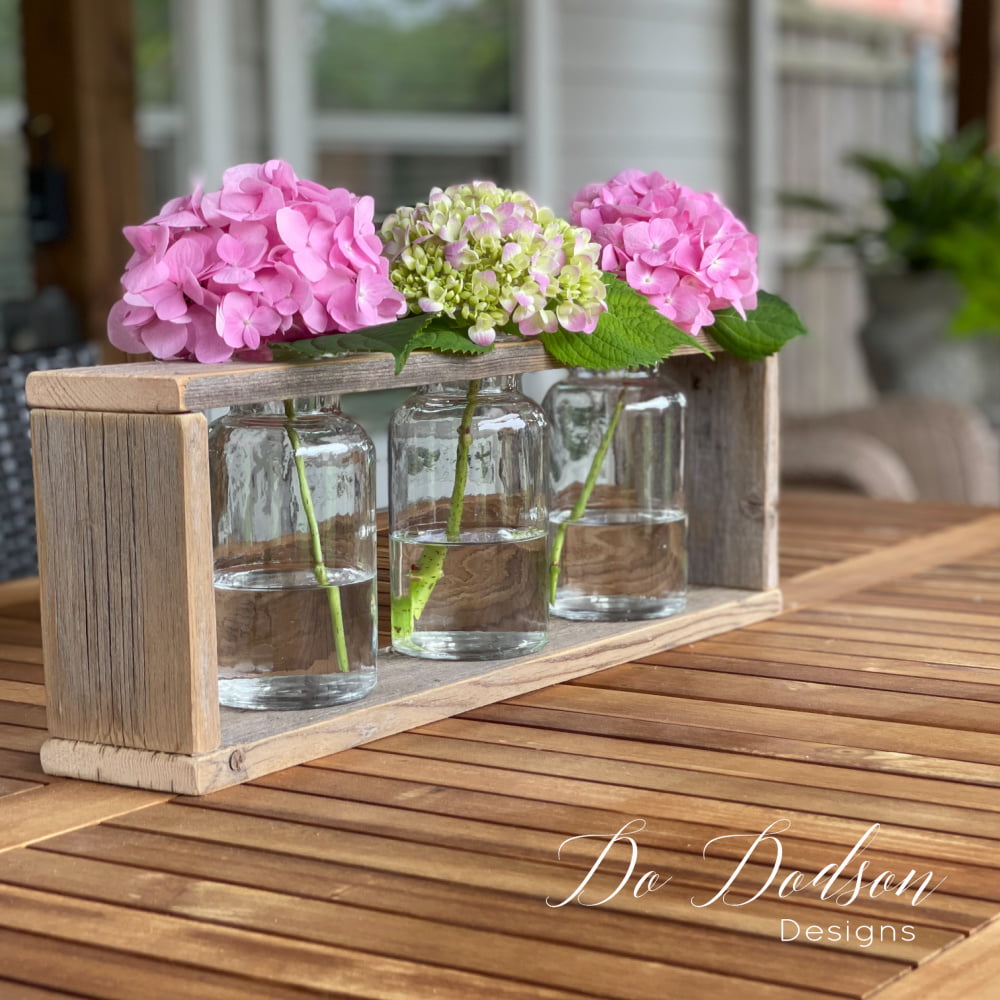
If you’re aiming for a more rustic or vintage vibe, consider using mason jars or old milk bottles. These shorter and wider bottles are great for showcasing lush bouquets or colorful arrangements.
No matter what style you’re going for, make sure to choose bottles with interesting shapes or textures. This will add visual interest and make your vases stand out.
Once you’ve selected your bottles, it’s time to move on to preparing them for upcycling.
Prepare Your Bottles
Before you begin upcycling your glass bottles, you’ll need to give them a good cleaning. Remove any labels or stickers by soaking the bottles in warm, soapy water for at least 30 minutes. For stubborn adhesive residue, try using rubbing alcohol or nail polish remover.
Once your bottles are label-free, rinse them thoroughly with water and dry them completely with a clean towel. Inspect the bottles for any chips or cracks. While minor imperfections can add character to your vases, larger defects can make them unsafe to use.
Finally, if you plan on painting or decorating your bottles, make sure they are completely dry before you start. Any moisture left inside the bottles can cause your paint or decorations to peel or flake off.
With your bottles cleaned and inspected, you’re ready to move on to the fun part: decorating!
Chose A Design For Your DIY Bottle Vase
To really make your DIY glass bottle vase stand out, consider adding some decorative touches. There are endless possibilities here, from painting the bottles with a design or pattern to adorning them with ribbon or twine. If you’re feeling particularly crafty, you could even decoupage them with cut-out images or decor transfers. But I have something special planned for mine, and it involves GOLD. Beat still my heart!
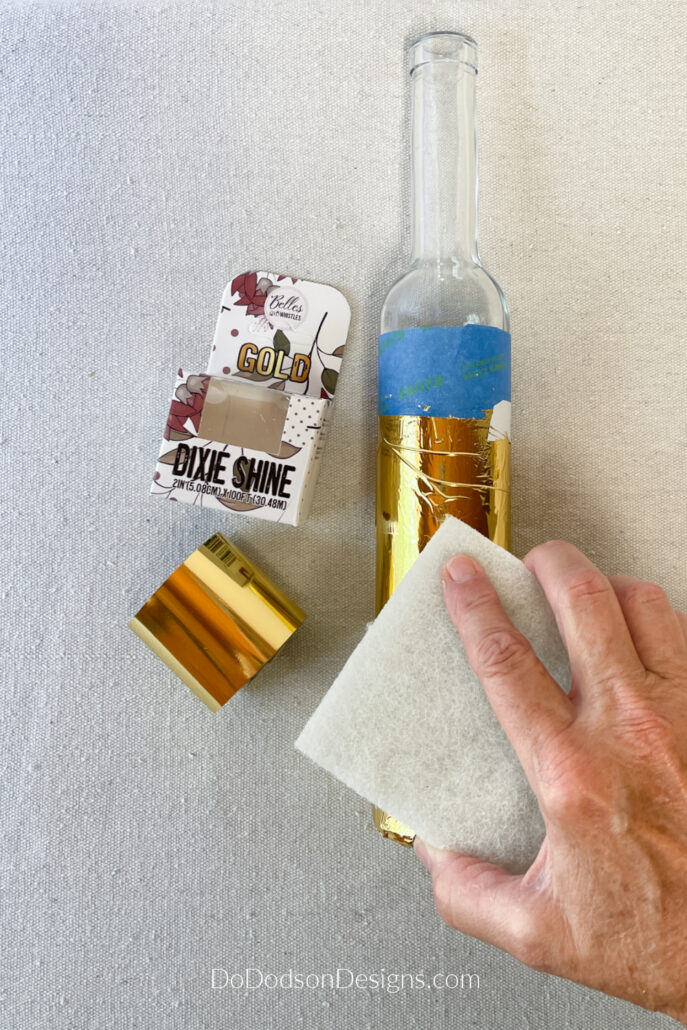
For my bottle vase, I chose to use Dixie Belle’s Dixie Shine in Gold. Here’s how I applied it to my vase.
How To Apply (Dixe Shine) Metallic Foil To Glass
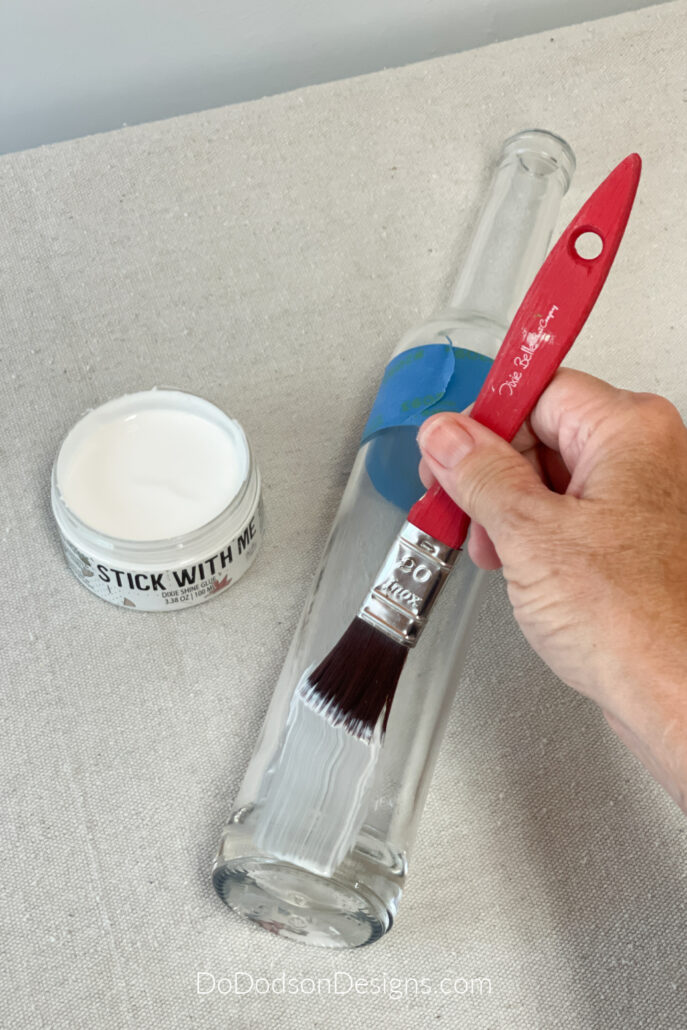
STEP 1: The first thing I did was mark off the area that I didn’t want to apply the gold to. Painter’s tape is my go-to for dividing finishes on projects.
STEP 2: Apply the Dixie Shine glue directly to the areas with a craft brush that you want the gold to adhere to. Use long smooth strokes, and be careful not to miss any areas. Don’t worry; if you do miss an area, you can always go back and reapply glue to those areas later.
The glue will need to sit after applying for about 15 minutes to get tacky or until it is clear in appearance. Warning! It’s super sticky, so do this in a clean and draft-free area.
STEP 3: After the glue has become tacky, apply the Dixie Shine metallic foil with the shiny side up over the glue.
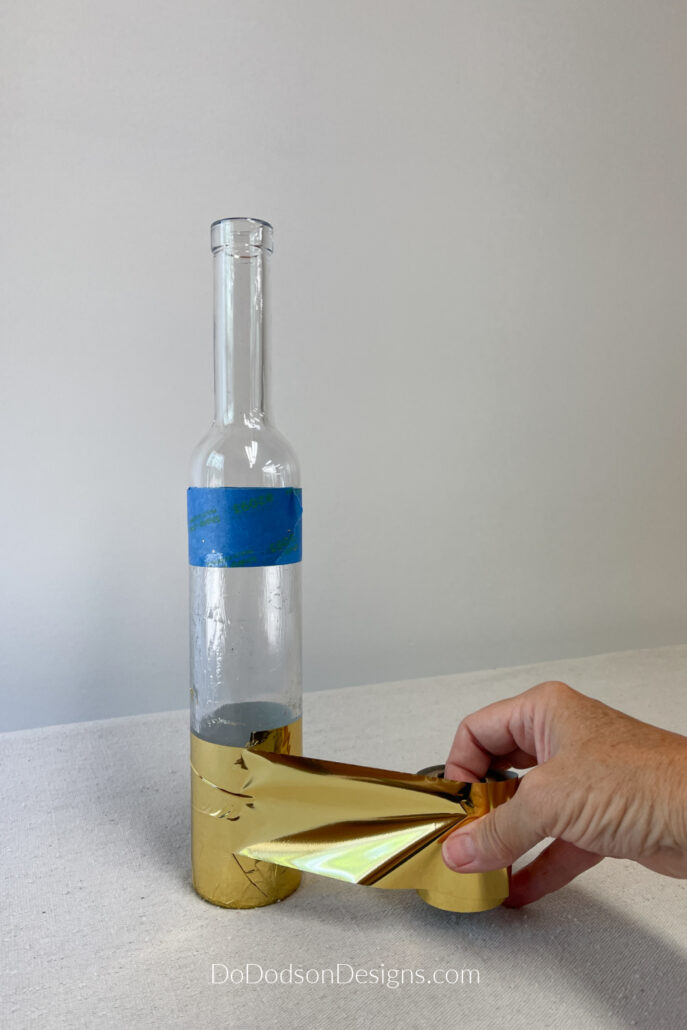
STEP 4: Next, use a burnishing pad to gently rub the metal foil off of the transfer paper to ensure that the product comes in contact with the glue. Rub, rub, rub, and rub some more.
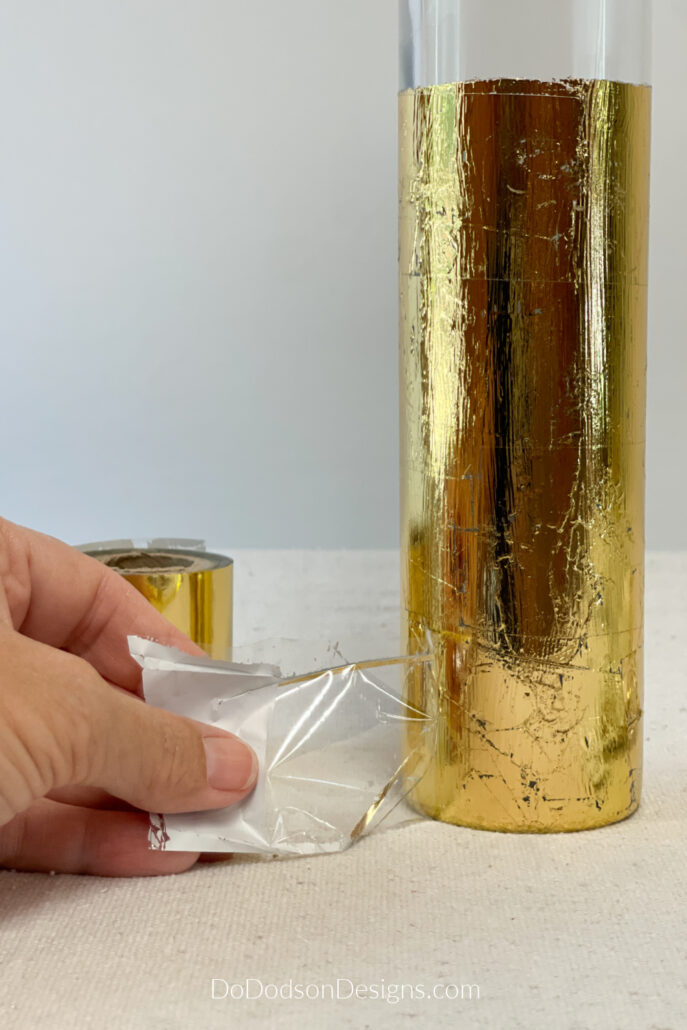
STEP 5: After that, carefully peel the thin film layer (transfer paper) away from the glass.
Because the gold is attached to a backing, this method of foiling is a lot less messy than traditional gold leafing. It’s a simple process with great results.
Adding Support For Vines Using Wire
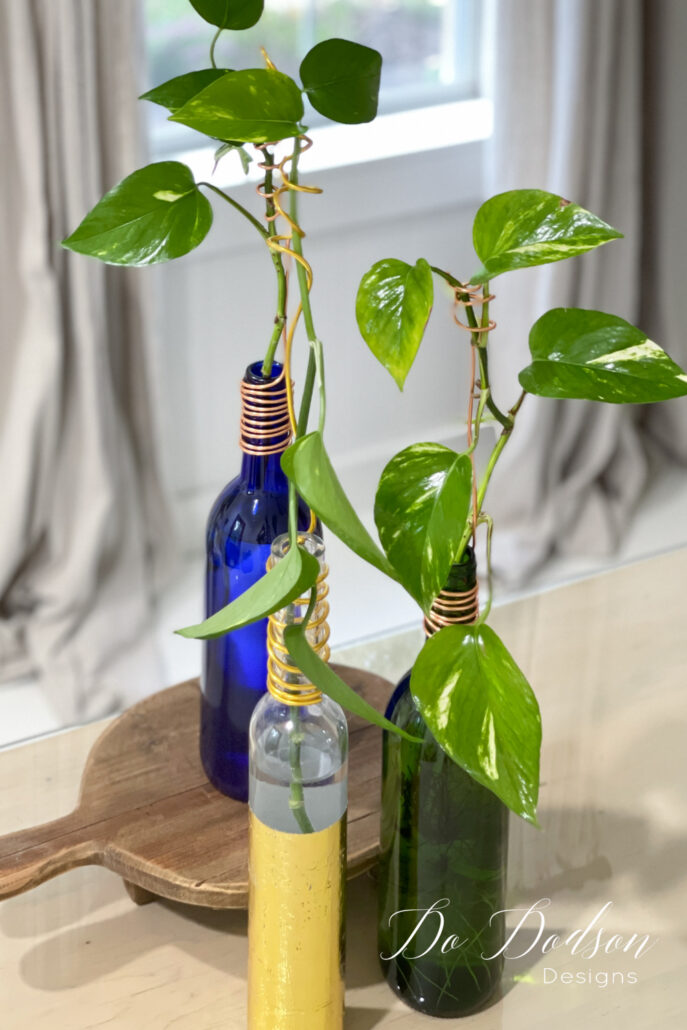
Because I’ll be adding cuttings from my Pothos (ivy) which actually can grow and live in water, I used a 9mm aluminum gold color craft wire as a support.
Doing this will allow more stability to my cuttings and add an element of height while leaving room for more growth.
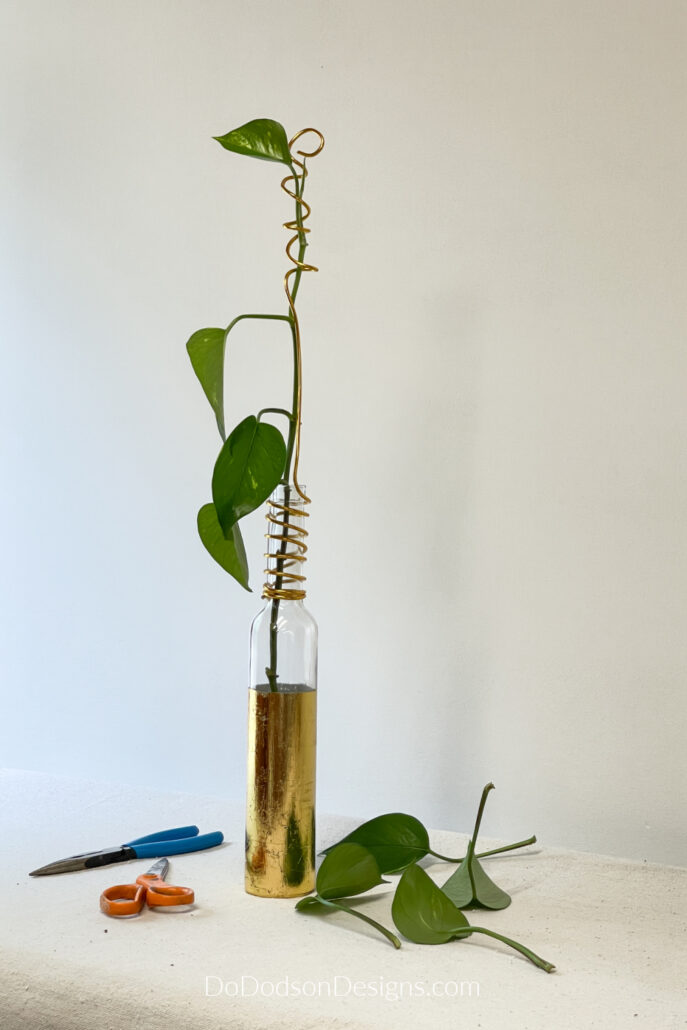
STEP 6: Start at the base of the neck of the bottle and begin wrapping the aluminum wire around the neck and continue upward until you reach the top of the bottle. With the wire still connected, measure out an amount that you think you will need to support your plant. Be sure to make the wire longer than you need; you can always trim it once you place the plant in the bottle.

STEP 7: Decide what you’re putting in your DIY bottle vase (live greenery, faux or fresh flowers) and measure the length you want to be displayed, but keep in mind the additional length of the stem that will be inside the bottle. The height of the bottle will determine this. You’ll need to leave enough of the stem for rooting if you’re using a pothos cutting.

STEP 8: Insert your cutting into the bottle, but don’t put water in the vase just yet. You’ll want to do a dry run first. Gently wrap the wire around the stem to support it. I like to make an additional curly, twisty at the top of the wire. This serves as a decorative feature with the wire but also serves as additional support for new growth.
Once you have the wire in the shape you want, trim the wire and tuck the cut end under.
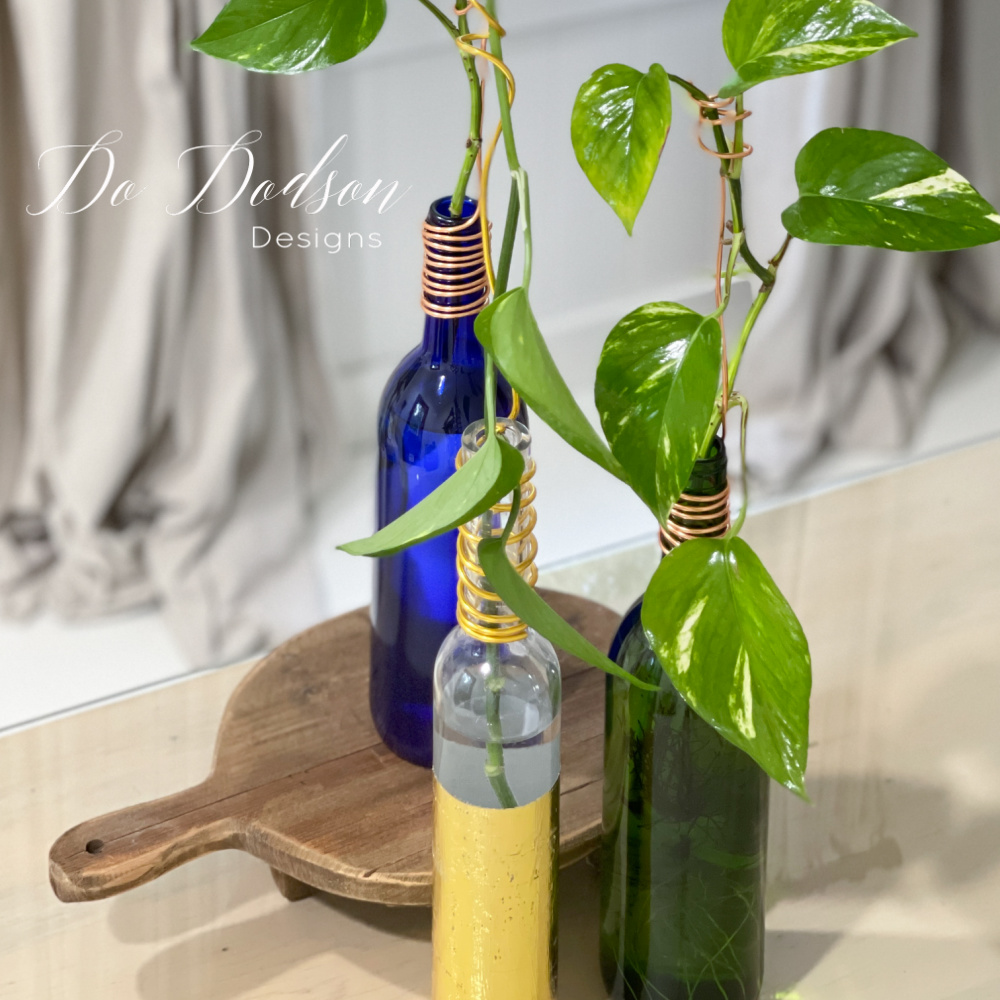
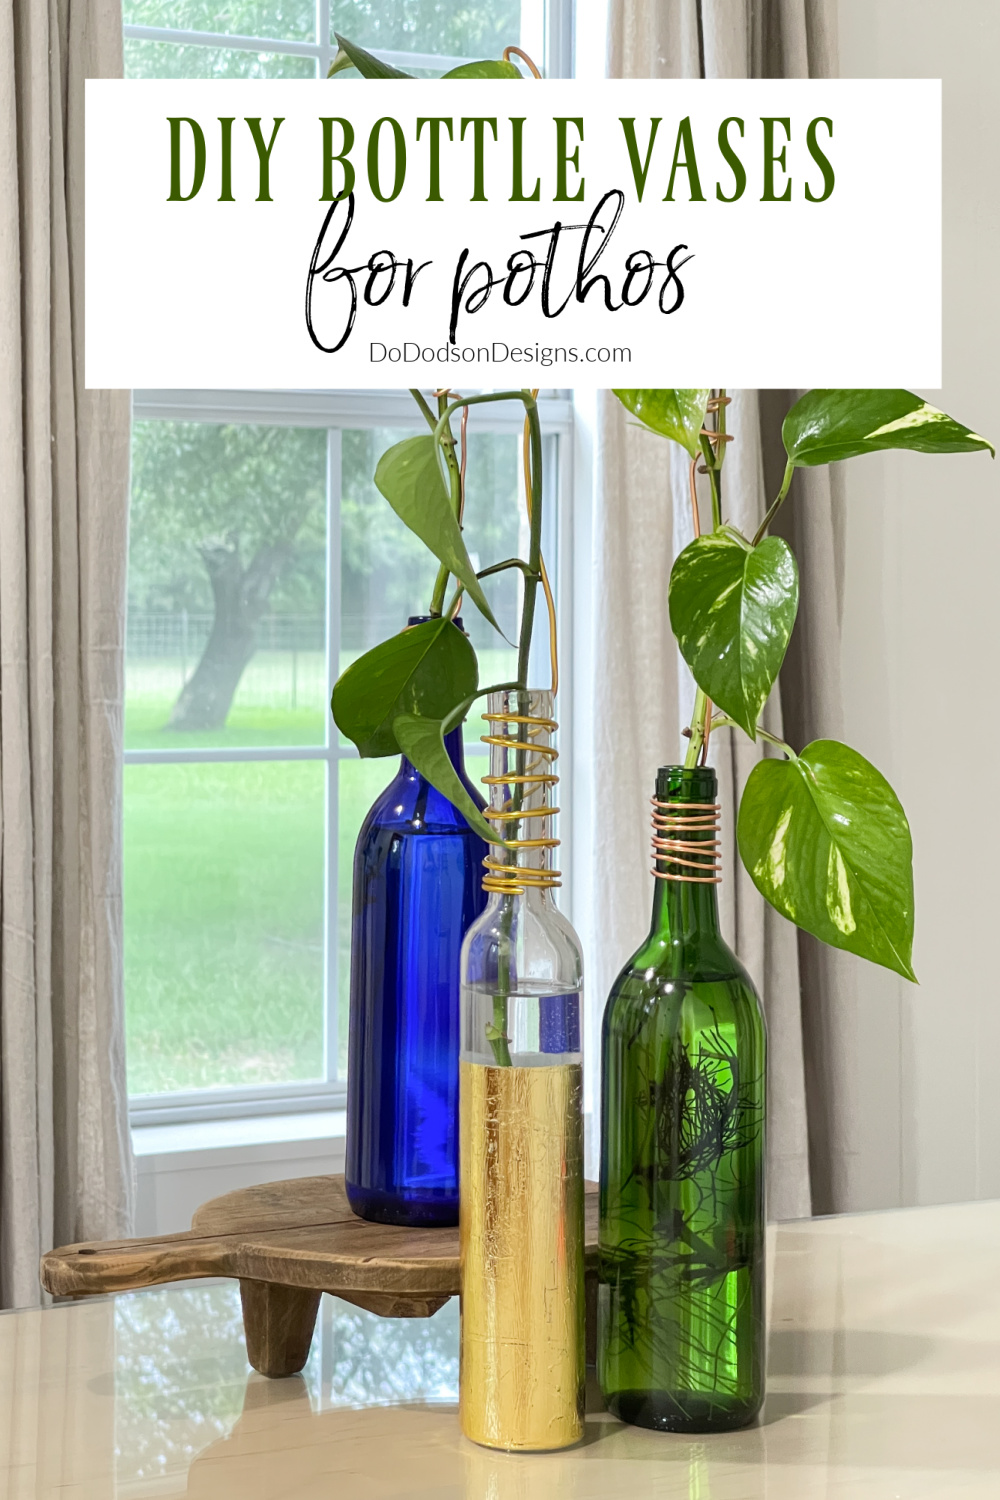
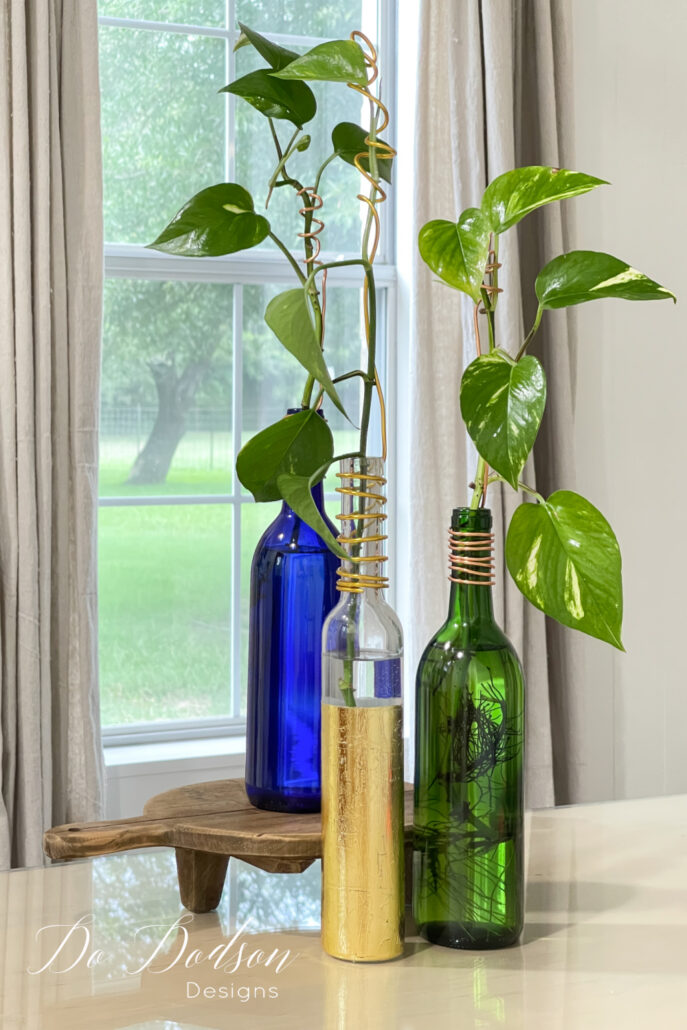
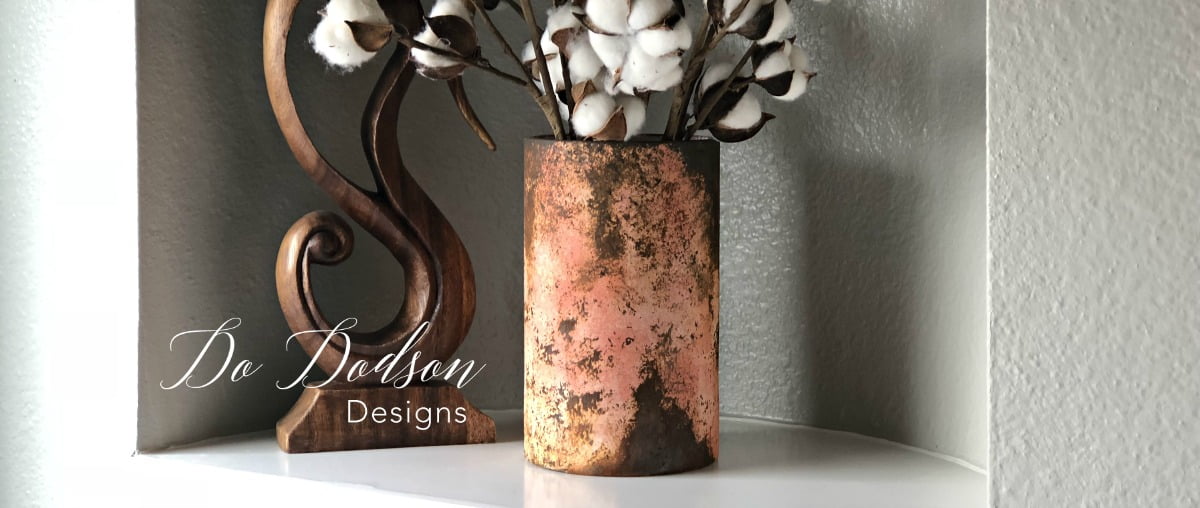
How My DIY Bottle Vases Turned Out
Once you’ve successfully upcycled your glass bottles into chic, modern glass bottle vases, the next step is to figure out how to display them in a way that showcases their newfound beauty. There are many ways to do this, depending on your personal style and the look you’re going for.
One option is to place your vases on a shelf or mantel, either on their own or as part of a larger display. You could mix and match with other decorative items, like candles or picture frames, to create a vignette that highlights your unique style.
Another option is to group your vases together on a tabletop or windowsill. This works especially well if you have several bottles that are all similar in size and shape. Try arranging them in a pyramid shape or in a row for a clean, streamlined look.
I’m placing mine on my office desk in front of a bright window with lots of natural light for a beautiful pothos plant display.

No matter how you choose to display your upcycled vases, the key is to have fun and let your creativity shine. These unique and stylish pieces are sure to add a touch of charm to any room in your home.
Hey, thanks for joining me today for this unique DIY bottle vase tutorial. I hope you enjoyed it and learned everything you need to know to create your own amazing home decor displays with your plants.
Please feel free to ask any questions if I missed anything, and as always, I’d love to hear from you. So, drop me your comments below, or just say hi so that I know you stopped by.
Until the next project… xo, Do
What a clever, easy and fun idea! Your posts always give me ideas for my next crafting session with friends. Can’t wait to get started!!
Hi Catharine!
I’m so glad you stopped by. When I create I do keep in mind other creatives that like to teach in person. Quick and easy with amazing results. Have a wonderful week. 🙂 xo
This is really relevant for me because I just emptied a lovely blue bottle and was wondering whatever I could do with it to save it from the landfill. Thank you so much!
Hi Marion!
Don’t you just love when you find a purpose for trash. From trash to treasure! I’m so glad this was helpful. Have fun creating your bottle vase. 🙂 xo
This looks like a great way to upscale a plain glass bottle! Love the idea Do1 Pinned 🙂
Hey, thanks Cindy! Just when you think you can’t find a purpose. LOL xo 🙂
I love this idea especially for cool wine bottles.
Thank you! It’s fun to display plants in a unique way. 🙂
I Love this idea ! Nice to save pretty bottles from the trash 🙂
Creating the wire plant support is genious !! I have family that would love these too.
I’ll need to go thru my glass stash ….
I really appreciate your creativity – and your helpful tutorial talent !
Thanks.
p
Wonderful! I’m so glad you enjoy this one. Have a wonderful weekend. 🙂
Do
Do- I absolutely LOVE these! What a beautiful way to upcycle something that others might see as waste! I do have a question for you though. Do you have any problem with these tipping over as the pothos begin to grow? I can’t wait to make these for our home and for friends and family. Thank you!
Hi Tess! Aren’t these fun? The bottles should be filled with water which makes the base heavy. However, it you have small children and a doggo with a wagging tail, they most certainly can be knocked over. I keep mine up high away from close contact. Have fun creating these. 🙂
I’m going to share this with my sister Andrea. She LOVES propagating plants and this is such a fun way to do it and then display them beautifully. We have a pathos plant that our Mum bought 30 years ago and we still have it and propagate babies from it!! 😃 Great tutorial, Do! XOXO
What a great way to use a plant with such a sweet history. Tell Andrea I’d share plants with her if we lived closer. I love propagation too. Free plants! Thanks for sharing, Denise. xo 😘