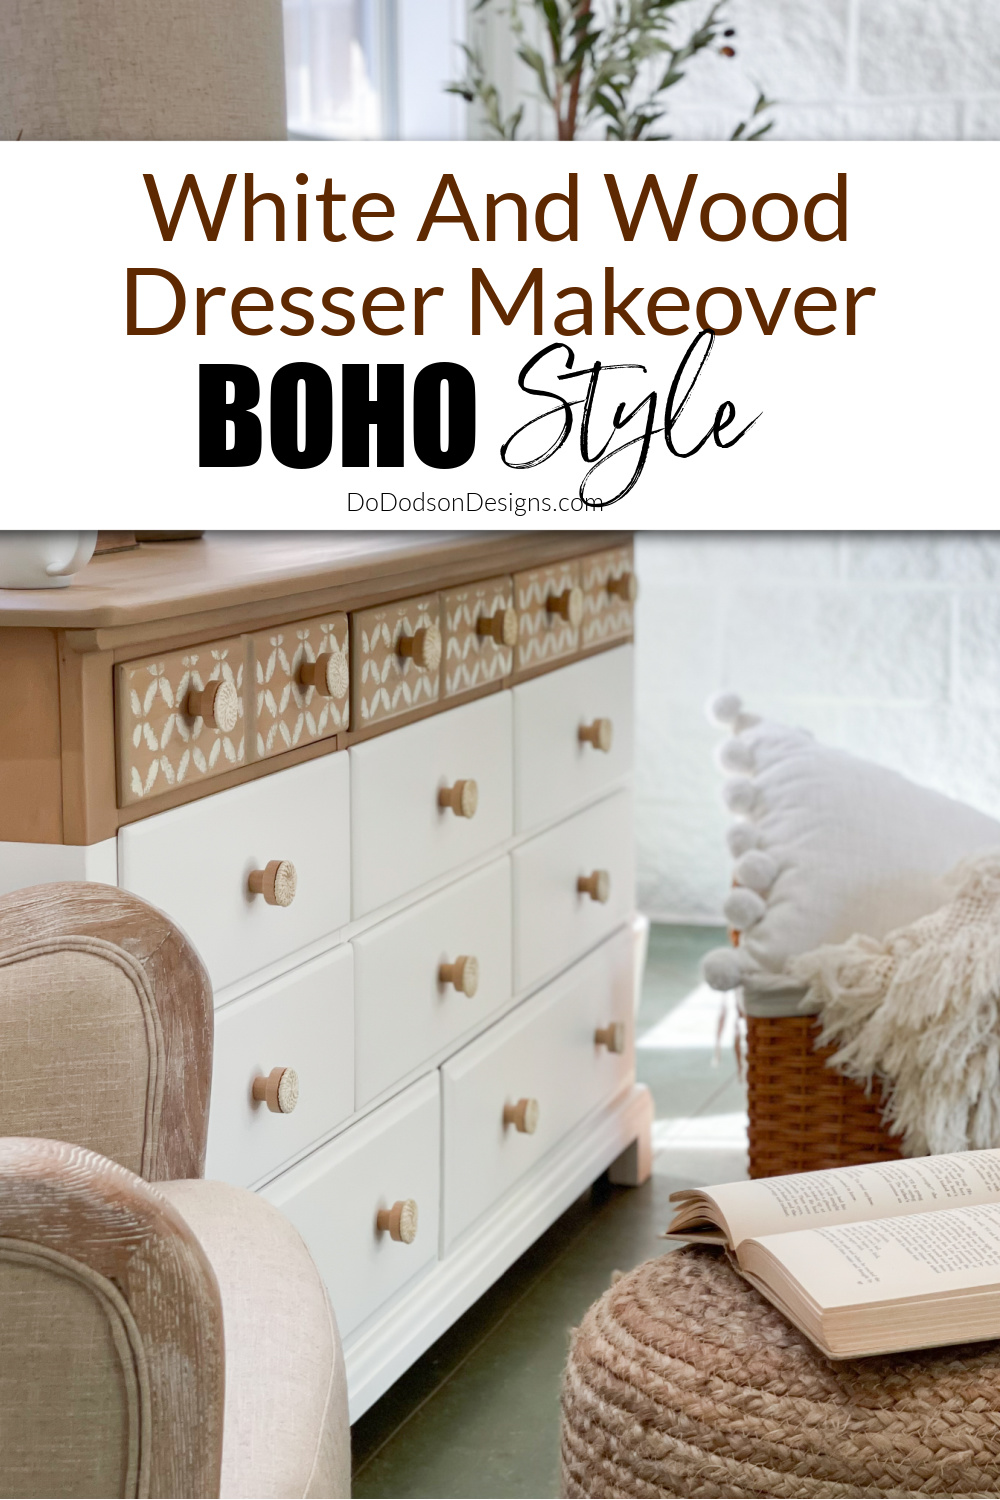
Orange wood furniture? No, thank you! Don’t get me wrong; I love wood furniture. But this orange wood finish on this hard rock maple dresser is bringing me down. So, my challenge is to give it a modern bare wood finish and some white paint. A two-toned white and wood BOHO style dresser makeover with some amazing new knobs I found.
Thanks to Dixie Belle Paint Co for sponsoring this post. While I was compensated to write this post, all opinions are my own.
* As an Amazon Associate, I earn from qualifying purchases and through other companies as well. You will not be charged extra when you purchase through these affiliate links, but any income I make helps me create more amazing DIY projects to share with you! To see my full disclaimer, click here!
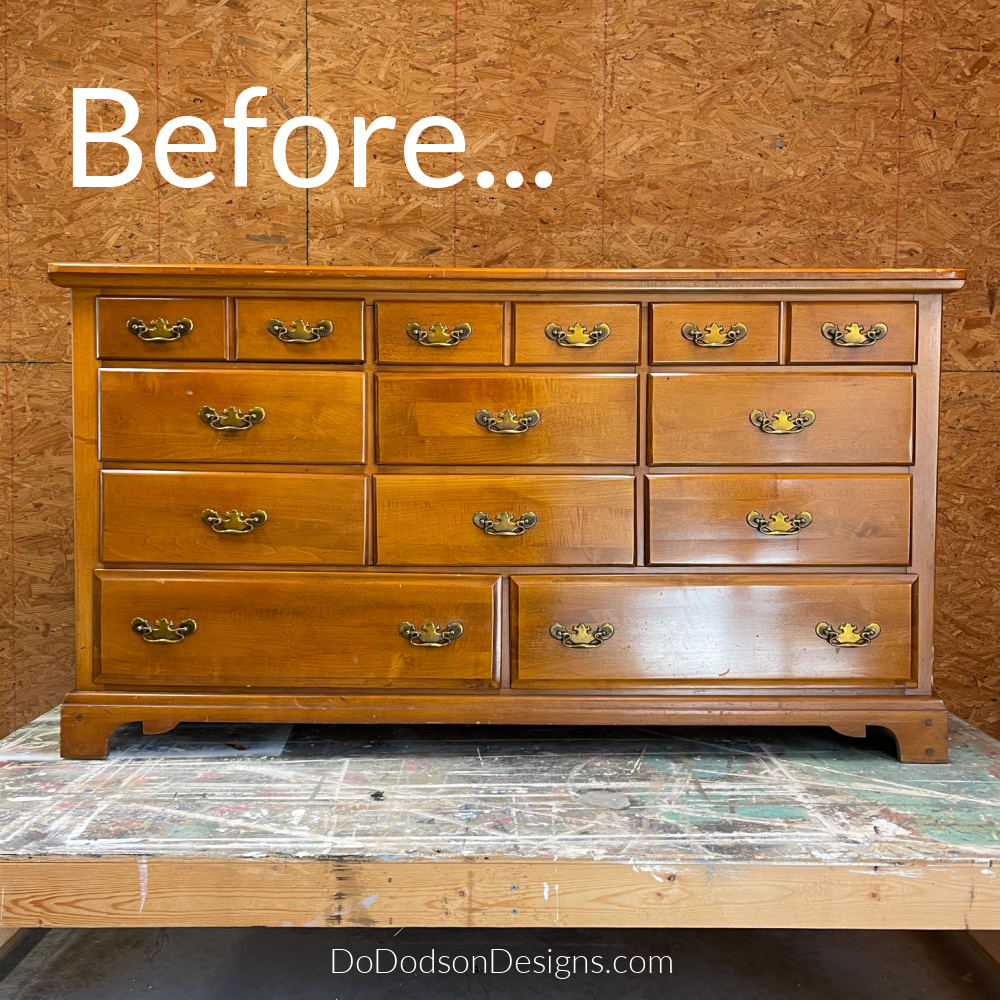
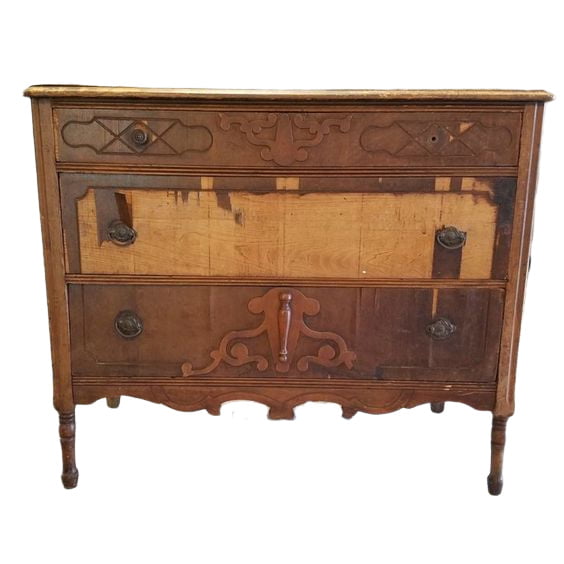
This Piece Of Furniture – Before The Makeover
I normally don’t find old dressers in good shape so I was really excited about this one. I already had a plan in my head for this outdated dresser and wanted to give it a modern look. Actually, the hardware I chose had a lot to do with the direction of this makeover. I found some amazing BOHO ratan pulls on Amazon. I’ll list them below.
And those early American bat wing pulls had to go!

SUPPLY LIST:
What you’ll need to recreate this white and wood dresser makeover.
- Solid Wood Dresser
- Pristine Clean (powerful degreaser and furniture cleaner – prep before painting)
- 2 Minute Stripper
- paint scraper tool
- carbide scraper tool for wood
- carpenters square
- saw
- plastic wood (wood filler)
- sanding blocks or paper or electric sander
- French Linen chalk mineral paint
- Pine Cone chalk mineral paint
- primer (to prevent bleed-through)
- Whitecap Silk ALL-IN-ONE Mineral Paint
- paintbrush
- Retro Lattice mylar stencil
Do The Prep Work First
First things first; I started by cleaning the entire piece with Dixie Belle’s Pristine Clean. Even if you think the furniture isn’t dirty, it is. I promise you! Your furniture doesn’t have to come from a thrift store or a garage sale to be dirty. Dirt is dirt and all pre-loved furniture is dirty. End of story!
To clean the wood, mix the Pristine Clean crystals in warm water to dissolve as per directions and apply liberally over the entire piece. Wipe away dirt and grime you can and can’t see. You may have to repeat this process several times for those extra dirty pieces. Afterward, wipe away any residual cleaner that may be on the surface with a damp rag and clean water.
Next, scuff sand the wood surface with 220-grit sandpaper and wipe away any dust with a damp cloth.
How I Made This White And Wood Dresser Look Modern
This step is totally optional but this was the perfect piece for this modern update.
It was the style back in the day to have a fancy trim design at the bottom of the dresser, especially with this style of dresser.
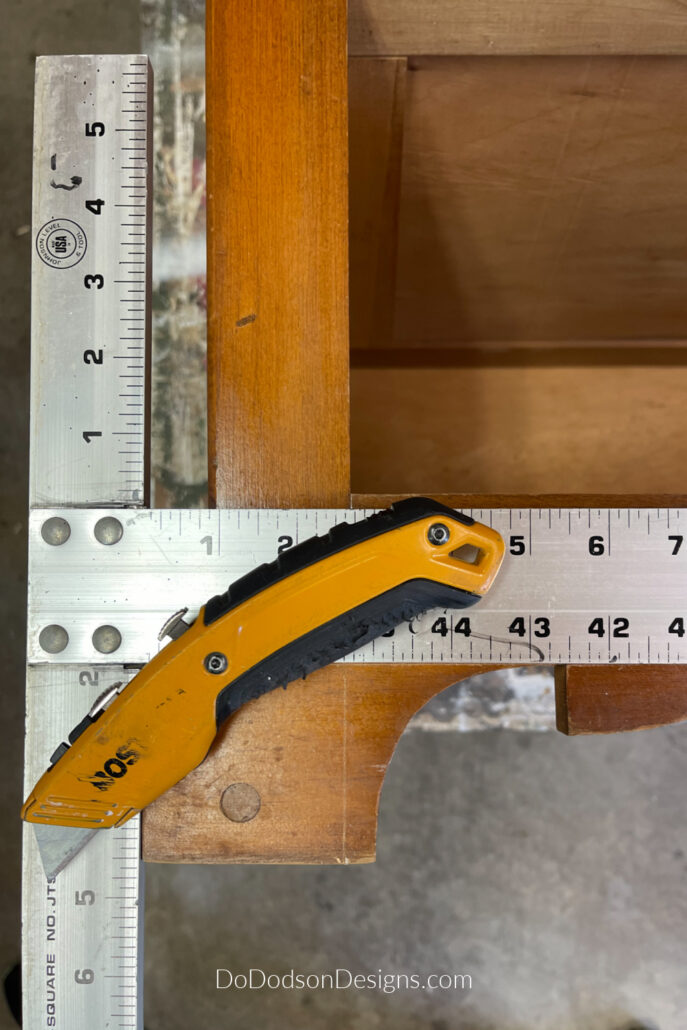
It’s actually super easy to make these alterations with wood. All you need is a carpenter square and a saw.
I started by squaring up the bottom line of this dresser and marking off the areas I wanted to trim away. But before cutting, I made sure to inspect the underside for structural issues. If nothing is in the way of your cut lines, you can cut away the additional design to make a more sleek modern look. This was simple to do and I’m loving the new look so far.
How To Fill Hardware Holes In Wood Furniture
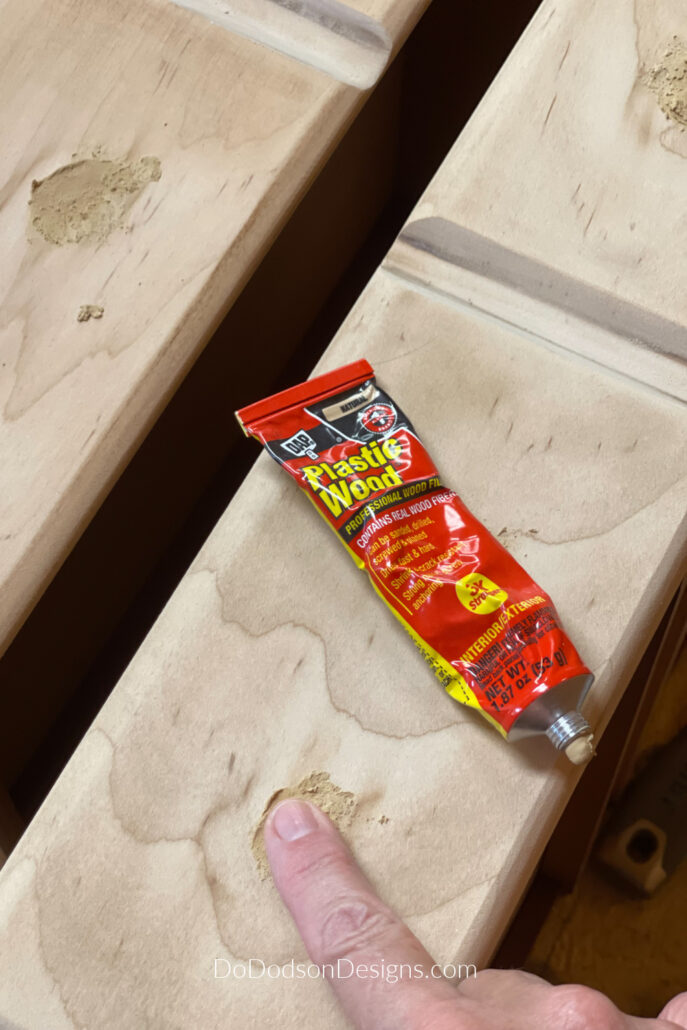
If you want new hardware or knobs on your dresser makeover, there’s more than a good chance that you’ll need to fill in the holes from the old hardware with a good wood filler.
There are a lot of products on the market and I’ve used a lot of them for filling wood holes and even wood repairs on furniture. Some are better than others but I always grab this one.
I like to use my fingers for this. Shove a good amount inside the front of the hardware hole until it comes out the backside. With a finger from both hands, squish it inside the hole tight. Leave extra above the level of the wood hole. Allow it to dry overnight and sand with 220-grit sandpaper until smooth.
On occasion, I have had to go back and apply a small amount if I missed a spot but usually, I don’t have to.
Stripping Furniture To The Bare Wood
For the top of the dresser, I decided to give it a raw wood finish. It’s super trendy in the furniture refinishing industry right now and I even decided to strip the top three drawer fronts too. Here’s how I did it.
The first task is to remove the varnish on the top of the dresser, the three top drawers, and 1/4 of the top part of the sides of the dresser. I used a 2-minute striper and it does just what it says it will do.
Apply the varnish stripper (it’s a gel) liberally with a disposable chip brush and wait two minutes. Remove the stripper within 2-3 minutes of application. Do not allow it to dry on the wood surface. Use a metal or plastic scraper and gently remove the gel in the direction of the wood grain. You’ll need a lot of paper towels and a plastic-lined trash can or container to dispose of the gooey mess. You’ll know exactly what I’m talking about when you use this product. Remove as much as possible and reapply if needed. Wipe up any remaining on the surface with a paper towel or soft cloth and allow it to dry.
Next, I used a new tool to me called a carbide scraper. I’ve been watching other furniture flippers and thought I’d give it a try. This thing works!
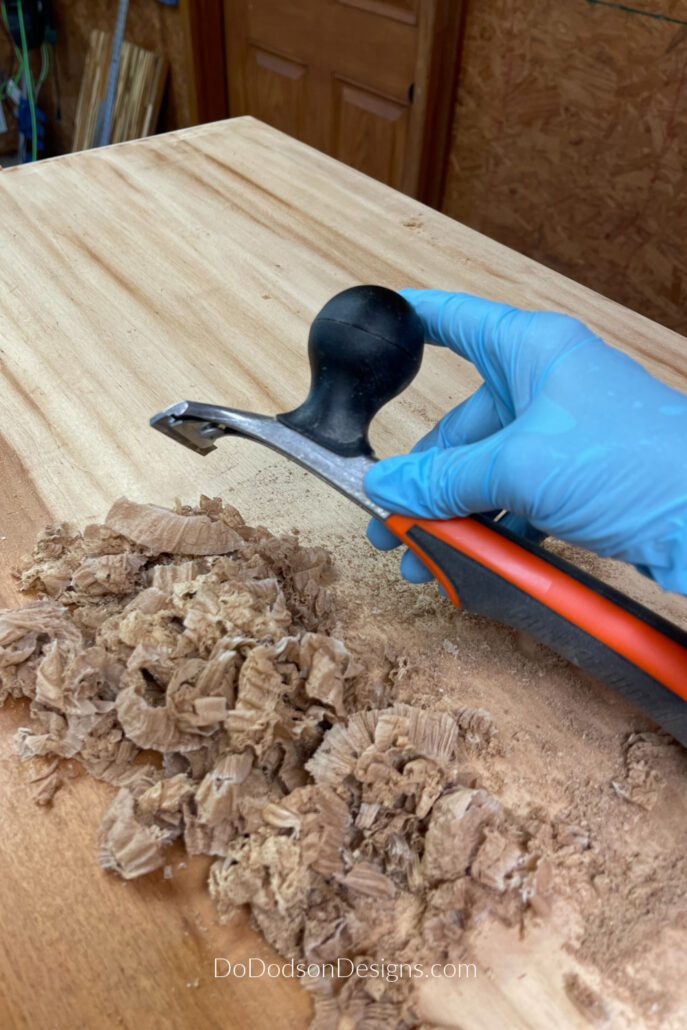
After stripping the varnish from the wood I normally would sand off the remaining varnish (minimal) and stain to get down to the bare wood. But instead, I used this tool and scraped it off. I was amazed at how well it worked. It did take a little elbow grease but I’m certain I will be using this tool again and again. The dresser top was sanded afterward with 220 grit paper to smooth any roughness from the stripping and to get it ready for the next step of this dresser makeover.
How To Create A Neutral Light Color Wood Wash
After stripping the dresser top and the first section of drawer fronts, I decided the easiest way to keep the wood light was to make a wash with paint. I chose two chalk mineral paint colors by Dixie Belle to create the look I was wanting. Here’s the recipe for this color wash.
2 Tbsp French Linen
2 Tbsp Pine Cone
1/4 cup of water
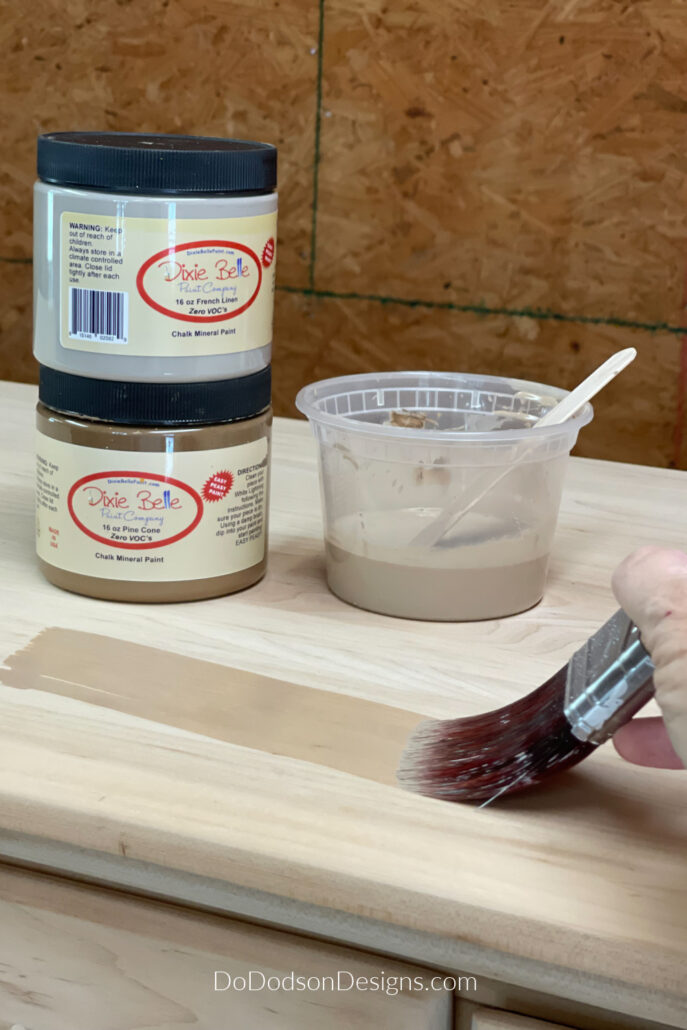
Combine and mix well in a small container and apply over the wood with a paintbrush in long even strokes. Wipe away additional color wash left on the surface with a paper towel or cotton cloth to give the bare wood an even tone. You can also use a spray bottle with water to mist over any areas that appear darker after application. This technique should be done quickly as chalk paint dries fast. All the more reason to have that bottle of water on hand and ready to go.
This is a great way to tone down some of those unsightly orange tones in the wood. I could have just used the french linen but because of my past experiences with washing over bare wood, some wood also has a pinkish tone. I didn’t want that either! That’s why I added the Pine Cone to the mixture to cancel out the pink.
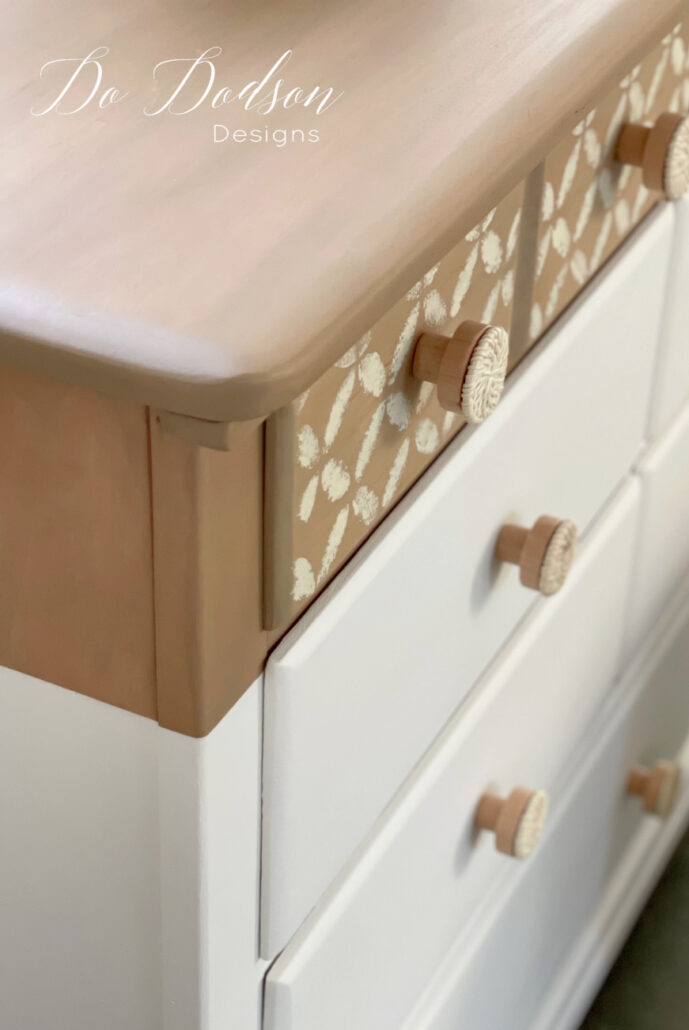
How To Add Charm With A Stencil
After filling in the holes from the previous hardware I noticed that the wash I did over the wood did not blend out the holes on the dresser drawers like I thought it would. So, to cover up this issue without making it obvious, I opted to use a stencil to cover these holes. This technique worked like a charm and no one but you and me will know any different. Here’s how simple it is.
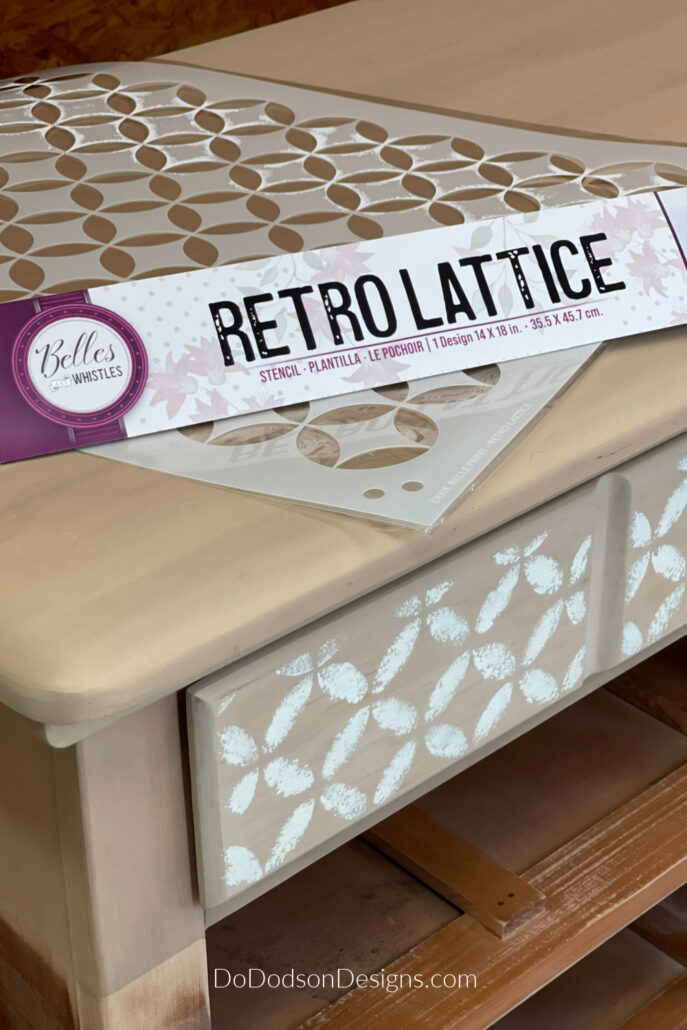
I took a top drawer and placed the stencil pattern where the stencil would hit the holes perfectly. Then I used a stiff flat stencil brush and lightly apply a minimal amount of Whitecap (white) Silk ALL-IN-ONE Mineral Paint to the stencil. I wanted it to appear like a dusting of snow (light stenciling) on the drawers and not give it full coverage. After the stencil design dried, I used fine grit sandpaper to soften the stencil design even more. More like distressing the design. Perfectly imperfect.
Before Painting – Applying A Stain Blocker Will Save You Time And Frustration
Painting furniture white isn’t as easy as it sounds. It’s one of the harder shades to paint with. Here’s how I painted this old dresser and a common issue that could arise with white furniture makeovers. I’ll be painting the lower 3/4 of the dresser with a fresh coat of paint.
If you haven’t heard me say this before, stick around and you’ll hear me repeat myself over and over. All white paints (most paint colors too) need a stain blocker to prevent bleed-through of stains and wood tannins. I don’t care what the brand says, you need to do this! You may not need it but it’s better to be safe than sorry.
Apply two coats of primer. Allow it to dry overnight to check for bleed-through. If it looks good and no stains are visible, it’s safe to paint. If you see some areas that look iffy, use a shellac-based primer (I like the spray-on) and spray over those areas. This has worked for me 100% of the time. Now you can paint without fear of those ugly bleed-through stains on your beautiful white finishes.
* DISCLAIMER… I tried painting without a stain blocker as you can see in the photo below. BIG FAT FAIL! I went back and used a stain blocker. Don’t be like DO.
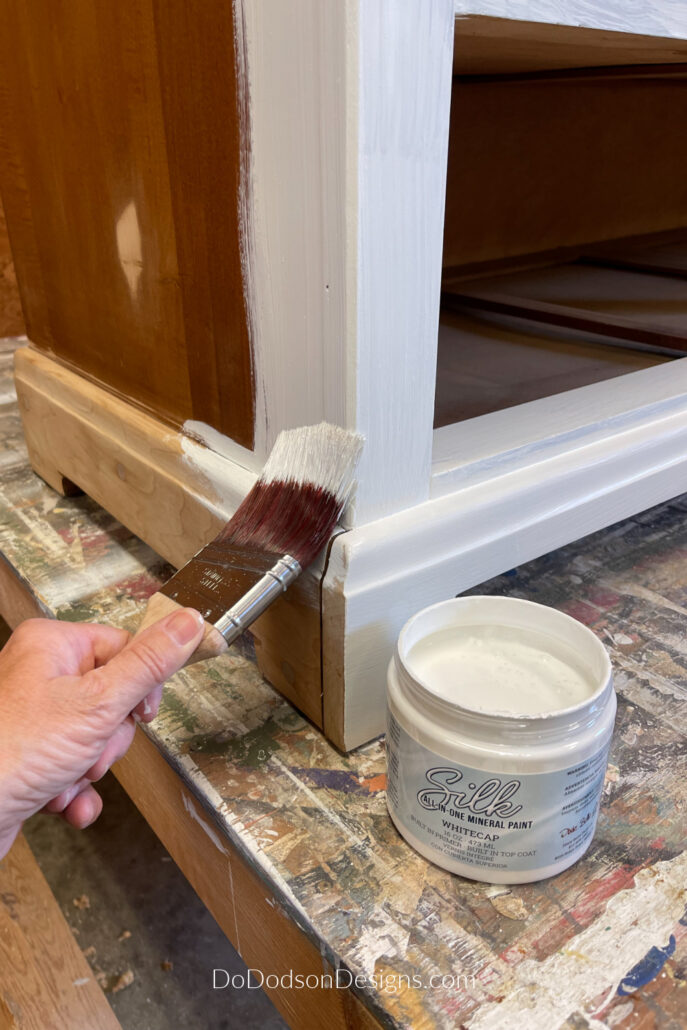
A Fresh Coat Of Paint – White And Wood Desser Makeover
I applied 2 coats of paint (Silk ALL-IN-ONE Mineral Paint) as recommended by the manufacturer. The second coat of this paint is will cover most projects and is recommended for durability.
I personally think this is the best paint to use if you’re new to furniture painting. Always use a good quality synthetic brush to minimize brush strokes and to get a smooth finish.
No top coat is needed since it’s built-in but you can if you wish. I have used this paint several times and the last time was on my office desk that gets daily usage and it’s holding up beautifully.
Oh, and I used some paintable caulking to fill in the gaping seam before I painted it.
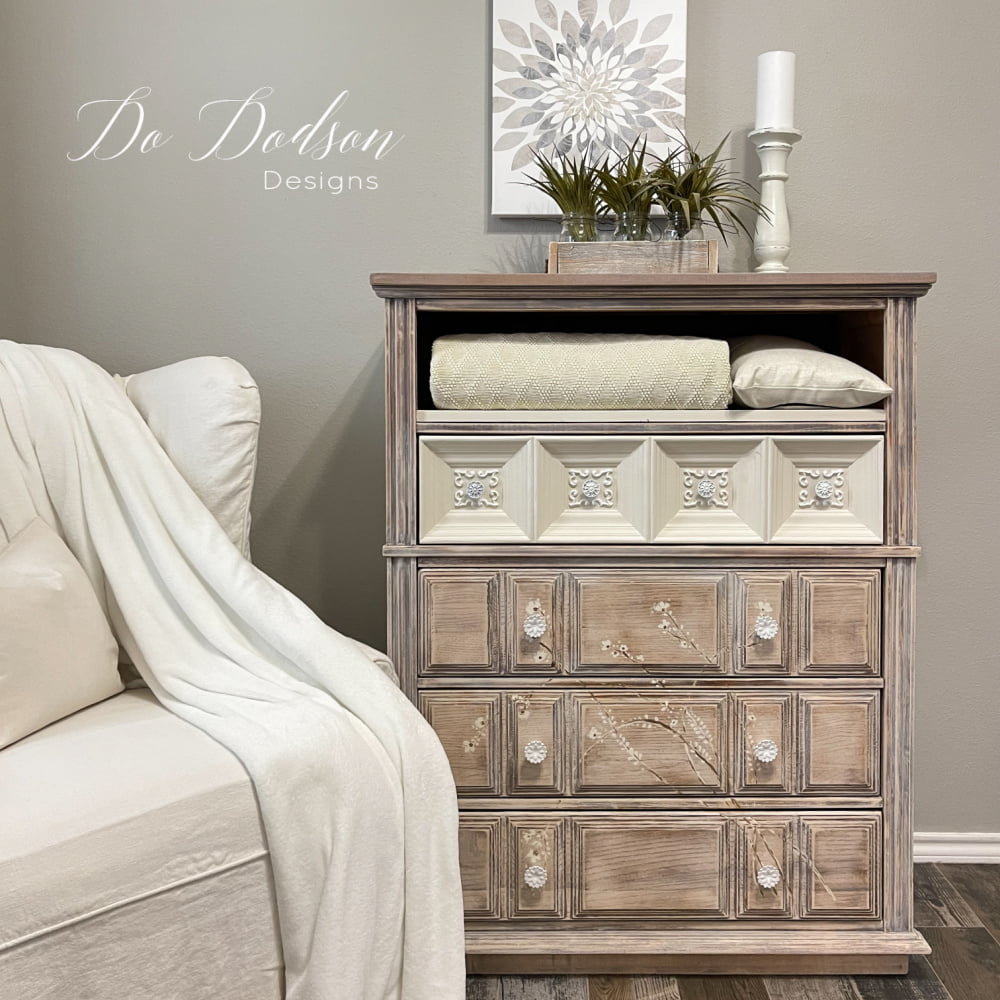
The Results Of The White And Modern Wood Dresser Makeover

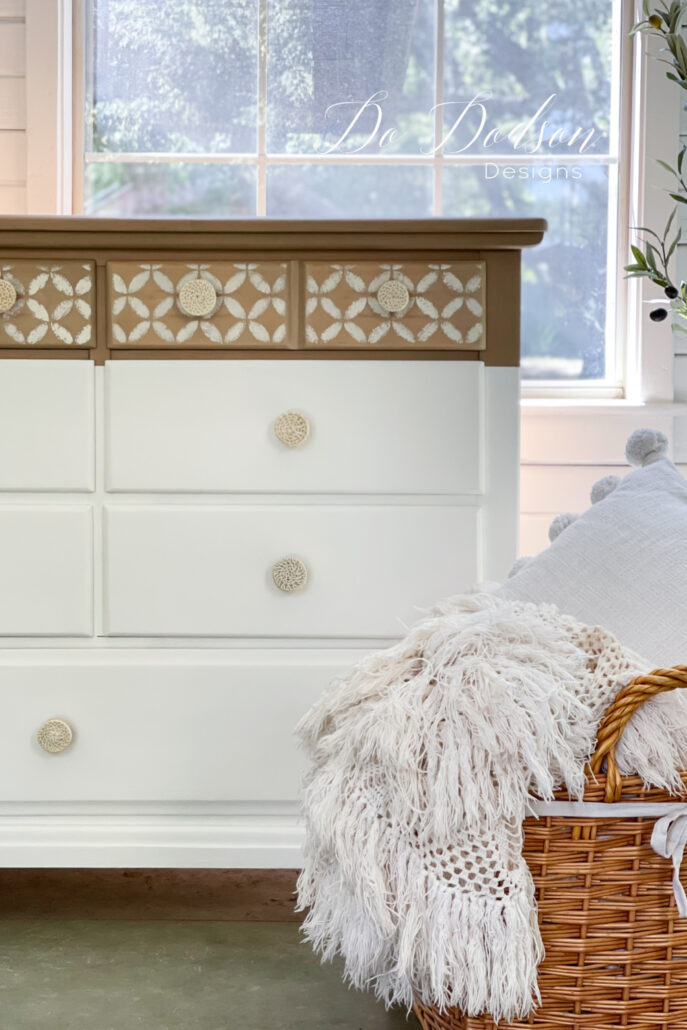
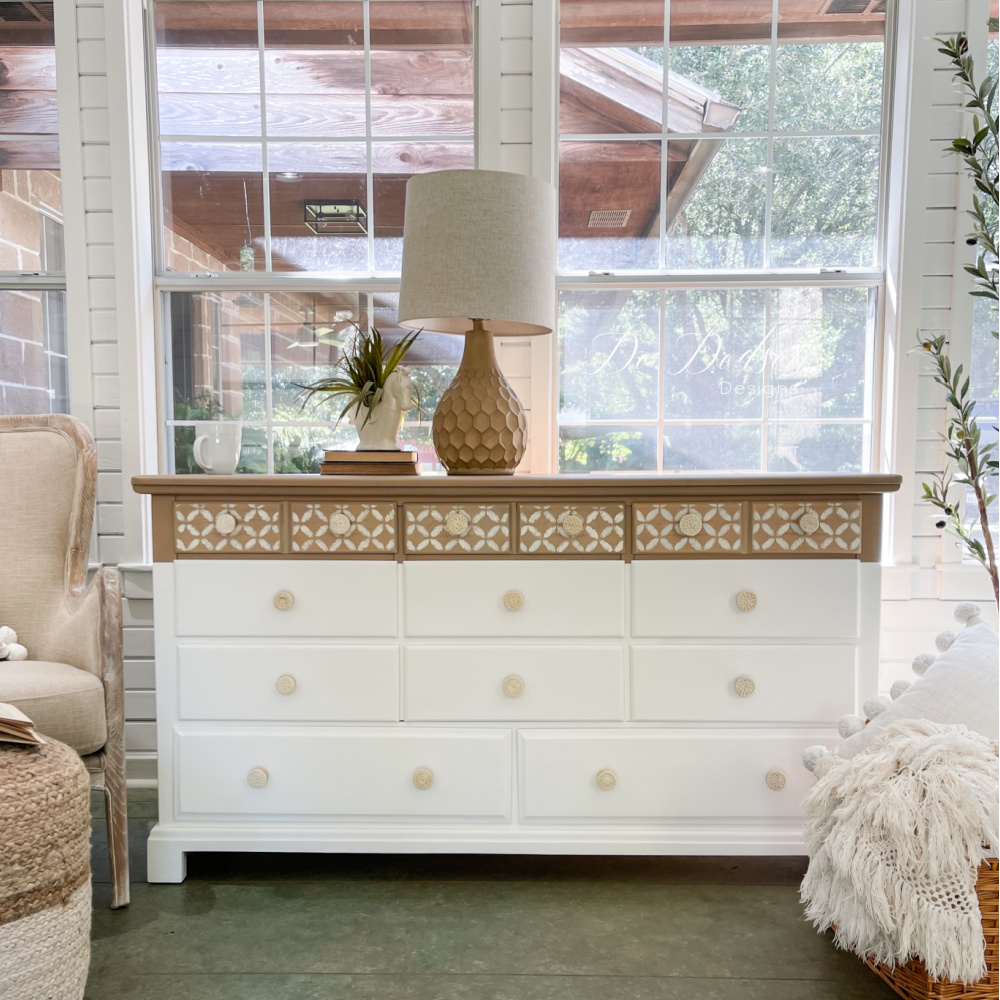
Thanks for joining me with this BOHO white and natural wood dresser makeover. I really enjoyed this project and I hope you did too.
As always, I love hearing from you. Your thoughts and opinions are always welcome in the comment section. Or just say hi so I’ll know you stopped by. Oh, and don’t forget to PIN this on your favorite Furniture Makeover board.
Until the next project… xo, Do
Love the look you got with the custom mix of colors for the wood tone Do! I’m going to give that method a try! It’s a beautiful boho look for the dresser! Pinned 😊
Thanks, Cindy! Just call me a mixologist! LOL, The mad scientist. Have a great week! 🙂 xo
I love this piece, Do. Such a creative vision. The wash is really pretty. Bravo!
Thank you, my friend. I love the challenge of mixing customer colors. It makes me feel like a mixologist. LOL 🙂 xo
Love the transformation!
Thanks, Cindy! I think it turned out pretty well. 🙂 xo
Gorgeous! And great tips. Thanks.
Thank you so much, Joanne! It’s always good to hear from you. 🙂 xo
Hi Do! Great makeover. I have seen a lot of people use that carbide scraper. Does it scratch the wood at all? What keeps you from scraping the wood? I love how you did the top part.. so pretty!!
Hey Cheryl! It did not scratch the wood. I will say that you have to use the proper technique of using even pressure. It reminds me of a wood planer. It takes a tiny amount of wood away from the surface. You will have to sand afterward but that is the easy part. I really enjoyed using it. Have a great week. 🙂 xo
Hi Do, what a great work you did with this dresser, as usual! It went from a ugly dated piece of furniture to a modern and stylish one that fits in any space! Congrats.
Thank you, Val! It’s always good to hear from you. Have a fantastic week. 🙂 xo
I’m in love with this makeover! Gorgeous Do! Enjoy your weekend my friend! 🤗
Thank you, Denise! I like it too. Simple. But sometimes simple is enough. Have a great rest of the week. :0 xo
This dresser is absolutely stunning. I love the custom color mix for a wood tone. The two tones of the dresser. The stencil pattern and knobs are a perfect combination. I love everything about it. What a beautiful addition it would be in anyone’s home.
Hey Tammy! Thank you so much. My Granddaughter claimed it this past weekend for her bedroom. She wants to redesign her bedroom (teenager) into a BOHO look. Thanks for reading. Have a great week. 🙂 xo
ruined it, lot of times women break things to make them worst; this is a good example of this fact.
Dear Chad,
I find it hard to take your opinion seriously with all the grammatical errors. You just slaughtered the english language. Have a nice day. 🙂
Happy Painting.