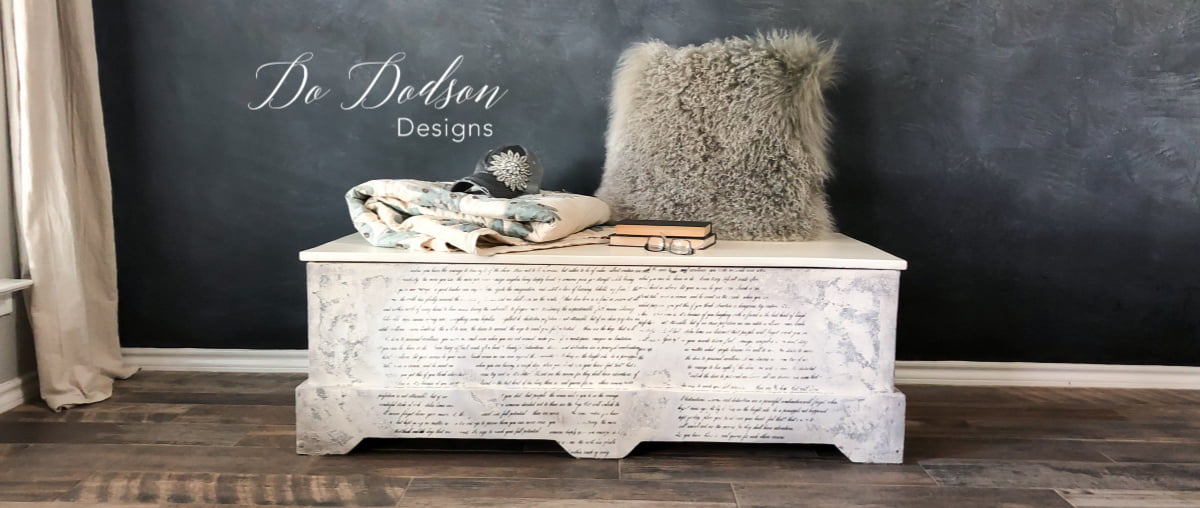
Hey friends! Today I’m sharing how to update furniture with wallpaper. But not just any old wallpaper. I’m using the textured kind. No, it’s not a new idea because I have been doing this for years and I’m not alone. Over the years, wallpaper has evolved, and now they make it paintable. That’s right up my alley! Wait till you see the curvy pattern I chose for this makeover. Modern meets farmhouse.
This post contains a few affiliate links to help you find the products I use. You are not charged extra to use any of the links, but any income I make will be used for more amazing DIY projects to share with you! To see my full disclaimer, click here!
How To Update Furniture With WallPaper – Easy Makeover
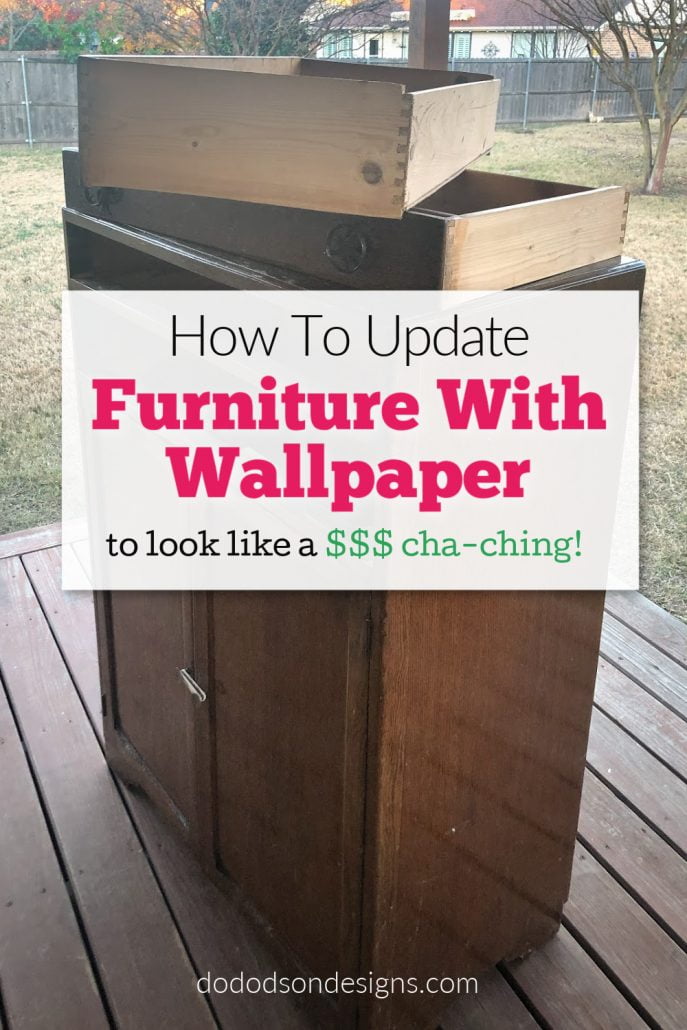
As usual, the cabinet/chest I found for this makeover was… let’s just say, was lacking in the beauty department. Again, you know I like ugly furniture, so there’s that. It just makes the victory so much sweeter.

Products Needed For This Project
- Wood Furniture
- Paintable Textured Wallpaper
- Wallpaper Adhesive or Mod Podge
- Hobby Knife (craft knife or scissors) to cut wallpaper
- Surfprep Sanding System (Use my discount code DOIT10 to save 10% )
- Cotton (chalk mineral paint)
- Sand Bar (chalk mineral paint)
- Chip Paintbrush
- disposable bowl (for color wash mixture)
- paper towels or soft cotton cloth
- Best Dang Wax (clear)
- Dixie Dirt Earth (for shading and aging)
- Gold Modern Hardware
Choosing The Textured Wallpaper
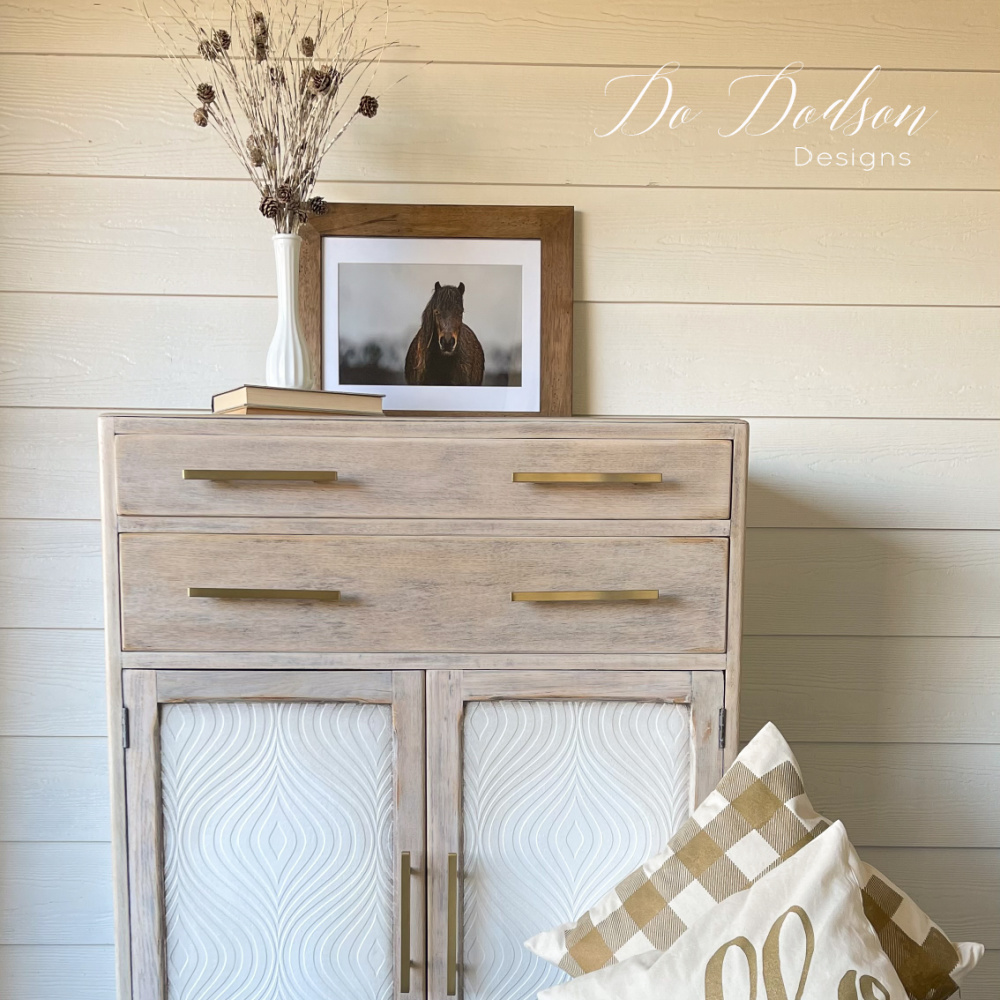
With so many paintable texture wallpaper patterns available, you may have a hard time choosing. My best advice to you is to choose a pattern that works in your home. For example, my home is heavy on the farmhouse design with a modern twist. Choosing this geometric curvy design with my raw wood furniture added a modern elegance without being over the top.
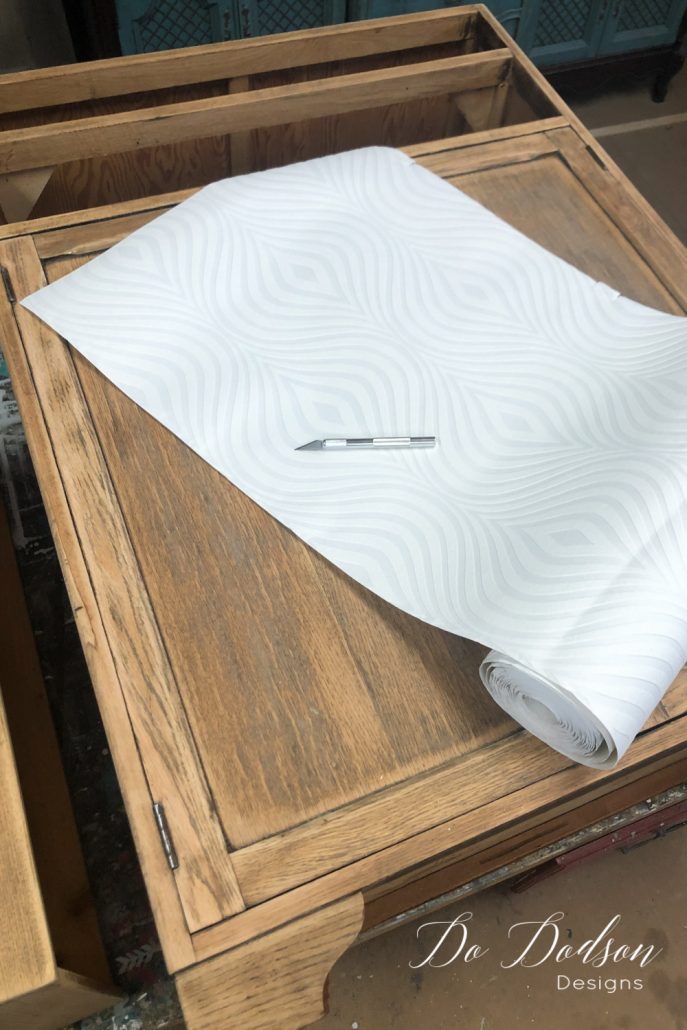
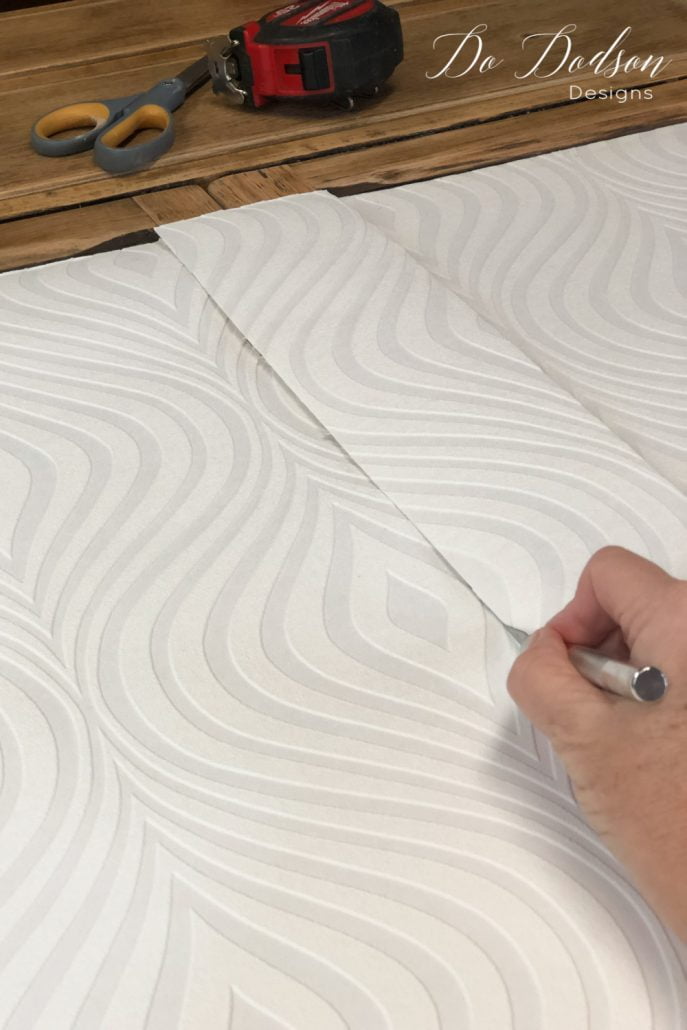
Cutting The Textured Wallpaper To Fit
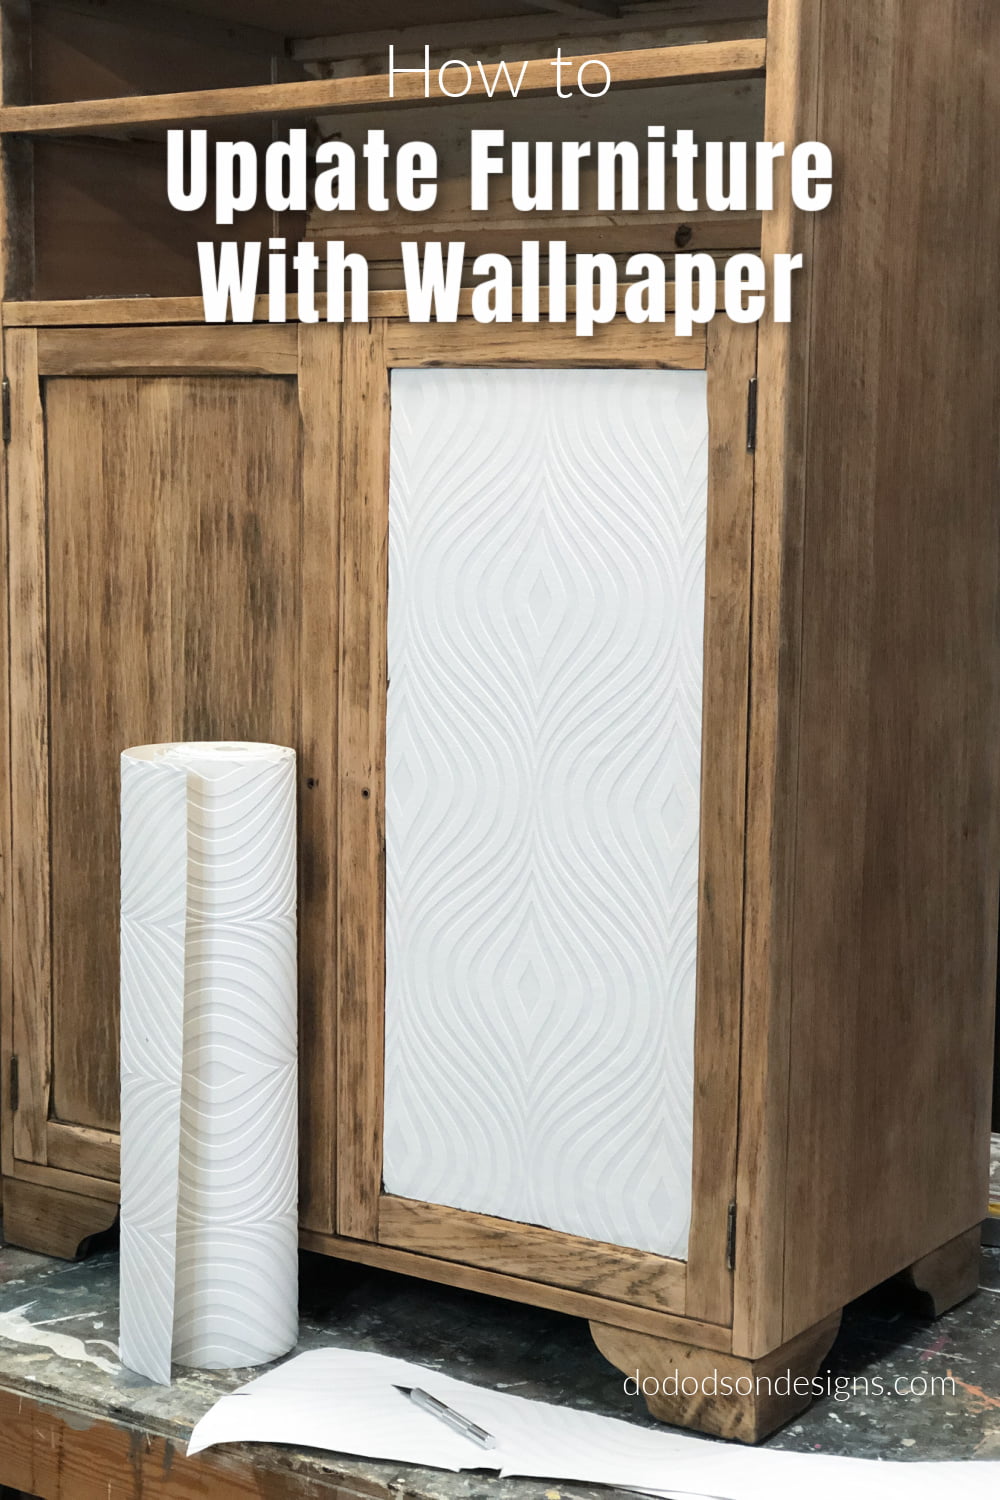
Firstly, I don’t recommend using it on the tops of dressers or tabletops because of the thickness of the textured wallpaper. However, it works beautifully in recessed areas like cabinet doors that don’t get a lot of traffic.
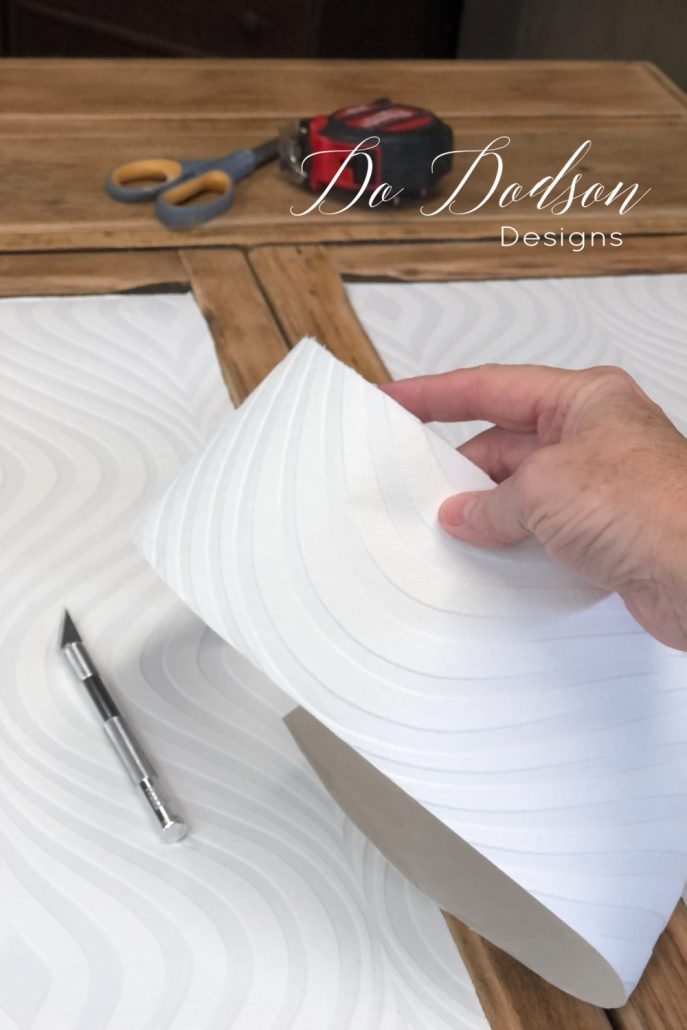
If the wallpaper you chose has a repeatable pattern like this one, you’re going to need to match the design up on both sides if you’re using it to update cabinet doors. Cutting the wallpaper is very easy because the paper is thick. You lay it inside the area (line up your pattern) you want to apply it to and run your finger across the paper where the cabinet corners meet to crease the paper. You can then flip it over and cut the creased area with scissors or use a craft knife to get that precision cut. If you’re using a craft knife, cut it in place and use the corners as your guide.
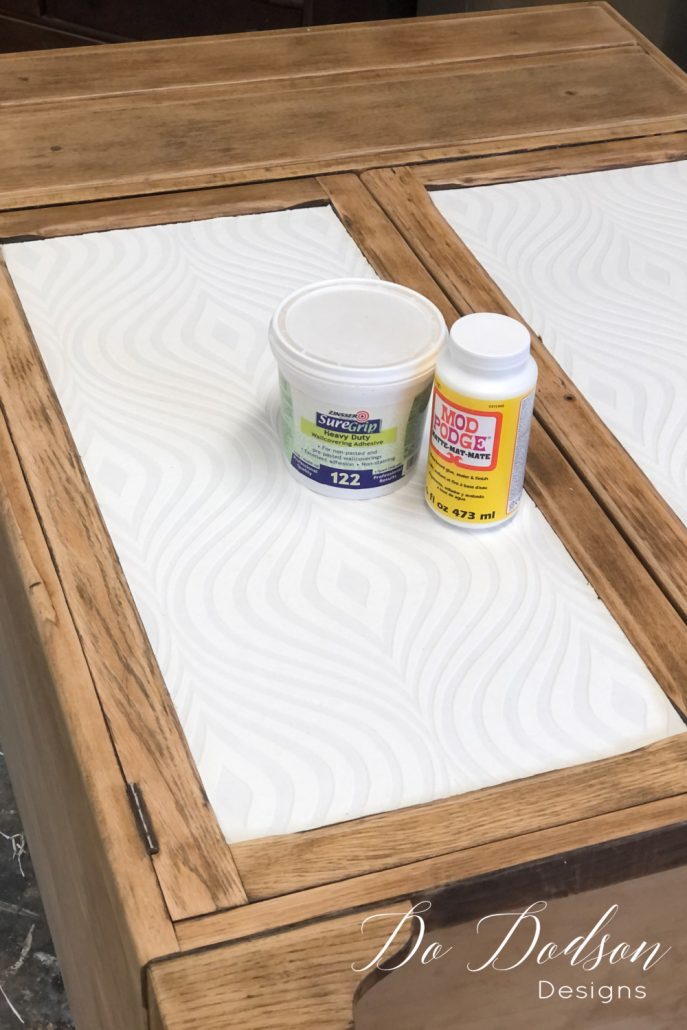
How To Glue Wallpaper To Wood Furniture
Let’s talk glue for a minute. It just a small piece of wallpaper and you don’t have to buy wallpaper adhesive. You can use any craft glue (water-based) that you have on hand as long as it’s made for paper and wood. For this project, I used wallpaper adhesive I had on hand that was leftover from another project. But no reason not to use good ole fashioned Mod Podge if you have it one hand.
TIPS & Tricks For Updating Furniture With Wallpaper
#1 To get a good bond with the wood and wallpaper, be sure that the wood is clean and intact. I sanded this cabinet down first to the raw wood, but you most certainly do not have to. A light scuff sanding with 220 grit sandpaper to create a smooth surface will work just fine, especially if you’re going to be painting it anyway.
#2 Apply the glue to the wood AND the back of the wallpaper. Don’t skimp. Again, the wallpaper is thick and will absorb some of the glue and the wood surface. Try to keep the glue off of the surrounding surface if you plan on painting it. Painting over the glue will give you a crackle in the paint once it dries. It’s a pretty look, but not if it’s a surprise.
#3 Once you have applied the wallpaper to the surface, gently rub in a circular motion with your hands from the center of the paper, working your way outward to the sides. This will help to remove any air pockets under the wallpaper. If you have ever wallpapered before… you know what I’m talking about. If you haven’t… you’ll soon find out why. 🙂 If you get a bubble that you can’t get out of, you can poke a tiny hole through the wallpaper to release the air. You’re going to be painting it anyway, so it’s fine.
#4 Remember, the wallpaper is paintable so if you don’t get the corners perfect, no worries. The paint will cover those areas.
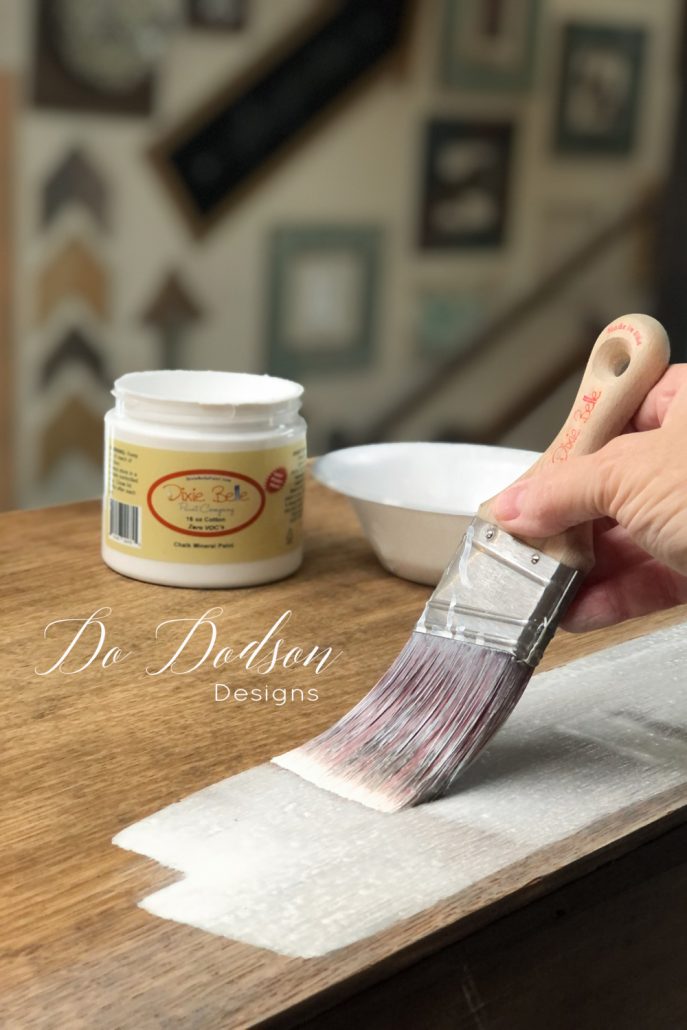
Paintable Textured Wallpaper
Time to paint! Yep, this wallpaper is paintable and what I use is a water-based chalk mineral paint. Paint 1-2 coats over the paper (allowing dry time between coats) and into the corners filling in any gaps where you may not have gotten the perfect (SHOCKER!) trim on the wallpaper. Trust me; mine wasn’t.
How To Make A Color Wash For Raw Wood Furniture
Next, I used a color wash over the raw wood but most certainly can paint over all the surfaces if that’s your plan. Here’s my recipe just in case you like this look.
Time needed: 5 minutes
Quick & Easy Color Wash For Raw Wood Furniture
- Mix 3 Tbsp of chalk mineral paint (any color) into 1/2 – 1 cup of water.
Mix well until all the paint is diluted. The amount of paint to water ratio depends on how much color you want on the wood.
- Brush the color wash (diluted paint) over the raw wood and let it sit a minute or so. Do not allow it to dry.
- Wipe away excess color wash with a soft cloth leaving just enough in the wood to create a soft hue of the paint color. The wood should still be visible.
Repeat this step if you want more color to the wood.
- Allow to dry over night.
Seal the wood with a water-based topcoat for durability. I recommend Gator Hide by Dixie Belle Paint Co.
Transitioning Lines With Textured Wallpaper On Furniture
Here’s a fix for the imperfections in the wallpaper in the corners. Add clear wax in the corners around all the edges. You can do this with a chip brush. Next, while the wax is still wet, use Dixie Belle Dirt to blend those edges and create a dirty, aged look to the cabinet doors. It works beautifully. You can also use colored wax, but I like the dirt as it gives that authentically aged finish I like.
The Results…
THIS is what I’m talking about! How fun is this?! And with a few simple products, you can update your furniture with amazing textured and paintable wallpaper too. I think it’s so much better than before, and it works well with my modern farmhouse decor.
Hey, thanks for joining me today on my mission to update this ugly cabinet dresser. I always welcome your feedback on all my projects and will be more than happy to answer any questions. You can drop me a comment below or say, “HEY!” It makes my day to hear from you. 😘
Until the next project, xo, Do
Love it! Very inspirational.
Thank you, April! So glad you enjoyed it. Happy New Year! xo, Do
Thanks for sharing this idea Donna! I am definitely going to try this!
Hi, Joan! Thanks for joining me today. I think you’ll have fun with this DIY. Happy New Year! xo 🙂
That looks awesome!!!
Thank you, Wendy!
Hi! Absolutely love this piece! Did you use a wash of both cotton and sand bar over this piece or just one? Similar, did you use the dirt all over or just in corners? Thanks!!
Hi Taylor, I used Cotton for the wash on the wood and then blended cotton and sandbar on the wallpaper. The dirt was used only in the corners. Glad you like it. 🙂
This is GORGEOUS Do! I love the wallpaper you picked for the inserts and your detailed instructions! XOXO
Thank you, Denise. I love having so many options with designs. 🙂
That paper is amazing Do! The piece looks fresh and modern with a touch of age! Pinned 🥰
Thank you, Cindy!
\The paper is a good way to cover up areas that have damage too. Have a great rest of your week.:) xo