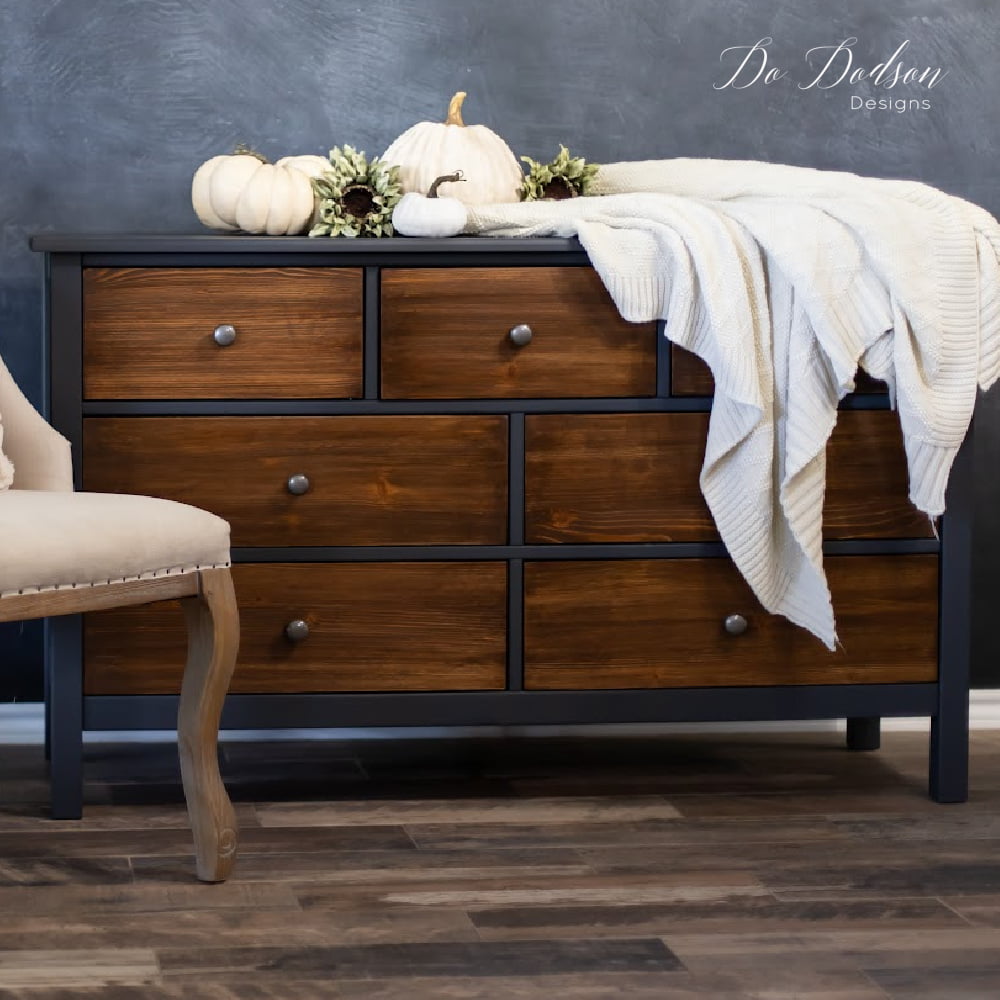
I’ve always loved the look of two-toned furniture makeovers and this black and wood dresser makeover was the perfect project for me. Luckily, this was an easy dresser makeover and it looks a lot better than it did before!
Thanks to Dixie Belle Paint Co for sponsoring this post. While I was compensated to write this post, all opinions are my own.
* As an Amazon Associate, I earn from qualifying purchases and through other companies as well. You will not be charged extra when you purchase through these affiliate links, but any income I make helps me create more amazing DIY projects to share with you! To see my full disclaimer, click here!
Two-Toned With Raw Wood Dresser
Maybe I’m stretching it a bit when I call this piece a dresser. Would you say a small dresser? It has the same look as a large dresser. And it was FREE and solid wood! Score again!
So, I thought I’d share it with you today to show you how to get a two-toned black and wood look that is fairly quick and easy.
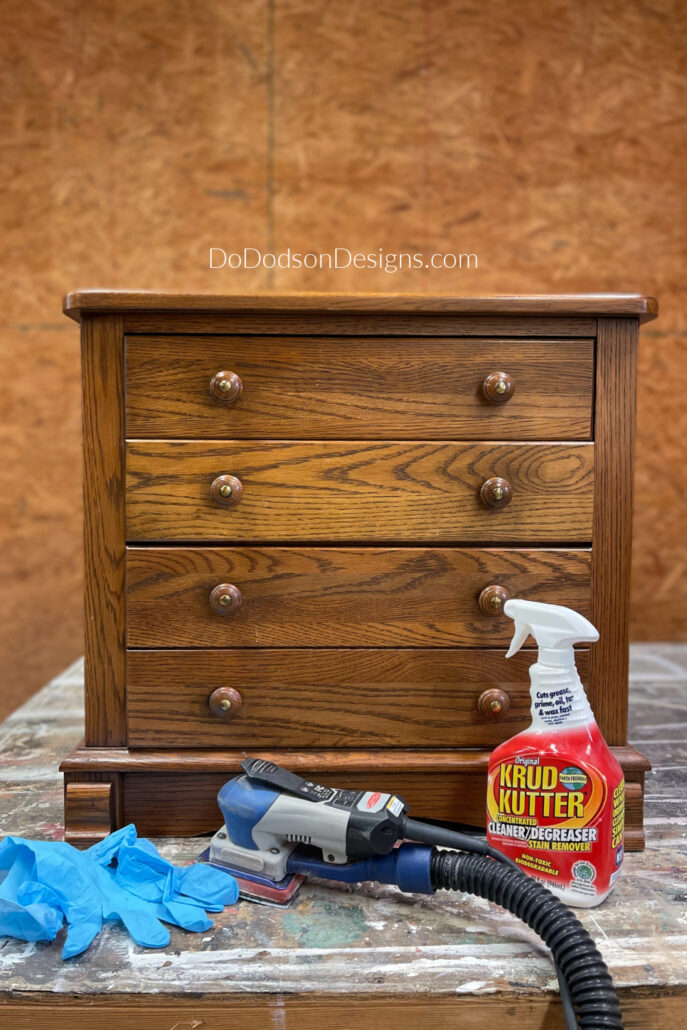
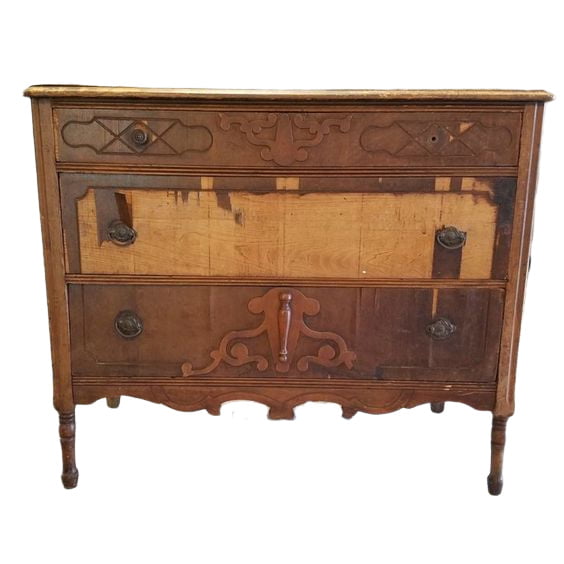
The process is fairly straightforward. Clean, sand, and paint for a new look. It’s a great way to update an outdated dresser. Let’s get started! Here’s how it looked before the makeover.

SUPPLY LIST:
Below are the supplies you will need to recreate this two-toned black and wood dresser finish.
- wood furniture – dresser/side table
- wood cleaner – Krud Kutter
- My sander – Surfprep Sanding System
- alternative electric sander- mouse sander | orbital sander
- 100 grit sandpaper
- 220 grit sandpaper
- screwdriver – remove hardware
- wood filler
- painter’s tape
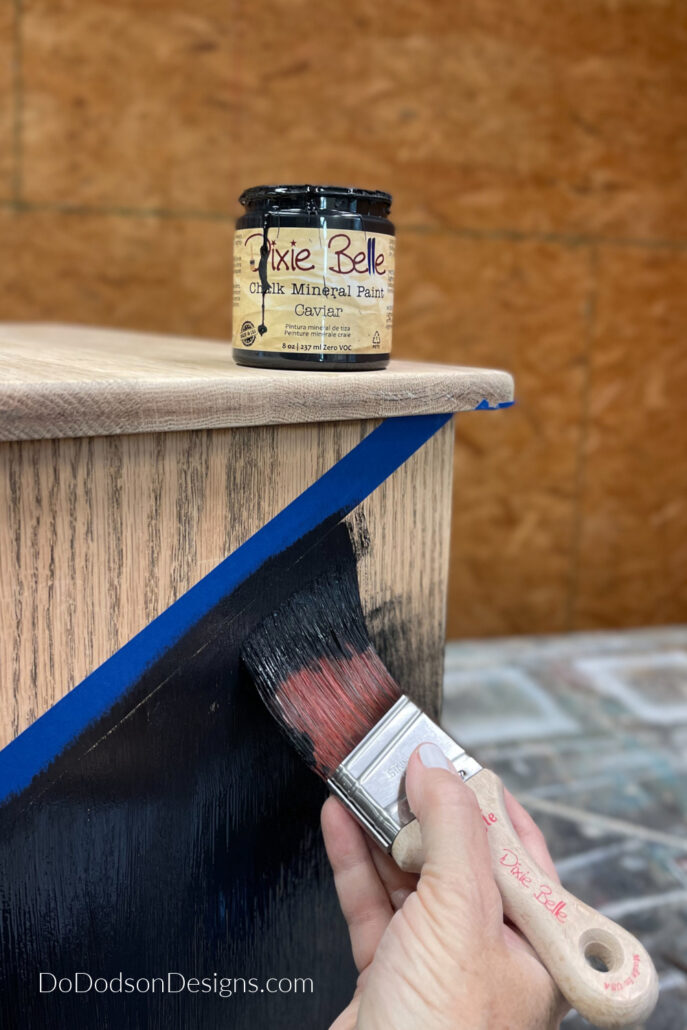
- Dixie Belle caviar chalk mineral paint
- Dixie Belle buttercream chalk mineral paint
- artists brush
- holiday joy Christmas stencils
- makeup wedges for stenciling
- card catalog hardware
- polyvine wax finish varnish
Prep And Repair First
The first thing I always do, of course, is to inspect the piece for any damage or necessary repairs. If you notice at the bottom of this “tiny dresser” there are some wood details on each side. Removing these pieces from old dressers can give your dresser a more modern and up-to-date look. Not all pieces can be removed but it’s worth trying.
Make sure before removing any wood parts that it doesn’t interfere with the structure in any way. You can usually learn a lot by inspecting furniture from underneath. I do a little flip-over on all my dressers before any makeover.
Next, clean the wood to remove any dust, dirt, grime, and or grease. Yes, I said grease. All furniture has grease and oils. Mostly from being touched by hands, but also from “furniture polish.” I know I used it back in the day.
Sanding – Raw Wood For A Two Toned Look
To get this two toned look on wood furniture, you must remove any topcoat or varnish as well as the stain. This sanding/stripping technique can be done on most finishes but work best on older finishes like with this dresser makeover.
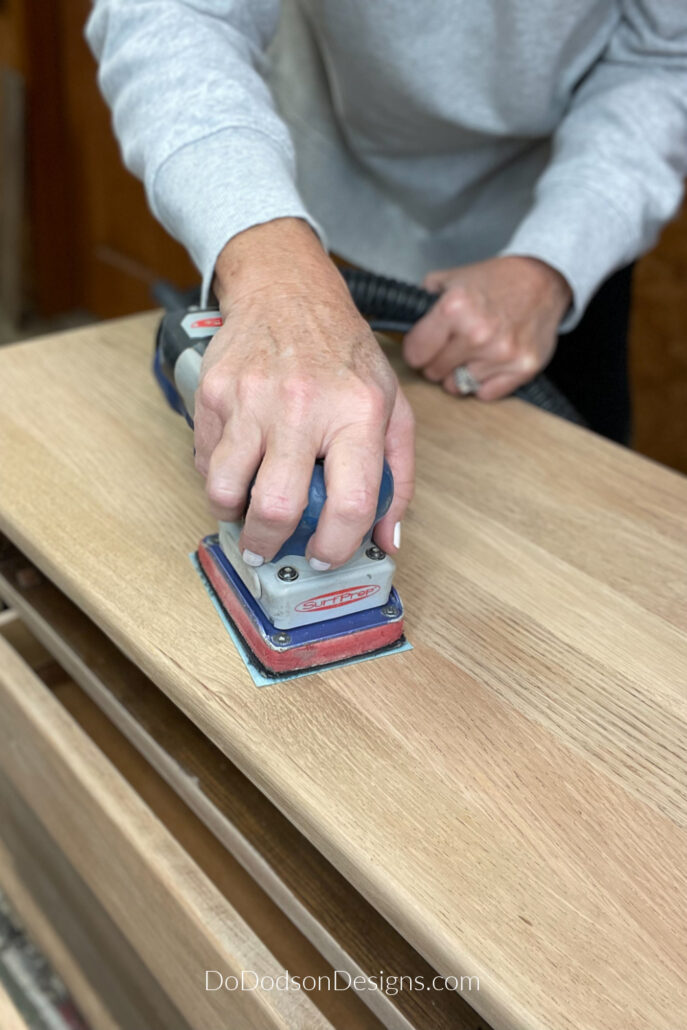
After the wood has been cleaned well, I use 100-grit abrasive sandpaper to rip away the finish all the way down to the bare wood. This will leave the wood in rough condition with the grain open. It’s necessary to get this aggressive and I find it’s the fastest way to achieve the look. You can opt to use a chemical stripper but you will still need to sand the wood to remove the stain that can be deep in the wood.
After sanding with the 100 grit, you’ll need to (smooth) close the wood grain with 220-grit sandpaper. You’re going to have a lot of dust so using a vac system indoors is super helpful. Or you can just take it outside. Always use your protective equipment (mask) when sanding to prevent lung injury.
Remove remaining wood dust with a soft cloth, vacuum, or tack cloth. Most of the time I find that vacuuming followed by a damp cloth or paper towels does the job. I’m a little leary about using tact clothes as they have a waxy feel. I don’t want anything on the bare wood that might interfere with the finish later on.
Consider New Hardware
Replacing original handles or pulls with new hardware can make the ugliest dressers come to life. It’s like earrings to an outfit!
After finding the hardware you like, you may need to fill the existing holes. That is easily done with a good wood filler. I use plastic wood in a tube. It dries quickly and can be painted or stained over.
The pulls I chose for this piece actually covered the existing holes so I didn’t have to worry about the holes showing on the raw wood parts of the dresser drawers. It’s something to consider before choosing new hardware.
Black Chalk Paint On Wood – Two Toned
Chalk paint is my go-to with most of my furniture makeovers and believe it or not, you can paint over wood without using a stain blocker or a coat of primer when you’re using a darker color or black chalk mineral paint. That’s what makes this a quick and easy project.
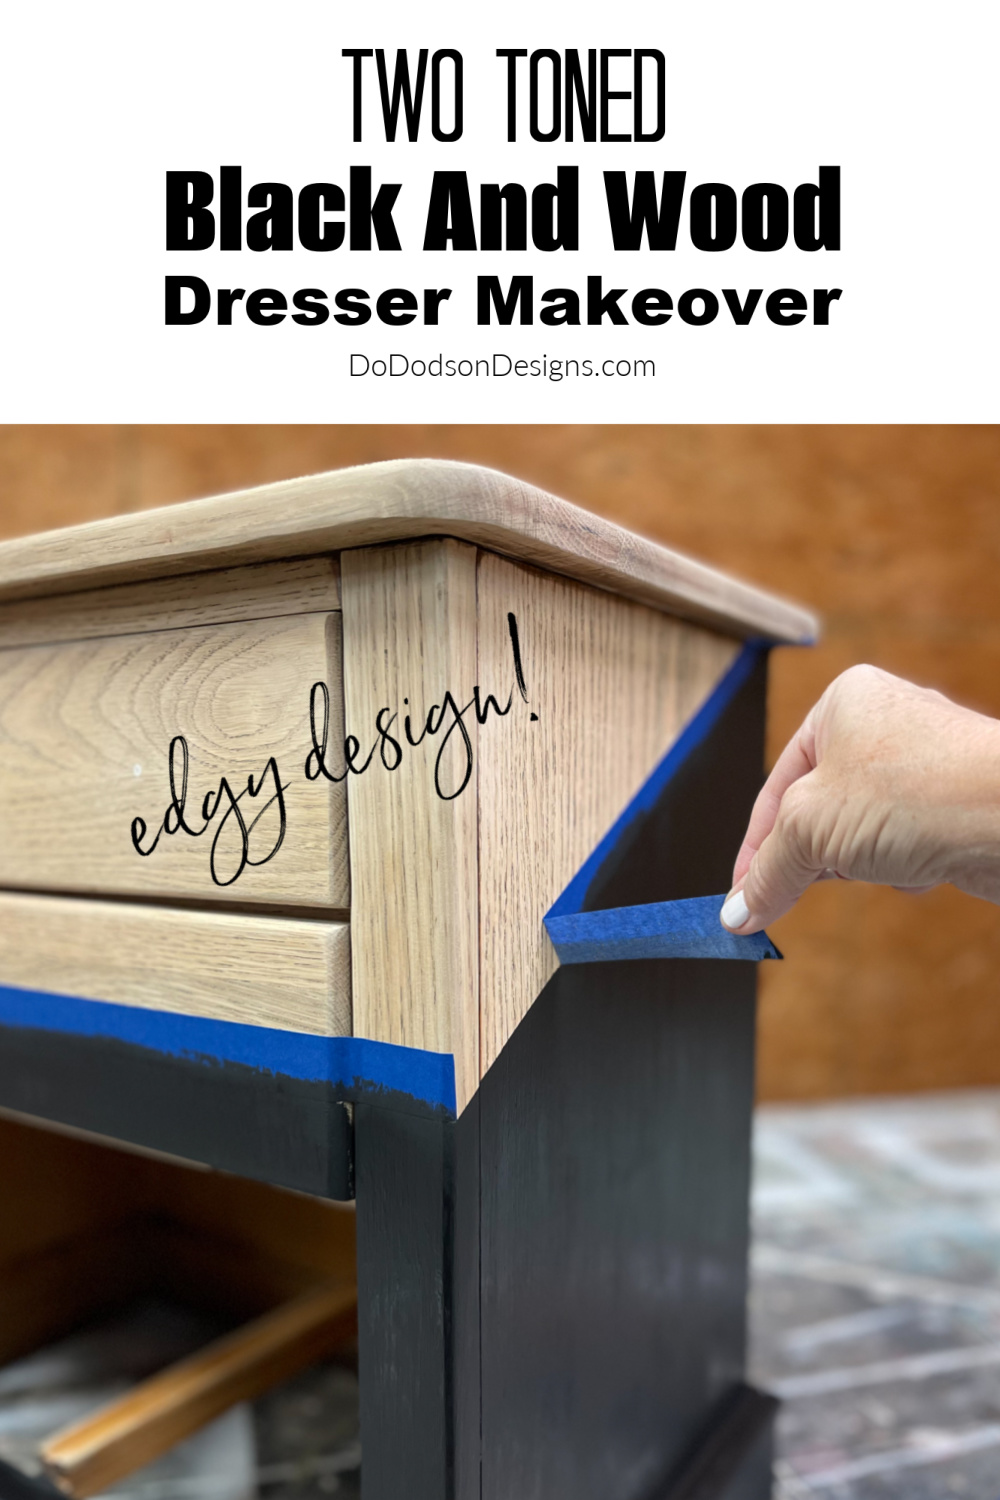
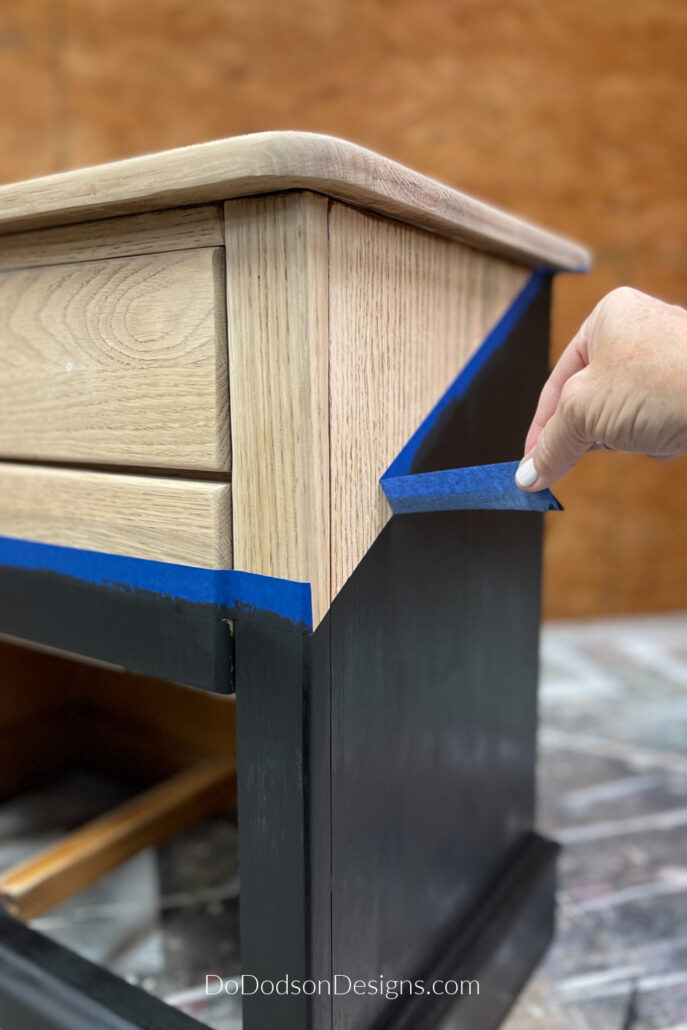
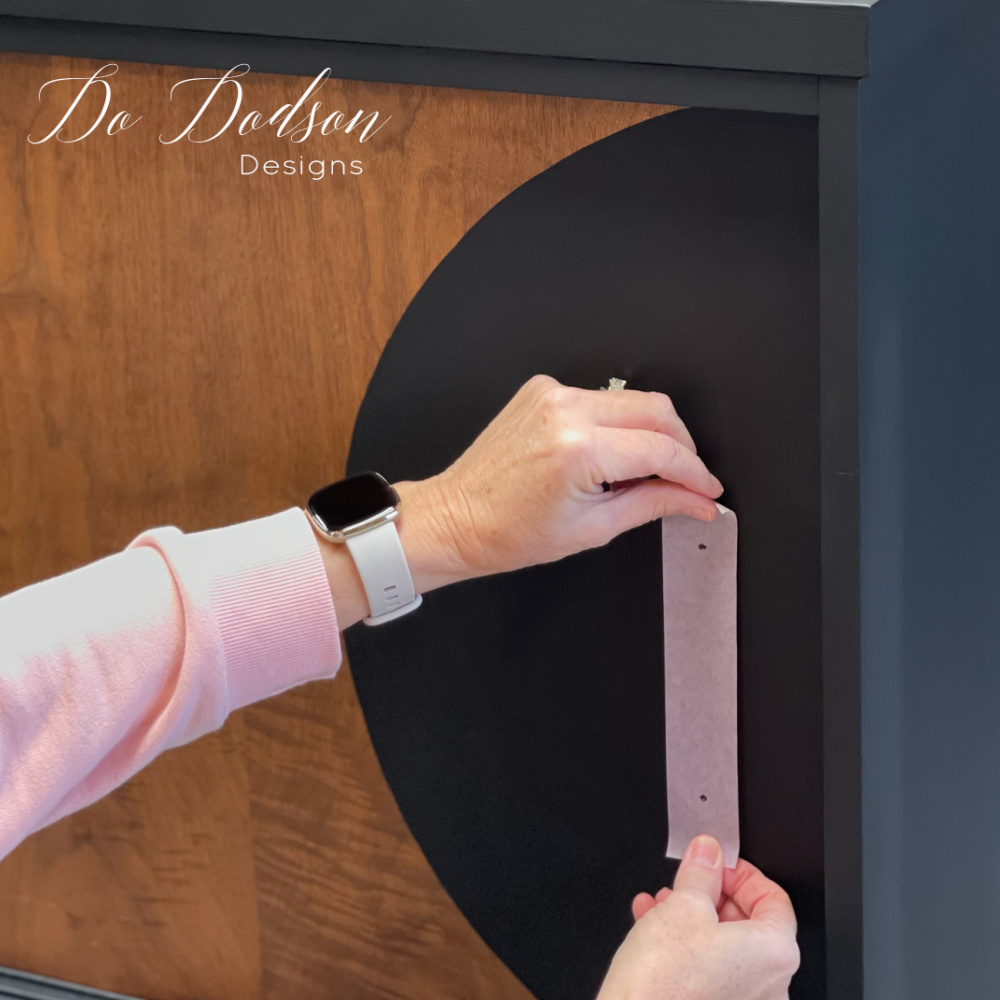
After deciding on my two toned design, I used painter’s tape to mark off the areas where I wanted my dresser makeover to be painted. I LOVE this edgy look with the two-toned paint and wood. After placing the painter’s tape where you want it, be sure to burnish the edges of the wood with your finger so that the tape makes good contact. Do this several times. It does make a difference.
It’s also important to have your wood surface clean and dust free so that the tape sticks well. Here’s where putting in a little elbow grease when sanding and cleaning pays off. If the wood is rough or dusty, you’ll have more chance of bleeding through with the chalk paint.
To get a crisp clean line when painting on wood with chalk paint, paint away from the tape in a downward motion. One stroke in one direction… DOWN! Not up or along the side of the tape. This will cause the paint to seep underneath the tape and make you very sad. I’ve made mistakes so you don’t have to.
I also find that it’s best to paint with the furniture sitting upright. Since paint runs down, painting with downward strokes minimizes the chances of bleeding under the tape.
I used two coats of black chalk mineral paint to get full coverage. Allow the first coat of paint to dry completely before adding the final coat of paint.
Remove the tape immediately after painting the final coat. This method works great for me every time!
How To Stencil With Chalk Paint
I have always wanted to paint a piece of furniture for Christmas and this two toned dresser makeover project presented itself at just the right time.
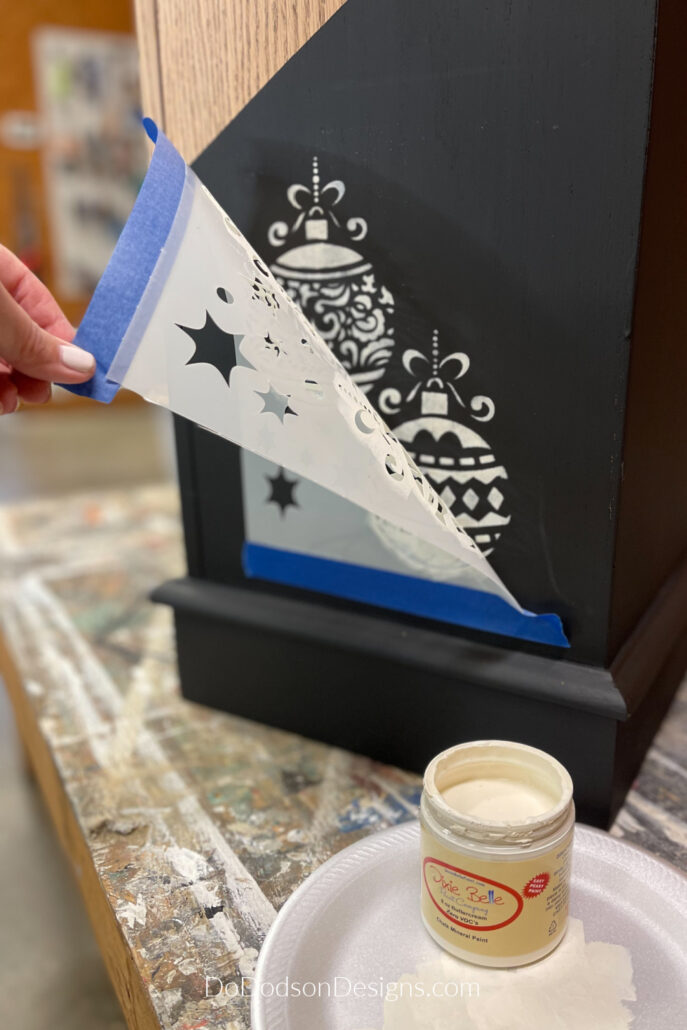
Dixie Belle Paint Company has a new HOLIDAY JOY stencil with 4 different designs that grabbed me by the HO HO HO and I knew it would work perfectly on this piece. Why not?!
Secure the stencil to your surface with painter’s tape.
Choose a contrasting chalk paint color. I used buttercream. MY FAVE!
Add a small amount of chalk mineral paint on a paper plate. Next, use a sponge or makeup wedge and apply the chalk paint over the stencil. Use a dabbing motion and less paint when stenciling.
Remove the stencil and clean it immediately with warm soapy water so you can use it over and over again.
Using a small art brush I added more dots to complete the line from the Christmas ornaments to the top where the wood and paint meet.
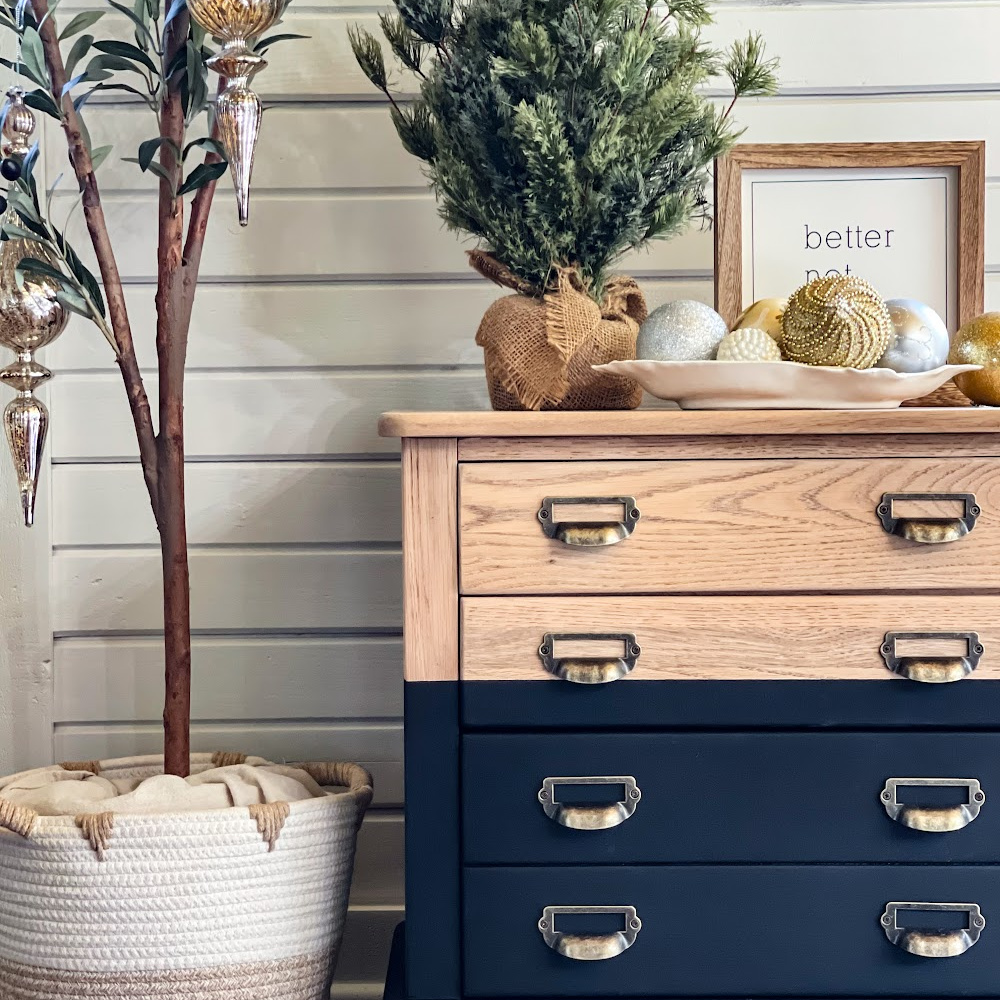
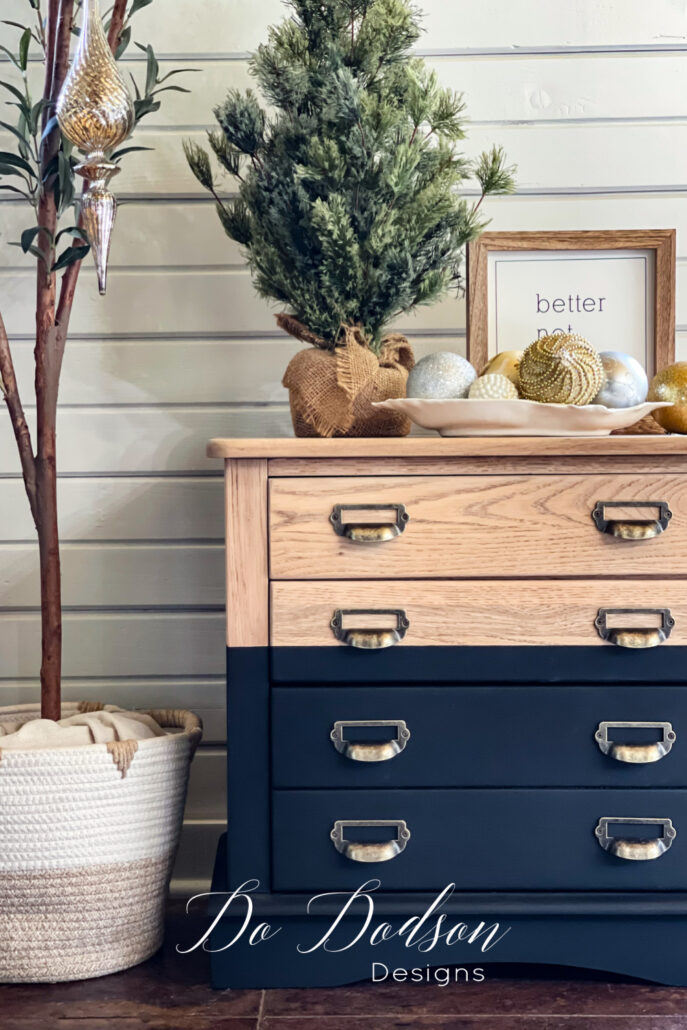
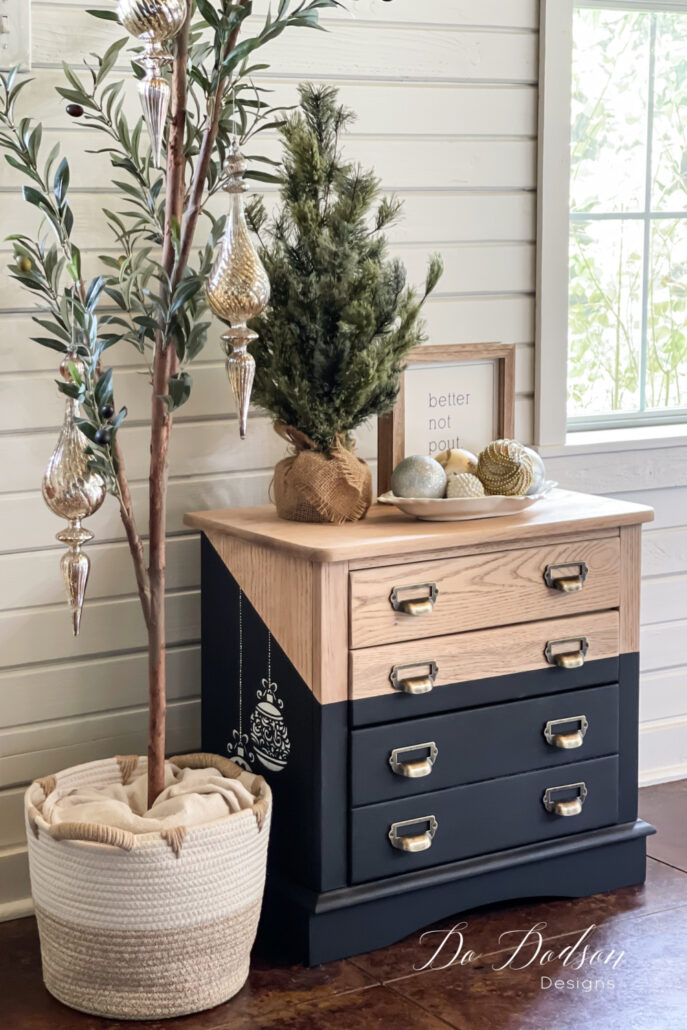
Holiday Dresser Makeover
This two toned wood dresser makeover is seriously gonna grab some heads. Now, who would have thought that painting FREE furniture for Christmas would be so fun? And gorgeous!
And, after Christmas, I have plans to sand off the stencil and use this “small dresser” (not really a dresser) in my office space. I didn’t seal this piece as I have plans to update this dresser and use it in my office after the first of the year and I’ll be adding a sealer over the wood and paint at that time. For now, it’s just going to be used as Christmas decor. Chalk Mineral Paint does not require a sealer but I recommend it if you’ll be getting a lot of traffic on this finish.
I’ll be updating this post so if you haven’t subscribed to my weekly newsletter, you can subscribe now and I’ll send it straight to your inbox as soon as it’s done.

Hey, thanks for joining me today with this FREE two toned black and wood dresser makeover. I hope this inspires you to add some holiday fun to your furniture. Impress your family and friends with a unique one of kind masterpiece.
Like this idea? Let me know your thoughts in the comment section, or just say hi so I know you stopped by.
Merry Christmas from our home to yours.
Until the next project… xo, Do

Donna!
I absolutely love this dresser! TFS and thanks for the tip on how to prevent bleed through under the tape! I hadn’t thought of that but it makes perfect sense!
You have given me so much inspiration with this project. I was torn between natural, natural/white, white, or black furniture pieces for my home refresh and you have just inspired me to combine the finishes for more versatility and impact!
Thanks so much!
Donna
Hi Ms. Donna! I like the way you think. I can’t wait to see what you do. PLease share a pic with me. 🙂 xo
You do such beautiful work in a perfect world you would love a block away, as I have a large piece, would love to have it done, to big and heavy to move….😢
Hi Susan! Thank you so much! I’ve done a few of those heavy pieces and I’m not a fan. LOL Have a great week and thanks for stopping by. 🙂 xo
Very nice, my friend! Love the black with the natural color. The holiday stenciling is such a cute idea. 😊
It’s tiny, but I think it will be beneficial for extra storage in my small office space. Thanks for stopping by, Wendy! 🙂 xo
Hi Donna! I love this little dresser. They just don’t make them like this anymore. Love the stencil too. Thank you for sharing.
Thanks, Cheryl. It will be a useful table in my office after Christmas. Have a great rest of your week. 🙂 xo
Love the two-tone look and the colors. It’s a stunner!
Thanks, friend. There’s nothing more classy than wood and paint in my book. 🙂 xo