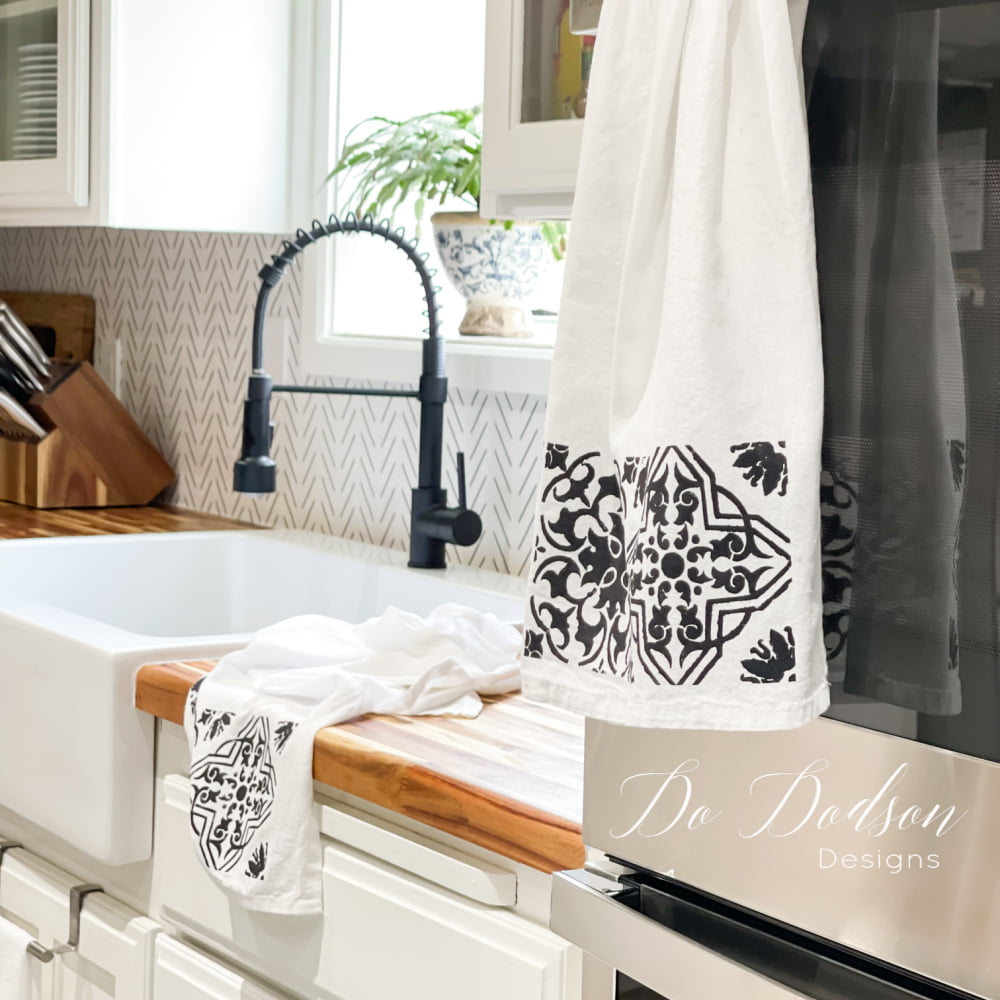
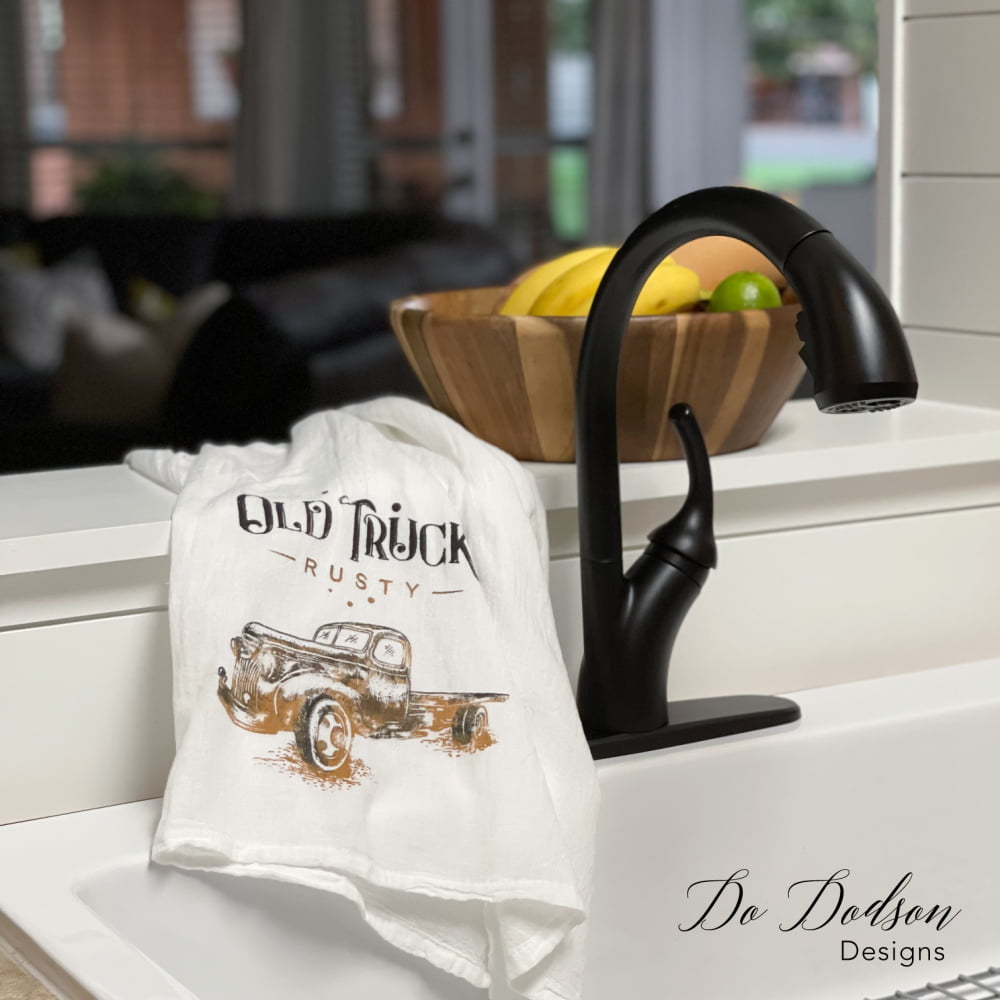
Who doesn’t love those old-fashioned flour sack dish towels? But what’s missing is they lack the designs I love. White is so basic! So, I decided to customize them with the patterns and colors I love. My style!
Thanks to Dixie Belle Paint Co for sponsoring this post. While I was compensated to write this post, all opinions are my own.
* As an Amazon Associate, I earn from qualifying purchases and through other companies as well. You will not be charged extra when you purchase through these links, but any income I make helps me create more amazing DIY projects to share with you! To see my full disclaimer, click here!
The Easy Way To Customize Flour Sack Dish Towels
Drying the dishes was my chore as a little girl. It was one of the many things I loved doing with my Grandma. I’ll never forget the feeling of the soft flour sack dish towels that soaked up the water like a sponge. It made drying dishes fun.
Grandma had a few special towels embroidered with beautiful flowers, but those didn’t come out of the drawer. Only for special occasions. That’s what SHE said! They now live in my kitchen drawer.
This stencil reminded me of those days, and since I already use the flour sack towels in my kitchen, I decided to add a few fun designs. Let’s craft in the kitchen!

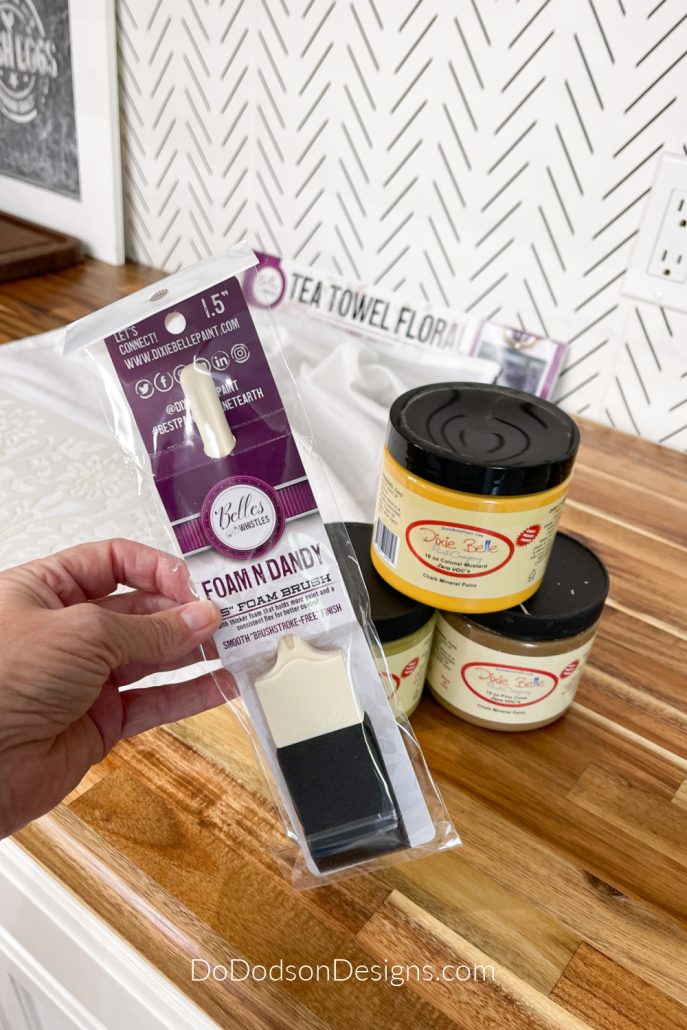
SUPPLY LIST:
- 100% Cotton Flour Sack Towels (perfect for crafts)
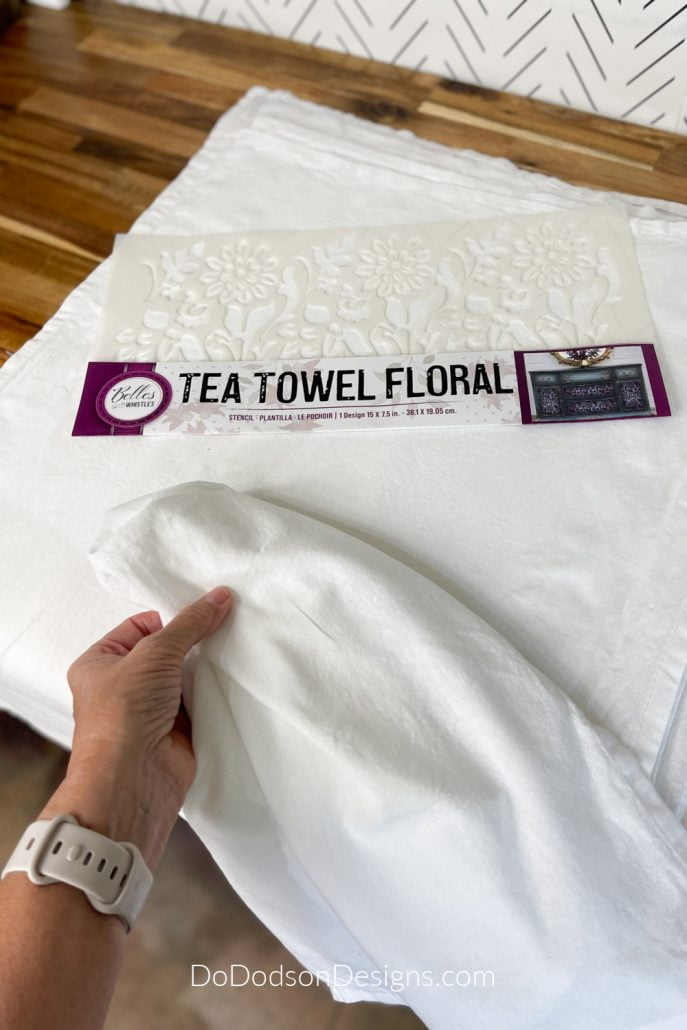
- Tea Towel Floral – Stencil
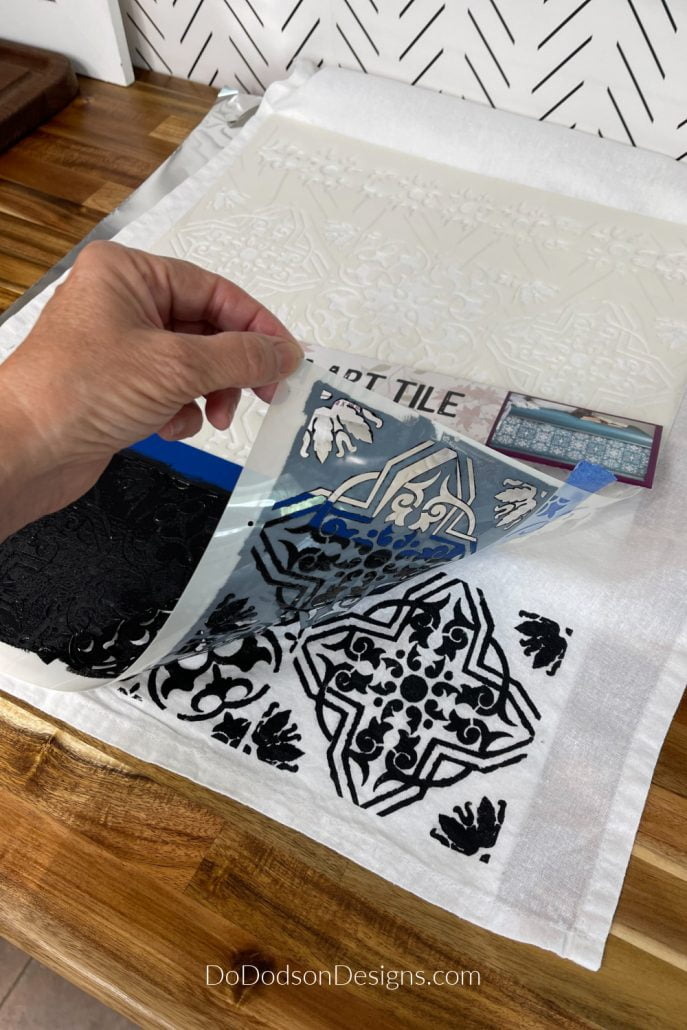
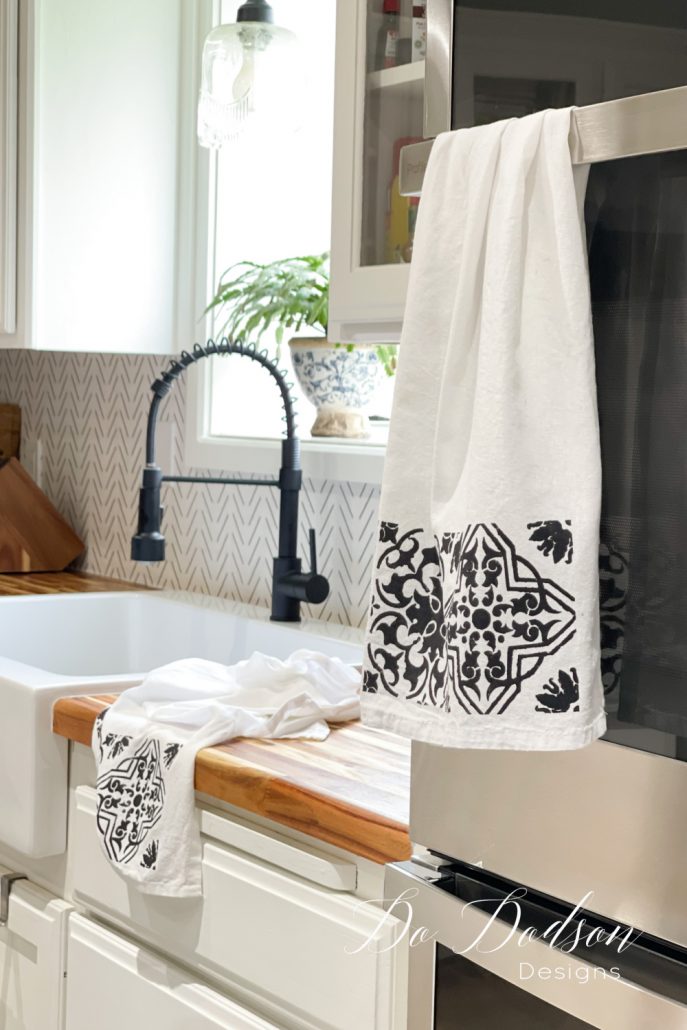
- Sonoma Art Tile – Stencil
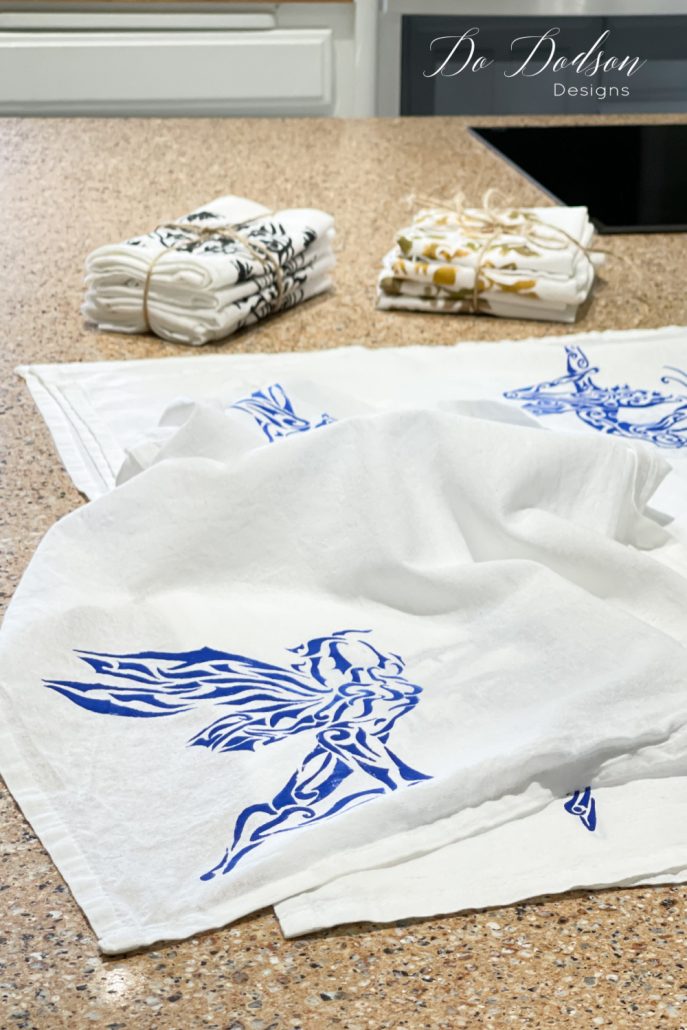
- Fairies – Stencil
- foam brush – great for stenciling!
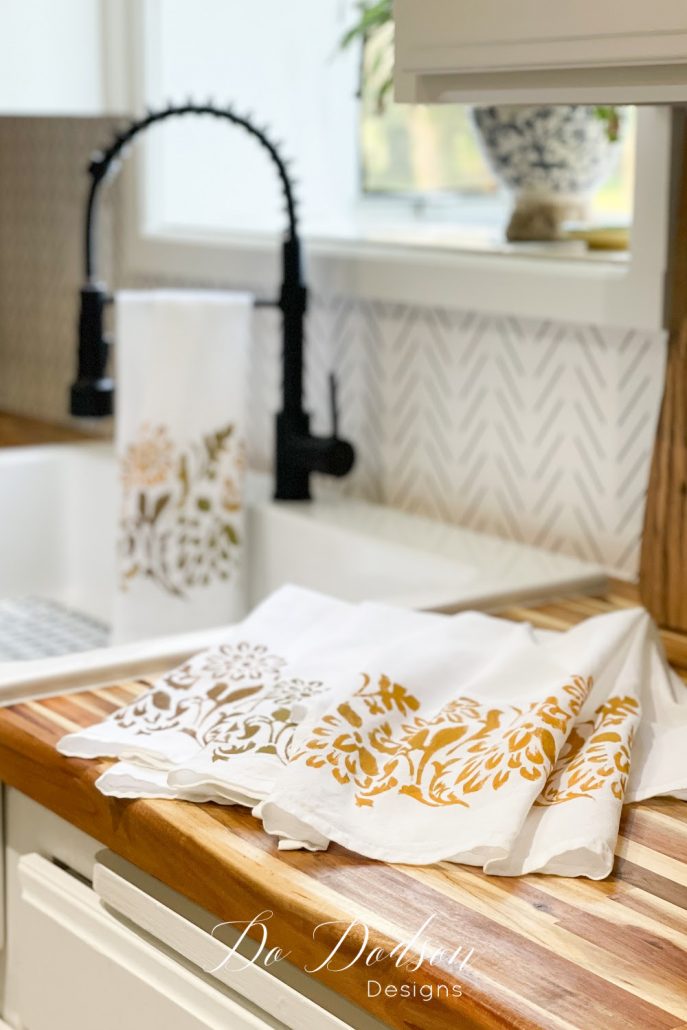
- Colonel Mustard chalk mineral paint
- Pine Cone chalk mineral paint
- Holy Guacamole chalk mineral paint
- Cobalt Blue chalk mineral paint
- Caviar chalk mineral paint
- painter’s tape
How To Stencil With Chalk Paint On Flour Sack Dish Towels
STEP 1:
If you purchase new flour sack dish towels, be sure to launder them first to remove any chemicals that may have been used on the fabric. Because flour sack material is 100% cotton, it will shrink after laundering. You’ll also need to give them a quick press with the steam iron. This will make stenciling the fabric easier.
STEP 2:
To protect the surface you’ll be working on (kitchen countertop, etc.), you will need to lay a barrier between the flour sack dish towels and your surface. I used the plastic wrapping that the stencil came packaged in. You can also use parchment paper, plastic bags, etc. Use whatcha got! Doing this will protect the work surface from any paint that bleeds through the fabric during stenciling.

Stenciling With Chalk Paint
STEP 3:
Gather your supplies.
I’m using a foam brush to apply the paint over the stencil for this DIY flour sack dish towel project. Usually, I would use a stiff bristle brush, but I’ve seen other DIYers do it, so I thought I’d try it.
STEP 4:
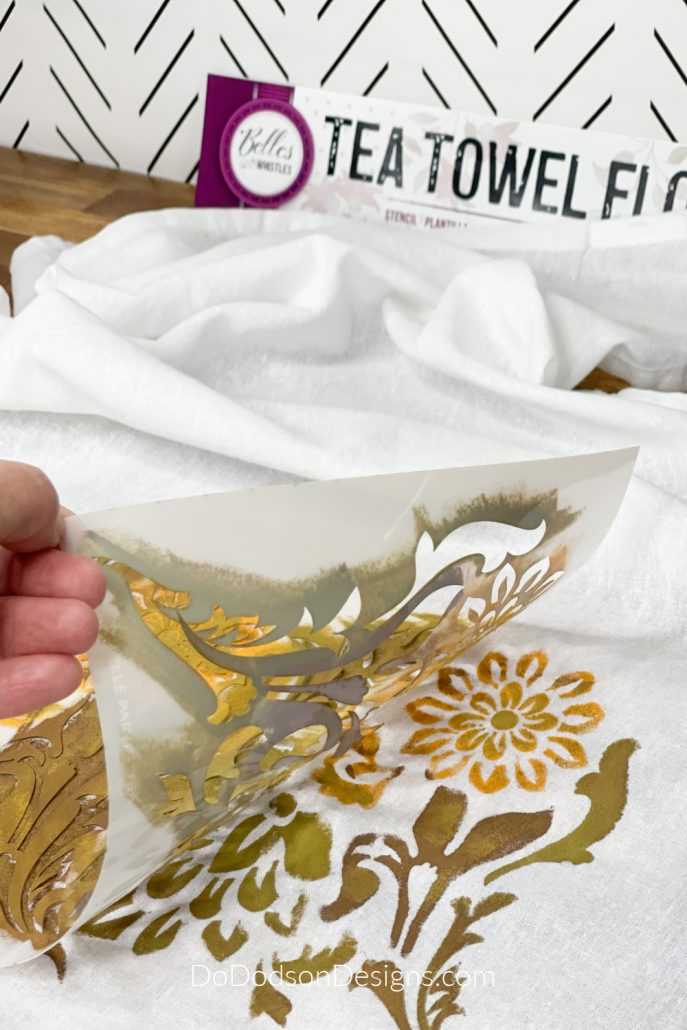
Lay the stencil directly over the fabric, and be mindful of the placement of your stencil. The design should be visible when you hang or fold your flour sack dish towels. Secure the stencil with painter’s tape to the fabric to prevent slipping.
STEP 5:
Apply the chalk mineral paint over the stencil with a foam brush using a dabbing up and down motion. Remember to dab and not brush the paint over the stencil. Resist the urge.
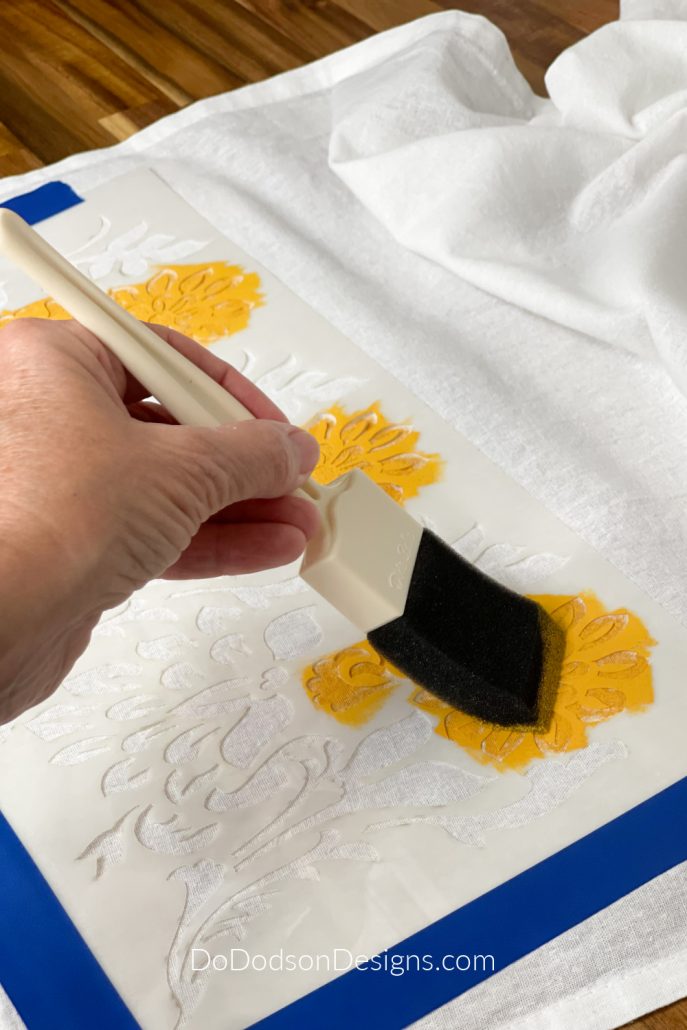
This foam brush worked beautifully with the application of the chalk paint, and I was able to blend some of the colors I chose over the stencil for a hand-painted look on the towels.
I was concerned that the paint would bleed through and I wouldn’t get that clean, crisp stencil line, so I went a little sparingly with the paint on my first set of DIY flour sack dish towels.
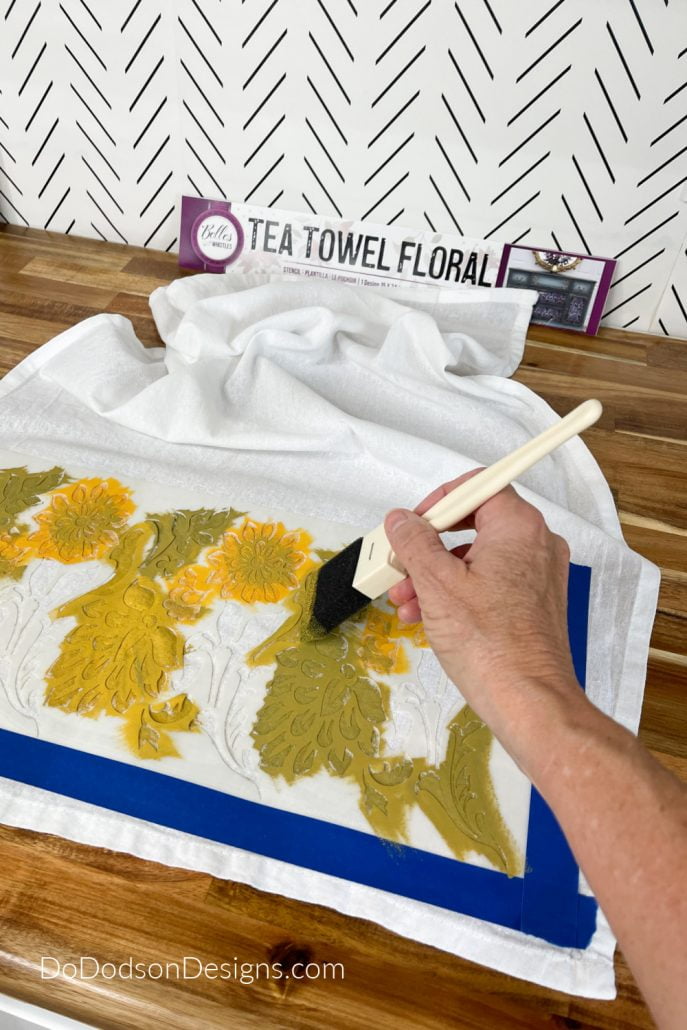
The result was beautiful, but I should have applied more paint to this design. Getting bleed through when stenciling over cotton fabric is minimal as the fabric soaks up the paint immediately and doesn’t spread under the stencil as fast. The towels are 100% cotton, and chalk mineral paint dries quickly on the fabric.
The next three towels I made with this design were perfect! Note to self: Use more paint.
Try Different Designs On Flour Sack Dish Towels
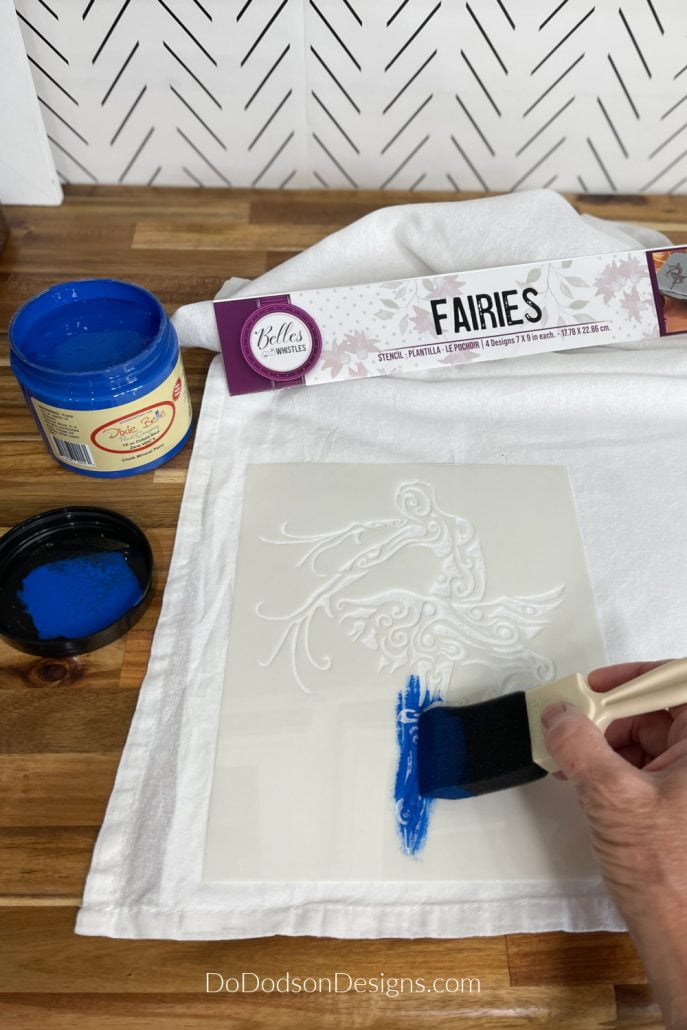
Go BOLD or go home! I used Cobalt blue chalk mineral paint with this fun Fairies Stencil. Oh my, is it cute? This stencil design may be my favorite of all three I used.
Flour Sack Dish Towels – Gift Ideas
If you need a quick gift idea, this is a great way to add your special touches, and who doesn’t love a homemade gift? Can you ever have too many dish towels?
I purchased a 12-pack of these flour sack dish towels, intending to make gifts. Should I keep them all?
This project took me a few minutes to add a beautiful stenciled design to something I use every day.
Thanks for joining me here on my blog, and I hope you have enjoyed this fun tutorial. Have you ever tried stenciling on fabric? I’d love to hear about your experience or just say hi. I’d love to know if you were here in the comment section. Don’t forget to SHARE and PIN this idea on PINTEREST to your favorite craft board.
Until the next project, xo Do
These turned out great! I’ve been wanting to try this project for a long time. Thanks for sharing!
Hi Kim! Thanks for stopping by. You should try this!
I love how these turned out! Thanks for sharing.
Thank you, Virginia! I think I’ll have to make more for gifts.
This is a cool idea. Did you need to do anything to set the paint?
Thanks.
Hi Robin! I totally forgot to address that in today’s blog post. No, I don’t feel you need to set chalk mineral paint but if you’re using craft paint you will need to heat set it. If you have ever use Dixie Belle chalk minetal paint and get it on your t-shirt, it doesn’t wash off.
Super cute idea! Have a great weekend my friend! XOXO
Hi Denise!. I sure will. The sun is shining and I have grass to mow. 🙂
How fun! Such a great way to use the stencils. 🥰
Hi Wendy! Thanks for stopping by. Yes, it’s always fun to use stencils. 🙂 xo
I love tea towels. Beautiful!
Something so simple makes me happy. Thanks for stopping by today. 🙂 Have a beautiful weekend. xo
I stenciled a canvas tote for our local food bank using DB paints & a sponge makeup triangle.
Hi Robin, Yes makeup sponges are great for stenciling as well. I’ve used them many times! 🙂 xo
Such a great idea!!! I never thought of using a sponge brush! Grandma memories are the best.❤️
Hi Karen! Thanks for stopping by. I’ve used makeup sponges forever, so I thought I’d try these. Grandmas are magic! :0 xo
Love these Do!,,,
Thank you, Sheila!
Love this idea and will make some for my kitchen. Thank you for the inspiration.
A fun DIY that gives back over and over. 🙂 Thanks for reading. Have a blessed day my friend. 🙂 xo
They turned so cute, such a great idea.
Thanks, Patti! So glad you enjoyed this project. 🙂 xo
Super cute Do!! They’re perfect for gifts. Thanks for all the great ideas….Hugs!
Thanks, Lynn. Always good to hear from you. Have a beautiful day. 🙂 xo
Love this!
Thanks, Paula! They make great gifts. ❤️
Shame about the annoying google ads on rhs which mask comments
Hmmm, I went back to see the issue you were having. I’m assuming this was from your mobile device. I’ll let my tech team know. Thank you so much for the feedback. Have a lovely weekend. 🙂
Worth a second comment because you can never have enough tea towels and this is an AWESOME gift idea! They turned out beautiful Do! Enjoy your day my friend. XOXO
Thanks, friend. DB chalk mineral paint sticks like glue on fabric. I’m pleasantly surprised how well it has held up to numerous washings over the last year. Merry Christmas. Have a lovely weekend.🎄