
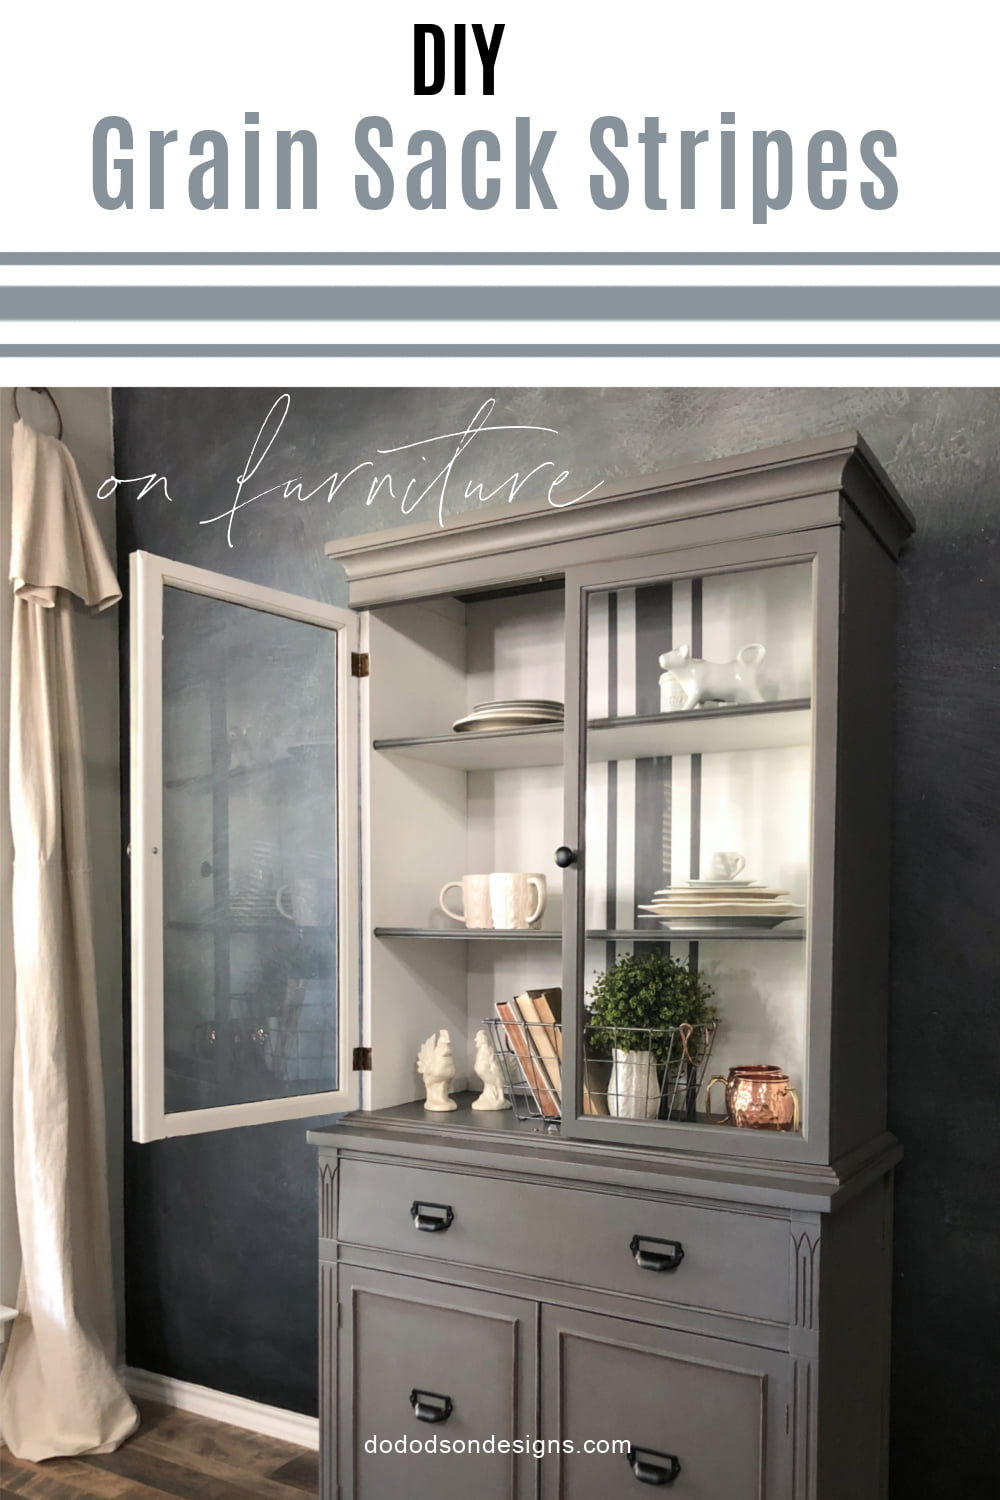
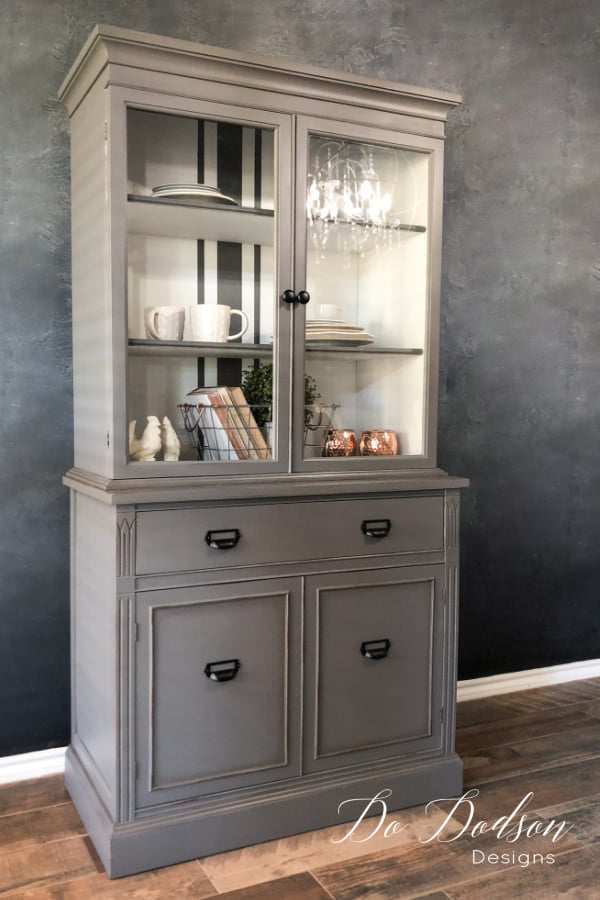
Hello, creative friends! Wait till you see this hutch makeover… it has beautiful french grain sack stripes right down the center of the inside shelves. Sounds like a lot of work, right? Well, it would have been if I hadn’t done this one thing. However, we all know that painting the inside of the cabinets is NOT easy. I’m excited to share this with you. Game changer!
This post contains a few affiliate links to help you find the products I use. You are not charged extra to use any of the links, but any income I make will be used for more fun projects! To see my full disclaimer, click here!
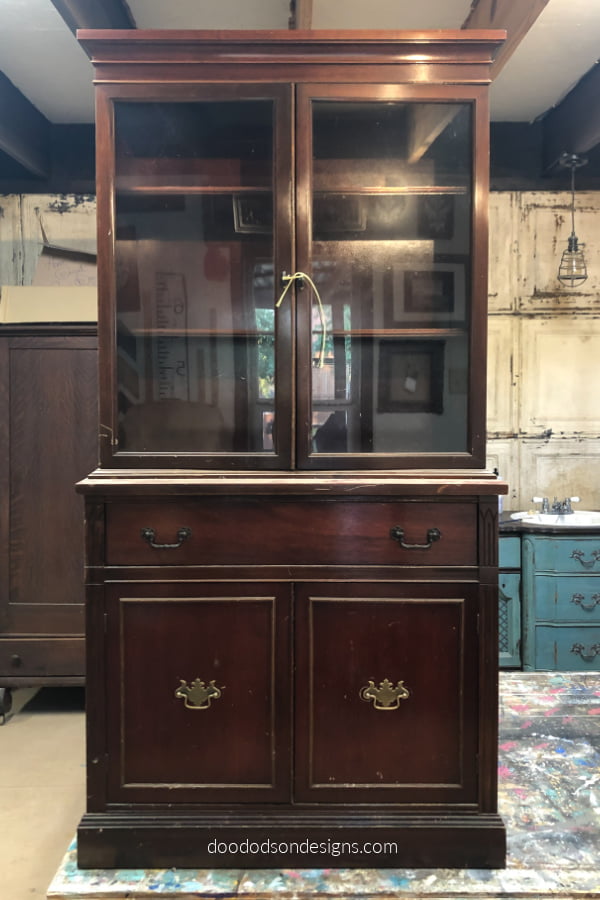
How To DIY Grain Sack Stripes On Furniture – BEFORE

SUPPLY LIST:
- Shellac (clear) or BIN shellac-based primer (white)
- Chip Brush (for shellac application)
- Synthetic Paintbrush
- Cotton chalk mineral paint
- Hurricane Gray chalk mineral paint
- Artist’s Brush
- Painters Tape (gentle release)
- Tape Measure
- Pencil
- Top Clear Coat (satin)
Before any furniture makeover, be sure not to miss this step. PREP!
Stain Blockers… A MUST When Painting White
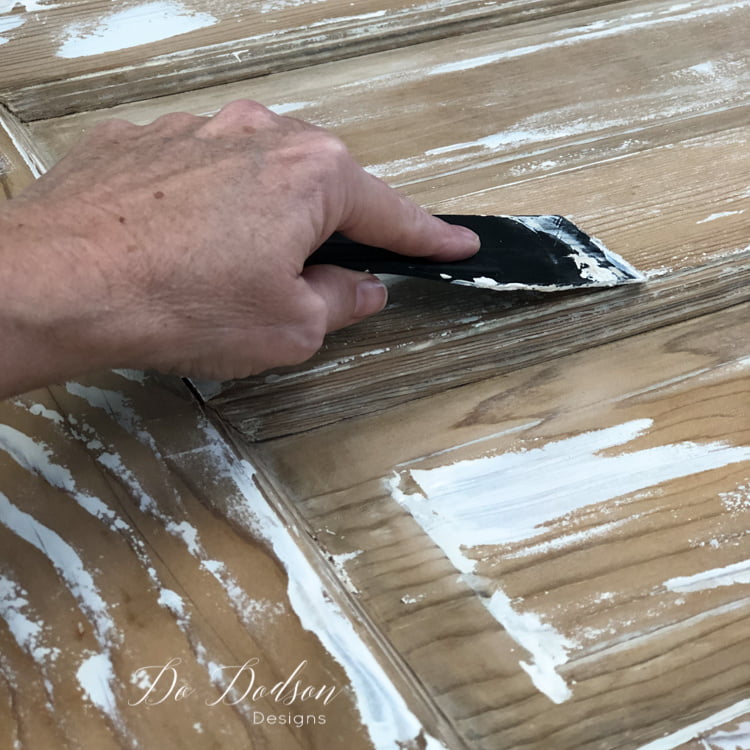
Before we dive into painting grain sack stripes, you will want to prep your wood before painting. This means that if you paint without using a stain blocker, some furniture… especially ones with red stains, will bleed through paint. I chose to use a shellac-based stain blocker/sealer for this project. Believe me when I say I have painted enough furniture to know a bleeder when I see it. Especially when painting white.
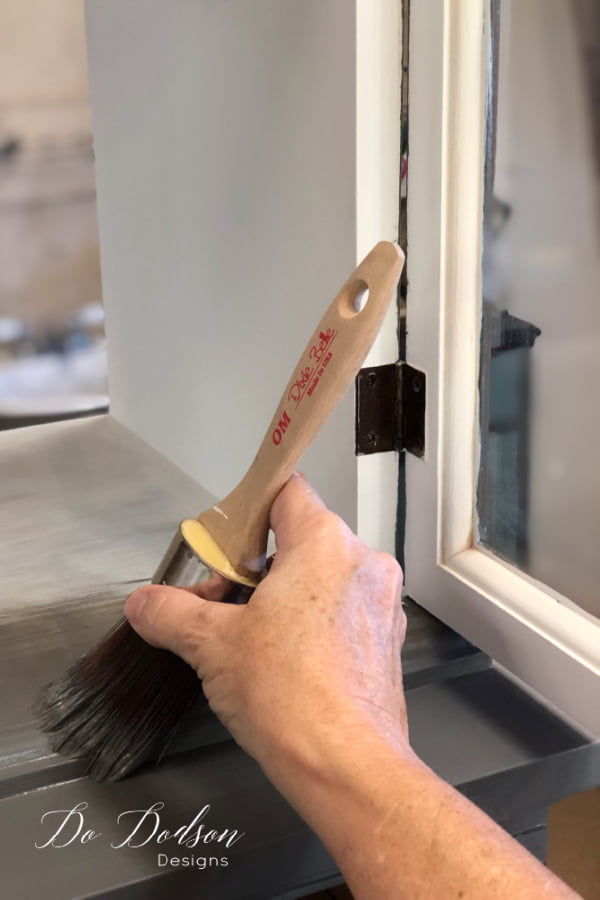
I applied two coats of the Shellac sealer and allowed it to dry. It dries pretty quickly, so I was able to start painting in a few hours.

*I used the clear Shellac for this project, but looking back, I should have used a white stain blocker on the inside of the cabinets. It may have saved me one coat of paint. You can expect to apply 3-4 coats of white chalk mineral paint to cover a dark piece like this one. That’s a lot of painting! But it’s so worth it.
Be patient with yourself when painting cabinets. It’s no small task, but perfection can’t be rushed, especially if you’re using a contrast of white and gray chalk mineral paint that meets in a corner. I admit I had to break out the artist’s brush for some areas.
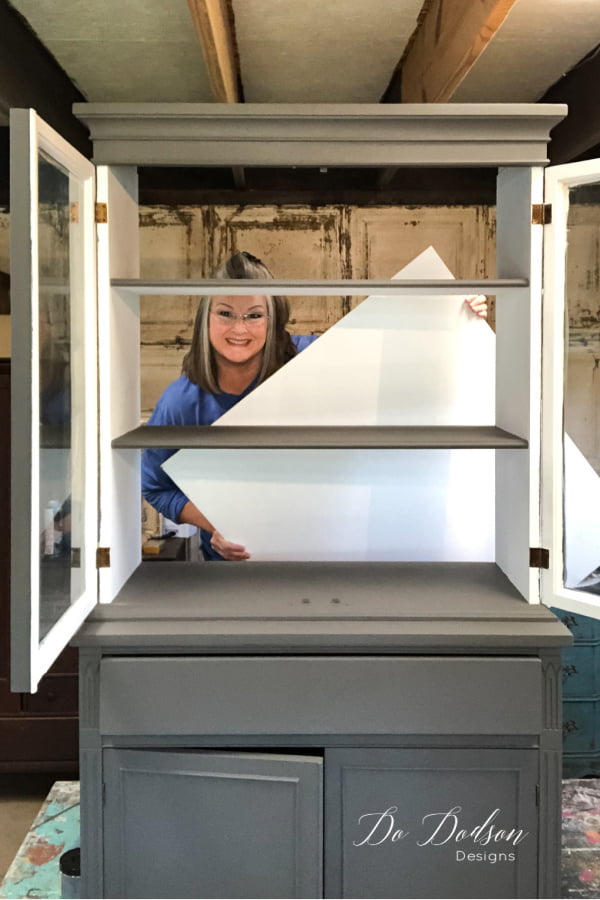
PRO TIP For Painting Grain Sack Stripes Inside Cabinets
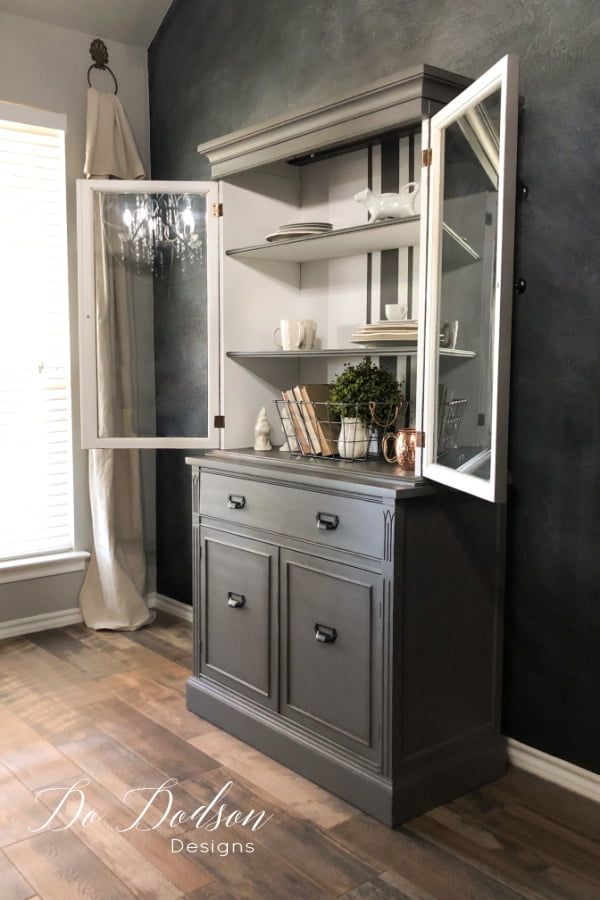
This will blow your mind! And why I never thought of it before is… well, who knows. But if you happen to have a removable backing on a cabinet hutch, remove that sucker! This will save you time, headache, and a few swear words. Painting grain sack stripes inside a cabinet is crazy hard to get perfect. So make it easy on yourself. I did. 🙂 I’m sure someone out there has done this before, but it sure is a game-changer for me.
*TIP… Allow the paint to dry overnight before taping off to prevent the paint from peeling when removing the tape. If you’re not into stripes, now is the perfect time to add wallpaper, transfers, or your unique design on the backer board.
How To Paint The Perfect Grain Sack Stripes
French grain sack stripes are usually one large strip in the middle and two smaller ones—one small strip on both sides.
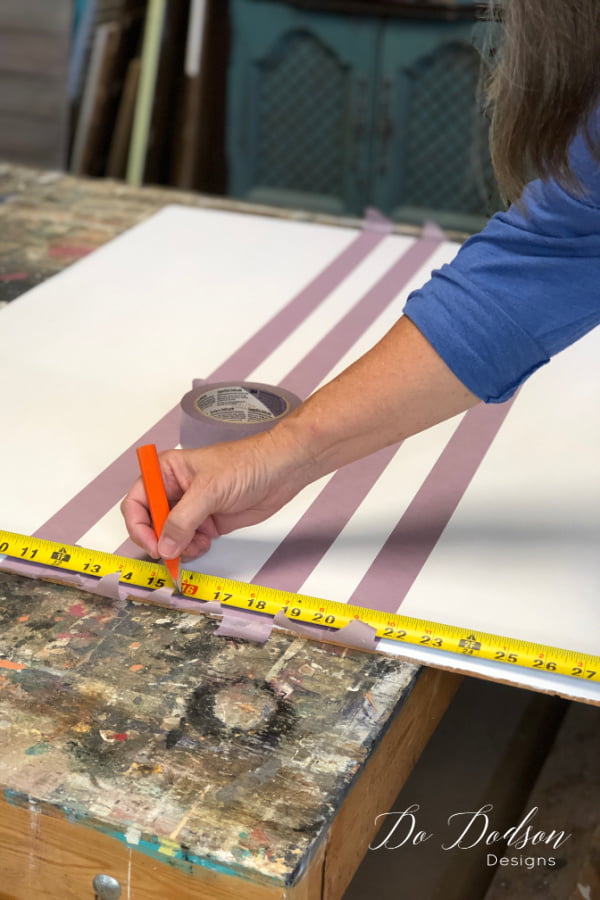
First, start by measuring the board and finding the center. This will be where your center stripe will begin. Next, decide the sizes of the stripes you want. This will depend on the size of the furniture you’re painting. The center strip should be twice as large as the outer smaller stripes. If you’re using a 1-inch tape, you can use that as your guide or use the tape measure. Double the 1-inch tape to make a 2-inch stripe for the middle. It’s not an exact science. Whatever looks good to you.
*TIP… rub the end of your finger over the taped edges to ensure good contact with the board or furniture. This will help prevent bleeding under the tape.
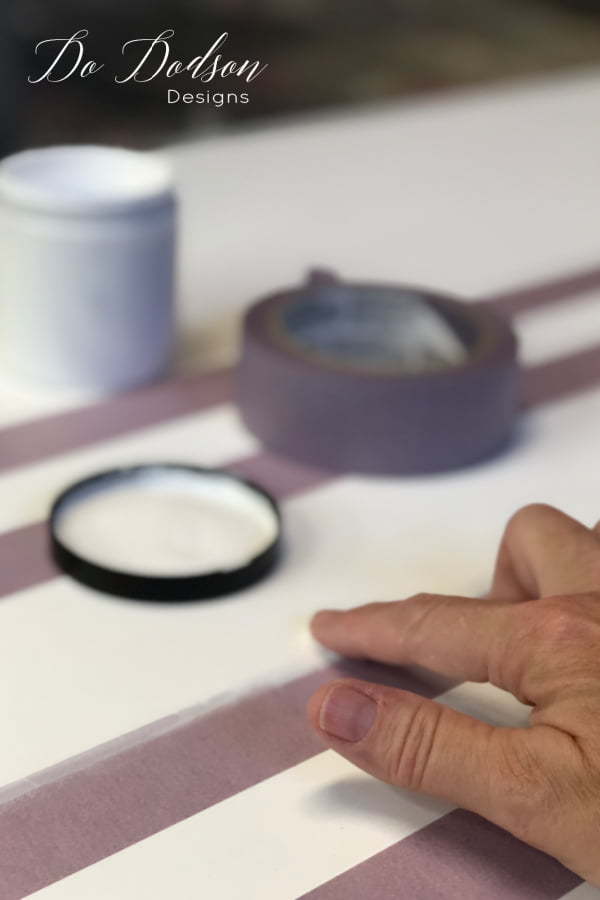
The No Bleed Method For The Perfect Garin Sack Stripes
The next step is crucial, and I never paint stripes without doing this first. With the same base color (cotton chalk mineral paint), paint or use your finger (it saves washing a brush) and add a layer of the base color over the striped side of the tape. This will fill in any air gaps between the tape and board (furniture) and ensure clean lines every time.
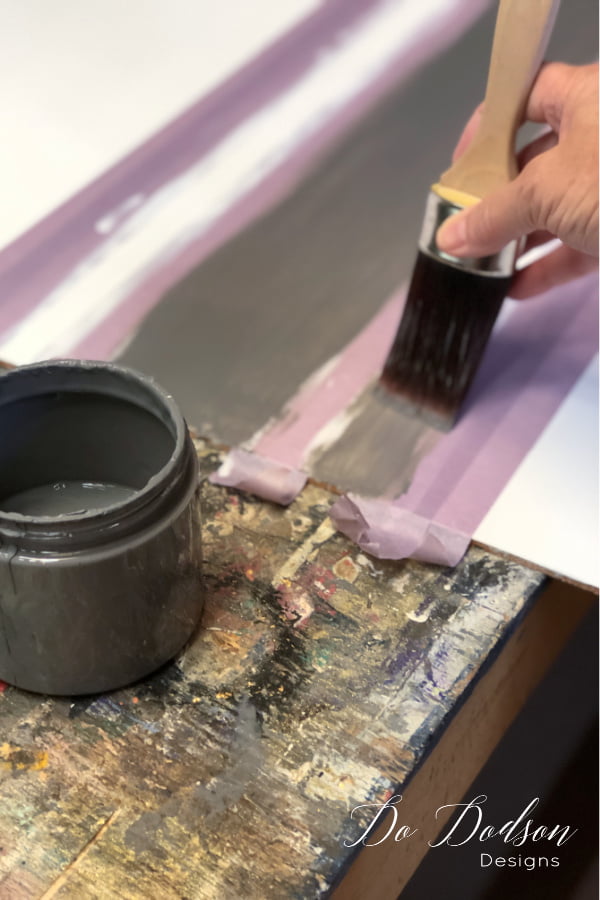
Painting The Grain Sack Stripes
Next, paint over the taped areas with your accent color (Hurricane Gray). Trust me; the gray will not seep under the tap if it is sealed properly. You’re gonna be shocked at how well it turns out.
If you’re painting darker color stripes on white, it will take 2 coats. Paint the first coat and allow it to dry. Then paint the second coat for full coverage and remove the tape immediately.
Perfection Every Time!
Remove the tape in one direction until it is off—one piece at a time. Be careful not to allow the tape to touch the white. We all know what that will look like. This I know.

Replacing The Backer Board
As you can see, the level of perfection on these stripes is amazing. Every single time! And this will ensure that the lines are consistent from the shelf to the shelf inside the cabinet. You’re gonna be a rock star creating grain sack stripes now—such a classy look.

The End Results Of Grain Sack Stripes On Furniture
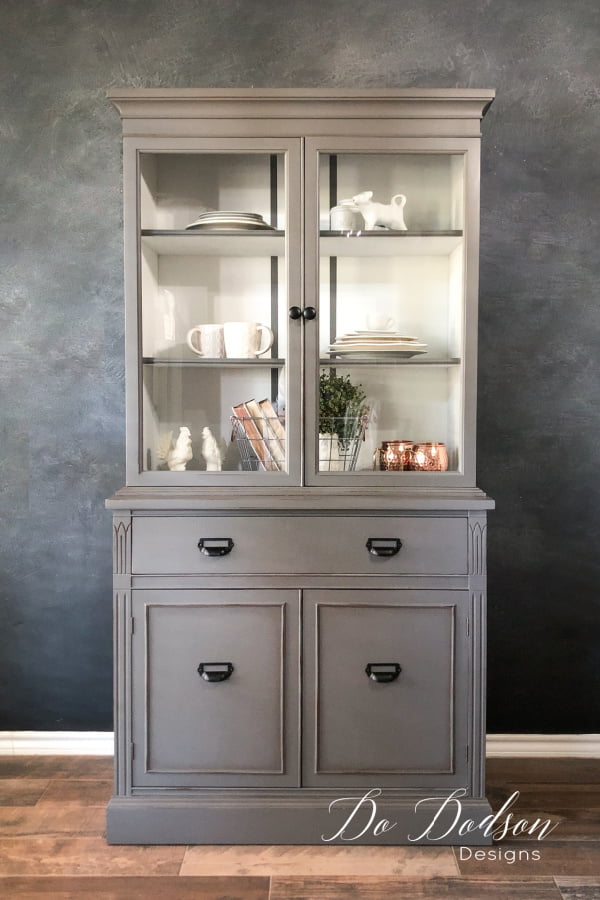
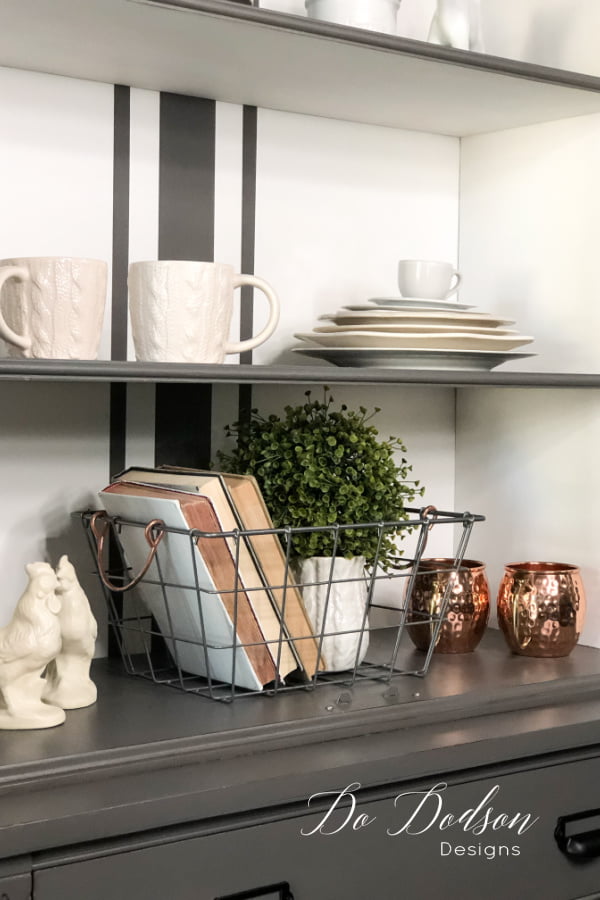
Clean lines… a classy look that will surely please those grain sack stripe lovers. It makes me happy.
What about you? I’d love to hear your feedback on this hutch makeover. I was hoping you could drop me a comment or say hi, so I know you’ve been here. My door is always open. Happy painting!
Until the next project… xo, Do

I love this! I just did a secretary but the back could not be removed…and yes it was a hassle! No grain stripes tho. I am wondering what do you think if the stripes were offset to the left? This way they wouldn’t be behind the center door frames. I am not sure how that would look but would love to hear your thoughts. Love your blog!
Hi Gail,
Thanks! I thought about that too. I see no reason why you can’t. I like the asymmetrical look. Makes it interesting. xo, Do
Just Beautiful!!!!!
Thank you, Paula! Thanks for stopping by. xo
I have the same red tone cabinet. Do I need to used stain blocker primer to keep from bleeding if I am using a dark gray?
Absolutely yes! And I would apply two coats. Red will bleed through any color. Good luck with your project. 🙂
Absolutely gorgeous!! Love everything about it…job well done.
Thank you so much, friend. I’ll never forget this one as I had so many obsticals. I HATE painting inside cabinets. 🙂
I just love the look of that grain strip highlighting the back of this cabinet. In addition, this paint color is yummy! It just looks so good~
Thank you, Ellen! My client was very happy. :0 xo
Love your piece!!! I sell grain sack stencils at my shop, my wholesaler has different sizes.
Love the look
Hi Sandra! Thank you. I would love to see your stencils. Can you send me a link?