
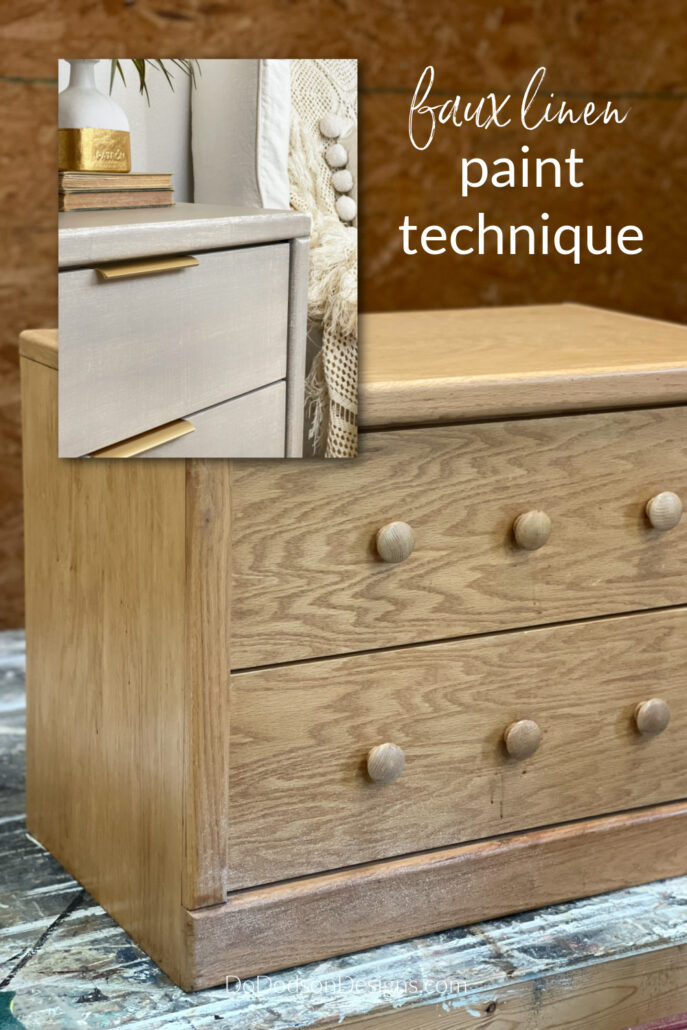
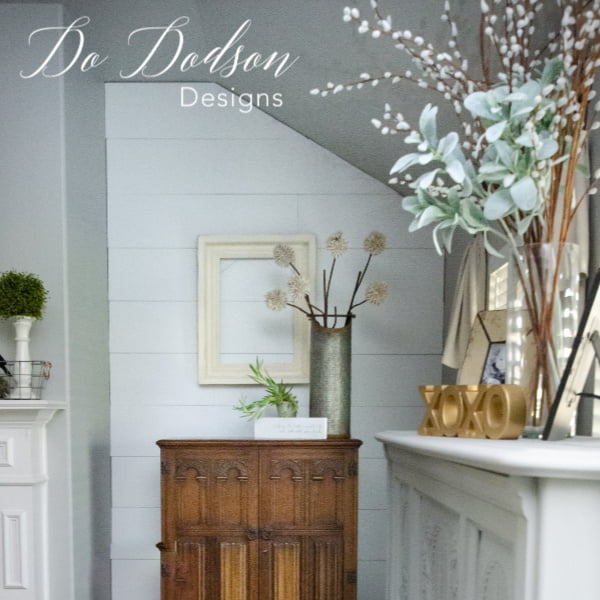
Hey friends! I know you’re going to love this hands-on faux linen paint technique! It’s one of the easiest and most popular ways to get the look of organic linen on wood furniture.
Thanks to Dixie Belle Paint Co. for sponsoring this post. While I was compensated to write this post, all opinions are my own.
* As an Amazon Associate, I earn from qualifying purchases and through other companies as well. You will not be charged extra when you purchase through these affiliate links, but any income I make helps me create more amazing DIY projects to share with you! To see my full disclaimer, click here!
Faux Linen | Grass Cloth Finishes For Furniture
We’ve all seen these gorgeous faux paint techniques on walls, but have you ever considered them for your furniture makeovers? How about a faux linen or grasscloth finish? Both finishes are very similar and have the same texture I love. So I thought, why not recreate that same look on a dresser?
Well, I didn’t have a dresser in stock, but this plain wood side table (with no details) worked well. This finish looks best on a flat surface (wall), so a piece of furniture with a smooth surface works best.
Before attempting this finish, I did some research, as any good faux finish painter would do. This technique is the one that I thought would be the easiest for furniture makeovers, mainly because I don’t typically use latex paint on furniture. You know I love my chalk mineral paint!
I did find a similar technique done by my friend Denise over at Salvaged Inspirations. CLICK HERE to see her dresser makeover.

SUPPLY LIST:
What you’ll need to create a faux linen finish on your wood furniture.
- wood furniture (dresser)
- electric sander SurfPrep Sanding System
- White Lightning furniture cleaner
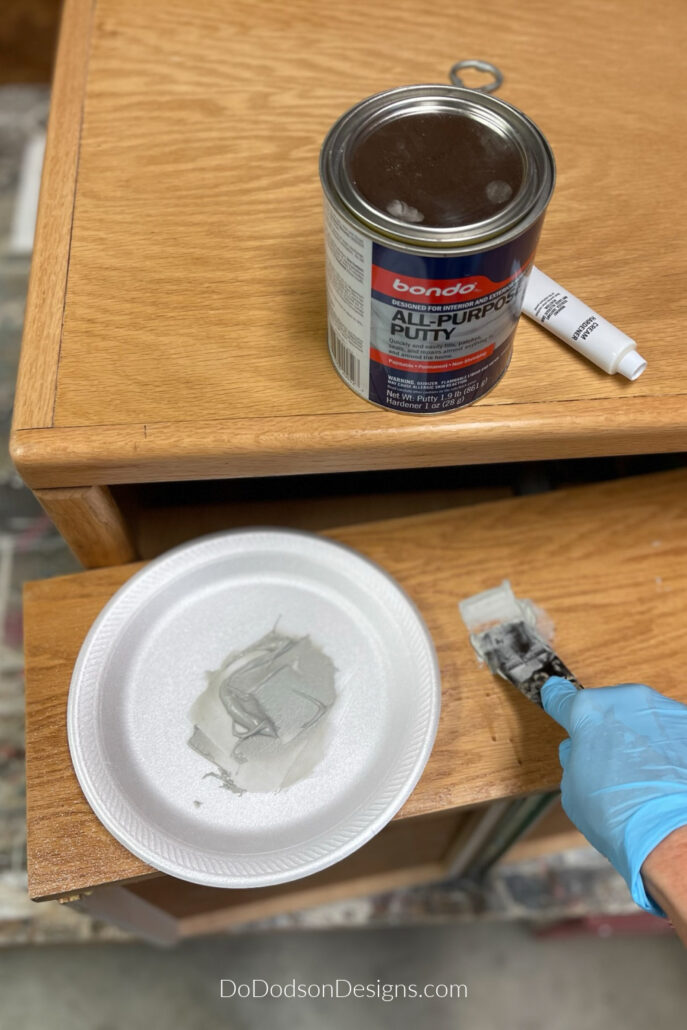
- Bondo (all-purpose)
- putty knife (flexible)
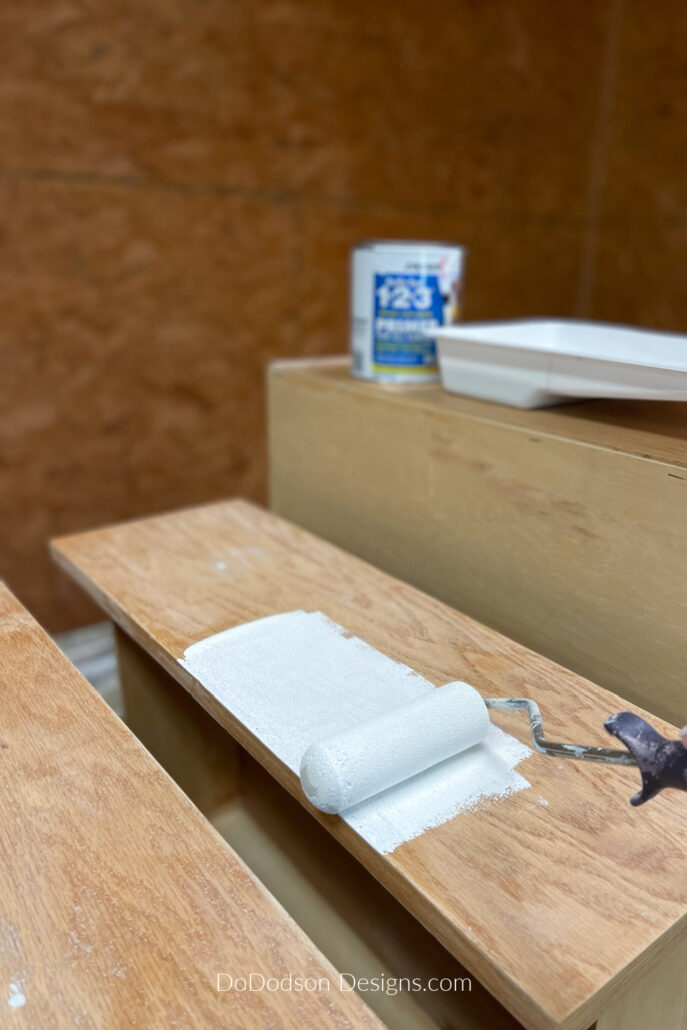
- Zinsser Shellac Based Primer
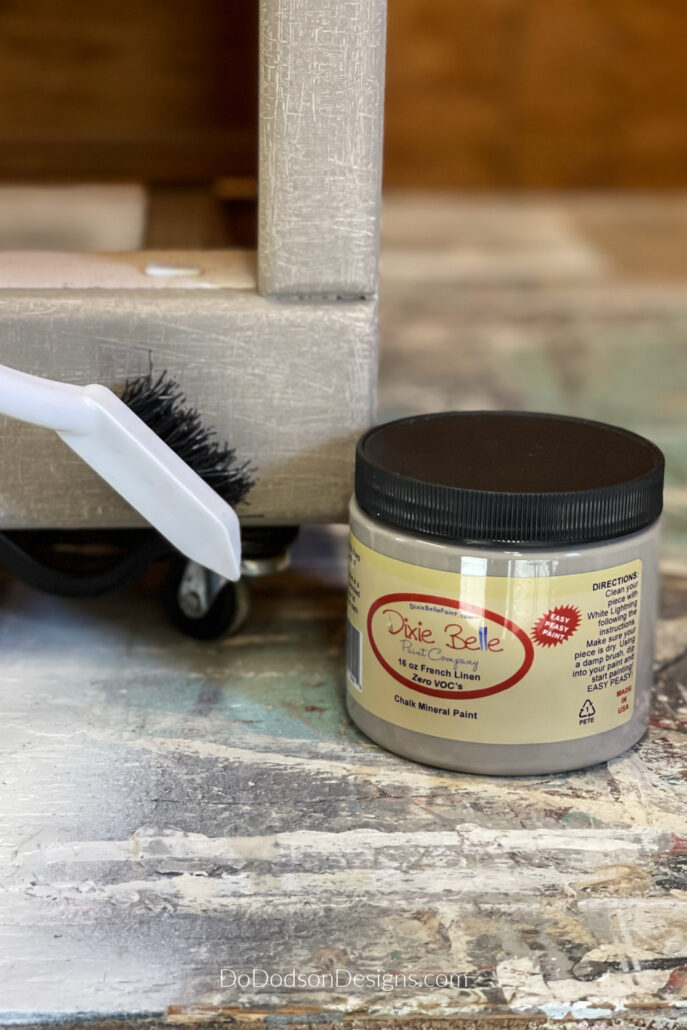
- French Linen Dixie Belle chalk mineral paint
- paint brush Dixie Belle 2-inch mini brush
- paint tray and roller (I used the sponge rollers)
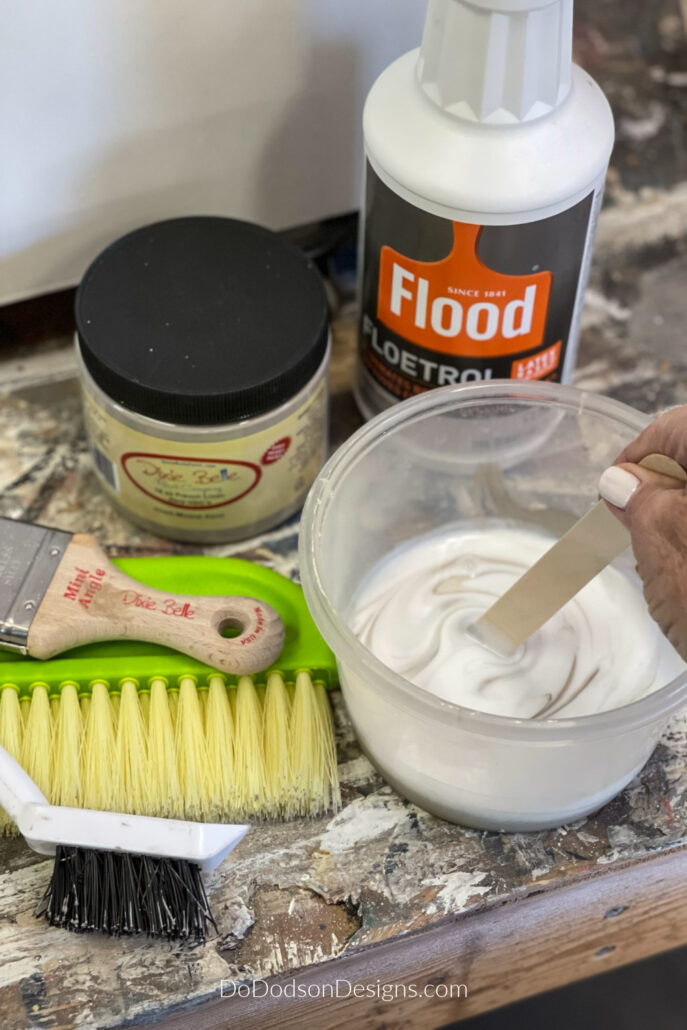
- floetrol paint conditioner (glaze medium)
- brush with stiff bristles (a broom works well too)
- Top Coat for durability and to protect the finish
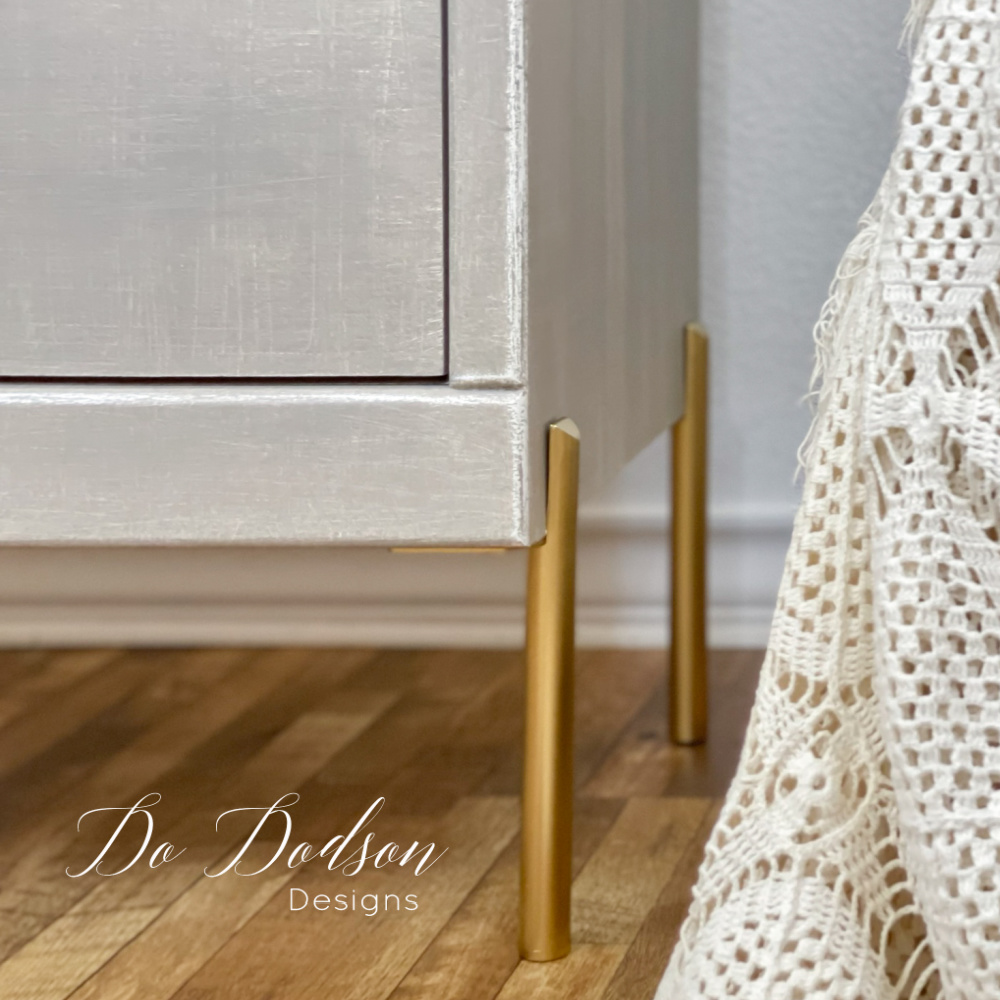
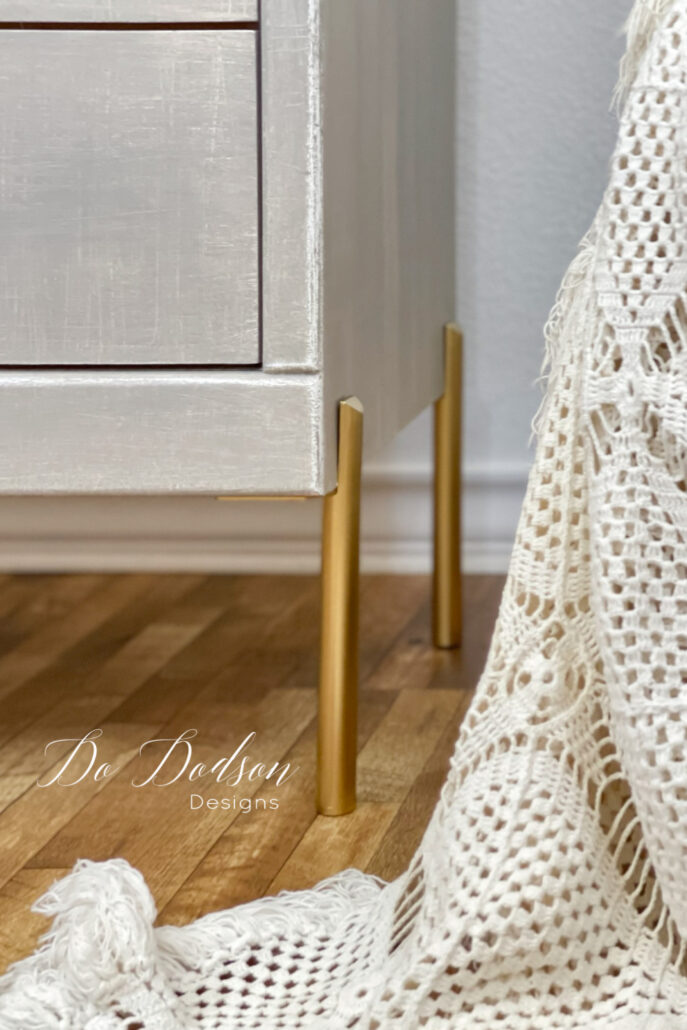
- GOLD pulls
- GOLD furniture feet
Prep, Clean, Prime, And Repair Before Painting
As always, before painting furniture, it’s necessary to prep by cleaning the piece well inside and out with a good furniture cleaner to remove dirt, grease, and grime. Even the stuff you can’t see because we both know it’s there.
This is also a great time to inspect your piece for damage, make repairs and clean the underside of that dresser that lived in the barn before you acquired it. That’s where the cobwebs and other icky critters live!
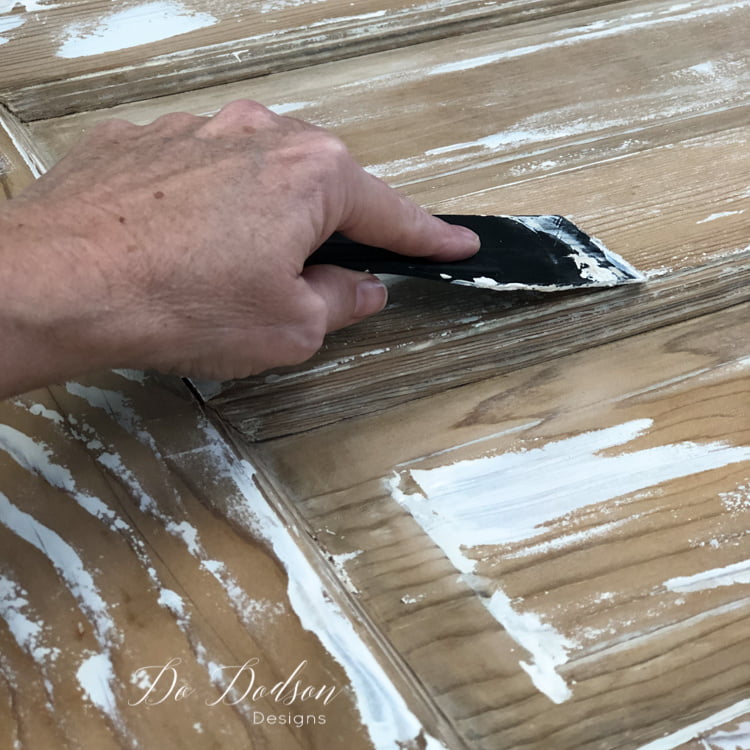
Remove the hardware if you plan on adding new pulls or knobs, and fill in the old holes with an all-purpose Bondo.
After the old holes have been filled, sand down the Bondo with 180 grit sandpaper until smooth. Finish up with 220 grit, and then scuff sand the surface of what you’ll be painting. Wipe away wood dust with a tack cloth or a dampened soft cloth.
How To Create An Organic Faux Linen Finish
This technique is typically used on a larger scale, like walls, by mixing latex paint with a glaze to create a latex glaze mixture. Doing this allows the paint to be more workable for longer periods and extends the dry time.
And believe me, you will need more time to perfect the faux linen look. When I say perfect, I don’t mean perfect. This organic look is appealing to me, but not for everyone, and it’s imperfect.
STEP 1: Apply a white primer over the wood to prevent bleeding through stains and wood tannins and to create a white base coat. I like to use a foam roller for this process because it’s quick and easy. It will take two coats of primer, so be sure to allow an ample amount of time between coats.
I also like to do the scratch test after the primer has had time to dry before painting. If your primer isn’t adhering to the wood, your finish will be a flop. That’s when the sadness comes in. Trust me.
The primer will serve as your base coat, and using a white primer works well for this finish.
If the primer is a bit rough after drying, you can use fine-grit sandpaper to smooth out the rough areas created by the roller. For the most part, you won’t need to do this.
Faux Linen Painting Technique
STEP 2: Here’s where the fun part starts!
I mixed equal parts of chalk mineral paint and the floetrol (glaze medium) in a plastic container and mixed well. The floetrol looks like a white, thick, milky semi-transparent substance that will extend the dry time of the chalk paint. At first glance, you may think it will change the color of your paint, but it won’t. Once it had dried, I saw no difference in the color.
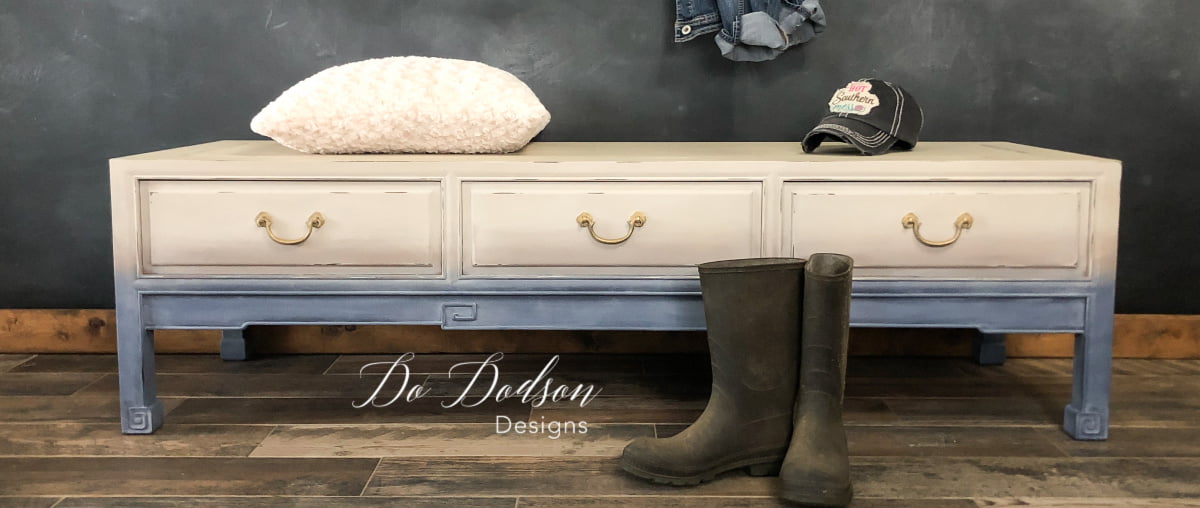
You can use any color you like for this technique, and blue will give you the look of a faux denim finish. CLICK HERE to see a similar finish I did on a bench.
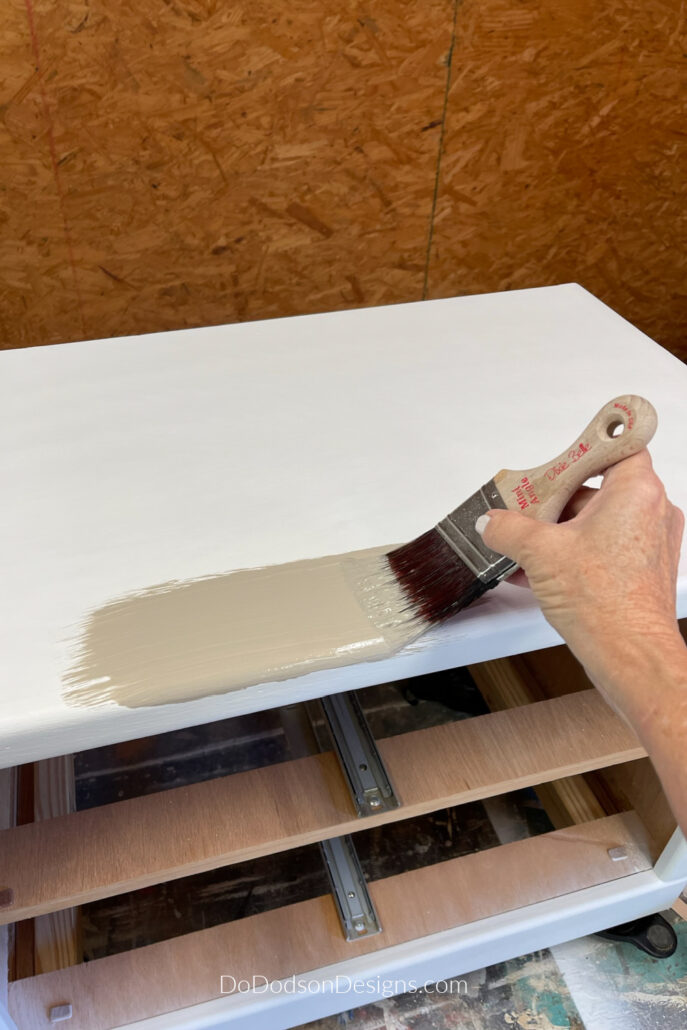
STEP 3: Apply one good coat of the paint mixture over the base (white primer) with a paintbrush or roller. You’ll need a fairly thick coat of paint for the best results.
I opted to brush it on with my paintbrush, but in hindsight, it would have been better to use a roller for a more even distribution of the paint color and to prevent brush strokes.
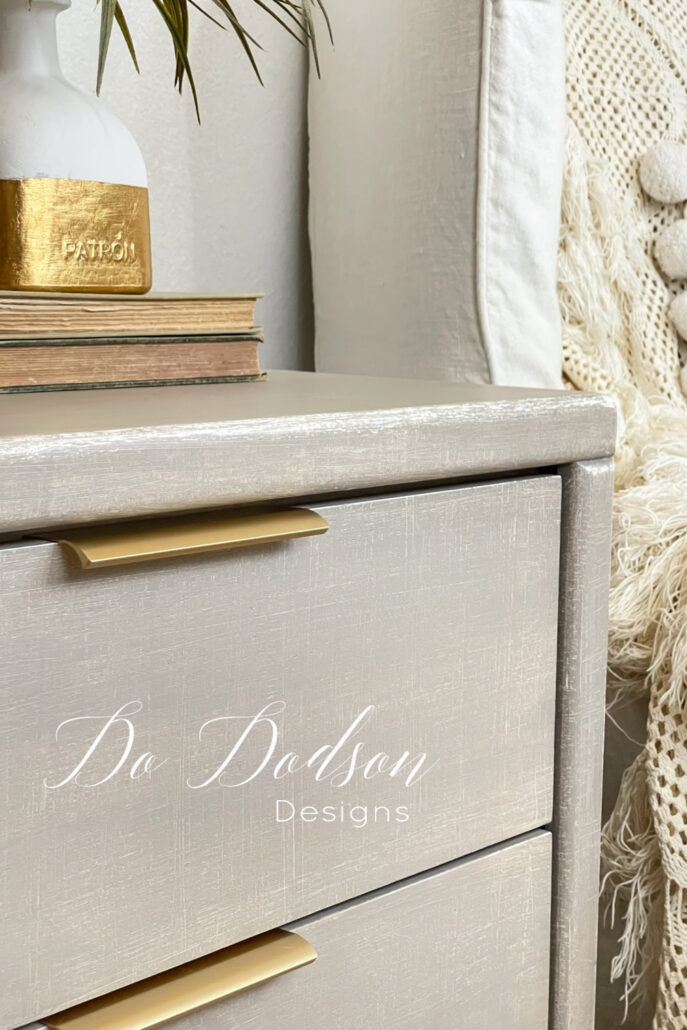
The Strie Technique
Strie is a French word that means striate or stripe. It’s a French glazing technique.
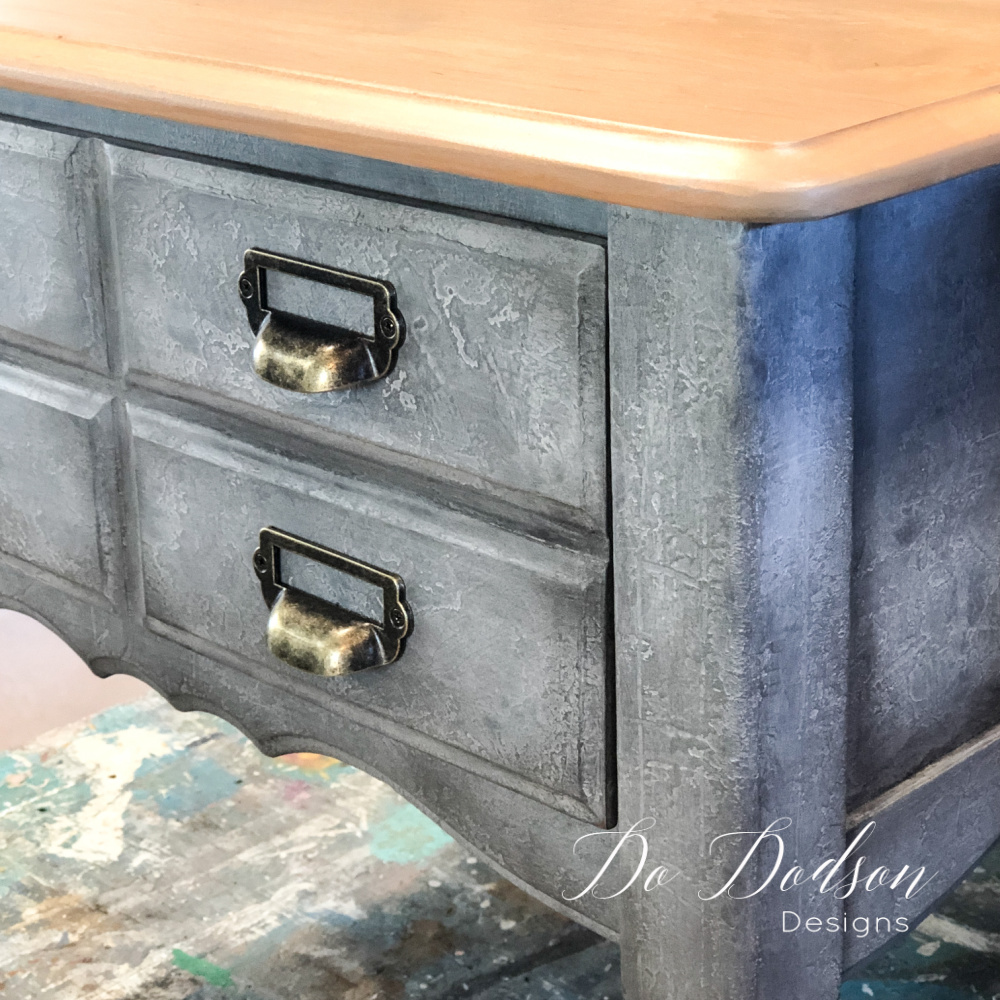
This dragging technique creates the appearance of a cloth fabric with a striped or streaked appearance. It’s a rather unusual pattern for furniture but simple and sophisticated. I think it looks great, but keep in mind that the finish will look irregular if your surface isn’t smooth. All imperfections will stand out like a sore thumb.
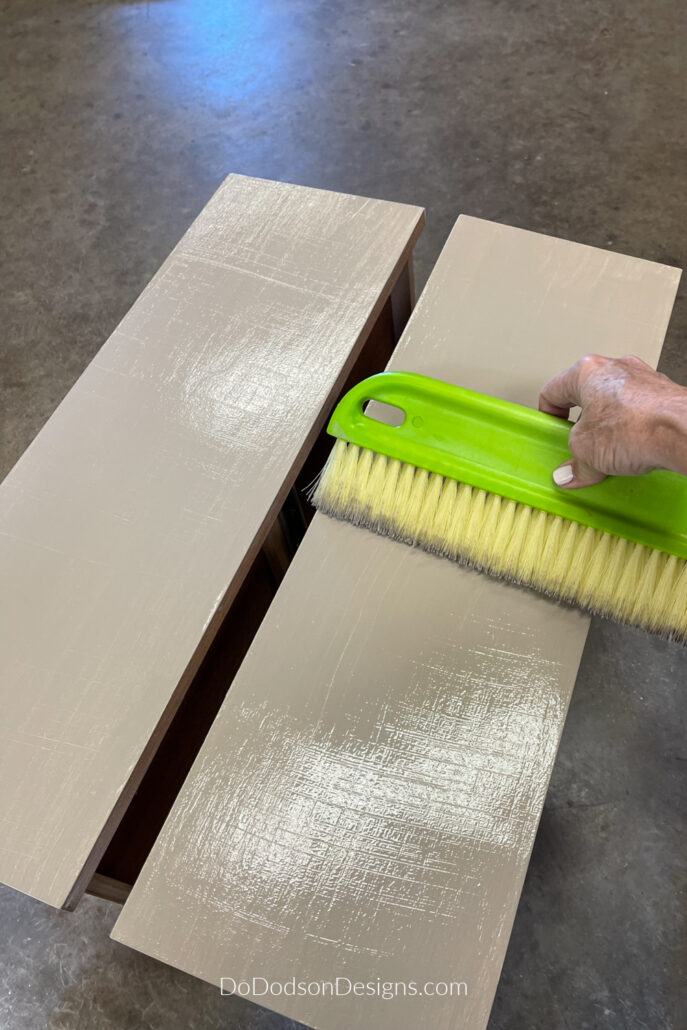
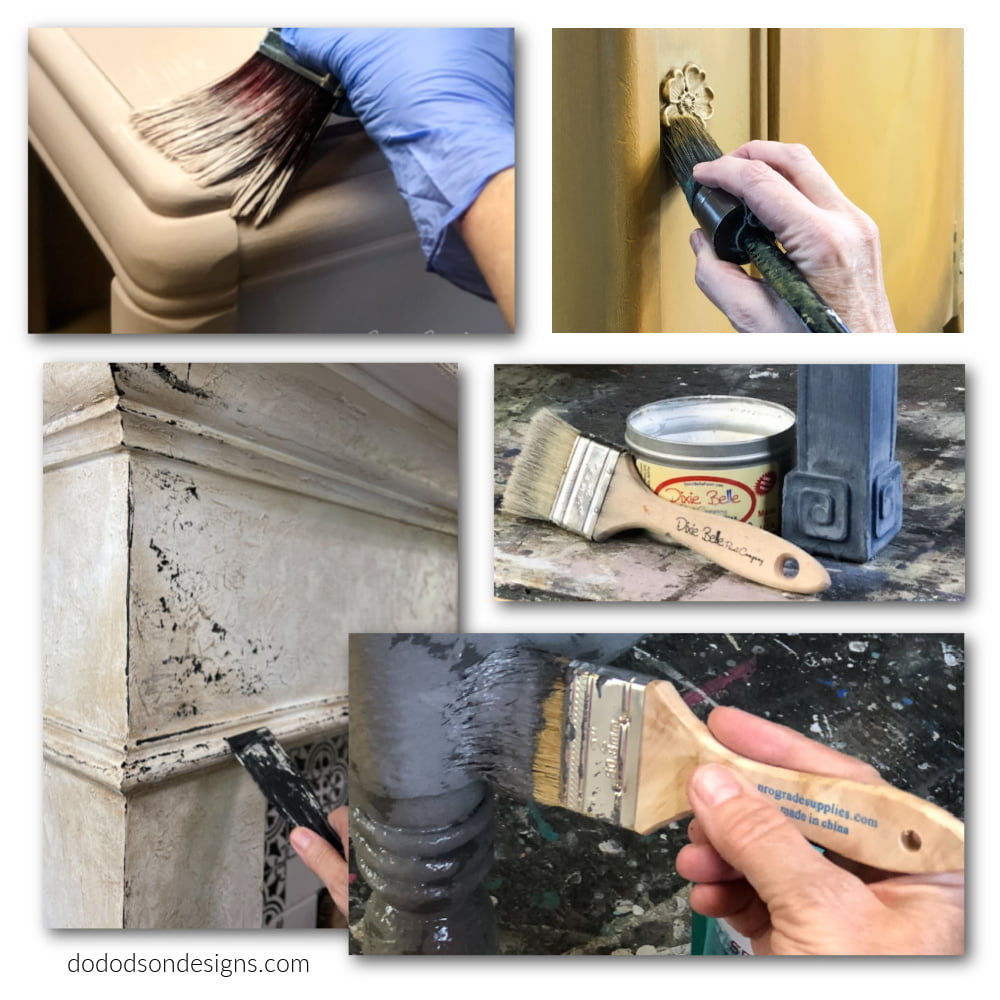
STEP 4: Using a stiff bristle brush, drag the wet paint glaze over the surface from one end to the other in a single motion on the first pass. You will notice that the bristles on the brush will pick up paint while dragging through the paint. Have a rag ready to wipe the brush and remove the paint.
The second pass will be in the opposite direction, creating a cross pattern that resembles a raised fabric with a white background that gives this pattern depth.
Continue dragging the brush over the paint, wiping away the excess on the brush until you get the look you want. You’ll need to work quickly because, after a few minutes, the paint will start to dry. Adding the medium to the chalk paint does extend the dry time, but you only have so long.
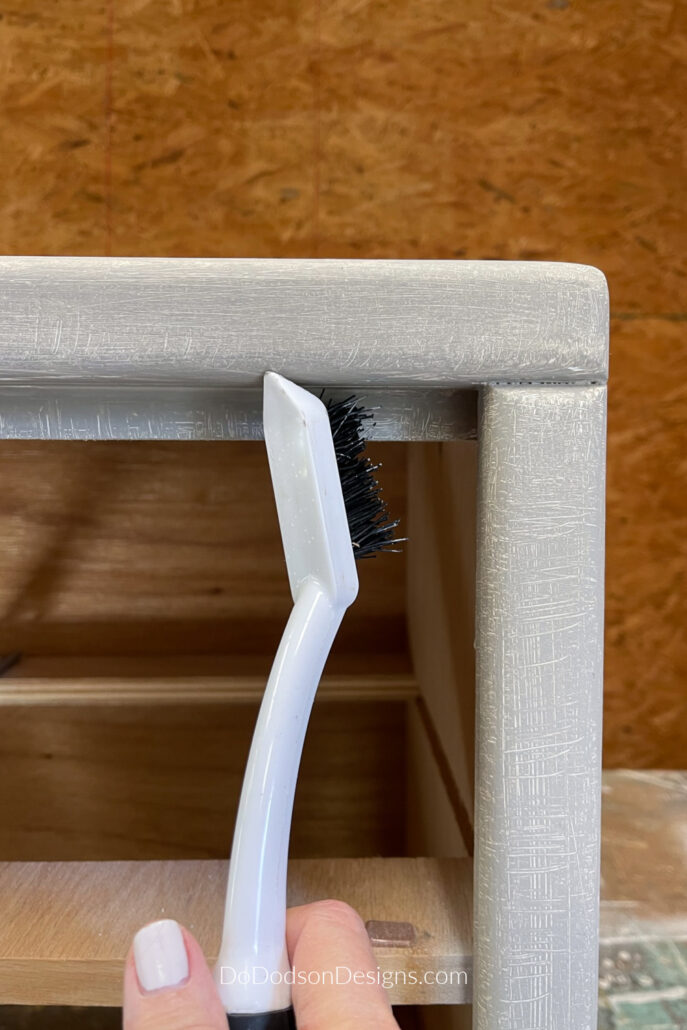
I also used another smaller brush I found in my stash. It worked perfectly in the smaller areas where, the larger one couldn’t reach.
* TIP When doing this technique for the first time, do the sides of the dresser first and the drawers last. I got better with the technique as I went, so doing the drawers last was a good thing. Also, lining the drawers up together will help give you a uniform finish when using this faux linen paint technique.
Protecting Your Faux Finish
Allow the finish to dry completely as least 24 hours.
STEP 5: You will need to apply a protective finish for protection and added durability, especially if your project will be susceptible to high traffic. Apply 1 -2 coats of a water-based topcoat.
I used wax varnish as my topcoat. Apply the first coat evenly and allow it to dry. The same with the second coat. It will dry to a smooth and durable finish.
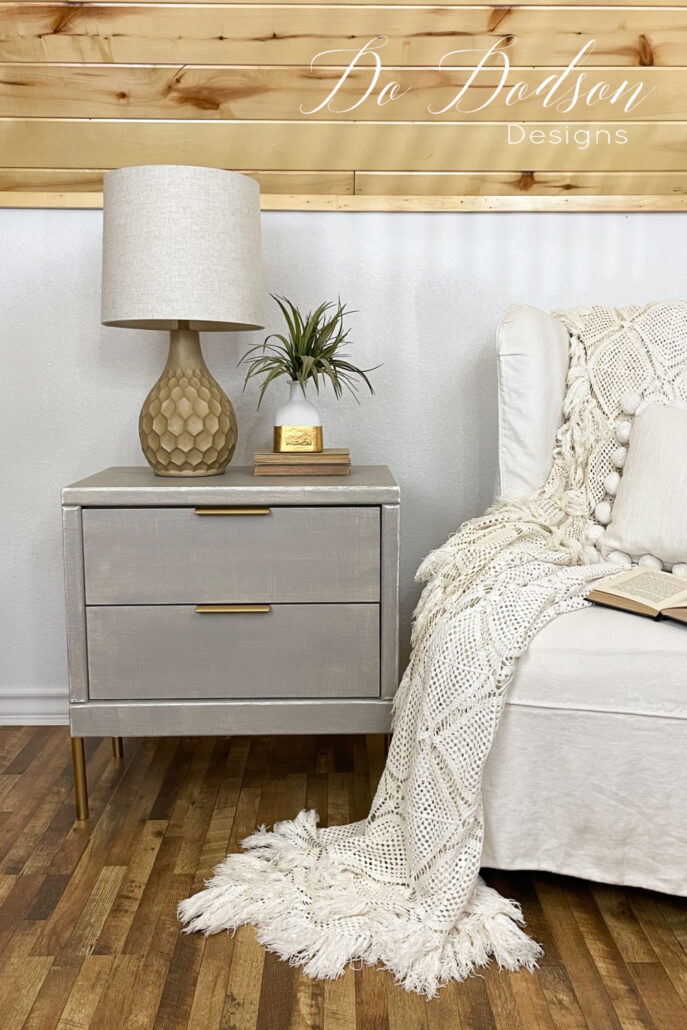
Faux Linen Paint Technique Results
What can I say? Is it perfect? no, but it is organic and very appealing. I learned a lot doing this finish, and the biggest takeback was that I should have used a roller to apply the paint mixture for a more even coat. Using a paint brush wasn’t the best method and caused the paint to be streaked in some areas, mainly on the sides. I’ll know better next time.
Thanks for joining me today as I share my experience with this faux linen paint technique. When you master it, it’s a beautiful look. We don’t learn by not trying, and I love sharing my lessons with you.
As always, I love hearing your feedback. Please share your thoughts in the comment section below or say hello so I know you stopped by.
Have a great week, and as always, happy painting!
Until the next project… xo, Do
I think it’s beautiful. If there are imperfections, it actually goes with the style. We always know where we made mistakes, but others almost always never even see them. Thanks for the tutorial!
You are so very correct, Kim. Our imperfections are rarely visible to most. It’s something I work on inside myself. It’s good to know I’m not alone. THanks for reading. 🙂 xo
Happy Saturday my friend! Your faux linen finish looks amazing Do! … and thanks for the shout out, much appreciated! 🤗💙🤗
Thanks, Denise! Once again, you inspired me to try this, and I’m glad I did. 🙂 xo
Where did you find the cool drawer pulls and legs for this piece?
Hi Melinda, I’m so sorry.
I totally missed adding the links. I went back in and added those to the products list in the blog post. Just a side note, the gold on the legs didn’t match the handles, so I spray-painted them to match. It was the only way to get a cohesive look. 🙂 Thanks for reading.
I love the look of the faux linen finish. This piece turned out beautiful. It is amazing what you can do with paint. Now I need a piece to try this technique on. Thanks for teaching us something new.
Glad you enjoy this technique, Tammy. It’s a bit of a challenge if you’re a perfectionist. 🙂 xo
Lovvve this upgrade and finish!
Thank you, Cletia! Wishing you and your family a beautiful Christmas. 🙂 xo
I love your paint technique, you are doing it so well. I learn so much since I joined your e-mail . Thank you Donna.
Hello there! I’m so happy you are enjoying my tutorials. 🙂