
Hey, fellow crafters! Have you seen the trending Michael’s spackle ghost art painting? I jumped all over this one, and I know you’re going to love creating this fun Halloween wall art, too. I felt like I was back in fifth-grade art class all over again.
Thanks to Dixie Belle Paint Co. for sponsoring this post. While I was compensated to write this post, all opinions are my own.
* As an Amazon Associate, I earn from qualifying purchases and through other companies as well. You will not be charged extra when you purchase through these affiliate links, but any income I make helps me create more amazing DIY projects to share with you! To see my full disclaimer, click here!
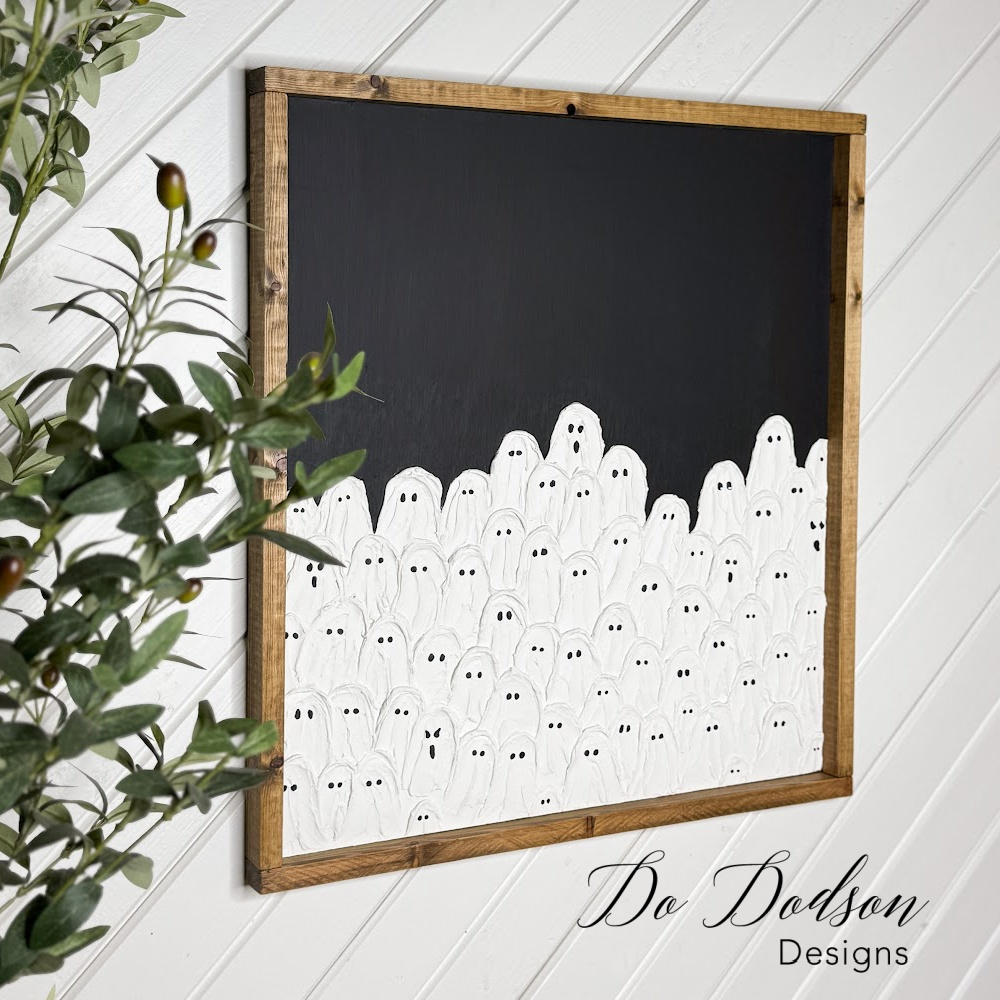
Michael’s Halloween Painted Ghost Wall Art – Dupe
Give me a good Halloween art dupe and I’m all over it! Especially with Michael’s painted Ghost wall art. I fell hard for this one, and I’m so making this! I was thinking this would be pretty easy, and I was right.
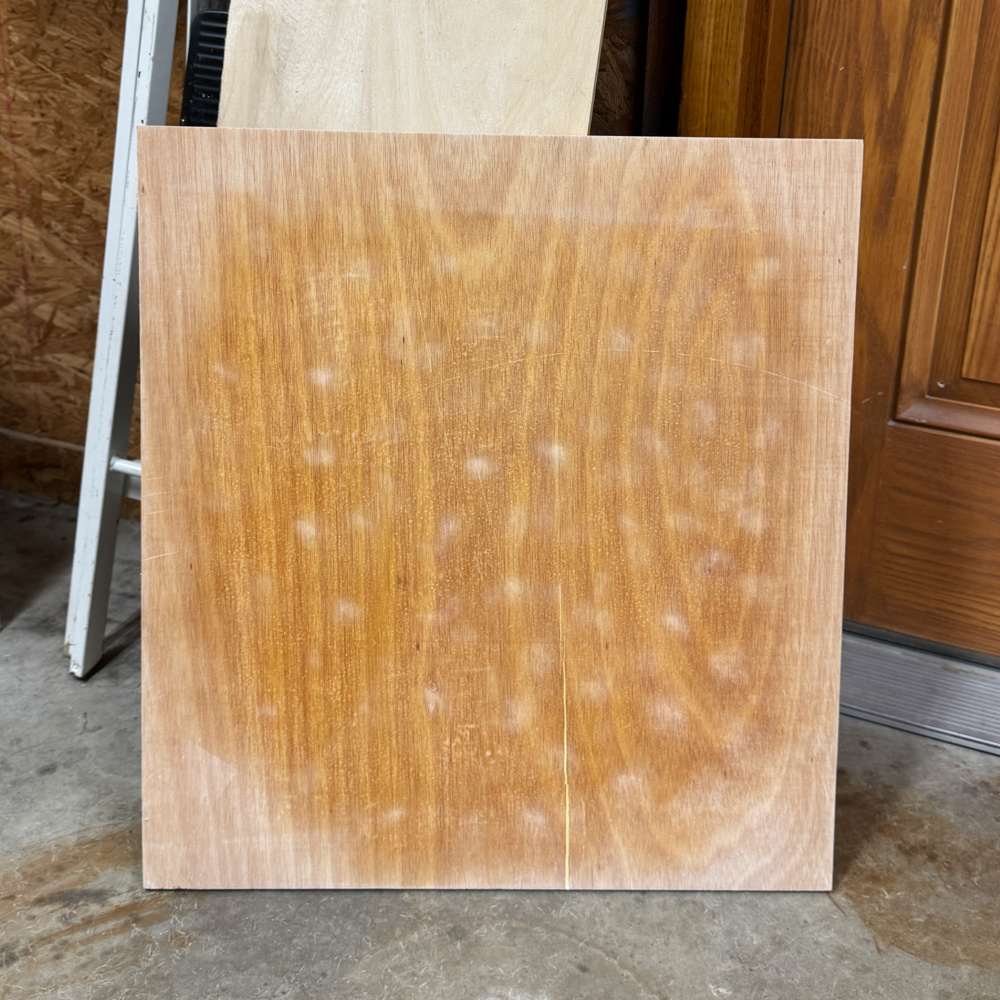
So, off to my favorite place for some scrap wood. I found this 1/4-inch piece of plywood, measuring 22 inches by 24 inches, in my stash. This was perfect for a wall hanging or could even stand alone above a fireplace. Too bad my hubby has a TV above ours. No worries, I have a wall.
You could also use a canvas, which would also work well for this DIY painted spackle art ghost project, but I used what I had on hand.

Supply List:
Here is what you’ll need to make a spackle art ghost painting.
- plywood 22 x 24 inch (scrap wood) or canvas
- wood sander (my preferred sander)
- spackle (1/2 pint)
- craft sticks
- paintbrush
- artist brushes
- Anchor SILK All-In-One Mineral Paint (background)
- Elderflower SILK All-In-One Mineral Paint (ghost)
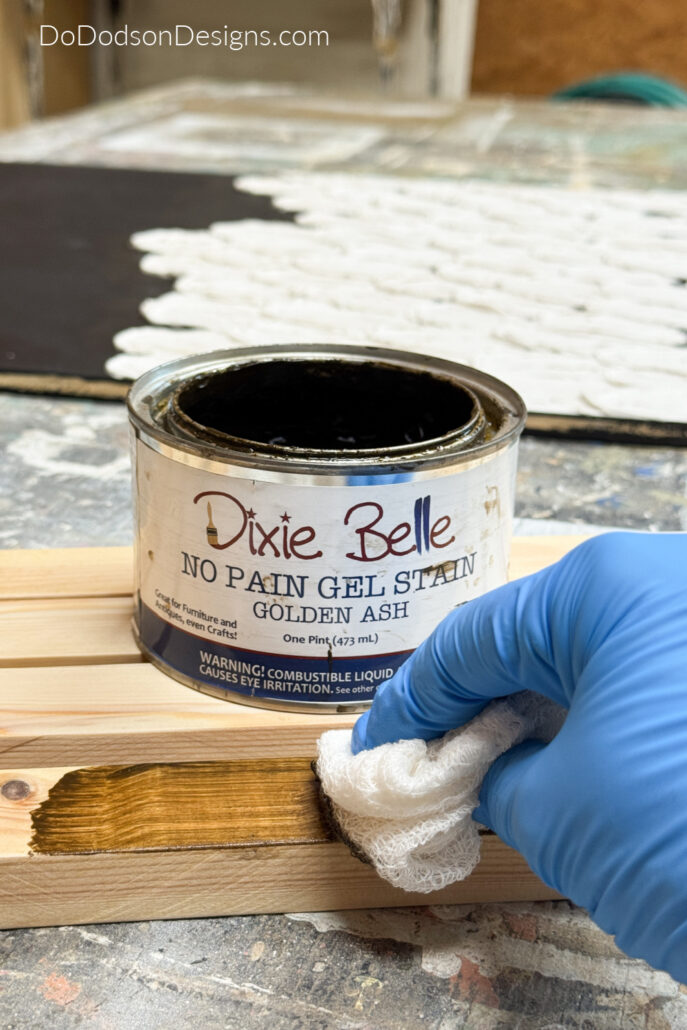
- Golden Ash No Pain Gel Stain (for the wood frame)
STEP 1: Prepare The Wood For Paint
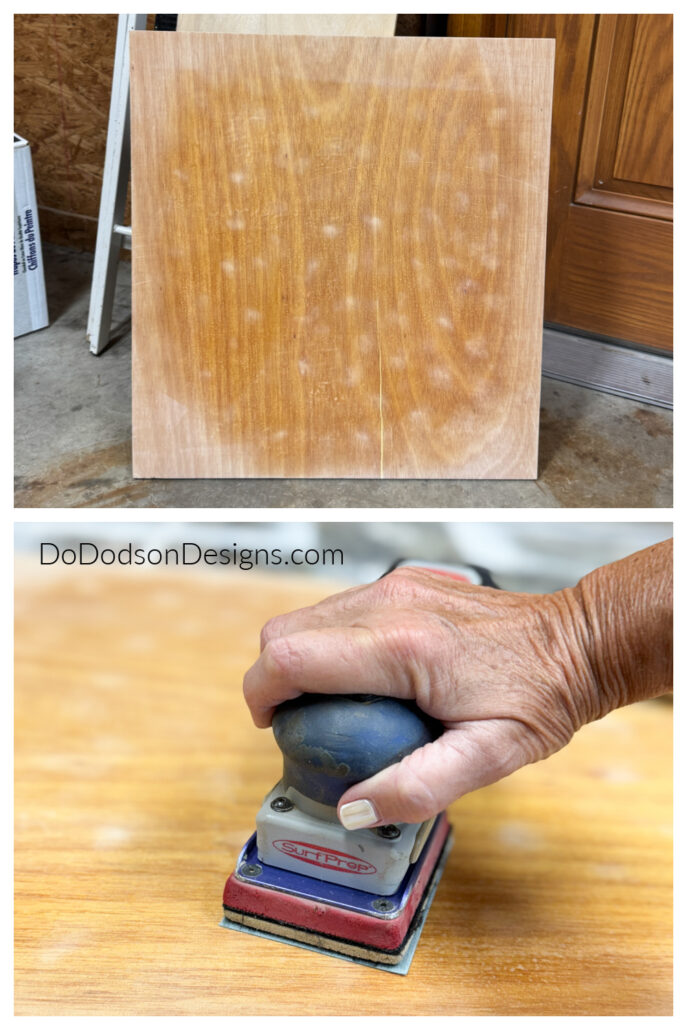
After choosing my wood, I sanded it smooth on both sides with 220-grit sandpaper with my Surfprep Sander. You could totally sand it by hand, but an electric sander is way faster!
Then, once the plywood was smooth, I vacuumed off the wood dust with my shop vac. You can also use a soft broom to brush it away or blow it off with an air compressor if you’re working outside.
If you can’t tell from the picture, I had already used this piece to spray paint other items. Actually, I used it to spray polyurethane on dried acorns for Fall decorating. CLICK HERE to learn how to preserve those little Fall cuties to decorate your home this season.
STEP 2: Painting The Background Black
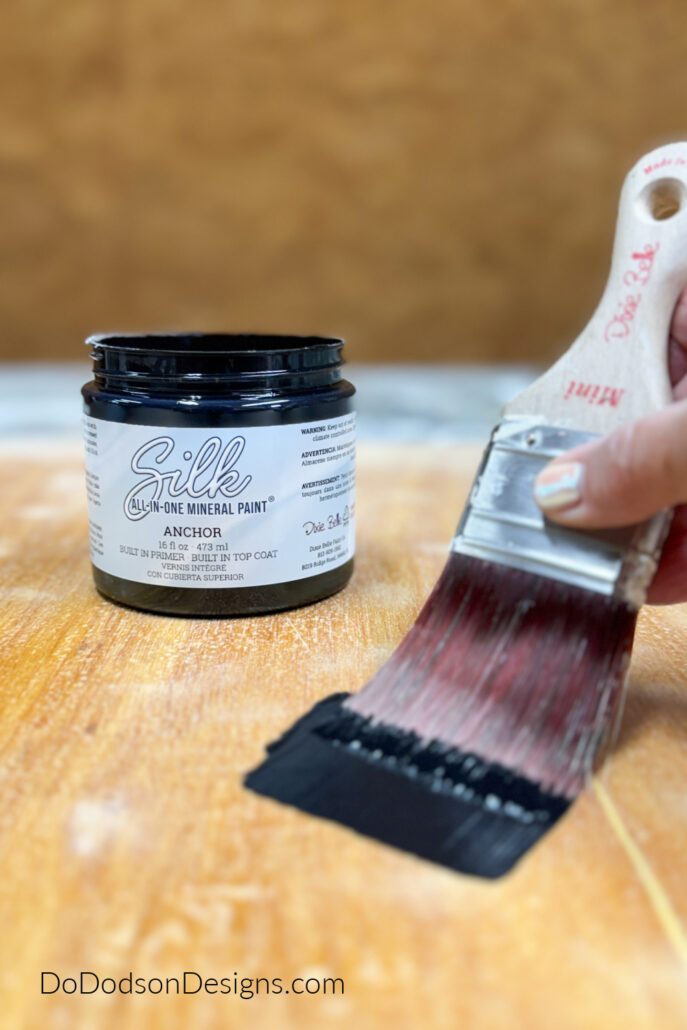
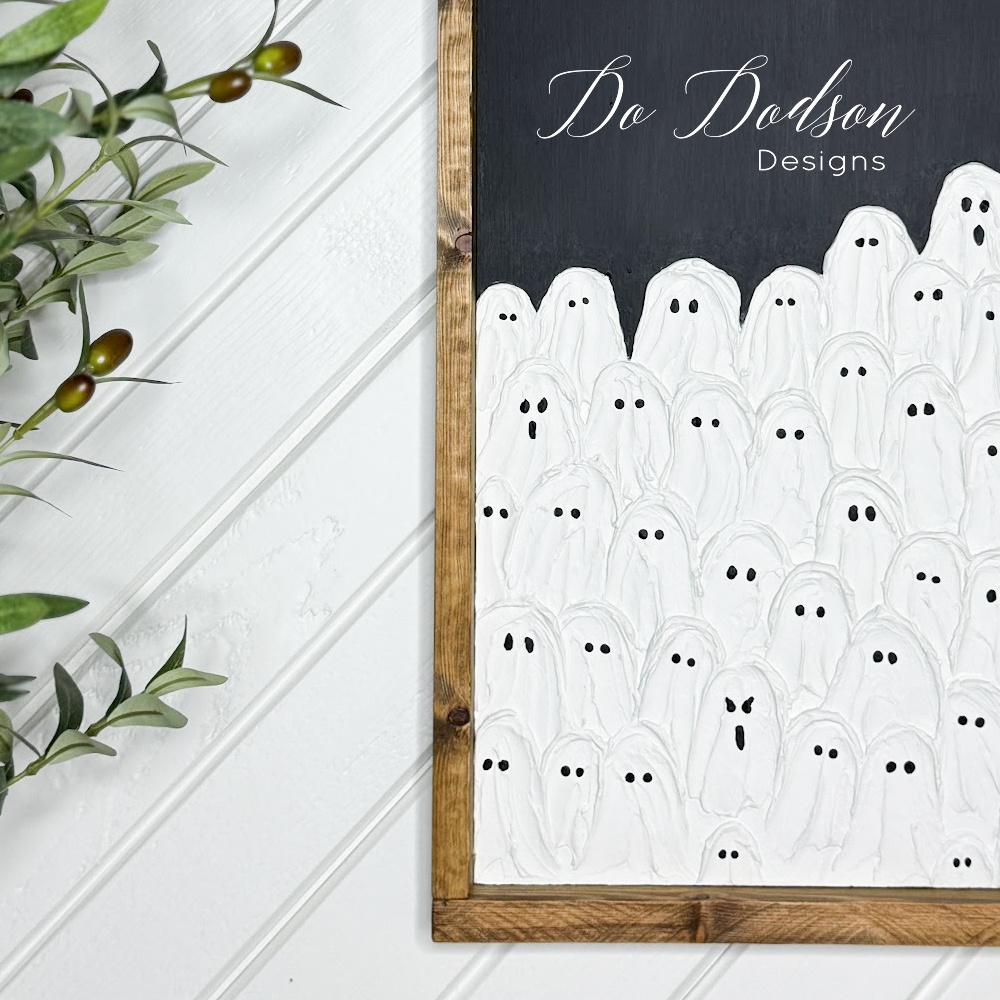
Okay, before we start messing around with the spackle to make those adorable little white ghosties, we need a black background. It adds depth to the painting and will make the art ghosts pop!
I went with this gorgeous, rich black from the SILK line by Dixie Belle Paint Co. It’s called Anchor. It’s an all-in-one paint, primer, stain blocker, and topcoat, all rolled into one!
I painted two coats, allowing ample dry time between each coat. This ensures a smooth, even finish and helps the paint adhere properly.
STEP 3: How To Create Spackle Art Ghosts
I read a lot of tutorials on how to best make these ghosties, and what I decided on was the ready-made spackle. DAP DRYTEX heavyweight spackling for drywall repairs that won’t shrink or crack, which is precisely what I was looking for. And it’s cheap enough at about five bucks for a 1/2 pint! It goes a long way.
I’m not all about mixing up plaster, paint, and glue. That was one recommendation, but it sounded too messy to me. NOPE
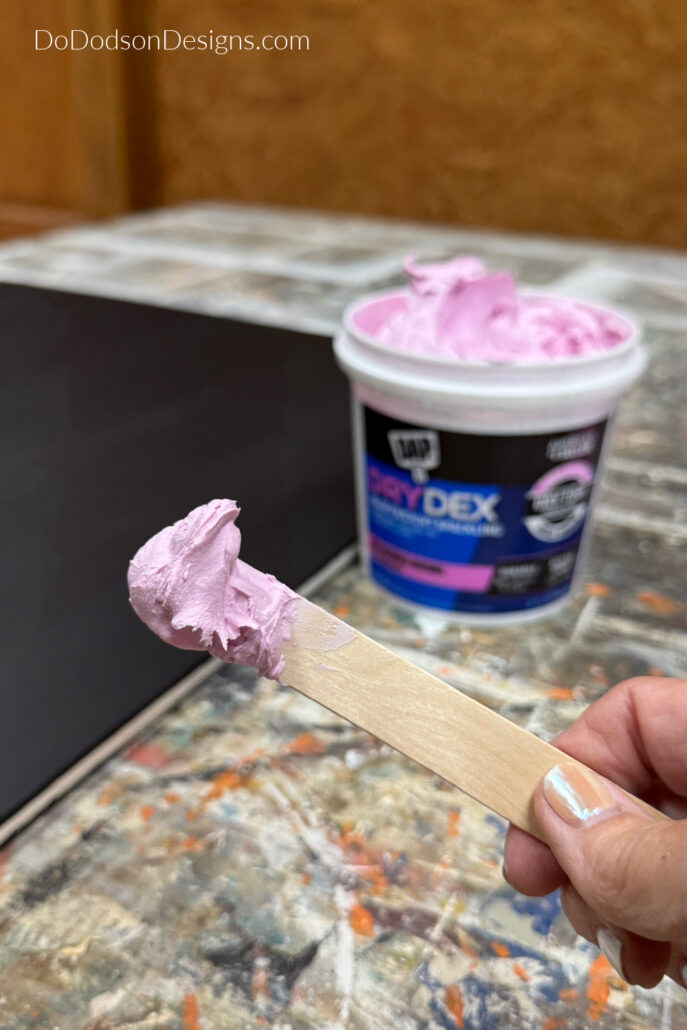
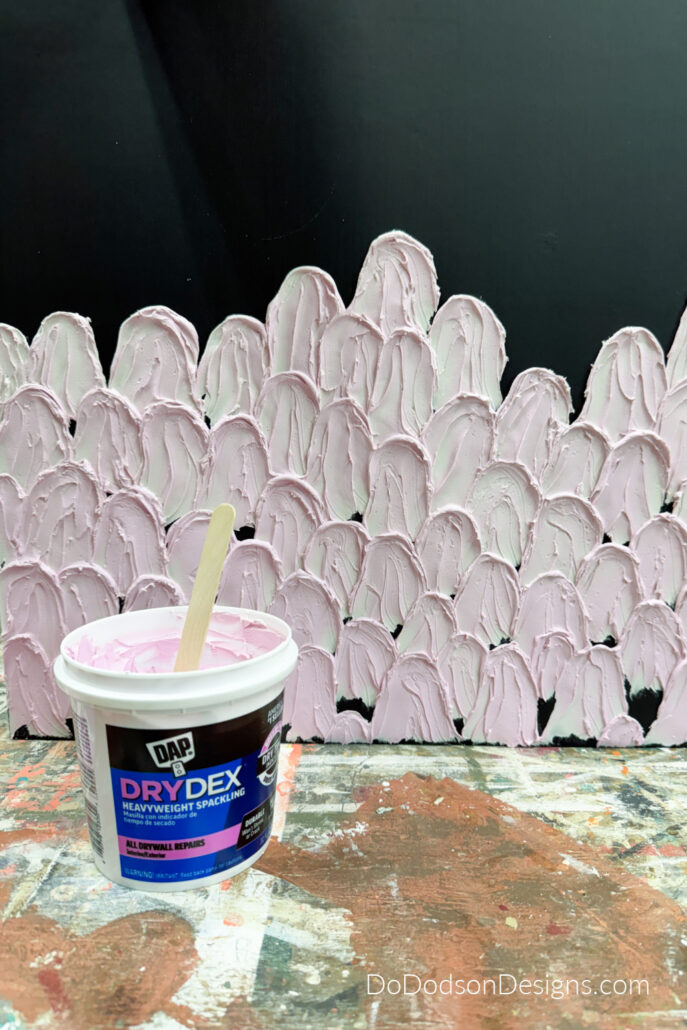
To make the spackle art ghosts, I used a craft stick and literally painted them on. It goes on pink and it dries white.
I started with the first ghost in the middle of the board and worked my way from the sides to the middle. Overlapping is key to getting that stacked look.
Don’t worry about the lines on the ghost; I think it adds character. It gives the appearance of lines on the ghost’s sheet. More depth!
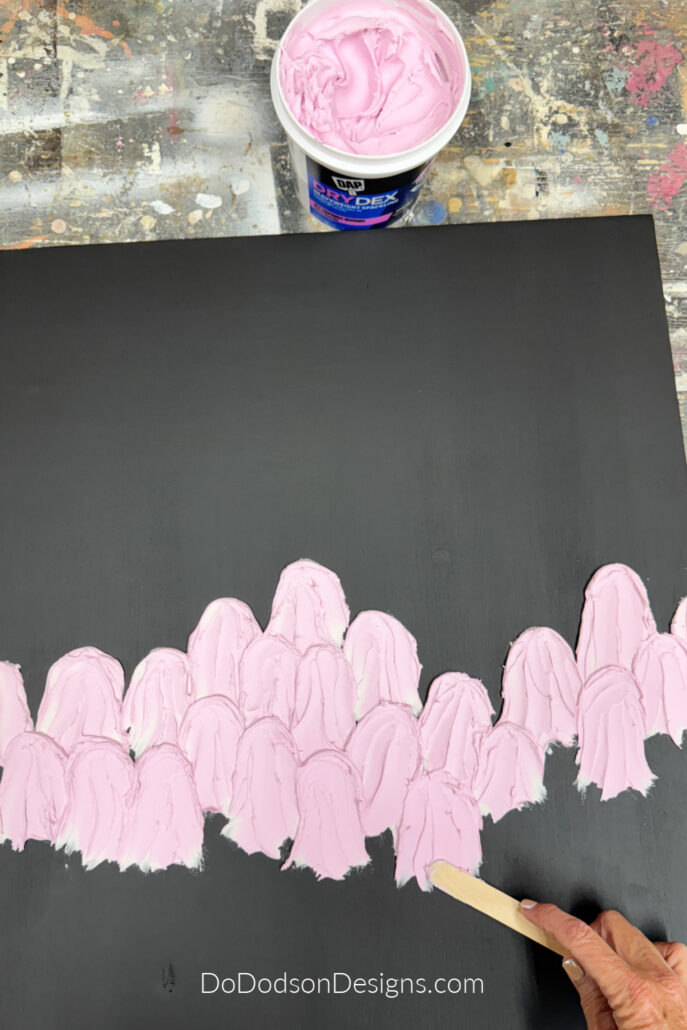
Use more at the head and less as it tapers downward. The transition is everything! Allow the spackle to dry overnight.
I felt like I was back in art class with Mr. McGowan (Art Teacher) in 5th grade. I hope you had a Mr. McGowan, too! He was such a cool teacher who always encouraged us to think outside the box. I’ll never forget him. I was the teacher’s pet. 😁
*While writing this post, I got distracted and decided to look for Mr McGowan. That was a rabbit hole! Have you ever looked up an old teacher? I didn’t find him. The year was 1973, and it’s doubtful he is still with us.
Wherever he is, I hope he’s painting something beautiful. ❤️🎨😊🖌️Perhaps he’s painting happy little clouds.
STEP 4: Painting The Spackle Art Ghosts
The next day, before painting the spackle, I used a soft-bristle paintbrush to knock off any stiff and or loose bits from the dried spackle.
The spackle is durable enough to rub lightly, but avoid using anything abrasive to smooth it off.
Next, you need to seal the (spackle) drywall. You can do this in several ways. Paint and apply a sealer over the paint, or use an all-in-one paint like SILK by Dixie Belle Paint Company.
It leaves a matte finish that’s not shiny while sealing the drywall, making it durable for artwork.
I only used one thick coat of this paint since it’s an art project. The spackle was white, so I didn’t think it was necessary for a second coat.

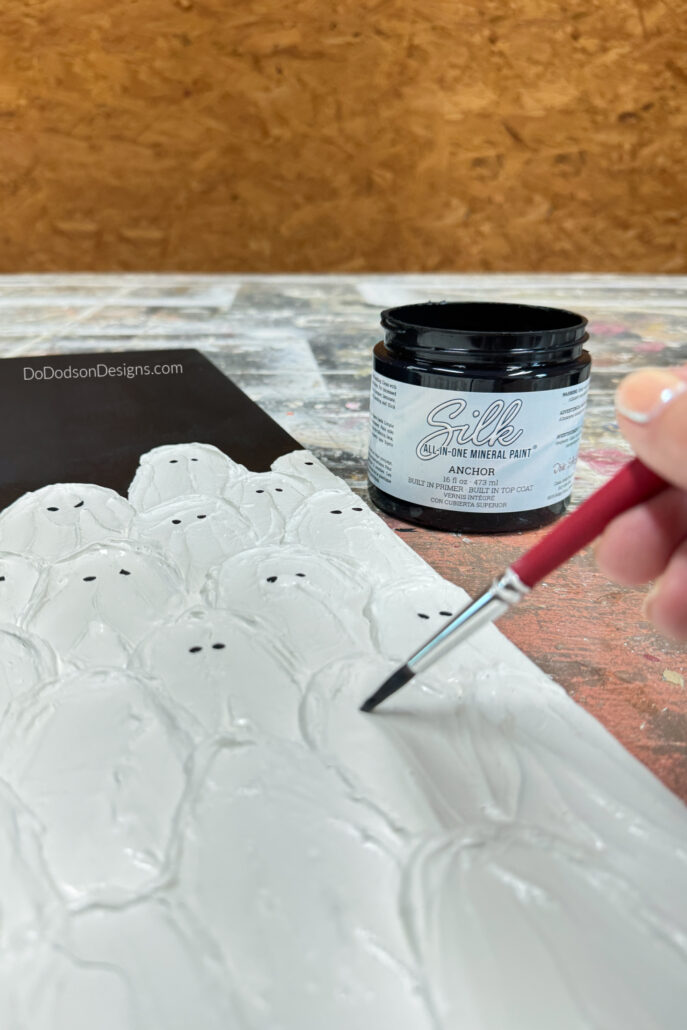
STEP 5: Painting The Ghost Eyes
I used the same black paint from the background and artist brushes to give each ghost its own unique look, complete with eyes. I even threw in a few with open mouths – for some extra spooky fun!
STEP 6: Adding A Wooden Frame
While I was waiting for my ghosties to dry, I measured my Art board for a DIY wooden frame. Black, white, and a wood frame! What could look any better than that for this neutral, spookily cute wall art?
CLICK HERE to view the easy, step-by-step tutorial on how I created it and how it enhanced my plain canvas for my family gallery wall.
More Ghostly Creative DIY Projects
Since I love sharing, I put together some more spooky DIY project ideas below to help you decorate your place for Halloween, too!
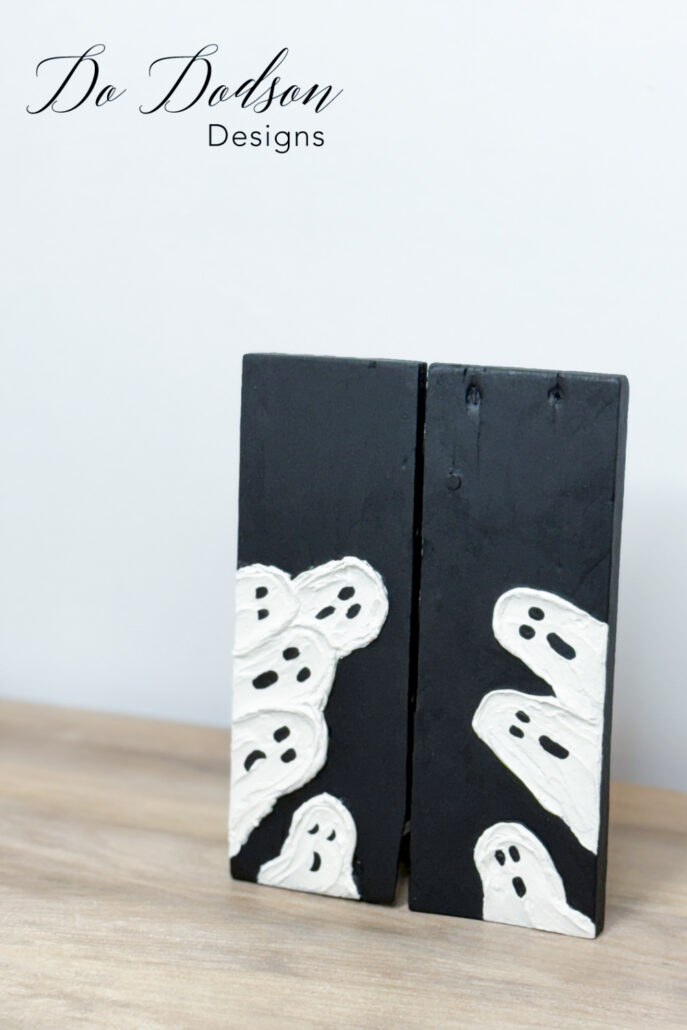
Michael’s DIY Ghost Painting Dupe
I’m totally feeling a Mr. McGowan vibe; the artist in me is strong today!
So much fun, I had to make another one! I grabbed some more scrap wood pieces, glued and nailed them together from the back, using two wooden cross pieces. I even left a few nails that were buried in the front side of the wood and painted over them. I’m a savage.
This one’s going in my kitchen – always wanted a kitchen ghost!
So, what do you think about this spackle art ghost painting? Is it doable for you? Please let me know in the comment section below, and don’t forget to hit the share and PIN buttons to save it to your favorite Pinterest Fall board so you can find it later.
Thanks for hanging out today! There are tons of ways you can use spackle to make your own wall art. It’s not just for ghosts, ya know!
Until the next project… xo, Do
So do-able and adorable! And this spackle art ghost painting looks soooo FUN, lol! Have a wonderful long weekend, and thanks for sharing your creativity my friend! XOXO
Thanks you my friend! I could do these projects all day long. I do enjoy decorating this time of year. Enjoy your long weekend too. I hope you’re doing something fun. 😘 Do