

Hey, creative friends! I may be a bit obsessed with vintage lockers, but I couldn’t help myself when I stumbled upon this magnificent reminder of old-school memories. Recently I overhauled my laundry room and incorporated a set of lockers for my broom closet, and ever since then, I have noticed more and more of these nostalgic finds. Today, I’m sharing how I made a few simple changes and made someone else’s idea my own.
Estimated reading time: 7 minutes
* As an Amazon Associate, I earn from qualifying purchases and through other companies as well. You are not charged extra to use any of the links I share, but any income I make helps me create more amazing DIY projects to share with you! To see my full disclaimer, click here!
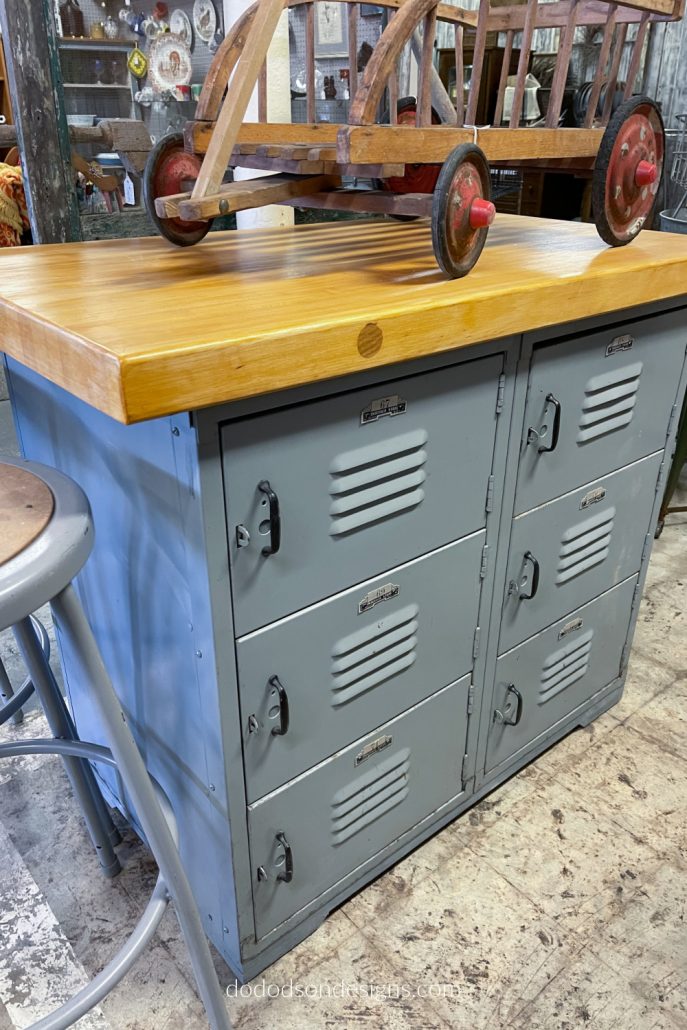
Repurposed Vintage Lockers – Butcher Block Top
All I wanted was something small to flip. NOT SMALL! And by all means, not even in my budget. But, I had to have it.
This happens a lot when I visit my favorite “treasure store” to browse in our small town. One of the things I love about thrifting in our small Flea Market Town in Canton, Texas, is that almost everything is negotiable. Well, at least it is in my little town. So, the deal was made, and the vintage lockers came home with me. And I knew exactly what I wanted to do with it.

Gather Your Supplies
- SurfPrep Sanding System (Use my discount code DOIT10 to get a 10% discount)
- drill
- furniture wheels 4 pack
- hemp oil
- Plastic Bag
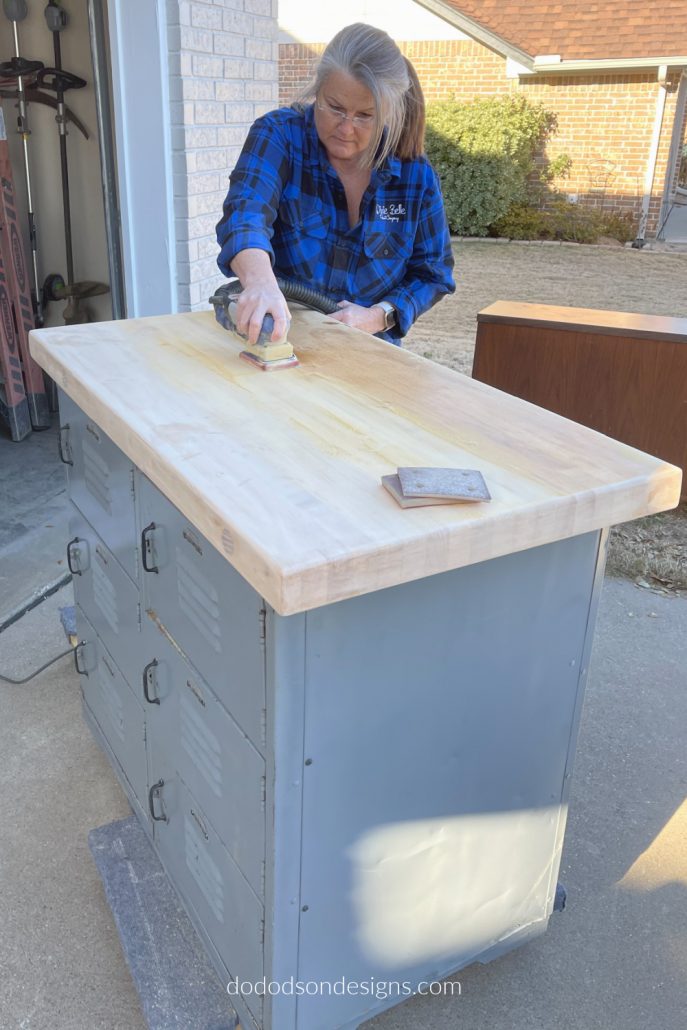
STEP 1: Restoring The Butcher Block Top
There were only 2 things that I wanted to change with my new (new to me) vintage lockers. The first thing was to restore the butcher block top. It had been previously sealed with what looked like a varnish, which had a glossy finish and would have to be removed first.
But, I didn’t want to use a harsh chemical to strip the old varnish away on the butcher block top, so I opted to sand it off with my SurfPrep Sander. My favorite tool in my arsenal, and I don’t know what I would do without it, and I give it a GOOD workout every time I turn it on.
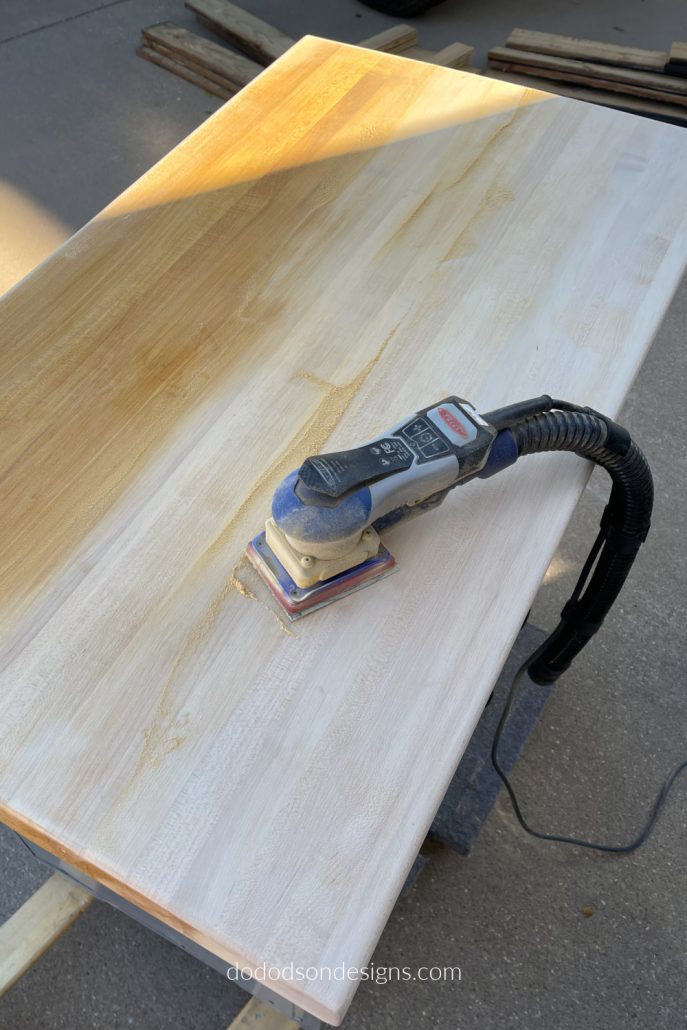
STEP 2: Refinishing The Butcher Block Top
After the old varnish had been stripped away, I gave the butcher block top a light sanding with a fine-grit sanding pad. Afterward, I removed the dust from sanding with a damp cloth and allowed the wood to dry.
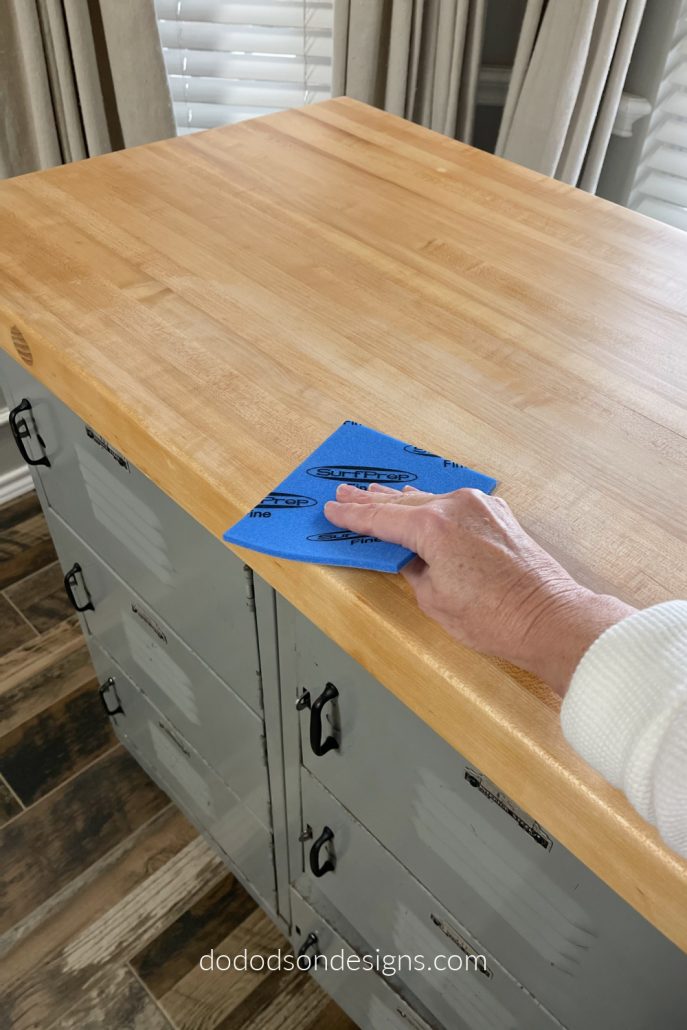
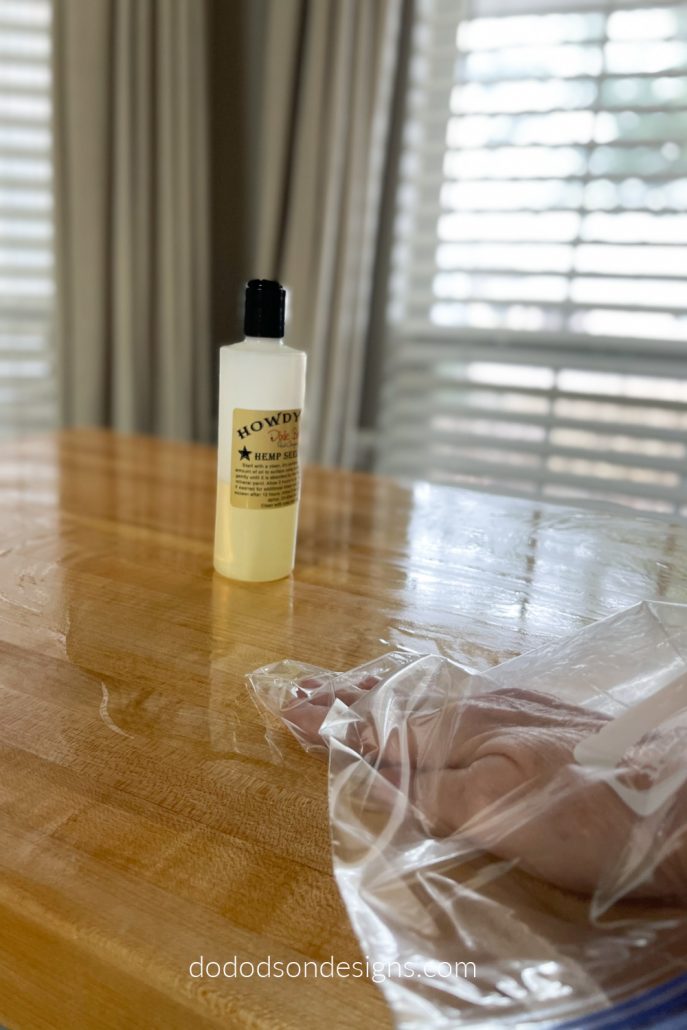
TIP ALERT! I used Hemp Oil to restore the butcher block top on the vintage lockers. It’s tough, durable, and food safe… not for consumption, but safe for your wood creations, wood utensils, and wood countertops. Here’s how I DO it.
Time needed: 4 hours
How To Restore Butcher Block With Hemp Oil
- Apply A Good Quality Hemp Oil
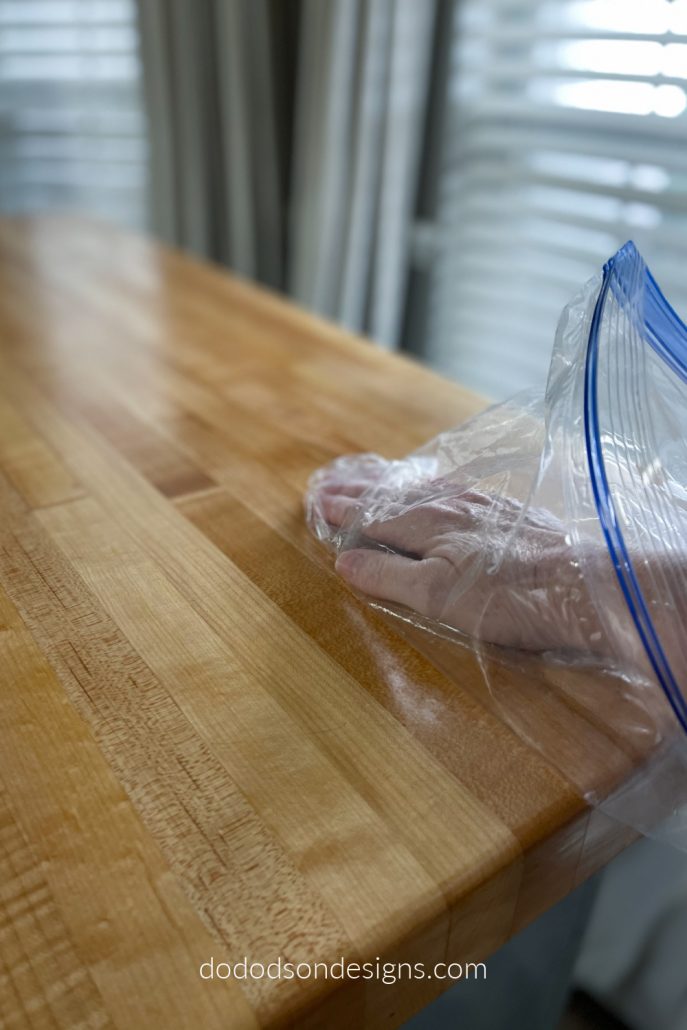
Use a plastic bag to protect your hand and rub, rub, rub the hemp oil in the butcher block until it’s all absorbed in. The plastic keeps the hemp oil right where it needs to be, on the wood, and not an applicator. Less waste. This took about 30 minutes, but it can depend on the dryness of the butcher block. Mine was really dry.
- Do It Again! Apply Multiple Coats
Repeat the first step and allow to absorb and dry. You can repeat this step 2-4 times until you get the finish you want. Wipe away any remaining Hemp Oil with a soft cotton cloth. It will take about 30 days for the Hemp Oil to cure fully, so go easy on the butcher block during this time. I also took the opportunity to work on my cutting boards and wooden utensils while waiting for the oil to absorb and dry.
* Hemp Oil will slowly wear away over time and should be reapplied to your butcher block about every 2-3 years to keep them durable and beautiful. It’s food safe

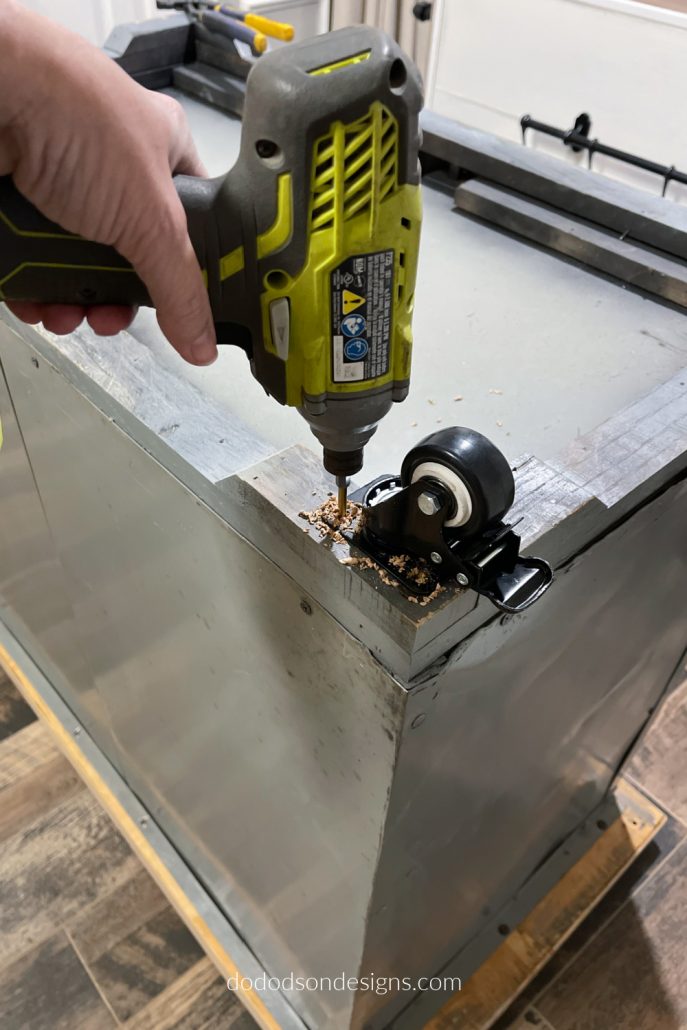
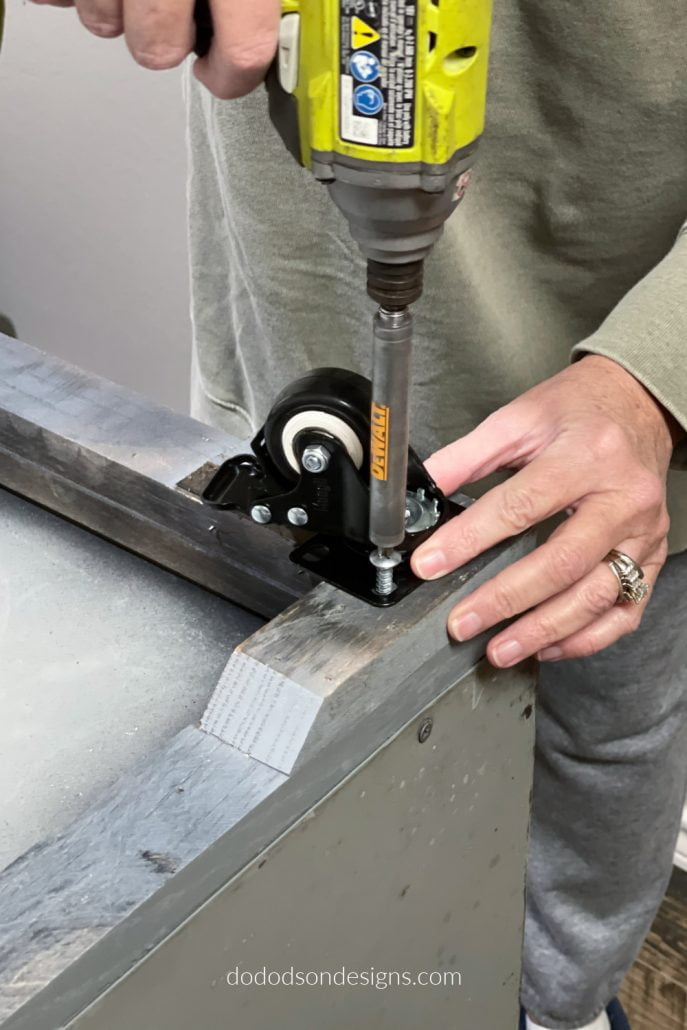
Adding Wheels On Vintage Lockers
The last thing I did to my vintage lockers were to add furniture wheels. Because old school lockers’ base is typically wood, it’s easy to add them with minimal effort. The only effort was flipping the lockers over. UGH! Thanks, Mr. Honey Do.
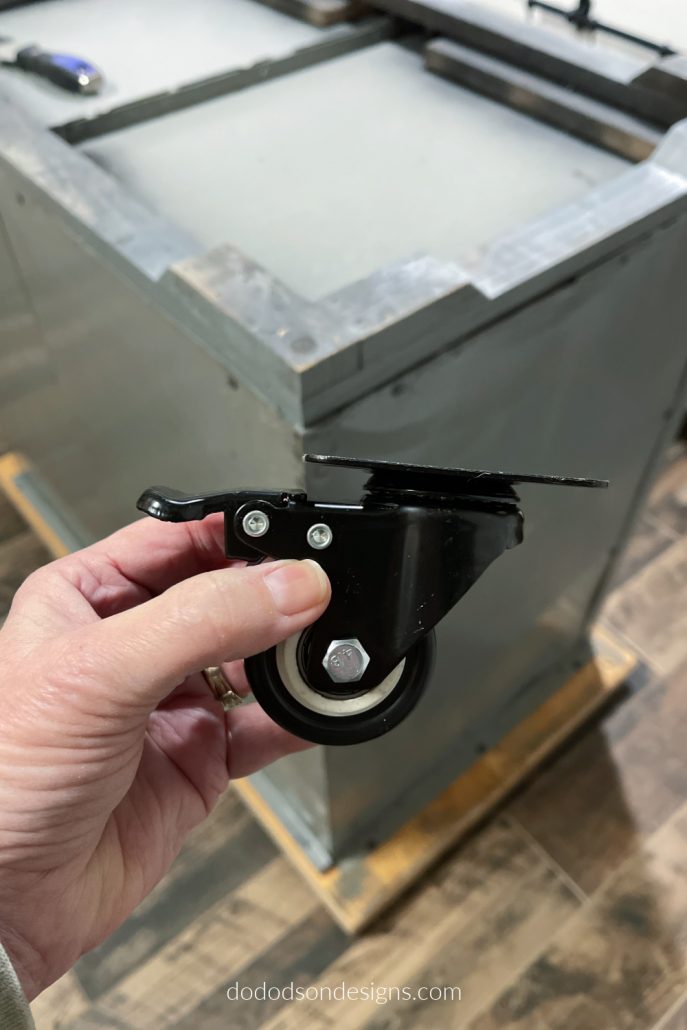
The furniture wheels I chose are rated for 600 lbs. total capacity and have locking mechanisms. This will ensure that it’s easy to roll around and lock in place when not in use. I also love the idea of being able to move the vintage lockers for quick and easy cleaning underneath them. Dang, those dust bunnies!
Repurposed Old School Metal Vintage Lockers
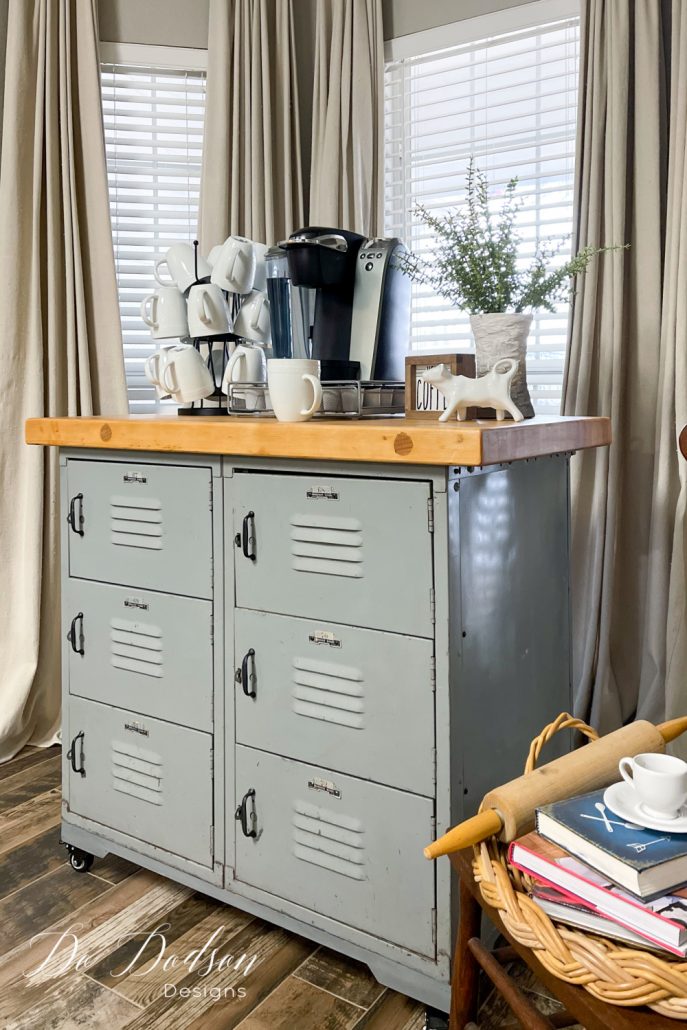
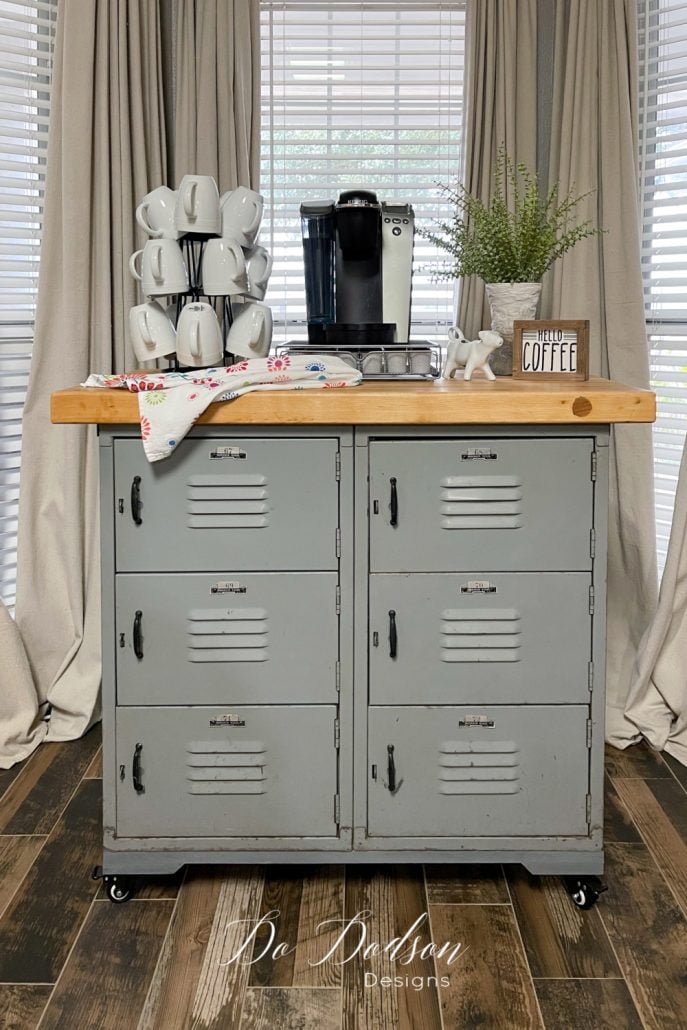
Gosh, I love this makeover! Especially when I get to open the doors on my vintage lockers. I feel like a school girl when I hear that metal clanging together. 😁 Oh, the joy it brings me every morning. I’m not sure what it is about the industrial look, but it grabs my attention and heartstrings. If I could, I would save them all.
Thanks for joining me today, and I hope my vintage locker project inspires you DIY with these fun finds. What would you have done with these lockers? I’d love to get your feedback and always welcome your comments.
Until the next project… xo, Do

Hello Do Dodson! I hope you are doing well and keeping warm. The weather is just crazy everywhere. Raining here in Florida, but warm. I love lockers. If I ever came across some I could afford I wouldn’t know what to do with them, but like you, the industrial pieces just grab my attention. So this piece already had a butcher too on it? What are the odds?!?. I love it!!
Hi Cheryl, Thanks! It was a great find. But it’s not hard at all to add them to these lockers… if you have the right tools. 🙂 xo
I.LOVE.THESE.LOCKERS!!! I know just how you feel about the industrial look, there is just something so earthy and cool about it! I would have used it for a coffee station, too. I just love it, DO, I really do!! And the storage behind those doors, Perfect!
The storage is a bonus too. Thanks, Karolyn. 🙂 I’m a 70’s child! ✌️ Peace out. 😆
First Monday at Canton brings back many happy and interesting memories! I’ve been many times but not since 2016 when my dad who lived in Longview died. I can’t help but wonder how COVID has affected Trade Days but look forward to going again sometime in the future. Thanks for reminding me of happy days!
Hi September,
I can only imagine how hard it has been to lose your Dad. I’m so sorry.
It hasn’t affected the market as much as you would think. The last 2 market weekends have been crazy busy. I guess everyone wants to be outside, and there’s plenty of room for social distancing there. It would be best if you come back in the Spring. It’s the best time, I think. 🙂
I like that, Do! My first thought was that it would make a great little kitchen island. I’d probably want to either replace the top with a larger piece or maybe just add a drop-down extension on each end. It could be used as a baking center too. Then I thought how nice it would be in a craft room. Lots of possibilities. Thanks for sharing.
Thank you, Sharon. My head was running all over the place with what to do with it. Coffee is life! 🙂 xo
Awesome project!! It looks amazing 👍 Ty!!
Thanks, Lily!
Absolutely beautiful 😍
Thank you, Sylvia! 🙂
I LOVE these lockers!! As always you find such great projects!
Thanks, Jackie! 🙂