Hey, creative friend! Looking for a super-easy scrap wood pumpkin project? I’ve got it – a perfect fall woodworking decoration you can use over and over every year. And guess what? No rotting pumpkins ever!
Thanks to Dixie Belle Paint Co. for sponsoring this post. While I was compensated to write this post, all opinions are my own.
* As an Amazon Associate, I earn from qualifying purchases and through other companies as well. You will not be charged extra when you purchase through these affiliate links, but any income I make helps me create more amazing DIY projects to share with you! To see my full disclaimer, click here!
How To Make Pumpkins Out Of Scrap Wood
Why make your own fall wood pumpkin decor, you ask? Well…
Time Well Spent: It’s a great way to unwind and let your mind take the lead. Plus, the process can be just as enjoyable as the final result!
Cost Savings: Okay, let’s be real, buying Fall decorations adds up fast. Making them lets you have pretty pumpkins without breaking the bank! And they are sustainable, not like the real pumpkins that decay at the end of the Fall Season.
Creative Outlet: Get creative and show off your own style! There’s just something so satisfying about creating something awesome and unique for your place—a one-of-a-kind design.
Using What You Have: Repurpose that scrap wood! It’s incredibly satisfying to transform old wood into beautiful fall decor.
Personal Touch: Homemade decor has that special warmth and charm that store-bought stuff just can’t match, turning into things you’ll treasure and that tell a story.

SUPPLY LIST:
Here is what you’ll need to make these gorgeous wood pumpkins.
- 2X8, 2×6 & 2×4 boards (chunky wood pumpkins)
- small branches (pumpkin stems)
- electric sander (my fave!)
- 180-220 grit sandpaper
- miter saw
- drill
- 1-inch paddle wood bit
- wood glue (exterior use)
- pin nailer (nails or screws)
- wood filler
- Fireside Ash VooDoo Gel Stain (Water-Based)
- Tobacco Road VooDoo Gel Stain (Water-Based)
- Synthetic Chip Brush (paint brush)
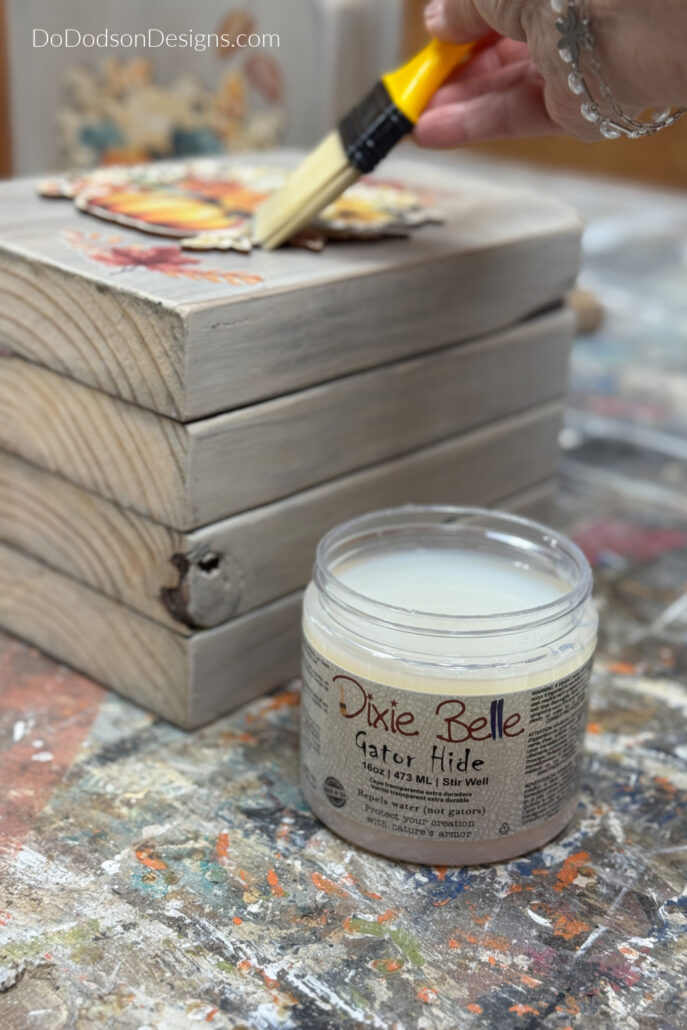
- Gator Hide (Water Repellent Top Coat)
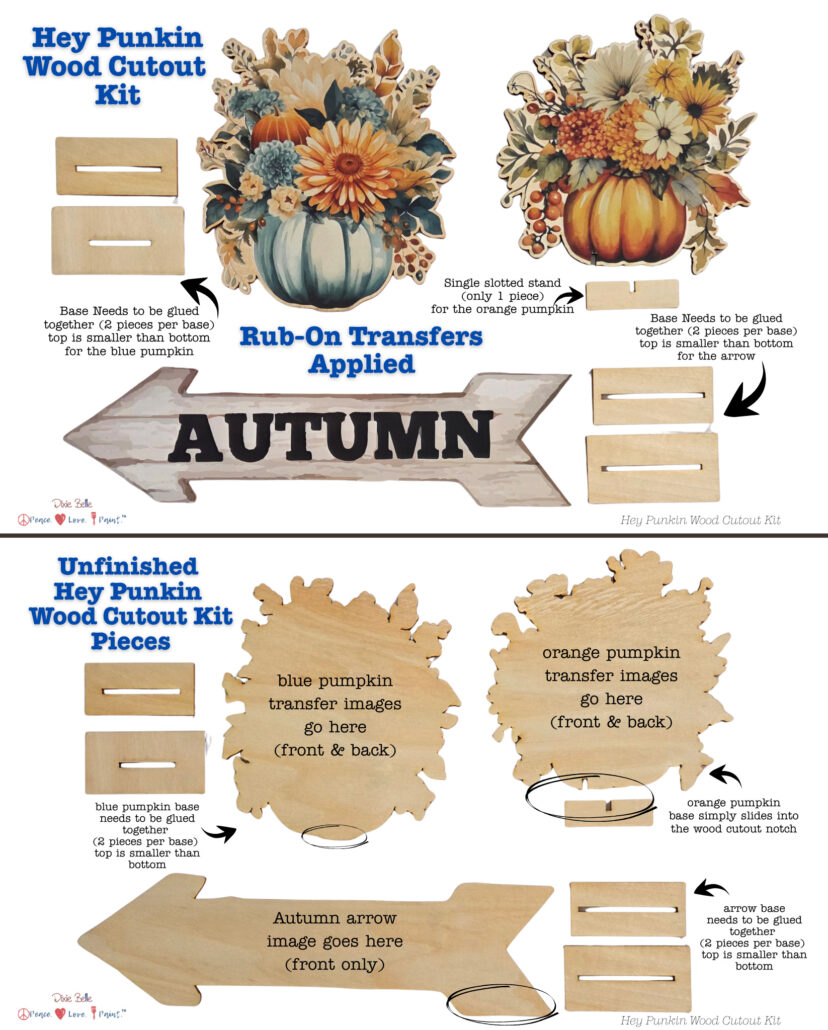
- Hey Punkin Wood Cutout Kit
- Copper craft wire
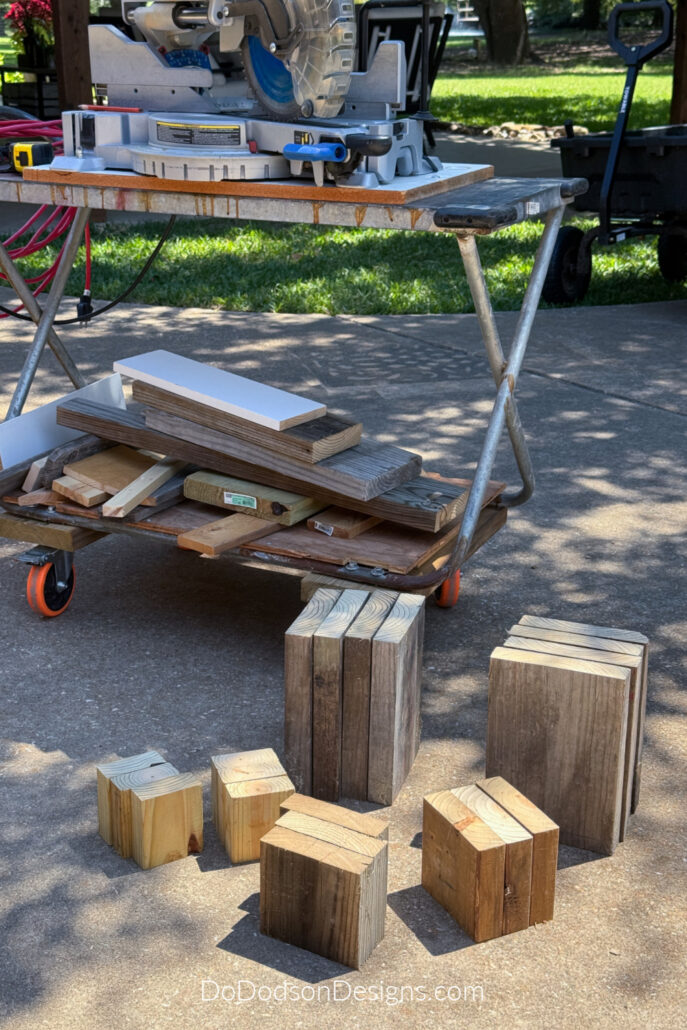
Selecting And Cutting Wood For Pumpkins
To make these chunky wood pumpkins, I grabbed several sizes (2×8, 2×6, 2×4) from my scrap wood pile.
But honestly, when I saved these boards, I had no idea what I would use them for. The funny thing is, I’ve never met a board I couldn’t turn into something awesome.
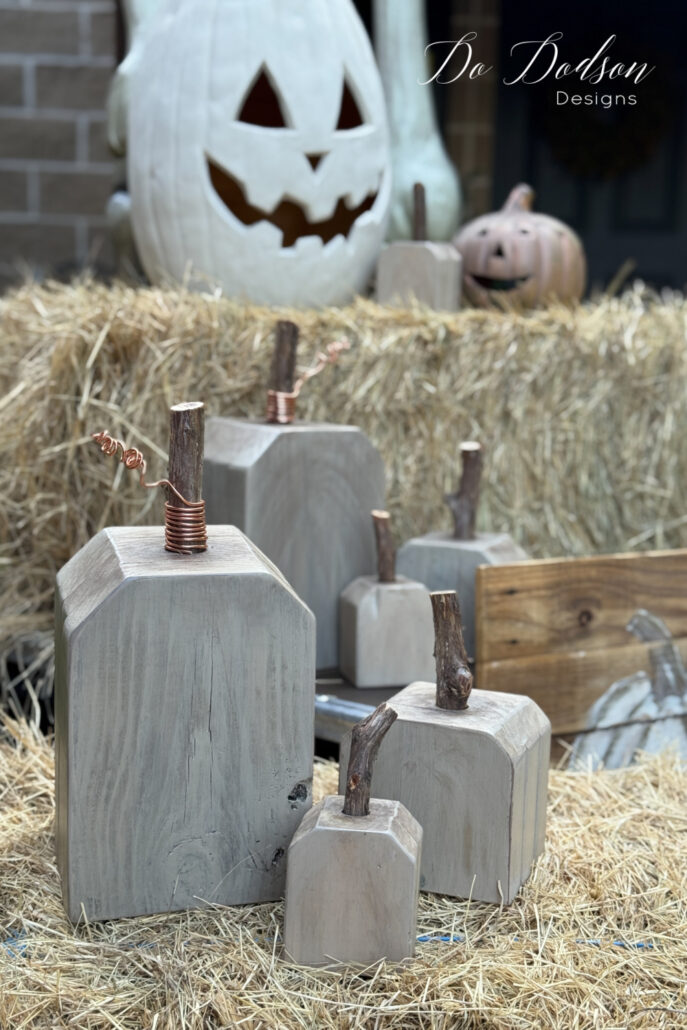
The plan was to make some small, medium, and large painted wooden pumpkins for my front porch, like the real deal! Only better!
For the large wood pumpkin, I chopped up four pieces of a 2×8, each one 10 inches long.
The medium pumpkin, I cut a 2×6 into three pieces, each measuring 5 inches long.
For the small pumpkin, I cut a 2×4 into two pieces, each 4 inches long. The pic below shows three, but after measuring, I decided two was better, so I just made another pumpkin!
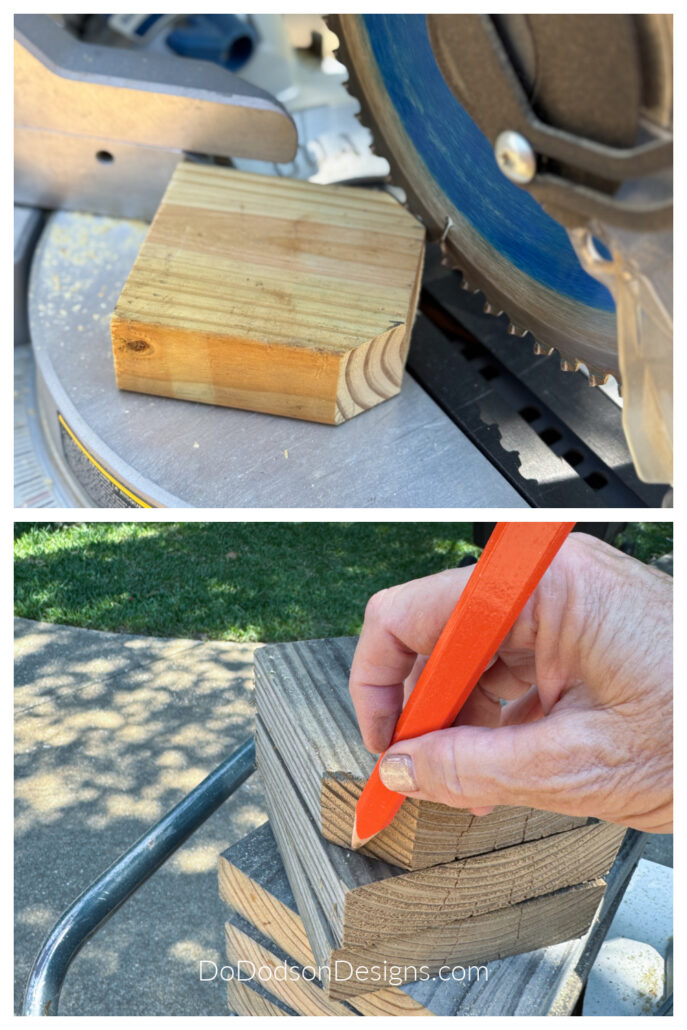
Once you’ve cut the boards, simply angle the top edge of each one at a 45-degree angle. That’s what makes them look more like pumpkins when you put the boards together!
Once I cut the first angled piece, I used it as a pattern to make sure all the cuts on the other pieces matched. A wonky pumpkin isn’t pretty unless it’s real, of course.
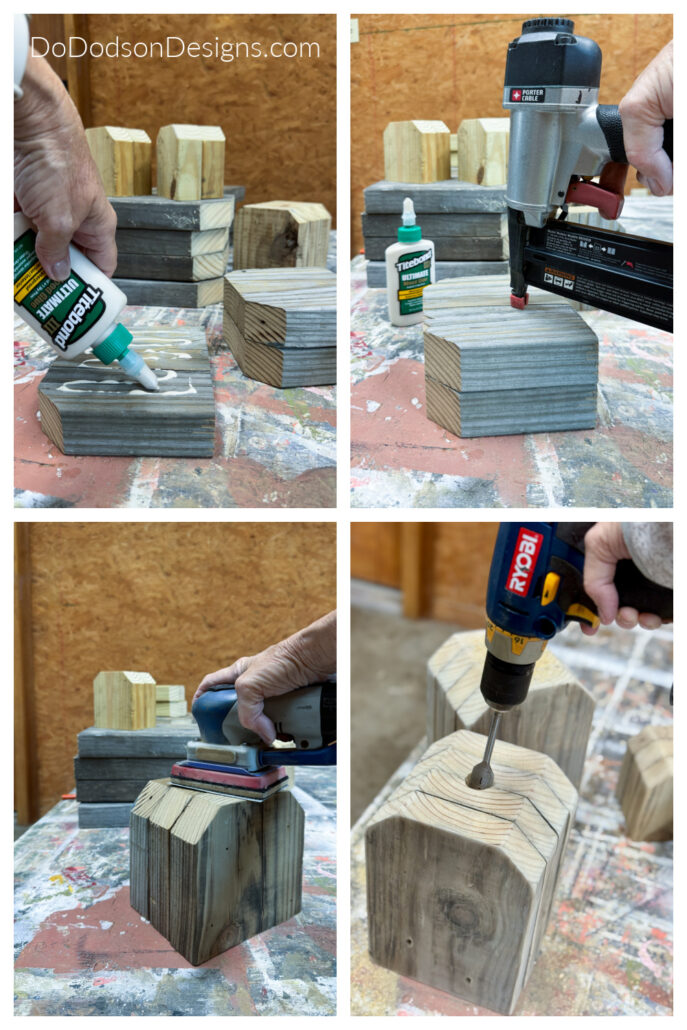
Give each board a thorough sanding until it is smooth and uniform in texture. I’ll be painting mine, so a smooth finish is important to me. Remove any remaining wood dust from the surface.

Assembling The Wood Pumpkins
After sanding, apply exterior wood glue to each piece where they connect to create the pumpkin. Secure the wood pieces together using finish nails. Allow to dry for several hours or overnight.
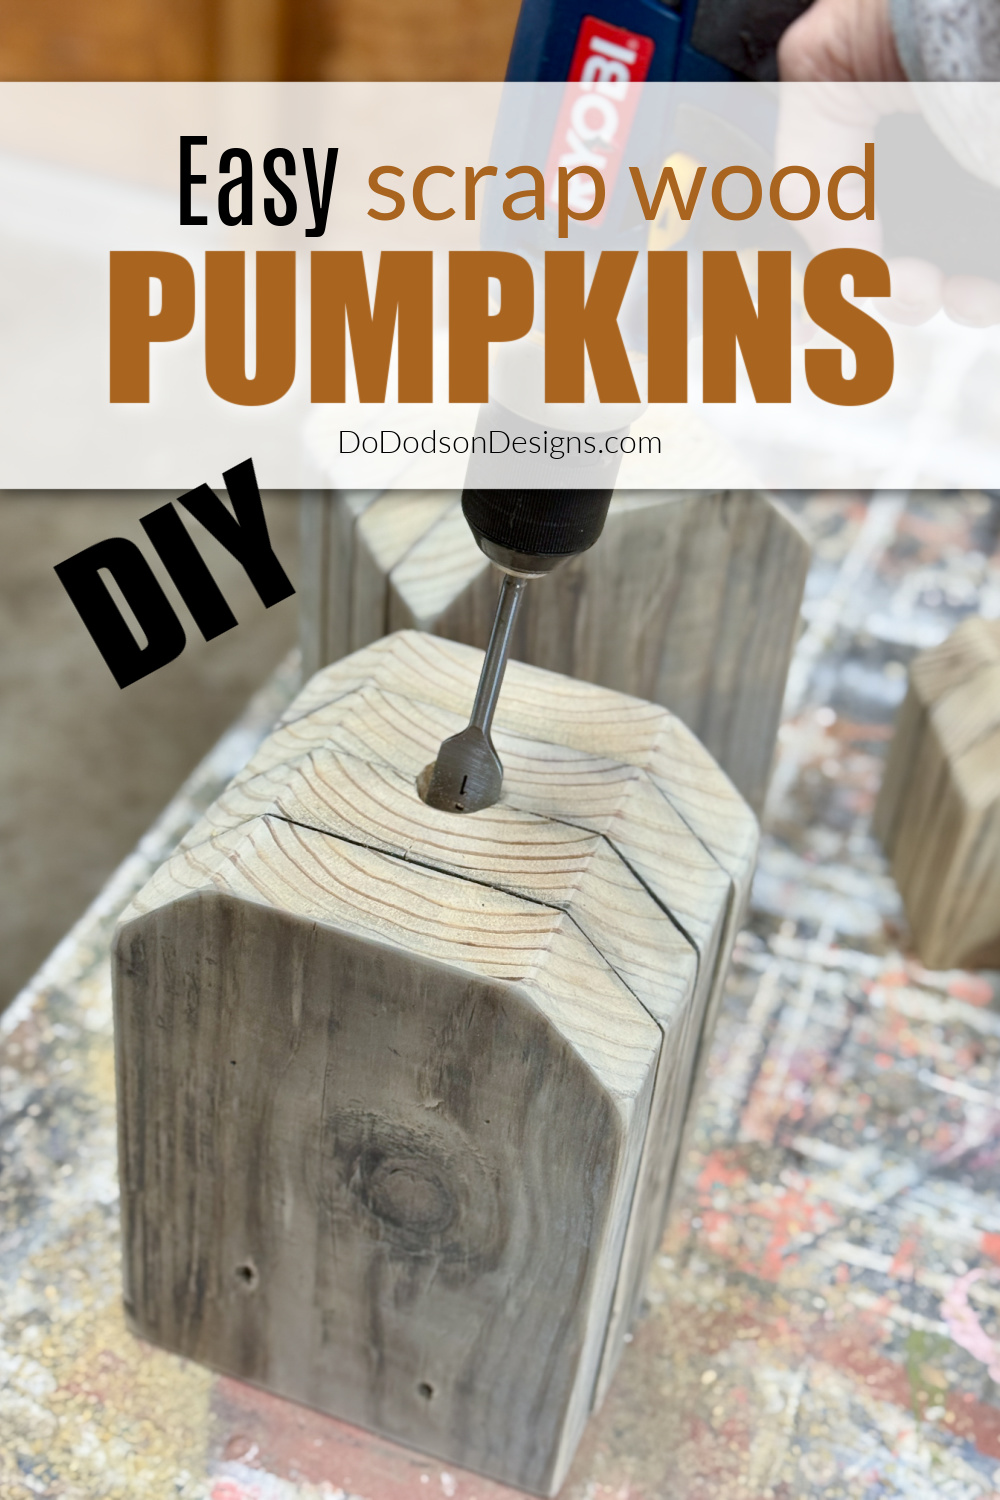
Okay, sand them one last time, then drill a hole in the top with a 1-inch paddle bit. Aim for about an inch deep. This is where you can have fun! If your branches are bigger or smaller, adjust the hole size to fit using a different size bit.
Grab some small branches and cut them to the desired length to make stems for the pumpkins. I went with cedar branches since they last forever.
Painting Your Wood Pumpkins
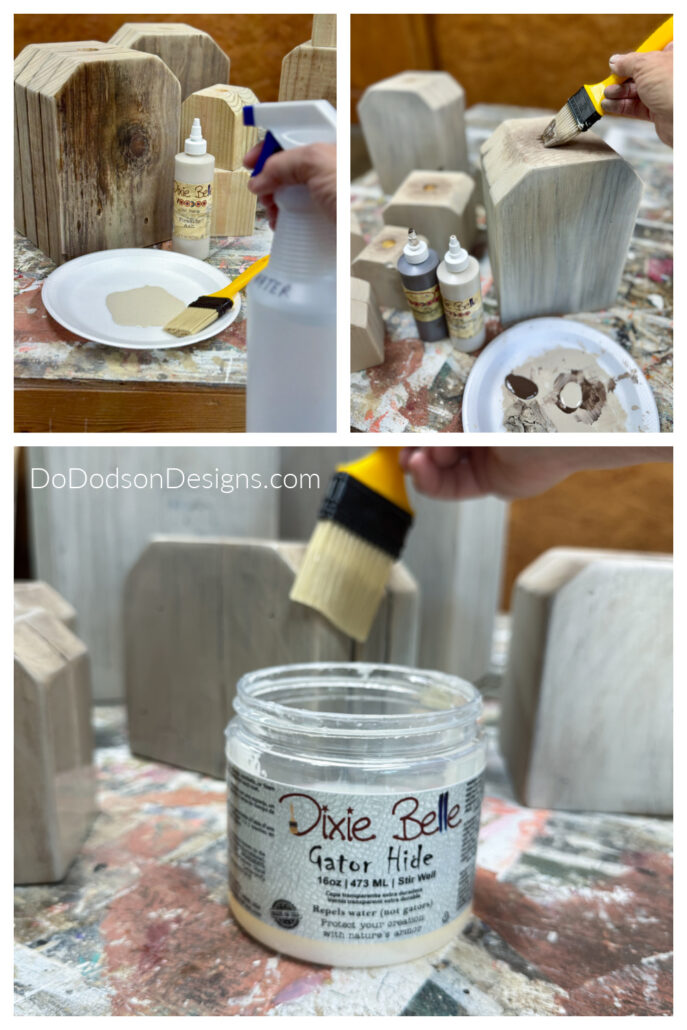
I’m calling these painted wood pumpkins, but the product I’m using isn’t really paint. It’s more of a wash.
I used Dixie Belle’s water-based VOODOO Gel Stain in two colors. Fireside Ash and Tobacco Road.
Before staining, give the wood a quick spritz with water from a spray mist bottle. Scrap wood tends to be pretty dry, so this helps the stain look even when applied and brings out the wood grain.
I used a paintbrush to apply it and then wiped off any remaining with a soft cotton cloth.
To give the pumpkins a little more character, I added a second color to create a sunken-in appearance on the top of the pumpkin. Well, in my mind, that’s what I see.
Hey Pumpkin Wood Cutout Kit – Transfers
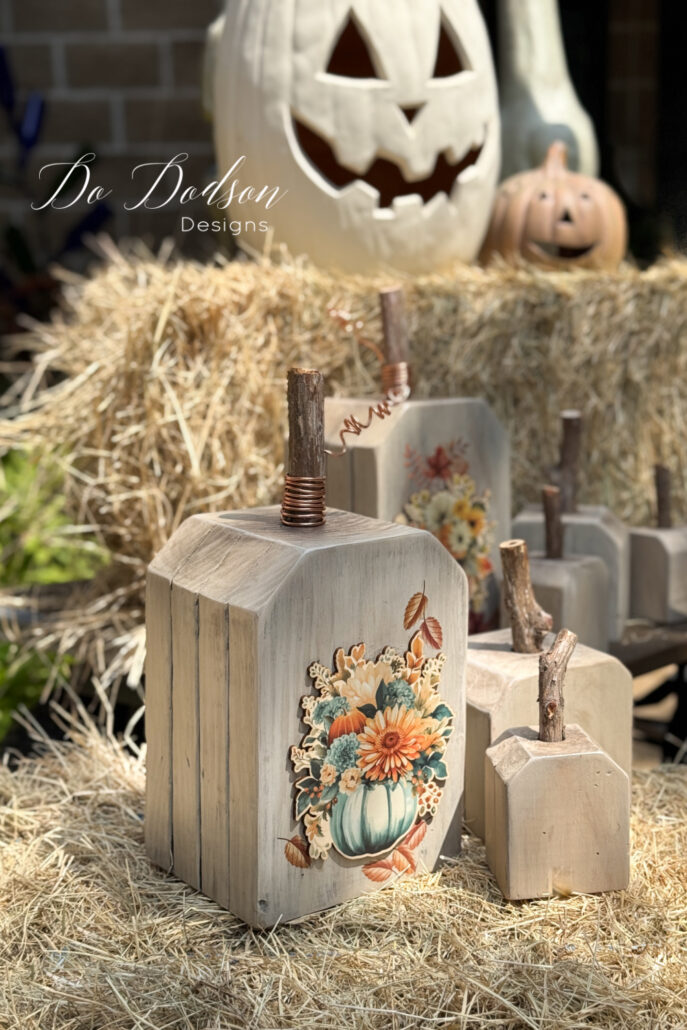
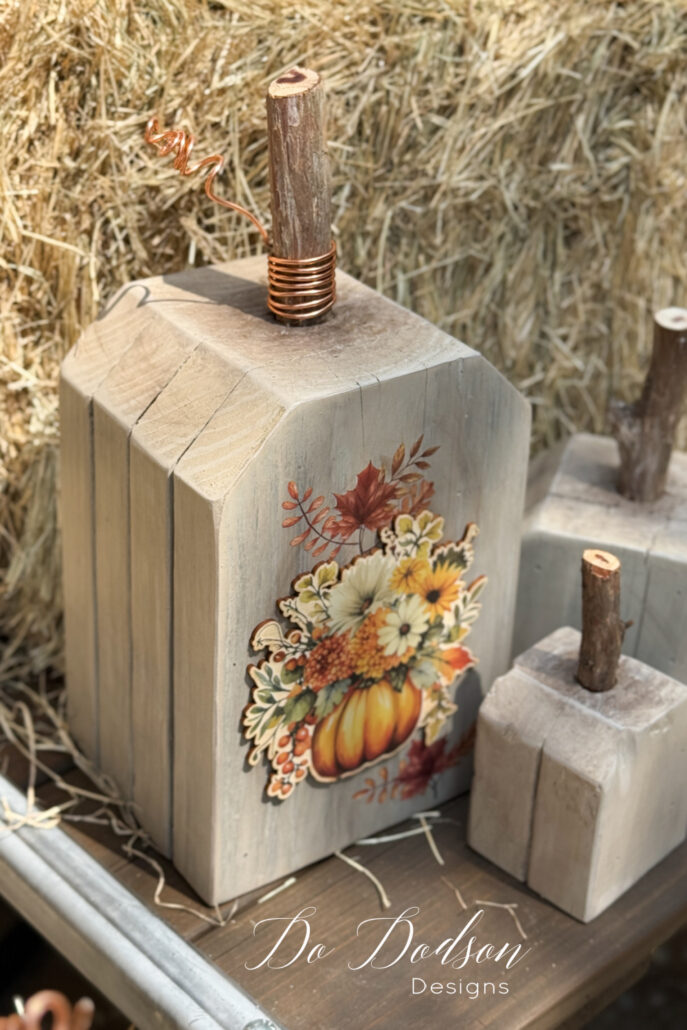
Now, to add even more cuteness to my wood pumpkins, I added this new wood pumpkin cutout kit from Dixie Belle Paint Company.
Since I’m always trying to find cool ways to use Dixie Belle products, I’m putting them on my pumpkins instead of the stands (which are super cute!). Just a little tip for anyone who needs a little help seeing my wood pumpkin vision. 😉
This product is super versatile – use it as is or make it your own! I ended up with a few extra pieces, so I’m using them on other fall crafts.
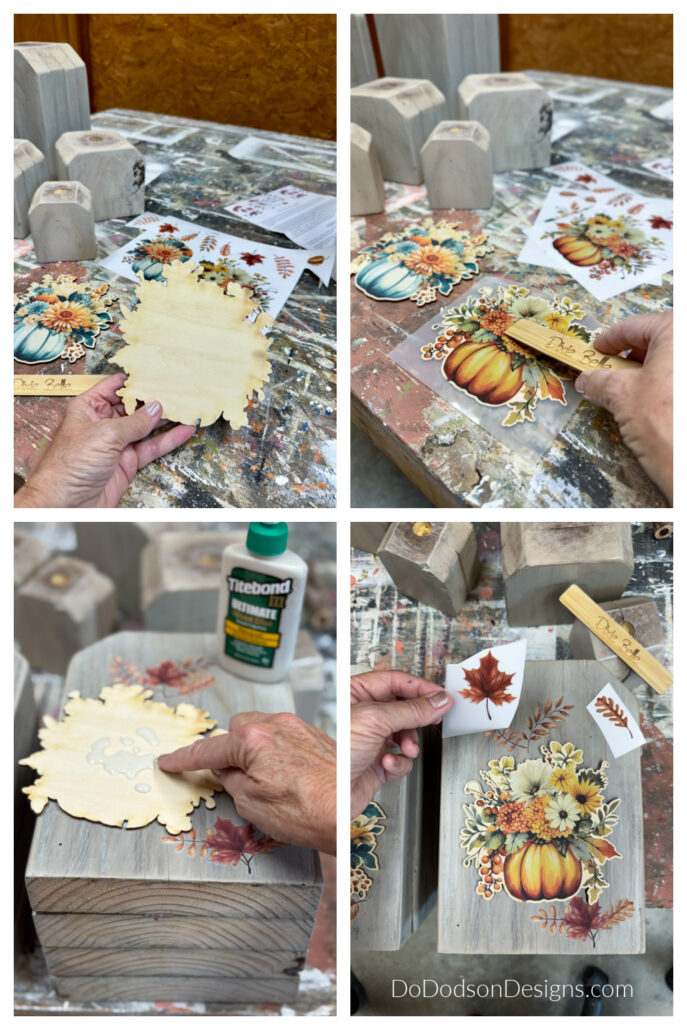
So, first things first, I cut out the transfers I wanted to use from the sheet. You’ll get more than just the big ones – the sheet also came with pretty fall leaves. I put those on first to make a background for the big pumpkin.
To apply, place them flat on the surface and rub gently as you remove the clear plastic backing.
Then, I slapped the pumpkin transfer on the wood and used wood glue to stick it to the front of the painted pumpkin. Super easy!
After the glue was dry, I sealed the transfers with Gator Hide, a water-repellent topcoat, so they wouldn’t get ruined by the weather on my porch.
For more wood pumpkin inspiration, check out the related links below.
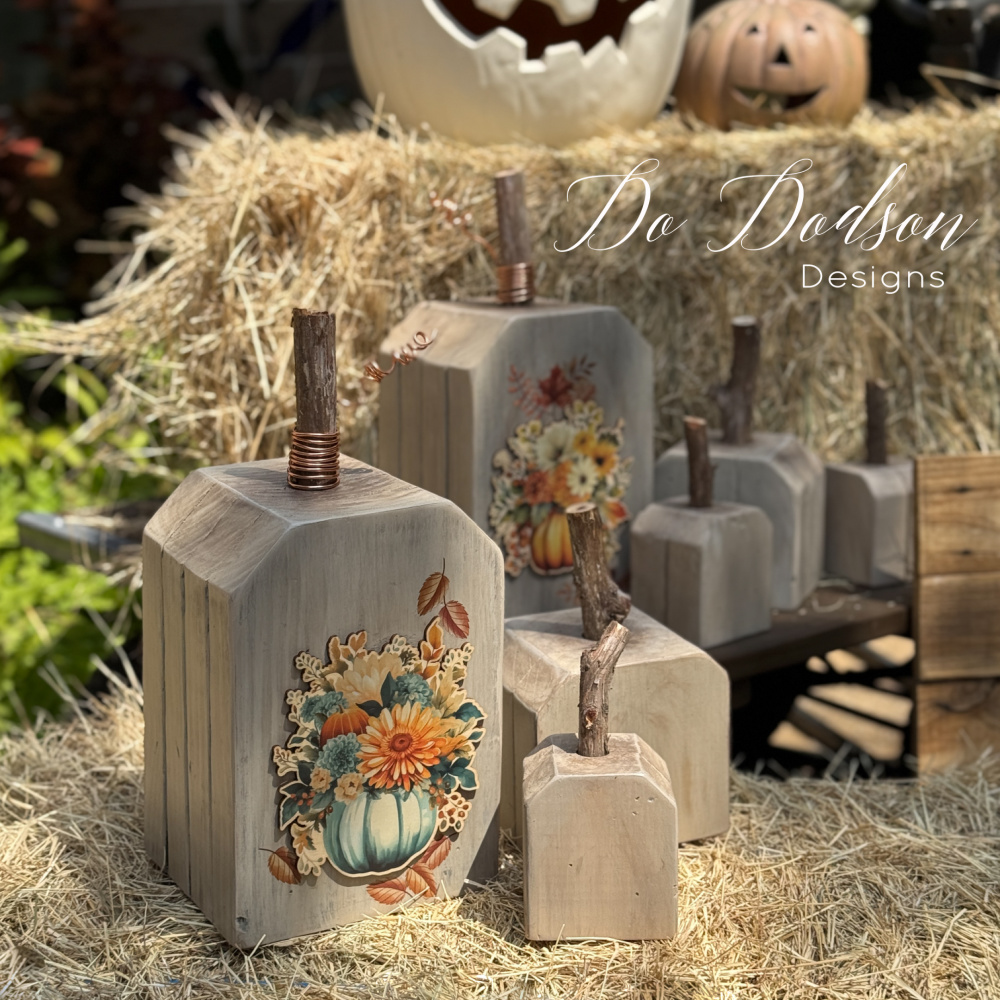
Creative Scrap Wood Pumpkins
The wood stems, made from small branches, were the perfect finishing touch when I glued them on. I took it a step further and used some copper craft wire from my stash, and it made the cutest little curly-Q at the base of the stem!
Those wood cutouts totally made a difference and added the fall color they needed – they really brought them to life, don’t you think?
Perhaps these wood pumpkins are a stretch of my imagination, but I L O V E them. Sustainable Fall decor that I can reuse year after year. And I can always repaint them if I want.
I’d love to hear your thoughts and opinions on this DIY project in the comment section below. Or say hi so that I know you stopped by. It always makes my day.
Until the next project… xo, Do
I love all your scrap wood projects, and these don’t disappoint Do, SUPER ADORABLE! 🎃 I can’t believe fall is officially just a few days away. 🍁🎃🍁 What a great project to celebrate the season! Thanks for sharing, pinned! XOXO
Thank you, Denise! Fall is my favorite time of the year. There’s just never enough of it in my opinion… or scraps of wood. 😉
I hope you have a fabulous weekend, my friend. xo 😘
So very cute! You went above and beyond for these Fall decor pumpkins. Nicely done!
Thanks, my friend. Sustainable decor that I can use year after year is important to me. Also I like having unique pieces. Happy Fall! 🍁 🍂🎃 😘