It’s not hard for me to walk the aisles of a home improvement store while my mind wanders to the opposite side of crafty creativity. And if you have been following me for any length of time, you know all about my love of scrap wood projects. I was only there to pick up wood shims for a new door we were installing. With the holiday season right around the corner (Christmas Tree Season), I’m always on the lookout for a simple DIY project that will have to meet my Hobby Lobby Farmhouse standards. Yep, I have standards.
Thanks to Dixie Belle Paint Co for sponsoring this post. While I was compensated to write this post, all opinions are my own.
* As an Amazon Affiliate Advertising Program Associate, I earn from qualifying purchases and through other companies as well. You will not be charged extra when you purchase through these affiliate links, but any income I make helps me create more amazing DIY projects to share with you! To see my full disclaimer, click here!
Is it possible to get inspired in Home Depot?
Of course, it is. Hello, wood shims! I thought to myself, hmmm, I wonder if anyone has used these to make something. It took me seconds to whip out my phone and head straight to Pinterest. After a quick search, I found so many wood shim tree ideas that my head was spinning. How could I have missed this?! Where have I been?
Obviously, I need to research the different ways to use these little wooden shims. They’re not just for the front door installation. The first thing I did after this monumental discovery (exaggerating a bit) was to grab some extra wood shims and head to the checkout line.

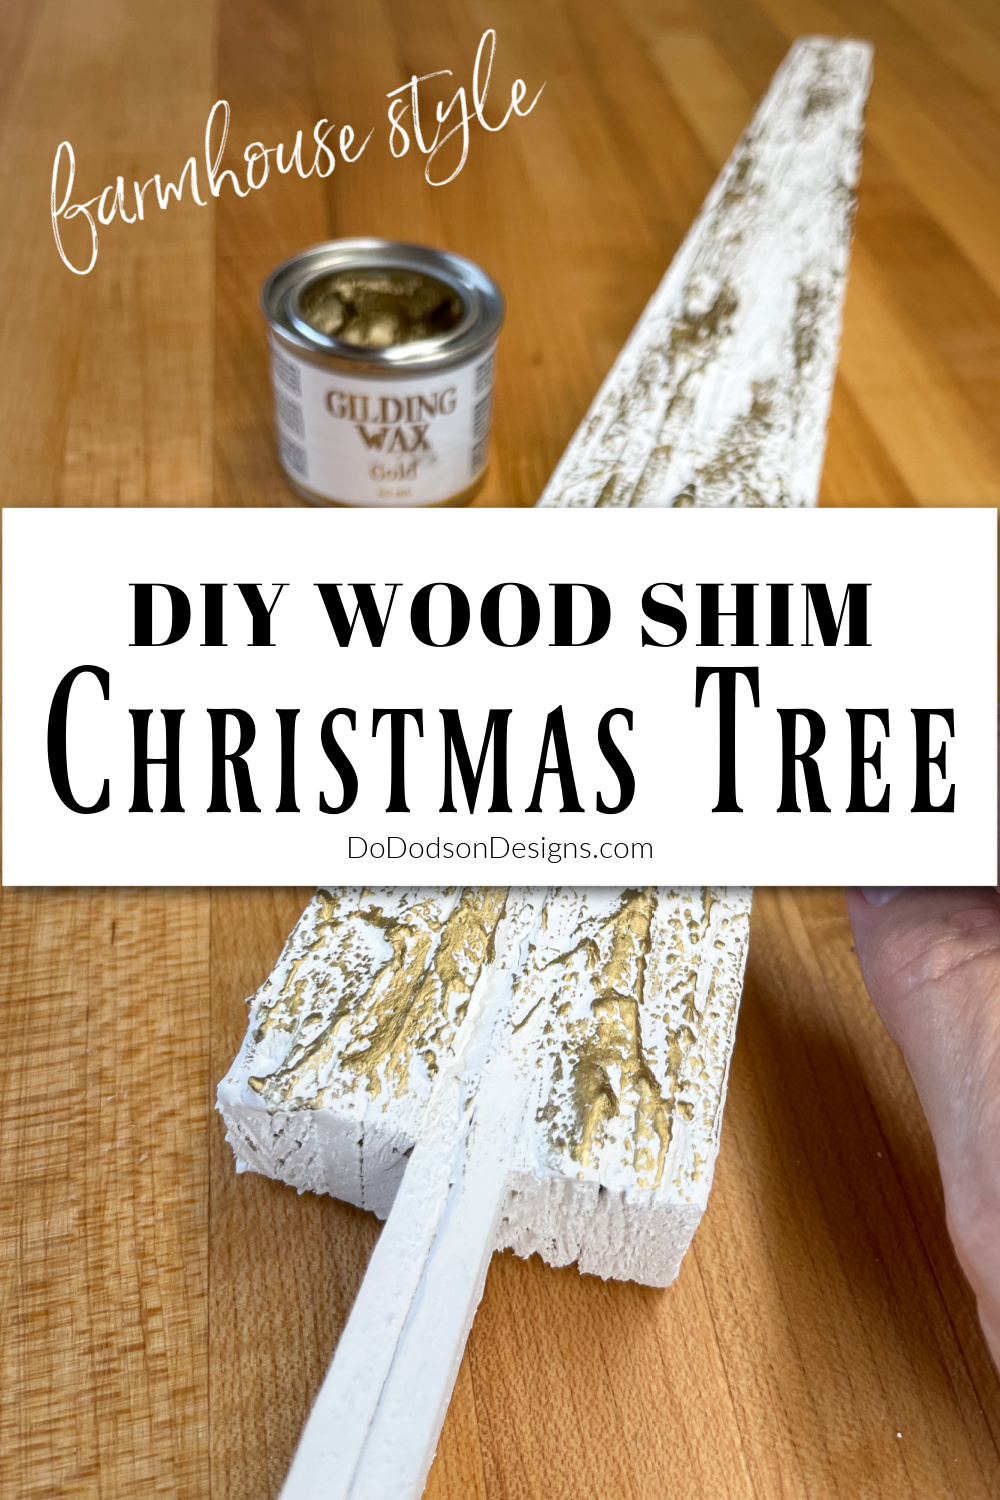
SUPPLY LIST:
What you’ll need to make beautiful wood shim Christmas trees.
- wood shims or cedar shims (various sizes) Lowe’s or Home Depot
- wood glue or hot glue (I like wood glue the best)
- craft stick
- Cotton Chalk Mineral Paint (white paint)
- paint brush
- Sea Spray Texture Additive (add to paint to create texture)
- GOLD Gilding Wax
Have Wood Shims, Will Christmas Craft
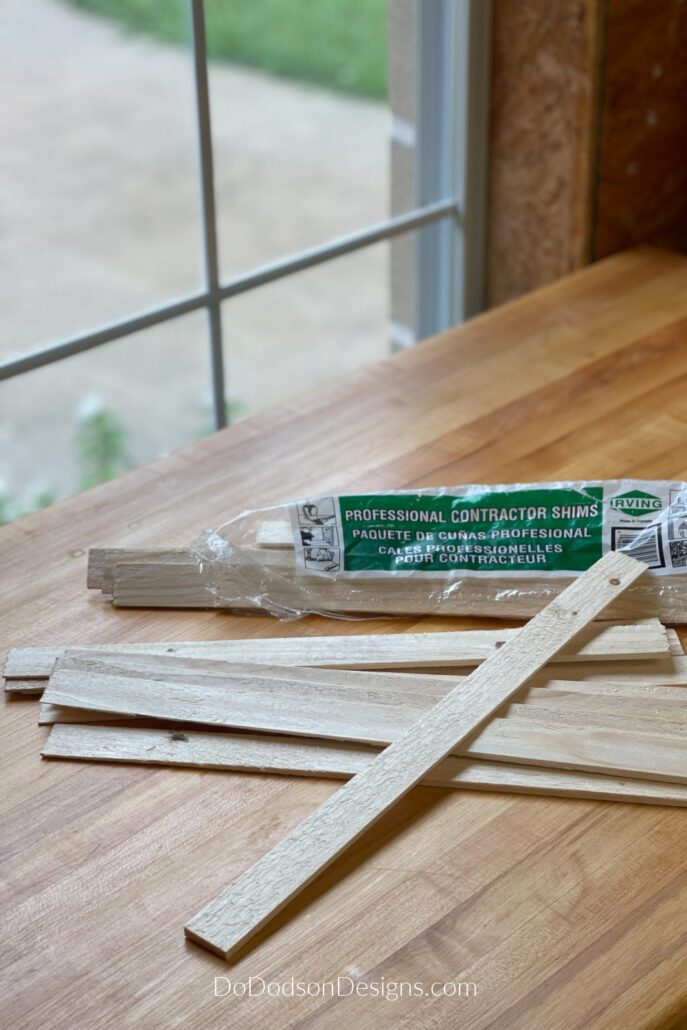
The first thing you should know is that wood shims are made from different types of wood. Even cedar if you want to be fancy. They also come in various lengths. The ones I’m using for this project are 15 inches. It’s what I had on hand. It really doesn’t matter which ones or what size you use. Get the cheapest ones you can find if you plan on painting them. You don’t need that extra cost when crafting on a budget.
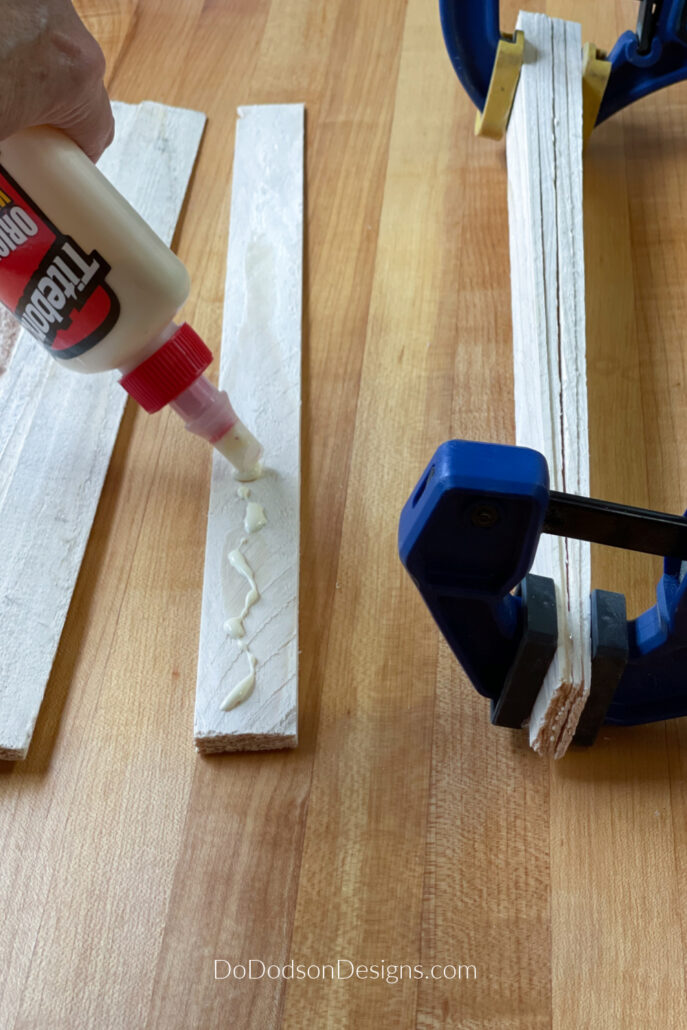
Wood Glue Is The Best Option (not hot glue)
I’m gonna say this now, but you be the judge of how you craft with wood. I have used hot glue with wood crafts; sometimes, it works, and sometimes it doesn’t. For the best bond with wood, I prefer wood glue.
If you’re using glue, you’ll need to prepare your work surface if you don’t want to leave a mess. I’m a messy crafter.
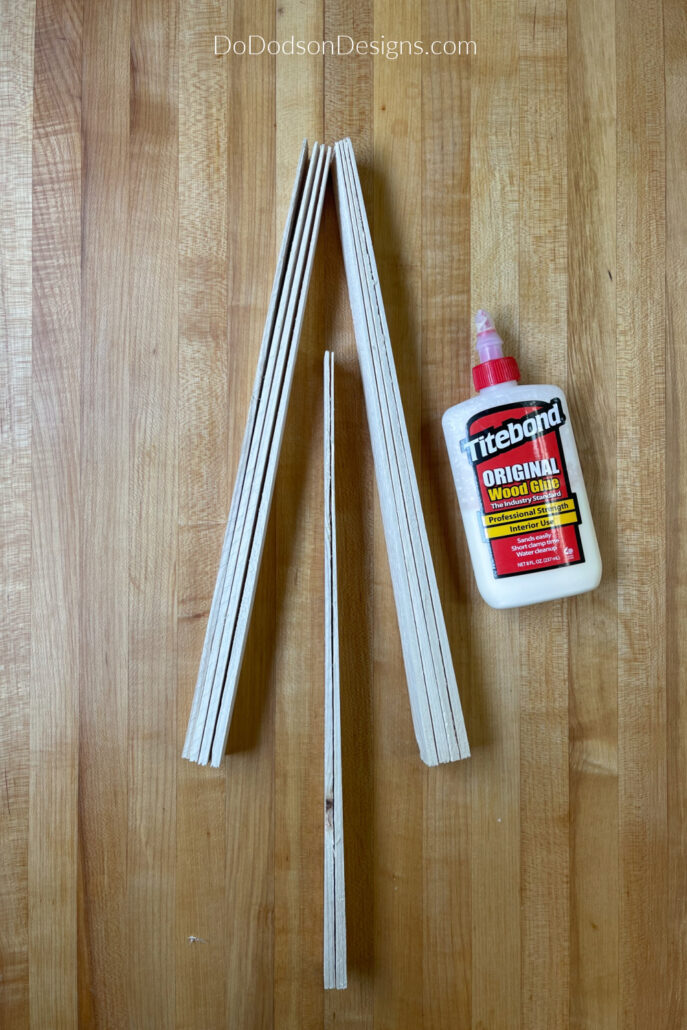
The next step is to gather your supplies and lay out the wood shims in the shape of a Christmas tree. I like to do a dry run before gluing them together. This way, you can pick the best shims to make your DIY wooden Christmas tree.
The thin ends of the wood shims should be pointed upward to the top of your tree, while the thick end is used to create the bottom of the tree. By doing this, your wood shim trees are larger at the base.
Assembling The Wooden Shim Tree
Start adding a little bit of glue to the four inside pieces of the wood shims. There will be four pieces on each side of the tree.
Next, secure them together with clamps, or simply press them together between your fingers for a few minutes until they are bonded.
If your wood shims have a rough wood texture, you will need to use the clamps for the best results.
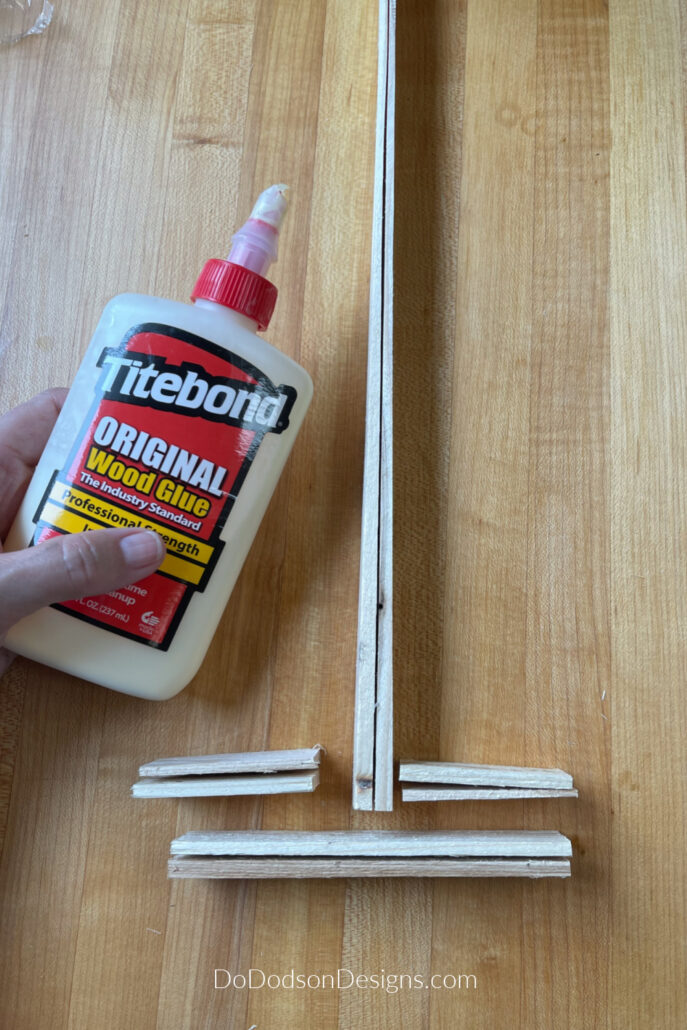
Building The Tree Trunk And Base
Can you see it taking shape? Now it’s time to assemble the trunk and base of the tree.
Again, using the wood glue, secure two wood shims together and allow them to dry.
Next, you’ll need about three more wood shims to build the base. I did have to pull out the tape measure for this part. Cut two pieces of the same length and glue them together at opposite ends. Thank goodness I have pictures because this is difficult to explain. I’m a show-and-tell kinda gal.
After the small pieces are dry, glue the base and the trunk together. Making these DIY wood shim Christmas trees are fun!
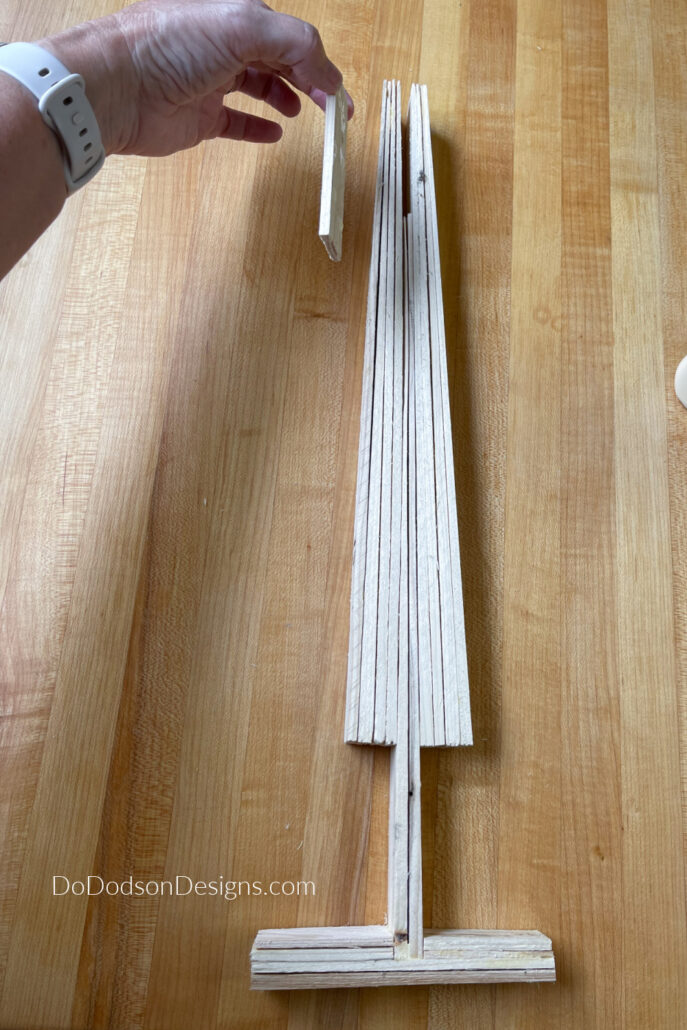
The whole Tree Is Wood Shims And Glue
Lastly, glue a small piece of wood shim to seal the gap at the top part of the tree where the two sides were joined. I just happened to have a small leftover piece, and I call that a happy little accident!
I don’t know about you, but I want an entire forest of small trees after making this one.
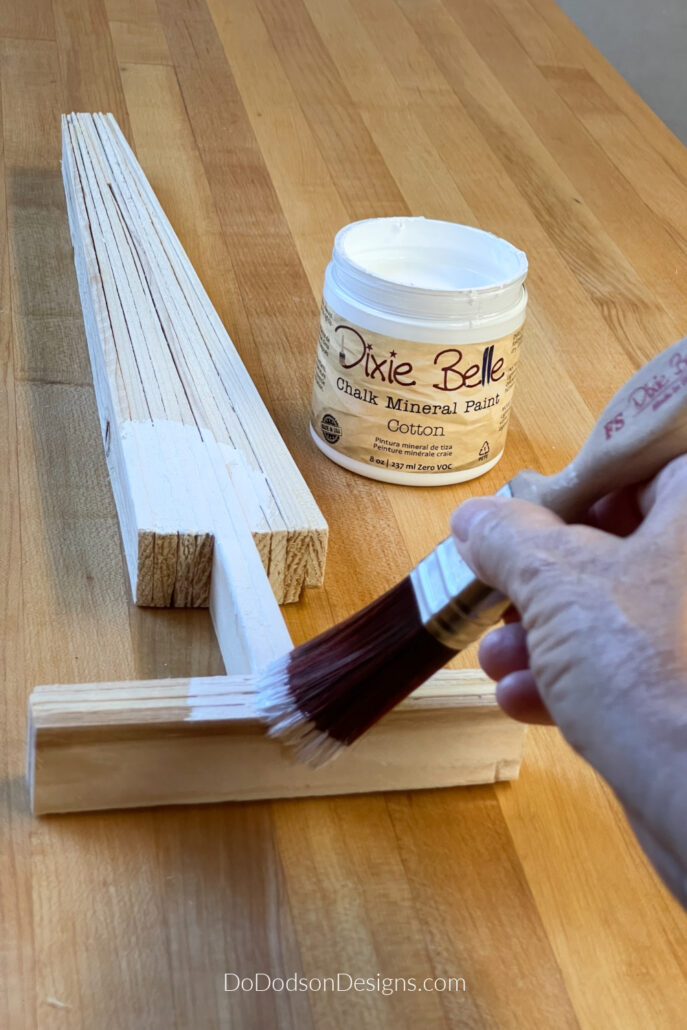
Easy Texture Paint Treatment + GOLD
It wasn’t hard to decide how I wanted to decorate (paint) my DIY Christmas tree. I thought about a rustic look to go with my Farmhouse style, and then I remembered a project I did last year using texture paint. So, why not? Here’s what I did.
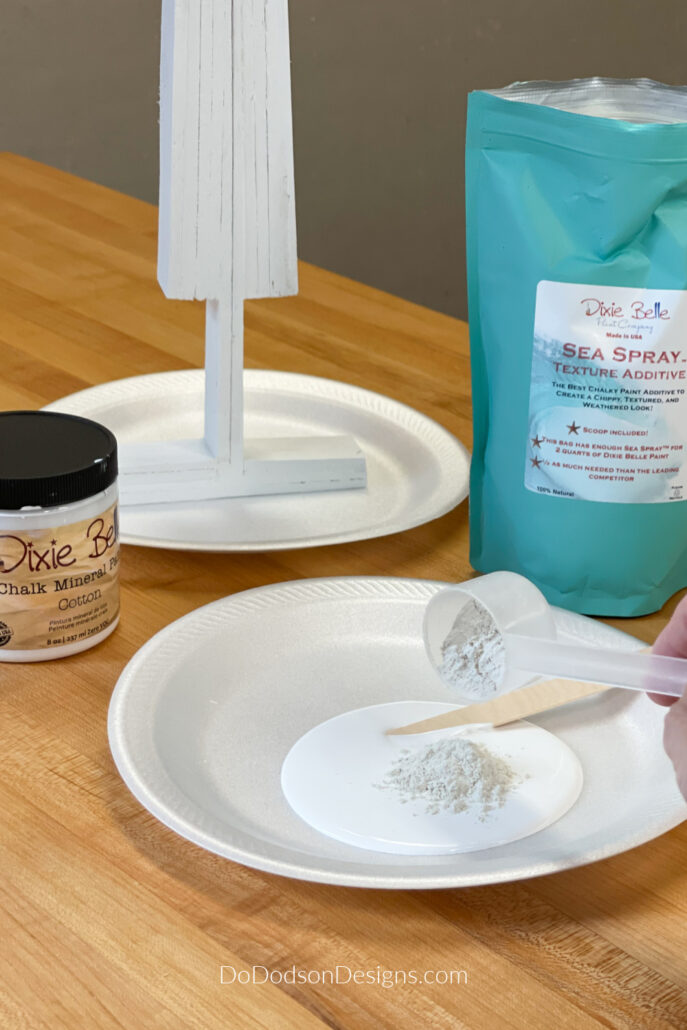
Step 1: Paint your little tree whatever color you love and allow it to dry. I chose Cotton Chalk Mineral Paint by Dixie Belle Paint Co. It’s pure white like the driven snow. LOL, I’ve always wanted to say that. We don’t get snow in Texas, so I’ll create the look on this little tree.
Step 2: Using the same color (Cotton), mix equal amounts of paint and Sea Spray in a small disposable container. Mix well with a craft stick.
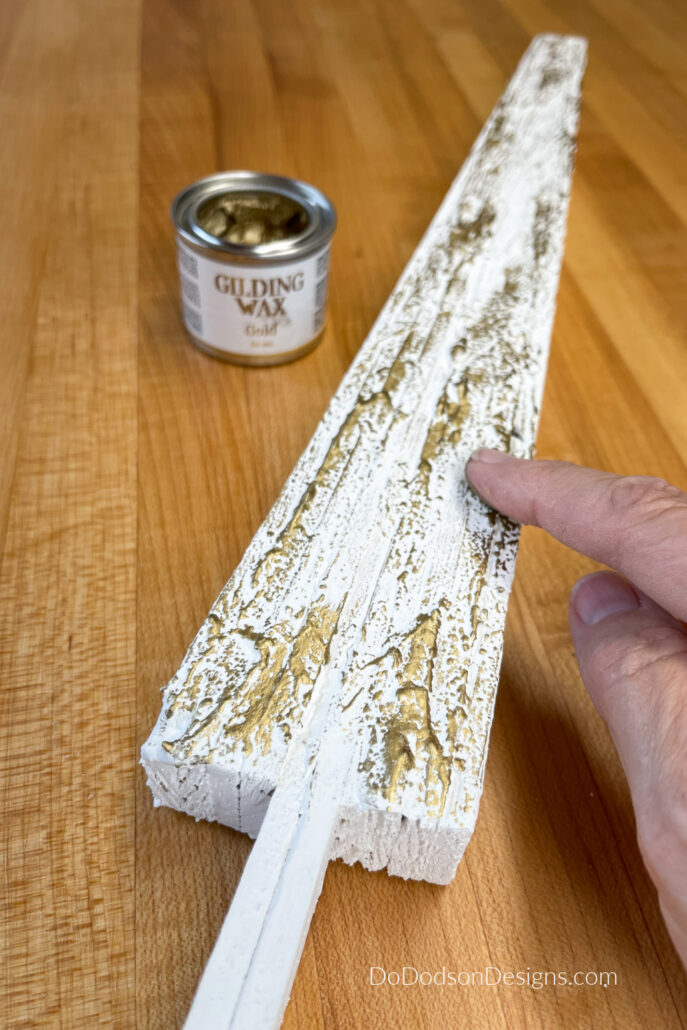
Step 3: With the same craft stick you used to mix the texture additive, apply it to the tree by dragging it downward (starting from the top) to create a beautiful textured finish. The more you add, the more texture you will have. The texture will take additional time to dry, so I left it out to dry overnight before the next step.
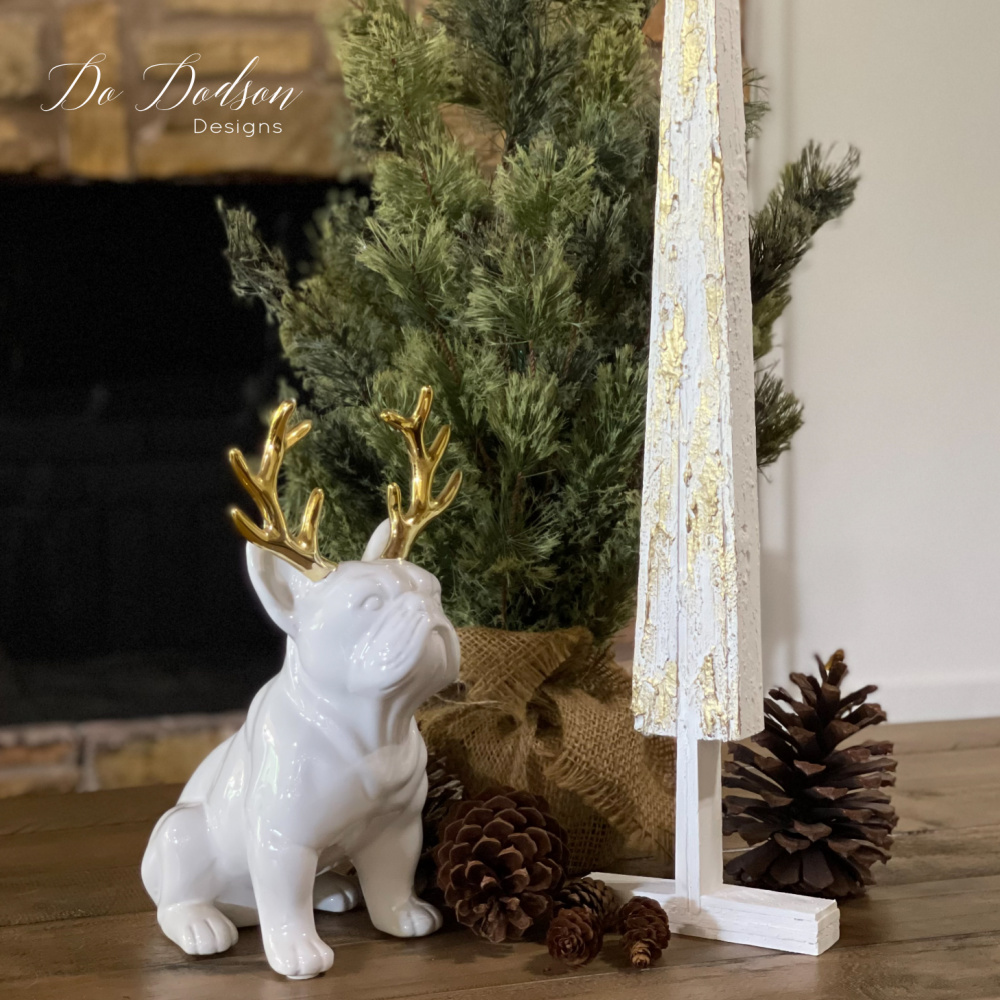
Step 4: Here’s where the GOLD comes in! To add a little extra, I used GOLD Gilding Wax by Dixie Belle Paint Co. to add golden highlights. Apply a small amount of the gilding wax to your fingertip and rub across the textured surface until you’re happy with what you see. Oh, it won’t take long! It’s pure magic.
DIY Wood Shim Christmas Tree Decor To Be Proud Of
I had fun styling my DIY wood shim Christmas tree. A few pine cones and my favorite ceramic (dog deer) reindeer pulled this Christmas DIY project together. Who said you need Hobby Lobby when you can craft with wood shims? I think it’s pretty stinking cute, even if I didn’t come up with the original design.
So, what do you think about this one? Is it DO-able for you?
Thanks for stopping by, and as always, I’d love to hear from you in the comment section. Oh, and don’t forget to share this idea with your friends and on Pinterest.
Until the next project… xo, Do


Love it, Do! How cute is that! 👏🏻
Isn’t that fun, Wendy? I want a whole forest of these trees! LOL, thanks for stopping by. 🙂 xo
I think that the shim tree could use a simple, rustic gold star as a topper….. maybe on a small pokey metal rod into the wood. Nothing that stands out, must rusticly (new word 🙂 relate.
LOL, I like your new word. That’s a great idea! I have some rusty wire around here somewhere. Thanks for the inspirational idea. 🙂 xo
Too cute! Such a great idea! Love the bulldog
Thanks, Cletia! Isn’t he cute? One of my favorite Christmas decor items. Thanks for stopping by. 🙂 xo
Do, this is a great project! I love the ideas you come up with.
Thanks, Tammy! Life would be better if we crafted more. Thanks for stopping by. 🙂 xo
So cute and simple. Love the trees!
Thanks, Carolyn! I really had fun with this one. They also make great Christmas gifts. There’s nothing better than a gift made from the heart. Thanks for stopping by. 🙂 xo
Hi Donna aka Do!! I love these trees and I love how you painted them.. I haven’t read that book but I read Show Your Work by the same Author. I love all of your trees you make this time of year.
Hi Cheryl! Thank you. I haven’t read that one, but I will look it up. Thanks for sharing. 🙂 xo