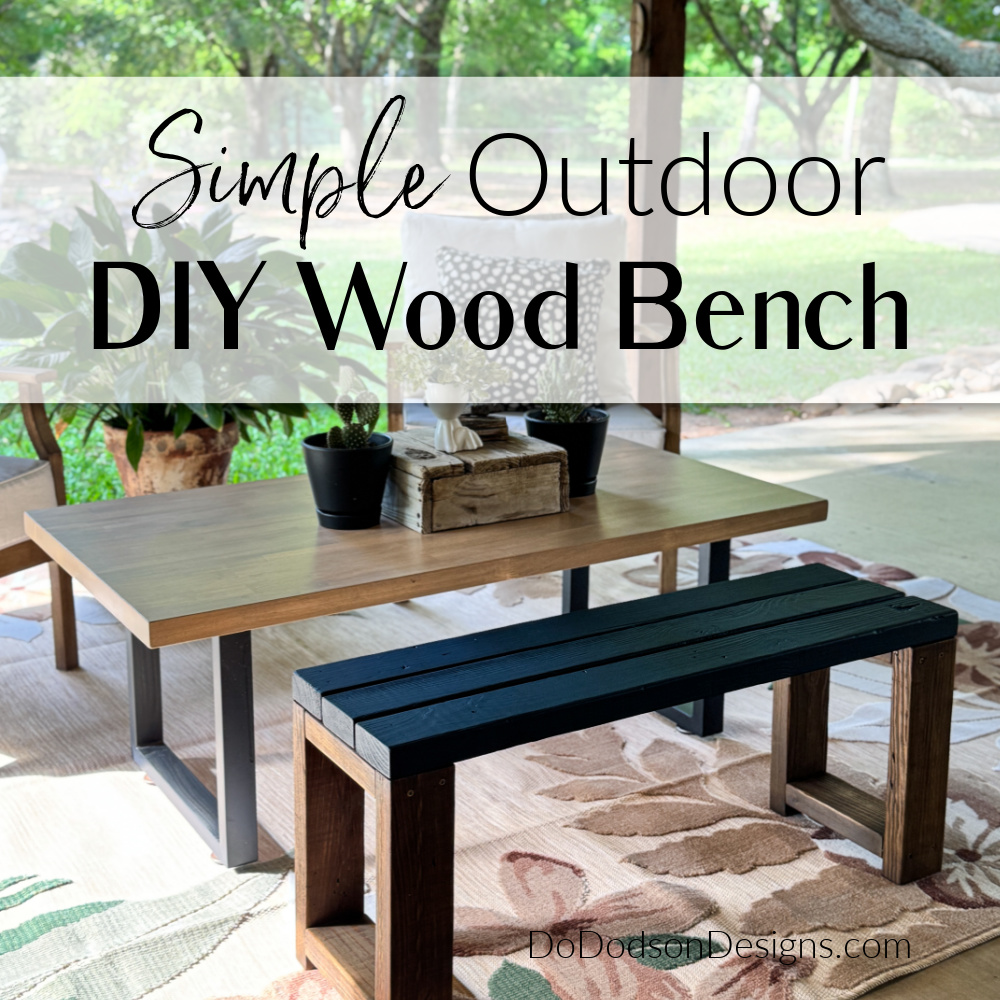
Got some scrap wood lying around? This DIY Wood Bench is super easy to build, and it looks amazing! I built this entire bench using only 2x4s, and I’m sharing the exact measurements so you can recreate it easily. This wood bench design has a clean farmhouse look, but it’s also durable enough for outdoor use, making it perfect for both indoor and outdoor spaces.
* As an Amazon Associate, I earn from qualifying purchases and through other companies as well. You will not be charged extra when you purchase through these affiliate links, but any income I make helps me create more amazing DIY projects to share with you! To see my full disclaimer, click here!
Why You’ll Love This DIY Wooden Bench
Whether you’re into home DIY projects or just want to try something new, this is a great beginner-friendly build.
This DIY wooden bench is one of those projects that checks all the boxes. It’s quick to build, budget-friendly, and you can customize it to fit your space. The chunky 2×4 design gives it that modern rustic feel. You can easily dress it up with stain, paint, or even leave it natural for a more organic look.
It works beautifully as:
- An entryway bench
- A small porch seat
- A simple garden bench (use treated lumber)
If you’ve ever searched for how to build a bench without complicated plans—this is it.
And if you’re new to woodworking, this project is a great place to start. It’s one of those home DIY projects where you can build confidence while still ending up with something useful and beautiful.
Supply List For DIY Wood Bench
Here’s what you’ll need to build this bench!
- Scrap wood 2X4s (treated lumber if you’re using the bench outdoors)
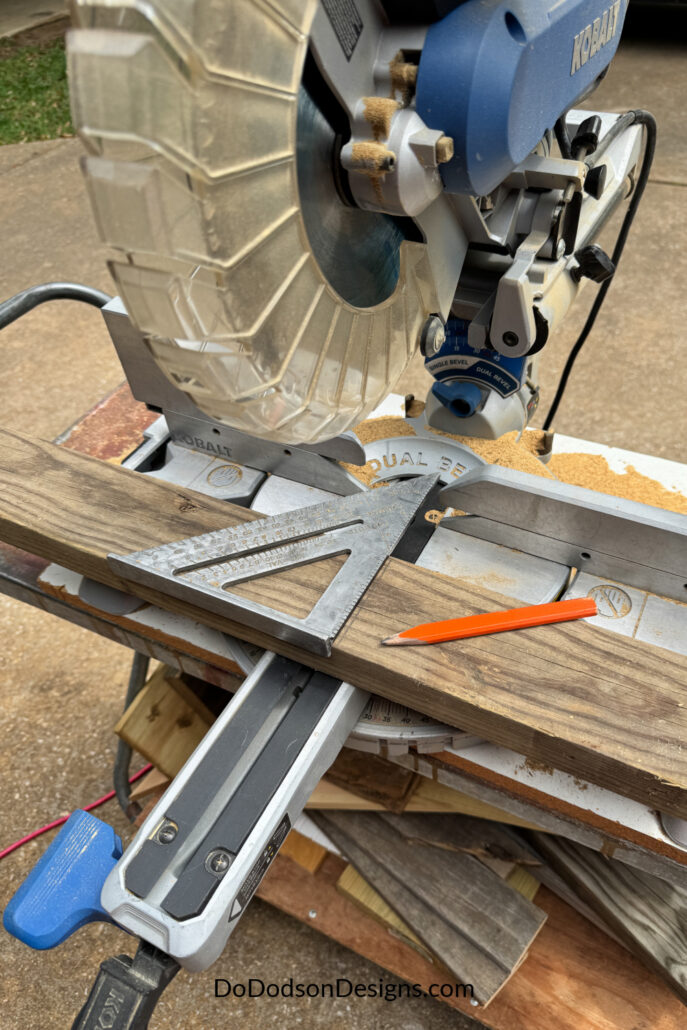
- Chop Saw or Miter Saw
- Speed Square
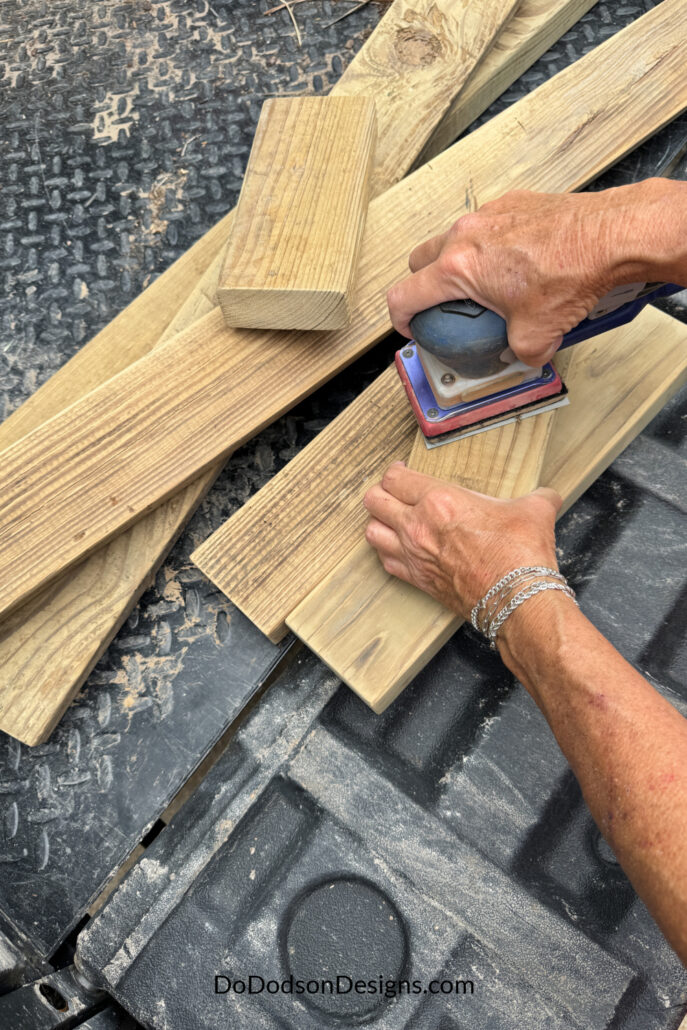
- Wood Sander and sandpaper (180 – 120 grit)
- Brad nailer (to secure the wood together before screwing it together)
- Exterior wood screws (I used 2.5-inch)
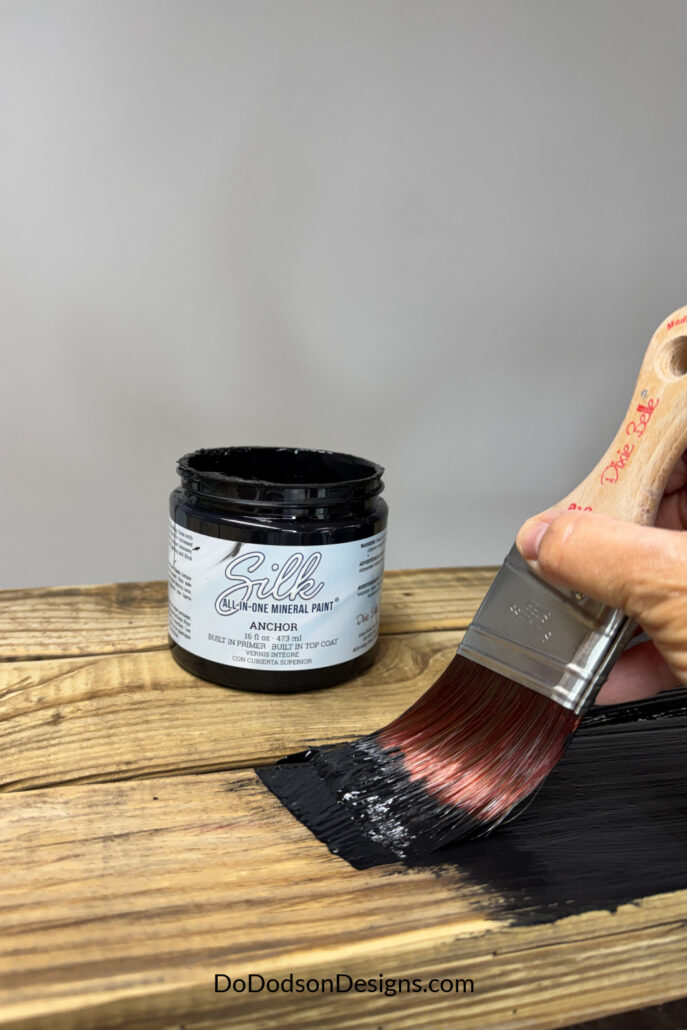
- Anchor SILK All-In-One Mineral Paint
- Golden Ash NO Pain Gel Stain (oil-based)
- Paintbrush
- Foam Brush (Foam and Dandy)
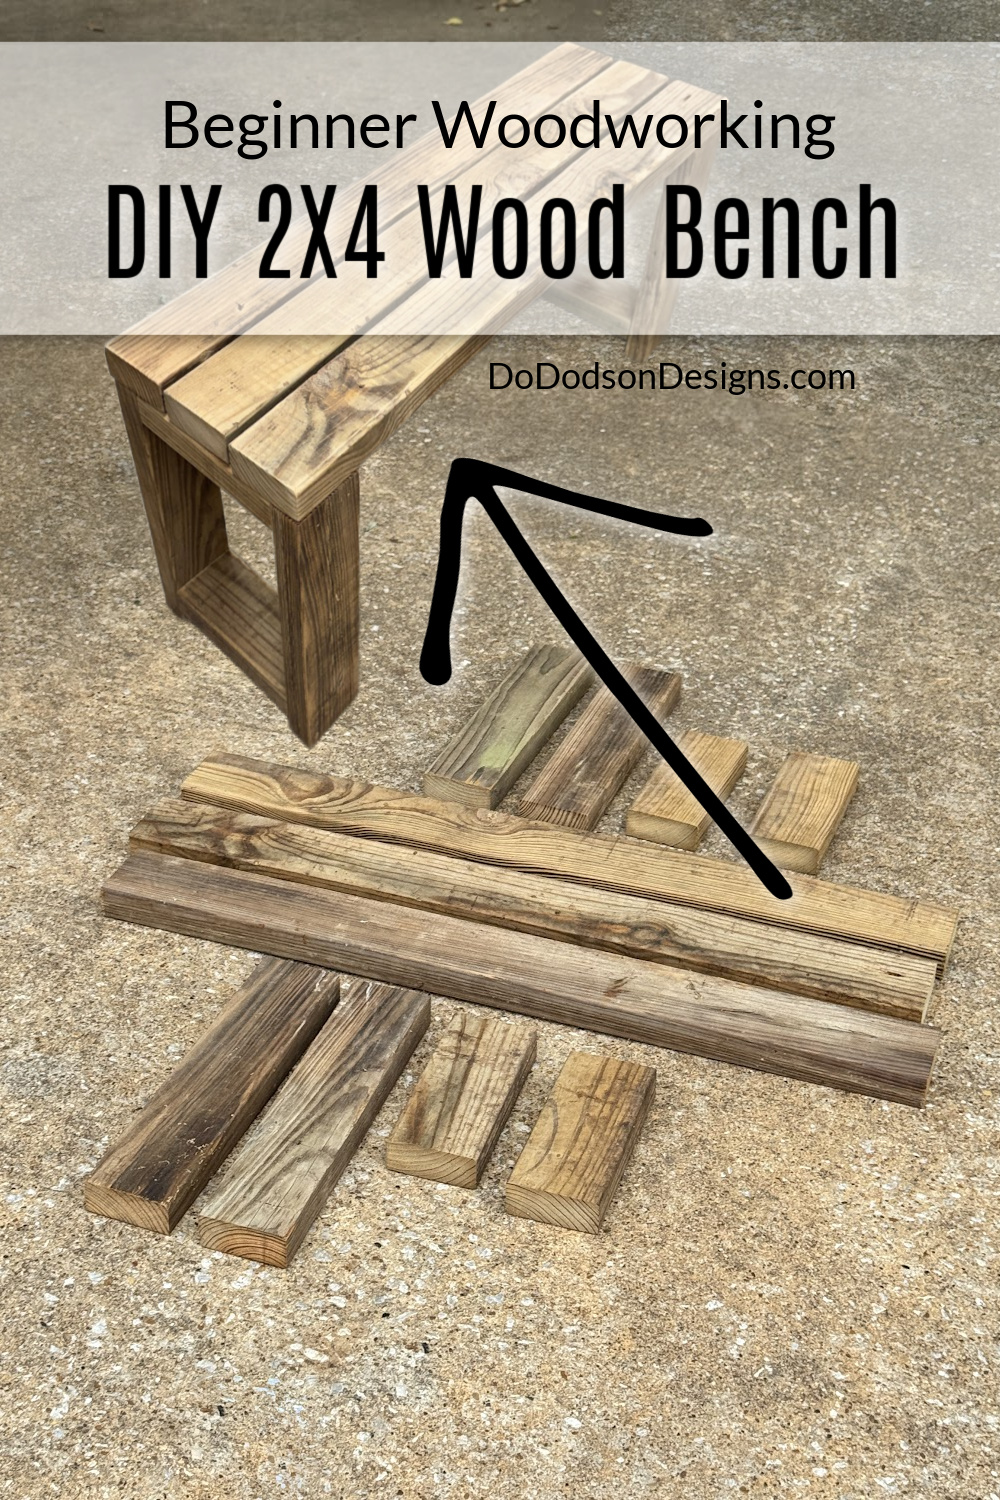
Cut List (Using Only 2x4s)
Here are the measurements I used for this DIY wood bench:
- 3 pieces at 36 inches (these are your top boards)
- 4 pieces at 14.5 inches (these are your legs)
- 4 pieces at 8 inches (these are the inner supports for each side frame)
That’s all there is to it—super simple and perfect for using up scrap wood! I only used one 10 ft and one 8 ft 2×4 to make this bench.
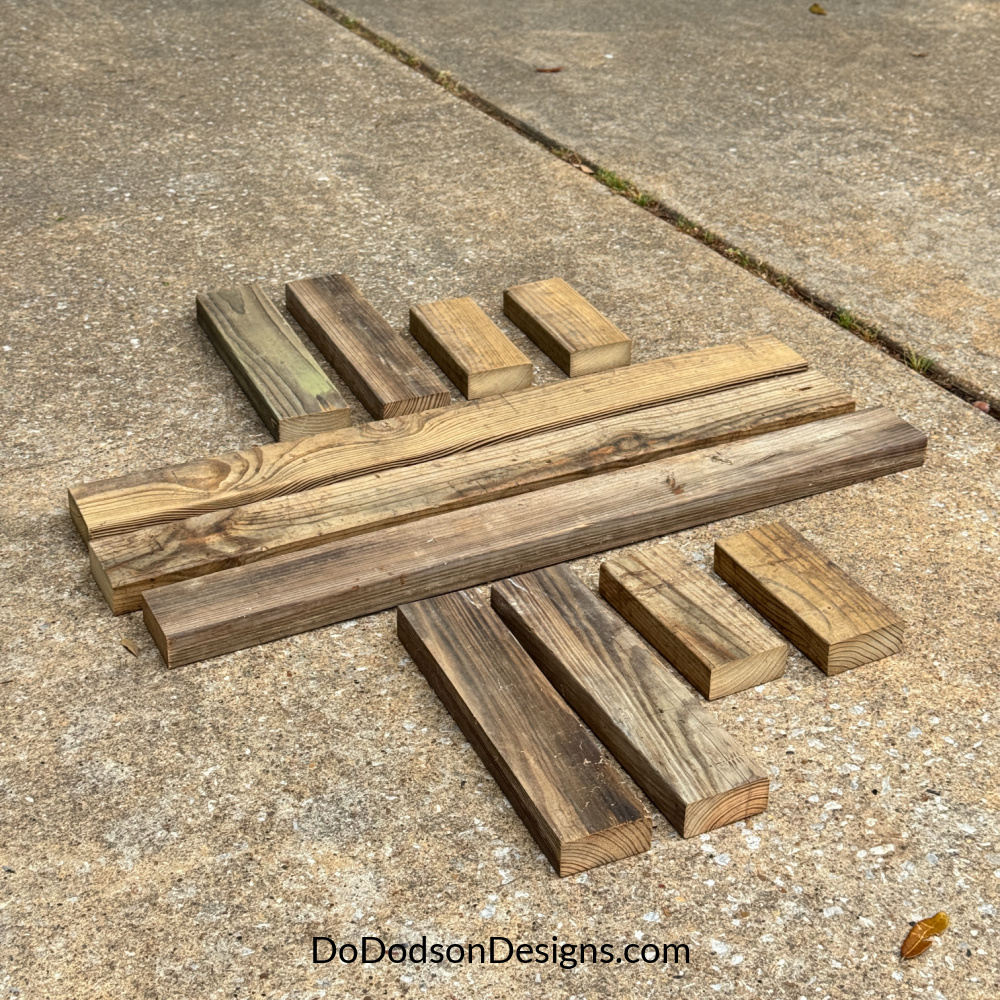
Step 1: Cut Your Wood Pieces
Start by cutting all your pieces using the measurements above. Try to keep your cuts as straight as possible so everything lines up nicely during assembly.
Once everything is cut, lay it out—you’ll see the bench taking shape quickly.
Step 2: Sand the Wood
Give each board a quick sanding to smooth rough edges and splinters. You don’t need to overdo it—just enough to make it clean and comfortable to use.
I always spend a little extra time on the top boards since those are the most visible and your delicates will be sitting on them. 🤭
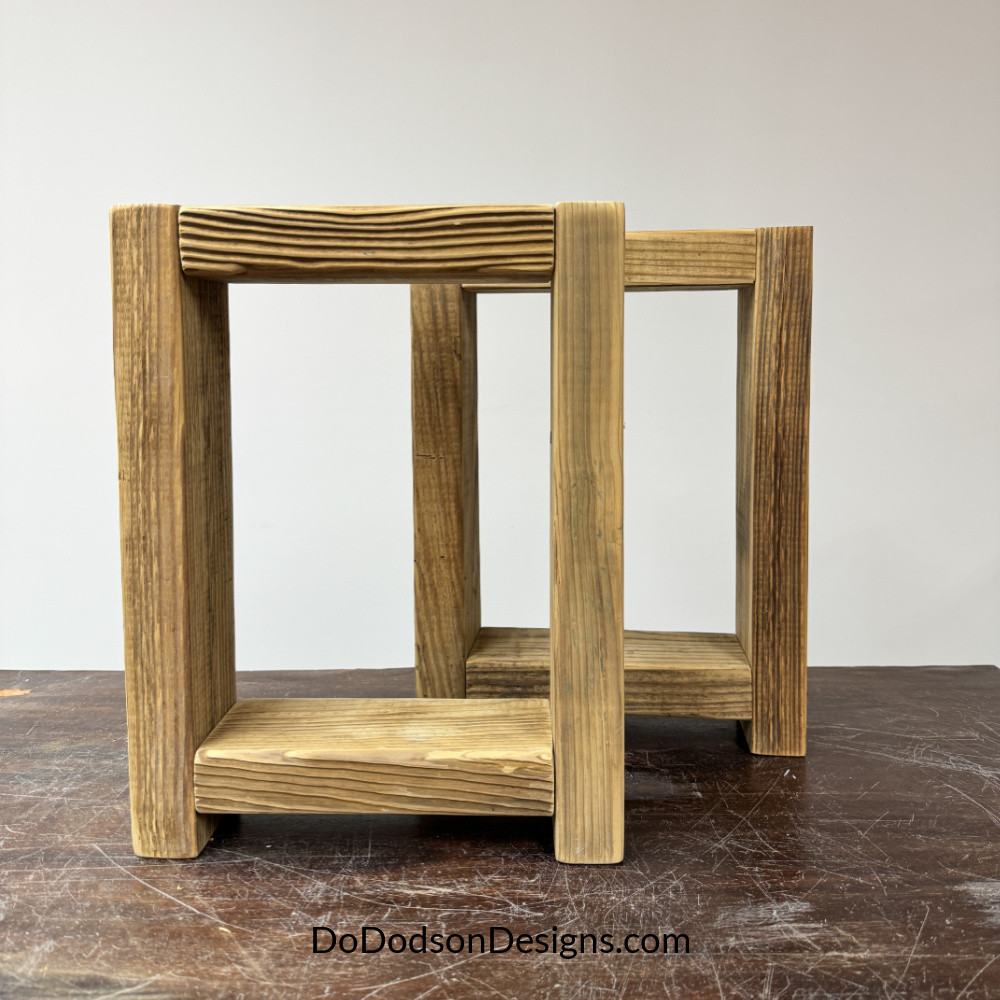
Step 3: Build the Side Frames
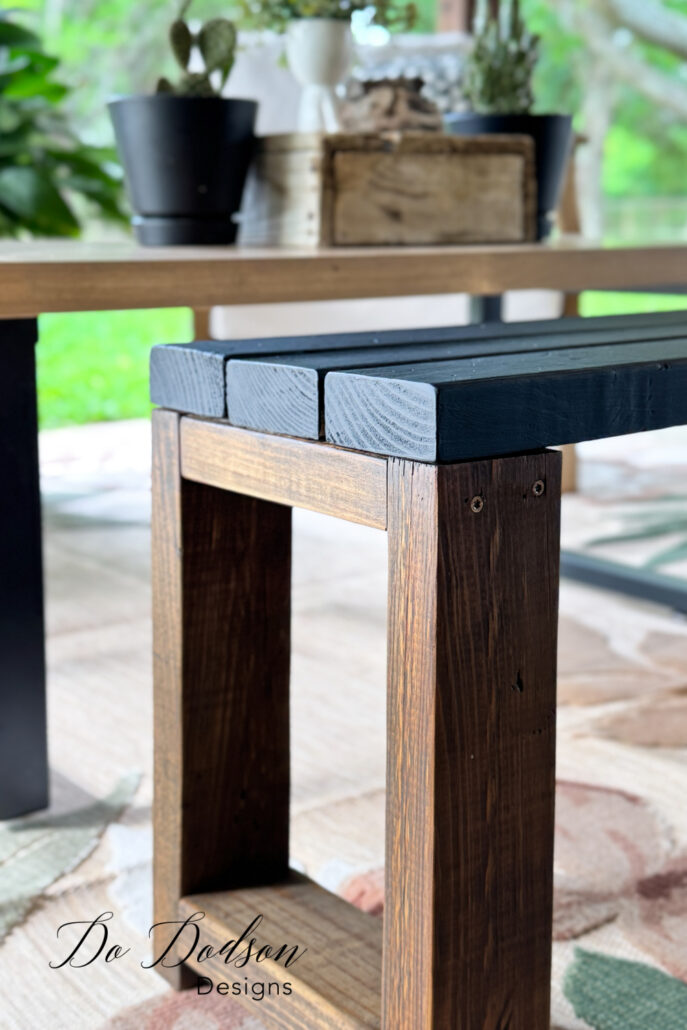
Each side of the bench is a simple rectangular frame. I love the simplicity of this design.
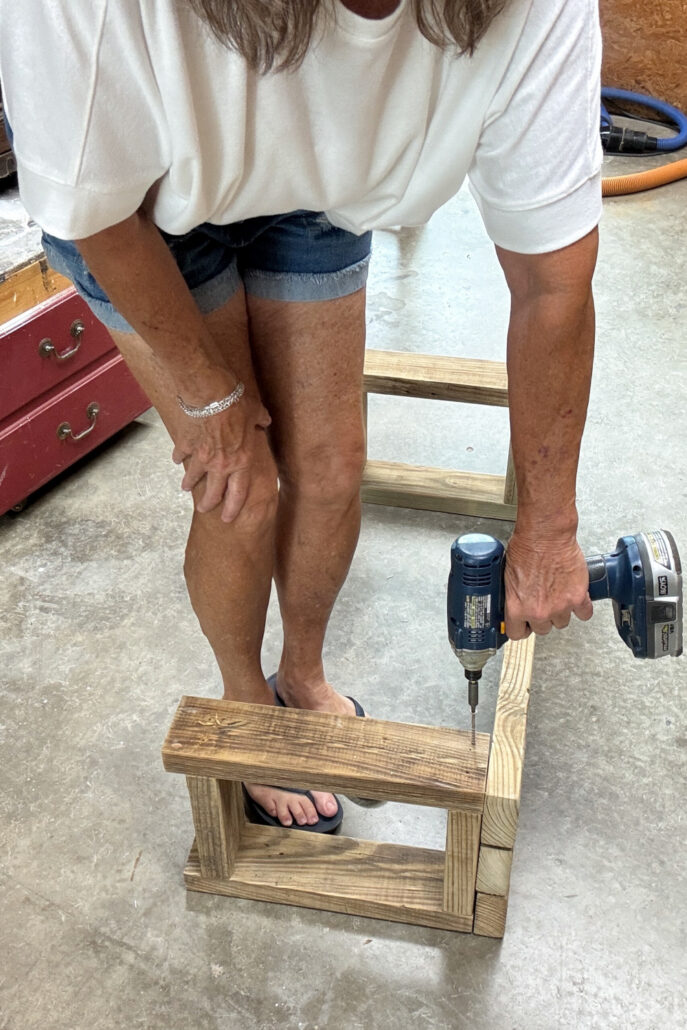
Take two of your 14.5-inch leg pieces and connect them with two of the 8-inch support pieces—one at the top and one at the bottom, leaving a one-inch space at the bottom of the leg piece. Make sure everything is nice and square. A speed square is super helpful and way more accurate than just guessing!
I used brad nails first to get everything in place, then went in with wood screws. Two pairs of hands are helpful, but if you can’t, nailing it first will do the trick.
Repeat this to create the second frame. These two frames will be the base of your DIY Wood Bench.

Step 4: Assemble the Bench Base
Stand both frames upright and space them apart. Now attach your 36-inch boards across the top.
These boards will act as both the structure and the seat support. Once attached with the wood screws, your bench should feel solid and balanced.
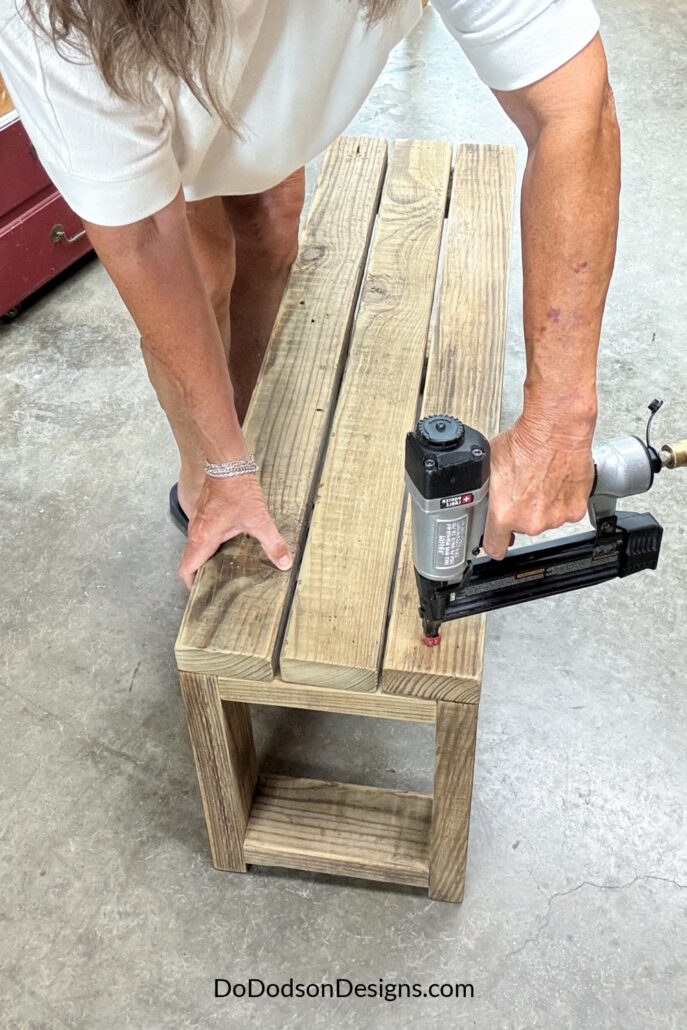
Step 5: Attach the Top Boards Of The DIY Wood Bench
Now secure all three 36-inch boards across the top to form the seat.
Leave a slight gap between them for a more rustic farmhouse look. Attach them evenly and check alignment as you go.
For the top boards, I used a pin nailer to attach them first, then flipped the bench over. I pre-drilled pilot holes in the side pieces and used wood screws to make it super sturdy. Plus, this way, no screws are showing on top of the DIY wood bench!
Step 6: Paint, Stain, or Both
Time to make your DIY wood bench pop! Or leave as is if you like the natural look of the wood.
For the seat of the bench, I opted for a rich, deep black color using Anchor SILK All-In-One Mineral Paint. I found that just two coats of this paint provided complete coverage, and what I really love about this paint is that it functions as a primer, stain blocker, and top coat, all in one convenient product! It has become an absolute favorite of mine for projects like this.
To really bring out the natural beauty of the wood on the leg base, I chose a warm No Pain Gel Stain in Golden Ash to beautifully highlight the wood grain.
Apply the stain (oil-based) on the wood with a sponge, cloth, or even a paintbrush. After applying, immediately wipe away any remaining on the wood. This product does not need a topcoat sealer. But if you’re using it outdoors and exposed to the weather, I do suggest adding a water-repellent topcoat to extend the life and to keep your bench looking beautiful.
I personally love this color combo, which creates a lovely contrast and results in a cozy, inviting farmhouse aesthetic that is sure to warm up any space.

A Few Helpful Tips
This wood bench design is very forgiving, so don’t stress over perfection. Small variations in wood actually add to the rustic farmhouse look.
Try to use whatever wood you have on hand. The results will surprise you!
If your boards are older or a little dry, pre-drilling before securing the wood with wood screws will help prevent splitting.
Finished DIY Wood Bench
And just like that, your DIY Wood Bench is done.
It’s simple, sturdy, and made entirely from 2x4s—which makes it one of those projects you’ll want to build again and again. I’m currently building a second one to match.
I’m using this bench as additional outdoor seating at my DIY outdoor coffee table. It’s perfect for the kiddos when they come to visit.

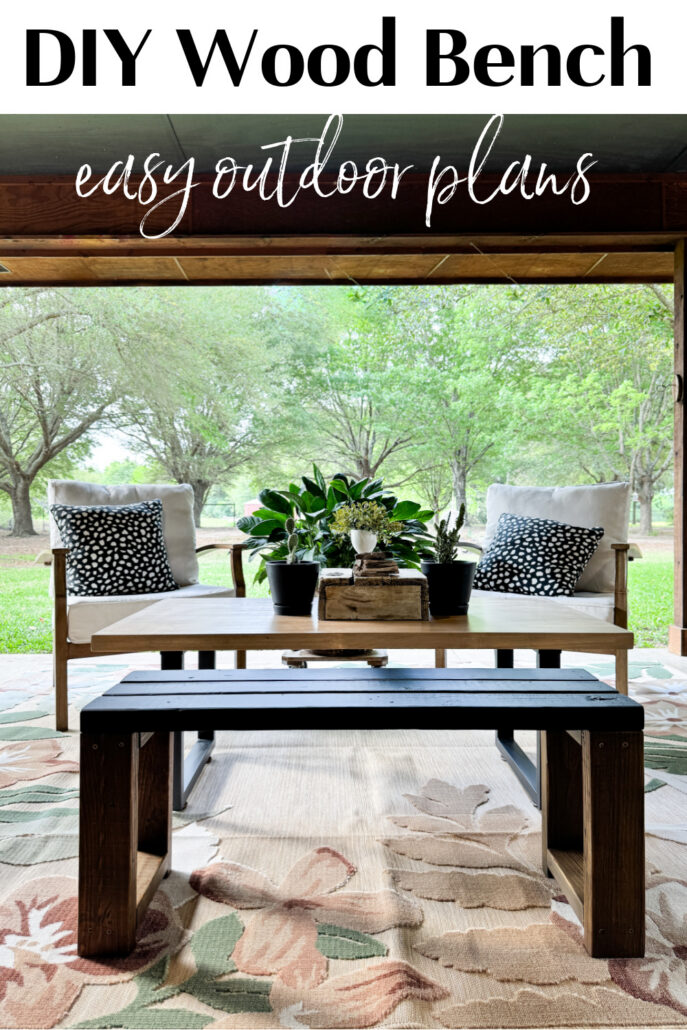
This rug! I snagged it from Amazon. It came folded up, so it’s still finding its shape, but I think it’ll be good in no time. It works great in this space with the new wood bench.
And if you’re wondering where I purchased my outdoor washable rug, here’s the link.
➡️ OUTDOOR RUG
Want More DIY Projects?
If you enjoyed this easy bench DIY, be sure to check out more of my simple DIYs and woodworking projects here on the blog!
There’s just something really satisfying to me about building something this useful out of just a few scrap boards. This DIY Wood Bench proves you don’t need complicated plans or expensive materials to create something beautiful.
I’d love to hear what you think about this DIY Wood Bench project! Do you have any questions, alternative ideas, or suggestions for future DIY tutorials? I’m eager to read your comments and discuss all things woodworking and home improvement. Let’s connect in the comment section below, or just say Hi, so I’ll know you stopped by.
Oh, and don’t forget to PIN and save this to your favorite DIY Project board on Pinterest.
Until the next project… xo, Do 😘
This bench is so adorable and I can see it working in so many scenarios and I LOVE the Anchor paint with the Gold Ash stain. Beautiful! Pinned XOXO Have a wonderful weekend my friend!
Thanks! You’re right, I’ll be using this bench in many ways. Enjoy your weekend, my friend. xo 😘
I love this bench! The black and brown look so good together. Can you ship it to me, please? 😏
Hey girl friend! Thank you! I can’t ship but I sure can build you one when I come to visit. 😉 xo
What a great bench — loving the stain and paint combination. I think a smaller version sized for the grands’ garden is calling out to me. Thanks for the inspo!
Hi Diane! It’s a great little bench and so easy to make. I love these quick win projects and I have plans to make more for my garden as well. Have fun making them and thanks for reading. xo