Like most of my projects, this headboard bench took a little turn from what I had envisioned. If not for my sweet friend Tammy Graves with Rustic Orchard Home giving me the idea, this project may have not had as much cattiness. Oh ya, I’m calling this one CATTY for sure! Read on…
This post contains a few affiliate links to help you find the products I use. You are not charged extra to use any of the links, but any income I make will be used for more fun projects! To see my full disclaimer, click here.
How To Make A Headboard Bench
In 1 Day
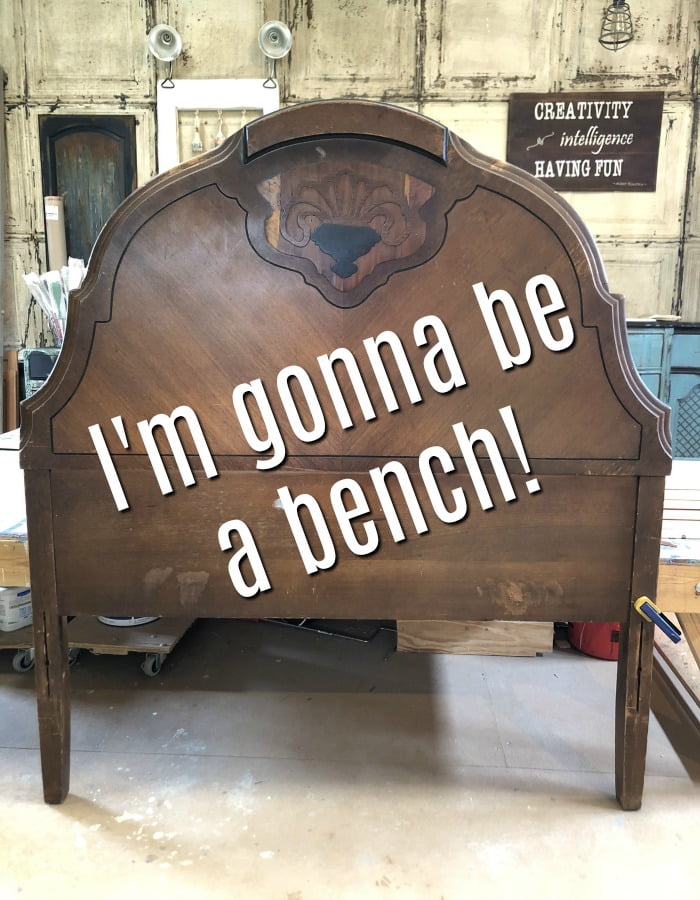 I picked up this vintage headboard full knowing that the plan was to make it into a headboard bench. It was small (twin size) and would make the perfect bench. But with the vintage headboard came issues that needed to be tackled before painting.
Cleaning And Prepping The Headboard
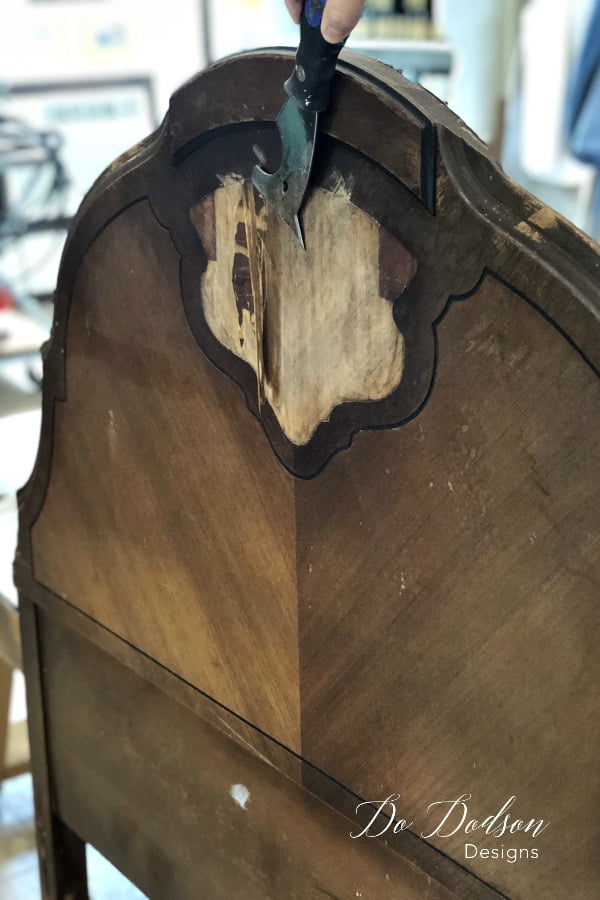 It had beautiful detail in the pics before I purchased it, but closer inspection at home showed veneer damage. A lot of it! Because of the age, it was a simple fix. Most of these pieces that have veneer have perfectly good wood underneath. The plan was to paint anyways, so no problem. I used a paint scraper and it popped right off. This is not always the case and usually, more aggressive techniques are needed.
Choosing Colors For The Headboard Bench
Here is a complete supply list for the products I used to prep, clean and paint this headboard before making the bench. Click on each product below to see the products and where you can purchase them.
- White Lightning (Dixie Belle cleaner prior to painting)
- BOSS (Dixie Belle stain and odor blocker)
- Cotton (Dixie Belle mineral chalk paint)
- Caviar (Dixie Belle mineral chalk paint)
- Clear Top Coat (satin finish)
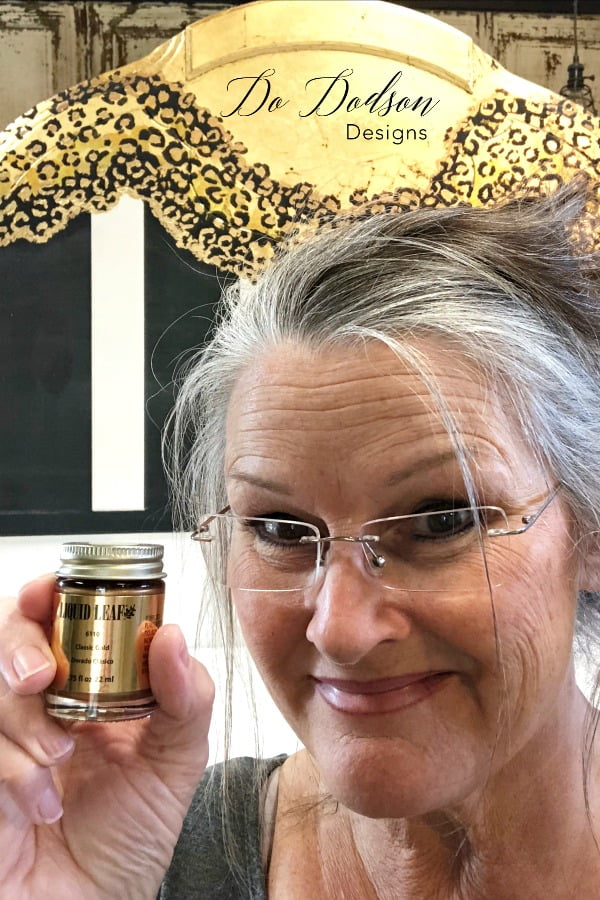
- Gold Leaf Kit
- Liquid Leaf (classic gold)
- Painters Tape (stripes)
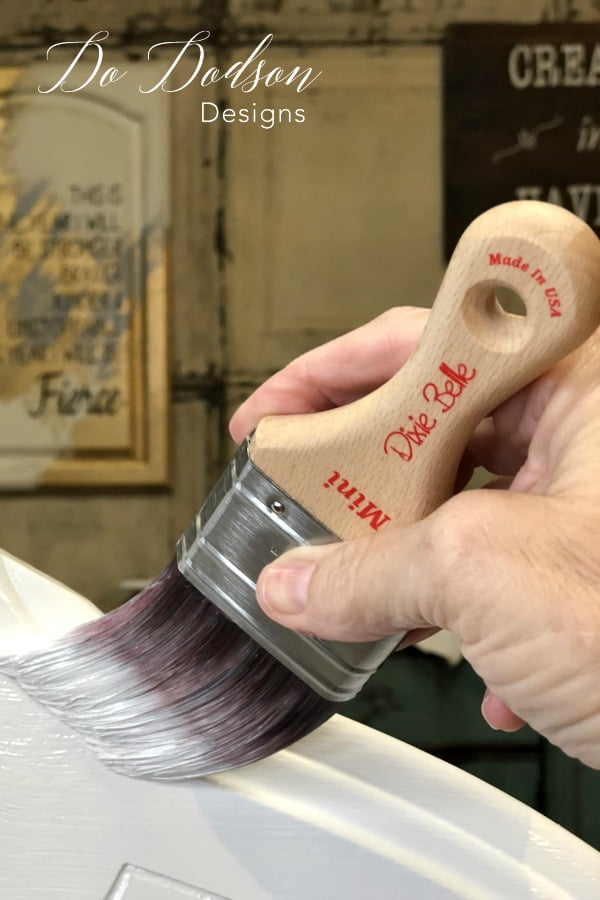
- Mini Paint Brush (Dixie Belle)
- Oval Small Paint Brush (Dixie Belle)
- 220 Grit Sandpaper
 After a quick cleaning with White Lightning (follow directions on the product) I sanded the headboard down with 220 grit sandpaper. Another quick wipe down with a damp cloth to remove leftover dust. I applied one coat of BOSS to prevent any bleed through due to the age of the piece.
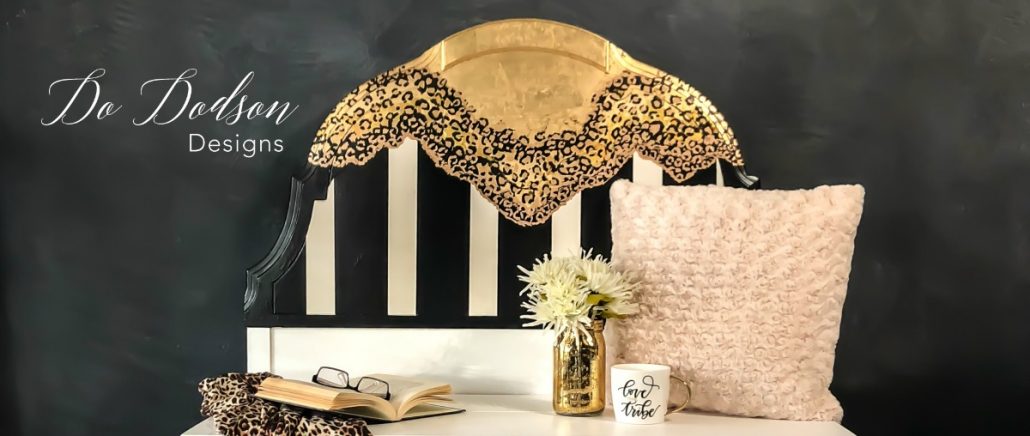
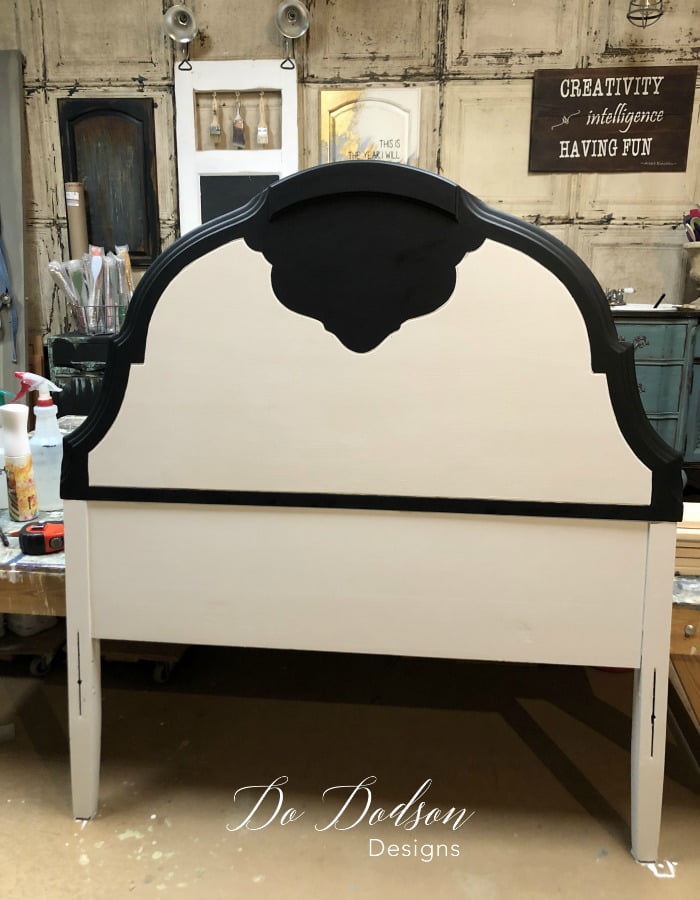 I used the colors Cotton and Caviar to paint the headboard first and then went back with my painter’s tape and taped off bold lines that were painted with the caviar. BOLD STRIPES totally inspired by the talented Tracey Bellion with Tracey’s Fancy! I love the classic look of black and white.
Adding Gold Leaf To The Headboard
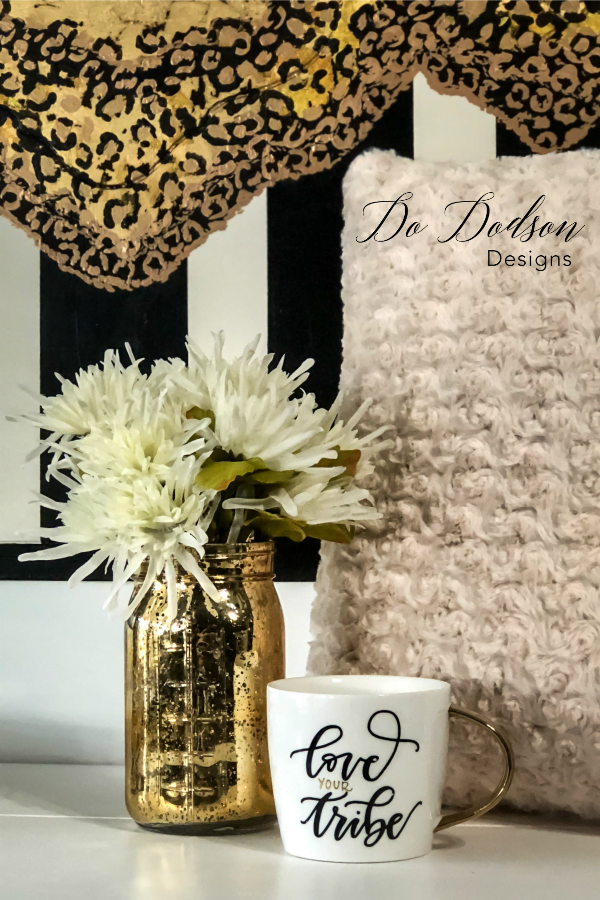
And then there’s GOLD! If you don’t know me, I’m a huge fan of gold leaf. This is where it takes a twist. I had envisioned a random pattern of a gold leaf falling down over the headboard. Actually, I had already completed it and was… just okay with it. So I stopped. To the corner, it went with the “meh” projects. It wasn’t until a few weeks later that my friend mentioned that it looked like leopard print. LIGHTBULB! I like this catty idea!
Leopard Print Pattern
 So after the gold leafing, I went back and added more Caviar (black) and even added this liquid leaf to give it a slightly different metallic gold. I really liked it! Oh if you want to know how to paint leopard print, search “how to paint leopard print” on Pinterest. Seriously, it’s not hard.
Building The Headboard Bench
Below is a complete supply list of the things I used to build the headboard bench.
- 2 6ft 1X10
- 1 6ft 1X4
- Repurposed Bed Spindles (legs)
- Kreg Jig Pocket Hole Kit
- Wood Glue
- Orbital Sander
- Drill
- Table Saw
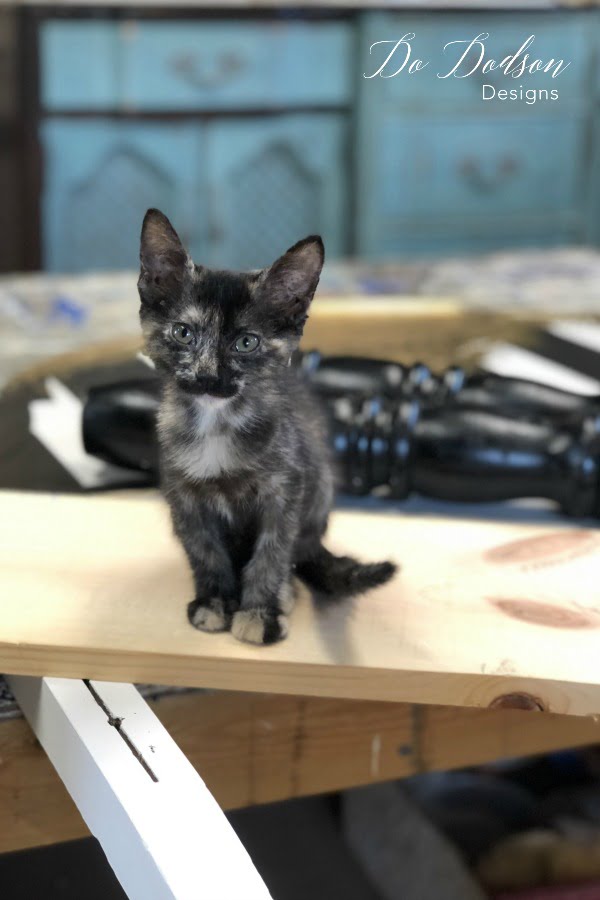 And the cattiness continues! Meet Linda, my newest rescue. I may or may not be turning into the crazy cat lady. This was her first full day in the studio and she just made herself right at home. Like she knew this was her place. After about an hour, she curled up in a chair and slept the rest of the day… right through all the sawing and sanding. I wished I slept that well. I think it’s her cattitude!
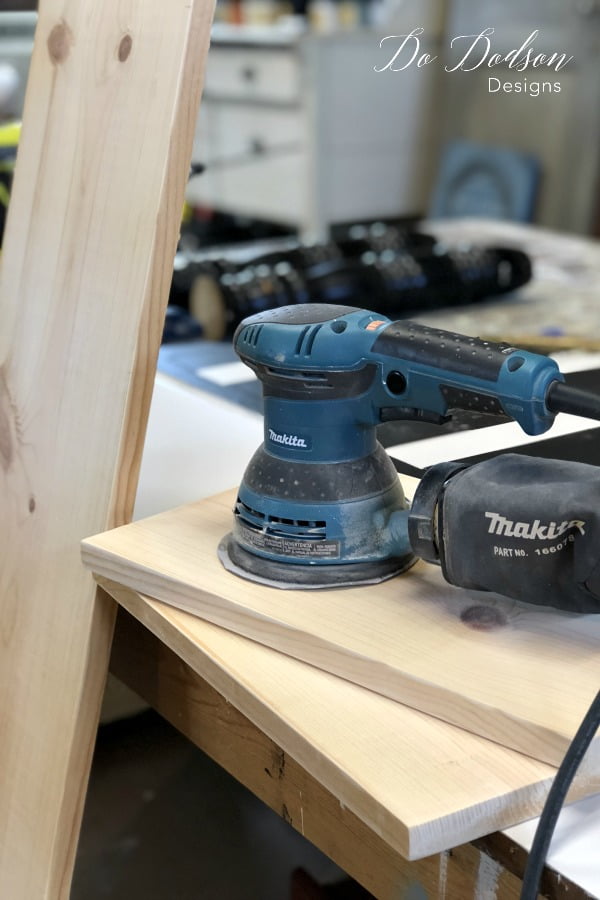 The 1X10 boards were measured, cut to size and sanded well before the assembly. It’s totally a custom project so your measurements will depend on the size of your headboard that you use.
Creating Pocket Holes With Kreg Jig
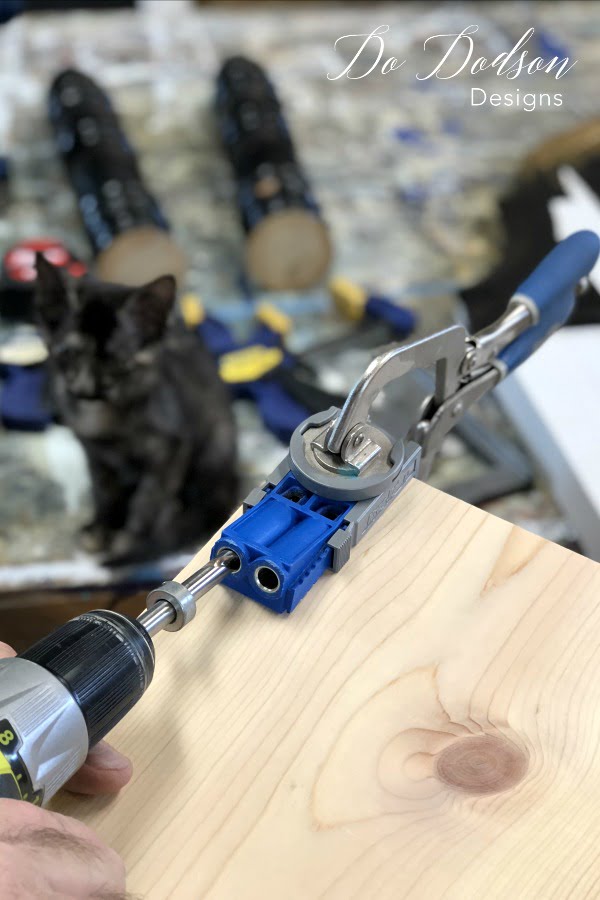 Mr. Honey Do (aka hubby) helped and drilled the pocket holes with a Kreg Jig. This is a must-have tool when building benches and connecting wood.
Headboard Bench Assembly
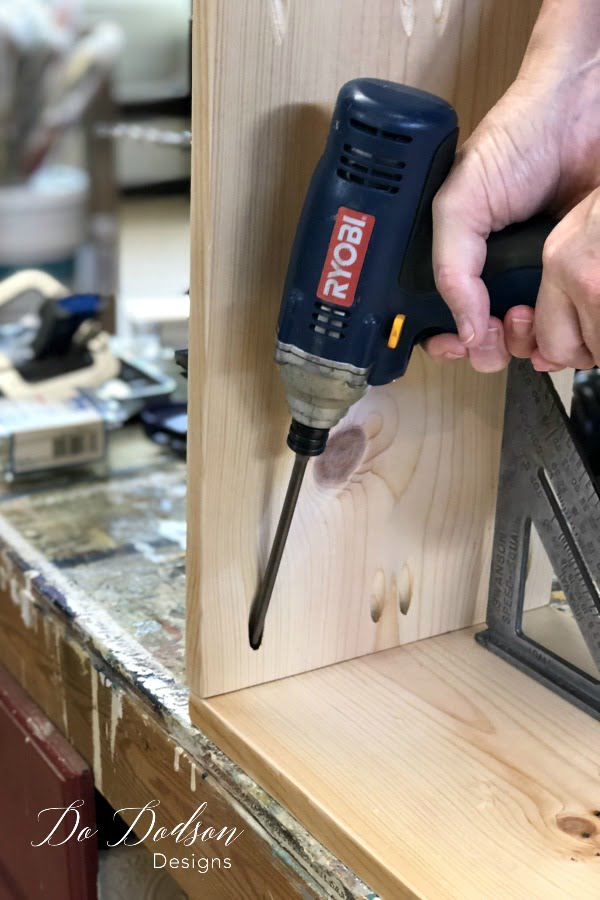 Each board was attached with special screws that came with the Kreg Jig Kit.
Securing The Legs
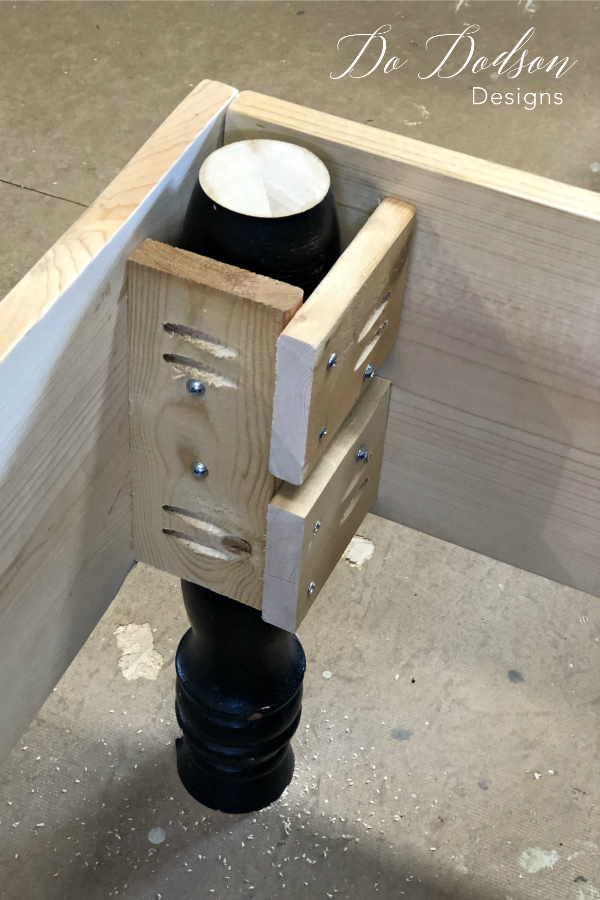 This was a bit tricky! I had picked up this large bed spindle thinking it would work well for legs. Not saying this is the best way to do this, but it worked. We took some scrap wood and built a box around the legs and secured them well. It was the easiest way plus I was determined to make it work. Bless Mr. Honey Do for putting up with me. I get pretty headstrong when I want what I want. And I wanted this to work! It did.
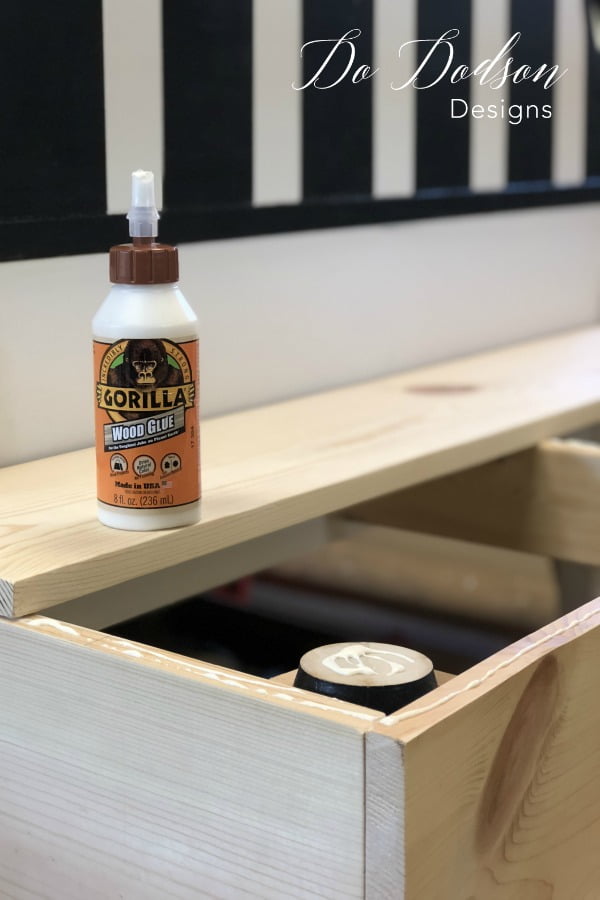 Two 1X10 boards were cut to fit for the seat. I added wood glue and secured the seat with my pin nailer. The nails were countersunk and filled with wood filler.
Before Painting The Headboard Bench Seat
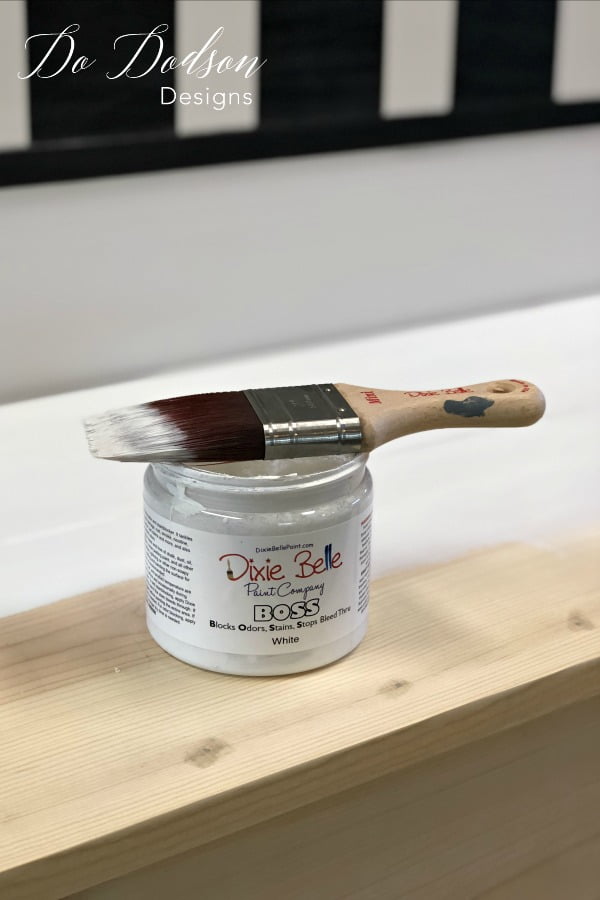 I painted the headboard bench seat with BOSS (stain blocker) and Cotton (white mineral chalk paint) and sealed it with a topcoat in a satin finish.
The Catty Headboard Bench
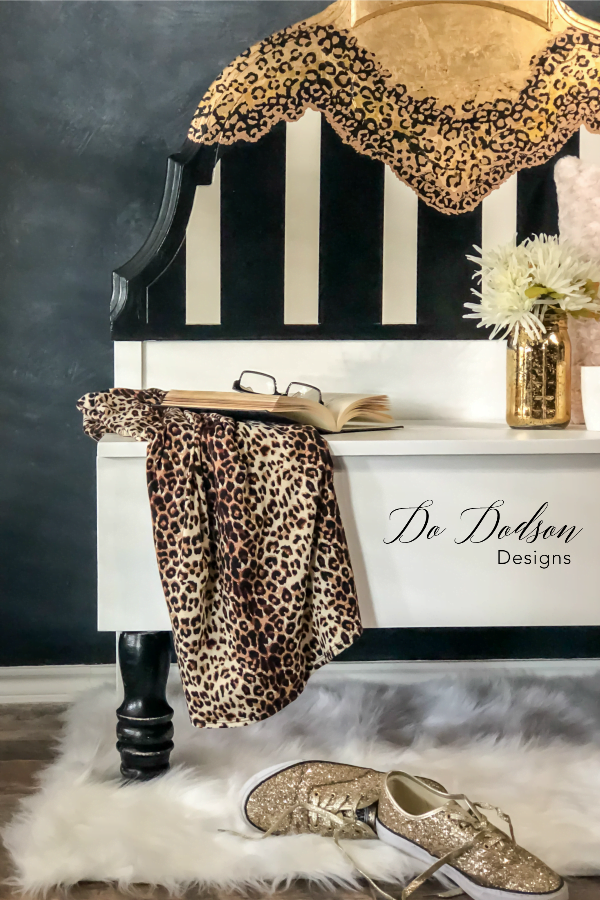
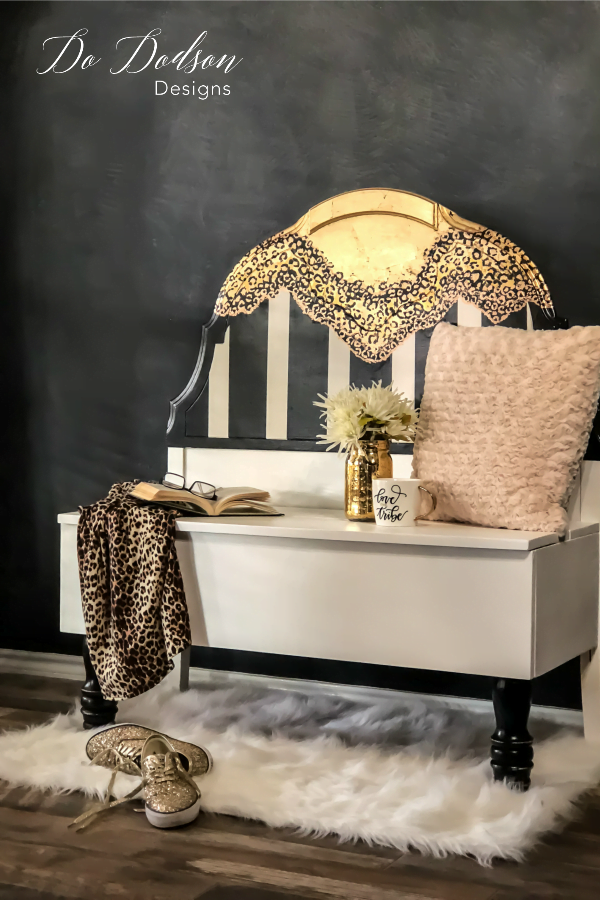
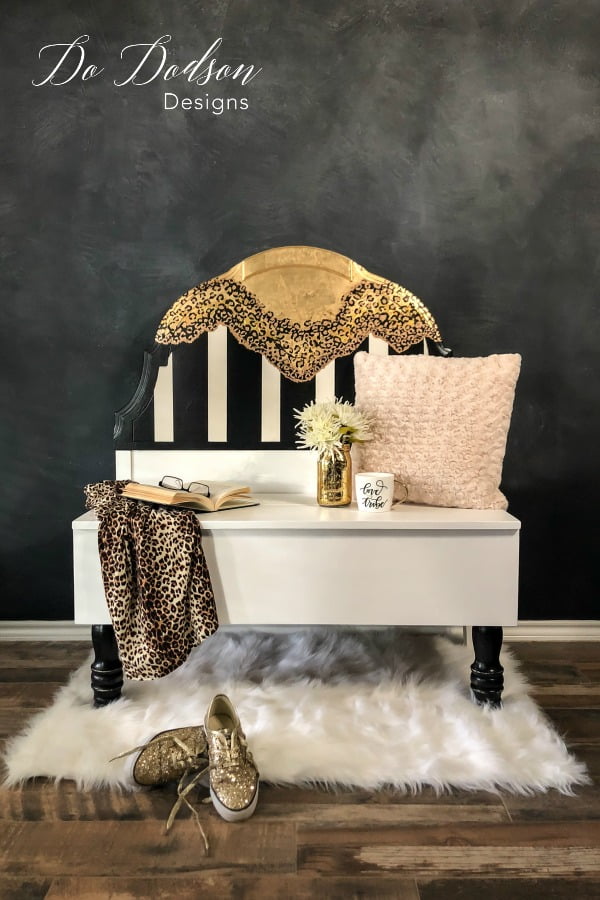 This was fun and a bit catty! I enjoyed making this bench and it just feels good to repurpose these beautiful vintage headboards. Have you ever repurposed an old headboard? Feel free to share your experiences and comments below.
Until the next project…

Turn out beautiful, I watched when you were doing the gold leaf., and was wondering how it turned out. Beautiful and one of a kind
Thanks Terrie! I had to sit on it a few weeks. Creative block. 🙂
I need those gold sneakers!!! Awesome project and Cattitude may be my new favorite word 🙂
I love those sneakers too! They make me happy. As for cattitude, I say it’s a good thing. Kinda like moxie!
xo, Do
Do, this is beautiful! I love the mottled tones of gold at the top. I recently found an old art deco headboard I want to make into a bench. I really see the need to purchase a Kreg pocket hole jig! Thanx for sharing! <3
Thanks Yvette! The mottled happened by accident when I ran out of gold leaf and purchased more from a different manufacturer. Happy ending! The Kreg Jig is an essential tool for any DIYer. If I can help in any way, please feel free to reach out to me. Have a blessed day.
xo, Do
Absolutely adore the leopard print, gold leaf, and stripes! Beautiful job!
Thank you, Nina! It was a fun project. xo
This is so beautiful and what I needed for inspiration to complete the one I’ve been procrastinating on for weeks! Ty! ( I think you should add matching stripes to the front of the bench !!). So glad I found you!! Xoxo
Hi Jessica! I’m happy to meet you. Don’t forget to sign up for my weekly newsletter where I share so much more. Those benches are so fun to create. Stripes would look awesome! xo, Do
What paint is that on your wall? Love it.
Hi April! Thank you. Here is a post I wrote about that wall. https://www.dododsondesigns.com/perfect-chalkboard-wall/
Wonderful work! You are inspiring. To us laggers! Cheri
Thank you, Cheri! I’m glad to hear you’re enjoying my projects. Have a wonderful week. ❤️