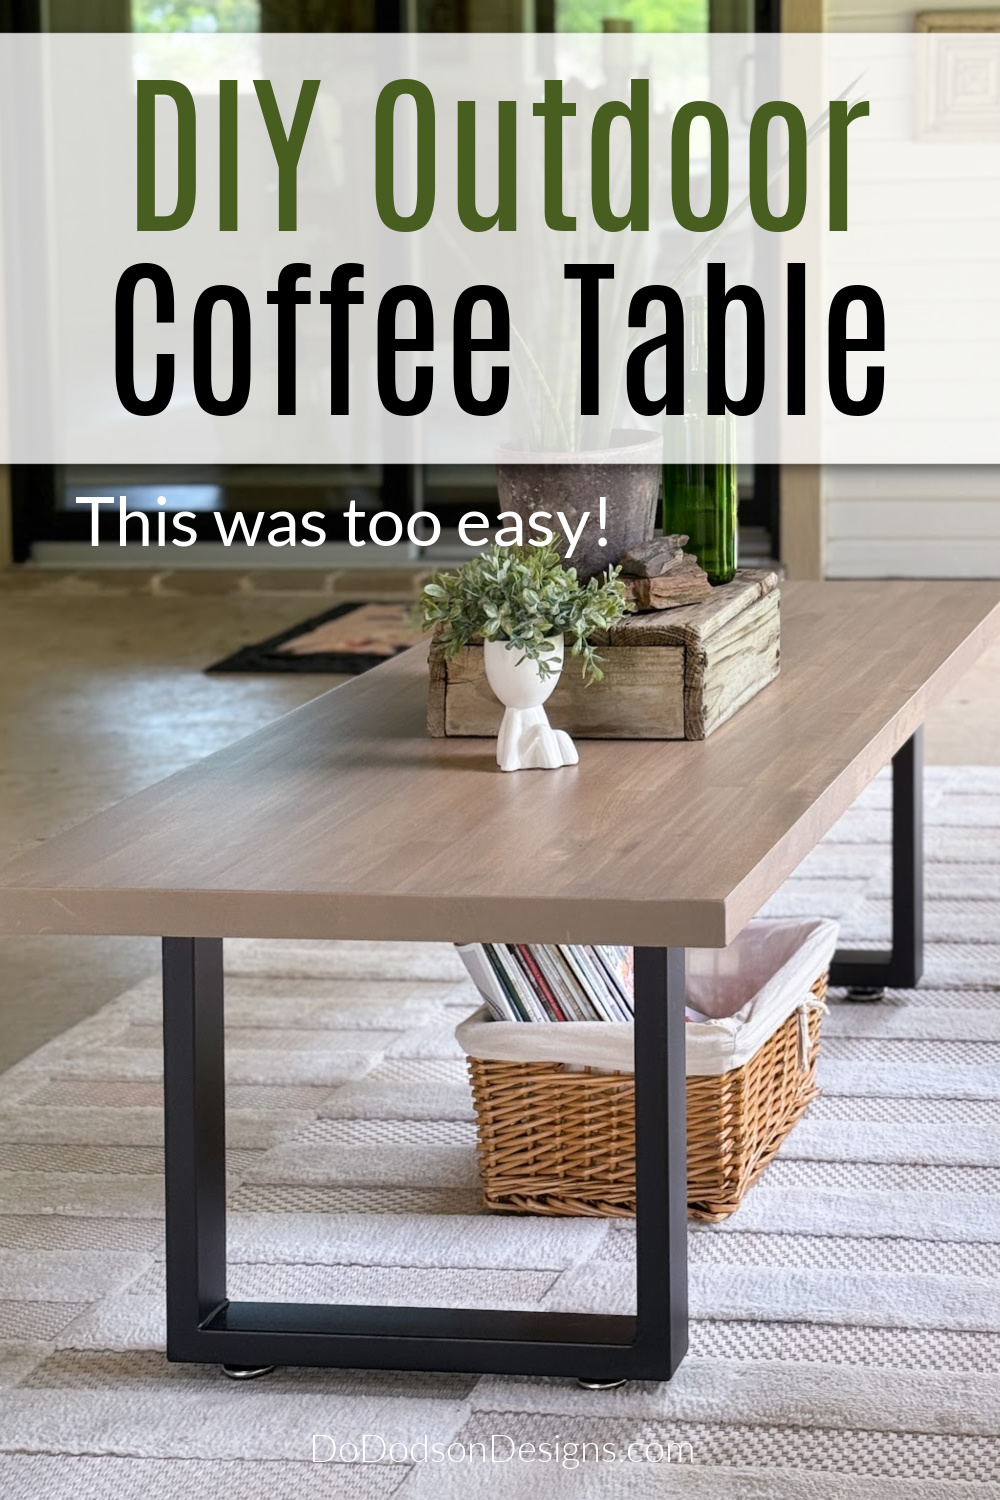
Hey DIY friends! I’m taking today’s DIY furniture project outdoors! If you’re looking for a quick and easy DIY Outdoor coffee table that requires zero woodworking skills, you’re in the right place. And if that’s not enough, the finish on the table repels water.
Thanks to Dixie Belle Paint Co. for sponsoring this post. While I was compensated to write this post, all opinions are my own.
* As an Amazon Associate, I earn from qualifying purchases and through other companies as well. You will not be charged extra when you purchase through these affiliate links, but any income I make helps me create more amazing DIY projects to share with you! To see my full disclaimer, click here!
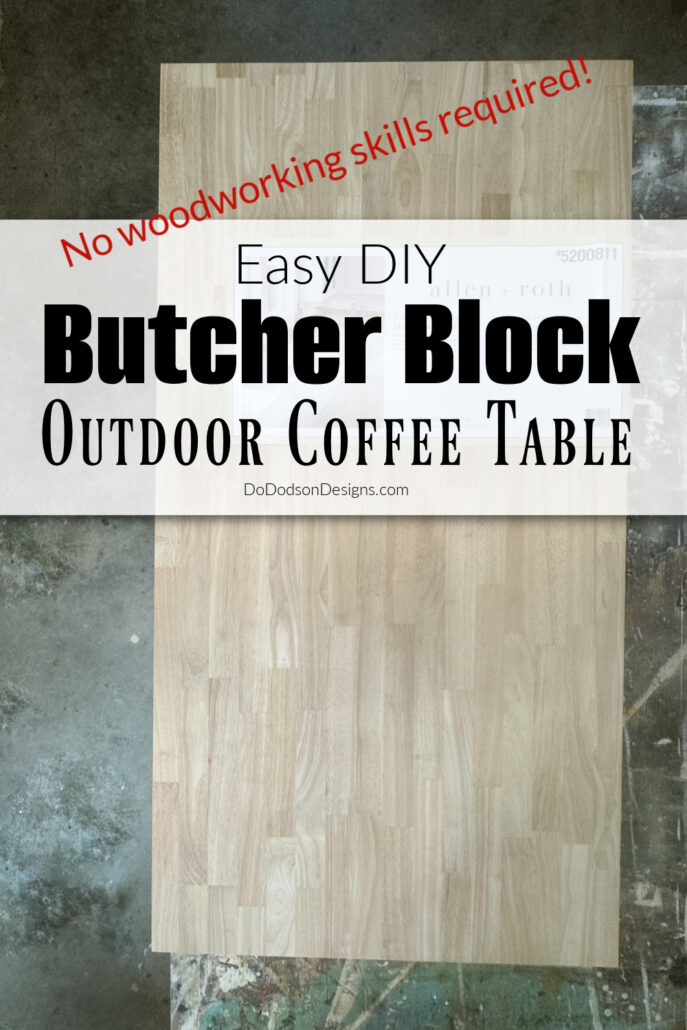
DIY Butcher Block Outdoor Coffee Table
During our kitchen renovation a few years ago, we had a leftover piece of butcher block from the installation of new countertops. Well, because I never throw away a good piece of wood (and a few iffy ones, too), I used that piece to make a quick and easy patio coffee table. CLICK HERE to see that project. To be totally honest, it was a bit too low, and it needed a higher base.
Recently, another idea popped into my head (a scary place to be at times), which led me to use the butcher block tabletop I had used on the old coffee table in another kitchen project. The butcher block matched my existing countertops, so it was a no-brainer. Wow, that wasn’t very clear. Lol, I’ll share that butcher block cabinet project with you soon.
So, what’s a girl to do without her outdoor coffee table now? I can’t have coffee outside in the morning without one. Well, maybe I could, but I don’t want to.

SUPPLY LIST: Here is what you’ll need to build a DIY outdoor coffee table.
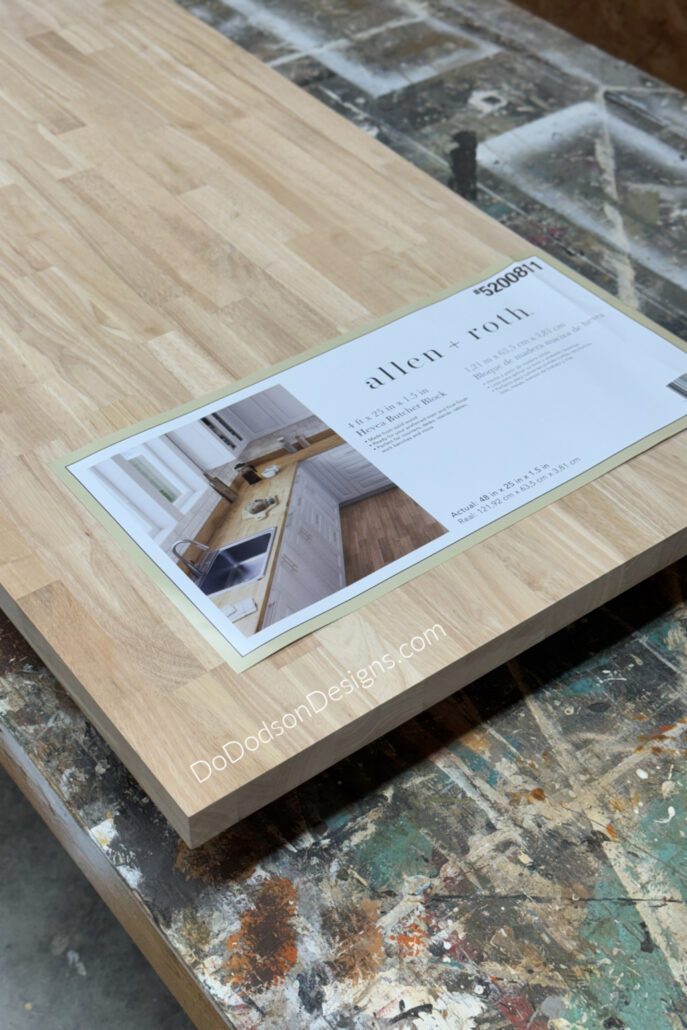
- Butcher block Allen Roth 4-ft x 25 in x 1.5 in
- wood sander (my preferred sander)
- 220 grit sanding pad
- Badlands SILK All-In-One Mineral Paint
- Extra Coat (water-based topcoat for Silk All-In-One Mineral Paint)
- 2-inch mini synthetic paintbrush
- 16-inch metal coffee table legs
- cordless drill
Butcher Block Prices
When I began searching for another piece of butcher block for this coffee table, I was surprised by the significant price increase over the last few years. The prices vary with the type of wood, length, and thickness.
I found this piece at Lowe’s for a little over $100, and it was just the right size for an outdoor coffee table. There was no need for a table saw or woodworking tools. Well, maybe a wood sander. How cool is that?
That may sound like a lot of money for a DIY Coffee table, but if you have priced IKEA coffee tables lately, you’ll quickly come to learn that making one is still a lot cheaper than buying one. I priced a similar one for $499. 😳NOPE
Not only that, but making your own allows you to customize it to your color and style. I wanted mine to match our outdoor dining table and chairs, and I think I nailed it!
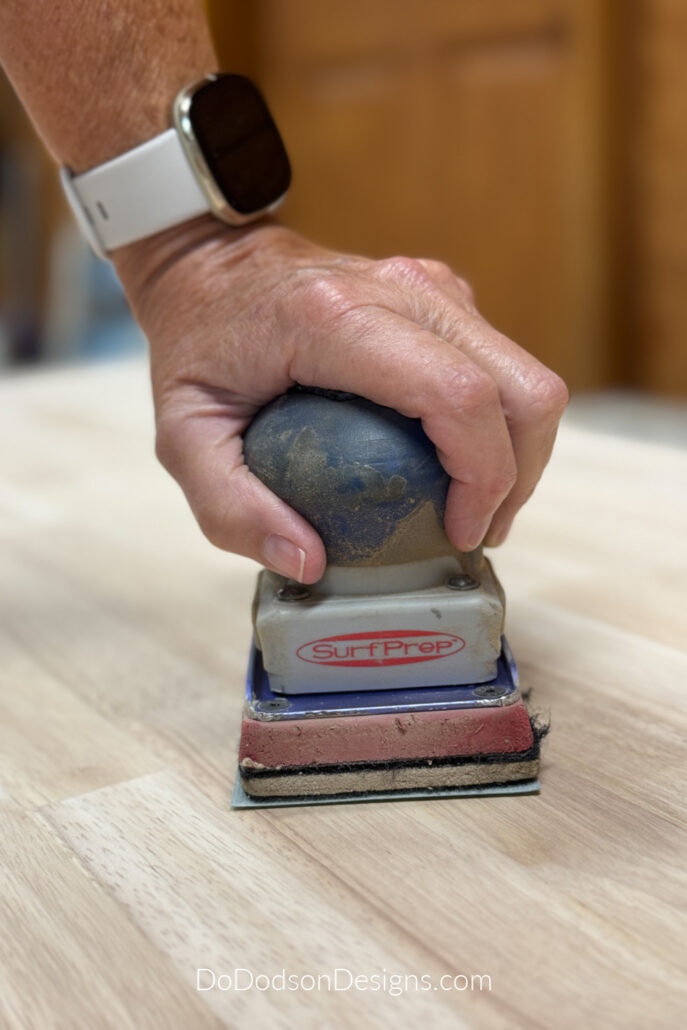
STEP 1: Sanding The Butcher Block
First, lightly sand the butcher block with 220-grit abrasive.
You can opt to sand by hand, but I use my favorite wood sander.
Sand the top and sides (including the underside) to remove any rough areas on the wood. Typically, the wood is smooth, but you will still need to lightly sand it to achieve a smooth finish. Remove any sawdust with a clean cotton cloth afterward.
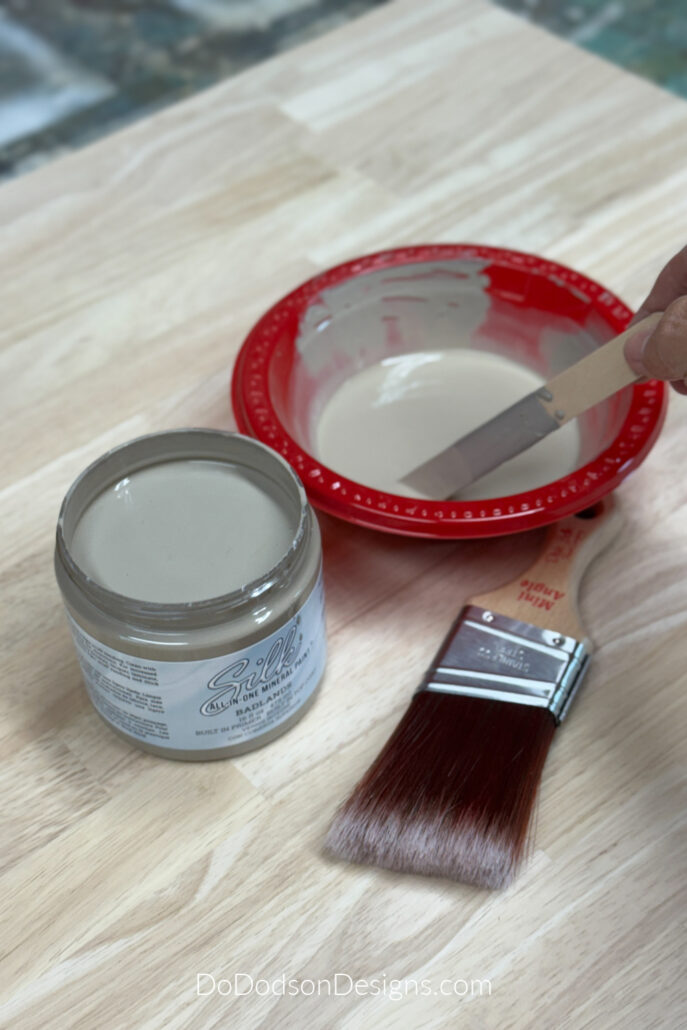
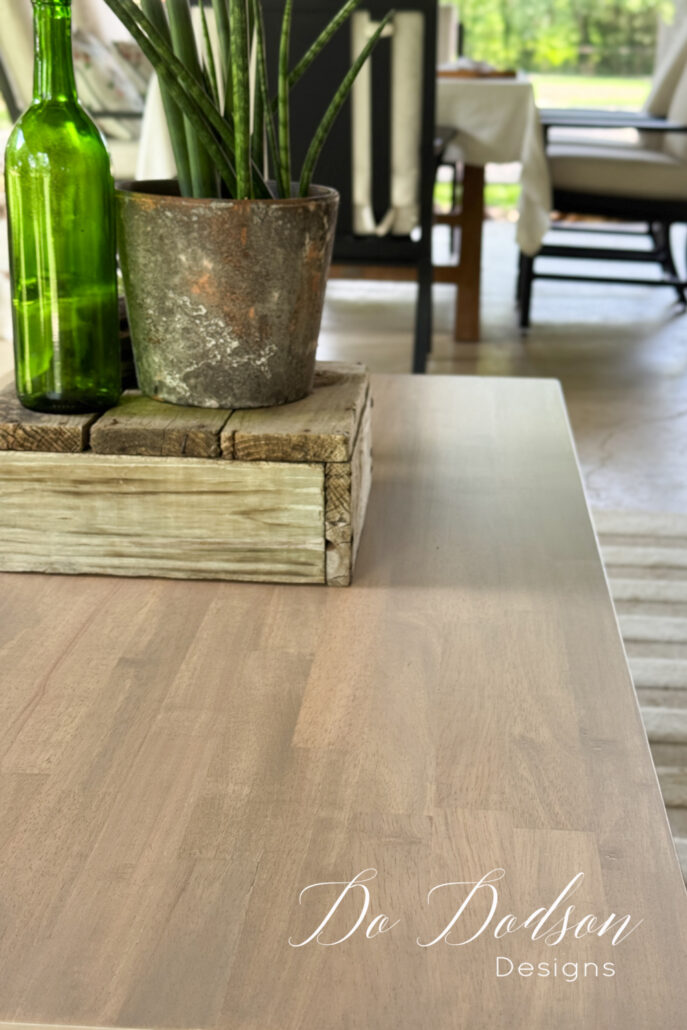
STEP 2: Color Washing Wood
The wood finish I’m working with today is called color washing, and it’s a great option when you want the wood grain to show but want to change the color subtly. Using a water-based paint, I mixed it with water, more water than paint. The water-to-paint ratio for this project is approximately 1:5. You can adjust the ratio according to the desired color intensity.
The butcher block I chose for this project has definite yellow undertones in the wood. I could use a sealer directly over the wood; however, I know that doing so will only accentuate the yellow even more. A color wash is a good option for correcting this, but colors matter when trying to cover the yellow and orange wood tones.
The chairs that will accompany this outdoor coffee table are made of a wood-colored metal with a hint of gray. Knowing this, I chose the color Badlands from the SILK All-In-One Mineral Paint line by Dixie Belle Paint Company to correct the yellow and to get a similar color match to the chairs. This color is the perfect blend of brown and gray, which creates a soft, weathered look on wood when used as a wash.
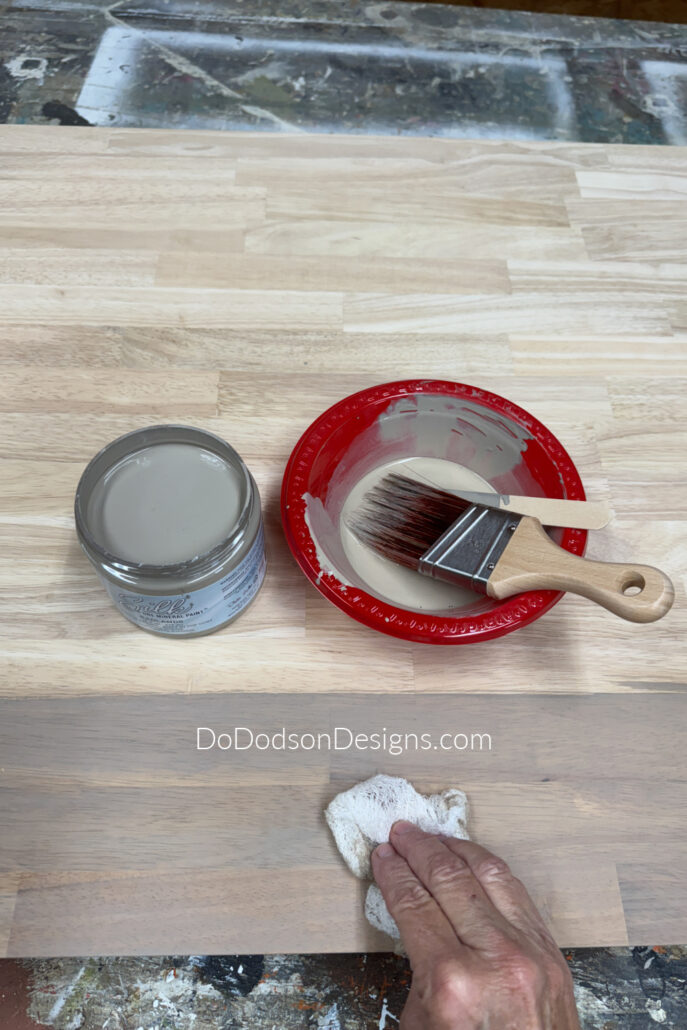
How To Apply A Color Wash To Wood
Using a soft-bristled paintbrush, apply the wash in the same direction as the wood grain. For these large projects, I work on one manageable section at a time.
Wipe away the remaining wash immediately after applying with a soft cotton cloth. If you notice that you have more color in one area, use a spray mist bottle filled with water to lightly mist over the area and wipe back any overlapping color. You don’t want a blotchy finish on your outdoor coffee table.
You will need to work quickly as the color wash will penetrate the wood immediately.
Additionally, you may want to dampen the wood with the spray mist bottle of water first before applying the color wash. I’ve used this method before, but not on this wood project.
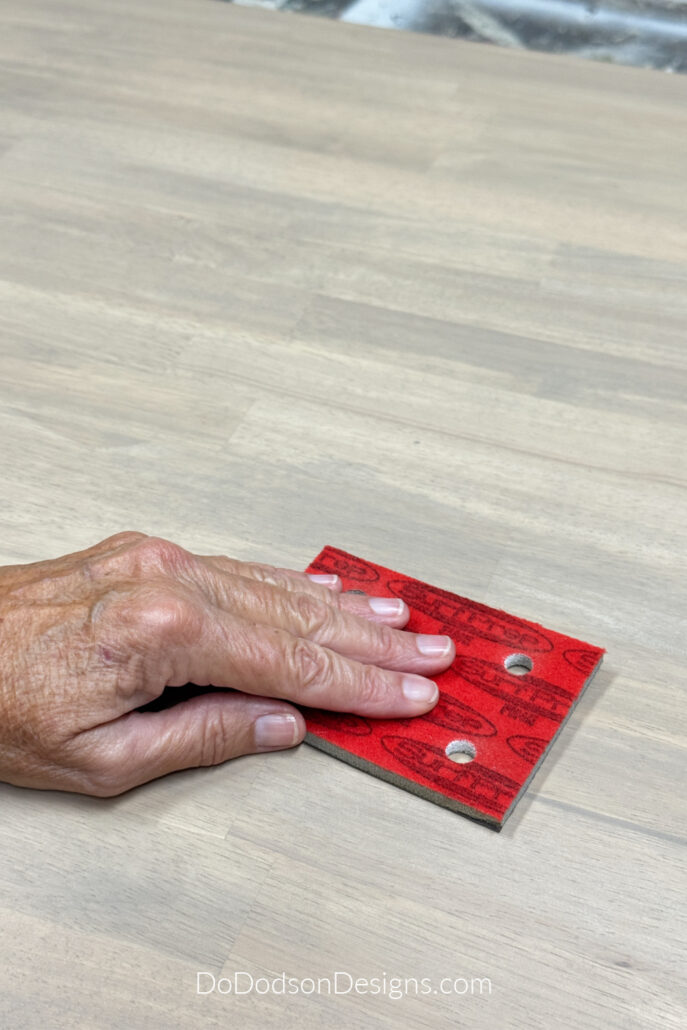
Once the color wash has completely dried, you will notice that the wood is now slightly rough to the touch.
This occurs when water is applied to bare wood, causing the wood grain to swell. No worries! All you’ll need to do is lightly sand the wood with a 220-grit sandpaper. Remove any remaining dust from the wood with a soft cotton cloth.
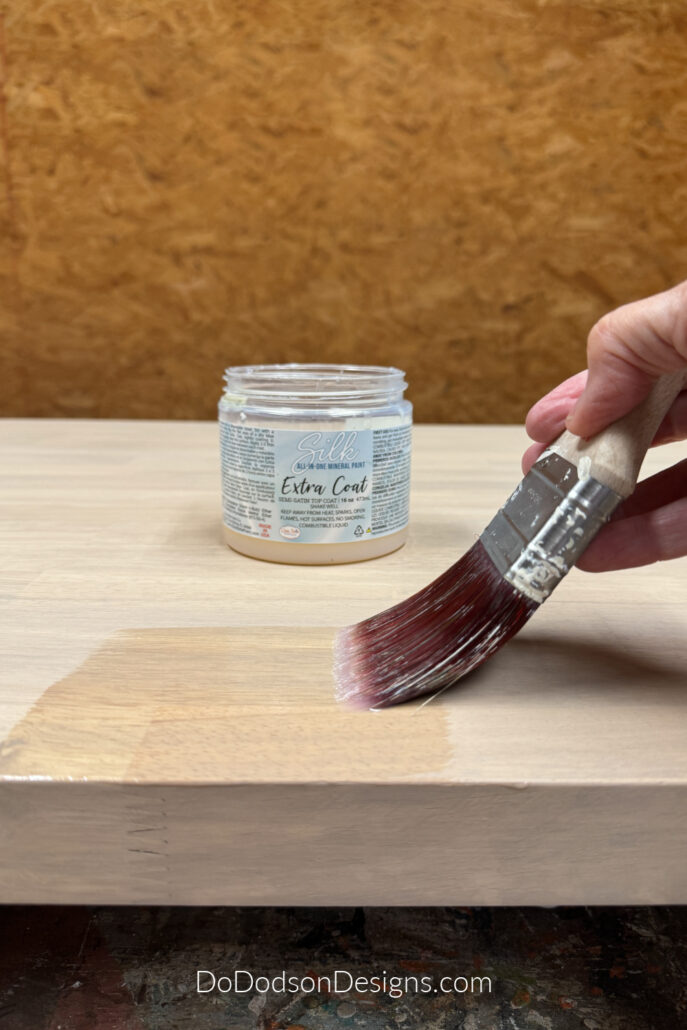
STEP 3: How To Apply Water Repellant To Wood Furniture
Because my DIY coffee table will be living outdoors under my covered patio, it will need a water-repellent finish.
We experience high humidity levels in Texas, and even the moisture in the air can cause significant damage to wood furniture.
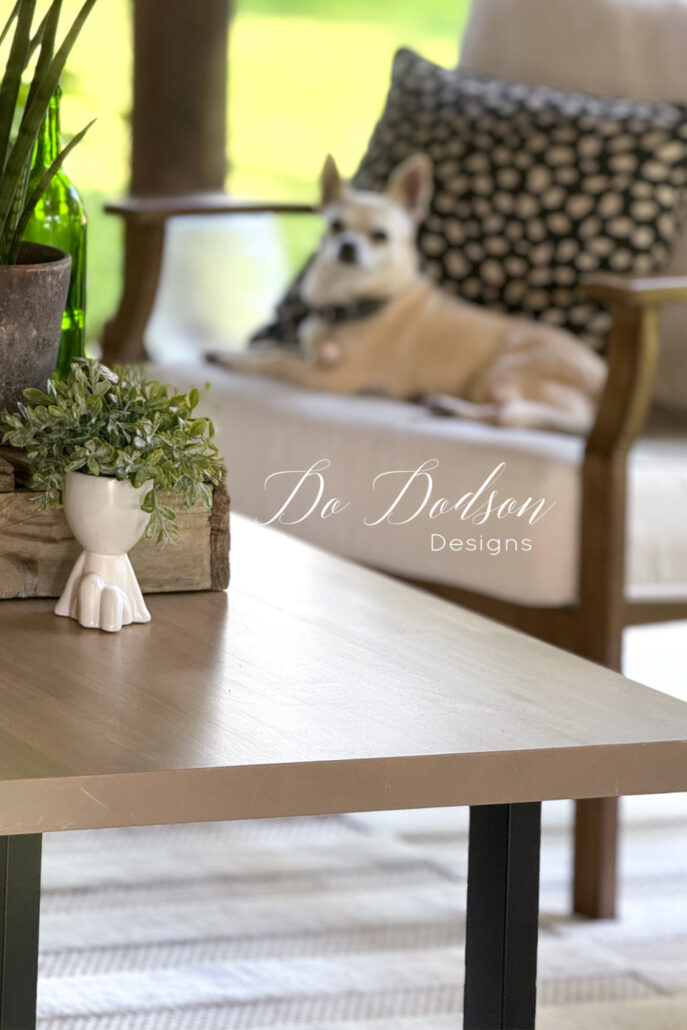
Extra Coat is a water-based polyacrylic that repels water when applied correctly. It leaves a beautiful satin finish that adds additional protection to the surface. It’s also great for high-traffic areas. I’m thinking my Chihuahua “Tallulah” will be jumping on this table when I’m not looking. Stinker!
First, stir the Extra Coat before application. Do not shake, as this will create bubbles in your finish.
Apply the first layer of Extra Coat with a high-quality synthetic paintbrush. Work quickly, applying it in long, smooth strokes. Allow to dry completely. About 2 hours in a controlled temperature environment.
Afterwards, use a 220 grit (fine sandpaper) to smooth any tiny bubbles. This occurs as the brush glides over the wood. This will lessen with each topcoat applied.
Repeat the application and lightly sand the surface for a total of three coats. Do not sand the third and final coat. The total dry time is about 48 hours.
The total cure time is anywhere from 21 to 30 days.
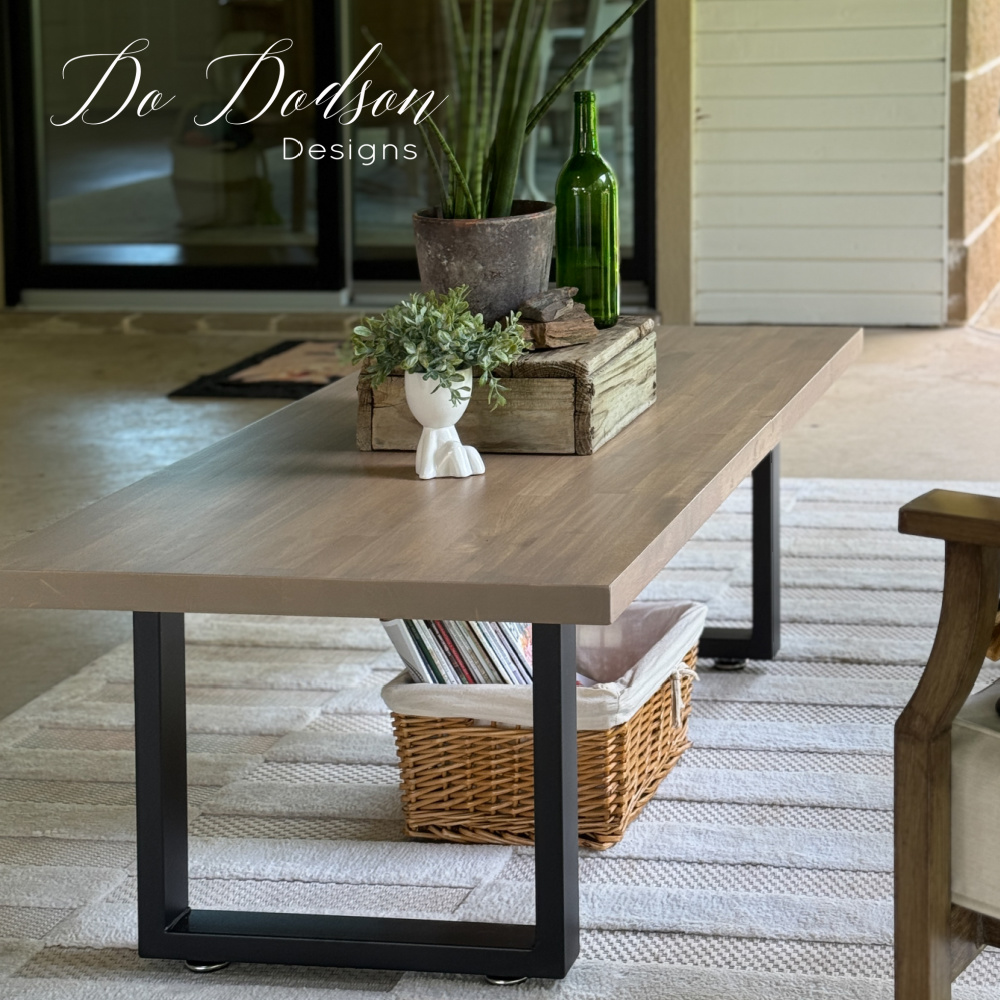
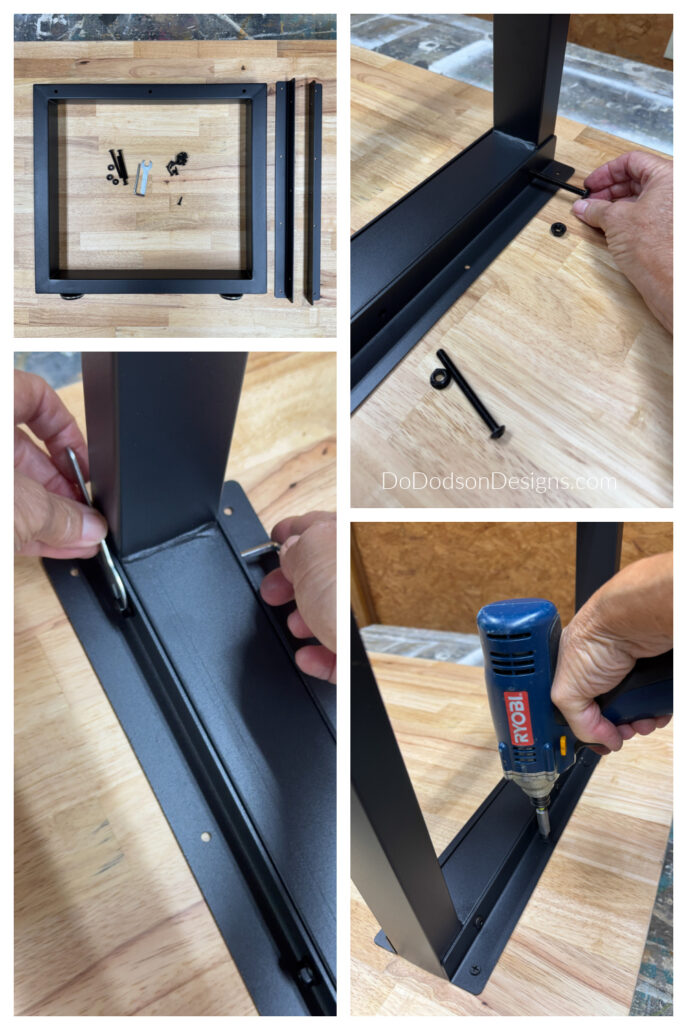
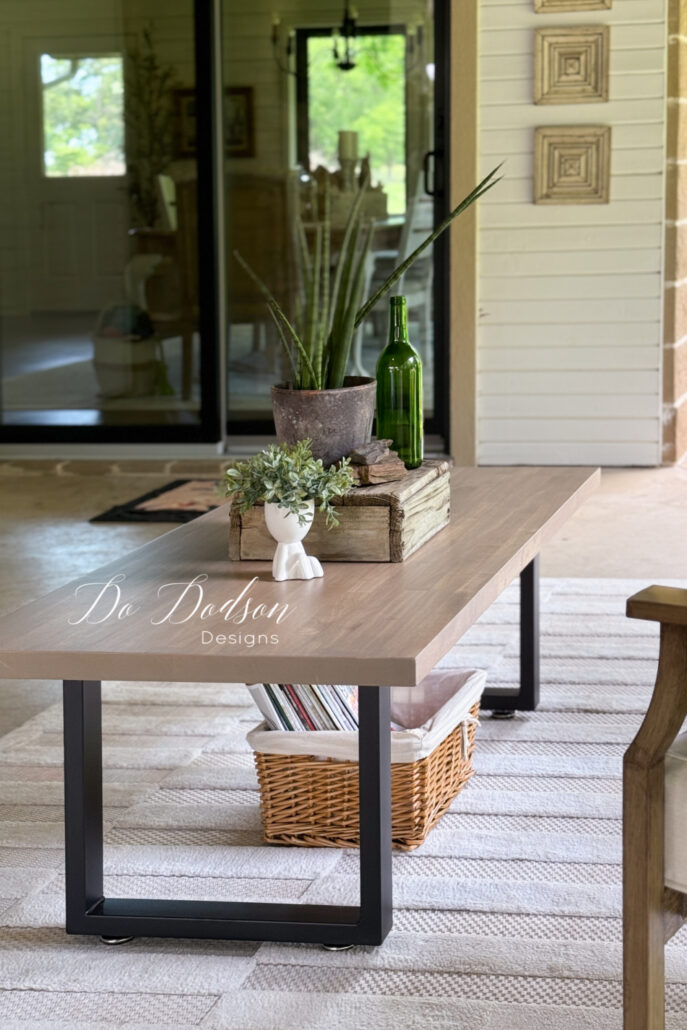
STEP 4: Outdoor Coffee Table – Adding Modern Legs
We are almost done! This is the easiest part of all. I found these black modern legs on Amazon (CLICK HERE) for more details) and installed them in literally minutes.
The pictures below are self-explanatory, and I know you can do this too.
These legs come with screws, bolts, and the necessary tools for assembly. They also have levelers that screw into each leg. My porch isn’t level, and I appreciate this detail.
The Finished Results Of My DIY Outdoor Coffee Table
A cool morning, a quilt, a good magazine, and my morning coffee. This is the good life.
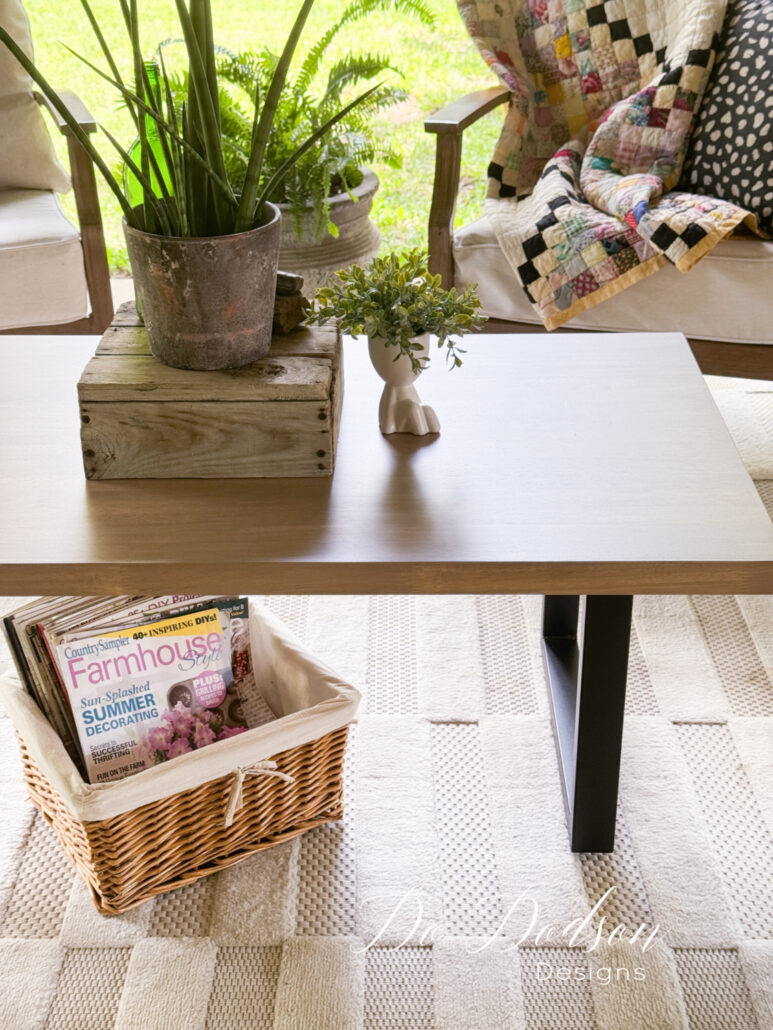
Yes, I have a white outdoor rug and four dogs. “It will all come out in the wash”, as Grandma would say.
I’m rethinking my white chair cushions, though.
We painted our walls white and the porch ceiling black, with three black ceiling fans overhead to keep us cool on those hot summer days. The space has a cozy ambiance. The black accents on our furniture tie everything together nicely, and I’m happy with the look.
I thoroughly enjoy working on projects of this kind. I get a lot of satisfaction from creating my home decor, and I especially enjoy sharing it with you.
What do you think about this project? I certainly appreciate the feedback I receive on all my projects. The good, bad, and ugly. I can handle it! LOL, or say hello so I’ll know you stopped by.
Don’t forget to share and PIN this to your favorite DIY Home Project board on Pinterest for future reference. I hope you have a beautiful week. Please subscribe to my weekly emails if you don’t want to miss out on all the latest and greatest projects I have coming up. ❤️
Until the next project… xo, Do
Beautiful Do! I’ve also seen similar tables for selling upwards of $500+ – what a great budget-friendly DIY! And have to say your little Tallulah is adorable! Have a great weekend my friend! Pinned XOXO
Yes! I saved $$$ that I plan on spending on other DIY projects. 😆 Tallulah is a hot mess but we love her. Thanks my friend. Enjoy this beautiful weekend. 🤗 😘
Proof: Sometimes the simplest projects are the best!!!
Love the finish. Love your porch. Hoping to catch of peek of the black ceiling and fans. Sounds to cool and inviting!
Hi Diane! It’s always good to hear from you. I’m a simple girl and if there’s a way to “keep it simple stupid”, I’m doing it. As for the black ceiling. Here’s link to that post. I’m still loving it after 3 years. I hope you’re enjoying your weekend. 😘 🤗
https://www.dododsondesigns.com/why-i-painted-my-porch-ceiling-black-instead-of-blue/
I love this, Do! I love the color badlands as well. You did a great job here and I can’t wait to see it in person soon.😘
Thanks, Wendy. We can sit and have coffee at the coffee table. 🙂