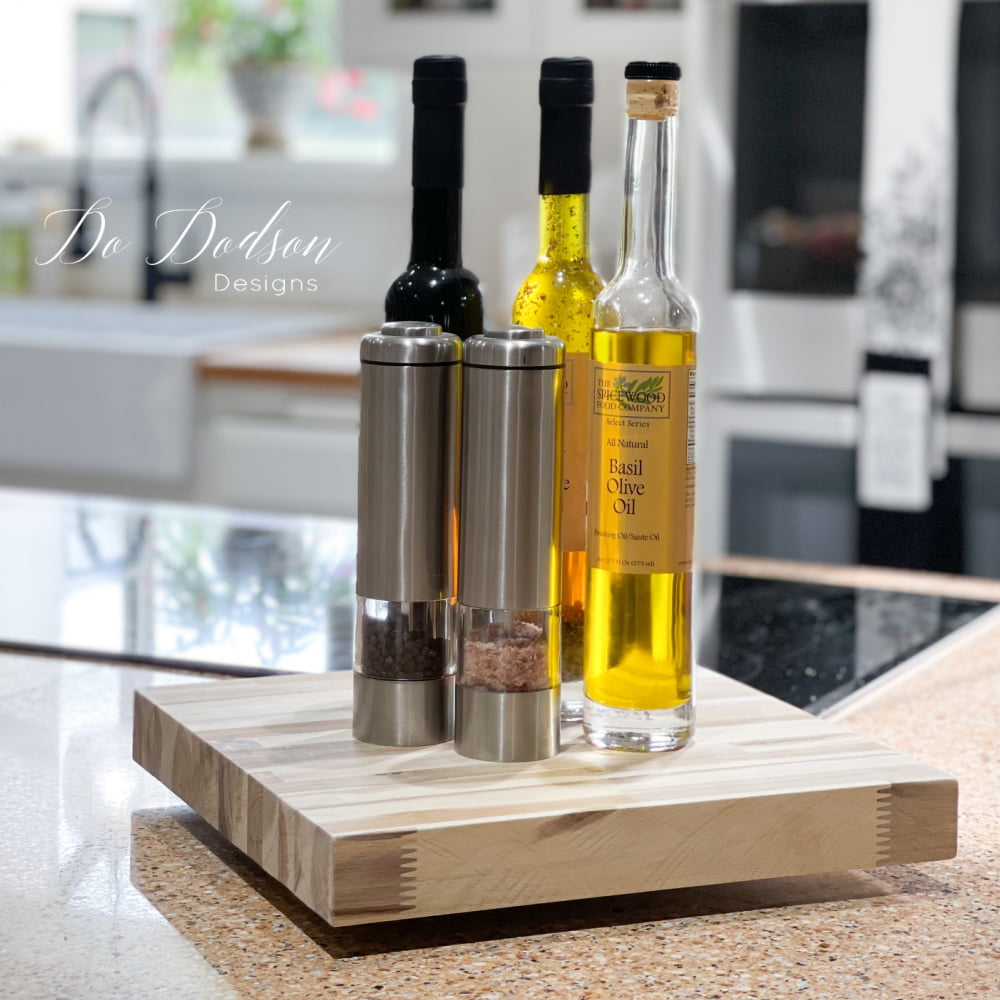

You better believe I’m all over it regarding lazy DIY and shortcuts. Having leftover pieces of an acacia butcher block countertop from our recent kitchen renovation, I was dying to use them inside our home for something. Today, I’ll show you how to make a DIY lazy susan turntable with some scrap wood that isn’t the traditional round style.
* As an Amazon Associate, I earn from qualifying purchases and through other companies as well. You are not charged extra to use any of the links, but any income I make helps me create more amazing DIY projects to share with you! To see my full disclaimer, click here!
How To Make A DIY Lazy Susan Turntable
Of course, if you know me, you know that I L O V E to use wood scraps to make simple DIY projects around the house. After replacing our kitchen countertops, I had enough leftover pieces to make a lazy susan but didn’t have a circle-cutting jig. Instead of the traditional round susans, I chose the easy route with a square.
I also used a larger scrap piece to make a patio coffee table. CLICK HERE to see how I made this gorgeous table that we use on our covered porch.
For more butcher block inspirational projects, see the list below.
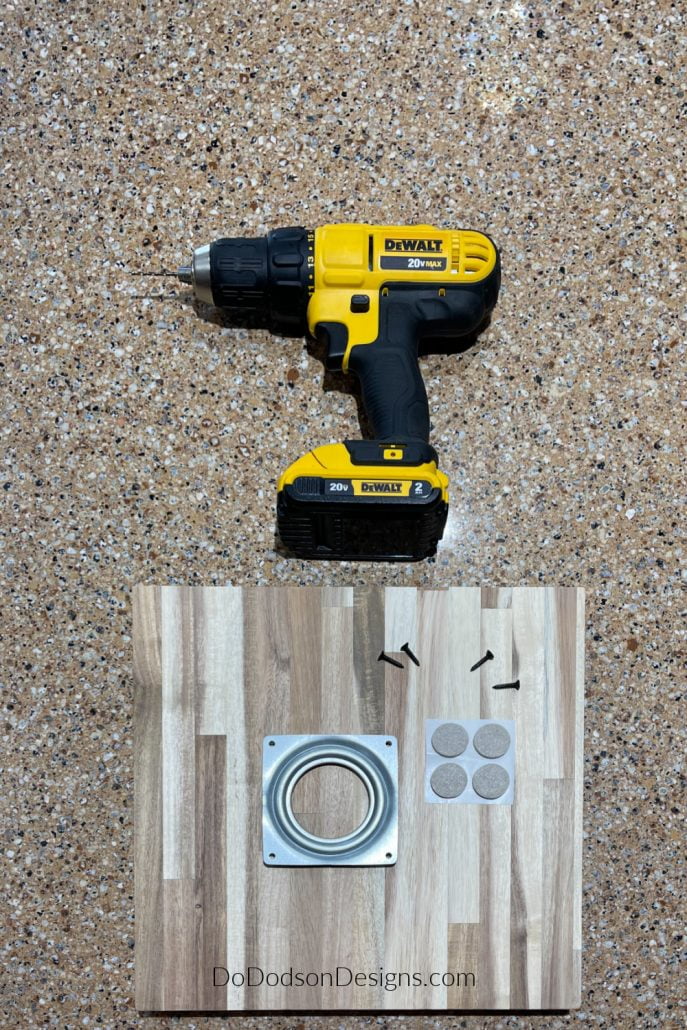

Table Of Contents
Here is what you will need to make this DIY project.
- scrap wood (square or round)
- lazy susan hardware
- table saw
- orbital sander (or sander of your choice)
- wood screws
- felt pads
- drill set
- screwdriver set
- The BEST Dang White Wax
- Best Dang Brush (I used for wax application)
What Kind Of Wood Should I Use?
When making a countertop DIY lazy susan, you can use just about any wood you like. I prefer a thick block of wood like the butcherblock. But you can purchase the rounds from the Dollar Store or MDF boards. As long as the wood is sturdy enough to hold whatever condiments, kitchen supplies, or decorative items you want to display.
It can also make a great serving tray on your dining room table.
Cutting Wood For A Square DIY Lazy Susan
Cutting the wood is simple if you have the right tools. A table saw will give you the best results with a clean cut.
No worries if you don’t have a table saw. Ask your tool-loving neighbor for help.
Sealing The Wood – DIY Lazy Susan Turntable
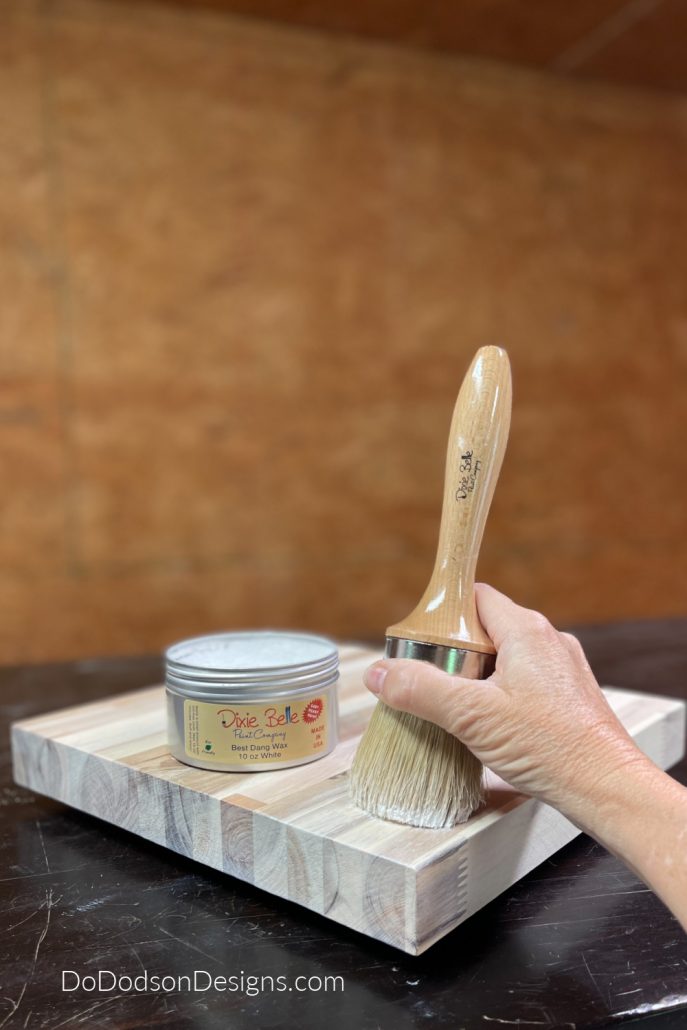
The wood I’m using for this project is an unfinished butcher block and must be sealed to protect it from dirt, grime, water, and everyday life in my kitchen. You can also opt to use a stain to match your existing countertop.
I used Dixie Belle’s white wax to seal the wood because I love the natural wood look of the unfinished butcher block. It lightens and brightens the wood.
Ensure your wood is sanded smooth with 220 grit or finer sandpaper. Apply a small amount of the white wax over the wood using a wax brush. After applying, gently buff it with a soft cotton cloth.
If you want extra protection on the wood surface, you can use a water-based topcoat over the wax after it has cured for 30 days.
And if you’re wondering why I didn’t use a round piece of butcher block, I didn’t have it in me to even try to make a perfect circle. Thus, the lazy method. Square is fine with me and my farmhouse style.
How To Assemble The Lazy Susan Turntable
STEP 1:
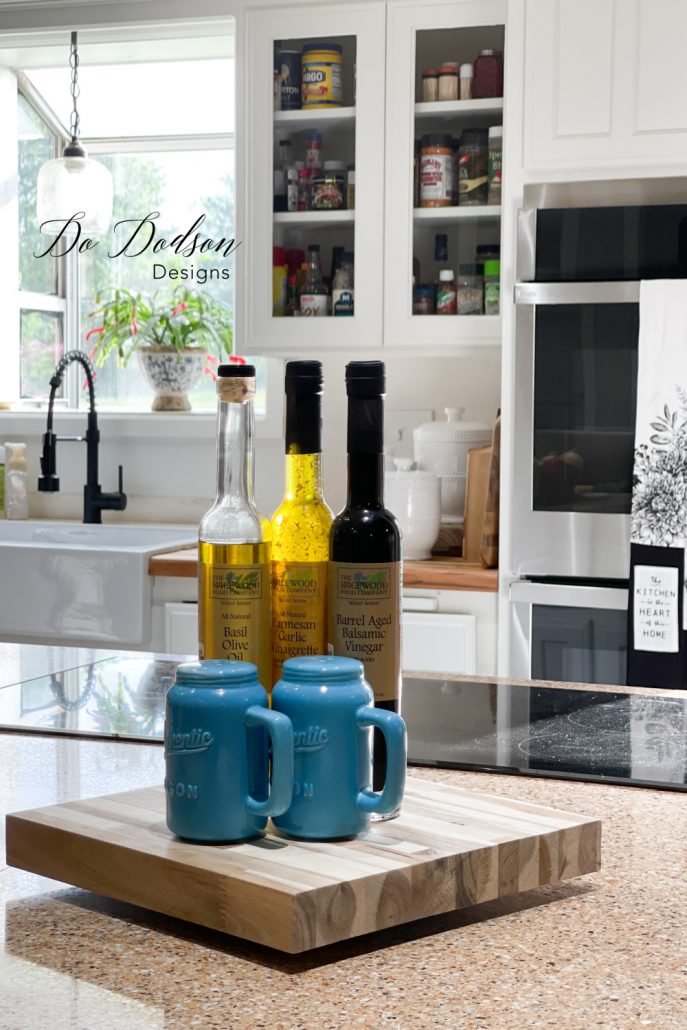
Layout all your supplies on a clean surface. I like to work on my kitchen island. It’s HUGE! And it will be the home of my DIY lazy susan turntable to hold my oils for cooking.
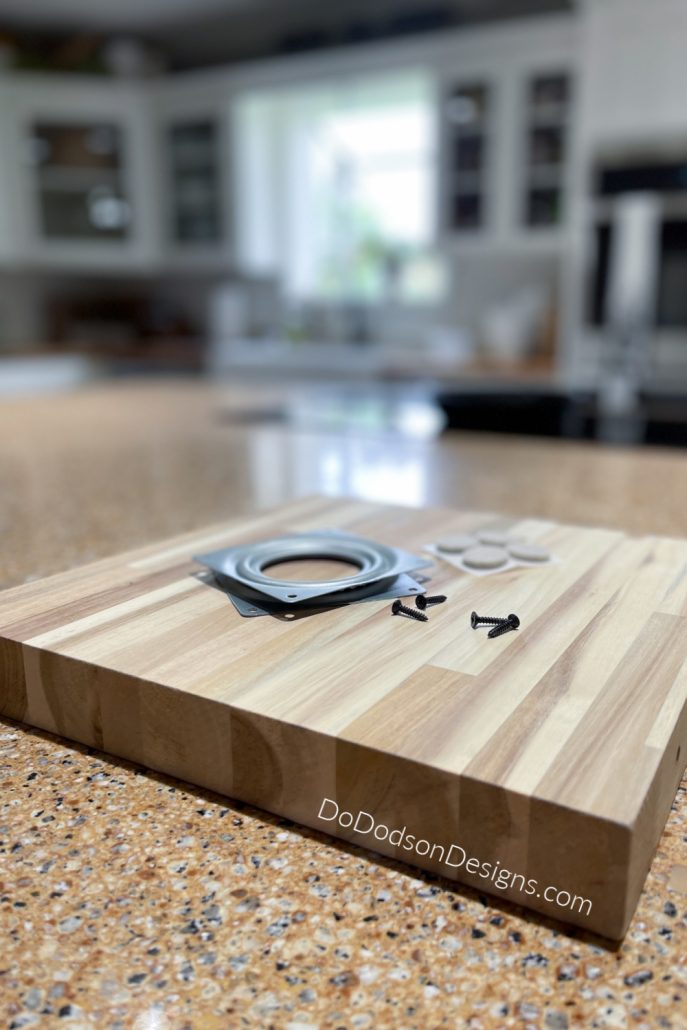
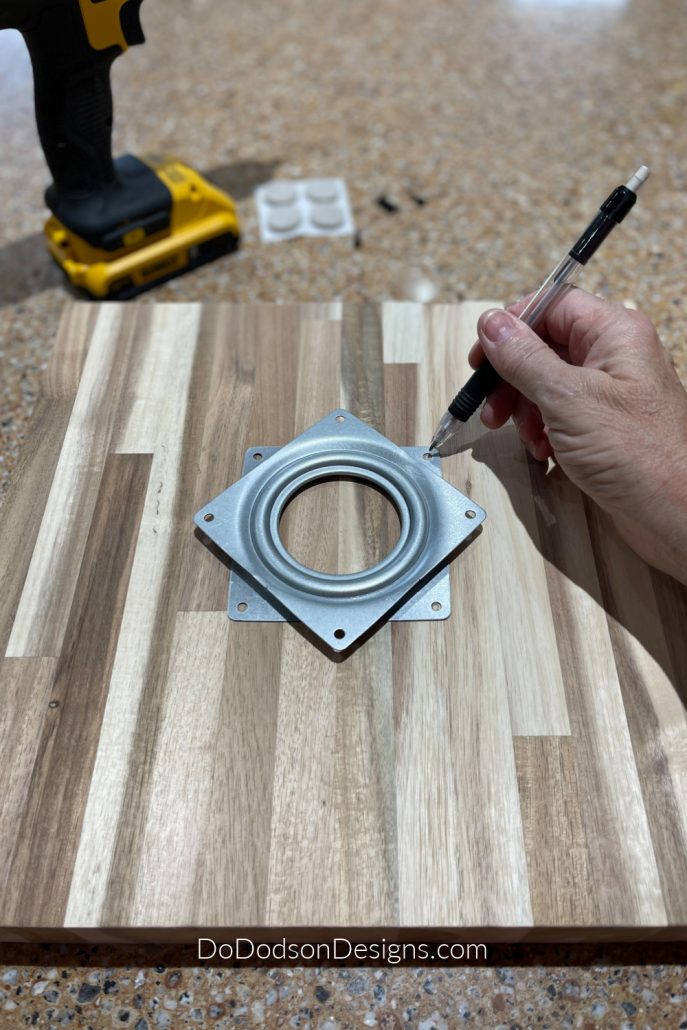
STEP 2:
Center the lazy susan hardware in the center of the bottom side of your board. Next, with a pencil, mark where the screws will be inserted but only on the base part of the hardware. This is so much easier than guessing you have it right. I’ve done that a few times. But who is counting?
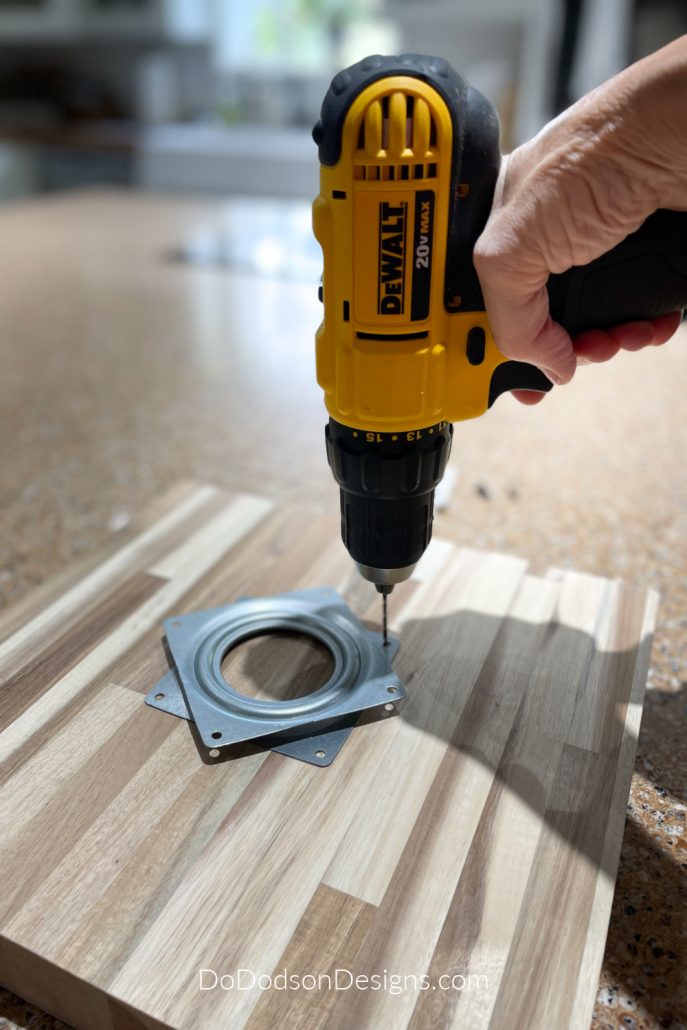
STEP 3:
Now you’re going to predrill the holes for the screws. Be sure to use a drill bit that is a bit smaller than your screw. Basically, you’re making a pilot hole so that it’s easier to insert the screw into the wood, and it also prevents the wood from cracking if you’re using older brittle wood.
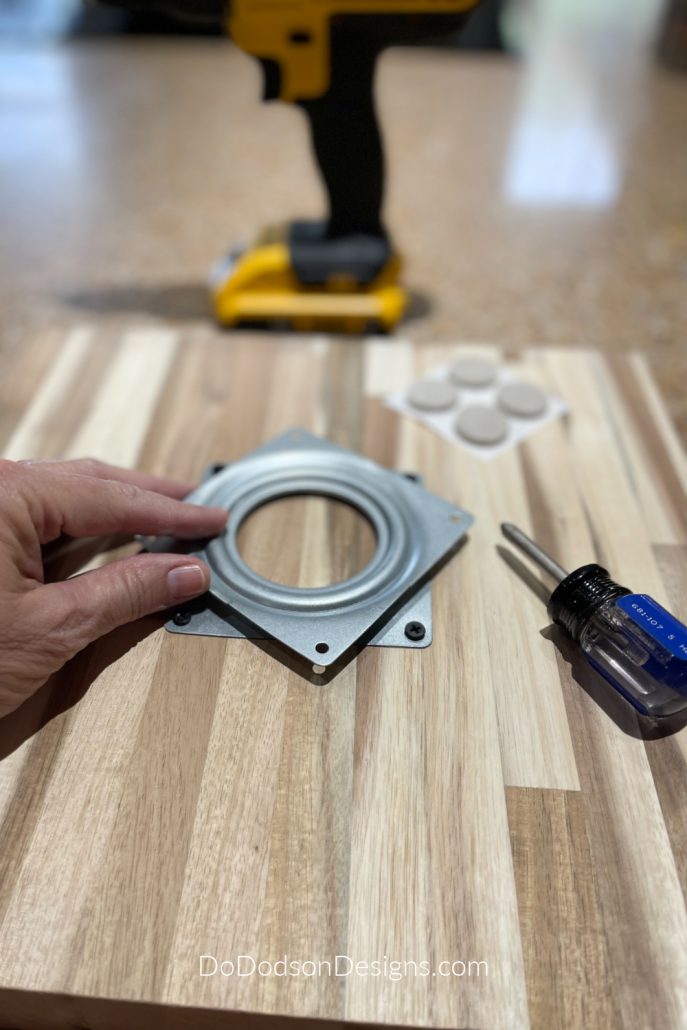
STEP 4:
Attach the lazy susan rotating turntable hardware with the screws leaving the top part of the hardware free to rotate.
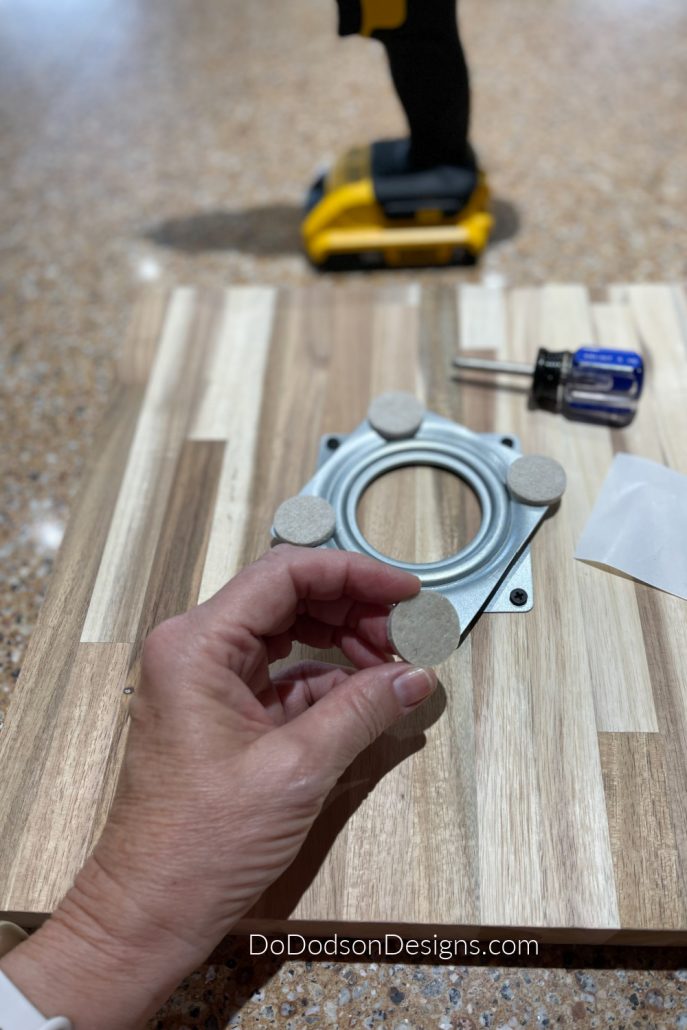
STEP 5:
Attach felt pads to the bottom to prevent the metal from scratching your surface.
DIY Lazy Susan Turntable
I’ve been using my square DIY lazy susan turntable on my kitchen island. Our new home has an amazing island with a cooktop, and I needed something to help organize the ingredients that I use the most while cooking.
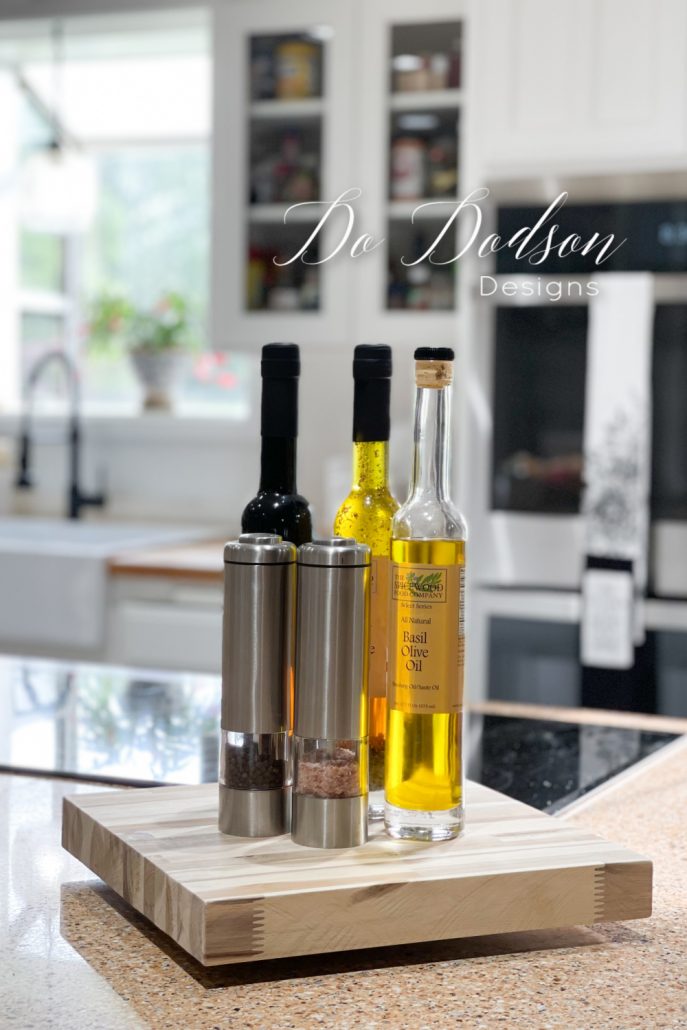
And the square style of this DIY Lazy Susan doesn’t bother me one bit. I think it ties in nicely with my kitchen decor. I am that square peg trying to fit into a round hole. 🙂
Thanks for joining me today, and I would love to know how you would use this square lazy susan. Let me know in the comment section, or say hi so I’ll know you stopped by.
Don’t forget to share this on your Pinterest board!
Until the next project… xo, Do


Love it! And I have a butcher block piece left from our countertops that may now have new purpose!
I’m enjoying my lazy susan turntable. It’s turned out to be very useful in my kitchen. 🙂 Thanks for reading. xo
Do, love this project. It would make wonderful Christmas presents.
Yes, it would!
We’re thinking about doing that same butcherblock for our lit hen counters..ease tell me the best way to seal and protect them. ❤
I’ll have a blog post coming out soon about the process I used to seal ours. Stay tuned! 🙂 xo
Aren’t you clever….. but I already knew that. I really like the square look. I can see a square lazy Susan on our picnic table. It would be so simple to make.
Thanks for the simple clever ideas for using the leftovers.
Yes! This would be great on a picnic table. Great idea. Thanks for stopping by. xo 🙂
Love the soft tone of the wood. I would probably use in the same way. Board stays nice and cleanly and attractive to look at. You definitely can get more on a square compared to round. Great job.
Thank you! My thoughts exactly. xo 🙂
Love it!
Thank you, Emma! xo 🙂
What a great transformation with your left over butcher block. Stylish and useful! Your new home looks so pretty!
Thank you, Kim. I have saved all the scrap wood for future projects.
Your lazy susan and NEW kitchen look amazing my friend! Have a super day. XOXO
Thanks, Denise! It’s turning out to be very useful in the kitchen. xo 🙂
Projects like this are my fave! I love using every last little bit of supplies I have. This is a great project Do! Pinned!
Me too! It fills my soul with the warm fuzzies. I don’t know what it is about repurposing, but it just feels good. Thanks for stopping by. 🙂 xo
Do, I absolutely LOVE LOVE LOVE all the wonderful projects you create! You are so blessed with talent. Your new home is so beautiful and spacious- if it was my house, I wouldn’t change a thing. Wishing you and your family a blessed Christmas and Happy New Year!
Thank you so much, Brenda. I’m looking forward to sharing more DIY projects in 2023. Happy New Year! 🙂 xo
Hi Do! I’m so glad I read this because I just have one of those do hickeys and now I know how to use it. I always thought I would have to attach another something under it. I haven’t been around lately. I’m taking a break from painting furniture and I gave up my booth so I can have more time with my grandkids. I always enjoy your DIY’s though. Plenty of time you have gotten me thru. I hope you and your family have a very Merry Christmas!!
Merry Christmas, Cheryl!
Totally understandable. I too have taken a few steps back to spend more time with my family. We all need to rejuvenate.